TCP RCKP PHR 2009-04 - Chris Alston's Chassisworks
TCP RCKP PHR 2009-04 - Chris Alston's Chassisworks
TCP RCKP PHR 2009-04 - Chris Alston's Chassisworks

You also want an ePaper? Increase the reach of your titles
YUMPU automatically turns print PDFs into web optimized ePapers that Google loves.
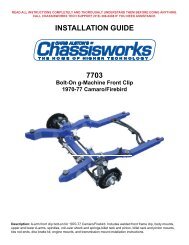
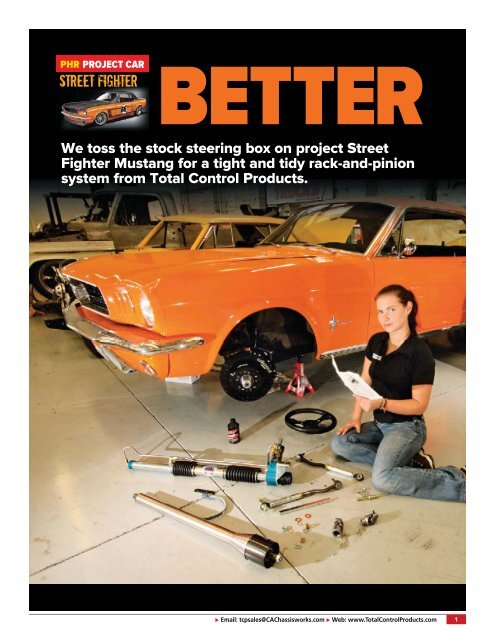
<strong>PHR</strong> PROJECT CARBETTERWe toss the stock steering box on project StreetFighter Mustang for a tight and tidy rack-and-pinionsystem from Total Control Products. Email: tcpsales@CA<strong>Chassisworks</strong>.com Web: www.TotalControlProducts.com 1
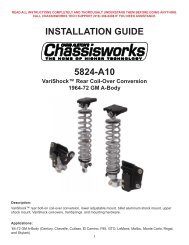
STEERINGWe’re swiftly moving our waythrough the front end of our1966 Mustang, giving it theupdates expected to make it perform.The vague steering feel was not going tofly on the street or at the track. It wasn’tas wild in the lane as some 40-year-oldsteering systems are, but a couple newparts weren’t going to cure it. Ourchoices were: do the best we could witha steering-box–style system by replacingall the worn joints, or start from scratchand do a rack-and-pinion conversion.We went with the rack.Nearly all modern cars use rack-andpinionsteering because of its lightweight and compact packaging. We likeit because of its precision and superiorroad feel. The next question was whetherto run a manual or power rack. Sinceultimately this is a street car, and itwould have some seriously sticky andwide meats on the front, power wouldbe a whole lot easier for car show andcity cruising.To go along with the rest of our suspension,we chose Total ControlProducts’ rack-and-pinion setup. TotalControl Products is a division of <strong>Chris</strong>Alston’s <strong>Chassisworks</strong> that specializes inmaking early Fords outperform latemodels. They have rack-and-pinion conversionkits for ’60-65 Comets, ’67-70Cougars, ’60-65 Falcons, ’64-70Mustangs, and ’60-65 Rancheros. Therack itself is a direct bolt-in unit thatrequires zero cutting or welding toinstall. Instead of having the more traditionalends seen on late-model cars, thisrack uses a center link that you can boltonto the factory tie-rod ends. Becauseour Mustang was originally a six-cylinder,the tie-rod ends don’t work withthe V-8 spindles or the steering rack.To remedy this problem, we used<strong>TCP</strong>’s tie-rod ends and bumpsteer kit.Bumpsteer is a phenomenon where thewheels steer without input from thesteering wheel. It’s caused by incorrectsteering geometry. <strong>TCP</strong>’s bumpsteer kit“No more twirlinga 17-inch steeringwheel around fourtimes to get intothe next lane!”Next, it’s time to ditch the factory crossmemberby removing the two bolts attachingit to the frame. The rack will serve asits replacement.The first step for our six-cylinder ’66Mustang is to remove the factory componentsto make way for the Total ControlProducts rack. You will need to removethe tie-rod ends from the spindles, and theidler and steering box from the frame.To get the steering box out, we removedthe steering wheel, unbolted the clamp atthe edge of the dash panel, and pulled thecolumn housing out over the shaft.2 Order: 888-685-1790 Technical Assistance/Customer Service: 916-388-0288
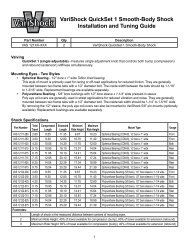
BETTER STEERINGIn order to get the steering box out of itshome, the center link of the steeringassembly needs to be unbolted from thePitman arm. Once the column housing isout of the way, the box can slide out withthe shaft.Like the driver’s side, the inner bracket onthe passenger side uses the lower controlarm hole. The outer passenger-side bracketuses a factory threaded insert on theunderside of the frame where the crossmemberwas mounted. Remember to onlysnug down the bolts after the rack isaligned.The Total Control rack kit comes with anew firewall pass-through bracket for thecolumn. To remove the old one, unscrewthe 3 Phillips-head bolts.The Flaming River steering rack inthe Total Control system uses thefactory lower control arm mounting holeto mount its driver-side bracket. (Thereare three mounting brackets total: One forthe driver’s side, and two for the passengerside that consist of an inner and outerbracket.) The new supplied hardwareshould be snug, but not too tight to allowproper alignment with the other brackets.With all three of the clamps loosely boltedto the rack, you can begin tightening themevenly so as not to bind up any portion ofthe rack. From this rear view, you can seethe center link on the backside of the rackwhere you bolt the factory tie-rod ends.TheseTotal ControlProduct’s tie-rod endsreplace the outer ball joint with a rod endto allow adjustment for bumpsteer. Thecamber, caster, and toe need to be setbefore bumpsteer can be addressed.Here is the old and new firewall mount.Which one would you want in yourMustang when you assault a high-speedcorner? Notice how the new one fromTotal Control Products has a floating supportring. Instead of sheetmetal screws,the new unit uses three button head Allenbolts.allows you to shim the bolt connectingthe tie-rod end to the spindle to give itthe desired angle, which in most casesclosely parallels the lower control arm.In order to make this adjustment correct,you need to have the camber, caster,and toe correct. We will be installing<strong>TCP</strong>’s coilover conversion and tubularcontrol arms at a later date, so thebumpsteer adjustment will have to wait.These early Mustangs have an interestingway of putting their steering systemstogether. Unlike GM, the shaft isone with the steering box unless youdisassemble it. To adapt the new rack,we replaced this assembly with a stainlesssteel tilt-wheel column fromFlaming River. The new column bolts inthe same way the old one did, but withan updated firewall mount andGM-style wiring. Our Mustang’s wiringharness is a mess of shorts, so building aconnector to fit the new column wouldbe a waste of time. All the pins and thediagram were supplied with the kit,which will make it really easy when thetime for new wiring comes.The last piece to complete the steeringchain of command is the steeringwheel itself. We got Grant’s FormulaGT wheel for its simple race-inspiredstyling. It’s also a couple inches smallerin diameter than stock at 13 inches, so itmakes quick steering input a lot easier.Before sliding the column through the firewall,we used the supplied adhesive padson the factory clamp bracket. This is tokeep the bracket from scratching our newFlaming River column.No more twirling a 17-inch steeringwheel around four times to get into thenext lane!When we pulled this Mustang intothe shop, it was a sad and tired stockerwithout a purpose. Each improvementwe’ve done on this car is bringing it onestep closer to being a pavement-hungrysupercar. Email: tcpsales@CA<strong>Chassisworks</strong>.com Web: www.TotalControlProducts.com 3
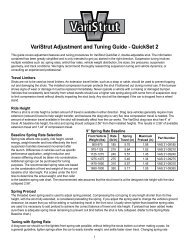
We tightened thecolumn clamp underthe dash to securethe column’s depth.At this point, you’llneed to set up yournew column linkageand cut your steeringshaft to length.Once the columndepth is set, installthe U-joints on thecolumn and therack. Measure thedistance from theface of each jointwhile they point ateach other. Add 1 ⅞inches to this measurementto get thecut length for theincluded shaft. Thisensures the shaftgoes into each jointenough to fastencorrectly. To installthe shaft after beingcut, slide the columnout for clearance, then backdown after you slip the shaft in.With the column in, install the turn signal lever. Test it to makesure it’s not too tight. If it’s overtightened, it can make it hard tocancel the signal without signaling the opposite direction. Next,install the steering-wheel base and components in the ordershown here. It can be done on the bench, but it’s much easierwhen the column is already mounted.Here’s the final product. We were really happy with the clean, no-nonsense look.It will go great with what else we’ve got in store for this soon-to-be race car.WHERE THE MONEY WENTPart: Source: Part number: Cost:Rack-and-pinion kit (with column) .................... <strong>TCP</strong> ..............................<strong>RCKP</strong>A126 ...........................$2,644Bumpsteer kit .................................................... <strong>TCP</strong> ................................... TIER-14 ..............................$269Formula GT 13-inch wheel ..............................Grant ......................................... 773 ................................ $82Steering wheel installation kit ........................Grant ....................................... 3196 ................................. $17Total .................................................................................................................................................... $3,0124 Order: 888-685-1790 Technical Assistance/Customer Service: 916-388-0288