RS-1000 Manual - kamery airlive airlivecam
RS-1000 Manual - kamery airlive airlivecam RS-1000 Manual - kamery airlive airlivecam
103Schedule: Select the item listed in the schedule to enable the policy to automatically executethe function in a certain time and range.Alarm Threshold: To set the maximum value of transmitting and receiving packet, enter thenumber based on the unit(KBytes/Sec)QoS: To determine if the QoS function can work in this Policy function.Click OK to execute the new setting or click Cancel to discard changes.If you want to change or add new items in the pull-down menu, go to the correspondingchapter for setup.Source Address: LAN of Address menuDestination Address: WAN of Address menu
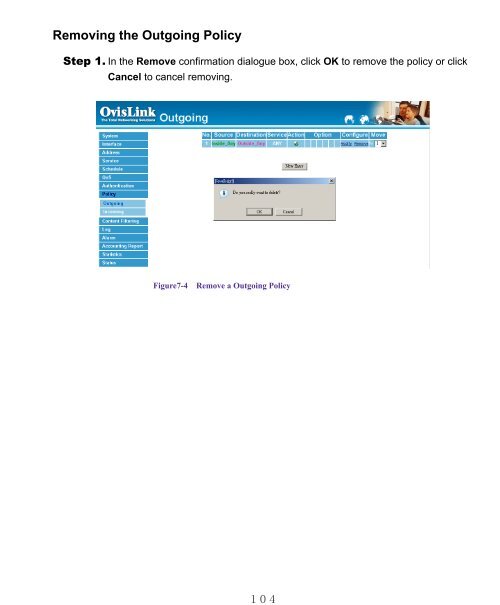
Removing the Outgoing PolicyStep 1. In the Remove confirmation dialogue box, click OK to remove the policy or clickCancel to cancel removing.Figure7-4Remove a Outgoing Policy104
- Page 57 and 58: 52If you want to set up DNS Server,
- Page 59 and 60: AddressThe Security Bandwidth Manag
- Page 61 and 62: Adding a new LAN AddressStep 1. In
- Page 63 and 64: Removing a LAN AddressStep 1. In th
- Page 65 and 66: Adding a LAN GroupStep 1. In the LA
- Page 67 and 68: Removing a LAN GroupStep 1. In the
- Page 69 and 70: Adding a new WAN AddressStep 1. In
- Page 71 and 72: Removing an WAN AddressStep 1. In t
- Page 73 and 74: Adding an WAN GroupStep 1. In the W
- Page 75 and 76: Removing a WAN GroupStep 1. In the
- Page 77 and 78: Pre-definedEntering a Pre-defined w
- Page 79 and 80: 74Use” message will appear in the
- Page 81 and 82: Modifying Custom ServicesStep 1. A
- Page 83 and 84: GroupAccessing the Group windowStep
- Page 85 and 86: Modifying Service GroupsStep 1. In
- Page 87 and 88: 82ScheduleThe Security Bandwidth Ma
- Page 89 and 90: Adding a new ScheduleStep 1. Click
- Page 91 and 92: Removing a ScheduleStep 1. In the S
- Page 93 and 94: 88Configuration of QoSClick QoS in
- Page 95 and 96: 90Modify QoSStep 1. Click QoS in th
- Page 97 and 98: 92AuthenticationBy configuring the
- Page 99 and 100: STEP 2.Enter the following setting
- Page 101 and 102: STEP 4.When user_1 is going to acce
- Page 103 and 104: OutgoingThis section describes step
- Page 105 and 106: 100Adding a new Outgoing PolicyClic
- Page 107: 102Modifying an Outgoing policyStep
- Page 111 and 112: 106fourth column is the Alarm Thres
- Page 113 and 114: Adding an Incoming PolicyUnder Inco
- Page 115 and 116: Modifying Incoming PolicyStep 1. In
- Page 117 and 118: Removing an Incoming PolicyStep 1.
- Page 119 and 120: URL BlockingThe Administrator may s
- Page 121 and 122: Adding a URL Blocking policyStep 1.
- Page 123 and 124: Removing a URL Blocking policyStep
- Page 125 and 126: Virtual ServerThe Security Bandwidt
- Page 127 and 128: Mapped IPInternal private IP addres
- Page 129 and 130: Modifying a Mapped IPStep 1. In the
- Page 131 and 132: Virtual ServerVirtual server is a o
- Page 133 and 134: Modifying a Virtual Server IP Addre
- Page 135 and 136: Setting the Virtual Server’s serv
- Page 137 and 138: Modifying the Virtual Server config
- Page 139 and 140: LogThe Security Bandwidth Manager s
- Page 141 and 142: Downloading the Traffic LogsThe Adm
- Page 143 and 144: Event LogWhen the Security Bandwidt
- Page 145 and 146: Clearing the Event LogsThe Administ
- Page 147 and 148: Download LogsStep 1. Click Log in t
- Page 149 and 150: Log BackupStep 1. Click Log $Log Ba
- Page 151 and 152: Disable Log Mail Support & Syslog M
- Page 153 and 154: Traffic AlarmIn control policies, t
- Page 155 and 156: Clearing the Traffic Alarm LogsStep
- Page 157 and 158: Downloading the Event Alarm LogsThe
Removing the Outgoing PolicyStep 1. In the Remove confirmation dialogue box, click OK to remove the policy or clickCancel to cancel removing.Figure7-4Remove a Outgoing Policy104


