EXM 110HP.cdr - Ample Audio
EXM 110HP.cdr - Ample Audio
EXM 110HP.cdr - Ample Audio
- No tags were found...

Create successful ePaper yourself
Turn your PDF publications into a flip-book with our unique Google optimized e-Paper software.
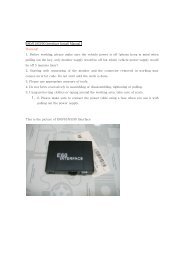
POWER AVMENUCautionPlease read and observe all warnings and instructions in this manualand those marked on the unit. Retain this booklet for future reference.There are two kinds of alarm symbols as follows:WARNINGThe lightning bolt with arrowhead inside in an equilateraltriangle is intended to alert the user to the presence of,dangerous voltage within the product s enclosure that may beof sufficient magnitude to constitute a risk of electric shock topeople.CAUTIONThe exclamation point inside an equilateral triangle is intendedto alert the user to the presence of important operating andmaintenance (servicing) instructions in the literature accompanyingthe product.WARNINGInstallation of all TV monitorsmust be out of the driver,sfield of vision.Do not try and service theseproducts yourself, locale aqualified service center orfactory service center for allrepairs.Be careful not to drop orapply under pressure to thefront panel of your videomonitor. If the screen cracksdue to misuse, your warrantywill be void!Do not mount the product whereit will obstruct the deployment ofthe airbag or in an area where itwould affect the driver s abilityto control the vehicle. Also becareful to avoid mounting theproduct where it can becomehazardous during sudden stopsor in the event of an accident.Use extra caution with any liquidsin your car. If you or your childspills any liquid on these products,pull your vehicle to the roadsideand turn the key off to disconnector wipe the products with a towel. Do notoperate the equipment until all liquids haveeither evaporated or you have had the monitorinspected at a service center by a qualifiedtechnician. Severe harm or danger can result.Be careful not to overload yourcigarette lighter plug by addingmore than one device at a time.Use only a damp cloth to cleanthe screen and use only purifiedwater on the cloth. wring out allexcess water prior to wiping thescreen. Do not use any cleanersor chemicals to clean the screen.In most cases a dry cloth will do!4
VIDEOAUDIOAV2 INPUTSDisc InformationFeatures And ControlsDVD featuresPOWER ButtonMENU ButtonPLAY/PAUSE ButtonDVD discs provide high-resolution images with high-quality sound and surroundsound effects. This DVD player can play not only DVD discs of various versions, butalso S-VCD, VCD, audio CD and MP3 discs.Discs that cannot be playedDVD-RW, DVD-REM, CD-ROM, CD-EXTRA discs cannot be played on this unit. Inaddition, a CD or a CD-RW which was recorded on special software cannot be played.Region codeYour DVD player is designed and manufactured to region management informationthat is recorded on a DVD disc. Please check the region code.1: North America 2: Japan 3: Korea and Southeast Asia4: Australia, Mid & South America 5: Russia 6: ChinaHow to handle the discDon t touch the shiny side of the disc (the side with the embedded information).Don t stick a label or a glue-based note on either side of the disc.Don t use discs that have glue or a damaged label with exposed adhesive reside.It might result in damage to your DVD player.Don t put discs in the sunshine.Park your car in the shade.Dome Light ButtonAV Select Button+/- ButtonsEJECT ButtonDisc loading slotHow to handle the discsOnly use round discs. Discs with other shapes like a star, a heat, etc. may causedamage to the player.If a disc is dirty, wipe softly with a wet cloth and then with a dryone. Before playback, wipe the disc outward from the center with a clean cloth. Do notuse any type of solvent such as thinner, benzene, commercially available cleaners orantistatic spray. To avoid damaging your DVD player, don t use a scratched disc.AUX Input JackLR. . . .XCautionDo not bring magnetic devicessuch as credit cards or magneticcards near the monitor.347
Features and ControlsInstallationRemote Control1. Open the package and check that these items are presents.1 POWERTurns the DVD Player/Monitor on or off.2 MUTEPress this button to switch off theaudio during playback. Press againto restore the audio.3 Auto TV (not function in this unit)TVMONITORUP/DOWN/RIGHT/LEFT ARROWS(not function in this unit)A/V SELECTDVD AV1 AV2MENU (OSD on monitor)Press this button to open the onscreenmenu system to setup andcontrol various parameters of themonitor and DVD player.UP/DOWNUse to move to the desired menu.P/NThis button permits you to chooseamong Multi, PAL and NTSC.MODE(not function in this unit)MENU (DVD menu)This button permits you to view themenu on the DVD.SUBTITLEUse this button to select the menufor choosing a subtitle language.TITLE (Title menu)When a DVD is playing, press thisbutton to view the Title Menu.DISPLAYPress to show elapsed or remainingtime of a chapter or a title.PBC (Video CD only)Press this button to access the specialPlayback Control functions for VCD2.0 format Video CD S.NUMERIC buttonUse when making a selection on themenu screen.RETURNPress this button to return root menu.SETUPPress this button to display the Setupmenu. The Setup menu enables youto enter the settings required for theunit to work properly.REPEATPress this button to change the playbackmode to repeat, and to select the repeatmode.INSTALLATION PLATE UNIT SCREW A SCREW B2. Connect the external compoments to the RCA cable or AV output.(Refer to the connection diagram on page 32)4. Tighten the unit with the suppliedscrew B.3.Match the position of installation bracket andinstallation plate with screw A.833
POWER AVMENU VOL- VOL+Connection DiagramName And Function Of Each PartYELLOW+ 12 V DC BatteryBLACKChassis GroundREDACCPositive NegativeTrigger Door Trigger DoorSwitch SwitchDome Light TriggerGAMECAMCORDERCar dome lampWHITERed AUDIO(R)White AUDIO(L)Yellow VIDEOAV Input AV Input(AV 2) (AV 1)32Red AUDIO(R)White AUDIO(L)Yellow VIDEOAVOutputRed AUDIO(R)White AUDIO(L)Yellow VIDEOGAMECAMCORDERAMPMONITORFM ANTENNAA-B (repeat from A to B)Use this button to select the beginningand end of a track which you wish to haverepeat in playback.VOL-/+ buttonUse to incease or decrease volume level.AUDIOUse this button to select one of theaudio soundtracks programmed on aDVD disc. It is alse used to select theaudio output mode for the DVDplayback.ENTERPress this button to confirm the itemyou have found and highlighted usingthe arrow buttons. Usually this is doneto confirm a selection or item to beplayed on the DVD.ZOOMIf your DVD disc supports zooming into see the program differently, pressingthis button will enable you to changethe amount of zoom.UP/DOWN/RIGHT/LEFT ARROWSUse thes buttons to navigate thevarious menus and screens for themonitor and DVD systems.PLAY/PAUSETo start playback of a disc, press thisbutton. Press again to pause theplayback. If playback is paused, pressthis button to resume playback.GO TOUse to search for a title or a chapter onyour DVD disc.STOPPress this button to stop the playbackof the current disc.SKIP FORWARD/BACKUse these buttons to skip to the nextor last track, chapter or file on thedisc in the player.9FAST FORWARD/REVERSE PLAYUse these buttons to select either fastforward or fast reverse playback.
Power And Mode SelectionReleasing The MonitorPush the release button (located on the front edge of the screen housing) andlower the monitor. You can also adjust the swivel angle.RELEASE BUTTONMake this arrow in DOWNdirection only.Turning on The Monitor1. Connect the monitor to external devices.2. Press the POWER button on either the remote control or the unit once to turnthe power on.Press the same POWER button to turn the power off.Mute FunctionPOWERUNITPOWERREMOTE CONTROLLER3.Power on the external devices and play.1. Press the MUTE button on the remote control to mute the audio.2. Press the MUTE button again on the remote control to return to theprevious volume level.10DVD FunctionsPBC[DVD]/[AUDIO]/[MP3]This button does not function in PBC mode.[VCD]You can turn the PBC (Play Back Control) function on or off by pressing this button.When PBC is loaded, the PBC function is enabled automatically. This function issimilar to selection of DVD title. Please note that this function does not work withMP3 dics.Zoom[DVD]Some DVDs are programmed to allow you to zoom intothe image, magnifying it. Pressing the ZOOM buttondoes this in steps, according to the chart to the right.[VCD]/[AUDIO]/[MP3]This button does not function in this mode.GO TOThe GO TO function allows you to begin playback at a specific location on the disc. Todo this, press GO TO and navigate the screen which follows to select this playbacklocation.TitleMove to the desired title.ChapterMove to the desired chapter.<strong>Audio</strong>Selects the desired audio output.SubtitleSelect the desired subtitle.AngleWatch the different view angle.TT TimeTotal time.CH TimeChapter time.RepeatSets the repeat play.Time DisplayWatch play time.31OSD2X3X4X1/21/31/4MenuTitle01/0202Chapter 06/6161<strong>Audio</strong>5.1CH ChineseSubtitle OFFBitrate 31 Title Elapsed 0:20:02CONDITIONZOOM X 2ZOOM X 3ZOOM X 4ZOOM X 1 / 2ZOOM X 1 / 3ZOOM X 1 / 4Off
DVD FunctionsPower and Mode SelectionRepeat[DVD]Pressing REPEAT button changesthe play mode as follows:[AUDIO]Pressing REPEAT button changesthe play mode as follows:Selecting AV Mode1.Turn the power ON the unit and external devices.2.Select the DVD/AV1/AV2 mode by pressing the AV button on the unitor on the remote control.OSDChapterCONDITIONRepeat chapterOSDTrackCONDITIONRepeat single3.Play the external device.TitleRepeat titleAllAllAllAllRepeat offRepeat off[VCD]The REPEAT button does not functionwhen a VCD disc is being played.[MP3]Pressing REPEAT button changesthe play mode as follows:OSDRepeat OneRepeat FolderFolderShuffleRandomSingleCONDITIONSingleRepeat folderRepeat folder one timeAllRandom playSingle playNTSC/PALThis button is used to select the video standard for the DVD mode between NTSCand PAL formats.AngleSome DVD s are recorded with additional footage which allows you to view a scenefrom a different camera angle. If the ANGLE feature is enabled in the Setup Menu(see page 14) and the disc has this option,an angle mark will be displayed onthe screen. When that occurs, press the ANGLE button to see these alternate viewingangles.3011
Picture ControlDVD FunctionsContrast/Brightness/Color/FMTo adjust CONTRAST, BRIGHTNESS, COLOR or FM press the MENU button untilyou arrive at the screen for that item. Use the arrow buttons to adjust the value.Press the MENU button to make another adjustment or leave the MENU system.1. Bring up the on-screen function menu by pressing the MENU button on the unitor the remote control.2. Press the MENU button on the unit or the remote control of monitor until you seethe screen you wish to adjust.3. Use the arrow buttons to adjust the value.4. Press the MENU button to make another adjustment or leave the MENU system.CONTRASTBRIGHTNESSCOLORFM87.7425550(FM function added 87.7 87.9 88.1 88.3MHz)Prev( )[DVD]/[VCD]Press this button to advance the player from the current chapter to the previouschapter.[AUDIO]/[MP3]Press this button to move to the previous track.Next( )[DVD]/[VCD]Press this button to advance the player from the current chapter to the next chapter.[AUDIO]/[MP3]Press this button to move from the current track to the next track.Repeat(A-B)[DVD]/[VCD]/[AUDIO]You can set the player to repeat a segment over and over until you cancel it. To dothis, you mark the beginning of the desired segment (A) and the end of segment (B).The selected segment will berepeated automatically until canceled.OSDCONDITIONAA BStart point of repeatEnding point repeat function1229
DVD FunctionsFast Reverse Searching( )[DVD]Pressing FR button repeatedly changesthe play mode as follow:OSDCONDITIONFR 2XFR 4XFR 8XFR 16XFR 32XPLAY2X rewind search4X rewind search8X rewind search16X rewind search32X rewind searchPlayFast Forward Searching( )[DVD]Pressing FF button repeatedly changesthe play mode as follow:OSDFF 2XFF 4XFF 8XFF 16XFF 32XPLAYCONDITION2X forward search4X forward search8X forward search16X forward search32X forward searchPlay[AUDIO]Pressing FR button repeatedlychanges the play mode as follow:OSDFR 2XFR 4XFR 8XFR 16XFR 32XPLAYCONDITION2X rewind search4X rewind search8X rewind search16X rewind search32X rewind searchPlay[MP3]Pressing FR button repeatedlychanges the play mode as follows:OSDFR 2XFR 4XFR 8XFR 16XFR 32XPLAYCONDITION2X rewind search4X rewind search8X rewind search16X rewind search32X rewind searchPlay[AUDIO]/[VCD]Pressing FF button repeatedlychanges the play mode as follow:OSDFF 2XFF 4XFF 8XFF 16XFF 32XPLAY[MP3]CONDITION2X forward search4X forward search8X forward search16X forward search32X forwardsearchPlayPressing FF button repeatedlychanges the play mode as follows:OSDFF 2XCONDITION2X forward searchDVD SetupSetup Menu-Main PageWhen the SETUP button is pressed, the setup menu will be displayed as shownbelow. Select the menu category and make changes according to charge yourpreferences.1. Press the STOP button if the disc is playing.2. Press the SETUP button to display setup menu.General Setup PageTV DisplayAngle MarkOSD LangCaptionsScreen SaverLast MemoryPSOnENGOnOnOnGo To General Setup Page3. Use the (arrow and ENTER) buttons to select and set desired settings.4. Press the SETUP button again to turn off the setup menu.FF 4XFF 8XFF 16XFF 32XPLAY4X forward search8X forward search16X forward search32X forwardsearchPlay2813
DVD SetupGeneral Setup1. TV Aspect RatioIn the Setup function called TV Display, you set the player to output the video signal at thesame aspect ratio as your monitor. If the monitor is widescreen format, select WIDE.If it is as normal screen (4:3), choose NORMAL/PS (Pan and Scan) or NORMAL L/B(Letterbox).Normal/PS4:3PANSCANChoose this setting if you want the movie to fill the entire screen.(This might mean that the left and right edges won t be seen)Normal/LB4:3Choose this setting if you want to see the movie in its original aspect ratio.(The movie might appear with black bars at the top and bottom of the screen.)Wide 16:9 WIDE SCREENChoose this setting if your DVD Player is connected to a widescreen TV.(This opition is available only if the disc has a 16:9 display aspect ratio.)Wide 16:9 SQUEEZE (Justified)Choose this setting if your DVD Player is connected to a widescreen TV.(This opition is available only if the disc has a 16:9 display aspect ratio.)DVD FunctionsSubtitle(SUB-T)[DVD]This button is used to select the language for the on-screen display system.(This title menu may vary, depending on the particular DVD.)Title[DVD]Used to display the title menu of the loaded DVD disc.This function is only present on discs which support it.2.Angle ViewingSome DVD discs contain programming which allows youto view a scene from a few different camera angles. Youcan tell when a scene is so recorded when an Angle Markis displayed on the screen. This mark will only appear if youhave enabled the Angle Mark featurein the DVD Setup menu.On: When selected, the screen will be shown withangle mark.Off: When selected, no angle mark is shown onthe screen.3.OSD LanguageUse this option to set the OSD language.When selected, change to set the on-screen displaylanguage.General Setup PageTV Display PS Normal/PSAngle MarkOSD LangCaptionsScreen SaverLast MemoryOnENGOnOnOnNormal/LBWideswide SqueezeSet TV Display ModeGeneral Setup PageTV DisplayPSAngle Mark On OnOSD LangCaptionsScreen SaverLast MemoryENGOnOnOnOffSet Angle MarkGeneral Setup PageTV DisplayAngle MarkOSD LangCaptionsScreen SaverLast MemoryPSOnENGOnOnOnEnglishSlow( )[DVD]/[VCD]OSDUse this button to play a disc in slow-forward or1/2slow-reverse. Slow playback can be done at five1/4different speeds. Pressing this button repeatedly1/8decreases the speed in steps. Pressing a sixth1/16time returns playback to the normal speed.1/21/41/81/16PlayCONDITION2X slow forward4X slow forward8X slow forward16X slow forward1/32 32X slow forward2X slow rewind4X slow rewind8X slow rewind16X slow rewind1/32 32X slow rewindPlaySet OSD Language1427
DVD FunctionsDVD SetupDisplay[DVD]Pressing the DISPLAY button on theremote control changes the play mode asfollows:OSDTitle ElapsedTitle RemainChapter ElapsedChapter RemainDisplay OffCONDITIONDisplay the Title ElapsedDisplay the Title RemainDisplay the Chapter ElapsedDisplay the Chapter RemainingNo sign[AUDIO]Pressing the display button displaysinformation about the current CD on thescreen as follows:OSDSingle ElapsedSingle RemainTotal ElapsedTotal RemainCONDITIONDisplay the single elapsedDisplay the single remainDisplay the total elapsedDisplay the total remaining4. CaptionsAdjust caption selection.On:Choose this setting to display captions.Off: Choose this setting to colse captions.5. Screen SaverThe screen saver is useful to prevent your displayfrom becoming damaged. The screen saver pictureappears when you leave the DVD player in stop modefor about two minutes.6. Last Position MemoryGeneral Setup PageTV DisplayPSAngle MarkOSD LangCaptionsOnENGOn OnScreen SaverLast MemoryOnOnOffClosed GaptionGeneral Setup PageTV DisplayPSAngle MarkOSD LangCaptionsScreen SaverOnENGOnOn OnLast MemoryOn OffScreen Saver[VCD]Whenever press the button,title chapterwill be displayed as follows:OSDSingle ElapsedSingle RemainDisplay OffCONDITIONDisplay timeLeft display timeNo sign[MP3]Your DVD player will display the counterautomatically when you play the MP3 disc.The DVD player is capable of remembering the momentin the DVD playback you were viewing at the time youturned off the player. If Last Memory is set ON, when youstart your car the DVD player will automatically beginplayback at this point in the program.<strong>Audio</strong> SetupGeneral Setup PageTV DisplayPSAngle MarkOSD LangCaptionsScreen SaverOnENGOnOnLast Memory On OnOffSet Last Memory StateNumber Buttons[DVD]The 0 through 9 number buttons are used to enter the number of the track, the numberof the DVD chapter, the time, the date, etc.[AUDIO]Select a track by pressing thecorresponding number button.[DVD]You can select a track in the folder bypressing the corresponding number button.OSDSelect Track:____:__OSDCONDITIONSelect track noCONDITIONSelect track noGeneral Setup PageSpeaker SetupSpdif SetupDolby Digital SetupChannel DelayEqualier3D ProsessingHDCDGo To Speaker Setup2615
DVD SetupDVD FunctionsShow below are two examples of <strong>Audio</strong> Setups.1. Dolby Digital SetupGeneral Setup PageSpeaker SetupSpdif SetupDolby Digital SetupChannel DelayEqualizer3D ProsessingHDCDGo To Dolby Digital SetupDual MonoUse this function to set the input audiosignal to match your speaker setup.Dolby Digital SetupDual Mono Mix StereoDynamicL-MonoR-MonoMix-MonoDual Stereo SetupDynamicUse this function to change the settingfrom the factory.Stop( )[DVD]/[AUDIO]In DVD mode, Press STOP to stop playback.To resume playback, press PLAY/PAUSE. Ifyou press STOP and then PLAY/PAUSE twice,the player will begin playback at the firstscene of the movie.[MP3]In MP3 mode, Pressing STOP will stop theaudio playback. Press PLAY/PAUSE to beginplayback of the first title on the disc.Arrows( / / / )OSDCONDITION1 Time Press Play Key To Continue StopOSDCONDITION1 Time Stop Stop[DVD]In addition to navigating the various menus, you can use the arrow buttons to define the areaof the screen you want to enlarge in ZOOM mode.[MP3]2TimeDisc StopAfter pressing STOP button, select the desired folder and set the condition by pressingENTER button.Dolby Digital SetupDolby Digital SetupDual MonoDynamicMixStereoL-MonoR-MonoMix-MonoDual MonoDynamicMixFULL3/41/21/4SetupPressing the SETUP button opens the Setup Menu, where you can make and adjust DVDsettings to suit your equipment and preferences.OFFDual Stereo Setup2. Equalizer SettingsGeneral Setup PageSpeaker SetupSpdif SetupDolby Digital SetupChannel DelayEqualizer3D ProsessingHDCDSet DRC OffEqualizer PageEQ Type None NoneBass BoostSuper BassTreble BoostOffOffOffRockPopLiveDanceTechnoClassicSoftMenu[DVD]Pressing the SETUP brings up the DVD disc menu. The content of this menu varies,depending on the programming of the disc.Go To Dolby Digital SetupSelect Equalizer Type1625
DVD FunctionsDVD SetupEjectWhen this button is pressed, the disc is ejected. When this button is pressed for morethan 3 seconds, the disc is unconditionally ejected. So, you can use this function whenyou encounters not ejected situation due to unknown reasons.Vol+/Vol-Use these buttons to adjust the audio output level of the speaker from 0 to 20.MutePress MUTE to turn off the audio part of thecurrently playing program. Press it again toreturn the audio volume to the level at whichyou were last listening.OSDMuteMute offCONDITIONMuteMute offEQ Equalizer TypeIn this menu you can choose the desired presetequalizer mode.(Choose from Rock, Pop, Live, Dance, Techno,ClassicorSoft)Bass BoostThe Bass Boost function increases the volumelevel of the bass frequencies.Equalizer PageEQ Type None NoneBass BoostSuper BassTreble BoostOffOffOffRockPopLiveDanceTechnoClassicSoftSelect Equalizer TypeEqualizer PageEQ TypeNoneBass Boost Off OnSuper BassTreble BoostOffOffOffBoss BoostPlay or Pause( )Whenever this button is pressed, the modeswitches from pause to play or play to pause.OSDCONDITIONPlay DiscSuper BassSuper Bass Boost further increases the volumelevel of the bass frequencies.Equalizer PageEQ TypeBass BoostSuper BassTreble BoostNoneOffOffOffOnOffPauseSuper Boost<strong>Audio</strong>[DVD]Change the audio output format.(Available only if the disc supports available audiotype.)[VCD]/[AUDIO]Changes the audio output format.(Available only of the disc supports available audiotype.)[MP3]An invalid button press.OSD1/2:Ac32CHEnglish2/2:Ac35.1CHEnglishOSDStereoMono LeftMono RightMix MonoCONDITION2 Channel5.1 ChannelCONDITIONStereoMono LeftMono RightMix MonoTreble BoostTreble Boost increases the volume level of the upperfrequencies.Equalizer PageEQ TypeBass BoostSuper BassTreble BoostTruble BoostNoneOffOffOffOnOff2417
DVD SetupVideo SetupPicture QualityIn the Video Setup, you can make adjustments to various elements of the picture quality.Video Setup PageComponent offTV ModeQualityVideo Quality SetupSharpness Low HighBrightnessContrastGamma0000NoneMediumLowHue00SaturationLuma Delay001TDVD SetupPassword Setup1. Password ModePassword Setup, which is required for using the Parental Controls settings,is divided into two modules: Turning on the Password function, and settinga Password. The first step is to turn it on in the Password Mode setting.Password Setup PagePassword Mode OnPasswordOnOffGo TO Video Setup PageSharpnessSharpness can be adjusted by highlighting it in the menu and then using theUP/DOWN arrow buttons to increase or decrease the sharpness.Video Quality SetupSharpness Low HighBrightnessContrastGamma0000NoneMediumLowHue00SaturationLuma DelaySharpness001TPassword Mode2. Password ChangeIn the Password setup, you must first enter the current 6-digit passcode, andthen you have the opportunity to change it. The factory default passcode is 136900.Once you have changed and confirmed the password, press the ENTER button.Password Setup PagePassword Mode On OnPassword Change Old PasswordNew PasswordConfirm PWDOKChange Password1823
DVD Setup5.Disc MenuUse the Disc Menu option to select the displaylanguage for a DVD s disc menu display language.(not the same as the players menu)1. Press the SETUP button during stop mode.2. Press the / buttons to move to Preference.3. Press the / buttons to move to Disc Menu.4. Press the ENTER button.5. Press the / buttons to select Disc Menu.6.ParentalThe Parental Control settings limit the player to only play content at or below a certainmovie rating. The ratings systems in different countries vary. In the USA, the MotionPicture Association of America(MPAA) rates movies as G, PG, PG-13, etc.In this menu item, you can set what is the highest level of rating you wish to allow theunit to play.1. Press the SETUP button when stop mode.2. Press the / buttons to move to Preference.3. Press the / buttons to move to Parental.4. Press the ENTER button.5. Press the / buttons to select desiredparental level.7.Country RegionThe Country Region setting is important becausein order to set the Parental Controls, you mustidentify the country whose rating system yourDVD disc is using.1. Press the SETUP button when stop mode.2. Press the / buttons to move to Preference.3. Press the / buttons to move to CountryRegion.4. Press the ENTER button.5. Press the / buttons to select desiredCountry Region.8.DefaultIf you select RESET when in the DEFAULT settingsmode, all the settings of the Setup Menu will bereturned to the factory defaut settings, except forParental Level, Region and Password values.1. Press the SETUP button when stop mode.2. Press the / buttons to move to Preference.3. Press the / buttons to move to Default.4. Press the ENTER button to select Reset.22Preference PageTV Type PAL EnglishPBC<strong>Audio</strong>SubtitleOnENGFrenchSpanishChineseDisc MenuENG JapaneseParental00 KoreanCountry RegionUSA RussianDefaultThaiPreferred Menu LanguagePreference PageTV Type PAL 1KIDSAFPBC<strong>Audio</strong>SubtitleOnENG2G3PG4PG13Disc MenuENG 5PGRParental006RCountry RegionUSA 7 Nc17Default8ADULTPreferred Menu LanguagePreference PageTV TypePBC<strong>Audio</strong>SubtitleDisc MenuParentalCountry RegionDefaultPALOnENGENGUSAPG Country Region GodsPreference PageTV TypePBC<strong>Audio</strong>SubtitleDisc MenuParentalCountry RegionDefaultLoad Factory SettingPALOnENGENGUSAChinaFranceHongkongJapanTaiwanGBRUSAResetDVD SetupBrightnessUse this option to adjust the display brightness. When you reach desiredbrightness level, use the / buttons and press the ENTER button.Video Quality SetupSharpnessBrightnessContrastGammaHueSaturationLuma DelayBrightnessContrastLow0000None00001TBrightnessBrightness 0Use this option to adjust the contrast level.Use the / buttons and press the ENTER button, when you reach thedesired contrast level. The contrast control increases or decreases the ratio ofbright and dark screen sections.Video Quality SetupSharpness LowBrightnessContrast0000Gamma NoneHue00Saturation 00Luma Delay 1TContrast19ContrastContrast 0
DVD SetupGammaIn some systems, you might experience a loss in the strength of the dark sections ofthe displayed picture. This can be helped by changing the Gamma setting, whichboosts the dark level but leaves the other levels unchanged.Video Quality SetupSharpness LowBrightnessContrast0000Gamma None HighHue00 MediumSaturation 00 LowLuma Delay 1TNoneGammaHueSelect screen hue level using the direction / buttons and press the ENTER button.Video Quality SetupSharpness LowBrightnessContrast0000Gamma NoneHue 00Saturation 00Luma Delay1THueSaturationSelect screen saturation level using the direction / buttons and press theENTER button.Video Quality SetupSharpness LowBrightnessContrast0000Gamma NoneHue 00Saturation 00Luma Delay 1TSaturationLuma DelaySelect the Luma Delay menu and select the preferred video image quality.Video Quality SetupSharpness LowBrightnessContrast0000Gamma NoneHue 00Saturation 00Luma Delay1TLuma Delay001T20HueSaturationHue 0Saturation 0DVD SetupPreference1.TV TypeChoose the proper TV format appropriate to themonitor you have connected to the player fromthe following: NTSC, PAL or Multi type.1. Press the SETUP button during stop mode.2. Press the / buttons to move to Preference.3. Press the / buttons to move to TV Type.4. Press the ENTER button.5. Press the / buttons to select TV Type.2.PBC (Play Back Control)This feature is only available when a SVCD discis loaded. It allows you to disable or enable thePBC (Play Back Control) menu of VCD discs.1. Press the SETUP button during stop mode.2. Press the / buttons to move to Preference.3. Press the / buttons to move to PBC.4. Press the ENTER button.5. Press the / buttons to select TV TypeOn/Off.3.<strong>Audio</strong>Use the audio language menu to select the subtitlelanguage that you prefer. If the disc you are playinghas that language available, it will display subtitlesin that language.1. Press the SETUP button during stop mode.2. Press the / buttons to move to Preference.3. Press the / buttons to move to <strong>Audio</strong>.4. Press the ENTER button.5. Press the / buttons to select desiredaudio language.4.SubtitleIn the Subtitle menu, you can select a subtitlelanguage. Please note that subtitle will onlyappear in this language if the disc programminghas included it.1. Press the SETUP button during stop mode.2. Press the / buttons to move to Preference.3. Press the / buttons to move to Subtitle.4. Press the ENTER button.5. Press the / buttons to select desiredsubtitle.21Preference PageTV TypePBC<strong>Audio</strong>SubtitleDisc MenuParentalCountry RegionDefaultSet TV StandardPreference PageTV TypePBC<strong>Audio</strong>SubtitleDisc MenuParentalCountry RegionDefaultSet PBC StatePALOnENGENGUSAPALOnENGENGUSAPreference PageTV Type PAL EnglishPBC<strong>Audio</strong>OnENGFrenchSpanishSubtitleChineseDisc MenuENG JapaneseParentalKoreanCountry RegionUSA RussianDefaultThaiPreferred Menu LanguagePreference PageTV Type PAL EnglishPBC<strong>Audio</strong>OnENGFrenchSpanishSubtitleChineseDisc MenuENG JapaneseParentalKoreanCountry RegionUSA RussianDefaultThaiPreferred Menu LanguagePALMultiNTSCOnOff