Fuser Unit Installation Guide - Fuji Xerox Printers
Fuser Unit Installation Guide - Fuji Xerox Printers
Fuser Unit Installation Guide - Fuji Xerox Printers
- No tags were found...

Create successful ePaper yourself
Turn your PDF publications into a flip-book with our unique Google optimized e-Paper software.
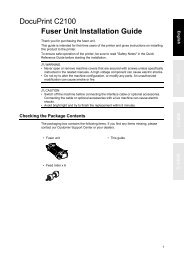
<strong>Fuser</strong>.fm Page 1 Monday, August 21, 2006 10:36 AMDocuPrint C3055/C3055 DX<strong>Fuser</strong> <strong>Unit</strong> <strong>Installation</strong> <strong>Guide</strong>Thank you for purchasing the fuser unit.This guide is intended for first-time users of the printer and gives instructions on how toreplace this product.To ensure safe operation of the printer, be sure to read "Safety Notes" in the QuickReference <strong>Guide</strong> before starting the replacement procedure.The illustrations used in this guide are those of the DocuPrint C3055.EnglishWARNING• Never open or remove machine covers that are secured with screws unless specificallyinstructed in the related manuals. A high voltage component can cause electric shocks.• Do not try to alter the machine configuration, or modify any parts. An unauthorizedmodification can cause smoke or fire.CAUTION• Be sure to switch off and unplug the machine before accessing the interior of themachine for cleaning, maintenance, or fault clearance. Access to a live machine'sinterior can cause electric shocks.Important• The fuser unit becomes very hot during printing. If replacing the fuser unit, switch the printer off and waitfor at least 40 minutes until the unit cools down. If you replace the fuser unit right after printing, you mayget burnt.Note• The fuser unit yields approximately 100,000 pages. When the fuser unit is near the end of its life, the[Replace soon] message appears on the control panel. After approximately 60,000 (A4 landscape)prints, another message, [Replace], appears and the printer shuts down. Make sure to have a new fuserunit ready before the printer shuts down.The actual page yield may vary depending on the print requirements or the contents of documentsprinted. Refer to the User <strong>Guide</strong> for more information.Checking the Package ContentsThe packaging box contains the following items. If you find any items missing, pleasecontact our Customer Support Center or your dealers.• <strong>Fuser</strong> unit• This guide1
<strong>Fuser</strong>.fm Page 2 Monday, August 21, 2006 10:36 AMReplacing the <strong>Fuser</strong> <strong>Unit</strong>1. Switch the power off and wait for 40minutes.2. If paper is loaded in the bypass tray,remove the paper and close the bypasstray cover.Important• When closing the bypass tray cover, be careful not toget your fingers caught between (the left or right edgeof) the cover and the printer.3. Press the button B and open the frontcover.If the duplex unit (optional) is installed, holdthe projection on its right side and open thethe duplex unit cover. (The illustrations inthe following steps will not show the duplexunit. The procedure, however, is the sameeven when the duplex unit is not installed.)Note• The duplex unit comes standard on the DocuPrintC3055 DX.4. Push up the levers on both sides of thefuser unit toward to release the lock.2
<strong>Fuser</strong>.fm Page 3 Monday, August 21, 2006 10:36 AM5. Hold the fuser unit by the tabs on bothsides and gently remove it from the printer.TabTabEnglish6. Remove the new fuser unit from the box.Hold it by the tabs, and insert theprojections on both sides to the rollerbearings in the printer.Note• If the levers are pressed accidentally when insertingthe fuser unit, push them up to their original positions.7. Push down the lever on both sides of thefuser unit toward .8. Close the front cover.If the duplex unit is installed, close theduplex unit cover first and then the frontcover.Important• When closing the front cover, be careful not to get yourfingers caught between (the left, right, top, or bottomedge of) the cover and the printer.The replacement of the fuser unit is now complete.3
<strong>Fuser</strong>.fm Page 4 Monday, August 21, 2006 10:36 AMResetting the CounterIf you are finished replacing the fuser unit, reset its counter on the control panel.1. Press the < > and buttonssimultaneously.[Consumables Menu] is displayed.Consumables MenuNon-genuine2. Press the < > button.[Reset Counter] is displayed.Consumables MenuReset Counter3. Press the < > button to accept theselection.[<strong>Fuser</strong>] is displayed.Reset Counter<strong>Fuser</strong>4. Press the < > button to accept theselection.The confirmation screen is displayed.Use SET to reset5. Press the button.The resetting of the counter starts. Whenfinished, the display returns to the screenshown on the right.6. Press < > button until [Ready to print] isdisplayed.Reset Counter<strong>Fuser</strong>Ready to print4
<strong>Fuser</strong>.fm Page 5 Monday, August 21, 2006 11:19 AMDocuPrint C3055/C3055 DX정착부 설치 설명서정착부를 구입해 주셔서 감사드립니다 .본 설명서는 프린터를 처음으로 구입한 사용자를 위해 본 제품 교체 방법에 대한 지침을 제공합니다 .프린터의 안전한 작동을 위하여 , 교체를 시작하기 전에 핵심 가이드의 " 안전하게 사용하기 위하여 " 를 읽어 주십시오 .본 설명서에 사용된 그림은 DocuPrint C3055 에 해당합니다 .경고• 나사로 고정되어 있는 패널이나 커버 등은 함께 제공된 설명서가 지시하는 곳 이외에는절대로 열지 말아 주십시오 . 내부에는 전압이 높은 부분이 있어 감전의 원인이 될 수 있습니다 .• 기계를 개조하거나 부품을 변경하여 사용하지 말아 주십시오 . 화재나 발연의 원인이 될수 있습니다 .English 한국어주의• 기계의 청소 및 보수 , 고장처리를 실시할 경우에는 전원스위치를 끄고 반드시 전원플러그를 콘센트에서 뽑아 주십시오 . 전원스위치를 끄지 않은 채 기계의 청소나 보수를 실시하면감전의 원인이 될 수 있습니다 .중요• 정착부는 프린트 중 매우 뜨거워집니다 . 정착부를 교체하려면 전원을 끄고 장치가 식을 때까지 최소 40분 동안 기다립니다 . 프린트 후 바로 장치를 교체할 경우 화상을 입을 수 있습니다 .보충• 정착부는 약 100,000 페이지를 출력할 수 있습니다 . 프린터는 정착부가 수명에 가까워지면 [ReplaceSoon] 이 조작부에 표시됩니다 . 약 60,000 페이지 (A4 가로 ) 정도 프린트한 후 [Replace] 가 표시되고프린터가 작동되지 않습니다 . 프린터가 작동되지 않기 전에 새 정착부를 준비해야 합니다 .실제 페이지 한계는 프린트 요구 사항 또는 프린트되는 문서 내용에 따라 다를 수 있습니다 . 자세한 내용은 사용 설명서를 참고하여 주십시오 .패키지 내용물 확인패키지에는 다음과 같은 항목이 포함되어 있습니다 . 항목이 누락된 경우 고객 지원 센터또는 판매 대리점에 문의하여 주십시오 .• 정착부• 본 설명서5
<strong>Fuser</strong>.fm Page 6 Monday, August 21, 2006 11:19 AM정착부 교체1. 전원을 끄고 40 분 동안 기다립니다 .2. 수동 트레이에 용지가 있는 경우 용지를 제거하고 수동 트레이 커버를 닫습니다 .중요• 수동 트레이 커버를 닫을 때 손가락이 커버(좌측 또는우측 모서리 ) 및 프린터 사이에 끼이지 않도록 주의합니다 .3. 버튼 B 를 누르고 앞커버를 엽니다 .양면 유니트 ( 옵션 ) 가 설치된 경우 우측에서 돌출부를 잡고 양면 유니트 커버를 엽니다 . ( 다음 단계의 그림에서는 양면 유니트가 표시되지 않습니다 . 그러나 절차는양면 유니트가 설치되지 않은 경우와 동일합니다 .)보충• 양면 유니트는 DocuPrint C3055 DX 의 경우 표준입니다 .4. 정착부의 양쪽 측면에서 레버를 위로 밀어올려 잠금 상태를 해제합니다 .6
<strong>Fuser</strong>.fm Page 7 Monday, August 21, 2006 11:19 AM5. 정착부 양쪽 측면에서 탭을 잡고 프린터에서 부드럽게 제거합니다 .탭6. 새 정착부를 상자에서 꺼냅니다 .탭을 잡고 양쪽 측면의 돌출부를 프린터의롤러 베어링에 삽입합니다 .보충• 정착부를 삽입할 때 실수로 레버를 누른 경우 레버를눌러 원래 위치로 복귀시킵니다 .탭English 한국어7. 정착부의 양쪽 측면에서 레버를 아래로 누릅니다 .8. 앞커버를 닫습니다 .양면 유니트가 설치된 경우 먼저 양면 유니트 커버를 닫은 다음 앞커버를 닫습니다 .중요• 앞커버를 닫을 때 손가락이 커버 ( 좌측 또는 우측 모서리 ) 및 프린터 사이에 끼이지 않도록 주의합니다 .정착부 교체가 완료되었습니다 .7
<strong>Fuser</strong>.fm Page 8 Monday, August 21, 2006 11:19 AM카운터 재설정정착부를 교체한 후 조작부에서 카운터를 재설정합니다 .1. < > 및 버튼을 동시에 누릅니다 .[Consumables Menu] 가 표시됩니다 .Consumables MenuNon-genuine2. < > 버튼을 누릅니다 .[Reset Counter] 이 표시됩니다 .Consumables MenuReset Counter3. < > 버튼을 눌러 선택 사항을 적용합니다 .[<strong>Fuser</strong>] 가 표시됩니다 .Reset Counter<strong>Fuser</strong>4. < > 버튼을 눌러 선택 사항을 적용합니다 .확인 화면이 표시됩니다 .Use SET to reset5. 버튼을 누릅니다 .카운터 재설정이 시작됩니다 . 완료되면 디스플레이가 우측에 표시된 화면으로 돌아갑니다 .6. [Ready to print] 가 표시될 때까지 < > 버튼을 누릅니다 .Reset Counter<strong>Fuser</strong>Ready to print8
<strong>Fuser</strong>.fm Page 9 Monday, August 21, 2006 12:47 PMDocuPrint C3055/C3055 DX熔 著 部 組 件 安 裝 說 明 書感 謝 您 選 用 熔 著 部 組 件 。本 說 明 書 適 用 於 初 次 使 用 本 印 表 機 的 使 用 者 , 並 說 明 如 何 更 換 本 產 品 。為 了 確 保 印 表 機 的 安 全 操 作 , 開 始 更 換 程 序 之 前 , 請 務 必 先 閱 讀 『 快 速 參 考 說 明 書 』 中 的" 為 了 機 器 的 安 全 使 用 "。本 說 明 書 使 用 的 圖 為 DocuPrint C3055 的 圖 。English警 告• 嚴 禁 開 啟 相 關 說 明 書 未 指 示 的 、 用 螺 絲 固 定 住 的 控 制 板 與 蓋 , 以 免 接 觸 到 內 部 的 高 壓 部而 引 起 觸 電 。• 請 勿 擅 自 改 造 機 器 、 更 換 零 件 , 以 免 機 器 起 火 或 冒 煙 。注 意• 清 潔 及 維 修 機 器 、 處 置 故 障 時 , 請 務 必 關 掉 電 源 以 後 , 再 拔 出 插 頭 。 開 著 電 源 進 行 以 上作 業 , 容 易 引 起 觸 電 。重 要• 熔 著 部 組 件 於 列 印 時 會 發 出 高 熱 。 若 要 更 換 熔 著 部 組 件 , 請 先 關 閉 電 源 後 至 少 靜 置 40 分 鐘 , 等 候 組 件 冷卻 。 若 在 列 印 之 後 隨 即 更 換 組 件 , 可 能 會 使 您 灼 傷 。補 充• 熔 著 部 組 件 的 使 用 壽 命 將 盡 時 , 控 制 面 板 上 會 顯 示 [Replace soon] 訊 息 。 大 約 列 印 60,000 頁 (A4 橫 向 )之 後 , 會 顯 示 另 一 個 訊 息 [Replace], 印 表 機 並 會 關 機 。 請 確 定 在 印 表 機 關 機 之 前 先 備 妥 新 的 熔 著 部 組件 。實 際 產 出 的 頁 數 依 照 列 印 需 求 或 所 印 文 件 的 內 容 而 有 差 異 。 有 關 詳 情 , 請 參 照 『 操 作 說 明 書 』。檢 查 包 裝 內 容包 裝 盒 內 含 有 下 列 項 目 。 若 您 發 現 有 項 目 短 少 , 請 聯 絡 本 公 司 的 客 服 支 援 中 心 或 經 銷 商 。• 熔 著 部 組 件• 本 說 明 書9
<strong>Fuser</strong>.fm Page 10 Monday, August 21, 2006 12:47 PM更 換 熔 著 部 組 件1. 關 閉 電 源 , 等 候 40 分 鐘 。2. 若 手 送 紙 盤 中 裝 有 紙 張 , 請 取 出 紙 張 , 關 閉手 送 紙 盤 的 外 蓋 。重 要• 關 閉 手 送 紙 盤 的 外 蓋 時 請 留 意 , 避 免 手 指 夾 在 外 蓋( 左 右 邊 緣 ) 與 印 表 機 之 間 。3. 按 下 B 按 鈕 , 開 啟 前 蓋 。若 安 裝 有 雙 面 組 件 ( 選 購 ), 握 住 右 側 的 彈出 部 位 , 打 開 雙 面 組 件 的 外 蓋 。( 下 列 步 驟的 圖 解 中 未 顯 示 雙 面 組 件 。 然 而 , 即 使 未 安裝 雙 面 組 件 , 程 序 依 然 相 同 。)補 充• 雙 面 組 件 為 DocuPrint C3055 DX 的 標 準 配 備 。4. 將 熔 著 部 組 件 兩 側 的 拉 桿 朝 推 , 以 解 除 鎖定 。10
<strong>Fuser</strong>.fm Page 11 Monday, August 21, 2006 12:47 PM5. 握 住 熔 著 部 組 件 兩 側 的 小 凸 片 , 輕 輕 從 印 表機 卸 下 。小 凸小 凸English6. 從 包 裝 盒 中 取 出 新 的 熔 著 部 組 件 。握 住 小 凸 片 , 將 彈 出 部 位 插 入 印 表 機 中 的 滾輪 軸 承 。補 充• 若 插 入 熔 著 部 組 件 時 意 外 壓 下 拉 桿 , 請 上 推 回 到 原 來的 位 置 。7. 將 熔 著 部 組 件 兩 側 的 拉 桿 朝 壓 。8. 關 上 前 蓋 。若 安 裝 有 雙 面 組 件 , 先 關 閉 雙 面 組 件 的 上蓋 , 接 著 關 閉 前 蓋 。重 要• 關 閉 前 蓋 時 請 留 意 , 避 免 手 指 夾 在 外 蓋 ( 上 下 左 右 邊緣 ) 與 印 表 機 之 間 。熔 著 部 組 件 的 更 換 程 序 即 完 成 。11
<strong>Fuser</strong>.fm Page 12 Monday, August 21, 2006 12:47 PM重 設 計 數 器當 您 完 成 熔 著 部 組 件 的 更 換 程 序 之 後 , 請 重 設 控 制 面 板 上 的 計 數 器 。1. 同 時 按 著 < > 與 鍵 。即 顯 示 [Consumables Menu]。Consumables MenuNon-genuine2. 按 < > 鍵 。即 顯 示 [Reset Counter]。Consumables MenuReset Counter3. 按 < > 鍵 以 確 認 選 擇 。即 顯 示 [<strong>Fuser</strong>]。Reset Counter<strong>Fuser</strong>4. 按 < > 鍵 以 確 認 選 擇 。即 顯 示 確 認 畫 面 。Use SET to reset5. 按 鍵 。即 開 始 重 設 計 數 器 。 完 成 後 , 螢 幕 會 恢 復 右圖 所 示 的 畫 面 。Reset Counter<strong>Fuser</strong>6. 按 < > 鍵 , 直 到 顯 示 [Ready to print] 為止 。Ready to print12
<strong>Fuser</strong>.fm Page 13 Monday, August 21, 2006 1:53 PMDocuPrint C3055/C3055 DX定 影 器 组 件 安 装 说 明 书感 谢 您 购 买 定 影 器 组 件 。本 说 明 书 供 初 次 使 用 本 打 印 机 的 用 户 使 用 , 其 中 介 绍 了 将 本 产 品 更 换 的 方 法 。为 保 证 打 印 机 的 安 全 操 作 , 务 必 在 开 始 更 换 前 阅 读 《 快 速 参 考 说 明 书 》 中 的 “ 安 全 注 意事 项 ”。本 说 明 书 中 插 图 使 用 的 是 DocuPrint C3055。English警 告· 严 禁 开 启 使 用 说 明 书 未 指 示 的 用 螺 丝 固 定 住 的 控 制 板 与 盖 , 以 免 接 触 到 内 部 的 高 压 部 位而 引 起 触 电 。· 请 勿 擅 自 改 造 机 器 、 更 换 零 件 , 以 免 机 器 起 火 或 冒 烟 。注 意· 清 洁 及 维 修 机 器 、 处 理 故 障 时 , 请 务 必 关 掉 电 源 以 后 , 再 拔 出 插 头 。 开 着 电 源 进 行 以 上作 业 , 容 易 引 起 触 电 。重 要· 定 影 器 组 件 打 印 时 很 烫 。 如 果 更 换 定 影 器 组 件 , 关 闭 电 源 开 关 并 至 少 等 待 40 分 钟 , 使 定 影 器 组 件 冷 却 。如 果 在 打 印 后 立 即 更 换 该 组 件 , 您 可 能 会 被 烫 伤 。补 充· 定 影 器 组 件 的 使 用 寿 命 约 100,000 页 。 当 定 影 器 组 件 接 近 其 寿 命 时 , 在 控 制 面 板 上 会 显 示 消 息 [Replacesoon]。 打 印 大 约 60,000 页 (A4 横 向 ) 之 后 , 另 一 消 息 [Replace] 将 会 显 示 , 并 且 打 印 机 关 闭 。 请 确 定在 打 印 机 关 机 前 已 准 备 好 新 的 定 影 器 组 件 。实 际 打 印 页 数 取 决 于 打 印 要 求 或 打 印 文 档 的 内 容 。 有 关 更 多 详 情 , 请 参 照 《 使 用 说 明 书 》。检 查 包 装 盒 内 容包 装 盒 内 应 装 有 以 下 物 品 。 如 果 发 现 有 任 何 物 品 缺 少 , 请 联 络 本 公 司 客 户 支 持 中 心 或 经 销商 。· 定 影 器 组 件 · 本 说 明 书13
<strong>Fuser</strong>.fm Page 14 Monday, August 21, 2006 1:53 PM更 换 定 影 器 部 件1. 关 闭 机 器 电 源 并 等 待 40 分 钟 。2. 如 果 旁 路 纸 盘 装 有 纸 张 , 请 取 出 纸 张 并 关 闭旁 路 纸 盘 盖 板 。重 要· 在 关 闭 旁 路 纸 盘 盖 板 时 , 当 心 您 的 手 指 不 要 夹 在 盖 板( 左 侧 或 右 侧 边 缘 处 ) 与 打 印 机 之 间 。3. 按 下 按 键 B 并 打 开 前 盖 。如 果 安 装 了 自 动 双 面 组 件 ( 选 装 ), 握 住 其右 侧 的 凸 起 部 分 并 打 开 自 动 双 面 组 件 盖 子 。( 以 下 步 骤 中 的 插 图 将 不 显 示 双 面 打 印 组件 。 即 使 未 安 装 自 动 双 面 组 件 , 操 作 步 骤 仍一 样 。)补 充· 自 动 双 面 组 件 是 DocuPrint C3055 DX 的 标 准 配 置 。4. 朝 向 上 推 压 定 影 器 组 件 两 侧 的 拉 杆 , 松 开锁 定 机 构 。14
<strong>Fuser</strong>.fm Page 15 Monday, August 21, 2006 1:53 PM5. 握 住 定 影 器 组 件 两 侧 的 凸 耳 ( 上 侧 凸 出部 ), 将 其 从 打 印 机 上 小 心 拆 下 。凸 耳凸 耳English6. 从 包 装 盒 内 取 出 新 的 定 影 器 组 件 。握 住 它 的 两 个 凸 耳 , 将 它 两 侧 的 中 心 凸 起 部分 插 入 打 印 机 的 滚 柱 轴 承 装 置 中 。补 充· 如 果 在 插 入 定 影 器 组 件 时 意 外 按 下 了 拉 杆 , 将 其 推 回到 原 来 位 置 。7. 朝 向 下 按 压 定 影 器 组 件 两 侧 的 拉 杆 。8. 关 闭 前 盖 。如 果 安 装 了 自 动 双 面 组 件 , 先 关 闭 自 动 双 面组 件 盖 子 , 再 关 闭 前 盖 。重 要· 在 关 闭 前 盖 时 , 当 心 您 的 手 指 不 要 夹 在 盖 板 ( 左 侧 、右 侧 、 上 侧 以 及 下 侧 边 缘 处 ) 与 打 印 机 之 间 。定 影 器 组 件 更 换 完 毕 。15
<strong>Fuser</strong>.fm Page 16 Monday, August 21, 2006 1:53 PM计 数 器 复 位如 果 完 成 了 定 影 器 组 件 的 更 换 , 在 控 制 面 板 上 将 其 计 数 器 复 位 。1. 同 时 按 < > 键 和 键 。显 示 [Consumables Menu]。Consumables MenuNon-genuine2. 按 < > 键 。显 示 [Reset Counter]。Consumables MenuReset Counter3. 按 < > 键 接 受 该 选 择 。显 示 [<strong>Fuser</strong>]。Reset Counter<strong>Fuser</strong>4. 按 < > 键 接 受 该 选 择 。显 示 确 认 画 面 。Use SET to reset5. 按 键 。计 数 器 开 始 复 位 。 完 成 时 , 屏 幕 显 示 恢 复 为右 侧 所 示 。Reset Counter<strong>Fuser</strong>6. 按 < > 键 , 直 到 显 示 [Ready to print]。Ready to print<strong>Fuji</strong> <strong>Xerox</strong> Printing Systems Co., Ltd. 604E 23680/DE3599Z4-1 (Edition 1)November 2006Copyright © 2006 by <strong>Fuji</strong> <strong>Xerox</strong> Co., Ltd.