iBT-GPS Bluetooth GPS Data Logger User's Manual
iBT-GPS Bluetooth GPS Data Logger User's Manual
iBT-GPS Bluetooth GPS Data Logger User's Manual

You also want an ePaper? Increase the reach of your titles
YUMPU automatically turns print PDFs into web optimized ePapers that Google loves.
<strong>iBT</strong>-<strong>GPS</strong> <strong>Bluetooth</strong> <strong>GPS</strong> <strong>Data</strong> <strong>Logger</strong>User’s <strong>Manual</strong>Published on 15-Jan-2007 Rev 1.18029407701A
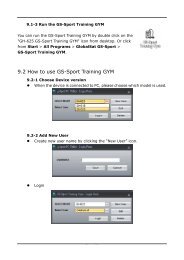
Table of ContentsChapter 1 Before you begin.........................................................................................41.1 Note and Warning ..........................................................................................41.2 Introduction....................................................................................................51.3 Features...........................................................................................................51.4 Applications ....................................................................................................61.5 Appearance .....................................................................................................71.6 Power Switch and Push Button.....................................................................81.7 LED Display ...................................................................................................9Chapter 2 Getting Started .........................................................................................102.1 Checking the package content ....................................................................102.2 Getting Started .............................................................................................11Step 1 Charging Your Battery...................................................................11Step 2 Turning on the power switch (NAV/ LOG)...................................12Step 3 Connecting your handheld device with <strong>iBT</strong>-<strong>GPS</strong> ........................12Step 4 Loading your <strong>GPS</strong> mapping or routing software ........................16Step 5 Starting the application..................................................................162.3 Helpful Tips ..................................................................................................17Chapter 3 Using <strong>Logger</strong> ............................................................................................183.1 How to connect the <strong>iBT</strong>-<strong>GPS</strong> to your PC...................................................183.1.1 Driver installation .............................................................................183.1.2 Google Earth......................................................................................203.2 Software Utility --- <strong>iBT</strong>-<strong>GPS</strong> <strong>Logger</strong> Tool..................................................213.2.1Configuration .....................................................................................223.2.2 Satellite Information.........................................................................312
3.2.3 <strong>Data</strong> Log List --- way to download the data from logger!.................333.2.4 About ..................................................................................................38Appendix.....................................................................................................................39Appendix A. Specifications................................................................................39Appendix B. Certification .................................................................................42Appendix C. Warranty Information ................................................................443
Chapter 1 Before you begin1.1 Note and Warning- <strong>iBT</strong>-<strong>GPS</strong> uses Lithium battery. If <strong>iBT</strong>-<strong>GPS</strong> is used in temperaturelower than -10℃ or higher than 60℃, its battery charging capabilitywill decrease. Please leave the <strong>iBT</strong>-<strong>GPS</strong> far from heat or hightemperature environment. In addition, do not expose your <strong>iBT</strong>-<strong>GPS</strong> intemperature higher than 140℉/60℃. If you do not follow these rules,the battery inside <strong>iBT</strong>-<strong>GPS</strong> may overheat, explode or burn itself, andthis will lead to very serious damage. The Lithium battery inside the<strong>iBT</strong>-<strong>GPS</strong> should be recycled.- While in the hospital, turning off the <strong>iBT</strong>-<strong>GPS</strong> is recommended.Wireless <strong>GPS</strong> receiver may interfere with medical equipments whichuse radio frequency.- For a long period not using <strong>iBT</strong>-<strong>GPS</strong>, take out the battery and store itin dry/cool places.- For safety, keep the <strong>iBT</strong>-<strong>GPS</strong> and all accessories out of children’sreach.- The manufacturer assumes no responsibility for any damages and lossresulting from the use of this manual, or from deletion of data as aresult of malfunction, dead battery, or from misuse of the product inany way.- Use only the supplied and approved accessories. Unauthorizedaccessories, modifications or attachments could damage the <strong>iBT</strong>-<strong>GPS</strong>,and may violate regulations governing radio devices.4
- Use a dry, clean soft cloth to clean the unit. Do not use harsh cleaningsolvents, chemicals, or strong detergents.- Do not attempt to open the <strong>iBT</strong>-<strong>GPS</strong> yourself. Unauthorized hackingmay damage the unit, and void your warranty.1.2 IntroductionThis <strong>iBT</strong>-<strong>GPS</strong> logger features an all-in-one, cost-effective portable <strong>GPS</strong>logging solution. With its on-board memory, it allows you to log yourroutes by ways of time/ distance/ speed. Points of interest can also berecorded by a push button. Through user friendly software utility, itshows your track on Google Earth. This data logger is small and robust,ideal to carry everywhere for applications such as routetracking, mountain climbing or fleet management.1.3 Features1. MTK <strong>GPS</strong> chipset 32 channels.2. 20+ hrs operation time.3. Embedded with 16Mb memory for saving up to 100,000 way points.4. Dual modes for both route recording and navigation.5. Push to log for points of interest.6. 3 recording methods: by time, by distance or by speed.7. Tracks can be shown on Google Earth.8. WAAS and EGNOS supported for better accuracy.9. Support NMEA-0183 GGA, GSA, GSV, RMC, VTG, GLL.5
10. Fully compliant with <strong>Bluetooth</strong> V1.211. Support NMEA compliant mapping softwares like TomTom,Route66…etc.1.4 Applications- Route recording- Business trip expense management- Fleet management- Driving behavior monitoring- Saving of Point of Interest6
1.5 Appearance1. DC jack (mini USB type)2. Mode switch (Power off/ Navigation&log/ Pure log)3. <strong>Bluetooth</strong> status LED (blue)4. Battery status LED (red/green)5. <strong>GPS</strong> status LED (orange) / Push to log LED (blue)6. Internal <strong>GPS</strong> antenna7. Push Button7
1.6 Power Switch and Push ButtonPower SwitchRight (Off) Power offMiddle (NAV) Enable Navigation + log modeLeft (LOG) Enable pure log modePush buttonPush Push to log points of interest, LED blinks 3 times.Difference between NAV and LOG:NAV You can use the <strong>iBT</strong>-<strong>GPS</strong> as a <strong>Bluetooth</strong> <strong>GPS</strong> receiver tonavigate when you have a <strong>Bluetooth</strong> enabled PDA/Smartphone in your car. The logging is on as well.Note:When the <strong>Bluetooth</strong> connection is cut off, <strong>iBT</strong>-<strong>GPS</strong> will stopits logging.LOG In this mode <strong>iBT</strong>-<strong>GPS</strong> works as a pure logger, no navigationfunction is supported.8
1.7 LED DisplayThe <strong>Bluetooth</strong> <strong>GPS</strong> data logger has three LED lights, one is <strong>Bluetooth</strong>Status LED, the 2 nd one is Battery Status LED, the 3 rd one is <strong>GPS</strong> StatusLED/ Push to log LED. The status table of LED shows as follows:Category SYMBOL COLOR STATUS Function<strong>Bluetooth</strong> StatusLEDBattery StatusLED<strong>GPS</strong> Status LEDBlue Alwayson:<strong>Bluetooth</strong> on, but not connectedto any <strong>Bluetooth</strong> devices yetSlowlyblinking:Sleeping mode (1 time / 5seconds)Quickly <strong>Bluetooth</strong> is connected andblinking: ready for data transmission (1time / 2 seconds)Red Blinking: The battery is too lowGreen Light On: The battery is chargingGreen Blinking: The battery is fully chargedOrange Always Acquiring satellites, <strong>GPS</strong>on: position not fixedQuickly <strong>GPS</strong> position is fixed,Blinking: NavigationBlue Quickly LED blinks 3 times, Points ofBlinking: Interest is recordedSlowly The memory space is too lowBlinking: (20% left now)Solid The memory is full and stop9
Chapter 2 Getting Started2.1 Checking the package contentCongratulations on your purchase of the <strong>iBT</strong>-<strong>GPS</strong> with built-in Lithiumrechargeable battery. Before you start using <strong>iBT</strong>-<strong>GPS</strong>, please make sure ifyour package includes the following items. If any item is damaged ormissing, please contact your dealer at once.- <strong>Bluetooth</strong> <strong>GPS</strong> Date <strong>Logger</strong> - <strong>iBT</strong>-<strong>GPS</strong> x 1- USB to mini-USB cable x 1- Traveler Power Adapter x 1- DC cigarette lighter adapter x 1- Lithium rechargeable battery x 1- CD Tool x 1 (user manual, software utility)- Quick start guide x 1*Unit package contents may vary depending on countries without priornotice.10
2.2 Getting StartedPlease follow the procedure step by step.Step 1 Charging Your BatteryTo charge your <strong>iBT</strong>-<strong>GPS</strong> data logger, you have to plug your USB cableinto the power source. Charging time is about 3~4 hours and you cancharge from PC/ Notebook’s USB HOST or from cigarette-lighter in car.For the 1st time you use the <strong>iBT</strong>-<strong>GPS</strong>, please charge battery until it is full(the green LED blinks). The LED that represents the battery is theright-most battery icon (shown in below).- If the LED is red, that means battery power is critically low. Charge immediately.- If the LED is green, that means battery is charging now.- If the green LED is blinking, that means battery is fully charged.11
Step 2 Turning on the power switch (NAV/ LOG)Power off Navigation <strong>Data</strong> recordDifference between NAV and LOG:NAV You can use the <strong>iBT</strong>-<strong>GPS</strong> as a <strong>Bluetooth</strong> <strong>GPS</strong> receiver tonavigate when you have a <strong>Bluetooth</strong> enabled PDA/Smartphone in your car. The logging is on as well.Note:When the <strong>Bluetooth</strong> connection is cut off, <strong>iBT</strong>-<strong>GPS</strong> will stopits logging.LOG In this mode <strong>iBT</strong>-<strong>GPS</strong> works as a pure logger, no navigationfunction is supported.**For further function to download your routes to PC, please refer toChapter 3.Step 3 Connecting your handheld device with <strong>iBT</strong>-<strong>GPS</strong>Note: <strong>iBT</strong>-<strong>GPS</strong> is allowed to connect to a <strong>Bluetooth</strong> device (PDA/Smartphone/ laptop) only in Navigation mode.12
Please refer to the user manual of PDA to enable the <strong>Bluetooth</strong>connectivity. If the connection between your device and <strong>iBT</strong>-<strong>GPS</strong> issuccessful, the blue LED of <strong>iBT</strong>-<strong>GPS</strong> will be blinking.Below, we provide a common procedure of software installation to set upyour PDA. (For other PDA, the steps may be different. <strong>Bluetooth</strong>Manager is a popular program used on <strong>Bluetooth</strong> device.)-->Start -> <strong>Bluetooth</strong> Manager New1. Open “<strong>Bluetooth</strong> Manager” on your pocket pc, and establish a newconnection.13
-->Explore A <strong>Bluetooth</strong> device Tap <strong>iBT</strong>-<strong>GPS</strong>->Next2. Explore a <strong>Bluetooth</strong> device, and find the “<strong>iBT</strong>-<strong>GPS</strong>”Passkey 0000 (if your PDAasks for the passkey)3. (Optional)14
-->Select SPP slave->NextFinish4. Connect to Serial Port Profile (SPP) Slave-->Tap and Hold <strong>iBT</strong>-<strong>GPS</strong>: SPPslave, Connect5. Finish <strong>Bluetooth</strong> Manager SetupDone15
Step 4 Loading your <strong>GPS</strong> mapping or routing softwareYou should have mapping software on your PDA/ Smartphone/ laptop oryou need to install it before using the <strong>iBT</strong>-<strong>GPS</strong> for navigation.Step 5 Starting the applicationSelect the correct COM port & baud rate within the applicationNote: The <strong>Bluetooth</strong> device in most of the applications has an“auto-detect” feature so that you do not need to select the Baud Rate.16
2.3 Helpful Tips- It’s better to turn off the <strong>iBT</strong>-<strong>GPS</strong> when you don’t use it, or the serial Flash'slife can’t last long.- Some vehicles having heavy metallic sun protecting coating on windshieldsmay affect <strong>GPS</strong> signal receptions- Driving in and around high buildings may affect <strong>GPS</strong> signal receptions.- Driving in tunnels or indoor park may affect signal receptions.- In general, any <strong>GPS</strong> receiver performs best in open space where it can seeclean sky. Also weather will affect <strong>GPS</strong> reception – rain & snow contributeto worse sensitivity.- Low battery of a PDA or of an <strong>iBT</strong>-<strong>GPS</strong> may affect signal receptions.- Please check the correct “COM” and “Baudrate” of your PDA.- <strong>iBT</strong>-<strong>GPS</strong> output data updates every second, therefore the actual position andthe position shown in your map may have slight time delay. This mayhappen when you drive at higher speed or make a turn around a corner.- Note that <strong>iBT</strong>-<strong>GPS</strong> may not work indoors where it can not see the sky.- For the 1 st time you use the <strong>iBT</strong>-<strong>GPS</strong>, it will take 1 to 3 minutes to obtain thesatellite constellation information and fix your position, this is called “ColdStart”. If you replace the battery, <strong>iBT</strong>-<strong>GPS</strong> will do Cold Start again.- If your <strong>iBT</strong>-<strong>GPS</strong> can’t fix your position for more than 20 minutes, wesuggest you change to another spot with open space and then try again.17
Chapter 3 Using <strong>Logger</strong>3.1 How to connect the <strong>iBT</strong>-<strong>GPS</strong> to your PC3.1.1 Driver installationNote: These drivers are only designed for Microsoft Windows based PConly (Windows XP/ 2000)! Therefore, Mac OS and Linux are notsupported.1、 Driver is located in “CP210x folder". Please double click the“CP210xVCPInstaller.exe".18
2、 Click “Install". Now installing…3、 Complete installation, but you must restart your computer before thenew settings will take effect.User can go to the MS Windows’ device manager to see the statusshowing this USB device installation is completed.19
Please go to check the corresponding virtual COM Port. Afterwardusers only have to use same COM Port in same USB port, and candirectly make a connection successfully between the PC end and<strong>iBT</strong>-<strong>GPS</strong> data logger. For example, COM7.3.1.2 Google EarthIf you computer is not yet installed with Google Earth. Google Earth hasfree download version, go download it in the internet first. For moreinformation, please visit http://earth .google.com/.20
3.2 Software Utility --- <strong>iBT</strong>-<strong>GPS</strong> <strong>Logger</strong> Tool(To use a mini-USB cable to connect the <strong>iBT</strong>-<strong>GPS</strong> to your PC, you haveto power on the <strong>iBT</strong>-<strong>GPS</strong> unit. Therefore, you have to switch to LOG)Note: Please install USB Driver before you use <strong>iBT</strong>-<strong>GPS</strong> <strong>Logger</strong> Tool.For driver installation, please refer to “3.1 Drivers”.Step 1.You have to create and name a folder in your computer to further putthe <strong>iBT</strong>-<strong>GPS</strong> logger tool. Please copy the “<strong>Data</strong>Log.exe” into thisfolder.Step 2.Click on the icon of the logger tool “<strong>Data</strong>Log.exe”Step 3.See below, four sections will display horizontally on the screen in anarray from left to right as below:‣ Configuration:To create settings for connection/ Command setting‣ Satellite Information:To view <strong>GPS</strong> status and perform Hot/ Warm/ Cold Start‣ <strong>Data</strong> Log List:Download of logged data/ Use of Google earth for showingtracks21
‣ About:Software version and company information...etc.3.2.1Configurationi. Connection Setting:This is to build a connection between your PC and <strong>iBT</strong>-<strong>GPS</strong> data logger.22
1. Please go to”device manager” and find out the Virtual Com Portnumber of <strong>iBT</strong>-<strong>GPS</strong> data logger (check Virtual Com Port number of<strong>iBT</strong>-<strong>GPS</strong> data logger)2. Select correct Port (COM7 used in this example)and set BaudRate ata fixed 115200. Then click on “Connect” to build a connection. <strong>GPS</strong>status in the “SATELLITE INFORMATION” section will start to showwhen you click on it.Note: Please remember to plug in the USB cable to connect your PC and<strong>iBT</strong>-<strong>GPS</strong>3. To stop connection anytime, just click on “Disconnect”.23
ii. Output Period:This is to set NMEA output selection for the <strong>Bluetooth</strong> interface in theNAV mode.‣ Check the NMEA type -> Choose output period -> Set‣ For selecting NMEA data output (RMC, GSV, GSA, GGA arecompulsory data, user are not allowed to DE-SELECT)‣ NMEA setting here will only affect the NMEA sentences fornavigation usage. This has nothing to do with logger’s data recording.‣ Period (s): For example, GLL (4) stands for GLL sentence updateevery 4 seconds.24
iii. AutoLog Option (Change Recording Interval):This is to set the record method.1. Setting log time interval:Configure log interval between 1~999 sec.For example, “10 Seconds” stands for <strong>iBT</strong>-<strong>GPS</strong> will record one dataevery 10 seconds.2. Setting log distance:Configure log interval between 10~9999 meter(s)For example, “1000 meters” stands for <strong>iBT</strong>-<strong>GPS</strong> will record one dataevery 1000 meters.3. Setting log speed:Configure log interval between 10~999 km/h. Set speed at the highest25
ate. If any log data exceeds this speed, it will be recorded.For example, “100km/hr” stands for <strong>iBT</strong>-<strong>GPS</strong> will record one datawhen exceeding 100km/hr. The number of data count shows the timeuser exceeds 100km/hr.Note: Can be Mixed to log by time interval/ distance/ speed.26
iv. Log Format:The table presents which information will be recorded for each waypoints.‣ Normally, UTC, latitude, longitude, valid, speed and RCR should bechosen. Therefore, the number of recorded data is estimated to beabout 74,000 points.‣ ELEVATION, AZIMUTH and SNR can only be checked when SID ischecked.27
UTC Universal Coordinated Time, formerly GMT orGreenwich Mean Time.VALID <strong>Data</strong> fix or notLATITUDE A north/south measurement of position perpendicular tothe earth's polar axis.LONGITUDE An east/west measurement of position in relation to thePrime Meridian, an imaginary circle that passes throughthe north and south poles.HEIGHT The altitude of a place above sea level or ground level.SPEED Rate of motionHEADING The compass direction in which the longitudinal axis of aship or aircraft pointsDSTA D<strong>GPS</strong> station ID numberDAGE Time in seconds since last DPGS updatePDOP (Positional Dilution Of Precision) ; Position accuracy;3D-coordinatesHDOP (Horizontal Dilution Of Precision); horizontal accuracy;2D-coordinatesVDOP (Vertical Dilution Of Precision); vertical accuracy; heightNSAT Number of Satellite (in Used, in View)SID Satellite IDELEVATION The elevation of the satelliteAZIMUTH Line-Of-Sight angle of the satellite28
SNRRCRMSSignal to Noise RatioRecord method: Speed/ Time/ Distance/ Push ButtonMili-second29
v. Other Setting:This setting is about: when the logger's on-board Flash memory is full,what would you want the logger to do in terms of recording?‣ The default setting is “Stop” (Full and stop)‣ The other recording method is “Overwrite” (Repeat).30
3.2.2 Satellite Informationi. <strong>GPS</strong> status view:To check <strong>GPS</strong> acquisition condition (Reception)Date UTC dateUTC Time Universal Coordinated Time, formerly GMT orGreenwich Mean Time.31
Mode (3D Fix/ 2D Fix/ No Fix)TTFF Time to first fixLATITUDE A north/south measurement of positionperpendicular to the earth's polar axis.LONGITUDE An east/west measurement of position in relation tothe Prime Meridian, an imaginary circle that passesthrough the north and south poles.SPEED Rate of motionPDOP (Positional Dilution Of Precision) ; Positionaccuracy; 3D-coordinatesHDOP (Horizontal Dilution Of Precision); horizontalaccuracy; 2D-coordinatesVDOP (Vertical Dilution Of Precision); vertical accuracy;heightii. Hot:Perform hot startiii. Warm:Perform warm startiv. Cold Start:Perform cold start32
3.2.3 <strong>Data</strong> Log List --- way to download the data from logger!Below steps is to show the way to download the data from logger.Step 1. Click “Stop Log” to disable log feature.Step 2. Click “Download"to download log data to computer.Step 3. Click “Draw Map” to map your recorded data on Google Maps33
i. Grid Array:Show the detail recorded data listii. Memory Used:To know how much space there are remaining in the memoryiii. Record Count:<strong>Data</strong> record countiv. Start Log:Enable Log featurev. Stop Log:Disable Log featurevi. Download:To download log data to computer file ( While downloading,“cancel” manu bar will appear on middle of the screen. To ceasedownloading, click on Cancel.vii. Erase:To clear all log data from <strong>GPS</strong> receiver’s memory(Note: To perform erase, we suggest to do “Stop Log” first)34
viii. Read:To open previous travel file from user’s PC (CSV File)ix. Save:To save the logged data in <strong>iBT</strong>-<strong>GPS</strong>’s memory to user’s PC (Save asCSV File/ NMEA File/ KML File). Afterward, you can open the*.csv file by clicking “Read”x. Draw Map (Map your recorded data on Google Maps):Download, then just click “Draw Map”!Note:1. Google Earth is needed:If you computer is not yet installed with Google Earth. Google Earthhas free download version, go download it in the internet first. Formore information, please visit http://earth .google.com/.2. Enable Internet connecton:To display the track points on Google Maps, your PC must have theInternet connection enabled.35
To show route in GoogleEarth, there are 2 options foryou to choose from:- Icon Style- Line StyleSome icons:Push to log, show your favorite Points of InterestLogged by time intervalLogged by distanceLogged by speedMixed logged points37
3.2.4 AboutSoftware version and company information...etc.38
AppendixAppendix A. SpecificationsGeneralFrequency L1,1575.42MHZC/A Code1.023MHZDatumWGS84Performance CharacteristicsPosition Accuracy Without aid: 3.0m 2D-RMS
DynamicAltitude Maximum 18,000mVelocityMaximum 515m/sAcceleration Maximum 4gPowerInput Voltage Vin : 5.0V±10%Power Consumption 40mABatteryBuilt-in rechargeable 1000mAH Lithium batteryI/OAvailable Baud Rates 115200 bpsProtocols NMEA 0183 v3.01EnvironmentOperatingTemperature -10 ~ 60CStorage Temperature -20 ~ 60CCharging0 ~ 45C<strong>Bluetooth</strong>Standard Fully compliant with <strong>Bluetooth</strong> V1.2Output Power 0dBm (Typical),ClassIIRangeUp to 15 meters<strong>Bluetooth</strong> Profile Serial Port Profile(SPP)Frequency 2.4G ~ 2.4835GHz ISM BandSecurityYes40
USB BridgeStandardFully compliant with USB2.0Full - speed 12MbpsDimension 46.5 x72.2 x20 mm<strong>Data</strong> Log16Mb serial Flash ROMUp to 100,000 way points.Log <strong>GPS</strong> data by time interval/ distance/ speed limit.Log <strong>GPS</strong> data by button push.User can configure settings by using utility.41
Appendix B. CertificationFCC NoticesThis device complies with part 15 of the FCC rules. Operation is subjectto the following two conditions:1. This device may not cause harmful interface, and2. This device must accept any interference received, includinginterference that may cause undesired operation.FCC RF Exposure requirements:This device and its antenna(s) must not be co-located or operation inconjunction with any other antenna or transmitter.NOTE: THE MANUFACTURER IS NOT RESPONSIBLE FOR ANYRADIO OR TV INTERFERENCE CAUSED BY UNAUTHOURIZEDMODIFICATION TO THIS EQUIPMENT. SUCH MODIFICATIONSCOULD VOID THE USER’S AUTHORITY TO OPERATE THEEQUIPMENT.Industry Canada CautionThe installer of this radio equipment must ensure that the antenna islocated or pointed such that it does not emit RF field in excess of HealthCanada limits for the general population; consult Safety Code 6,42
obtainable from Health Canada's website."www.hc-sc.gc.ca/rab"CE NoticesIs herewith confirmed to comply with the requirements set out in theCouncil Directive on the Approximation of the Laws of the MemberStates relating to Electromagnetic Compatibility (89/336/EEC),Low-voltage Directive (73/23/EEC) and the Amendment Directive(93/68/EEC), the procedures given in European Council Directive99/5/EC and 89/3360EEC.The equipment was passed. The test was performed according to thefollowing European standards:- EN 300 328-2 V.1.2.1 (2001-08)- EN 301 489-1 V.1.4.1 (2002-04) / EN 301 489-17 V.1.2.1 (2002-04)- EN 50371: 2002- EN 60950: 200043
Appendix C. Warranty InformationThank you for your purchase of <strong>GPS</strong> product from the company.The company warrants this product to be free from defects in materialsand workmanship for one year from the date of purchase. The warrantyfor accessories is six months. The stamp of distributor or a copy of theoriginal sales receipt is required as the proof of purchase for warrantyrepairs. The company will, as its sole option, repair or replace anycomponents, which fail in normal use. Such repair or replacement will bemade at no charge to the customer for parts or labor. The customer is,however, responsible for any transportation costs.This warranty does not cover failures due to abuse, misuse, accident orunauthorized alteration of repairs. The company assumes noresponsibility for special, incidental punitive or consequential damages,or loss of use.44
WarrantyModel number:Series number:<strong>Data</strong> of purchase:Name:Address:City, Zip code:State, Country:E-mail address:Distributor Stamp Here45