


You also want an ePaper? Increase the reach of your titles
YUMPU automatically turns print PDFs into web optimized ePapers that Google loves.
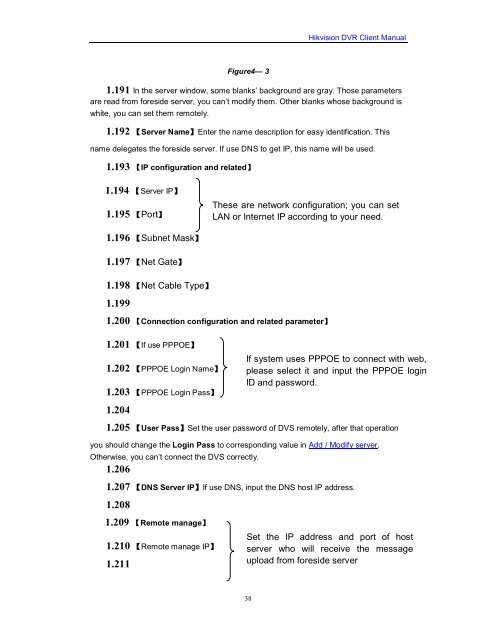
Figure4— 3<br />
38<br />
<strong>Hikvision</strong> <strong>DVR</strong> <strong>Client</strong> <strong>Manual</strong><br />
1.191 In the server window, some blanks’ background are gray. Those parameters<br />
are read from foreside server, you can’t modify them. Other blanks whose background is<br />
white, you can set them remotely.<br />
1.192 【Server Name】Enter the name description for easy identification. This<br />
name delegates the foreside server. If use DNS to get IP, this name will be used.<br />
1.193 【IP configuration and related】<br />
1.194 【Server IP】<br />
1.195 【Port】<br />
1.196 【Subnet Mask】<br />
1.197 【Net Gate】<br />
1.198 【Net Cable Type】<br />
1.199<br />
1.200 【Connection configuration and related parameter】<br />
1.201 【If use PPPOE】<br />
1.202 【PPPOE Login Name】<br />
1.203 【PPPOE Login Pass】<br />
1.204<br />
1.205 【User Pass】Set the user password of DVS remotely, after that operation<br />
you should change the Login Pass to corresponding value in Add / Modify server.<br />
Otherwise, you can’t connect the DVS correctly.<br />
1.206<br />
1.207 【DNS Server IP】If use DNS, input the DNS host IP address.<br />
1.208<br />
1.209 【Remote manage】<br />
1.210 【Remote manage IP】<br />
1.211<br />
These are network configuration; you can set<br />
LAN or Internet IP according to your need.<br />
If system uses PPPOE to connect with web,<br />
please select it and input the PPPOE login<br />
ID and password.<br />
Set the IP address and port of host<br />
server who will receive the message<br />
upload from foreside server