RSA-1.0 Manual - SpeakerCraft
RSA-1.0 Manual - SpeakerCraft
RSA-1.0 Manual - SpeakerCraft
You also want an ePaper? Increase the reach of your titles
YUMPU automatically turns print PDFs into web optimized ePapers that Google loves.
<strong>RSA</strong>-<strong>1.0</strong> Installation Instructions Page 55. Select an Address from the Address pull-down. (Refer toFigure 4) If using only one <strong>RSA</strong>-<strong>1.0</strong> use the default of ‘0’. Ifusing multiple <strong>RSA</strong>-<strong>1.0</strong>’s, set each to a different address.6. Left click OK in the Expansion Device Setup Window toset the Address. An <strong>RSA</strong>-<strong>1.0</strong> icon will appear at the bottomof the Project Content Window under Expansion Devicesas <strong>RSA</strong>-<strong>1.0</strong>-0 (assuming Address ‘0’ was selected). If multiple<strong>RSA</strong>-<strong>1.0</strong>s are added, they will all appear and each willindicate its Address, <strong>RSA</strong>-<strong>1.0</strong>-0; <strong>RSA</strong>-<strong>1.0</strong>-1; <strong>RSA</strong>-<strong>1.0</strong>-2; etc.as shown in Figure 5.7. In the Project Content Window, left click the EZ-Pad inthe Zone that is going to be programmed to send RS232commands from the <strong>RSA</strong>-<strong>1.0</strong>. (Zone 1, EZ-Pad-0 as shownin Figure 6.) The EZ-Pad selected will appear on screen.Figure 4Selecting an <strong>RSA</strong>-<strong>1.0</strong> Address8. Left click the button on the EZ-Pad that is going to beprogrammed to send RS232 commands via the <strong>RSA</strong>-<strong>1.0</strong>.The button will highlight in blue, and the Button PropertiesWindow will appear, if not already on screen.9. In the Project Content Window, left click the <strong>RSA</strong>-<strong>1.0</strong> thatis going to control the device selected on the EZ-Padin Step 8 above, (in this case AUX, which is an EscientFireBall). The word SELECTED will appear after the <strong>RSA</strong>-<strong>1.0</strong> icon to indicate that the <strong>RSA</strong> has been selected forprogramming. If multiple <strong>RSA</strong>s are being used in a system,this will indicate which <strong>RSA</strong> has been selected.Figure 5Multiple <strong>RSA</strong>-<strong>1.0</strong> Addresses10. Left click the CMD Library Tab to bring the IR/RS232 CommandLibrary to the front.11. In the Brands text box, type in the name of the brandto be programmed, in this case Escient. (The pull-downcan also be used as well as typing in ‘E’ and scrolling toEscient from the beginning of the ‘E’s’ using the arrowdown key.)12. Double left click the type of component being controlled,DVD player, CD changer, etc. or in this case, Music Server.If a single model is available under the component selected,the sub-directory will open a list of commands. Ifmultiple model numbers are available, double left click themodel number for the device being controlled to openthe command list.Figure 6Select EZ-Pad13. Scroll through the list to fi nd the RS232 Commands.RS232 Commands are ‘prefi xed’ with a blue ‘1010’. Ifno RS232 commands are available from the CommandLibrary, see section: Creating RS232 Commands.14. Double left click the desired RS232 command. The commandwill appear in the Button Properties Window. (Referto Figure 8) If there are commands already associatedwith the button being programmed, the RS232 commandwill appear at the bottom of the list. The commandFigure 7EZ-Pad Button and <strong>RSA</strong>-<strong>1.0</strong> Selection
<strong>RSA</strong>-<strong>1.0</strong> Installation Instructions Page 6can be moved up in the list by dragging and droppingthe command to a different position. Be sure movingcommands in the list does not adversely affect existingfunctionality.15. The RS232 command line in the Button Properties Windowwill show the blue ‘1010’ icon to indicate an RS232command, the function, brand, component and ‘<strong>RSA</strong>-<strong>1.0</strong>Add. 0 RS232’ indicating that the command has beenproperly associated with the <strong>RSA</strong>-<strong>1.0</strong>. If an EZ-Pad buttonpress does not properly execute control functions, this is agood place to look in troubleshooting to confi rm Zone/EZ-Pad/Button/<strong>RSA</strong>-<strong>1.0</strong>/RS232 command confi guration.See section: Troubleshooting for additional information.16. Repeat steps 1-6 above to add <strong>RSA</strong>-<strong>1.0</strong>s.17. Repeat steps 7-14 to program EZ-Pads with RS232 commandsfor <strong>RSA</strong>-<strong>1.0</strong>s.Figure 8Programmed <strong>RSA</strong>-<strong>1.0</strong> RS232 CommandADDING NEW RS232 COMMANDS TO THE COMMAND LIBRARYNew RS232 Commands can be quickly added to the EZ-Tools CMD Library. ASCII text strings of up to 100 characters can beadded when either the ASCII or HEX code is known. Additionally, Baud Rate, Data Bits, Parity, Stop Bits, Character Delay,Response Length and Response Timeout can be set to assure proper performance of these control commands. ASCII, HEXand other code parameters can typically be found in product manuals or on manufacturers web sites. It may be necessary onoccasion to contact a particular manufacturer’s tech support to get this information.In some cases, the EZ-Tools CMD Library will already have IR codes or possibly some RS232 Commands for a particular Brand,Component and Model, and all that need be done is to add a couple of RS232 commands. In other cases, the Brand, Componentand Model for which RS232 commands are required may not be in the CMD Library. Start with the appropriate stepfor the specifi c command(s) being added.1. With EZ-Tools running, open the project for which the new RS232 Commands are required. (If not ready to program aspecifi c project, open any EZ-Tools project.)2. Left click the CMD Library Tab.3. If the Brand name does not already exist, right click within the Brands space and left click “New Brand”. Type in thenew brand name and click OK.4. Right click the empty space below the brand name and left click “New Component”. Type in the new componentname (i.e. Projector) and click OK.5. Right click the new (Projector) folder and left click “New Model”. Type in the new model name (the model # of the componentor it’s remote, i.e., VX-2c) and click OK.6. Right click the new model # folder (i.e., VX-2c). Go to “New Commands” and left click “RS232 Serial Commands”.Type in command name (i.e., ON) and left click right arrows (>>) to put the name in the New Command List. Type in acomplete list of command names (i.e., ON, OFF, COMPOSITE, S VIDEO 1, S VIDEO 2, etc.) as needed. (Refer to Figure9)7. When all new command names have been added to the New Command List, click OK.8. The Command Properties Window will open automatically, with the fi rst new command already placed in theCommand Name fi eld. (i.e. ON) (Refer to Figure 10)
<strong>RSA</strong>-<strong>1.0</strong> Installation Instructions Page 79. Left click Modify in the Com Port Settings box, to makeany changes necessary to: Baud Rate, Data Bits, Parityand Stop bits, per the manufacturer’s protocol. TheSerial Port Settings pop-up will appear. Make necessarychanges and click OK. (Refer to Figure 10)10. In the Command/Data Editor box, left click eitherthe ASCII or HEX fi eld under “01” depending uponwhich data, ASCII or HEX will be used to create the newcommand. Type in the command string, one characterper box, up to 100 characters.11. In the Advanced Settings box select a CharacterDelay, from 0 (no delay) to 50 mS (milliseconds) ifneeded, to be inserted between characters whencommand strings are being sent.12. In the Response Settings box, select the appropriateResponse Length from 0 to 100 Characters to confi rmthat the command string has been properly sent, receivedand executed.Figure 9Adding New RS232 Command Names13. In the Response Settings box, select the appropriateResponse Timeout from 0.0 to 10.0 seconds. This willdetermine the amount of time the RS232I/O Port will stay‘open’ waiting for a response from the controlled device.14. When all Command Properties for the specifi c commandbeing edited have been made, click OK. The commandwill be added to the CMD Library and will be designatedwith a “1010” icon. The next New Command willautomatically come up in the Command PropertiesWindow. Typically, a manufacturer will use the samesettings for baud, Data Bits, etc., so all that need be doneis to type in the ASCII or HEX code for the individualcommands. When all New Commands have beenformatted, the Command Properties Window will closeand all commands will be listed in the appropriate CMDLibrary List. (Refer to Figure 11)Figure 10Entering RS232 Command PropertiesOnce RS232 Commands have been added to the CMDLibrary, they are available for use in any EZ-Tools project whenprogramming RS232 codes is required.Figure 11New RS232 Commands in Command Library
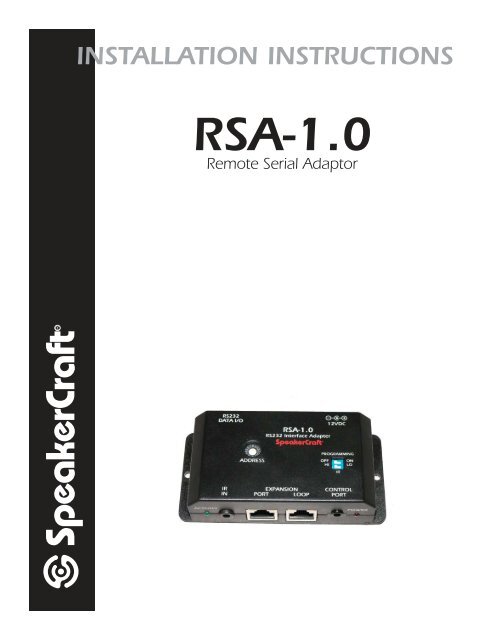
<strong>RSA</strong>-<strong>1.0</strong> Installation Instructions Page 8SPECIFICATIONSDimensions: 4.3”L x 2.125”W x 1”HPower Requirement:ConnectorsPower:IR In:Network:RS232:Control Port:RS232 ParametersBaud Rate:Data Bits:Stop Bits:Parity:Command String:Character Delay:Response String:Response Timeout:Transmission LengthNetwork (RS485):RS232 Data I/O:12V DC; 200mA (<strong>SpeakerCraft</strong> PS-<strong>1.0</strong> Power Supply)2.1mm coaxial jack3.5mm mini jack2 x RJ45DB9M3.5mm mini jack (4-circuit)300, 1200, 2400, 4800, 9600, 19200, 38400, 57600 Selectable7, 8 Selectable1, 2 SelectableNone, Odd, Even Selectable100 Characters Max0-50mS0-100 Characters0.0-10.0 Seconds1000’ Max50’ Max
<strong>RSA</strong>-<strong>1.0</strong> Installation Instructions Page 9LIMITED 2-YEAR WARRANTY<strong>SpeakerCraft</strong> Inc. warrants to the original retail purchaser only that this <strong>SpeakerCraft</strong> product will be free from defects inmaterials and workmanship for a period of two years, provided the product was purchased from a <strong>SpeakerCraft</strong> AuthorizedDealer.Defective products must be shipped, together with proof of purchase, prepaid insured to the <strong>SpeakerCraft</strong> AuthorizedDealer from whom they were purchased, or to the <strong>SpeakerCraft</strong> factory at the address listed on this installation instructionmanual. Freight collect shipments will be refused. It is preferable to ship this product in the original shipping container tolessen the chance of transit damage. In any case, the risk or loss or damage in transit is to be borne by the purchaser. If,upon examination at the Factory or <strong>SpeakerCraft</strong> Authorized Dealer, it is determined that the unit was defective in materialsor workmanship at any time during this warranty period, <strong>SpeakerCraft</strong> or the <strong>SpeakerCraft</strong> Authorized Dealer will, at itsoption, repair or replace this product at no additional charge, except as set forth below. If this model is no longer availableand cannot be repaired effectively, <strong>SpeakerCraft</strong>, at its sole option, may replace the unit with a current model of equal orgreater value. In some cases where a new model is substituted, a modification to the mounting surface may be required.If mounting surface modification is required, <strong>SpeakerCraft</strong> assumes no responsibility or liability for such modification. Allreplaced parts and product become the property of <strong>SpeakerCraft</strong> Inc. Products replaced or repaired under this Warranty willbe returned to the original retail purchaser, within a reasonable time, freight prepaid.This Warranty does not include service or parts to repair damage caused by accident, disaster, misuse, abuse, negligence,inadequate packing or shipping procedures, commercial use, voltage inputs in excess of the rated maximum of the unit, orservice, repair or modification of the product which has not been authorized or approved by <strong>SpeakerCraft</strong>. This Warrantyalso excludes normal cosmetic deterioration caused by environmental conditions. This Warranty will be void if the SerialNumber on the product has been removed, tampered with or defaced.This Warranty is in lieu of all other expressed warranties. If the product is defective in materials or workmanship as warrantedabove, the purchaser’s sole remedy shall be repair or replacement as provided above. In no event will <strong>SpeakerCraft</strong> be liablefor any incidental or consequential damages arising out of the use or inability to use the product, even if <strong>SpeakerCraft</strong> Inc.or a <strong>SpeakerCraft</strong> Inc. Authorized Dealer has been advised of the possibility of such damages, or for any claim by any otherparty. Some states do not allow the exclusion or limitation of consequential damages, so the above limitation and exclusionmay not apply.All implied warranties on the product are limited to the duration of this expressed Warranty. Some states do not allow limitationon the length of an implied warranty. If the original retail purchaser resides in such a state, this limitation does not apply.<strong>SpeakerCraft</strong> offers a variety of accessories to make your installation of this and other <strong>SpeakerCraft</strong> products easy, economical,and professional. Contact your authorized <strong>SpeakerCraft</strong> Dealer for more information.For technical inquires, please call 1-800-448-0976 or e-mail us at techsupport@speakercraft.com. We are available to assistyou every weekday, except holidays, between the hours of 7:00 a.m. and 5:00 p.m. PST.
<strong>RSA</strong>-<strong>1.0</strong> Installation Instructions Page 10940 Columbia Avenue, Riverside, CA 92507(800) 448-0976 Fax (951) 787-8747www.speakercraft.comLIT07105


