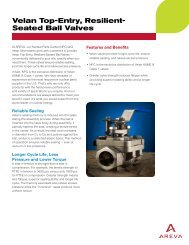
800 series Analyzer Primary Calibration - AREVA NP Inc.
800 series Analyzer Primary Calibration - AREVA NP Inc.
800 series Analyzer Primary Calibration - AREVA NP Inc.

You also want an ePaper? Increase the reach of your titles
YUMPU automatically turns print PDFs into web optimized ePapers that Google loves.
<strong>800</strong> <strong>series</strong> <strong>Analyzer</strong> <strong>Primary</strong> <strong>Calibration</strong><strong>Primary</strong> calibration of the analyzer is achieved by exposing the partial pressure sensor(hydrogen or oxygen) to known concentrations of calibration gas and adjusting the frontpanel Zero and Span potentiometers to achieve displayed values in agreement with theknown calibration gas concentrations.Setup:Two Concentrations of calibration gas - Concentrations should be selected to be aboveand below decision points (the alarm set points). For example, if the alarm point is 2.5%then appropriate choices for calibration gases would be 1% for low concentration and4% for the high concentration.Digital Volt Meter – A typical senor signal is 1mVDC per percent hydrogen or oxygen at1 atmosphere total pressure. This value applies to all sensors except the 101D031sensor. Signal for the 101D031 sensor is a nominal 0.65mVDC/percent hydrogen.Flow Measurement – <strong>Calibration</strong> gas flow rate should be in the range of 3 to 6 CFH.Note that sample flow is not to be stopped during the calibration and is assumed to be inthe range of 10 to 30 CFH. Lower sample flow rates will require less calibration gas If aflow measurement is not convenient, an alternate approach is to monitor pressure at thecalibration gas connection to the sensor chamber assembly. For systems including totalpressure compensation, simply monitor the transducer mVDC signal at the conditionerterminal strip connections TB2-10 and TB2-11. This assumes the transducer ismonitoring pressure at the recommended location, the chamber calibration gas inlet.<strong>Inc</strong>rease the calibration gas flow until the transducer signal increases 0.05 mVDC (or0.05 PSI pressure increase) relative to the reading with no calibration gas flow.mVDC Signal Simulator – Range will be dependent on the analyzer concentration rangeof operation. For most applications, a simulator with an adjustment range of 0-50mVDCand adjustment resolution of ±0.01mVDC will be satisfactory.Procedure:A. Connect the DVM to conditioner terminals TB2-4 and TB2-5.B. Initiate the low concentration calibration gas flow as described above. At 15minutes, record the values shown on the DVM and the analyzer display.Note: <strong>Calibration</strong> gas is very dry. Waiting longer than 15 minutes will result in a lessaccurate calibration. Continued flow of the dry gas for more than 15 minutesbegins to pull water vapor out of the sensor diffusion barrier. With the watervapor removed, the barrier becomes more permeable to hydrogen causing aslight increase in sensor sensitivity. 15 minutes is sufficient time for the sensor torespond to the change in concentration. Exposing the sensor to sample betweencalibration gases (step C) also allows the water vapor in the diffusion barrier tore-equilibrate with the sample water vapor content.C. Wait 5 minutes for the low concentration gas to be purged out of the chamber.D. Initiate the high concentration calibration gas flow as described above. At 15minutes, record the values shown on the DVM and the analyzer display.E. Temporarily disconnect the partial pressure sensor from conditioner terminalsTB2-4 and TB2-5 and connect the sensor signal simulator to TB2-4 and TB2-5.
F. Alternately inject the two mVDC values into the conditioner sensor terminals andadjust the front panel Span potentiometer until the ideal difference inconcentration is obtained. For example, if the calibration gas concentrationswere 1% and 4%, the ideal difference will be 3%.G. While applying the mVDC signal obtained in step B, adjust the conditioner frontpanel Zero potentiometer to obtain the correct displayed absolute value In theexample used above the ideal displayed value will be 1%.H. <strong>Inc</strong>rease the applied signal to the value obtained in step D and observe thecorrect conditioner displayed value (4% for the example used above).Note: The last adjustment should always be the Zero potentiometer. Zero will not affectthe Span adjustment. Span will affect the Zero adjustment.I. Disconnect the simulator and re-connect the sensor leads to the conditioner tocomplete the analyzer calibration.Adjustment Example:Assume the following results were obtained during steps B and D and that the selectedcalibration gases were 1% and 4%.Step Sensor Signal Displayed ValueB 0.9mVDC .9%D 3.30mVDC 3.3%Alternate between 0.90 and 3.30 mVDC while adjusting the span pot to achieve a deltaof 3.0%. The initial delta is 2.4% so the span pot will need to be adjusted to providemore gain. Assume the final Span adjustment to be;Step Sensor Signal Displayed ValueB 0.9mVDC 1.1%D 3.30mVDC 4.1%All that will be required is a slight decrease in the zero setting. With 0.90 mVDC applied,decrease the Zero pot to provide a displayed value of 1.0%. <strong>Inc</strong>reasing the signal to3.3mVDC should provide the ideal displayed value of 4.0% or;Step Sensor Signal Displayed ValueB 0.9mVDC 1.0%D 3.30mVDC 4.0%