Manual - ABOVE GROUND POOLS, inflatables, ready to use - INTEX
Manual - ABOVE GROUND POOLS, inflatables, ready to use - INTEX
Manual - ABOVE GROUND POOLS, inflatables, ready to use - INTEX
- No tags were found...

Create successful ePaper yourself
Turn your PDF publications into a flip-book with our unique Google optimized e-Paper software.
(108) MODEL 636T FILTER PUMP ENGLISH 7.5” X 10.3” PANTONE 295U 06/27/2011English108APARTS REFERENCE (continued)Before assembling your product, please take a few minutes <strong>to</strong> check the contentsand become familiar with all the parts.898910 11 12 13 1410 11 12 13PARTS REFERENCENOTE: Drawings for illustration purpose only. Actual product may vary. Not <strong>to</strong> scale.REF. NO. DESCRIPTION QTY. SPARE PART NO.891011121314PLUNGER VALVE (HOSE O-RING & STEP WASHER INCLUDED)HOSE O-RINGSTEP WASHERSTRAINER NUTFLAT STRAINER RUBBER WASHERTHREADED STRAINER CONNECTORADJUSTABLE POOL INLET NOZZLE2222110747102621074510256102551123511074When ordering parts, be sure <strong>to</strong> quote the model number and part numbers.SAVE THESE INSTRUCTIONS Page 6
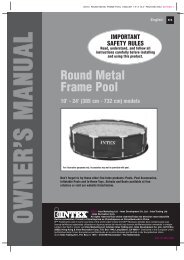
(108) MODEL 636T FILTER PUMP ENGLISH 7.5” X 10.3” PANTONE 295U 06/27/2011English108APOOL OUTLET - STRAINER & PLUNGER VALVE SETUPThe strainer grid prevents large objects from jamming and/or damaging thefilter pump. The plunger valve assembly prevents water from flowing in<strong>to</strong> thefilter pump while the filter cartridge is being placed or cleaned. If your poolhas an inflatable <strong>to</strong>p ring, install the strainer, nozzle and plunger valve beforeinflating the pool liner <strong>to</strong>p ring. The parts numbers here onward, refer <strong>to</strong> theparts depicted in the Parts List section of this manual. To install, do thefollowing:1. In a counter-clockwise motion unscrewplunger valve union from the threadedstrainer connec<strong>to</strong>r (13) (see drawing 1).Be careful not <strong>to</strong> lose the step rubberwasher (10). Place the plunger valve onthe ground in a safe place.2. In a counter-clockwise motion unscrewthe strainer nut (11) from the threadedconnec<strong>to</strong>r (13). Leave the flatwasher (12) on the connec<strong>to</strong>r (13).3. Install the strainer and plunger valve at thelower position of pool outlet (marked "+").From the inside of the pool liner insertthe connec<strong>to</strong>r (13) in<strong>to</strong> one of thepre-cut holes with the washer remainingon the connec<strong>to</strong>r <strong>to</strong> be placed againstthe inside of the liner wall.4. Before assembly, lubricate the threads witha petroleum jelly. Then, with the flat side ofthe strainer nut (11) facing the outside wallof the liner in a clockwise motion screw thestrainer nut (11) back on<strong>to</strong> the threadedconnec<strong>to</strong>r (13) (see drawing 2).5. Finger tighten the strainer nut (11) on<strong>to</strong>the threaded connec<strong>to</strong>r (13).6. Grasp the plunger valve assembly. Makesure the step washer (10) is in place.7. In a clockwise motion screw the plungervalve union back on<strong>to</strong> the threadedconnec<strong>to</strong>r (13) (see drawing 3).8. Examine the plunger valve <strong>to</strong> see if thehandle is pushed fully down <strong>to</strong> the "0/1"position. If not, grasp the handle atthe <strong>to</strong>p and push down, turning thehandle in a clockwise direction until theplastic protruding notch anchors inthe "0/1" position. This will preventwater from flowing out during filling of thepool (see drawings 4.1 & 4.2).111222INSIDELINER WALL12 13111234.1INSIDELINERWALL4.2SETUP INSTRUCTIONSSAVE THESE INSTRUCTIONS Page 7
(108) MODEL 636T FILTER PUMP ENGLISH 7.5” X 10.3” PANTONE 295U 06/27/2011English108APOOL INLET - NOZZLE & PLUNGER VALVE SETUP1. In a counter-clockwise motion unscrewplunger valve union from the threadedstrainer connec<strong>to</strong>r (13) (see drawing 5).Be careful not <strong>to</strong> lose the step rubberwasher (10). Place the plunger valve onthe ground in a safe place.2. In a counter-clockwise motion unscrewthe strainer nut (11) from the threadedconnec<strong>to</strong>r (13). Leave the flatwasher (12) on the connec<strong>to</strong>r (13).3. Install the nozzle and plunger valve at theupper position of the pool inlet. From theinside of the pool liner insert theconnec<strong>to</strong>r (13) in<strong>to</strong> one of the pre-cutholes with the washer remaining on theconnec<strong>to</strong>r <strong>to</strong> be placed against theinside of the liner wall.4. Before assembly, lubricate the threadswith a petroleum jelly. Then, with the flatside of the strainer nut (11) facing theoutside wall of the liner in a clockwisemotion screw the strainer nut (11) backon<strong>to</strong> the threaded connec<strong>to</strong>r (13) (seedrawing 6).5. Finger tighten the adjustable pool inletnozzle (14) and the strainer nut (11) on<strong>to</strong>the threaded connec<strong>to</strong>r (13).6. Grasp the plunger valve assembly. Makesure the step washer (10) is in place.7. In a clockwise motion screw the plungervalve union back on<strong>to</strong> the threadedconnec<strong>to</strong>r (13) (see drawing 7).8. Examine the plunger valve <strong>to</strong> see if thehandle is pushed fully down <strong>to</strong> the "0/1"position. If not, then grasp the handle atthe <strong>to</strong>p and push down turning thehandle in a clockwise direction until theplastic protruding notch anchors inthe "0/1" position. This will preventwater from flowing out during filling of thepool (see drawings 8.1 & 8.2).9. Adjust the direction of the nozzle headpointing away from the pool outlet for abetter circulation result (see drawing 9).10. The pool liner is now <strong>ready</strong> <strong>to</strong> be filledwith water. Consult theabove-ground-pool owner’s manual forthe filling instructions.111212INSIDELINER WALL12 13 1412WATERFLOW5678.1INSIDELINERWALL8.29SETUP INSTRUCTIONS<strong>POOLS</strong>AVE THESE INSTRUCTIONS Page 8
(108) MODEL 636T FILTER PUMP ENGLISH 7.5” X 10.3” PANTONE 295U 06/27/2011English108AFILTER PUMP STATIONARY MOUNTING OPTIONSome countries, especially in the European community, require the filter-pump <strong>to</strong>be secured <strong>to</strong> the ground or <strong>to</strong> a base in a permanent upright position. Check yourlocal authorities <strong>to</strong> determine if there is a regulation in your area regardingabove-the-ground swimming pool filter-pumps. If yes, then the filter-pump can bemounted <strong>to</strong> a platform using the two holes located in the base. See drawing below.The filter-pump can be mounted on a cement base or on<strong>to</strong> a wooden platform <strong>to</strong>prevent accidental falling over. Total assembly must exceed 18kg.1. The mounting holes are 6.4mm in diameter and spaced 130mm apart.2. Use two bolts and lock nuts with a maximum of 6.4mm in diameter.130 mmSETUP INSTRUCTIONSSAVE THESE INSTRUCTIONS Page 10
(108) MODEL 636T FILTER PUMP ENGLISH 7.5” X 10.3” PANTONE 295U 06/27/2011English108AOPERATING INSTRUCTIONS1. Make sure the filter pump is switched off. The switch is located on the mo<strong>to</strong>rhousing.2. Connect the power cord <strong>to</strong> a GFCI protected electrical outlet.WARNINGRisk of electric shock. Connect this product only <strong>to</strong> a grounding typereceptacle protected by a ground-fault circuit interrupter (GFCI) or residualcurrent device (RCD). Contact a qualified electrician if you cannot verifythat the receptacle is protected by a GFCI/RCD. Use a qualified electrician<strong>to</strong> install the GFCI/RCD, which has a maximum rate of 30mA. Do not <strong>use</strong> aportable residual current device (PRCD).IMPORTANTTo prevent air lock, open the lower plunger valve (connected inlet hose)first and then the upper plunger valve (connected outlet hose). Open the airrelease valve, wait until water starts <strong>to</strong> flow out of the air release valve,close air release valve.3. Grasp a plunger valve handle. Turn the handle counter-clockwise, pull up untilit s<strong>to</strong>ps, and then turn it clockwise until the metal protruding notch anchors inthe "0/1" position. Repeat for the second plunger valve. This opens the valves,allowing water <strong>to</strong> flow in<strong>to</strong> the filter pump.4. With water flowing in<strong>to</strong> filter pump, the water pressure will allow the air trappedinside <strong>to</strong> escape from the air release valve (2). When all the air has escapedwater will flow out of the valve (2). When this occurs gently finger tighten thevalve (2) in a clockwise direction.5. To operate the filter pump on “TIMER” mode:A. Set the timer dial <strong>to</strong> the desired operating hours. See operation time table.See Fig. 10B. Turn on the pump by pressing the switch <strong>to</strong> “ ” position, the filter pump isnow filtering the water and will s<strong>to</strong>p after the operating hours arecompleted. The built-in timer will now operate for the number of hoursselected at the same time each day.C. Operating hours can be re-adjusted if necessary. Follow step A – B.To operate the filter pump manually (without the “TIMER” mode):A. Turn on the pump by pressing the switch <strong>to</strong> “-” position, the filter pump isnow filtering the water.B. To turn off the pump, press the switch <strong>to</strong> “O” position.246812OPERATING INSTRUCTIONSTIMER DIAL (HOURS)FIG 10ON OFF TIMERSAVE THESE INSTRUCTIONS Page 11
(108) MODEL 636T FILTER PUMP ENGLISH 7.5” X 10.3” PANTONE 295U 06/27/2011English108AOPERATING TIME TABLEThis table shows the required operating time for average <strong>use</strong> of the filter pump with AGP's. Thefilter pump running time should be 1 hour longer than the required operating time of theSaltwater System.Pool Size<strong>INTEX</strong> <strong>ABOVE</strong> <strong>GROUND</strong> <strong>POOLS</strong> (AGP’s)12' x 30" (366cm x 76cm)12' x 36" (366cm x 91cm)15' x 33" (457cm x 84cm)15' x 36" (457cm x 91cm)EASY SET ®15' x 42" (457cm x 107cm)15' x 48" (457cm x 122cm)POOL16' x 42" (488cm x 107cm)16' x 48" (488cm x 122cm)18' x 42" (549cm x 107cm)18' x 48" (549cm x 122cm)18' x 52" (549cm x 132cm)12' x 30" (366cm x 76cm)12' x 36" (366cm x 91cm)14' X 42” (427cm X 107cm)15' x 36" (457cm x 91cm)CIRCULAR15' x 42" (457cm x 107cm)METALFRAME POOL15' x 48" (457cm x 122cm)16' x 48" (488cm x 122cm)16' x 52" (488cm x 132cm)18' x 48" (549cm x 122cm)18' x 52" (549cm x 132cm)ULTRA FRAME16' x 48" (488cm x 122cm)POOL18' x 52" (549cm x 132cm)SEQUOIA SPIRIT ®16'8" x 49" (508cm x 124cm)POOL SET18'8" x 53" (569cm x 135cm)18' x 10' x 42" (549cm x 305cm x 107cm)20' x 12' x 48" (610cm x 366cm x 122cm)OVAL FRAME24' x 12' x 48" (732cm x 366cm x 122cm)POOL28' x 12' x 48" (853cm x 366cm x 122cm)28' x 12' x 52" (853cm x 366cm x 132cm)18' x 9' x 52" (549cm x 274cm x 132cm)RECT. ULTRA24' x 12' x 52" (732cm x 366cm x 132cm)FRAME POOL32' x 16' x 52" (975cm x 488cm x 132cm)86-5/8" x 59" x 23-5/8" (220cm x 150cm x 60cm)SMALL102-1/2" x 63" x 25-5/8" (260cm x 160cm x 65cm)RECTANGULARFRAME POOL 118" x 78-3/4" x 29-1/2" (300cm x 200cm x 75cm)177-1/4" x 86-5/8" x 33" (450cm x 220cm x 84cm)Water Capacity (Calculated at90% for Frame Pool and 80%for Easy Set & Oval Pool)100% WaterCapacityRecommendoperating hoursper day(Gals) (Liters) (M 3 ) (Gals) (Hours)148517792587282232843736375442734786545558941718208633573282386144405061550164236981506169815061698128854393540764206925454580801436443960310131883562167349792106811243014141142091617318115206472230965037896127061242214614168051915620821243112642319156264231915626423109201662820465243002621117203305835436816622282383471277.08.412.213.415.517.717.820.222.625.827.97.28.814.113.816.218.721.323.127.029.421.329.421.329.413.720.825.630.432.819.134.060.41.82.54.37.918562223323335274105467146925342598368197367190923183730364742904934562361127136775756237757562377573607549167588025865750508978159604886701125209222444444466224444466646464466646122222SAVE THESE INSTRUCTIONS Page 12
(108) MODEL 636T FILTER PUMP ENGLISH 7.5” X 10.3” PANTONE 295U 06/27/2011English108ACLEANING OR REPLACING FILTER CARTRIDGESIt is recommended that the filter cartridge be replaced at leastevery 2 weeks.1. Make sure the filter pump is turned off, then disconnect the power cord fromthe electrical outlet.2. Grasp a plunger valve handle. Turn the handle counter-clockwise, push downuntil it s<strong>to</strong>ps and then turn it clockwise until the plastic protruding notch anchorsin the "0/1" position. Repeat for the second plunger valve. This prevents thewater from flowing out of the pool.3. Gently turn the <strong>to</strong>p air release valve once or twice in a counter-clockwisedirection. The housing cover can now be easily removed.4. In a counter-clockwise direction remove the filter housing collar (1). Place it in asafe location.5. Remove the housing cover (4).6. Now remove the <strong>use</strong>d filter cartridge.7. Examine the inside of the filter housing.8. If dirt or sediment is located on the bot<strong>to</strong>m of the housing then:A. In a counter-clockwise motion gently unscrew and remove the sedimentvalve (2) located at the bot<strong>to</strong>m of the housing. Place it in a safe place.B. With a bucket of water or a garden hose pour water in<strong>to</strong> the housingflushing out the sediment.C. Screw back the sediment valve (2) in a gentle clockwise motion. Do no<strong>to</strong>ver-tighten.9. Place a new cartridge filter in the housing.10. Return the housing cover (4) <strong>to</strong> its position and in a clockwise direction rescrewthe housing collar (1) on<strong>to</strong> the filter housing.11. Turn both plunger valve handles in a counter-clockwise direction, pull up untilthey s<strong>to</strong>p, and then turn them clockwise until the metal protruding notchanchors in the "0/1" position.12. When the trapped air has escaped through the air release valve gentlyretighten the valve (2) in a clockwise direction.13. Reconnect the power cord.14. Turn on the pump.MAINTENANCESAVE THESE INSTRUCTIONS Page 13
(108) MODEL 636T FILTER PUMP ENGLISH 7.5” X 10.3” PANTONE 295U 06/27/2011English108APOOL CARE AND CHEMICALS• All pools require care <strong>to</strong> keep the water clear and hygienically clean. With properchemical control, your filter will help attain this objective. Consult your pool supplydealer for instructions regarding the proper <strong>use</strong> of chlorine,algaecide and other chemical agents required for sparkling clear water.• Keep pool chemicals away from children.• Do not replenish chemicals in pool while pool is occupied. Skin or eye irritationscould occur.• Daily pH checking and chemical treatment of the water is very important and cannotbe overemphasized. Chlorine, algaecide and maintenance of proper pH levels arerequired when filling the pool as well as during the season. Consult your localswimming pool supply s<strong>to</strong>re for instructions.• The season's first filling of the pool may have brackish water requiring extra wateradditives and extra filter changes. Do not allow swimming in pool until the pH levelis balanced. Consult your local swimming pool supply s<strong>to</strong>re for instructions.• Keep spare filter cartridges on hand. Replace cartridges every two weeks.• Chlorinated water may damage lawns, gardens or shrubbery as children play in thepool and splash water outside the pool. Lawn areas underneath the pool liner willbe destroyed. Note that some types of grass may grow through the liner.• Filter run time depends on pool size, weather and usage level. Experiment withvarious run times so as <strong>to</strong> produce clean clear water.CAUTIONConcentrated chlorine solutions may damage the pool liner. Alwaysfollow the chemical manufacturer’s directions, and the health and hazardwarnings.MAINTENANCELONG TERM STORAGE1. Before emptying your pool for long term s<strong>to</strong>rage, or relocation, be sure the water isdirected <strong>to</strong>wards an acceptable drain water receptacle away from the ho<strong>use</strong>. Checklocal regulations for specific directions regarding disposal of swimming pool water.2. Disconnect power cord from electrical outlet.3. Now, drain the pool.4. When the pool is empty, disconnect all hoses from pump and plunger valves andremove the strainers from the pool wall.5. Drain all water from the filter pump.6. Leave filter pump pieces & hoses outside <strong>to</strong> thoroughly air dry.7. Twist the plunger collar counter-clockwise removing the water flow controlmechanism from the plunger housing.8. Coat the following O-rings and washers with petroleum jelly for long term s<strong>to</strong>rage:• Air release valve & sediment O-rings (3).• Filter housing cover O-ring (5).• Pump hose O-rings (9).• Strainer valve assembly step washers (10).• Flat strainer rubber washers (12).9. Discard the <strong>use</strong>d filter cartridge. Put aside 1 or 2 new cartridges for next season’s<strong>use</strong>.10. It is best <strong>to</strong> place all dry pieces in the original packaging for s<strong>to</strong>rage or place themin an airtight plastic bag.11. S<strong>to</strong>re the unit and accessories in a dry place. The s<strong>to</strong>rage's temperature should becontrolled, between 32 degrees Fahrenheit (0 degrees Celsius) and 104 degreesFahrenheit (40 degrees Celsius) s<strong>to</strong>rage location.IMPORTANTIt is best <strong>to</strong> s<strong>to</strong>re away your poolsystem in its original packaging.SAVE THESE INSTRUCTIONS Page 14
(108) MODEL 636T FILTER PUMP ENGLISH 7.5” X 10.3” PANTONE 295U 06/27/2011English108ATROUBLESHOOTING GUIDETROUBLE CAUSE SOLUTIONFILTER MOTORFAILS TO STARTFILTER DOESN’TCLEAN POOLFILTER DOESN’TPUMP WATER ORTHE WATER FLOWIS VERY SLOWPUMP DOESN’TWORKTOP COVERLEAKINGHOSE LEAKINGAIR LOCK• The mo<strong>to</strong>r is not plugged in.• The F<strong>use</strong> box needs checking.• The GFCI/RCD circuit breakeris tripped.• Mo<strong>to</strong>r <strong>to</strong>o hot and overloadprotection is shut off.• Improper chlorine or pHlevels.• Filter cartridge is dirty.• Damaged cartridge.• Excessively dirty pool.• The strainer screen isrestricting the water flow.• Clogged inlet or discharge.• An air leak on the intake line.• Scale or buildup on cartridge.• Excessively dirty pool.• Dirty filter cartridge.• The nozzle and strainerconnection are reversed.• Low water level.• Strainer screen plugged up.• An air leak on the intake hose.• Faulty mo<strong>to</strong>r or the impelleris jammed.• An air lock inside the cartridgechamber.• O-ring missing.• Cover is not tight.• Filter cartridge is dirty.• Hose nuts are not well-fitted.• There’s air trapped in thepump housing and inlet hose.• The inlet and outlet hosesconnection are reversed.• Filter cord must be plugged in<strong>to</strong> a 3 wireoutlet that is protected by a Class AGround Fault Circuit Interrupter, or RCD.• Reset circuit breaker. If circuit breakertrips repeatedly, your electrical systemmay have a defect. Turn off circuitbreaker and call an electrician <strong>to</strong>correct the problem.• Let the mo<strong>to</strong>r cool down.• Adjust the chlorine and pH level.Consult your local swimming poolsupply s<strong>to</strong>res.• Clean or replace cartridge.• Check the cartridge for holes. Replaceif damaged.• Operate the filter for longer periods.• Clean the strainer screen at the inlet.• Clear any obstructions in the intakehose by discharging it inside pool wall.• Tighten hose nuts, check hoses fordamage, check pool water level.• Replace cartridge.• Clean cartridge more often.• Clean inside the plunger valve.• Pull valve handle <strong>to</strong> full upright position.• Install the nozzle at the upper positionof the pool inlet, and the strainer at thelower position of the pool outlet.• Fill pool <strong>to</strong> correct water level.• Clean strainer screens at pool inlet.• Tighten hose nuts, check hose for damage.• Clear any sticks or leaves in theintake hose.• Turn and pull valve handle <strong>to</strong> fullupright position.• Remove cover & check for O-ring.• Tighten cover (<strong>Manual</strong>ly).• Replace or clean cartridge.• Tighten or reinstall hose nut.• Open air release valve, wait until waterstarts <strong>to</strong> flow out of the valve, thenclose it.• The lower position of pool outletconnects <strong>to</strong> filter pump water inlet. Theupper position of pool inlet connects <strong>to</strong>filter pump water outlet.TROUBLESHOOTING GUIDEIMPORTANTIf you continue <strong>to</strong> experience difficulty, please contact our ConsumerService Department for assistance. See back cover for contact information.SAVE THESE INSTRUCTIONS Page 15
(108) MODEL 636T FILTER PUMP ENGLISH 7.5” X 10.3” PANTONE 295U 06/27/2011English108ACOMMON POOL PROBLEMSPROBLEM DESCRIPTION CAUSE SOLUTIONALGAECOLOREDWATERFLOATINGMATTER INWATERCHRONICLOW WATERLEVELSEDIMENTON POOLBOTTOMSURFACEDEBRIS• Greenish water.• Green or blackspots on pool liner.• Pool liner isslippery and/or hasa bad odor.• Water turns blue,brown, or blackwhen first treatedwith chlorine.• Water is cloudy ormilky.• Level is lower thanon previous day.• Dirt or sand onpool floor.• Leaves, insectsetc.• Chlorine and pH levelsneed adjustment.• Copper, iron ormanganese in waterbeing oxidized by theadded chlorine.This is Common.• "Hard water" ca<strong>use</strong>dby a <strong>to</strong>o high pH level.• Chlorine content is low.• Foreign matter inwater.• Rip or hole in poolliner or hoses.• The drain valves areloose.• Heavy <strong>use</strong>, getting inand out of pool.• Pool <strong>to</strong>o close <strong>to</strong>trees.• Super chlorinate with shocktreatment. Correct pH <strong>to</strong> yourpool s<strong>to</strong>re's recommendedlevel.• Vacuum pool bot<strong>to</strong>m.• Maintain proper chlorinelevel.• Adjust pH level <strong>to</strong> therecommended level.• Run filter until water is clear.• Clean cartridge frequently.• Correct the pH level. Checkwith your pool dealer foradvice.• Adjust the chlorine level.• Clean or replace your filter.• Repair with a patch kit.• Finger tighten all caps.• Use Intex pool vacuum <strong>to</strong>clean bot<strong>to</strong>m of pool.• Use Intex pool skimmer.COMMON PROBLEMSSAVE THESE INSTRUCTIONS Page 16
(108) MODEL 636T FILTER PUMP ENGLISH 7.5” X 10.3” PANTONE 295U 06/27/2011English108AGENERAL AQUATIC SAFETYWater recreation is both fun and therapeutic. However, it involvesinherent risks of injury and death. To reduce your risk of injury, readand follow all product, package and package insert warnings andinstructions. Remember, however, that product warnings, instructionsand safety guidelines cover some common risks of water recreation,but do not cover all risks and or dangers.For additional safeguards, also familiarize yourself with the followinggeneral guidelines as well as guidelines provided by nationallyrecognized Safety Organizations:• Demand constant supervision. A competent adult should be appointed asa “lifeguard” or water watcher, especially when children are in and aroundthe pool.• Learn <strong>to</strong> swim.• Take the time <strong>to</strong> learn CPR and first aid.• Instruct anyone who is supervising pool <strong>use</strong>rs about potential poolhazards and about the <strong>use</strong> of protective devices such as locked doors,barriers, etc.• Instruct all pool <strong>use</strong>rs, including children what <strong>to</strong> do in case of anemergency.• Always <strong>use</strong> common sense and good judgement when enjoying anywater activity.• Supervise, supervise, supervise.SAFETY GUIDELINESSAVE THESE INSTRUCTIONS Page 17
(108) MODEL 636T FILTER PUMP ENGLISH 7.5” X 10.3” PANTONE 295U 06/27/2011English108ALIMITED WARRANTYYour Krystal Clear Filter-Pump has been manufactured using the highest qualitymaterials and workmanship. All Intex products have been inspected and found free ofdefects prior <strong>to</strong> leaving the fac<strong>to</strong>ry. This Limited Warranty applies only <strong>to</strong> the KrystalClear Filter-Pump and accessories listed below.The provisions of this Limited Warranty apply only <strong>to</strong> the original purchaser and is nottransferable. This Limited Warranty is valid for the period noted below from the date of theinitial retail purchase. Keep your original sales receipt with this manual, as proof ofpurchase will be required and must accompany warranty claims or the Limited Warranty isinvalid.Krystal Clear Filter-Pump Warranty – 1 YearHoses, Plunger Valves & Fittings Warranty – 180 daysIf a manufacturing defect is found within the periods noted above, please contact theappropriate Intex Service Center listed in this manual. The Service Center will determinethe validity of the claim.IMPLIED WARRANTIES ARE LIMITED TO THE TERMS OF THIS WARRANTY AND INNO EVENT SHALL <strong>INTEX</strong>, THEIR AUTHORIZED AGENTS OR EMPLOYEES BE LIABLETO THE BUYER OR ANY OTHER PARTY FOR DIRECT OR CONSEQUENTIALDAMAGES OR LIABILITIES.This Limited Warranty does not apply if the products are subject <strong>to</strong> negligence, abnormal<strong>use</strong> or operation, accident, improper operation, improper voltage or current contrary <strong>to</strong>operating instructions, or <strong>to</strong> damage by circumstances beyond Intex’s control, including butnot limited <strong>to</strong>, ordinary wear and tear and damage ca<strong>use</strong>d by exposure <strong>to</strong> fire, flood,freezing, rain, or other external environmental forces. This Limited Warranty applies only <strong>to</strong>those parts and components sold by Intex. The Limited Warranty does not coverunauthorized alterations, repairs or disassembly by anyone other than Intex ServiceCenter personnel.The Limited Warranty is also not applicable if this product is <strong>use</strong>d with another produc<strong>to</strong>ther than an Intex product, when setting up your pool.The costs associated with the loss of pool water, chemicals or water damage are notcovered by this warranty. Injury or damage <strong>to</strong> any property or person is not covered by thiswarranty.SAVE THESE INSTRUCTIONS Page 18
(108) MODEL 636T FILTER PUMP ENGLISH 7.5” X 10.3” PANTONE 295U 06/27/2011English108AFor service questions or <strong>to</strong> order replacement parts, please contact the appropriate officelisted below or visit www.intexdevelopment.com for answers <strong>to</strong> most frequently askedquestions.AREAS LOCATION AREAS LOCATION• ASIA <strong>INTEX</strong> DEVELOPMENT CO. LTD.9TH FLOOR,DAH SING FINANCIAL CENTRE,108 GLOUCESTER ROAD,WANCHAI, HONG KONGTEL: 852-28270000FAX: 852-23118200E-mail: xmservicesupport@intexcorp.com.cnWebsite: www.intexdevelopment.com• EUROPE <strong>INTEX</strong> TRADING B.V.POSTBUS 1075, 4700 BB ROOSENDAAL,THE NETHERLANDSTEL: 31-(0)165-593939FAX: 31-(0)165-593969E-mail: service@intexcorp.nlWebsite: www.intexcorp.nl• FRANCE UNITEX / <strong>INTEX</strong> SERVICE FRANCE S.A.SZ.A. DE MILLEUREBOIS DU BAN - N°471480 LE MIROIRTEL: 08 90 71 20 39 (0,15€/min)FAX: 03 84 25 18 09Website: www.intex.fr• GERMANY STEINBACH VERTRIEBSGMBHC/O WEBOPAC LOGISTICS GMBHINTER-LOGISTIK-PARK 1-387600 KAUFBEURENTEL: 0180 5 405 100 200(0,14€/min aus dem Festnetz, Mobilfunk max. 0,42€/min)FAX: + 43 (7262) 61439E-mail: service@intexcorp.deWebsite: www.intexcorp.de• ITALY A & A MARKETING SERVICEVIA RAFFAELLO SANZIO 1920852 VILLASANTA (MB)TEL: 199 12 19 78FAX: +39 039 2058204E-mail: info@intexitalia.comWebsite: www.intexitalia.com• UK JOHN ADAMS LEISURE LTDMARKETING HOUSE,BLACKSTONE ROAD,HUNTINGDON, CAMBS.PE29 6EF. UKTEL: 0844 561 7129FAX: 01480 414761E-mail: sales@johnadams.co.ukWebsite: www.intexspares.com• SWITZERLAND GWM AGENCYGARTEN-U. WOHNMÖBEL,RÄFFELSTRASSE 25,POSTFACH,CH-8045 ZURICH/SWITZERLANDTEL: 0900 455456 or +41 44 455 50 60FAX: +41 44 455 50 65E-mail: gwm@gwm.chWebsite: www.gwm.ch, www.gwmsale.ch• SPAIN / PORTUGAL Nostrum Iberian Market S.A.Av. de la Albufera, 32128031 Madrid, SpainTEL: +34 902101339FAX for Spain: +34 9 029 089 76Email for Spain: sat@intexiberian.comFAX for Portugal: +351 707 506 090Email for Portugal: spv-pt@intexiberian.comWebsite: www.intexiberian.com• AUSTRALIA HUNTER PRODUCTS PTY LTDLEVEL 1, 225 BAY STREET,BRIGHTON, VICTORIA,AUSTRALIATEL: 61-3-9596-2144 or 1800-224-094FAX: 61-3-9596-2188E-mail: enquiries@hunteroverseas.com.auWebsite: www.hunterproducts.com.au• NEW ZEALAND HAKA NEW ZEALAND LIMITEDUNIT 4, 11 ORBIT DIVE, ALBANY,AUCKLAND 0757, NEW ZEALANDTEL: 649-4159213 / 0800 634434FAX: 649-4159212E-mail: geoff@hakanz.co.nzWebsite: www.hakanz.co.nz• MIDDLE EAST FIRST GROUP INTERNATIONALREGIONAL MOOSA GROUP BUILDING, 1STFLOOR, OFFICE 102 & 103, UMM HURAIRROAD, KARAMA, DUBAI, UAETEL: 00971-4-800<strong>INTEX</strong>(46839) / +971-4-3373322FAX: 00971-4-3375115E-mail: intex@firstgroupinternational.com.Website: www.firstgroupinternational.com• SOUTH AFRICA WOOD & HYDE15-17 PACKER AVENUE, INDUSTRIA 2,CAPE TOWN, SOUTH AFRICA 7460TEL: 0-800-204-692 (Toll Free) or 27-21-505-5500FAX: 27-21-505-5600E-mail: ygoldman@melbro.co.za• CHILE / URUGUAY COMEXA S.A.EL JUNCAL 100, PARQUE INDUSTRIAL PORTEZUELO,QUILICURA, SANTIAGO, CHILE.TEL: 600-822-0700E-mail: serviciotecnico@silfa.cl• ARGENTINA JARSE INDUSTRIAL Y COMERCIAL S.AMANUEL GARCIA 124 (CP1284)CIUDAD AUTÓNOMA DE BUENOS AIRES,ARGENTINA.TEL: 011-4942-2238 (interno 139);TEL: 011-4942-2238( interno 145)E-mail: Martín Cosole<strong>to</strong>: mcosole<strong>to</strong>@jarse.com.arE-mail: Daniel Centurion: dcenturion@jarse.com.arWebsite: www.jarse.com.ar• PERU COMEXA S.A.AVENIDA COMANDANTE ESPINAR 142,MIRAFLORES, LIMA, PERÚTEL: 446-9014• SAUDI ARABIA SAUDI ARABIAN MARKETING &AGENCIES CO. LTD.PRINCE AMIR MAJED STREET,AL-SAFA DISTRICT. JEDDAH,KINGDOM OF SAUDI ARABIATEL: 966-2-693 8496FAX: 966-2-271 4084E-mail: <strong>to</strong>y@samaco.com.saWebsite: www.samaco.com.sa• AUSTRIA STEINBACH VERTRIEBSGMBHAISTINGERSTRAßE 24311 SCHWERTBERGTEL: 0820 - 200 100 200(0,145€/min aus allen Netzen)FAX: + 43 (7262) 61439E-mail: service@intexcorp.atWebsite: www.intexcorp.at• CZECH REPUBLIC / <strong>INTEX</strong> TRADING S.R.O.EASTERN EUROPE BENESOVSKA 23,101 00 PRAHA 10,CZECH REPUBLICTEL: +420-267 313 188FAX: +420-267 312 552E-mail: info@intexcorp.cz• BELGIUM N.V. SIMBA-DICKIE BELGIUM S.A.MOESKROENSESTEENWEG 383C,8511 AALBEKE, BELGIUMTEL: 0800 92088FAX: 32-56.26.05.38E-mail: intex@nico<strong>to</strong>y.beE-mail: intexsupport@nico<strong>to</strong>y.beWebsite: www.nico<strong>to</strong>y.be/downloads.htm• DENMARK K.E. MATHIASEN A/SSINTRUPVEJ 12, DK-8220BRABRAND, DENMARKTEL: +45 89 44 22 00FAX: +45 86 24 02 39E-mail: intex@keleg.dkWebsite: www.intexnordic.com• SWEDEN LEKSAM ABBRANDSVIGSGATAN 6,S-262 73 ÄNGELHOLM,SWEDENTEL: +46 431 44 41 00FAX: +46 431 190 35E-mail: intex@leksam.seWebsite: www.intexnordic.com• NORWAY NORSTAR ASPINDSLEVEIEN 1,N-3221 SANDEFJORD,NORWAYTEL: +47 33 48 74 10FAX: +47 33 48 74 11E-mail: intex@norstar.noWebsite: www.intexnordic.com• FINLAND NORSTAR OYSUOMALAISTENTIE 7,FIN-02270 ESPOO,FINLANDTEL: +358 9 8190 530FAX: +358 9 8190 5335E-mail: info@norstar.fiWebsite: www.intexnordic.com• RUSSIA LLC BAUERKIEVSKAYA STR., 20,121165 MOSCOW, RUSSIATEL: 099-249-9400/8626/9802FAX: 095-742-8192E-mail: intex.russia@gmail.comWebsite: www.intex.su• POLAND KATHAY HASTERUL. LUTYCKA 3, 60-415 POZNANTEL: +48 61 8498 334FAX: +48 61 8474 487E-mail: inx@kathay.com.plWebsite: www.intexpoland.pl• HUNGARY RECONTRA LTD./RICKI LTD.H-1113 BUDAPEST, DARÓCZI ÚT 1-3,HUNGARYTEL: +361 372 5200/113FAX: +361 209 2634E-mail: service@recontra.hu• BRASIL KONESUL MARKETING & SALES LTDARUA ANTONIO DAS CHAGAS,1.528 - CEP. 04714-002,CHÁCARA SANTO ANTONIO - SÃOPAULO - SP - BRASILTEL: 55 (11) 5181 4646FAX: 55 (11) 5181 4646E-mail: sacintexbrasil@uol.com.br• ISRAEL ALFIT TOYS LTDMOSHAV NEHALIM,MESHEK 32, 49950, ISRAELTEL: +972-3-9076666FAX: +972-3-9076660E-mail: michald@chagim.co.ilSAVE THESE INSTRUCTIONS Page 19