Op Man; XP Series Rev D - Denver Instrument
Op Man; XP Series Rev D - Denver Instrument
Op Man; XP Series Rev D - Denver Instrument

You also want an ePaper? Increase the reach of your titles
YUMPU automatically turns print PDFs into web optimized ePapers that Google loves.
<strong>Denver</strong> <strong>Instrument</strong> CompanyCertificate ofCalibration<strong>XP</strong>-<strong>Series</strong>Toploading Balances<strong>XP</strong>-300/<strong>XP</strong>-600/<strong>XP</strong>-1500/<strong>XP</strong>-3000We hereby certify that this instrumentwas manufactured in the United Statesand that it has been calibrated using appropriatereference standards traceable to theNational Institute of Standards and Technology.This instrument has been fully inspectedand has passed all quality tests as specified by<strong>Denver</strong> <strong>Instrument</strong> Companyquality procedures.To assure proper measurements, it is necessary toperiodically recalibrate the instrumentusing appropriate standardsas specified in the operating manual.<strong>Denver</strong> <strong>Instrument</strong> Company%<strong>XP</strong>-30003000x0.1g•••dwtozgI/O•0*<strong>Denver</strong> <strong>Instrument</strong> Company6542 Fig Street • Arvada, Colorado 80004 U.S.A.1-800-321-1135 • (303) 431-7255 • Fax (303) 423-4831www.denverinstrument.comEuropean Office:<strong>Denver</strong> <strong>Instrument</strong> Company, Ltd.<strong>Denver</strong> House, Sovereign Way • Trafalgar Business ParkDownham Market, Norfolk PE38 9SW • EnglandTel: (01366) 386242 • Fax: (01366) 386204<strong>Op</strong>eration <strong>Man</strong>ual700929.1<strong>Rev</strong>. D
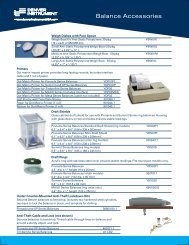
You have purchased a quality precision weighing instrument thatrequires handling with care.Read entire contents of this <strong>Op</strong>eration <strong>Man</strong>ual prior to operatingyour new <strong>Denver</strong> <strong>Instrument</strong> balance.Disclaimer NoticeCalibrate your balance using a reference weight of the appropriatetolerance (class). An instrument can be no more accuratethan the standard to which it has been compared. For assistancein the selection of reference weights, please contact the factory.!Caution!Changes or modifications not expressly approved by the manufacturercould void the user’s authority to operate this equipment.!WarningNever lift balance by the weighing pan as this may causedamage to internal mechanisms.Always lift and transport the balance by its base, includingremoval from packing materials!WarningDo not drop weights on pan.Damage will occur to the balance’s internal mechanisms.Note:Damage may occur if load exceeds 150%of maximum capacity.Note:This product may contain a lead acid battery.The user is responsible for disposing of the unit in accordancewith local ordinances and regulations.<strong>Denver</strong> <strong>Instrument</strong> Company6542 Fig Street • Arvada, Colorado 80004(303) 431-7255 • (800) 321-1135 • Fax(303) 423-4831Cleaning InstructionsThe exterior surfaces of the product may be cleaned with a mild waterbaseddetergent and a lint-free nonabrasive cloth. Alternatively, isopropylalcohol may be used. Do not immerse the product in any liquid.WarningNever lift balance by the weighing pan as this may causedamage to internal mechanisms.Always lift and transport the balance by its base.NoteThis unit contains no user serviceable parts.All replacement parts should be obtained from themanufacturer. Please refer to the inside front cover ofthis manual for the phone number of your sales andservice representative.Warranty Instructions1. Please return the prepaid, pre-addressed Purchase Registration Card to<strong>Denver</strong> <strong>Instrument</strong> Company promptly upon your purchase of the <strong>Denver</strong><strong>Instrument</strong> product. The return of the card is not a condition precedent towarranty coverage.2. If you have any questions about a <strong>Denver</strong> <strong>Instrument</strong> product, please calltoll-free, 1-800-321-1135 or FAX a description of the problem to(303) 423-4831 for technical assistance.3. If it becomes necessary to return your <strong>Denver</strong> <strong>Instrument</strong> product for service,you must obtain a “Return Authorization Number”. Please pack theproduct securely in its original approved packing carton or an other suitablecontainer. Include your Return Authorization Number on the shippinglabel. Shipping charges must be fully prepaid.Return to authorized distributor or :<strong>Denver</strong> <strong>Instrument</strong> Company6542 Fig StreetArvada, Colorado 80004!
Preparation• This product is intended for indoor use and portable applications.• Select a suitable work area.• Work area should be relatively free from drafts and vibrations.• Work surface should be level and rigid.• Do not locate near magnetic materials or equipment/instrumentswhich use magnets in their design.• Avoid areas which have variations in room temperatures or haveexcessive room temperatures. Room temperatures above 105°F/40°Cor below 60°F/15°C could affect balance operation and accuracy.Installation• Remove balance and accessories from the carton. Save packing materialfor transportation purposes.• A rechargeable battery is already installed in your balance.• Charge balance for 12 hours before using on battery power.• When the battery icon flashes, you must recharge the unit.• If using the AC adapter, insert power cord into the receptacle locatedon the rear of the unit. Firmly push in the plug.• Allow the balance to warm up for 30 minutes prior to use.Your balance features a numeric display that continuously shows your weighingresults. The number of decimal places displayed depends on the <strong>XP</strong> model.Hardware HandshakeWith a 4-wire interface, 1 or 2 more characters can be transmitted after CTS.Note:These connections must be made when interfacingthe balance through the RS232C port!Data Interface Cable Pin Configuration For <strong>XP</strong>-<strong>Series</strong> BalancesDI <strong>XP</strong> <strong>Series</strong>Balance 9-Pin portRxD 2TxD 3DTR 4Signal Ground 5CTS 8!Standard RS-2329-Pin Connector3 TxD2 RxD4 DTR5 Signal Ground8 CTS%•#03.42*•••dwtozgI/ODI <strong>XP</strong> <strong>Series</strong>Balance 9-Pin PortRxD 2TxD 3DTR 4Signal Ground 5CTS 8Standard RS-23225-PIN Connector2 TxD3 RxD20 DTR7 Signal Ground5 CTSFunction KeysI/OTurns balance ON or OFF, or Standby if AC adapter is connected.Scroll; for selecting various units of weight or options.Print/Menu*–0– Zero/Tare; returns display to zero, exits from menu.
Maintenance and TroubleshootingDisplay Shows: Cause: Remedy:I/O key pressedPress the I/O key.to turn OFF Displays.(Blank Screen) Power cord notConnect cord.connected.(No stability indicator)E-02E-30E-54No power to outlet orimproper voltage.Temporary faultWeight exceedsbalance capacity.Pan obstructed.Balance operating error.Load cell damaged.Air movementaround balance.Usually detected whenthe calibration operationis being attempted. It isusually the result of thebalance being exposedto vibrations, air drafts orunstable environments.Pan was not in placewhen unit was turned on.This is an indication thatan electronic malfunctionhas occurred.This fault will appear on thedisplay when the unit ispowered on. This occurswhen the electronics are nolonger within the factory setparameters.Check power supply.Check power supplyand voltage switch.Disconnect and reconnectpower cord. (Wait at least fiveseconds before reconnecting.)Reduce weight.Check pan placement.Re-calibrate balance.The most common causeis from objects being droppedonto the weighing pan orfrom the balance itself beingdropped. The balance must bereturned for service.Move balance to stable,draft-free location.The balance must be placed ina stable environment beforecalibration occurs.Turn unit off and place pan onand turn unit on.The unit must be returnedto the factory for evaluation.The most common causeis from objects being droppedonto the weighing pan orfrom the balance itself beingdropped. The balance must bereturned for service.IntroductionThank you for choosing one of our precision instruments. Your balance isdesigned and manufactured to the most rigorous standards in order to giveyou years of service. First, check the contents of the shipping carton. Youshould find the following:• <strong>Man</strong>ual • Balance • AC Adapter • Cover PanNext, follow the instructions for installing your balance.Now you’re ready to begin using your balance. To take advantage of its manyfeatures, carefully read your operating manual. It contains step-by-step procedures,examples, and other vital information.Finally, remember to return your completed warranty card within ten days andto record all purchase information in the space provided on the back coverof your manual.Warning: Use of this product in a manner not specified by the manufacturermay impair any safety protection provided by the equipment!Specifications!Model <strong>XP</strong>-300 <strong>XP</strong>-600 <strong>XP</strong>-1500 <strong>XP</strong>-3000Range 300g 600g 1500g 3000gReadability 0.01g 0.02g 0.05g 0.1gLinearity ±0.01g ±0.02g ±0.05g ±0.1gPan 5” x 7” 5” x 7” 5” x 7” 5” x 7”Dimensions (127 x 178mm) (127 x 178mm) (127 x 178mm) (127 x 178mm)PermissibleCalibration 200g 500g 1000g 2000gWeightsTemperature 15 - 40 °CHumidity 80% for temperature to 31°C, decreasing linearly to 50% relativehumidity at 40°CAltitude 3000mCommon Specifications: Unit dimensions (L x W x H) 8.2 x 8.3 x 2.7” (208 x 211 x 69mm);Net Weight: 3.75 lbs. (1.7 kg). Power: 15 VDC, 100mA, AC adapter included. Mains supplyvoltage fluctuations not to exceed ±10% of nominal supply voltage. Equipment idsuitable for continuous operation with AC adapter/charger. Pollution degree:2;Installation category: II; Sound Pressure Level emitted by equipment does not exceedambient noise. Storage/Transport Temperature: -20° – +40°C.NOTE: The battery is not a user serviceable part. If the battery does notrecharge with use of AC adapter, contact an authorized service technician.!Caution: Use AC adapter/charger supplied with unit only!Consult <strong>Denver</strong> <strong>Instrument</strong> Company for replacement.
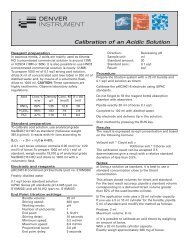
C. Calibration1. To calibrate the balance, tare or zero the balance with no weight on pan,press and hold down the key for 3 seconds. The display will read “Unit”.*Press the once, the display will now show “CAL”.*2. Press the key. The calibration weight of the balance in grams will be displayed.3. Place the correct weight on the balance. After a few seconds the displaywill flash indicating the value has been accepted.D. Count or Percentage Mode Setup1. Press and hold* key for 3 seconds. The display will read “Unit”. Press the *key repeatedly until unit displays “Count”.2. Press the key to correct number of pieces to be counted is displayed: 10,20, 50, 100 or P100 for percentage mode.3. Press the –0– key to enter correct count or percentage mode.E. Set reference weight for Count or Percentage Mode1. Tare unit by pressing –0–.2. Place reference weight on balance.3. Press the key repeatedly until the stability icon goes to % of #.4. Balance should display reference mode setup 10, 20, 50, 100.Note: If balance power is removed or turned off, the reference weight mustbe redone.F. Auto-Shut OffIf a fully charged balance loses AC power, it will be able to use its batterybackup for 48 hours of weighing. When operating on battery backup the displaywill flash after 4 minutes if there is no weight change. If left in this mode,the display will continue to flash for 2 additional minutes, after which the balancewill shut itself off.Menu Tree*unit lbs 0 “exit to weighing mode”*cal*count*taelcarattroygrain“placeweight”Function inWeighing Mode0000“advance to next option”0“advance to next option”“exit to weighing mode”“exit to weighing mode”“exit to weighing mode”“exit to weighing mode”cal to applied weightexit to weighing mode10 0 “exit to weighing mode”20 0 “exit to weighing mode”50 0 “exit to weighing mode”100 0 “exit to weighing mode”P100.0 0 “exit to weighing mode”Function inMenu Mode0*Zero’s the balancePushed momentarily sends printerstring out optional serial port. Pushedfor 3 seconds enters menu mode.Advances display optionsto next clockwise optionExits from current point weighingmode, saves last optionsAdvances mode select to nextmenu option.Cycles through selections atcurrent menu levelNotes: 1. Text in quotes above indicates an action to occur (i.e., “place weight”)2. Text not in quotes is the display message at that level (i.e., count or tael)3. P100.0 is used to denote percentage weighingMenu Level Functions:unit selects the units to be displayed when in free units modecal calibrates the unit to the applied weightcount selects the reference quantity that the applied load will represent andthe mode to operate in
RS232C Interface (<strong>Op</strong>tion)The RS232C interface is an option added at the factory at the time of orderingyour <strong>XP</strong> balance.Data Input FormatYou can connect a computer or printer to your balance to send commandsvia the balance interface port to control balance functions and application.A control command can have up to 4 characters. Each character must betransmitted according to the communication port setting for data transmission.Communications Port SettingsBaud Data Bits Parity Stop Bit9600 7bit Space 1Flow Control = None or Xon/XoffLine Delay 50msCharacter Delay 50 msFormat for Control CommandsFormat: Esc ! CR LFEsc: EscapeCR: Carriage Return (optional)!: Command character LF: Line Feed (optional)Command character: ! MeaningK Very Stable ConditionsL Stable ConditionsM Unstable ConditionsN Very Unstable ConditionsO Disable KeypadP Print DisplayR Enable KeypadS Reset BalanceT Tare and Zero (combined)U Tare (tare only)V ZeroW External Calibration/Adjustment<strong>Op</strong>erationYour new balance weighs in different units and can perform parts countingand percent of weight functions.A. Taring (Zeroing)All models have taring capabilities up to their total weight capacity (varies witheach model).1. Place sample container on pan.2. Press the –0– key to zero the balance.3. Add your sample, when the balance is stable the display is showing theweight of the sample.ACAdapterPort(rear)Low BatteryIndicator(flashing)B. Weigh UnitsPoundsTroy Ounces<strong>Denver</strong> <strong>Instrument</strong> Company%•0*ZeroKey<strong>XP</strong>-30003000x0.1g•••dwtozgI/OPrintKeyWeighing PanScrollKeyOn/OffPowerStandbyKeyStability/SelectionIndicator1. To toggle between pennyweight, ounces, grams, counting features (countor percentage depending on which one is activated) and optional unit( *** ), press the key.2. To change the optional unit, press and hold down the key for 3 seconds.*The display will read “Unit”.3. Press the key to cycle through the different weight modes.4. Press the –0– key when the desired mode appears.GrainsCaratsTael, Hong Kong