BiPAP Harmony User Guide - Sleep Restfully, Inc.
BiPAP Harmony User Guide - Sleep Restfully, Inc.
BiPAP Harmony User Guide - Sleep Restfully, Inc.

You also want an ePaper? Increase the reach of your titles
YUMPU automatically turns print PDFs into web optimized ePapers that Google loves.
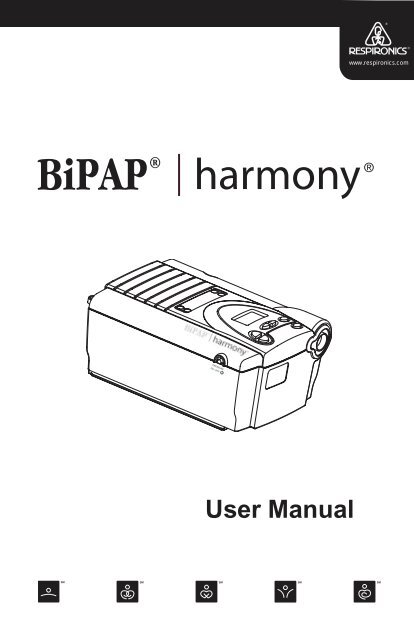
<strong>User</strong> Manualwww.respironics.com
<strong>BiPAP</strong> systems are the subject of one or more patents: U.S. Patents#5148802, #5239995, #531937, #5433193; Canadian Patent #2, 024,477;European Patent #EP0425092; German Patent #6902161681.5-08; andother pending U.S. and foreign patents. <strong>BiPAP</strong>, <strong>Harmony</strong>, Encore andSmartCard are registered trademarks of Respironics, <strong>Inc</strong>.© 2003 Respironics, <strong>Inc</strong>. All rights reserved.
2TABLE OF CONTENTSCHAPTER 1: PACKAGE CONTENTS ........................................................................... 4CHAPTER 2: WARNINGS AND CAUTIONS ................................................................. 52.1 WARNINGS ................................................................................................ 52.2 CAUTIONS ................................................................................................. 62.3 INTENDED USE .......................................................................................... 62.4 CONTRAINDICATIONS ................................................................................. 72.5 PRECAUTIONS ............................................................................................ 72.6 INDUSTRY CANADA NOTICE....................................................................... 8CHAPTER 3: INTRODUCTION TO THE HARMONY ....................................................... 93.1 DEFINITIONS .............................................................................................. 93.2 WHAT IS THE HARMONY?........................................................................ 103.2 WHAT IS THE HARMONY?........................................................................ 113.3 SYMBOLS ................................................................................................. 123.4 HOW TO CONTACT RESPIRONICS .............................................................. 12CHAPTER 4: HARMONY CONTROLS ANDDISPLAY FEATURES ........................................................................................ 134.1 PRESSURE ON/OFF BUTTON.................................................................... 134.2 HARMONY CONTROL PANEL ................................................................... 134.2.1 CONTROL KEYS ............................................................................. 144.2.2 ALARM AND POWER INDICATORS ................................................... 154.2.3 DISPLAY SCREEN ........................................................................... 154.2.4 BREATHING CIRCUIT CONNECTION ................................................ 184.2.5 REAR PANEL ................................................................................. 18CHAPTER 5: SETTING UP THE HARMONY ............................................................... 205.1 INSTALLING THE AIR FILTERS ................................................................... 205.2 WHERE TO PLACE THE HARMONY ........................................................... 215.3 CONNECTING THE BREATHING CIRCUIT .................................................... 215.4 COMPLETE HARMONY SETUP ................................................................... 235.5 PLUGGING THE HARMONY IN .................................................................. 245.5.1 USING AC POWER ........................................................................ 245.5.2 USING DC POWER ........................................................................ 24CHAPTER 6: OPERATING THE HARMONY .............................................................. 266.1 STARTING THE HARMONY ........................................................................ 266.2 CHANGING THE DEVICE SETTINGS ........................................................... 286.2.1 CHANGING THE HUMIDIFIER SETTING ............................................ 296.2.2 NAVIGATING THE USER DISPLAY SCREENS ...................................... 306.2.2.1 CHANGING THE FLEX SETTING ............................................ 316.2.2.2 CHANGING THE RISE TIME SETTING .................................... 316.2.2.3 CHANGING THE RAMP STARTING PRESSURE ......................... 326.2.2.4 CHANGING THE LED BACKLIGHT SETTING ......................... 33Provider Manual
CHAPTER 7: HARMONY ALARMS........................................................................... 347.1 INTRODUCTION TO ALARMS ..................................................................... 347.2 WHAT TO DO WHEN AN ALARM OCCURS ............................................... 357.3 ALARM TABLES ....................................................................................... 377.3.2 MEDIUM PRIORITY ALARMS ........................................................... 387.3.3 LOW PRIORITY ALARMS ................................................................. 38CHAPTER 8: TROUBLESHOOTING ............................................................................ 39CHAPTER 9: CLEANING AND MAINTENANCE ........................................................ 419.1 CLEANING THE HARMONY....................................................................... 419.2 CLEANING OR REPLACING THE INLET FILTERS .......................................... 41CHAPTER 10: ACCESSORIES .................................................................................. 4410.1 ADDING A HUMIDIFIER .......................................................................... 4410.2 ADDING OXYGEN TO THE HARMONY ..................................................... 44CHAPTER 11: SPECIFICATIONS ............................................................................... 45ENVIRONMENTAL ........................................................................................... 45PHYSICAL ...................................................................................................... 45ELECTRICAL ................................................................................................... 45PRESSURE ...................................................................................................... 46CONTROL ACCURACY .................................................................................... 46INDEX ................................................................................................................... 473Provider Manual
www.respironics.com4CHAPTER 1: PACKAGE CONTENTSYour <strong>BiPAP</strong> <strong>Harmony</strong> should include the following items. If any ofthese items are missing, contact your home care provider.<strong>BiPAP</strong> <strong>Harmony</strong> withEncore ® Pro SmartCard ®Power CordUltrafine FilterFilter CapPollen Filters<strong>User</strong> ManualFlexible Tubing6 ft. (1.83 m) X 22 mm i.d.External AC Power SupplyProvider Manual
5CHAPTER 2: WARNINGS AND CAUTIONSWARNING:CAUTION:NOTE:Indicates the possibility of injury to the user or operator.Indicates the possibility of damage to the device.Places emphasis on an operating characteristic.2.1 WARNINGS• This manual serves as a reference. The instructions in thismanual are not intended to supersede the instructions of yourhealth care provider.• You should read and understand this entire manual before usingthe <strong>Harmony</strong>.• The <strong>Harmony</strong> is not intended to provide your total ventilatoryrequirement.• The prescription must only be adjusted by a trained home careprovider.• Use only the breathing circuit provided by your home careprovider.• When using a breathing circuit that contains a mask with anintegrated exhalation port or a circuit with a separate exhalationdevice, do not tape, seal, or otherwise block the vent openings.Doing so could result in suffocation.• If oxygen is used with the <strong>Harmony</strong>, the oxygen flow must beturned off when the <strong>Harmony</strong> is not in use.• Oxygen supports combustion. Oxygen should not be used whilesmoking or in the presence of an open flame.• Do not use the <strong>Harmony</strong> in the presence of flammable liquids orgases. Do not clean the <strong>Harmony</strong> with flammable fluids.• Do not use the <strong>Harmony</strong> if the room temperature is above 95º F(35°C). If the device is used at room temperatures above 95° F,the temperature of the airflow may exceed 106º F (41°C), whichcould cause irritation to your airway.• Do not operate the <strong>Harmony</strong> in direct sunlight or near a heatingappliance because these conditions can increase the temperatureof the air coming out of the <strong>Harmony</strong>.• When the <strong>Harmony</strong> is used with a humidifier, position thehumidifier so that the water level in the humidifier is lower thanyou and the humidifier is on the same level or lower than the<strong>Harmony</strong>.Provider Manual
6• If you detect any unexplained changes in the performance of the<strong>Harmony</strong>, if the device is dropped or mishandled, or if theenclosure is broken, seek the assistance of your home careprovider.• If water is spilled into the enclosure, discontinue use of the<strong>Harmony</strong> and remove the power cord. Pour out the excess liquidand allow the unit to dry out. If the device does not functionproperly, contact your home care provider.• Repairs and adjustments must be performed by Respironics -authorized service personnel only. Unauthorized service couldcause injury, invalidate the warranty, or result in costly damage.• Periodically inspect electrical cords for damage or signs of wear.• To avoid electrical shock, unplug the <strong>Harmony</strong> before cleaningit.2.2 CAUTIONSCAUTION!US federal law restricts this device to sale by or on theorder of a physician.• The <strong>Harmony</strong> may only be operated at temperatures between41º F (5°C) and 95º F (35°C).• A properly installed, undamaged reusable foam inlet filter isrequired for proper operation.• Do not immerse the <strong>Harmony</strong> or allow any liquid to enter theenclosure or the inlet filter.• Condensation may damage the <strong>Harmony</strong>. Always allow the<strong>Harmony</strong> to reach room temperature before use.Additional warnings, cautions, and notes are located throughoutthis manual.2.3 INTENDED USEThe <strong>Harmony</strong> is intended to provide noninvasive ventilation in adultpatients (>30 kg) for the treatment of respiratory insufficiency (a conditionin which the patient can continue without ventilation for someperiod of time, such as overnight) or obstructive sleep apnea. Thisdevice may be used in the hospital or home.The <strong>Harmony</strong> is intended for use with nasal masks and full-face masksas recommended by Respironics.Provider Manual
72.4 CONTRAINDICATIONSThe <strong>Harmony</strong> should not be used if you have severe respiratory failurewithout a spontaneous respiratory drive.If any of the following conditions apply to you, consult your physicianbefore using the <strong>Harmony</strong>:• Inability to maintain a patent airway or adequately clearsecretions• At risk for aspiration of gastric contents• Diagnosed with acute sinusitis or otitis media• Allergy or hypersensitive to the mask materials where the riskfrom allergic reaction outweighs the benefit of ventilatoryassistance• Epistaxis, causing pulmonary aspiration of blood• Hypotension2.5 PRECAUTIONS• Immediately report any unusual chest discomfort, shortness ofbreath, or severe headache.• If skin irritation or breakdown develops from the use of themask, refer to the mask instructions for appropriate action.• The following are potential side effects of noninvasive positivepressure therapy:— Ear discomfort— Conjunctivitis— Skin abrasions due to noninvasive interfaces— Gastric distention (aerophagia)Provider Manual
82.6 INDUSTRY CANADA NOTICENOTICE: The Industry Canada Label identifies certified equipment.This certification means that the equipment meets telecommunicationsnetwork protective, operational, and safety requirements as prescribedin the appropriate Terminal Equipment Technical Requirements documents.The Department does not guarantee the equipment will operateto the user’s satisfaction.Before installing this equipment, users should make sure that it ispermissible to be connected to the facilities of the local telecommunicationscompany. The equipment must also be installed using an acceptablemethod of connection. The customer should be aware that compliancewith the above conditions may not prevent degradation of servicein some situations.Repairs to certified equipment should be coordinated by a representativedesignated by the supplier. Any repairs or alterations made by theuser to this equipment, or equipment malfunctions, may give thetelecommunications company cause to request the user to disconnectthe equipment.<strong>User</strong>s should ensure for their own protection that the electrical groundconnections of the power utility, telephone lines and internal metallicwater pipe system, if present, are connected together. The precautionmay be particularly important in rural areas.CAUTION:<strong>User</strong>s should not attempt to make such connectionsthemselves, but should contact the appropriate electricinspection authority, or electrician, as appropriate.Ringer Equivalence Number (REN): The REN assigned to each terminaldevice provides an indication of the maximum number of terminalsallowed to be connected to a telephone interface. The termination on aninterface may consist of any combination of devices subject only to therequirement that the sum of the Ringer Equivalence Numbers of all thedevices does not exceed 5.Provider Manual
9CHAPTER 3: INTRODUCTION TO THE HARMONYThis chapter contains the following information:• Definitions for common terms used throughout this manual• An overview of the <strong>Harmony</strong> device• An explanation of the symbols used on the <strong>Harmony</strong> andthroughout this manual• Contact information3.1 DEFINITIONSThe following terms appear throughout this manual:ApneaA condition marked by the cessation ofspontaneous breathing.CPAPContinuous Positive Airway PressureEPAPExpiratory Positive Airway PressureHigh Priority Alarm Alarm signal indicating a condition thatrequires immediate attentionIPAPInspiratory Positive Airway PressureLow Priority Alarm Signal indicating an information messageMedium Priority Alarm Alarm signal indicating a condition thatrequires operator awarenessOperate StateThe state of the <strong>Harmony</strong> device when theunit and the blower are both on.Standby StateThe state of the <strong>Harmony</strong> device when theunit is on, but the blower is off.OSAObstructive <strong>Sleep</strong> ApneaPatient Disconnect Alarm This event occurs when the device detects alarger circuit leak. The event terminates whenthe circuit leak returns to normal limits orwhen initiated by the user.RampA feature that may increase patient comfortwhen therapy is started. The <strong>Harmony</strong> IPAPstarts at the EPAP level and is increasedgradually (breath by breath over severalbreaths) until the IPAP prescription pressureis reached.Provider Manual
10Rise TimeRRSpontaneous (S)Spontaneous/Timed (S/T)The time it takes for the <strong>Harmony</strong> to changefrom EPAP to IPAP. You can adjust this timefor your comfort.Respiratory RateA bi-level mode which responds to both yourinhalation and exhalation by increasingpressure when you start to inhale and decreasingpressure when you start to exhale.There is no automatic delivery of a breathshould you not inhale.A bi-level mode which responds to both yourinhalation and exhalation by increasingpressure when you start to inhale and decreasingpressure when you start to exhale. Ifyou do not start inhaling within a set time, the<strong>Harmony</strong> automatically starts inhalation.When the <strong>Harmony</strong> starts inhalation, itcontrols the time of inhalation and automaticallydecreases the pressure for exhalationwithin a set time.3.2 WHAT IS THE HARMONY?The <strong>Harmony</strong>, shown in Figure 3–1, supplies air pressure through abreathing ciruit.Figure 3–1 The <strong>Harmony</strong>Provider Manual
11The circuit, shown in Figure 3–2, consists of:• Circuit tubing to deliver air from the <strong>Harmony</strong> to your interface(e.g., mask)• A mask or other interface to deliver the prescribed pressure toyour nose or nose and mouth, depending on which interface hasbeen prescribed for you• An exhalation port to vent exhaled air from the circuitPatient Interface(Typical)Exhalation Device(Typical)Exhalation Ports(one port on eachside of elbow)CircuitTubingCircuit with SeparateExhalation DeviceCircuit with Mask withIntegrated Exhalation PortsFigure 3–2 Typical Breathing CircuitsNOTE:The exhalation port may be part of the mask or may be part ofa separate exhalation device.The system senses your breathing effort and changes pressure levelswhen you inhale and exhale depending on the mode of operation.The <strong>Harmony</strong> can operate on AC or DC power. The DC power option isnot intended as a battery backup. When DC power is obtained from avehicle battery, the <strong>Harmony</strong> should not be used while the vehicle’sengine is running.Provider Manual
123.3 SYMBOLSThe symbols shown below are used on the <strong>Harmony</strong> and throughoutthis manual.SymbolMeaningAttention, consult accompanying documentsDC PowerType BF Applied PartClass II (Double Insulated)European CE Declaration of ConformityNotified Body Approvalfor Standards ComplianceCanadian/US Certification3.4 HOW TO CONTACT RESPIRONICSTo have your unit serviced, contact your home care provider. If youneed to contact Respironics directly, call 1-800-345-6443 or use thefollowing address:Provider Manual
13CHAPTER 4: HARMONY CONTROLS ANDDISPLAY FEATURESFigure 4–1 shows the location of the <strong>Harmony</strong>’s control panel, PressureOn/Off button, and breathing circuit connection.Control PanelBreathing CircuitConnectionPressure On/OffButtonFigure 4–1 <strong>Harmony</strong> Front and Top4.1 PRESSURE ON/OFF BUTTONThe <strong>Harmony</strong>’s Pressure On/Off button, located on the side of the unit,starts and stops the unit’s airflow. Press the button in to turn the airflowon. This puts the <strong>Harmony</strong> in the Operate state. Depress the button toturn the airflow off and put the <strong>Harmony</strong> in the Standby state.When the <strong>Harmony</strong> is in Standby, any ramp in progress is terminated,the alarms are reset (except for the System Errors alarm), and thehumidifier is turned off.The Pressure On/Off button is independent of the display screen.4.2 HARMONY CONTROL PANELThe control panel contains the following control keys and indicators.Provider Manual
144.2.1 CONTROL KEYSThe control keys on the control panel are shown in Figure 4–2.DisplayScreenHeatedHumidifierButtonHEATRAMPRampButton<strong>User</strong>ButtonsRESETSILENCEAlarmSilenceButtonAlarmResetButtonFigure 4–2 <strong>Harmony</strong> Control PanelHEATRAMPUSERSILENCERESETWhen the optional REMstar or H2 heated humidifier isprescribed, this button controls the humidifier’s output.Follow the instructions provided with the humidifier.When a humidifier is not in use, this button can be usedto adjust the parameters shown in the user menuscreens.When the airflow is turned on, this button lowers theairflow pressure, allowing you to fall asleep more easily.When the airflow is turned off, this button can be usedto adjust the parameters shown in the user menuscreens.The left and right user buttons allow you to navigate thedisplay screens.This button silences the audible portion of an alarm forone minute.This button allows you to clear an alarm and reset thedevice for alarm detection.Provider Manual
15NOTE:If the display backlight is off, the first press of a control keyturns the backlight on and does nothing else. The normal keyaction is suppressed until you press the key a second time.The instructions in this manual assume that the backlight isalready on.4.2.2 ALARM AND POWER INDICATORSFigure 4–3 shows the <strong>Harmony</strong>’s alarm and power indicators.AC PowerIndicatorHigh PriorityAlarm LED (RED)AC PowerDC PowerALARMSDC PowerIndicatorLow/Medium PriorityAlarm LED (Yellow)Figure 4–3 <strong>Harmony</strong> Alarm and Power IndicatorsAC Power IndicatorDC Power IndicatorRed Alarm IndicatorYellow Alarm IndicatorThis green LED lights up when the <strong>Harmony</strong>is connected to AC Power.This green LED lights up when the <strong>Harmony</strong>is connected to DC power.The red LED lights up when a high priorityalarm occurs.This yellow LED lights up when a medium orlow priority alarm occurs.NOTE: All LED indicators turn on during the System Self Test screen.4.2.3 DISPLAY SCREENThe display shows you the current pressure control settings and displaysalarm messages. A backlight activates when the <strong>User</strong> buttons arepressed and remains on until there are no keystrokes for one minute.Provider Manual
16Figure 4–4 shows the <strong>Harmony</strong> display screen.Figure 4–4 <strong>Harmony</strong> Display ScreenThe information shown on the display screen is defined as follows:ALARMALERTAPNEABPMCARDCPAPcm H 2OEPAPERASEFLEXFOSQIndicates that the device requires user attentionas indicated on the screen.Indicates that the device requires user attentionas indicated on the screen. Not used for<strong>Harmony</strong> devices.Indicates that an apnea alarm has occurred orits setting is being displayed.Indicates that a breath rate setting is beingdisplayed.Indicates that a SmartCard is inserted anddetected.Indicates that the <strong>Harmony</strong> is in the ContinuousPositive Airway Pressure (CPAP) mode.Indicates that the alphanumeric digits aredisplaying a pressure valve.Indicates that an EPAP pressure setting isbeing displayed.Indicates that the user may clear the compliancedata.Indicates that a C-Flex or Bi-Flex comfortsetting is being displayed.Indicates that the FOSQ test is active. Notused for <strong>Harmony</strong> devices.Provider Manual
17HEATHOURSINSP. TIMEIPAPLIGHTNIGHTSPATIENTPCRAMPRAMP STARTRATERISE TIMESSETUPS/TIndicates that the humidifier is turned onand/or its setting is displayed.Indicates that the Therapy Hour Meter isbeing displayed.Indicates that the inspiratory time setting isbeing displayed.Indicates that an IPAP pressure setting isbeing displayed.Indicates that the keypad LED backlightsetting is being displayed or is active.Indicates that the session counter is beingdisplayed. Not used for <strong>Harmony</strong> devices.Indicates that a Patient Disconnect alarm isactive or its setting is being displayed.Indicates the Pressure Control mode. Notused for <strong>Harmony</strong> devices.Indicates that the Ramp function is inprogress, or during Provider mode, that theRamp length is being displayed.Indicates that the Ramp Starting Pressure isbeing displayed.Used in conjunction with the BPM.Indicates that a rise time setting is beingdisplayed.Indicates that the alphanumeric digits aredisplaying a time value.Indicates that the device is in Provider modeand not in <strong>User</strong> or Diagnostic mode.Indicates that the <strong>Harmony</strong> is in the Spontaneousmode if only the S appears, or theSpontaneous/Timed mode if the S/T appears.Provider Manual
184.2.4 BREATHING CIRCUIT CONNECTIONFigure 4–5 shows where the circuit tubing connects to the <strong>Harmony</strong>.Patient Interface(Typical)Exhalation Port(Typical)CircuitTubingBacteriaFilter(Optional)PatientInterfacePortFigure 4–5 Breathing Circuit Connection4.2.5 REAR PANELFigure 4–6 shows the <strong>Harmony</strong>’s rear panel.Communications PortDC InletSmartCardConnectorFilter CapFigure 4–6 Rear PanelNOTE:The SmartCard Connector is located on the side of the <strong>Harmony</strong>.Provider Manual
19The rear panel contains the following:RS-232 CommunicationsConnectorDC InletsFilter CapThis connector accepts the RespironicsCommunications cable for computer andexternal modem communication.There are two DC inlets on the rear panel,one for connecting the external AC powersupply and another for battery operationusing an external DC power supply.The filter cap can be removed to inspect theinlet air filters.Provider Manual
20CHAPTER 5: SETTING UP THE HARMONYThis chapter provides instructions on how to:• Install the air filters• Position the <strong>Harmony</strong> unit• Connect the breathing circuit• Plug the <strong>Harmony</strong> in using AC or DC power5.1 INSTALLING THE AIR FILTERSCAUTION:A properly installed, undamaged foam filter is requiredfor proper operation.The <strong>Harmony</strong> uses a gray foam filter that is washable and reusable, andan optional white, ultra-fine filter that is disposable. One filter of eachkind is supplied with the <strong>Harmony</strong>.If your home care provider did not install the inlet air filters, you mustinstall at least the gray foam filter before using the <strong>Harmony</strong>.1. Place the gray foam filter on top of the ultra-fine filter (if using theultra-fine filter).2. Slide the filters into the air inlet at the rear of the <strong>Harmony</strong>, and pushthem down into the recess as shown in Figure 5-1.Reusable GrayFoam FilterFilterCapDisposable Ultra-fineFilterFigure 5–1 Installing the Filters3. Attach the filter cap as shown in Figure 5–2. Position the cap so thatthe small opening on the cap is facing down. Insert the caps bottomtabs into the openings below the filter area. Snap the cap into place.Provider Manual
21Figure 5–2 Attaching the Filter CapNOTE:The filter cap should be installed with the air inlet opening atthe bottom.See Chapter 8 to clean or replace the filters.5.2 WHERE TO PLACE THE HARMONYPlace the <strong>Harmony</strong> on its base somewhere within easy reach of whereyou will use it. Make sure that the air inlet on the rear of the unit is notblocked. Place the unit on a hard, flat surface. If you block the air flowaround the unit, the <strong>Harmony</strong> may not work properly.If you are using a humidifier, place the humidifier and unit on aplacemat or other waterproof material to protect your furniture frommoisture. Position the humidifier so the water level is lower than youand the humidifier is on the same level or lower than the <strong>Harmony</strong>. Seethe humidifier instructions for complete setup information.5.3 CONNECTING THE BREATHING CIRCUITTo connect your breathing circuit to the <strong>Harmony</strong>, complete the followingsteps:1. Connect one end of the circuit tubing to the outlet of the bacteriafilter (if using one) and connect the inlet of the bacteria filter to thelarge connector on the <strong>Harmony</strong> as shown in Figure 5–3.If you are not using a bacteria filter, connect the end of the circuittubing directly to the outlet connector on the <strong>Harmony</strong>.Provider Manual
22NOTE:Follow the recommendations of your home care provider forusing the optional bacteria filter.CircuitTubingBacteriaFilter(Optional)Figure 5–3 Connecting the Tubing to the Outlet2. Connect the open end of the circuit tubing to the exhalation port asshown in Figure 5–4. If you are using a mask that has the exhalationport built into the mask, connect the tubing directly to the mask andskip to Step 4.ExhalationPortCircuitTubingFigure 5–4 Connecting the Tubing to the Exhalation PortWARNING: The exhalation device or exhalation port is designed toexhaust CO 2from the patient circuit. Do not block or sealthe ports on the exhalation device.Provider Manual
233. Connect the exhalation port to the mask connector as shown inFigure 5–5.Mask or OtherInterfaceMask ConnectorExhalation PortFigure 5–5 Connecting the Mask4. Attach the headgear to the mask. See the instructions that came withyour headgear.5.4 COMPLETE HARMONY SETUPFigure 5–6 shows the completed breathing circuit setup for the <strong>Harmony</strong>.Patient Interface(Typical)Exhalation Port(Typical)CircuitTubingBacteriaFilter(Optional)Figure 5–6 Complete <strong>Harmony</strong> Breathing CircuitProvider Manual
245.5 PLUGGING THE HARMONY INYou can use AC power or DC power to operate the <strong>Harmony</strong>.WARNING:The DC power option is not intended as a battery backupwhen using AC power.5.5.1 USING AC POWERComplete the following steps to operate the <strong>Harmony</strong> using AC power:1. Plug the pronged end of the AC power supply’s cord into an electricaloutlet.WARNING:Never plug the <strong>Harmony</strong> AC power supply into an outletthat is controlled by a wall switch.2. Leaving a small amount of slack in the cord, connect the cord on theother side of the power supply to the AC inlet on the <strong>Harmony</strong>, asshown in Figure 5–7.NOTE:The external AC power supply features an AC cord retainer toprovide strain relief for the AC power cord.Figure 5–7 Plugging in the AC Power Supply5.5.2 USING DC POWERComplete the following steps to operate the <strong>Harmony</strong> using DC power:CAUTION:Only use a Respironics-supplied DC boost converter.Provider Manual
251. Plug the DC boost converter into the rear of the <strong>Harmony</strong>, as shownin Figure 5–8.2. Leaving a small amount of slack in the cord, press the cord into theDC cord retainer.3. Connect the DC cord to the appropriate DC source. See the instructionsthat came with the DC boost converter for proper DC connections.CAUTION:When DC power is obtained from a vehicle battery, the<strong>Harmony</strong> should not be used while the vehicle’s engine isrunning. Damage to the vehicle may occur.DC Power SourceFigure 5–8 Plugging in the DC Boost ConverterProvider Manual
26CHAPTER 6: OPERATING THE HARMONYThis chapter explains how to start the <strong>Harmony</strong> and change the devicesettings.6.1 STARTING THE HARMONY1. Plug the <strong>Harmony</strong> in to power up the unit. The <strong>Harmony</strong> sounds aconfirmation alarm and the keypad buttons light up.NOTE:If the alarm does not sound or the buttons do not light up, the<strong>Harmony</strong> requires servicing. Contact your home care provider.Several screens appear initially during this step:a. The first screen that appears is the Self Test screen, shown inFigure 6–1. This is the internal test performed by the <strong>Harmony</strong>.Figure 6–1 Self Test Screenb. The next screen displays the software version, as shown inFigure 6–2:Figure 6–2 Software Version ScreenProvider Manual
27c. The third screen to appear is the Blower Hours screen, whichdisplays the blower hours time meter:Figure 6–3 Blower Hours ScreenNOTE:With the exception of the Pressure On/Off button, the keypadis inactive during these first three screens. Each of these firstthree screens appears for approximately 1-3 seconds.d. The next screen that appears is the Standby screen, shown inFigure 6–4. This indicates that the <strong>Harmony</strong> is in the Standbystate.Figure 6–4 Standby Screen2. Press the Pressure On/Off button to put the unit into the Operatestate. The Monitoring screen, shown in Figure 6–5, appears.Figure 6–5 Monitoring ScreenThe Monitoring screen displays the actual measured pressure alongwith the appropriate icons.Provider Manual
283. Put on your mask assembly when the air starts to flow.4. Make sure that no air is leaking from your mask into your eyes. If itis, adjust the mask and headgear until air stops leaking into youreyes. See the instructions that came with your mask for more information.5. If you are using the <strong>Harmony</strong> while sleeping, try placing the tubingfrom the <strong>Harmony</strong> over your headboard. This may reduce tensionon the mask.NOTE:A small amount of mask leak is normal and acceptable.Correct large mask leaks or eye irritation from an air leak assoon as possible.6. Relax. Take normal, relaxed breaths through your nose.NOTE: If you are having trouble with your mask, see Chapter 7,Troubleshooting, for some suggestions.6.2 CHANGING THE DEVICE SETTINGSYou can view the following settings on the <strong>Harmony</strong> display screen:• Measured pressure• Mode• SmartCard• Breath Rate• Patient alarmsAdditionally, you can view and modify the following settings using thedisplay screens:• Humidifier• Flex• Rise Time• Ramp start pressure• LED backlightProvider Manual
29NOTE:If the display backlight is off, the first press of any key turnsthe backlight on. Normal key function is suppressed until thekey is pressed a second time.NOTE:When changing any setting (except for the Ramp Start Pressuresetting), once a maximum setting is reached, the settingrolls back over to the minimum setting, and likewise, once aminimum setting is reached, it rolls back over to the maximumsetting provided.For example, the minimum Flex setting is 1 and the maximumis 3. Once the Flex setting is increased to 3, if you press theHeat key again, the setting will go back at 1. Or, once the Flexsetting is decreased to 1, if you press the Ramp key again, thesetting will go back to 3.6.2.1 CHANGING THE HUMIDIFIER SETTINGIf you are using an optional REMstar or H2 heated humidifier with your<strong>Harmony</strong>, you can adjust the humidifier heat setting by completing thefollowing steps:1. From either the Standby or Monitoring screen, press and hold theHeat key for approximately 4 seconds. The Humidifier Setting screenappears, as shown in Figure 6–6.Figure 6–6 Humidifier Setting Screen2. Press the Heat key to increase the humidifier setting, or press theRamp key to decrease the setting. You can adjust the setting from 1to 5. The change takes effect immediately as you adjust the setting.For additional information on using a humidifier wit the <strong>Harmony</strong>,see Chapter 9.Provider Manual
306.2.2 NAVIGATING THE USER DISPLAY SCREENSYou can navigate the rest of the user display screens by pressing the Leftand Right <strong>User</strong> keys.You can change the settings on any of the display screens by pressingthe Heat and Ramp keys to increase or decrease the setting.Figure 6–7 shows how to navigate the user display screens.Flex Parameter ScreenOnly displayed if the Flex settingis not equal to zero.Right <strong>User</strong>KeyLeft <strong>User</strong>KeyRise Time Parameter ScreenOnly displayed if the Flex setting is equalto zero and the Mode setting is NOT set to CPAP.Right <strong>User</strong>KeyLeft <strong>User</strong>KeyRamp Start Pressure Parameter ScreenOnly displayed if the Ramp Lengthsetting is greater than zero.Right <strong>User</strong>KeyLeft <strong>User</strong>KeyLED Backlight Parameter ScreenFigure 6–7 Navigating the <strong>User</strong> Display ScreensProvider Manual
316.2.2.1 CHANGING THE FLEX SETTINGThe Flex setting allows you to adjust the level of air pressure relief thatyou feel when you exhale during therapy.NOTE:The Flex feature is not prescribed for all users. If the screenshown in Figure 6–8 does not appear on your display, youcannot adjust this setting.To change the Flex setting, complete the following steps:1. From the Monitoring screen, press the Right <strong>User</strong> key. The FlexSetting screen appears, as shown in Figure 6–8.Figure 6–8 Flex Setting Screen2. To increase or decrease the Flex setting, press the Heat or Ramp keyuntil the correct setting appears. You can choose from 1 to 3.NOTE:It is recommended that you start with the minimum setting of1, which provides the least relief. Levels 2 and 3 progressivelyincrease the pressure relief.6.2.2.2 CHANGING THE RISE TIME SETTINGRise time is the time it takes for the <strong>Harmony</strong> to change from IPAP toEPAP. You can adjust the rise time to find the setting that provides youwith the most comfort.NOTE:The rise time feature is not prescribed for all users. If thescreen shown in Figure 6–9 does not display, you cannotadjust this setting.Provider Manual
32To change the rise time setting, complete the following steps:1. From the Monitoring screen, press the Right <strong>User</strong> key. The Rise TimeSetting screen appears, as shown in Figure 6–9.Figure 6–9 Rise Time Setting Screen2. <strong>Inc</strong>rease or decrease the rise time setting from 1 to 6 by pressing theHeat or Ramp key until you find the right setting. A setting of 1 isthe fastest rise time, while 6 is the slowest.NOTE:When the <strong>Harmony</strong> is in Bi-Flex mode, it will use a rise timeof 3 regardless of the chosen setting.6.2.2.3 CHANGING THE RAMP STARTING PRESSUREThe <strong>Harmony</strong> is equipped with an optional ramp feature that yourhome care provider can turn on or off. This feature will reduce thepressure and then gradually increase (ramp) the pressure to the prescriptionpressure setting so you can fall asleep more comfortably.NOTE:The ramp feature is not prescribed for all users. If the screenshown in Figure 6–10 does not appear on your display, youcannot adjust this setting.If your physician prescribed ramp for you, complete the following steps:1. From the Monitoring screen, press the Right <strong>User</strong> key until theRamp Start Setting screen appears, as shown in Figure 6–10.Provider Manual
33Figure 6–10 Ramp Start Setting Screen2. Press the Heat or Ramp key to increase or decrease the ramp startingpressure as needed. You can adjust the setting from 4.0 cm H 2O tothe EPAP or CPAP setting.6.2.2.4 CHANGING THE LED BACKLIGHT SETTINGWhen airflow is turned on and the <strong>Harmony</strong> is in the Operate state, youcan turn the keypad lighting behind the buttons on or off using the LEDbacklight setting.NOTE:The lights are always on when the airflow is off and the unit isin Standby.To change the LED backlight setting, complete the following steps:1. From the Monitoring screen, press the Right <strong>User</strong> button until theLED Backlight Setting screen appears, as shown in Figure 6–11.Figure 6–11 LED Backlight Setting Screen2. Press the Heat or Ramp key to select a new setting. A setting of 1means the light is on, while 0 means the light is off.Provider Manual
34CHAPTER 7: HARMONY ALARMSThis chapter describes the <strong>Harmony</strong> alarms and what you should do ifan alarm occurs.7.1 INTRODUCTION TO ALARMSThe <strong>Harmony</strong> provides three alarm levels: high, medium, and lowpriority.High PriorityMedium PriorityThese alarms require immediate response.The alarm signal consists of a red LEDindicator and a sound that is either continuousor a pattern of three beeps, a pause, andthen two more beeps. The display has themessage ALARM at the top of the screen.These alarms require prompt response. Thealarm signal consists of a yellow LED and asound that repeats a pattern of three beeps.The display has the message ALARM at thetop of the screen.Low PriorityThese alarms require your awareness. Thealarm signal consists of a yellow LED and asound that repeats a pattern of two beeps. Thedisplay has the message ALARM at the top ofthe screen.Some audible alarms are self-cancellable. This means that the alarmsound stops when the cause of the alarm is corrected.The alarm LED indicators are located on the right side of the keypad, asshown in Figure 7–1.High PriorityAlarm LED (RED)AC PowerDC PowerALARMSLow/Medium PriorityAlarm LED (Yellow)Figure 7–1 Alarm LED IndicatorsProvider Manual
35In addition to the alarm LED indicators, the keypad also contains alarmReset and Silence buttons, as shown in Figure 7–2.HEATRAMPRESETSILENCEAlarmSilenceButtonAlarmResetButtonFigure 7–2 Alarm Buttons7.2 WHAT TO DO WHEN AN ALARM OCCURSThe following example applies to most alarm conditions. Follow thesesteps unless otherwise directed by the alarm tables that follow.1. Look at the alarm indicators and listen to the alarm sound.Alarm IndicatorIlluminatesAC PowerDC PowerALARMSFigure 7–3 Alarm Indicator IlluminatesNote the color of the LED and whether the LED is solid or flashing.Provider Manual
362. Look at the display for text.Figure 7–4 Sample Alarm DisplayThe word ALARM appears at the top of the screen to indicate analarm. Additional codes and icons may also appear depending onthe type of alarm.3. Press the Silence key to temporarily silence the alarm (for oneminute).4. Look up the alarm in the alarm tables in Section 7.3 and perform theaction specified.5. Press the Reset key to clear the alarm.The alarm is cleared and the display returns to the screen that wasshowing at the time of the alarm.Provider Manual
377.3 ALARM TABLESThe following tables summarize the high priority, medium priority, andlow priority alarms.AlarmLEDAlarmSoundDisplayMessage<strong>Harmony</strong>ActionPossibleCauseYourActionRed Flash• • • • •ALARM andPATIENTwordsflashOperatesBreathing circuit isdisconnected or hasa large leak.Reconnect the circuitor fix the leak.Red Flash• • • • • ALARMand APNEAwords flashOperatesAn apnea eventoccurred duringtherapy.Report the alarm toyour home careprovider.Red Flash• • • • •orALARMflashes andan errorcodedisplaysRed Flash• • • • •ALARMandcmH 2 OflashShuts down.Blower cannotbe restarted.Operates<strong>Harmony</strong> failureExcessive leakor blockage;malfunctioning unit.Cannot be silenced.Remove power fromthe unit and contactyour home careprovider.Check for thefollowing: dirty inletfilters, blocked airintake, excessive leakin the circuit. If thealarm continues, callyour home careprovider.Red SolidBlankscreenShuts downBattery is discharged.-or-Remove DC powersource from the unit,replace the battery,restore power to theunit; or seek a reliableAC power source.Power was lostwhile the unit wasproviding therapy.Press the Pressure On/Off button to silencethe alarm, turn off thered LED, and restorepower.Provider Manual
387.3.2 MEDIUM PRIORITY ALARMSAlarmLEDAlarmSoundDisplayMessage<strong>Harmony</strong>ActionPossibleCauseYourActionYellow Flash • • •DC PowerLEDFlashesOperatesBattery nearlydischarged.Replace the battery.7.3.3 LOW PRIORITY ALARMSAlarmLEDAlarmSoundDisplayMessage<strong>Harmony</strong>ActionPossibleCauseYourActionYellow Solid• •CARDflashes andcard errorcode (Cxx)displaysOperatesThere is a problemwith the SmartCardinserted in theSmartCardconnectivity slot.Remove the SmartCardfrom the device andcontact your homecare provider.Yellow Solid• •ALARM,CARD, andcmH 2Oflash andLCD lightis onOperatesThe SmartCardstorage capacityis reached.Remove the SmartCardfrom the device andcontact your homecare provider.Yellow Solid• •DC powerLED flashesBlank screenOperates<strong>Harmony</strong> lost ACpower and is nowoperating on DCpower.Check AC power andseek reliable powersource.At start-up only,alarm notifies youthat a battery isbeing usedto provide power.Provide AC power ifyou do not want to usea battery; otherwise,no action needed.Provider Manual
39CHAPTER 8: TROUBLESHOOTINGThis chapter describes problems that you may experience with your<strong>Harmony</strong> or mask and presents possible solutions.Problem Why It Happened What To DoDoes not operatewhen you pressthePressure On/Off button.The air out ofthe mask ismuch warmerthan usual.The mask feelsuncomfortableto wear.If the power LED is off,no power at the outlet orthe <strong>Harmony</strong> is unplugged.If the power LED is on,problems in the <strong>Harmony</strong>.The inlet filters maybe dirty.The <strong>Harmony</strong> may beoperating in directsunlight or near a heater.This could be due toimproper headgearadjustment or impropermask fitting.Check the outletpower and verifythat the <strong>Harmony</strong>is plugged in.Clean or replace theinlet air filters asdescribed in Chapter9. If the <strong>Harmony</strong> isin direct sunlight ornear a heater, move it.If the problempersists, contact yourhome care provider.Check the headgearadjustment asdescribed in theheadgear instructions.Contact your homecare provider for arefitting or adifferent size mask.There is significantair leakage aroundthe mask.This could be due toimproper headgearadjustment or impropermask fitting.Check the headgearadjustment asdescribed in theheadgear instructions.Contact your homecare provider for arefitting or adifferent size mask.Provider Manual
40Problem Why It Happened What To DoRedness occurswhen the maskcushion comes incontact with theskin.This could be due toimproper mask fitting orimproper mask cleaning.Contact your homecare provider for arefitting or adifferent size mask.Be sure to rinse themask thoroughlyafter cleaning toremove residue. Seethe mask cleaninginstructions.Redness occurswhen the maskcushion accessorycomes in contactwith the skin.Sore or dry eyes.Runny nose.Irritation or allergicreaction to the maskmaterial.The mask may not bepositioned correctly, orthe mask is not properlyfitted.Nasal reaction to theair flow.Use a barrierbetween your skinand the mask, suchas 3M’s Microfoam ®or Squibb’sDuoderm ® .Check the headgearadjustment asdescribed in theheadgear instructions.Contact your homecare provider for arefitting or adifferent size mask.Call your doctor.Provider Manual
41CHAPTER 9: CLEANING AND MAINTENANCEThis chapter provides information on how to clean and maintain your<strong>Harmony</strong> system.9.1 CLEANING THE HARMONYBefore cleaning or performing any routine maintenance, always makesure the <strong>Harmony</strong> is not operating and disconnect the <strong>Harmony</strong> fromthe power source.NOTE:The following cleaning instructions are for the <strong>Harmony</strong> only.To clean the accessories, refer to each accessory’s instructionsheet.CAUTION:Do not immerse the <strong>Harmony</strong> or allow any liquid to enterthe enclosure, inlet filter, or any openings.Clean the front panel and exterior of the enclosure as needed using acloth dampened with water and a mild detergent. Allow the <strong>Harmony</strong>to dry completely before plugging in the power cord.Gently wash the reusable circuit tubing in a solution of warm water anda mild detergent. Rinse thoroughly and allow to air dry.9.2 CLEANING OR REPLACING THE INLET FILTERSThe <strong>Harmony</strong> has two removable filters at the air inlet. The gray foamfilter is washable and reusable. The optional white, ultra-fine filter isdisposable.NOTE:Dirty inlet filters may cause high operating temperatures andmay affect <strong>Harmony</strong> performance. Regularly examine the inletfilters as needed for integrity and cleanliness.1. Make sure the <strong>Harmony</strong> is not operating, and disconnect the powercord from the wall outlet.2. As shown in Figure 9–1, remove the filter cap by gently pressingdown on the top panel and pulling the cap out from <strong>Harmony</strong>’sbody.Provider Manual
42Figure 9–1 Removing the Filter3. Remove the filters from the enclosure as shown in Figure 9–2. Thetop filter is the reusable gray foam filter. The bottom filter is theoptional disposable, white, ultra-fine filter.Reusable GrayFoam FilterDisposable Ultra-fineFilterFigure 9–2 Removing the Air Filters4. Check the filters to see if they are dirty or torn.5. If needed, wash the foam filter in warm water and a mild detergent.Rinse the filter thoroughly to remove all detergent residue. Allow thefilter to completely dry before reinstalling it. If the foam filter is torn,replace it.6. If the ultra-fine filter is dirty or torn, replace it.7. Reinstall the filters, with the ultra-fine filter on the bottom. Slide thefilters into the air inlet at the rear of the <strong>Harmony</strong> and push themdown into the recess.Provider Manual
438. Replace the filter cap.Contact your home care provider to order filters.NOTE:To clean the breathing circuit accessories, refer to eachaccessory’s instruction sheet.Provider Manual
44CHAPTER 10: ACCESSORIESThere are several accessories you can use with the <strong>Harmony</strong>.10.1 ADDING A HUMIDIFIERThe REMstar Heated Humidifier, REMstar Pass-over Humidifier, andH2 Heated Humidifier are available from your home care provider. Thehumidifiers may reduce nasal dryness and irritation by adding moisture(and heat, if applicable) to the airflow.CAUTION:For safe operation, the humidifier must always be positionedbelow the circuit connection at the mask and the airoutlet on the <strong>Harmony</strong>. The humidifier must be level forproper operation.Refer to the humidifier instructions for complete information on how toset up your humidifier.10.2 ADDING OXYGEN TO THE HARMONYOxygen may be added to the mask connection. Please note the warningslisted below when using oxygen with the <strong>Harmony</strong>.WARNING:If you are using oxygen, your <strong>Harmony</strong> must be equippedwith the Respironics Pressure Valve (Part number 302418).Failure to use the Pressure Valve could result in a firehazard.WARNING:Oxygen supports combustion. Oxygen should not be usedwhile smoking or in the presence of an open flame.WARNING:When using oxygen with your <strong>Harmony</strong>, the oxygensupply must comply with the local regulations for medicaloxygen.WARNING:When using oxygen with this system, turn the <strong>Harmony</strong>on before turning the oxygen on. Turn the oxygen offbefore turning the <strong>Harmony</strong> off. This will prevent oxygenaccumulation in the device.Provider Manual
45CHAPTER 11: SPECIFICATIONSENVIRONMENTALOperatingStorageTemperature 5ºC to 35 ºC -20ºC to 60ºCRelative Humidity 15 to 95% 15 to 95%(non-condensing) (non-condensing)Atmospheric Pressure(5600 feet to sea level)83 to 102kPaPHYSICALDimensions:4.4” HWeight:9.75” L x 6.625” W xApproximately 4.1 lbELECTRICALAC Voltage:DC Voltage:AC Current:DC Current:Protection against electric shock:Degree of protection against electric shock:Degree of protection againstharmful ingress of water:100 to 240 V, 50/60 Hz12 V (when operatedwith the external DCpower supply)1.25 A maximum3.0 A maximumClass IIType BF Applied Part<strong>Harmony</strong> unit:Ordinary Equipment,IPX0AC Power Supply:Ordinary Equipment,IPX1DC Boost Converter:Ordinary Equipment,IPX1Provider Manual
46Modes of Operation:Electromagnetic Compatibility:Fuses:ContinuousThe <strong>Harmony</strong> meets therequirements ofEN 60601-1-2.There are no userreplaceablefuses.PRESSUREOutput:4 to 30 cm H 2OCONTROL ACCURACYParameter Range AccuracyIPAP 4 to 30 cm H 2O ± 2.5 cm H 2O*EPAP 4 to 25 cm H 2O ± 2.5 cm H 2O*CPAP 4 to 20 cm H 2O ± 2.5 cm H 2O*Breath Rate 0 to 30 BPM Greater of ± 1BPM or ± 10%of the settingTimed Inspiration 0.5 to 3.0 seconds ± 10% of thesettingRamp Duration 0 to 45 minutes ± 10% of thesettingRise Time 1 to 6** ± 25%** Measured at the patient end of circuit with a Whisper Swivel IIexhalation port and no patient flow. Dynamic pressure accuracy is ±5 cm H 2O measured at the patient end of the circuit with a WhisperSwivel II and varying flow conditions.** The range of values correspond to hundreds of milliseconds (e.g., asetting of 4 indicates a Rise Time of .4 seconds).Provider Manual
47LIMITED WARRANTYRespironics, <strong>Inc</strong>. warrants that the <strong>BiPAP</strong> <strong>Harmony</strong> system shall be freefrom defects of workmanship and materials and will perform in accordancewith the product specifications for a period of two (2) years fromthe date of sale by Respironics, <strong>Inc</strong>. to the dealer. If the product fails toperform in accordance with the product specifications, Respironics, <strong>Inc</strong>.will repair or replace – at its option – the defective material or part.Respironics, <strong>Inc</strong>. will pay customary freight charges from Respironics,<strong>Inc</strong>. to the dealer location only. This warranty does not cover damagecaused by accident, misuse, abuse, alteration, and other defects notrelated to material or workmanship.Respironics, <strong>Inc</strong>. disclaims all liability for economic loss, loss of profits,overhead, or consequential damages which may be claimed to arisefrom any sale or use of this product. Some states do not allow theexclusion or limitation of incidental or consequential damages, so theabove limitation or exclusion may not apply to you.This warranty is given in lieu of all other express warranties. In addition,any implied warranties – including any warranty of merchantabilityor fitness for the particular purpose – are limited to one year. Somestates do not allow limitations on how long an implied warranty lasts,so the above limitation may not apply to you. This warranty gives youspecific legal rights, and you may also have other rights which varyfrom state to state.To exercise your rights under this warranty, contact your local autorizedRespironics, <strong>Inc</strong>. dealer or contact Respironics, <strong>Inc</strong>. at:1001 Murry Ridge LaneMurrysville, Pennsylvania 15668-85501-412-387-4000Provider Manual
48IndexProvider Manual
1012892JH 3/14/03