Respironics EverGo Manual - ActiveForever
Respironics EverGo Manual - ActiveForever
Respironics EverGo Manual - ActiveForever
- No tags were found...
You also want an ePaper? Increase the reach of your titles
YUMPU automatically turns print PDFs into web optimized ePapers that Google loves.
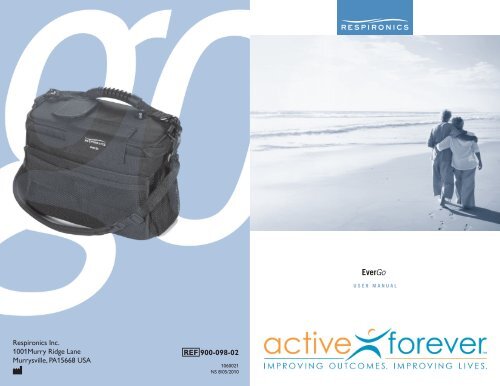
<strong>Respironics</strong> Inc.1001Murry Ridge LaneMurrysville, PA15668 USAREF 900-098-021060021NS 8/05/2010
Ta b l e o f Co n t e n t sIntroduction 1Intended Use1Contraindications1Description1<strong>EverGo</strong> System 2Warnings and Cautions3Symbol Key6How to Contact <strong>Respironics</strong>6Getting Started 7Battery Duration Times7Inserting the Battery(s)8Charging the Battery(s) with AC Power Supply10Operating the <strong>EverGo</strong> Device11Getting Started13Operating the Touch Screen15Alarm Indicators and Screen Symbols19Troubleshooting24Caring for your Battery(s) 25Battery Storage25Caring for your <strong>EverGo</strong> Device 26Cleaning the Air Inlet Filter26Cleaning the Carrying Case27Device Storage27Device Disposal27Traveling With Your System28Specifications31EMC Information33Limited Warranty35© 2010 Koninklijke Philips Electronics N.V. All rights reserved.www.<strong>ActiveForever</strong>.com
www.<strong>ActiveForever</strong>.com
<strong>EverGo</strong> User <strong>Manual</strong>In t r o d u c t i o nIntended UseThe <strong>EverGo</strong> Portable Oxygen Concentrator is intended for prescription use bypatients requiring high concentrations of oxygen on a supplemental basis. Itis small, portable and is capable of continuous use in home, institutional, andtravel / mobile environments.Contraindications• This device is not intended to be life-sustaining or life-supporting.• This device is not intended for use with humidifiers.• This device is not intended for pediatric use.DescriptionThe <strong>EverGo</strong> Portable Oxygen Concentrator, its features, and its accessories aredescribed in detail in this manual. Read and understand it completely beforeoperating the device.This manual applies to the following products:• <strong>EverGo</strong> Portable Oxygen Concentrator Device in Carrying Case*• Power Supply• AC Power Cord• DC Power Cord• Rechargeable Lithium Ion Battery• Air Inlet Filter• Accessory Bag* Warning: Do not attempt to remove the <strong>EverGo</strong> carrying case unlessinstructed to do so by airport security officials during air travel. Do notattempt to operate the <strong>EverGo</strong> without the carrying case. The <strong>EverGo</strong>cannot be operated safely without it. See the Traveling section in thismanual for more information.For the mobile cart, see the instruction sheet that is packaged with it.This manual does not apply to the following accessory items sold separately:• Standard Single Lumen Nasal Cannula• <strong>EverGo</strong> Smart Battery Charger/Recalibratorwww.<strong>ActiveForever</strong>.com1
<strong>EverGo</strong> User <strong>Manual</strong><strong>EverGo</strong> SystemThe device comes with the following items. If any are missing, contact yourequipment provider.• <strong>EverGo</strong> Device in Carrying Casewith Detachable Handle andShoulder Strap• This User <strong>Manual</strong>• Rechargeable Batteries (1 or 2)• Air Inlet Filters (2)(located in zippered pouch on side of bag)• AC Power Supply and Cord• DC Power Cord• Accessory Bag• Mobile Cart (optional)2www.<strong>ActiveForever</strong>.com
<strong>EverGo</strong> User <strong>Manual</strong>Warnings and CautionsCaution! U.S. federal law restricts this device to sale by or on the order of aphysician.WarningsA warning represents the possibility of harm to the operator or patient.• The operator should read and understand this entire manual beforeusing the device.• The device is not intended for life support. Where the prescribinghealth care professional has determined that an interruption in thesupply of oxygen, for any reason, may have serious consequences to theuser, an alternate source of oxygen should be available for immediateuse.• Geriatric or any other patient unable to communicate discomfort, orhear or see the alarms while using this device, may require additionalmonitoring.• Oxygen supports combustion. Oxygen should not be used whilesmoking or in the presence of an open flame.• Do not use the device in the presence of a flammable anaestheticmixture in combination with oxygen or air, or in the presence ofnitrous oxide.• Do not use oil or grease on the concentrator or its components asthese substances, when combined with oxygen, can greatly increase thepotential for a fire hazard and personal injury.• If you notice any of the following, discontinue use and contact yourhomecare provider:- unexplained changes in the performance of this device- unusual or harsh sounds- dropped or mishandled device or the power supply- water spilled into the enclosure- broken enclosure• Use only with a Philips <strong>Respironics</strong> <strong>EverGo</strong> power supply.• Use only with Philips <strong>Respironics</strong> <strong>EverGo</strong> batteries.• Use only approved <strong>EverGo</strong> accessories.www.<strong>ActiveForever</strong>.com3
<strong>EverGo</strong> User <strong>Manual</strong>Warnings (continued)• Repairs and adjustments must be performed by Philips <strong>Respironics</strong>authorized service personnel only. Unauthorized service could causeinjury, invalidate the warranty, or result in costly damage.• Periodically inspect electrical cords, cables, and the power supply fordamage or signs of wear. Discontinue use and replace if damaged.• To avoid electric shock, unplug the device and remove the battery(s)before cleaning the bag. DO NOT immerse the device in any fluids.• Your homecare provider is responsible for performing appropriatepreventive maintenance at the intervals recommended by Philips<strong>Respironics</strong>.• For proper operation, your device requires unobstructed ventilation.Always make sure filters and other openings in the case are notobstructed by items which may impede ventilation. Do not place thedevice in a small closed space (such as a closet).• Do not use an extension cord.• Device operation above or outside of the voltage, breath rate,temperature, humidity and/or altitude values specified may decreaseoxygen concentration levels.• Never drop or insert any object into any opening.• Be aware that the electrical cord and/or tubing could present a trippingor strangulation hazard.• Do not attempt to remove the <strong>EverGo</strong> carrying case unless instructedto do so by airport security officials during air travel. Do not attemptto operate the <strong>EverGo</strong> without the carrying case. The <strong>EverGo</strong> cannotbe operated safely without it. See the Traveling section in this manualfor more information.• Use only power cords supplied by Philips <strong>Respironics</strong> for this device.Use of power cords not supplied by Philips <strong>Respironics</strong> may causeoverheating or damage to the device.4www.<strong>ActiveForever</strong>.com
CautionsA caution represents the possibility of damage to the equipment.<strong>EverGo</strong> User <strong>Manual</strong>• Do not immerse the device or allow any liquid to enter the enclosure.• When the device is used in an automobile, disconnect it from theDC auto adapter outlet when the automobile is turned off. Do notoperate the device in a non-running vehicle for an extended period oftime, as this may deplete the vehicle’s battery and prevent the vehiclefrom starting. Do not allow the device to be connected to the autoadapter outlet while starting the automobile normally or while youare starting the automobile with battery recharging cables. Wait untilthe automobile starts before connecting the device to the DC poweroutlet. Secure the device securely when used in any moving vehicle.(The same cautions apply if using the DC adapter outlet on a boat orrecreational vehicle.)• Turn off the device before removing the battery(s). The device shouldnot be operated without the battery(s) installed. If the device isoperated without the battery(s) installed, the standard shut-downroutine will not be implemented when the power is disconnected priorto turning off the unit. This can result in damage to the device.• Only use the supplied handle and shoulder strap to carry your device.With every use, verify that the case, shoulder strap and handle are ingood condition.Note: Additional warnings, cautions, and notes are located throughout themanual.www.<strong>ActiveForever</strong>.com5
<strong>EverGo</strong> User <strong>Manual</strong>Symbol KeyFollow instructionsfor useREFModel numberNo smoking SN Serial numberNo oil or greaseClass II equipmentKeep away from openflamesCanadian/USCertificationDo not disassembleDrip proof equipmentDC power + Rechargeable batteryType BF Applied PartCaution! U.S. federal law restricts this device to sale by or on theorder of a physician.Note: See also the section on alarm indicators and screen symbols.How to Contact Philips <strong>Respironics</strong>If you need to contact Philips <strong>Respironics</strong> directly, call the Philips <strong>Respironics</strong>Customer Service department at 1-800-345-6443 (US and Canada only) or1-724-387-4000. You can also use the following address:Philips <strong>Respironics</strong>, Inc.1001 Murry Ridge LaneMurrysville, PA 15668USA6www.<strong>ActiveForever</strong>.com
<strong>EverGo</strong> User <strong>Manual</strong>Ge t t i n g St a r t e dAttach the carrying handle and shoulder strap to the carrying case.Before using the <strong>EverGo</strong> device for the first time, the <strong>EverGo</strong> battery(s)require an initial uninterrupted charging time of 4 hours minimum. This canbe accomplished by installing the battery(s) and using the AC Power Cord, asdescribed in the following pages.Caution: Use only <strong>Respironics</strong> batteries in your <strong>EverGo</strong> device. Using otherbatteries could damage the device and will void the warranty.Battery Duration TimesThe <strong>EverGo</strong> device model comes with one or two batteries, depending on themodel being used. <strong>EverGo</strong>’s two-battery system gives it long operation durationtimes. For example, at a setting of 2 and 20 breaths per minute (BPM) with twofully charged batteries, the device can be expected to run for 8 hours. Likewise,under similar circumstances at a setting of 4, 5, or 6, it can run for 4 hours.The following table shows the approximate duration of use at 20 BPM. Yourtimes may vary based on your activity level and the condition of the battery(s).FlowSettingBreath Rate of20 BPM(2 batteries)Breath Rate of20 BPM(1 battery)1 12 hours 6 hours2 8 hours 4 hours3 6 hours 3 hours4 4 hours 2 hours5 4 hours 2 hours6 4 hours 2 hoursTable 1. Approximate duration of the <strong>EverGo</strong> device operating with two or one fully chargedbatteries.www.<strong>ActiveForever</strong>.com7
<strong>EverGo</strong> User <strong>Manual</strong>Inserting the Battery(s)Your <strong>EverGo</strong> device comes with one or two lithium ion batteries. To insert thebattery(s) correctly, follow these steps.1. Place your device in a well ventilated location.Note: The <strong>EverGo</strong> device is shipped from the factory with the battery(s)removed.Caution: Open the carrying case only when <strong>EverGo</strong> is turned off.Never open the case while the unit is operating.2. Open the top of the carryingcase using the zipperlocated underneath theflap surrounding the toppart of the case, as shownhere. If the device has beenoperating, the surfacesinside may be warm to thetouch. This is normal.3. Check the fuel gauge forFigure 1. Opening the carrying casethe battery(s). To do so,press the white dot on the battery(s) and watch how many LEDslight up. If the battery is low, you can recharge it. See the nextsection of this manual.No. of LEDsBattery Charge4 LEDs Light: 75% to 100% full3 LEDs Light: 50% to 75% full2 LEDs Light: 25% to 50% full1 LED Lights: 10% to 25% full1 LED Blinks3 Times:Battery is less than10% full andneeds to berechargedTable 2. Battery Charge LevelFigure 2. Battery Fuel Gaugeand White Button8www.<strong>ActiveForever</strong>.com
4. Gently insert the battery(s) intothe battery compartment locatedon top of the device. Beforeinserting the battery(s), be certainthat the battery connector on thebottom of the battery lines upwith the arrow located next tothe battery slot and the Philips<strong>Respironics</strong> logo faces the insideof the device. Pull back the plasticretainer to allow the battery to fitproperly.5. If your device uses a second battery,you may remove or insert thesecondary battery using the smallflap on the top of the carryingcase to gain access to the batterycompartment, shown here. Refer tothe diagram under the flap whichshows how the battery is inserted.Again, the Philips <strong>Respironics</strong>logo should face the inside of thedevice.<strong>EverGo</strong> User <strong>Manual</strong>6. After the battery(s) is inserted, check to make sure it is level with orslightly below the top of the plastic case. When fully inserted, theplastic retainer tab holds the battery in place. If the battery extendsabove the top gray surface, it may be in backwards. Remove it andinsert it correctly. Do not force the battery.7. Zip the case closed and keepit zipped during use.8. Touch the screen onceto verify that the batterysymbol(s) is visible. If you donot see battery symbol(s), thebattery(s) has been insertedincorrectly. Reinsert it ifnecessary.Figure 3. Inserting the primarybattery.Figure 4. Inserting the secondaryVER 1.0.0.0Figure 5. Typical startup screen showing2 batteries, each 3/4 full, with 421 hours ofdevice usage and with software version 1.0.0.0.www.<strong>ActiveForever</strong>.com9
<strong>EverGo</strong> User <strong>Manual</strong>Charging the Battery(s) with AC Power SupplyImportant: The first time you charge the battery(s), be sure to charge it fully. Donot use the DC power cord to do so; instead use AC power.Note: The battery(s) will begin charging whenever you connect the device to anAC outlet, even if you’re using it.To charge the battery(s) using the AC Power Cord provided with your system,follow these steps.1. Connect the output cable of the AC Power Supply to the <strong>EverGo</strong>power inlet.2. Connect the connector of the AC Power Cord into the AC powersupply.3. Connect the plug of the AC Power Cord into an AC outlet installedto meet national or regional electrical code.VER 1.0.0.0Figure 6. Connecting the power cord to the connector located under the Velcro flap.A typical battery charging screen is shown on the rightNote: As soon as you connect the device to an energized AC powersource, the light on the AC Power Supply will light up and the coolingfan will come on. This is normal. The fan will run the entire time it ischarging to keep the battery(s) cool.4. When charging is complete (this takes a minimum of four hoursfor first use), disconnect the AC Power Supply and store it with theAC Power Cord for future10www.<strong>ActiveForever</strong>.com
<strong>EverGo</strong> User <strong>Manual</strong>Note: An optional <strong>EverGo</strong> Smart Battery Charger/Recalibrator (soldseparately) is available for your system. For more information, contactyour home care provider.Op e r a t i n g t h e Ev e r Go De v i c eWarning: Do not use the device without one battery installed and operating.• To run the device on battery power, make sure the battery isproperly inserted and sufficiently charged. (The battery(s) should befully charged the first time you use it.)• To run the device using AC power, make sure you have one batteryinstalled. Follow these steps:1. Connect the output cable of the AC Power Supply to the<strong>EverGo</strong> power inlet.2. Connect the connector of the AC Power Cord into the ACpower supply.3. Connect the plug of the AC Power Cord into an AC outletinstalled to meet national or regional electrical code.Note: The AC Power Supply is equipped with a green light, whichilluminates when it is connected to an energized AC power source.• To run the device using DC power from an automobile or othermotorized vehicle, make sure you have one battery installed.Start the vehicle and connect one end of the DC Power Cord tothe device’s power inlet and the other end into the vehicle’s DCelectrical outlet.Caution: If you operate the <strong>EverGo</strong> system using the DC power cordwhile the vehicle engine is turned off, you could inadvertently drainthe vehicle’s battery.www.<strong>ActiveForever</strong>.com11
<strong>EverGo</strong> User <strong>Manual</strong>Back Up BreathingWhen you turn on your <strong>EverGo</strong> device, it will sense if you are breathingfrom it. If you are not yet breathing through the cannula, <strong>EverGo</strong> willbegin to pulse automatically about once every five seconds. The onlypurpose of this “back up breathing” is to help the unit warm up faster. Assoon as you begin breathing through the cannula, the device will begindelivering pulses based on your breathing. Back up breathing occurs onlywhen the <strong>EverGo</strong> unit has not detected a breath for 30 seconds. You maybegin breathing from the <strong>EverGo</strong> at any time.12www.<strong>ActiveForever</strong>.com
<strong>EverGo</strong> User <strong>Manual</strong>Getting StartedTo start your <strong>EverGo</strong> device, follow these steps. (Tolearn about the touch screen displays, turn tothe next section of this manual.)1. Connect a nasal cannula to the oxygenoutlet on top of your device, as shown inFigure 7.Note: A standard single lumen nasalcannula and tubing (not supplied) shouldbe used to deliver oxygen from the <strong>EverGo</strong> device. The device works withcannula tubing up to 30 ft. (9 m).2. To turn on the device, gentlytouch the screen shown inFigure 8. This first touch bringsthe screen to life and shows theon/off symbol, battery status, hourreading and software version.Figure 7. The nasal cannula isconnected to the oxygen outlet porton top.VER 1.0.0.03. Gently touch the on/off symbolto turn on the device.This “double touch” feature helpsprevent unwanted starts or inadvertent changes in oxygen flow.Figure 8. Touch the on/off symbol tostart. The number on the screen (i.e. Hr= 421) shows the number of hours thisunit has been operated.You may touch anywhere on the screen as your first touch.The second touch must be on the on/off symbol within5 seconds or the screen will turn off.You may begin breathing from your unit immediately after startingthe device.www.<strong>ActiveForever</strong>.com13
<strong>EverGo</strong> User <strong>Manual</strong>4. To set the device’s flow setting,first touch the large number (suchas the 2 shown in Figure 9) in thecenter of the screen.5. Each time you press the flowsetting number, an up arrowand/or down arrowFigure 9. Touch the number to change theflow setting.will appear on the screen.(Examples are shown in Figures 16-17). To increase the flowsetting, press the up arrow. To decrease the flow setting, press thedown arrow.The device can be set to: 1, 1½, 2, 2½, 3, 3½, 4, 4½, 5, 5½, and 6.Warning: It is very important to set your device to your prescribed levelof oxygen flow. Do not increase or decrease your flow rate from yourprescribed level until you first consult with your physician.Note: When it is turned on, the device will automatically start at the flowrate setting used when the device was last turned off. As a precaution, eachtime you start the unit, verify the flow setting.6. Position the nasal cannula on your face, as shown below, andbreathe normally through your nose.Figure 10. Correct position of cannula on your face.14www.<strong>ActiveForever</strong>.com
Operating the Touch Screen<strong>EverGo</strong> User <strong>Manual</strong>You can change all device settings by gently touching the display screen,including starting the device, stopping it, silencing an alarm, and changingoxygen flow. The figures that follow explain the displays on your touch screen.The symbols and alarms shown on these screens are discussed in detail in theAlarm Indicators section of this manual. Familiarize yourself with these pagesbefore using the device.Note: Because all interaction with your <strong>EverGo</strong> device is through this touchsensitiveinterface, there are no knobs to turn or buttons to push. Simply touchthe screen gently to operate the device.To start the device, touch anywhere on the blank screen. After the firsttouch, you will see a screen similar to the one shown below.on/off SymbolSeConDary batteryPrimary batteryVER 1.0.0.0Figure 11. Typical display after the first touch. Now touch the On/Off symbol shown above. Next,you will see the screen below, which indicates that the system is starting up.flow Setting,flow rate numberPrimary battery inSerteDanD fully ChargeDPulSe Symbol (Dot)Figure 12. Typical display when the device is turned on. This screen shows that the flow setting is1, and that the primary battery is inserted and fully charged. Because there is no symbol for thesecondary battery on the left, this means the secondary battery is not inserted.After you turn on the <strong>EverGo</strong>, it should take less than ten minutes to reachthe specified oxygen purity levels. It is safe to begin breathing from the <strong>EverGo</strong>device immediately. Breathing from the unit will cause it to reach oxygen puritylevels in less than ten minutes.www.<strong>ActiveForever</strong>.com15
<strong>EverGo</strong> User <strong>Manual</strong>The dot next to the on/off symbol is the pulse symbol. It appears whenever youtake a breath and the unit delivers a pulse of oxygen.SecondaryBattery is fullPrimary Batteryis fullPulse Symbol (dot)Figure 13. This screen shows a flow setting of 1. The primary battery is inserted correctly and fullycharged, and the secondary battery is inserted correctly and fully charged.Primary Batteryis 3/4 fulland chargingDC Power SymbolFigure 14. This typical display shows the flow setting is 1, the primary battery (which is 3/4 or 75%charged) is inserted, and the device is connected to a power source. The secondary battery is notinserted.Secondary Batteryis FullPrimary Batteryis almost emptyand chargingFigure 15. This display shows that two batteries are inserted. It also shows that the unit isconnected to a power source. The secondary (left) battery is fully charged. The primary (right)battery is nearly empty and charging.16www.<strong>ActiveForever</strong>.com
<strong>EverGo</strong> User <strong>Manual</strong>Up arrow to changeflow settingPress to turnunit offFigure 16. To change the flow setting, touch the setting number. (Here, it is the number 1.) Thiscauses the up flow change arrow to appear. To increase the flow setting, press the up arrow untilyou reach your prescribed setting. The flow setting arrow disappears 5 seconds after you touch it.For another example of the flow change arrows, see the next figure.Up arrow to changeflow settingPress to turnunit offDown arrowto change flowsettingFigure 17. To change the flow setting, touch the setting number; here it is 2 1/2. This causes the upand down arrows to appear. To increase the flow setting, press the up arrow on the right until youreach your prescribed setting. To decrease your flow setting, press the down arrow. The flow settingarrows disappear when you touch the number again or 5 seconds after you last touched the screen.Flow SettingNB Symbol forNo Breath AlarmAn Audio Alarmhas occurredFigure 18. Example of an alarm screen. If the device does not detect breathing for 120 seconds,it will sound the NB alarm and show this typical display with the NB alarm symbol (NB = NoBreath). The alarm symbol (bell) shows the audio alarm is on. To silence the audio alarm, press thealarm symbol. For a complete list of alarms, see the Alarm Indicators section of this manual.www.<strong>ActiveForever</strong>.com17
<strong>EverGo</strong> User <strong>Manual</strong>The audio alarm hasbeen silencedON/OFF SYMBOLFigure 19. After pressing the alarm symbol (the bell), the audio alarm is silenced, though the alarmsymbol remains on the screen as long as the condition remains. To correct an NB alarm, check forpinched cannula tubing. For details about alarms, see the Alarm Indicators section. To turn offthe device, press the on/off symbol and then press the on/off symbol again as described in the nextfigure.Press Here toturn off DeviceFigure 20. Typical display after touching the On/Off symbol on the previous screen to turn off thedevice. You must press this symbol again, on this screen, to turn off this device. If this symbol is notpressed within 5 seconds, the previous screen will reappear and the device will remain on.Note: To stop the device, gently touch the on/off symbol twice, once on eachof the last two screens (Figures 19-20). This “double touch” feature helpsprevent unwanted stops or starts.18www.<strong>ActiveForever</strong>.com
<strong>EverGo</strong> User <strong>Manual</strong>Al a r m In d i c a t o r s a n d Sc r e e n Sy m b o l sVisual, AudioIndicatorsDescriptionWhat To Do3 shortbeeps+1 long beepNo Breath AlarmThis alarm occurs when a breathis not detected for a period of 2minutes (120 seconds) or more.This alarm can be silenced bypressing the Alarm symbol(the bell symbol) shown on thescreen. This alarm becomes silentas soon as a breath is detected.If no breath is detected afterapproximately 30 minutes, theunit shuts down to conservepower. (This alarm is inactive forten minutes after startup.)Check theconnection fromthe cannula tothe device. Makesure the nasalcannula is properlypositioned onyour face and thatyou are breathingthrough yournose. Make surethe cannula tubingis not kinked orobstructed.3 long beeps+1 short beepOxygen Concentration AlarmThis alarm occurs when thedevice is delivering a lowerconcentration of oxygen thanspecified. This alarm can besilenced by pressing the Alarmsymbol (the bell symbol shownon the screen).Change to anothersource of oxygenand contactyour equipmentprovider.www.<strong>ActiveForever</strong>.com19
<strong>EverGo</strong> User <strong>Manual</strong>Visual, AudioIndicatorsDescriptionWhat To Do1 long beepwithin 2minutes3 short beeps+3 long beepsHigh Breath Rate IndicatorThis indicator indicates that theuser’s breath rate is exceedingthe capacity of the device. Thedevice is still working properlyand is still providing oxygen at arate of 1.05 liters per minute. Thesound associated with this alarmindicator is a single long beepthat occurs within 2 minutes afterthe indicator is displayed on theLCD.Technical Fault AlarmThis alarm occurs when:a) the battery runs out orb) the device has a generalmalfunction and the unit is nolonger operating properly.The device may or may not shutdown depending on the severityof the alarm.The indicatorresets itself whenbreath rate isreduced. If thisindicator occurson a routine basis,contact your homecare provider.Recharge thebatteries andtry to restart thedevice.If this alarm occursagain, change toanother sourceof oxygen andcontact your homecare provider.Alarm Silenced SymbolThis symbol appears when youpress the bell symbol to silencethe audible alarm (beeps).No further actionis needed.20www.<strong>ActiveForever</strong>.com
<strong>EverGo</strong> User <strong>Manual</strong>Visual, AudioIndicatorsDescriptionWhat To Do(Symbolflashes)1 short beepLow Battery AlarmThe battery symbol flasheswhen approximately 20minutes of battery life remainsfor the primary or secondarybattery. Remaining battery lifeis dependent on your devicesettings and your activity level.Replace thebattery or connectto a power source.(Press bell symbolto silence thealarm.)(Symbolflashes)Alternatingshort andlong beepsDepleted Battery AlarmThis battery symbol flashes whenapproximately two minutesof battery life remains for theprimary or secondary battery.Replace orrecharge battery.(Press bell symbolto silence thealarm.)Battery Charging While AlmostEmpty SymbolThis battery symbol appears (withthe charging bars scrolling) whenthe battery is almost depletedand recharging.No action needed.www.<strong>ActiveForever</strong>.com21
<strong>EverGo</strong> User <strong>Manual</strong>Visual, AudioIndicatorsDescriptionWhat To DoBattery Charging While PartlyFull SymbolWhen a battery symbol similar tothis appears (with the chargingbars scrolling on the left andat mid-height on the right),the battery is partly full andrecharging.No action needed.1 long beepBattery Charge CompleteSymbolThis battery symbol appearswhen the battery is fully charged.No action needed.DC Power Connection SymbolThis symbol appears when thedevice is connected to an AC orDC power source.No action needed.(PowerConnectionSymbolDisappears)1 short beepThe Power Connection symboldisappears when the device isdisconnected from the AC or DCpower source.No action needed.22www.<strong>ActiveForever</strong>.com
<strong>EverGo</strong> User <strong>Manual</strong>Visual, AudioIndicatorsDescriptionWhat To Do1st press= 1 longbeep.2nd press toturn deviceOFF= 3 longbeepsOn/Off SymbolThis symbol appears when thedevice is powered ON, or is readyto be turned ON or OFF.Touch this symbolto turn the deviceon or off.Note: To preventinadvertent startsand stops, thedevice requirestwo touches of thescreen to turn it onand off.Pulse SymbolThe dot next to the On/Offsymbol appears when the unitdelivers a pulse, whenever youtake a breath.No action needed.1 short beepFlow Control SettingThe large number in the centerof the screen shows the oxygenflow setting. (In this example, itis shown as 2.) This number canrange from 1 to 6 in incrementsof one-half: 1, 1½, 2, 2½, etc.If this is your flowsetting, no actionis needed.If this is not yourproper flowsetting, touch thenumber to activatethe arrows (shownbelow).1 short beepFlow Control Change ArrowsThese arrow symbols appearafter you touch the flow controlsetting number. They allowyou to change the flow controlsetting.Touch the toparrow to increasethe flow controlsetting.Touch the bottomarrow to decreasethe flow controlsetting.www.<strong>ActiveForever</strong>.com23
<strong>EverGo</strong> User <strong>Manual</strong>Tr o u b l e s h o o t i n gThe table below shows a list of common problems and actions you can take. Ifyou are unable to resolve a problem, please contact your home care provider.Problem Possible Cause What You Should DoDevice Won’tTurn OnDevice Will NotTrigger A PulseOf OxygenAlarm OccursBattery(s) isdepleted.Battery(s) is notinstalled correctly.Screen not touchedtwice.<strong>EverGo</strong> is notturned on.Cannula tubing iskinked or twisted.Device calibrationDevice malfunction.The device needsyour attention.Use the power supply and ACpower cord to operate the device(with the battery(s) inserted) torecharge the battery(s). If this doesnot resolve the problem, contactyour home care provider.Remove the battery(s) and installthem correctly.Touch the blank screen and thentouch the On/Off symbol shown onthe next screen.Touch the blank screen and thentouch the On/Off symbol shown onthe next screen.Make sure the tubing is connectedproperly to the oxygen outlet portand that it is free of any obstruction.Let the device run for 2 minuteswithout breathing through thecannula and then try breathingagain.Contact your home care provider.See the Alarm Indicators section forinformation about specific alarmsand what you should do.24www.<strong>ActiveForever</strong>.com
<strong>EverGo</strong> User <strong>Manual</strong>Ca r i n g f o r y o u r Ba t t e r y(s)Handle your battery(s) with care.• Do not allow a battery’s terminals to touch together as this will causethe battery to fail.• Do not immerse a battery in water.• Do not disassemble or deform a battery.• Do not expose to, or dispose of, a battery in fire.• Avoid exposing a battery to excessive physical shock or vibration(dropping, etc.).• Keep all batteries out of the reach of children.• Do not use any battery that has been damaged in any way.• Always charge the batteries in accordance with the manufacturer’sinstructions, using specified chargers only.• Do not use modified battery chargers.Battery StorageLithium ion batteries can be stored from -4° F (-20° C) to 140° F (+60° C) atup to 80% relative humidity. However, they are best stored below70° F (21° C) in a cool, dry, well-ventilated facility free from corrosive gas orvapor.Storage at temperatures above 113° F (45° C) such as in a hot car may degradebattery performance and reduce battery life. Storage at low temperatures mayaffect initial battery performance.www.<strong>ActiveForever</strong>.com25
<strong>EverGo</strong> User <strong>Manual</strong>Ca r i n g f o r y o u r Ev e r Go De v i c eCleaning the Air Inlet Filter<strong>Respironics</strong> recommends that you clean the air inlet filter weekly. Wash the airinlet filter, located in the zippered compartment on the end of the device case.Your home care provider may advise you to clean it more often depending onyour operating conditions.Follow these steps to properly clean the air inlet filter.Figure 21 Removing the air inlet filter for cleaning.1. Remove the filter, as shown above, and wash it in a solution ofwarm water and mild liquid dish detergent.2. Rinse the filter thoroughly in warm water. Remove excess moistureby placing the filter in a soft absorbent towel and gently squeezingthe filter dry. Allow it to air dry thoroughly. Ensure that the filteris completely dry before putting it back in the device.If you have a second air inlet filter on hand, insert this clean, dry filter intothe carrying case while cleaning the dirty filter.3. Place the dry filter in the zippered compartment and zip thecompartment shut.Caution: Do not operate the device without the air inlet filter in place.26www.<strong>ActiveForever</strong>.com
<strong>EverGo</strong> User <strong>Manual</strong>Cleaning the Carrying CaseIf cleaning is necessary, use only warm water and a mild liquid dish detergent.1. Make sure the carrying case is closed.2. Dampen a cloth in the detergent and water solution and wipe theoutside surfaces of the case clean.Warning: Do not use alcohol, solvents, polishes or any oily substances on thedevice, as they are flammable.Caution: Do not allow liquids into any of the controls, the interior of thecase, or the oxygen tubing connector. Should this happen, contact your homecare provider for assistance.Device StorageStore your device in a place where it will remain clean and dry.Caution: Do not store your device or accessories in extreme temperatures,below -4° F (-20° C) or above 140° F (60° C).Warning: The device should always be stored with the carrying case. The onlytime the carrying case should be removed is during air travel, if requested byairport security personnel. See the Traveling section in this manual for moreinformation.Device DisposalDispose of the device in accordance with local regulations or contact your homecare provider.www.<strong>ActiveForever</strong>.com27
<strong>EverGo</strong> User <strong>Manual</strong>Tr a v e l i n g Wi t h Yo u r Sy s t e mWith your <strong>EverGo</strong> system and proper advance planning, you can enjoytraveling within your community and beyond. Before you leave, make sure youpack the following:• Fully charged battery(s) (and extra batteries for a long trip)• Power supply and AC power cord• DC power cordAlso, be sure to take the telephone numbers of your home care provider andphysician in case of an emergency.By AirNote: Every airline has policies for travel with portable oxygen concentratorssuch as your <strong>EverGo</strong> device. Some airlines do not permit their use while flyingon their aircraft. When you make your reservation, be sure to ask the airlinefor their policy regarding use of your <strong>EverGo</strong> during flight.When flying in the U.S. and abroad, commercial airlines may have unusualrequirements for oxygen concentrators. Before you fly, contact all of yourairlines on each of your connecting flights for permission to carry your <strong>EverGo</strong>system on board. Be sure to ask about any documentation you may need tobring with you.Make sure your battery(s) is fully charged and that you have enough batterypower for the duration of your flight. If your airline allows you to connect toits DC power source or other external automotive/marine 12 VDC batteries,be sure to remove both internal batteries before connecting the <strong>EverGo</strong>. Theairline AC power source must not be used to operate the <strong>EverGo</strong>.On the day of your flight, plan to arrive early. Airport security officers may needextra time to clear your luggage and oxygen system. They may also ask you toremove the carrying case from the <strong>EverGo</strong> device for inspection.Note: DO NOT remove the <strong>EverGo</strong> carrying case until a security officerspecifically instructs you to do so.28www.<strong>ActiveForever</strong>.com
<strong>EverGo</strong> User <strong>Manual</strong>Traveling (continued)If a security officer requests that you remove the carrying case, please do thefollowing:14231. Unzip the filter compartment on the side of the case.2. Carefully remove the filter.3. Using your fingers, unscrew the thumb screw located under thefilter.4. Remove the thumb screw. Put it in a safe place.5. Gently remove the device for inspection.After inspection, immediately do the following:1. Replace the device in the carrying case. Make sure the display will showthrough the window on the case.2. Push the thumb screw through the mesh and into the screw hole.3. Using your fingers, screw in the thumb screw until it is secure.4. Carefully replace the filter.5. Close and zip the filter compartment on the side of the case.* Warning: Do not attempt to remove the <strong>EverGo</strong> carrying case unlessinstructed to do so by airport security officials during air travel. Do notattempt to operate the <strong>EverGo</strong> without the carrying case. The <strong>EverGo</strong>cannot be operated safely without it.www.<strong>ActiveForever</strong>.com29
<strong>EverGo</strong> User <strong>Manual</strong>Traveling (continued)By Motor VehicleUse the <strong>EverGo</strong> DC power cord to plug in your system using the vehicle’scigarette lighter or DC power input.Caution: Make sure the vehicle has been started before plugging in your DCpower cord. If you operate the <strong>EverGo</strong> system using the DC power cord while thevehicle engine is turned off, you could inadvertently drain the vehicle’s battery.By Bus or TrainMost bus and train lines allow passengers to use portable oxygen concentrators,but you may need to notify them in advance. When you make your travelarrangements, well before your departure, contact your carrier for permission tobring your system and use it on board.Note: Bus and rail carriers outside the United States may have additionalrequirements for oxygen concentrators. Contact them several weeks beforeyou leave to identify any requirements or specifications that may require yourattention.On ArrivalWhen you arrive at your destination, check the status of your system’sbattery(s). This is an excellent time to recharge the battery(s), so it is ready to gowhen you need it.If you have any questions or concerns about traveling with your <strong>EverGo</strong> system,contact your home care provider.30www.<strong>ActiveForever</strong>.com
<strong>EverGo</strong> User <strong>Manual</strong>SpecificationsOperatingConditionsStorageConditionsOperational temperature:41° F to 104° F (5° C to 40° C)Relative humidity: 15% to 95%Altitude: up to 8,000 ft. (2,438 m)-4° F to 140° F (-20° C to 60° C) - unit onlyRelative humidity: up to 95%, non condensing<strong>EverGo</strong> Oxygen ConcentratorOxygenConcentration*Flow Settings andPulse VolumesUser Interface90% - 3%/+6% at all settings1 = 12 ml; 1½ = 18 ml; 2 = 23 ml; 2½ = 29 ml;3 = 35 ml; 3½ = 41 ml; 4 = 47 ml; 4½ = 53 ml;5 = 59 ml; 5½ = 64 ml; and 6 = 70 ml,up to a max of 1050 ml/min.Touch screen, back lit liquid crystal display (LCD)Dimensions12 in. x 6 in. x 8.5 in.(30.5 cm x 15.2 cm x 21.6 cm)Weight8.5 lbs. (3.8 kg) with 1 battery installed10 lbs. (4.5 kg) with 2 batteries installedAudio Alarm 50 decibels (nominal) at 39 in. (1 m)Outlet Pressure 3 psi*Based on an atmospheric pressure of 14.7 psia (101 kPa) at 70° F (21° C)<strong>EverGo</strong> BatteryChemistryDimensionsWeightBattery DurationCharge TimeLithium Ion 14.4 VDC (nominal)0.9 in. H x 6.6 in. L x 4.3 in. W(2.7 cm x 16.75 cm x 10.73 cm)1.5 lbs. (0.7 kg)2 batteries: 8 hours (setting of 2 at 20 bpm)1 battery: 4 hours (setting of 2 at 20 bpm)Approximately 2-3 hours per battery from fullydischarged to fully charged, depending on thepower source and usage.www.<strong>ActiveForever</strong>.com31
<strong>EverGo</strong> User <strong>Manual</strong>AC PowerType <strong>Respironics</strong> PN 900-105Input:Output:100 to 240 VAC, 50/60 Hz, 1 A18V, 5ADC PowerInput:12 - 18V, 5A maxClassificationThe <strong>EverGo</strong> is classified as:• IEC Class II Internally Powered Equipment• Type BF Applied Part• IPX1: Drip Proof Equipment• Not suitable for use in the presence of a flammable anesthetic mixture with airor with oxygen or nitrous oxide.• Continuous Operation32www.<strong>ActiveForever</strong>.com
<strong>EverGo</strong> User <strong>Manual</strong>EMC In f o r m a t i o nGuidance and Manufacturer’s Declaration – Electromagnetic Emissions<strong>EverGo</strong> is intended for use in the electromagnetic environment specified below. The user of <strong>EverGo</strong> should assure that it is usedin such an environment.Emissions Test Compliance Electromagnetic Environment - GuidanceRF EmissionsCISPR 11RF EmissionsCISPR 11Harmonic EmissionsIEC 61000-3-2Voltage Fluctuations/Flicker EmissionsIEC 61000-3-3Group 1Class BClass ACompliesThe Device uses RF energy only for its internalfunction. Therefore, its RF emissions are verylow and are not likely to cause any interferencein nearby electronic equipment.The Device is suitable for use in allestablishments, including domesticestablishments and those directly connected tothe public low-voltage power supply networkthat supplies buildings used for domesticpurposes.Guidance and Manufacturer’s Declaration – Electromagnetic Immunity<strong>EverGo</strong> is intended for use in the electromagnetic environment specified below. The user of <strong>EverGo</strong> should assure that it is usedin such an environment.Immunity Test IEC 60601 Test Level Compliance Level Electromagnetic Environment - GuidanceElectrostaticDischarge (ESD)IEC 61000-4-2±6 kV Contact±8 kV Air±6 kV Contact±8 kV AirFloors should be wood, concrete or ceramic tile.If floors are covered with synthetic material, therelative humidity should be at least 30%.Electrical FastTransient/BurstIEC 61000-4-4±2 kV for Power SupplyLines±1 kV for Input/OutputLines±2 kV for Power SupplyLines±1 kV for Input/OutputLinesMains power quality should be that of a typicalhome or hospital environment.SurgeIEC 61000-4-5±1 kV Line to Line±2 kV Line to Ground±1 kV Line to Line±2 kV Line to GroundMains power quality should be that of a typicalhome or hospital environment.Voltage Dips, ShortInterruptions andVoltage Variations onPower Supply InputLinesIEC 61000-4-1195% Dip in U T)for 0.5 Cycle40% U T(60% Dip in U T)for 5 Cycles70% U T(30% Dip in U T)for 25 Cycles95% Dip in U T)for 5 Seconds95% Dip in U T)for 0.5 Cycle40 % U T(60% Dip in U T) for5 Cycles70 % U T(30% Dip in U T) for25 Cycles95% Dip in U T)for 5 SecondsMains power quality should be that of a typicalhome or hospital environment. If the user of theDevice required continued operation duringpower mains interruptions, it is recommendedthat the Device be powered from anuninterruptible power supply or battery.Power Frequency(50/60 Hz) MagneticFieldIEC 61000-4-83 A/m 3 A/m Power frequency magnetic fields should be atlevels characteristic of a typical location in atypical home or hospital environment.Note: U Tis the A.C. mains voltage prior to application of the test level.www.<strong>ActiveForever</strong>.com33
<strong>EverGo</strong> User <strong>Manual</strong>Guidance and Manufacturer’s Declaration – Electromagnetic Immunity<strong>EverGo</strong> is intended for use in the electromagnetic environment specified below. The user of <strong>EverGo</strong> should assure that it is usedin such an environment.Immunity TestIEC 60601Test LevelComplianceLevelElectromagnetic Environment - GuidancePortable and mobile RF communications equipment should be used no closerto any part of the Device, including cables, than the recommended separationdistance calculated from the equation applicable to the frequency of thetransmitter.Recommended separation distanceConducted RFIEC 61000-4-63 Vrms150 kHz to80 MHz3 Vd = 1.2 P 150 kHz to 80 MHzRadiated RFIEC 61000-4-33 V/m80 MHz to2.5 GHz10 V/m c d = 3.5 P 80 MHz to 800 MHzd = 7 P 800 MHz to 2.5 GHzwhere P is the maximum output power rating of the transmitter in watts(W) according to the transmitter manufacturer and d is the recommendedseparation distance in meters (m).Field strengths from fixed RF transmitters, as determined by anelectromagnetic site survey, a should be less than the compliance level in eachfrequency range. bInterference may occur in the vicinity of equipment markedwith the following symbol:Note 1:Note 2:At 80 MHz and 800 MHz, the higher frequency range applies.These guidelines may not apply in all situations. Electromagnetic propagation is affected by absorption and reflection from structures,objects, and people.abcField strength from fixed transmitters such as base stations for radio (cellular/cordless) telephones and land mobile radios, amateur radio, AM andFM radio broadcast and TV broadcast cannot be predicted theoretically with accuracy. To assess the electromagnetic environment due to fixed RFtransmitters, an electromagnetic site survey should be considered. If the measured field strength in the location in which the Device is used exceedsthe applicable RF compliance level above, the Device should be observed to verify normal operation. If abnormal performance is observed, additionalmeasures may be necessary, such as re-orienting or relocating the Device.Over the frequency range 150 kHz to 80 MHz, field strengths should be less than 3 V/m.<strong>EverGo</strong> incorporates a robust design and conforms with Radiated RF Immunity Test up to 10 V/m between 80 MHz and 2.5 GHz while the testrequirement is 3 V/m.Recommended Separation Distance Between Portable and Mobile RF Communication Equipment and the Device<strong>EverGo</strong> is intended for use in the electromagnetic environment in which radiated RF disturbances are controlled. The user of<strong>EverGo</strong> can help prevent electromagnetic interference by maintaining a minimum distance between portable and mobile RFcommunication equipment (transmitters) and <strong>EverGo</strong> as recommended below, according to the maximum output power of thecommunications equipment.Rated Maximum OutputPower of Transmitter(Watts)Separation Distance According to Frequency of Transmitter (meters)150 kHz to 80 MHzd = 1.2 P80 MHz to 800 MHzd = 3.5 P800 MHz to 2.5 GHzd = 7 P0.01 0.12 0.35 0.70.1 0.38 1.1 2.21 1.2 3.5 710 3.8 11 22100 12 35 70For transmitters rated at a maximum output power not listed above, the recommended separation distance d in meters (m) canbe estimated using the equation applicable to the frequency of the transmitter, where P is the maximum output power of thetransmitter manufacturer.Note 1:Note 2:34At 80 MHz and 800 MHz, the higher frequency range applies.These guidelines may not apply in all situations. Electromagnetic propagation is affected by absorption andreflection from structures, objects, and people.www.<strong>ActiveForever</strong>.com
<strong>EverGo</strong> User <strong>Manual</strong>Limited Wa r r a n t y<strong>Respironics</strong>, Inc. (“<strong>Respironics</strong>”) warrants the <strong>EverGo</strong> Portable Oxygen Concentrator System (the “Product”) as setforth in the following paragraphs.Limited Warranty<strong>Respironics</strong> warrants that the Product, except as otherwise stated herein, is free from defects in materials andworkmanship under normal and proper use and when correctly maintained in accordance with applicableinstructions, for a period of two (2) years from the date of shipment by <strong>Respironics</strong> to the original purchaser(the “Warranty Period”).Products Not Under WarrantyAccessories and replacement parts, including, but not limited to, filters and fuses, are not covered under thiswarranty. However, <strong>Respironics</strong> warrants that the battery in the Product will be free from defects in materialand workmanship, under normal and proper use and when correctly maintained in accordance with applicableinstructions, for a period of 90 days from the date of shipment by <strong>Respironics</strong> to the original purchaser. Thiswarranty does not apply to batteries that are dropped, misused, altered or otherwise damaged after they areshipped.LimitationsIf any Product purchased from <strong>Respironics</strong> fails to conform to the warranties set forth herein during theWarranty Period, as determined by <strong>Respironics</strong> in its sole discretion, <strong>Respironics</strong> may discharge its warrantyobligation by repairing or replacing the Product, in <strong>Respironics</strong>’ sole discretion. This may be accomplished byinstalling new or remanufactured assemblies or components, or by other repairs deemed appropriate in thesole discretion of <strong>Respironics</strong>. The choice of repair or replacement by <strong>Respironics</strong> shall be the sole and exclusiveremedy of the original purchaser. <strong>Respironics</strong> reserves the right, in its sole discretion, to refund the purchaseprice in lieu of repair or replacement of the Product. In no event shall <strong>Respironics</strong>’ maximum liability underthese warranties exceed the price paid to <strong>Respironics</strong> by the original purchaser for the Product.ConditionsThis warranty does not cover damage or injury whether to the Product or to personal property or personscaused by accident, misuse, abuse, negligence, failure to install in accordance with <strong>Respironics</strong>’ installationinstructions, failure to operate under conditions of normal use and in accordance with the terms of theoperating manual and instructions, failure to maintain in accordance with the applicable service manuals, oralteration or any defects not related to materials or workmanship of the Product. This warranty does not coverdamage which may occur in shipment. This warranty does not apply to any Product or individual part of aProduct that may have been repaired or altered by anyone other than <strong>Respironics</strong> or an authorized <strong>Respironics</strong>service center. This warranty does not apply to any Product which is not purchased new.Exclusions of WarrantiesEXCEPT AS SET FORTH IN THIS LIMITED WARRANTY, RESPIRONICS MAKES NO WARRANTIES, EXPRESSEDOR IMPLIED, STATUTORY OR OTHERWISE, REGARDING THE PRODUCT, ITS QUALITY OR PERFORMANCE.RESPIRONICS SPECIFICALLY DISCLAIMS THE IMPLIED WARRANTY OF MERCHANTABILITY AND THE IMPLIEDWARRANTY OF FITNESS FOR A PARTICULAR PURPOSE. IN NO EVENT SHALL RESPIRONICS BE LIABLE FOR THECOST OF PROCUREMENT OF SUBSTITUTE PRODUCTS OR FOR ANY INDIRECT, SPECIAL, CONSEQUENTIAL,PUNITIVE, EXEMPLARY OR INCIDENTAL DAMAGES (INCLUDING, BUT NOT LIMITED TO, COMMERCIAL LOSS ORLOST REVENUES), FOR ANY CAUSE OF ACTION, WHETHER IN CONTRACT OR TORT, AND WHETHER OR NOTRESPIRONICS WAS AWARE OR SHOULD HAVE BEEN AWARE OF THE POSSIBILITY OF THESE DAMAGES. EXCEPTFOR THE OBLIGATIONS UNDER THIS LIMITED WARRANTY, RESPIRONICS SHALL NOT HAVE ANY OBLIGATIONOR LIABILITY FOR ANY OTHER LOSS, DAMAGE OR INJURY RESULTING DIRECTLY OR INDIRECTLY FROM THEPRODUCT. PURCHASER’S SOLE AND EXCLUSIVE REMEDY FOR BREACH OF THE WARRANTIES SET FORTH IN THISDOCUMENT SHALL BE AS PROVIDED IN THE PARAGRAPH DESCRIBING LIMITATIONS.Purchaser is cautioned that no person or entity is authorized to make any warranties on behalf of <strong>Respironics</strong>and any such alleged warranties are hereby disclaimed by <strong>Respironics</strong>.<strong>Respironics</strong>, Inc.1001 Murry Ridge LaneMurrysville, PA 15668USAwww.<strong>ActiveForever</strong>.com35


