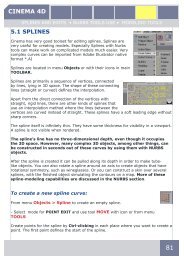
CINEMA 4D
CINEMA 4D
CINEMA 4D

Create successful ePaper yourself
Turn your PDF publications into a flip-book with our unique Google optimized e-Paper software.
<strong>CINEMA</strong> <strong>4D</strong>POLYGON MODELING • PRIMITIVE OBJECTS • STRUCTURE • HYPERNURBS4.1 POLYGON MODELING PRINCIPALSPolygon modeling is interesting alternative toNURBS modeling and it is good to understand itsprincipals. Both, NURBS MODELING and POLYGONMODELING, have pros and cons. Polygon modelingoffers something like sculpting, it means that westart with rough shapes and we are searching theright shapes and proportions. We start with roughpolygon mesh and then by editing and subdividingit we optimize the shape.Advantage is very fast feedback with shape onsmall changes in polygon mesh and ultimatefreedom when defining of shape, fast creation oforganic shapes and their quick editing.Small drawback is limited control over geometricallyexact shape and only limited accuracy of model.Even very fine subdivided polygon mesh is stillmesh of flat polygons.On the right picture is model of Falcon God HOR(Author - Pavel Zoch), which demonstrates polygonmodeling principals. First rough polygon mesh iscreated to show simple shape of model.Program function then create surface which issomehow attracted to this skeleton. At the samemoment rough polygons are subdivided and anglesbetween them are divided too. This process refineoptically this mesh.Next picture shows this final mesh created whenrough skeleton was divided few times with anglesrefined too.Last picture shows render of this hypothetical mesh.What is important is that polygon mesh definingmodel is still “rough“ and therefore is very easyto edit it and with simple change of few edges wecan change position of control polygons and in finaleffect shape of our “hypothetical “ refined mesh.58
<strong>CINEMA</strong> <strong>4D</strong>POLYGON MODELING • PRIMITIVE OBJECTS • STRUCTURE • HYPERNURBS4.2 WORK WITH VIEWPORT ELEMENTSThe same way as VIEWPORT has its own control elements, objects in modelingwindow have their control elements too. You can access them either in Menu Toolsor through icons in top Toolbar. We will skip Undo and RedoSelect ToolSelects specific element (point, edge, polygon, object). Click on the element to selectit and add to selection with SHIFT+LMB.MoveThis tool lets you place the selected object or element anywhere in a viewport,subject to other options like snap, whether certain axes are locked, etc. When movingobjects, <strong>CINEMA</strong> <strong>4D</strong> distinguishes between the world coordinate system and the localobject coordinate system. This distinction is especially noticeable when movementtakes place in different axial systems and only the X-axis is activated.Let’s assume you are moving a object which is positioned somewhat askew relativeto the world coordinate system and you have locked the Y-axis and Z-axis formovement. If you move within the world coordinate system, the cuboid movesparallel to the X-axis of the world system59
<strong>CINEMA</strong> <strong>4D</strong>POLYGON MODELING • PRIMITIVE OBJECTS • STRUCTURE • HYPERNURBS• To constrain scale to one axis only, drag the arrowhead at the end of the desiredaxis. This saves you from having to lock axes manually.• Again You can also lock the scaling to an axis by double-clicking the arrowheadfor that axis, which will then turn yellow. You can then drag from any position inthe viewport to scale the object along the locked axis (you no longer need to dragthe arrowhead itself). To change which axis is locked, click one of the other axisarrowheads. To unlock the axis, double-click its arrowhead or one of the other axisarrowheads.• To scale the selected object without its children, Ctrl-drag the object in the viewport.RotationThis tool rotates the selected objects or elements when you drag the mouse from anempty space within the viewport.When rotating objects, <strong>CINEMA</strong> <strong>4D</strong> distinguishesbetween the world coordinate system and the localobject coordinate system and you can choose torotate in either system. As long as the object liesparallel to the axes of the world coordinate systemyou will not notice a difference when you rotate ineither system. But when the object is askew, therecan be large differences between rotating in theworld or object systems.• You can also lock the rotation to an axis by doubleclickingthe band for that axis, which will then turnyellow. You can now drag from any position in theviewport to rotate around the locked axis (you nolonger need to drag the band itself). To changewhich axis is locked, click one of the other axis hoops.To unlock the axis, double-click its band or any other axis band.Axis X, Y, ZUsing these options, you can restrict movement, scaling or rotationto specific axes. For example, to allow movement along the Y-axisonly, enable Y and disable X and Z. Now, when you drag with theMove tool selected, the movement will be along the Y-axis only.Here you decide in which coordinate system an operation will take place.61
<strong>CINEMA</strong> <strong>4D</strong>POLYGON MODELING • PRIMITIVE OBJECTS • STRUCTURE • HYPERNURBS4.3 PRIMITIVE OBJECTSCinema offers whole bunch of modeling techniques andobjects for polygon modeling. Let‘s start with predefinedprimitives.All primitives on the Objects> Primitive menu areparametric, i.e. they are created from mathematicalformulae using a number of preset values. A consequenceof this is that such an object is initially simply amathematical abstraction and is not editable. In plainlanguage, this means that primitives have no points orsurfaces that you can manipulate.For example, you cannot edit a primitive using the Magnettool, because the Magnet needs points to pull on. To applypolygon tools such as Magnet, you must first convert theprimitive to polygons using the Make Editable command.FUNCTIONS/ MAKE EDITABLEor select this ICONOn the plus side, parametric means that you can change the parameter values of anobject, such as height or radius, at any time. This allows you to experiment with thedifferent parameters of an object in order to get a feeling for how it looks, behaves,etc.However you choose a new object primitive, first of all the relevant primitive iscreated in the scene and its settings appear in the Attribute manager . To displayan existing object’s parameters in the Attribute manager, select the object by clickingits name in the Object manager or by clicking the object in the viewport.Often you’ll see settings for segments; usethese to define the level of refinement of theparticular surface or solid. This is useful if youare going to extend the object, perhaps to buildfurther, more complex objects.62
<strong>CINEMA</strong> <strong>4D</strong>POLYGON MODELING • PRIMITIVE OBJECTS • STRUCTURE • HYPERNURBSSuppose you want to create a curved rod starting with a cylinder primitive. If thecylinder has only one segment along its length, it will be impossible to bend it into arod shape because there are no points along its length that can be transformed into abend. The more segments you assign to the object, the more smoothly it can be bentor otherwise deformed.In Figure are identical cylinders,the cylinder’s with same valuesin the Attribute manager. Leftcylinder has beveled edge with5 segments, middle one withone segment and right one hason segment and phong shadingturned off. Settings for primitivesare allowing us to change theirappearance very quickly.• A parameter common to many primitives is Orientation; this lets you change howthe object lies in the 3D space. Thus you can quickly move your object to lie inanother direction. Notice that the actual geometry isaffected by an orientation change, not the object axissystem• Interactive handles represent another waychanging the object’s parameters; these are displayedas small orange points called handles. Drag a handleto change the property it represents interactively inthe viewport and see the same change for the numericvalues in the attribute manager.of• New objects are created either centered at the world origin or centered within theviewport; this behavior is changed in the preferences.EDITING OF PRIMITIVESYou can insert all primitives to the scene from Menu Objects or byselecting their icons from Toolbar. Since settings are similar for allof them, We will discuss only some. Settings can be changed inAttribute manager or interactively with handles only until object isconverted to editable mesh.Then parametrical values are lost and we can edit only mesh ofpolygons.Insert Cylinder to the scene and check its parameters63
<strong>CINEMA</strong> <strong>4D</strong>POLYGON MODELING • PRIMITIVE OBJECTS • STRUCTURE • HYPERNURBSCylinderThis command creates a cylinder, whose long axis is parallel to Y axis.In Attribute manager window we can define all properties inall tabs and their values.ObjectRadius, HeightThese values define the basic dimensions of the cylinder.Height segmentsChanges the number of subdivisions of the object in the lengthwise direction(cylindrical part only).Rotation SegmentsDefines the number of subdivisions ofthe object along its circumference.The greater this value, the smoother thecylinder will appear. Example: value 4will turn cylinder into the cubeSame cylinders with different values forrotation segmentsOrientationChoose a value from this drop-down listto set the cylinder’s initial orientation inspace.CapsCapsEnable this option to add caps to the top and base of thecylinder.SegmentsDefines the number of subdivisions of the caps in a radialdirection. The subdivision along a cap’s circumference isdefined by Rotation Segments.FilletSegmentsWith Fillet selected you can choose the degree of the roundness. The higher the valuethe smoother the join will appear; enter a value of 1 to achieve a chamfer.64
<strong>CINEMA</strong> <strong>4D</strong>POLYGON MODELING • PRIMITIVE OBJECTS • STRUCTURE • HYPERNURBSIn the picture is arounded cylinder. Tothe left is a chamfer,then a rough filletand, on the right, ahigh-value, smoothfillet.RadiusDefines fillet betweencylinder and caps.Radius value is defined in attribute manager. From left or right: Segment values set to1, 3 a 10.SLICESliceFrom / ToEnable Slice to show a slice of thecylinder. Enter the slice angles into theFrom and To boxes.Regular gridWidthThe Regular Grid option is only available when Slice is enabled. By enabling thisoption and entering a value into the Width box you can control the subdivisions withinthe plane of section of the sliced object. This subdividing only affects the face (theplane of section) of the slice.Interactive editing• The cylinder initially has two handles. Drag handle 1 to change the radius, or handle2 to change the height. If you enable Fillet, handle 3 appears. Drag handle 3 tochange the cap fillet’s radius.65
<strong>CINEMA</strong> <strong>4D</strong>POLYGON MODELING • PRIMITIVE OBJECTS • STRUCTURE • HYPERNURBS4.4 BASIC EDITSAfter primitive object is converted to a polygonmesh you can edit this mesh further and usevarious functions and modifications.Structure Menu has various tools that allowyou to adjust the structure of polygon objects andspline objects. Most of these tools are available inthe point, edge and polygon modes.To switch editmodes use Toolbar.(Figure on the right).Any objects that you want to use with these toolsmust be editable. You can make objects editableby selecting them and choosing Functions > MakeEditable.Usually, the Structure tools affect the selected points, edges orpolygons only. However, if none of these elements are selected, thenmost of the tools will affect the entire selected object(s). Hiddenelements will usually be ignored. Selection of points, edges or polygons can bedone with selection arrow or with more advanced options fromSelection menu.• Any structure tools that cannot be used in the current editingmode (point, edge or polygon) will be grayed out. For example,Edge Cut only works with edges and therefore will be grayed outin point mode and in polygon mode.You can also use the Structure tools with multiple selectedobjects. For example, you could create two cubes, make themeditable, select a polygon on each cube and extrude bothpolygons at the same time using the Extrude tool.You can use most of the structure tools interactively. Also, manyof the tools have settings that you can adjust in the Attributemanager. For as long as the tool is active, you can change any ofits parameters or options and you’ll see the changes applied inrealtime.• With selected element (point, edge, polygon) press Rightmouse button to pop-up window with available commands fromMenu Structure and Menu Functions which you can apply toselected element.66
<strong>CINEMA</strong> <strong>4D</strong>POLYGON MODELING • PRIMITIVE OBJECTS • STRUCTURE • HYPERNURBS4.5 BASIC FUNCTIONS FROM MENU STRUCTUREWe will discuss some common functions used for modeling. More functions andmethods we will practise later with examples.BridgeBridge enables you to create connections betweenunconnected surfaces. In Attribute manager youhave to select object or objects where we willapply bridge.The Bride tool works in all three modes (point,edge and polygon).A selection is required in polygon mode.Point modeIn point mode, you can create polygons by definingnew polygon edges. To define a new polygonedge between two points, drag and drop from onepoint to the other. A yellow preview will appear toindicate where the new polygon will be created.Edge modeIn edge mode, you can create a new polygonbetween two edges by dragging and dropping fromone edge to the other. As with point mode, a yellowpreview will appear to indicate where the newpolygon will be created.Polygon modeIn polygon mode, before you use the Bridge tool,you must first select the polygons that you want toconnect. Then, using the Bridge tool, drag and dropfrom one side to the other. A yellow line will appearto assist you.Bridge can also connect groups that have adifferent number of selected polygons.67
<strong>CINEMA</strong> <strong>4D</strong>POLYGON MODELING • PRIMITIVE OBJECTS • STRUCTURE • HYPERNURBSUsing Bridge in point modeNot only does the Bridge tool enable you to connect surfaces, it also offers a quickway to create polygons from points. It is possible to create an entire, complexcharacter using the Bridge tool. This method of creating polygons is especially usefulwhen modeling with HyperNURBS.We’ll now use this technique to create a few polygons from scratch. The sametechnique applies to creating hundreds of polygons.Choose Objects > Polygon Object to create an empty object to which we can addpoints and polygons, On the left toolbar, select the Points tool.On the top toolbar, ensure that the Move tool is selected.Ctrl-click six times in various places within the viewport to create two rows of points(Fig 1).•If you click in the wrong place, you can quickly reset the Bridge tool by pressing theEsc key.Use BRIDGE toolIn the viewport, drag from the left point of the top row to the left point of the bottomrow and release the mouse button(a yellow line will appear between the two points while you drag). (Fig 2)Now drag from the middle point of the top row point to the middle point of the bottomrow and release the mouse button. The polygon is created (Fig 3).Drag from the right point of the top row to the right point of the bottom row andrelease the mouse button. The second polygon is created (Fig 4).In the example above, note that you had to drag and drop twice to create the firstpolygon, but only once to create the second polygon.This is because <strong>CINEMA</strong> <strong>4D</strong> assumes that you want the next polygon that you createto be connected to the one you’ve just created. This is ideal for quickly building a rowor loop of polygons. However, if you don’t want the current polygon and next polygonto be connected to each other, press Esc to reset Bridge.68
<strong>CINEMA</strong> <strong>4D</strong>POLYGON MODELING • PRIMITIVE OBJECTS • STRUCTURE • HYPERNURBSEXTRUDEThis tool extrudes selected points, edges or polygons. Ifno elements are selected, all of the object’s elements willbe extruded.To extrude interactively in the viewport, drag left or rightwithin the viewport. The extrusion takes place along thenormals of the selected surfaces; the average value isevaluated from all the normals to be extruded.Maximum angleIf Preserve Groups is enabled, polygons not exceeding this angle to each other arekept together. Polygons exceeding this angle are broken apart during extrusion.OffsetDefines the length of the extrusion..Var - VariabilityLeft: 0% - No deviation from the selectedoffset value.Right: 60% - All selected polygons areextruded between 40% and 100% of theOffset value..Varies the length of the extrusion. This option is not available if Preserve Groups isenabled.Value is subtracted from 100%, which gives us beginning variation0% - No deviation from the selected offsetvalue.60% - All selected polygons are extrudedbetween 40% and 100% of the Offset value.Subdivision Defines the number ofsubdivisions along the extrusion.set to 0 (left) and to 6 (right).Make N-GONSIf this option is enabled, n-gons will be created along the length of the extrusion.Although you won’t see edges along the length of the extrusion, the Subdivisionsetting is still applied internally.Make caps (polygon mode)Enable this option to create a cap at the base of the extrusion. This gives you a quickway to create a closed volume.69
<strong>CINEMA</strong> <strong>4D</strong>POLYGON MODELING • PRIMITIVE OBJECTS • STRUCTURE • HYPERNURBSEdge angle (edge mode)Here you can set the angle of the edge extrusion. You can also change the extrusionangle interactively in the viewport by holding down Shift during the extrusion.Edge snap (edge mode)If Edge Snap is enabled, the extrusionangle will be constrained to the Valuesetting. For example, to constrain theextrusion angle to steps of 45 degrees,enable the option and set Value to 45°.Preserve GroupsIf this option is enabled, the connectedpolygons will stay together during theextrusion, assuming they do not exceedthe Maximum Angle relative to oneanother.• To extrude along an object or world axis instead of along the normals, performan extrusion with an Offset (i.e. extrusion length) value of 0; then move the newsurfaces using Move:To extrude, say, in the Z direction, lock the X and Y axes:Extruding edges• To extrude the edges interactively, drag the mouse (this changes the Offset value,i.e. the length of the extrusion). With the mouse button still held down, you canShift-drag to change the direction of the extrusion. If, at this point, you still keep themouse button held down and release the Shift key and drag, you’ll change the Offsetonce more. So, by holding down or releasing the Shift key while you drag, you canchange between adjusting the extrusionlength and the extrusion direction.Extrude INNERThis tool operates in a similar wayto Extrude. However, in contrast toExtrude, the selected polygons areextruded inwards or, optionally, outwards.Parameters are same so we don‘t have togo through settings again.On picture you cans see how function Extrude Inner defines new polygon, subdivisionis set to 0. You can set value manually or interactively With the mouse button stillhold down drag it to the left or right to make it bigger or smaller.70
<strong>CINEMA</strong> <strong>4D</strong>POLYGON MODELING • PRIMITIVE OBJECTS • STRUCTURE • HYPERNURBS4.6 PRIMITIVE OBJECTS AS BASIS FOR MODELINGOn the following tutorial we will learn how to use basic primitive objects (cube)to create quite complicated model. We will use HyperNURBS and also some basicfunctions used for editing of polygon models.For our model, motor oil bottle, we will use primitive objectCube . Select Cube and insert in the scene. Object cube, aswell as all other primitive objects, has all parameters editablein the Attribute manager window in Object Tab.Correct settings of these parameters is important formodeling. If we set parameters right in the first place ourwork is much more efficient.Object Cube is should be set this way. Size of the object 90 x90 x 150 and segmentation 3, 3, 5. Segmentation shows tohow many segments is each surface divided. For an examplefront surface (axis x, y) is subdivided to 3 x 3 segments.When we convert our model to editable mesh this surface willhave 3*3=9 of polygons.Convert our cube to editable mesh with functionMake Object Editable.After conversion to editable mesh our object is no moreprimitive object and it is not possible to use settings inAttribute manager anymore. We created starting object forour model and further we will use toolset for editing ofpolygon meshes.Switch to the POLYGON MODE and use Select toolto highlight top nine polygon as on the picture.For polygon, edge and point selection use SELECTIONTOOL (lass, arrow..) and also Shift and Ctrl keys. Withleft mouse button and Shift pressed down we can addto selection, similar way LMB and with CTRL we cansubtract elements from selection.71
<strong>CINEMA</strong> <strong>4D</strong>POLYGON MODELING • PRIMITIVE OBJECTS • STRUCTURE • HYPERNURBSSelected polygons will create part of the bottle after extrusionUse Extrude tool from context menu activated with Right-Click of the mouse.Tools in the context menu are the most used tools,complete toolset is located in the main menu underStructure.After we have selected this tool, we can apply itinteractively with dragging mouse left or right (in normaldirection, against normal direction) or we can useprecise control which we can find in Active Tool tabSet Offset value to 50 and press Apply.Now we will use Bevel from context menu activatedwith Right-Click of the mouse.Setting are again in Active Tool tab.Set parameter Extrusion to 30 andparameter Inner Offset to 13,5. Finaleffect is the same with method whenfunction Extrude and then functionNormal Scale would be used. Bevel toolis therefore cumulative function.Select polygon which should be base forhandle of the bottle and from contextmenu activated with Right-Click selectcumulative tool Matrix Extrude• Matrix Extrude is another cumulativefunction which can be substituted withuse of Extrude and edits of polygonswith Scale and Rotate tools form theStructure menu.• This function is one of few which is notedited in Active Tool tab.Set Matrix Extrude parametersDon’t be afraid to experiment with eachnew function we are trying.Setting of parameters is this. Steps72
<strong>CINEMA</strong> <strong>4D</strong>POLYGON MODELING • PRIMITIVE OBJECTS • STRUCTURE • HYPERNURBS- Defines the number of extrusions for each polygon, Move - Defines the extrusiondistance for each step. The Z-axis is the direction of the normal. Scale - Sets thescale factor for each extruded step. A value of 100% will keep each step the samesize as the base polygon. Rotate - controls the rotation of the extruded surfacearound the individual axes. Each one of these values is relative - each step isadjusted to the previous step, not to the original polygon. To understand properfunction, experiment with values.Extrusion is set to 2 Steps with value20 for Z - axis, with 10° rotation foreach step in X-axis. Confirm with OKand changes are applied.If you set it right it should look likefigure on the right.Select polygon as shown and use Matrix Extrude again.Set values accordingly to the picture. Decrease number of stepsto 1, extrusion to 10 and leave rotation as is. Confirm with OK.Then select polygons facing each other on handles.Use Bridge tool and finish handle.Bridge tool is another tool which we can access from the contextmenu.When using Bridge is important to have selectedthose polygons which we need to connect. Afterselecting the function Bridge click on the cornerof one polygon, hold LMB and move cursor tofind adequate corner of other polygon. Futureconnection is shown with line. If we are satisfiedrelease left mouse button and function isfinished.73
<strong>CINEMA</strong> <strong>4D</strong>POLYGON MODELING • PRIMITIVE OBJECTS • STRUCTURE • HYPERNURBSSelect top polygon in the center, it will create bottle neck.Now we use the tool Normal Move.Settings for this function are located again in Active Tool tab.Set Value for Normal Move to 20 and press Apply button.Polygon is moved up.Let’s create final bottleneck with tools Extrude andExtrude InnerNext step is repeating few times.All parameters and settings are controlled in Active Tool tabSelect Extrude Inner and set value to 2 and confirm with Apply. Then select toolExtrude and set these values 2, 16, 2. For each one of these values confirm withbutton Apply for the next click on New Transform. Then select again ExtrudeInner and set value to 2 and confirm with Apply. Last step is again Extrude thistime with values -2, -16, -2.Our model is basically done.Insert HyperNURBS object to the scene (Objects - Nurbs - HyperNURBS) or useicons in the main toolbar. Move our polygonal object under HyperNURBS object in theObject manager. We are finishedInserting our model, createdfrom the cube, under theHyperNURBS object willsmooth all polygons andangles.On the left we can see roughpolygon model we havecreated and its subdividedand smoothed version withHYPERNURBS. Green Polygonmesh is called cage. We willdiscuss HYPERNURBS in detailsin the next chapter.74
<strong>CINEMA</strong> <strong>4D</strong>POLYGON MODELING • PRIMITIVE OBJECTS • STRUCTURE • HYPERNURBS4.7 HyperNURBSFor character designing especially, but forgeneral modeling also, HyperNURBS is oneof the most powerful sculpting tools availableto the 3D artist. With point weighting, edgeweighting and the subdivision surfaces ofHyperNURBS, you can craft any shape at all —from high performance sports cars to charactersthat you can pose and animate easily.HyperNURBS is the most powerful modelingtool in <strong>CINEMA</strong> <strong>4D</strong> and is ideal for characteranimation.Picture © Yoichi Mimura.HyperNURBS objects are also well-suited toanimation. Complex objects can be createdusing a relatively low number of control points.To animate these objects — perhaps using PLAor Soft IK — you animate these control points.This is a far quicker and easier process than, forexample, using PLA to animate a character that has over 100,000 polygons.The HyperNURBS object uses an algorithm to subdivide and round the objectinteractively — a process termed ‘subdivision surfaces’. This is an extremely quickand simple way to create organic forms or, with the help of edge and point weighting,firmer shapes also. There are various ways to go about building your HyperNURBSmodels. Techniques include starting from a simple object such as a cube or creatingthe points manually one by one (join them together with the Bridge tool or CreatePolygon tool).If you start with a Cube object, convert the cube to polygons with the Make Editablecommand and use tools from the Structure menu to extrude, bevel, knife and so onto craft the surface. To firm up the model, use point, edge and polygon weighting.Function HYPERNURBS use segmentation of polygons and edges with certain criteria.Angle between neighboring edges and polygons is divided with this criteria also.75
<strong>CINEMA</strong> <strong>4D</strong>POLYGON MODELING • PRIMITIVE OBJECTS • STRUCTURE • HYPERNURBSTo make edges sharper we can use two methods:With object geometry. Advantage is visual control over the edges and gooddefinition of object geometry. Disadvantage is time consuming changing of geometrywhen we need to change shape.(Used generally in previous versions of Cinema)Polygons (on the left ) used with HYPERNURBS are subdivided and angles arebetween then are also subdivided (middle figure - subdivision set to 1x). Figure onthe right shows use of object geometry definition. Polygons is divided with tool KNIFEclose to the common edge. It is visible that angle is subdivided only when anglesbetween them is not 180 degrees. In this case closer the edges are to common edgesharper edge (radius).With use of HyperNURBS weight - Advantage of this method is that you havequick control over the surfaces with weight of individual points, edges and polygonswithout need of additional subdivision of these elements.Although in principle you can use any type of object with HyperNURBS, most of thetime you’ll work with polygons so that you can use the various polygon tools such asKnife and Bevel.• Make the source object (termed the cage) a child of the HyperNURBS object.HyperNURBS object and cage object visible (right) and only cage object visible (left).76
<strong>CINEMA</strong> <strong>4D</strong>POLYGON MODELING • PRIMITIVE OBJECTS • STRUCTURE • HYPERNURBSSetting HYPERNURBS in Attribute managerObject propertiesUse this page to specify the subdivisionlevel for shading within the editor (i.e. theviewport) and for the renderer. The higheryou set the resolution, the smoother theobject becomes, but the more memory ituses and the slower it renders.From left to right: Source objectsSegmentation set to: 0, 1, 2.Use HyperNURBS weight for pointsand edges helps to “refine“ qualityof model.In Figure a cube (left) has beenmade a child of a HyperNURBSobject to produce a sphere(center). Edge and point weightinghas then been applied to producea complex shape (right).Weighting enables you to refineHyperNURBS models withouthaving to add new points and isespecially useful for creating hardedges or points.Weighting HyperNURBS modelsYou can weight HyperNURBS models in one of two ways: interactively, or manuallyusing the Live Selection tool.Interactive weightingSelect the elements (i.e. points, edges or polygons) that you want to weight. Holddown the period key (‘.’) and drag left or right to set the weighting for the selectedelements. The more weight you apply, the harder the surface will try to reach it. Toset the minimum and maximum weighting that you can apply by dragging, select theLive Selection tool and, in the Attribute manager, enter the desired values into theInteractive Minimum and Maximum boxes.Three modes are available: Point, Edge and Polygon.77
<strong>CINEMA</strong> <strong>4D</strong>POLYGON MODELING • PRIMITIVE OBJECTS • STRUCTURE • HYPERNURBSPoint modeSelected points. ‘.’ + drag. ‘.’ + Shift-drag. ‘.’ + Ctrl-drag.To weight selected points, hold down the period key (‘.’) and drag. To weight selectedpoints and all edges connected to them, hold down the period key and Shift-drag. Toweight selected points and the edges between them, hold down the period key andCtrl-drag.Edge modeSelected edges. ‘.’ + drag. ‘.’ + Shift-drag. ‘.’ + Ctrl-drag.To weight selected edges, hold down the period key (‘.’) and drag. To weight selectededges and all points connected to them, hold down the period key and Shift-drag. Toweight selected edges and their shared points, hold down the period key and Ctrldrag.78
<strong>CINEMA</strong> <strong>4D</strong>POLYGON MODELING • PRIMITIVE OBJECTS • STRUCTURE • HYPERNURBSPolygon modeSelected polygon. ‘.’ + drag. ‘.’ + Ctrl-drag.To weight all points and edges of the selected polygons, hold down the period key (‘.’)and drag. To weight only the edges of the selected polygons, hold down the periodkey and Ctrl-drag.Manual weightingSelect the elements (i.e. points,edges or polygons) that youwant to weight. Select the LiveSelection tool. You can now edit theHyperNURBS weighting parametersin the Attribute manager on theHyperNURBS Weights tab.Select the Live Selection tool and edit the weighting parameters in the Attributemanager..To assign a specific weight to the selected elements such as 60%, set Mode to Set,set Strength to the desired value and click the Set button. To add or subtract weight,set Mode to Add or Sub, set Strength to the amount that you want to add or subtractand click Set.Keep the following in mind when modeling with HyperNURBS:Use rectangles in preference to triangles — triangles tend to disrupt the smooth flowof the HyperNURBS surface. However, don’t be afraid to use triangles if you must.Place the triangles in areas where there are lots of points close together, to confinethe distortion to a small area. You can often avoid visible distortion by tucking thetriangles away in the less critical areas.79
<strong>CINEMA</strong> <strong>4D</strong>POLYGON MODELING • PRIMITIVE OBJECTS • STRUCTURE • HYPERNURBSA polygon should have one neighbor only per edge, otherwise the surface will tear.Sometimes you can repair a torn surface with the Optimize command from theFunctions menu. Structure > OPTIMIZEOnly connected polygons arerounded. To see which polygonsare connected, select a surface,then use Selection > Selectconnected .The sides of the cube are not connected to one another (left). The cube on the right isone piece.Two shortcuts are especially useful when modeling with HyperNURBS.Q switches the HyperNURBS on and off,Hold down the 9 key to temporarily switch on the Live Selection tool. Drag overpoints, edges or polygons (whichever mode is active) to select. key to temporarilyswitch on the Live Selection tool.80