Bluetooth Radio Adapter, QST August 2013 - KG4JJH
Bluetooth Radio Adapter, QST August 2013 - KG4JJH
Bluetooth Radio Adapter, QST August 2013 - KG4JJH
- No tags were found...

Create successful ePaper yourself
Turn your PDF publications into a flip-book with our unique Google optimized e-Paper software.
<strong>Bluetooth</strong> <strong>Radio</strong> <strong>Adapter</strong>Build this unit to connect a standard <strong>Bluetooth</strong> headset to your radioFor the last few years Amateur <strong>Radio</strong> enthusiasts have connected cellular <strong>Bluetooth</strong> headsets totransceivers using the Jabra A210 1 or a device called TalkSafe 2 . However, at the inception of thisarticle in the fall of 2011, this hardware has been discontinued and is hard to find. While some mayquestion the utility of such a device, the idea is intriguing and useful on three levels. First, there havebeen many occasions during contests where I am operating two or more radios and hand turningantennas. The capability to monitor the band or conduct QSOs while away from the radio would come inhandy. Second, the ability to have a hands‐free QSO while operating a vehicle. And third, the prospect ofadding another RF transmission link (complete with a transmit/receive antenna) into the normal radiocommunications process should appeal to most hams.The recent discovery of audio <strong>Bluetooth</strong> modules from KC Wirefree 3 provided the final inspiration forthis project. A module loaded with kcAudioGateway firmware provides a two‐way audiocommunications link to standard off‐the‐shelf <strong>Bluetooth</strong> mono headsets for cell phones. The RF range oftheir class 2 module is listed as 25 meters and features a built‐in antenna.The <strong>Bluetooth</strong> <strong>Radio</strong> <strong>Adapter</strong> resides at the transceiver with its audio input connected to the transceiveraudio output, and its audio output connected to the transceiver microphone connector. Front panelpushbuttons control the <strong>Bluetooth</strong> connection and volume. Power is supplied from a standard hamradio 12VDC power supply.Circuit DescriptionM1, KC‐6112‐AGM1 is a tiny (0.59” x 1.17”) 40 pin SMD module that supports standard and custom <strong>Bluetooth</strong> profiles.With a recommended operating voltage of 3.3 VDC, this class 2 module uses the standard <strong>Bluetooth</strong>carrier frequency of 2.4 GHz with a transmit power of up to 8 dBm into a 50Ω load. The module isregistered with and granted approval by the FCC and meets the conducted and radiated emissionrequirements of the FCC “Code of Federal Regulations” Title 47, Part 15, Subpart C, Section 15.247 for<strong>Bluetooth</strong> spread spectrum transmitters. KCWirefree has many firmware configurations and a PCBmounted mini USB jack (J4) allows the user to update the module firmware 4 .Once powered, S1 (<strong>Bluetooth</strong>) is used to enable the M1 module and establish the <strong>Bluetooth</strong> connectionper Table 2. S2 (VOL UP) and S3 (VOL DN) raise and lower the received volume, respectively. Doublepressing S2 and S3 will also raise and lower audio input gain.M1 has a maximum audio input level of 0.4 Vrms. A typical transceiver headphone/speaker outputsabout 1 Vrms of audio with the volume set to midpoint. Therefore, a ‐12 dB attenuator is placed on theinput via R4‐R5 to lower the transceiver audio level. 12 dB of attenuation equates to a 4:1 ratio.V D = 4V D = 1 + (R5/R4)dB = 20 * Log 10 (V D )<strong>Bluetooth</strong> <strong>Radio</strong> <strong>Adapter</strong>, <strong>KG4JJH</strong> Page 1 of 5
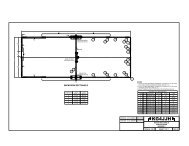
R6 = 7,500R5 = 2,200V D = 1 + 3.02 = 4.4dB = 20 * Log 10 (4.4) = 12.9M1 has a typical audio output level of 0.75 V rms. In a similar fashion, R1 and R6 form a ‐30 dBattenuator to convert the line output level from M1 to transceiver microphone level.R8 = 10KR2 = 300dB = 20 * Log 10 (33.3) = 30.46Two 3.5mm phone jacks supply the connections to the rig speaker/headphone output (J1), and the rigmicrophone (J2).Power SupplyThe voltage regulator accepts an input of 12 VDC and supplies the 3.3VDC required by the circuit. Theregulator features short‐circuit protection and supplies up to 500mA of current. Average current drawfor the circuit is 26mA.PC BoardPer the datasheet, the area around the M1 module should be free of any ground planes, power planes,trace routings, or metal. The recommended minimum clearance is 8mm, but additional clearance allowsimproved range and throughput. A PC board was designed and ordered from ExpressPCB 5 . I tookadvantage of their MiniBoard service which provides three 3.8 inch x 2.5 inch PCBs for $51. The<strong>Bluetooth</strong> <strong>Radio</strong> <strong>Adapter</strong> PCB is smaller than the standard MiniBoard size so it must be cut to fit theenclosure. Trim the PCB to size by removing the solid copper areas. Cut inside the copper areas (using aband saw or hack saw with a fine tooth blade) and finish removing the copper areas with a file.Construction and ToolsAll components are surface mount except J1‐J4, S1‐S3, D1‐D3, and FB1. Since this was my first project toimplement SMDs, I invested in a few tools and supplies: Magnifying lamp (3 diopter) Temperature controlled soldering station (Hakko FX‐888) Soldering tips (Hakko T18‐I, T18‐C05, T18‐B) Tweezers (DigiKey# EROP3CSA‐ND) 0.020" diameter solder (Mouser# 533‐24‐6337‐9702) De‐soldering braid (Mouser# 5878‐60‐1‐5)Another option for SMD soldering is a hot air rework station 6 . It uses hot air to solder the componentsusing solder paste. All components mount on the component side. Install all surface mount componentsfirst to allow room for the soldering iron. Inspect the PCB for correct components, componentorientation, good solder joints, and remove any solder bridges using the de‐soldering braid. Mount thetwo LEDs by bending the leads per the detail on drawing page 2 of 3. Also, remove the plastic tabs onthe bottom of J1 and J2.<strong>Bluetooth</strong> <strong>Radio</strong> <strong>Adapter</strong>, <strong>KG4JJH</strong> Page 2 of 5
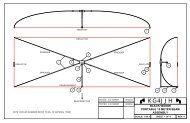
Tap the PCB mounting holes with a 4‐40 tap and install the PCB using four nylon 4‐40 x 3/16" machinescrews. The use of nylon screws prevents shorting any of the PCB traces and reduces the amount ofmetal around the antenna. A drill template is provided for the enclosure front and rear panels to aid inhole cutting. Print the PDF template full size by selecting “None” under Page Scaling, align the templatecenter lines with the panel center lines, and secure it to the panel using a temporary adhesive such as aglue stick. To complete the enclosure, add four sticky‐back rubber feet on the bottom.The cable for connecting the <strong>Bluetooth</strong> <strong>Radio</strong> <strong>Adapter</strong> audio input to the transceiver speaker/phoneoutput is a standard shielded cable with 3.5mm mono phone plugs on each end. The cable forconnecting the <strong>Bluetooth</strong> <strong>Radio</strong> <strong>Adapter</strong> microphone to the transceiver should have a 3.5mm monophone plug on one end and the appropriate microphone connector on the other end. I prepared onecable for use with my Yaesu FT‐817/857 and one for my Kenwood TS‐480SAT (both rigs use RJ‐45microphone connectors). J2 tip is audio out to the rig microphone, and J2 sleeve is microphone ground.Cut a five foot CAT‐5e cable in half and solder a 3.5mm mono phone plug on the cut end. Buildersshould consult their rig manual for microphone pinouts.<strong>Bluetooth</strong> HeadsetI chose the VXi Blue Parrott® B250‐XT 7 to test the <strong>Bluetooth</strong> <strong>Radio</strong> <strong>Adapter</strong> as it has a boom that placesthe microphone near the mouth, increasing intelligibility. This headset combines a high‐performancenoise‐canceling microphone and noise suppression technology to eliminate ambient noise. It features 16hours of talk time on a single charge and up to 150 hours standby time.Power Up and ConnectingTable 1 lists the LED event and state indicators. Table 2 lists the available button actions.Event LED Action SpecificPowering On Solid Blue 1s onPowering Off Solid Red 1s onDiscoverable Fast alternate Red Blue blink 60ms on, 60ms offConnectable Slow double Blue blink 80ms on/off/on, 1200ms offConnected Blue blip 40ms on, 2300ms offConnecting to Headset Fast Blue blinkSearching for new Headset Blue Red Blue blinkReset PairingTriple Red + Blue flashTable 1FeaturePower OnPower OffConnect LastSearch & ConnectVolume UpVolume DownInput Gain UpInput Gain DownReset PairingButton ActionHold <strong>Bluetooth</strong> button 2.5 sec when offHold <strong>Bluetooth</strong> button 2.5 sec when onPress <strong>Bluetooth</strong> buttonHold <strong>Bluetooth</strong> button 1 secPress VOL UP, hold for repeatPress VOL DN, hold for repeatDouble press VOL UPDouble press VOL DNHold VOL UP and VOL DN 2 secTable 2<strong>Bluetooth</strong> <strong>Radio</strong> <strong>Adapter</strong>, <strong>KG4JJH</strong> Page 3 of 5
OperationUpon power up, the <strong>Bluetooth</strong> <strong>Radio</strong> <strong>Adapter</strong> will search for any previously paired <strong>Bluetooth</strong> headsetsand attempt to connect with them. The <strong>Bluetooth</strong> <strong>Radio</strong> <strong>Adapter</strong> is only discoverable and available fornew pairings upon power‐up if there are no previously paired devices in memory. Otherwise, the<strong>Bluetooth</strong> <strong>Radio</strong> <strong>Adapter</strong> can be put into discoverable pairing mode manually by pressing and holdingthe BT button through power up. After a 7 second hold the <strong>Bluetooth</strong> <strong>Radio</strong> <strong>Adapter</strong> will enterdiscoverable mode, beep twice, and flash an alternating red and blue light sequence. Press and hold theBlue Parrot Headset <strong>Bluetooth</strong> button for six or seven seconds and release. The headset will beep andthe two units should connect in the next few seconds and display a slow flashing blue LED. Once paired,the unit can be powered up using a 2.5 second press of the BT button for instant connection.Once connection is established between the <strong>Bluetooth</strong> headset and <strong>Bluetooth</strong> <strong>Radio</strong> <strong>Adapter</strong>, adjust theoutput volume using the VOL UP and VOL DN buttons. Also, adjust the input gain input using a doublepress of the same buttons. The KC Wirefree modules support PTT functions, but since cell phones (andcell phone accessories) are full duplex there is no need for a PTT button. Therefore, when using the<strong>Bluetooth</strong> <strong>Radio</strong> <strong>Adapter</strong> with a standard <strong>Bluetooth</strong> headset set your rig for VOX operation. As an aid tounwanted transmissions, the Blue Parrot Headset features a mute button. When transmitting from the<strong>Bluetooth</strong> headset there is a wireless delay of about 45ms that is unnoticeable unless the transceivertransmit monitor is turned on. It is therefore recommended that the transmit monitor be turned off toavoid this slight echo effect.The highest signal to noise ratio on the <strong>Bluetooth</strong> headset is achieved by reducing the <strong>Bluetooth</strong> <strong>Radio</strong><strong>Adapter</strong> input gain to minimum (double press the VOL DN several times). Then, adjust the transceiveroutput volume for maximum volume with minimum distortion.The operating range depends on several factors. Best range is achieved with line‐of‐sight positioning ofthe <strong>Bluetooth</strong> headset and <strong>Bluetooth</strong> <strong>Radio</strong> <strong>Adapter</strong>. Certain conditions and obstructions, such as otherwireless devices, microwave ovens, walls, or placing the device on a metal surface (such as yourvehicle’s hood), can inhibit radio wave transmission and reduce range. Officially, there are three classesof <strong>Bluetooth</strong> 8 radios:Maximum Permitted PowermW dBm1 100 20 3002 2.5 4 333 1 0 3Table 3ClassRange(Feet)ConclusionI was pleasantly surprised at the ease of surface mount soldering. The magnifying lamp and tweezersmade component placement a snap. The high quality temperature‐controlled soldering iron and smalldiameter solder were instrumental in the completion of this project. My method was to lightly tin onepad with solder, place and align the component on the pads with tweezers, press down on thecomponent, and heat the tinned pad. This levels and holds the component in place to allow soldering ofthe remaining pads. Finally, go back and resolder the first pad with additional solder. In order to cleanup any solder bridges, place the solder wick over the solder bridge and hold the tip of the soldering ironon top of the solder wick. Excess solder is then pulled into the wick, eliminating the bridge.<strong>Bluetooth</strong> <strong>Radio</strong> <strong>Adapter</strong>, <strong>KG4JJH</strong> Page 4 of 5
The outdoor range of the Blue Parrot headset to <strong>Bluetooth</strong> <strong>Radio</strong> <strong>Adapter</strong> is over 50 feet and shouldprovide complete local coverage. Users should be aware that <strong>Bluetooth</strong> transmissions do not alwayspenetrate walls or ceilings and are therefore limited to relatively short line‐of‐sight ranges. Audioquality transmitted from the <strong>Bluetooth</strong> <strong>Radio</strong> <strong>Adapter</strong> to the <strong>Bluetooth</strong> headset is excellent, and theaudio from the <strong>Bluetooth</strong> headset to the transceiver via the <strong>Bluetooth</strong> <strong>Radio</strong> <strong>Adapter</strong> easily meets thenominal 300‐3 KHz communications bandwidth.This project is among the most enjoyable and interesting Amateur <strong>Radio</strong> devices that I have developed.And, because there are a relatively small number of components, it presents an ideal introduction tosurface mount soldering. Once the <strong>Bluetooth</strong> <strong>Radio</strong> <strong>Adapter</strong> has been paired with the headset and thelevels set, the fun begins. The Amateur <strong>Radio</strong> operator, no longer glued to the transceiver, is now free toroam around. So, get off of your station chair, lace up your tennis shoes, and turn your sedentary radiotime into a work out!GL & 73,Allen Baker, <strong>KG4JJH</strong>211 Brochardt Blvd.Knoxville, TN 37934http://www.kg4jjh.com/References1. Jabra A210 <strong>Bluetooth</strong> Interface for Amateur <strong>Radio</strong>, VK3KBC,http://radcomms.net/Jabra_A210.html2. TalkSafe, <strong>Bluetooth</strong> Interface, RPF Communications,http://www.universal‐radio.com/catalog/hamacc/2736.html3. KC Wirefree Corporation, <strong>Bluetooth</strong> Wireless Audio Products, KC‐6112 Datasheet,http://kcwirefree.com/kc6112.html4. KC Wirefree Corporation, Firmware Update Tools, http://kcwirefree.com/firmware.html5. Hot Air Rework Station, http://www.mcmelectronics.com/product/21‐114256. ExpressPCB, http://www.expresspcb.com/index.htm7. Blue Parrot B250‐XT Headset, http://www.vxicorp.com/products/blueparrott‐bluetooth‐mobilesolutions/bluetooth‐headsets/b250‐xt/8. <strong>Bluetooth</strong> Basics, <strong>Bluetooth</strong> SIG, Inc., http://www.bluetooth.com/Pages/Basics.aspx<strong>Bluetooth</strong> <strong>Radio</strong> <strong>Adapter</strong>, <strong>KG4JJH</strong> Page 5 of 5