Spreadsheet Server for use with Movex - Global Software, Inc.
Spreadsheet Server for use with Movex - Global Software, Inc.
Spreadsheet Server for use with Movex - Global Software, Inc.
- No tags were found...

You also want an ePaper? Increase the reach of your titles
YUMPU automatically turns print PDFs into web optimized ePapers that Google loves.
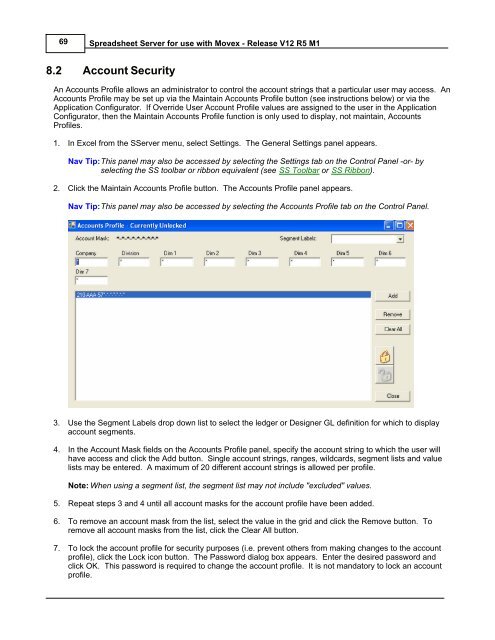
69<strong>Spreadsheet</strong> <strong>Server</strong> <strong>for</strong> <strong>use</strong> <strong>with</strong> <strong>Movex</strong> - Release V12 R5 M18.2 Account SecurityAn Accounts Profile allows an administrator to control the account strings that a particular <strong>use</strong>r may access. AnAccounts Profile may be set up via the Maintain Accounts Profile button (see instructions below) or via theApplication Configurator. If Override User Account Profile values are assigned to the <strong>use</strong>r in the ApplicationConfigurator, then the Maintain Accounts Profile function is only <strong>use</strong>d to display, not maintain, AccountsProfiles.1. In Excel from the S<strong>Server</strong> menu, select Settings. The General Settings panel appears.Nav Tip:This panel may also be accessed by selecting the Settings tab on the Control Panel -or- byselecting the SS toolbar or ribbon equivalent (see SS Toolbar or SS Ribbon).2. Click the Maintain Accounts Profile button. The Accounts Profile panel appears.Nav Tip:This panel may also be accessed by selecting the Accounts Profile tab on the Control Panel.3. Use the Segment Labels drop down list to select the ledger or Designer GL definition <strong>for</strong> which to displayaccount segments.4. In the Account Mask fields on the Accounts Profile panel, specify the account string to which the <strong>use</strong>r willhave access and click the Add button. Single account strings, ranges, wildcards, segment lists and valuelists may be entered. A maximum of 20 different account strings is allowed per profile.Note: When using a segment list, the segment list may not include "excluded" values.5. Repeat steps 3 and 4 until all account masks <strong>for</strong> the account profile have been added.6. To remove an account mask from the list, select the value in the grid and click the Remove button. Toremove all account masks from the list, click the Clear All button.7. To lock the account profile <strong>for</strong> security purposes (i.e. prevent others from making changes to the accountprofile), click the Lock icon button. The Password dialog box appears. Enter the desired password andclick OK. This password is required to change the account profile. It is not mandatory to lock an accountprofile.