Endopore implants with Internal Connection, One-Stage ... - Optident
Endopore implants with Internal Connection, One-Stage ... - Optident
Endopore implants with Internal Connection, One-Stage ... - Optident

Create successful ePaper yourself
Turn your PDF publications into a flip-book with our unique Google optimized e-Paper software.
<strong>Endopore</strong> ®ContentsContents3 Introduction4 Product Descriptions<strong>Endopore</strong> <strong>implants</strong> <strong>with</strong> internal connection for one-stage surgery<strong>Endopore</strong> <strong>implants</strong> <strong>with</strong> internal hex for one-stage and two-stage surgery<strong>Endopore</strong> <strong>implants</strong> <strong>with</strong> external hex connection for one-stage and twostagesurgery5 Surgical Instrumentation<strong>Endopore</strong> Surgical Kit<strong>Endopore</strong> Osteotome KitInstrument Care and Sterilization6 Patient SelectionPatient Records and SelectionImplant IndicationsContraindications7 Pre-Surgical Considerations8 <strong>One</strong>-<strong>Stage</strong> and Two-<strong>Stage</strong> Implant Placement ProcedureSteps 1 to 510 <strong>Endopore</strong> <strong>implants</strong> <strong>with</strong> <strong>Internal</strong> <strong>Connection</strong>,<strong>One</strong>-<strong>Stage</strong> Implant Placement ProcedureSteps 6 to 911 <strong>Endopore</strong> <strong>implants</strong> <strong>with</strong> <strong>Internal</strong> Hex and External Hex <strong>Connection</strong>,Two-<strong>Stage</strong> Implant Placement ProcedureSteps 6 to 912 Osteotome ProceduresImplant Placement Procedure Using OsteotomesSequence for OsteotomesElevating the Sinus Floor During Implant Placement18 Initial Healing Period and Postoperative Follow-UpInitial Healing PeriodImplant LoadingTwo-<strong>Stage</strong> Re-Entry Surgery19 <strong>Endopore</strong> Key Protocol Features for First and Second <strong>Stage</strong> Surgery
Introduction<strong>Endopore</strong> ®Introduction to the ENDOPORE ®Dental Implant SystemIt has been more than 20 years since researchbegan at the University of Toronto, Faculty ofDentistry, to seek out alternative technologyto threaded dental <strong>implants</strong> and since thattime, the <strong>Endopore</strong> Dental Implant System hasbeen successfully used in the treatment ofthousands of patients in over 20 countries torestore oral function and esthetics and bringto these patients a greatly enhanced qualityof life.The purpose of this manual is to describe the surgicalprotocols for the <strong>Endopore</strong> Dental Implant System used in a:• <strong>One</strong>-<strong>Stage</strong> Procedure• Two-<strong>Stage</strong> Procedure• Osteotome ProceduresA wide range of prosthetic options isavailable from Innova for functional andesthetic restorations. Additional options areavailable from Attachments International, anInnova subsidiary, which has over 25 years ofexperience in restorative dentistry.
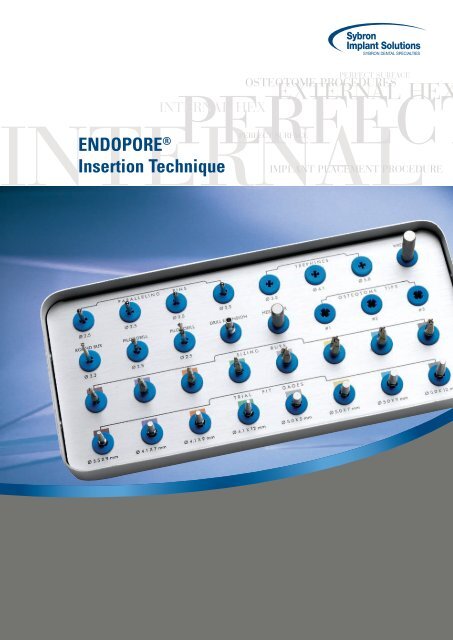
Surgical InstrumentationBICORTICAL <strong>Endopore</strong>® ®Surgical Instrumentation<strong>Endopore</strong> Surgical KitThe basic instrumentation for placing the <strong>Endopore</strong> Implant consists of:• round bur• twist drills• paralleling pins (occlusal guide pins)• colour-coded implant burs• colour-coded trial-fit gages• stainless steel punch tipA surgical motor and handpiece <strong>with</strong> internaland external irrigation capability suitablefor implant placement are necessary.• straight or offset punch handle• drill extension• 0.05” hex driver• tip wrench• mallet<strong>Endopore</strong> Osteotome KitThe <strong>Endopore</strong> Osteotome Kit consists of:three end-cutting osteotome tips, bothstraight and offset handles to which the tipsare connected for use, and a surgical mallet.Instrument Care and SterilizationThe <strong>Endopore</strong> Dental Implant System surgicalinstruments must be cleaned and sterilisedprior to and following their first and everyuse. Immediately following surgery, theinstruments should be submerged in aninstrument disinfectant and the surfaceof each item scrubbed <strong>with</strong> a soft brushto remove all debris. Special attentionshould be directed to the internally irrigateddrills/burs. Dislodge any debris from theirrigation openings or inside the shank ofthe drill/bur. Then each drill/bur should beflushed generously <strong>with</strong> distilled water.The instruments should then be placed inan ultrasonic unit followed by rinsing <strong>with</strong>distilled water and drying. It is acceptable todry <strong>with</strong> a lint free towel but is suggested thatthe internally irrigated items be “blown” dry<strong>with</strong> compressed air.The <strong>Endopore</strong> surgical tray should be wipeddown <strong>with</strong> disinfectant then rinsed <strong>with</strong> waterand dried. All items should be inspected andplaced in the appropriate position in the tray.Then the tray is wrapped or bagged, sealedand sterilised by steam autoclaving <strong>with</strong> acomplete drying cycle.
<strong>Endopore</strong> ®Patient SelectionPatient SelectionPatient Records and SelectionAny patient <strong>with</strong> a fully or partially edentulousmandible or maxilla can be considered for thistreatment modality provided that they are ingood general health (see Indications andContraindications).A well-prepared treatment plan is critical forimplant success, including but not limited to:• Complete oral examination• Treatment of existing pathologies prior toimplant placement• Radiographic assessment- Good quality panoramic film- Appropriate long-cone periapical films- Additional specialised films for the site(s)being treated: e.g. CT scans• Study models• A pre-surgical prosthetic guide using thepatient’s prosthesis or natural teeth asa reference so that the <strong>implants</strong> can beplaced in the most suitable locations duringthe surgery.The clinician must determine all potentialrisks and the suitability of the patient for animplant supported or implant retainedrestoration.Implant IndicationsThe <strong>Endopore</strong> Dental Implant is used as anartificial tooth root to support a prosthesisin an edentulous or partially edentulousmandible or maxilla.
Pre-Surgical Considerations<strong>Endopore</strong>Contraindications<strong>Endopore</strong> Dental Implants should not be used<strong>with</strong> patients who have contraindicatingsystemic or local diseases including, but notlimited to:Local contraindications• Oral infections or malignancies• Active periodontal diseaseGeneral medical contraindications• Blood dyscrasias• Uncontrolled diabetes• Hyperthyroidism• Renal disease• Uncontrolled hypertension• Liver problems• Leukemia• Severe vascular heart disease• Hepatitis• Any immunosuppressive disorderRelative medicalcontraindications• Tobacco use• Excessive alcohol consumption• Poor oral hygiene• Bruxism• Nail or pencil biting• Tongue habitsAnatomical contraindications• Insufficient ridge dimensions toaccommodate proper implant placement.Ideal ridge width is considered to be 6 mmor more.Pre-Surgical Considerations• Scaling and root planing one to four weeks before surgery.• Pre-operative intra-oral and extra-oral disinfection of the surgical site(s) <strong>with</strong>chlorhexidine mouthrinse or a similar antiseptic.• Isolation of the surgical field <strong>with</strong> sterile drapes and gowns (OSHArecommendations).
<strong>Endopore</strong> ®<strong>One</strong>-<strong>Stage</strong> and Two-<strong>Stage</strong> Implant Placement Procedure<strong>One</strong>-<strong>Stage</strong> and Two-<strong>Stage</strong> Implant Placement Procedure,Steps 1 to 5Step 1Elevate a full-thickness mucoperiosteal flap to expose theunderlying bone. The optimal implant site is marked byperforating the upper bony cortex using a 2.3 mm round bur<strong>with</strong> the pre-surgical prosthetic guide at 1500-2000 rpm <strong>with</strong>copious external saline irrigation.Step 2Use the twist drill at a drill speed of 1000-1500 rpm <strong>with</strong>copious internal and external sterile saline irrigation. The twistdrill is indexed <strong>with</strong> markings to correspond to the variousimplant lengths and is used to create a site of the appropriatedepth for the <strong>implants</strong> to be placed.12 mm9 mm7 mm5 mmStep 3A paralleling pin (occlusal guide pin) is used to verify theappropriate alignment <strong>with</strong> adjacent teeth, opposing occlusionor other <strong>implants</strong>.A radiographic image is recommended.
<strong>One</strong>-<strong>Stage</strong> and Two-<strong>Stage</strong> Implant Placement ProcedureBICORTICAL <strong>Endopore</strong>® ®Step 4When the final depth is reached <strong>with</strong> the twist drill and theparalleling pin confirms the proper angulation, the site isexpanded <strong>with</strong> the appropriate sized implant bur at a drillspeed of 1000 rpm <strong>with</strong> copious internal and external sterilesaline irrigation.Exact site preparation is important, especially for tapered,self-seating <strong>implants</strong>.If a 5.0 mm diameter implant is used, it is recommended toexpand the osteotomy gradually by using a 4.1 mm implant burof the same length, as an intermediate bur.Sharp burs and a high handpiece torque potential are criticalto avoid overheating of bone and bur chatter; therefore, it isrecommended to change burs after approximately 10 uses,depending on bone density.Surgical gauze fibers can contaminate the surface of theimplant and increase the risk of implant failure; therefore,gauze should not be used near the surgical site or on theinstruments used in the site preparation.Step 5Generously irrigate the osteotomy <strong>with</strong> sterile saline to removeany bone chips before checking the site <strong>with</strong> the appropriatesizedtrial-fit gage.The shoulder of the cone-shaped portion of the gage shouldbe flush <strong>with</strong> or just below the crestal bone level.The trial-fit gage can be left in the first site as a guide to helpachieve parallelism <strong>with</strong> other <strong>implants</strong>. For multiple <strong>implants</strong>ites it is important to ensure that the edge-to-edge interimplantdistance is at least 2 to 3 mm to ensure optimal boneand soft tissue (including papilla reformation).
<strong>Endopore</strong> ®<strong>One</strong>-<strong>Stage</strong> Implant Placement Procedure<strong>Endopore</strong> <strong>implants</strong> <strong>with</strong> <strong>Internal</strong> <strong>Connection</strong>,<strong>One</strong>-<strong>Stage</strong> Implant Placement Procedure, Steps 6 to 9Please note the following steps refer to the <strong>Endopore</strong> <strong>One</strong>-<strong>Stage</strong> implant placement procedure.Step 6The implant is carefully removed from the sterile packagingand delivered directly to the site using the attached whitedelivery tool only. The implant is pressed into the bleeding site<strong>with</strong> manual pressure and the delivery tool disconnected fromthe implant using a gentle rocking motion.Care should be taken to avoid inadvertent contact of theporous surface of the implant <strong>with</strong> anything prior to its fullseating into the prepared site. Such contamination could leadto foreign body reaction and failure of the implant to integrate.Step 710The implant is driven into its final position <strong>with</strong> several firmtaps <strong>with</strong> the punch tip and mallet, resulting in a tight fit of theimplant into the bone.In all cases, the entire porous-surfaced region of the implantand the 0.5 mm smooth coronal region must be fullysubmerged in bone and the implant must be immobile.Step 8The tapping action of seating the implant mayloosen the coverscrew; therefore it isimportant to tighten the cover screw using the0.05” hex driver and finger pressure.At this point the implant must remainimmobile.Step 9The flap margins are repositioned and sutured in a tensionfree manner.
Two-<strong>Stage</strong> Implant Placement ProcedureBICORTICAL <strong>Endopore</strong>® ®<strong>Endopore</strong> <strong>implants</strong> <strong>with</strong> <strong>Internal</strong> Hex/External Hex <strong>Connection</strong>,Two-<strong>Stage</strong> Implant Placement Procedure, Steps 6 bis 9Please note the following steps refer to the <strong>Endopore</strong> Two-<strong>Stage</strong> implant placement procedure.Step 6The implant is carefully removed from the sterile packagingand delivered directly to the site using the attached whitedelivery tool only. The implant is pressed into the bleeding site<strong>with</strong> manual pressure and the delivery tool disconnected fromthe implant using a gentle rocking motion.Care should be taken to avoid inadvertent contact of theporous surface of the implant <strong>with</strong> anything prior to its fullseating into the prepared site. Such contamination could leadto foreign body reaction and failure of the implant to integrate.Step 7The implant is driven to its final position <strong>with</strong> several firm taps<strong>with</strong> the punch tip and mallet, resulting in a tight fit of theimplant into the bone.11In all cases, the entire porous-surfaced region of the implantand at least 1 mm of the smooth coronal region must be fullysubmerged in bone and the implant must be immobile.Step 8The tapping action of seating the implant may loosen thecover screw; therefore it is important to tighten the coverscrew using the 0.05” hex driver and finger pressure.At this point the implant must remain immobile.Step 9The flap margins are repositioned and sutured in a tensionfree manner.
<strong>Endopore</strong> ®Osteotome ProceduresOsteotome ProceduresImplant Placement Procedure Using OsteotomesWith its press-fit design, highly osteoconductivesurface and integration by boneingrowth and 3-dimensional mechanicalinterlock, the <strong>Endopore</strong> Dental Implant isappropriate for placement using osteotometechniques, especially in the posteriormaxilla where cancellous bone (Types III &IV bone - Albrektsson and Zarb), i.e., boneof lower density but high vascularity, oftenpredominates. In denser bone in the maxilla(Types I & II) and all sites in the mandible,placement of the implant <strong>with</strong> surgical burs isnecessary.12As <strong>with</strong> all dental implant procedures, sterile technique must be followed.Step 1Elevate a full-thickness mucoperiosteal flapto expose the underlying bone. The optimalimplant site is marked by perforating the upperbony cortex using a 2.3 mm round bur <strong>with</strong> thepresurgical prosthetic guide at 1500-2000 rpm <strong>with</strong>copious external saline irrigation.Step 2After the cortex has been perforated, the #1osteotome tip attached to either a straight oroffset handle is inserted at the appropriateangulation (for later correct implant orientation)into the marked osteotomy site. The surgicalmallet is then used to deliver a series of tapsto the end of the osteotome handle takingcare to maintain the correct angulation of theosteotome.If the bone is as expected of Type III or IV,the osteotome will quickly advance into theosteotomy, and the development progress ofthe osteotomy can be measured by observingthe osteotome tip’s depth markings (5, 7, 9 and12 mm). If a simultaneous sinus floor elevationis being done using osteotomes, please seeprocedure, pages 13 to 15. If required, an x-raycan be taken at this point to verify the positionand proper alignment of the osteotome. Todo this, the handle can be unscrewed andremoved and the osteotome tip left in situ forthe radiograph.If considerable resistance to osteotomeadvancement is experienced, the twist drillmay be required to establish initial partial orcomplete depth for the osteotomy.
Osteotome ProceduresBICORTICAL <strong>Endopore</strong>® ®I Sequence for Osteotomesdiameter1.6 2.2 2.8Ø 3.5 mm9 mm Length57957957906-OT1 06-OT2 06M-9TFG/O121212Ø 4.1 mm7 mm Lengthtip #1 tip #2 tip #3* All measurements are in mm06-OT1 06-OT2 06-OT3 06-7TFG/OThe osteotome tips are labeled as #’s 1, 2 and 3 andhave increasing tip diameters. All three tips haveØ 4.1 mm9 mm Length06-OT1 06-OT2 06-OT3 06-9TFG/Ohorizontal markings indicating depths of 5, 7, 9 and 12mm corresponding to the available <strong>Endopore</strong> implantlengths.Generally the three tips are used in sequence and oncethe appropriate depth is reached, the trial-fit gagecorresponding to the implant being placed is connectedto an osteotome handle and used as the final osteotome.13Ø 4.1 mm12 mm Length06-OT1 06-OT2 06-12TFG/OØ 5.0 mm5 mm Length06-OT1 06-OT2 06-OT306-7TFG/Oto 5 mm only06W-7TFG/Oto 5 mm only06W-5TFG/OØ 5.0 mm7 mm Length06-OT1 06-OT2 06-OT3 06-7TFG/O 06W-7TFG/OØ 5.0 mm9 mm Length06-OT1 06-OT2 06-OT3 06-9TFG/O 06W-9TFG/OØ 5.0 mm12 mm Length06-OT1 06-OT2 06-OT3 06-12TFG/O 06W-12TFG/O
<strong>Endopore</strong> ®Osteotome ProceduresStep 3After the #1 osteotome tip has reached the required depth for the intendedimplant length, the procedure is repeated <strong>with</strong> osteotomes #2 and #3 <strong>with</strong>the exception of the 3.5 mm x 9 mm and 4.1 mm x 12 mm <strong>Endopore</strong>. In theseinstances, only the #1 and #2 osteotomes will be needed for site development(Reference chart on page 13).Pausing occasionally during site development <strong>with</strong> osteotomes while leavingthe osteotomes in the site allows some stress relaxation in the bone and mayreduce the risk of fracture of the buccal or palatal cortical plates.Step 414When the site depth has been reached <strong>with</strong> the three (or two in the case ofthe 3.5 mm x 9 mm and 4.1 mm x 12 mm implant site development) osteotometips, the appropriate <strong>Endopore</strong> trial-fit gages* are used as the final osteotometip. This gage has the exact shape and appropriate dimensions for the implantbeing placed, i.e., it acts as an implant replica. Note that each <strong>Endopore</strong>implant has a specific corresponding trial-fit gage found in the <strong>Endopore</strong>surgical kit, and must be used <strong>with</strong> the surgical mallet to complete sitedevelopment. Care should be taken to see that the entire conical tip of thetrial-fit gage is seated in bone in order to ensure that the implant later will beseated to the same degree.* As shown in the chart on page 13, if a 5.0 mm diameter implant is beingplaced, both the 4.1 mm diameter and the 5.0 mm diameter trial-fit gages willbe needed to complete the osteotomy. Moving directly from the #3 osteotometip to the 5.0 mm diameter trial-fit gage is not recommended as this approachcould overstress the bone and result in damage to the buccal or palatalcortices.Step 5The implant is carefully removed from the sterile packaging and delivereddirectly to the site using the attached white delivery tool only. The implantis pressed into the bleeding site <strong>with</strong> manual pressure and the delivery tooldisconnected from the implant using a gentle rocking motion.Care should be taken to avoid inadvertent contact of the porous surface ofthe implant <strong>with</strong> anything prior to its full seating into the prepared site. Suchcontamination could lead to foreign body reaction and failure of the implant tointegrate.
Osteotome ProceduresBICORTICAL <strong>Endopore</strong>® ®Step 6The implant is driven to its final position <strong>with</strong> several firm taps <strong>with</strong> the punchtip and mallet, resulting in a tight fit of the implant into the bone. In all cases,the entire porous-surfaced region of the implant must be submerged in bone(around the entire periphery of the implant).Step 7The tapping action of seating the implant may loosen the cover screw;therefore it is important to manually tighten the cover screw using the 0.05”hex driver and finger pressure.At this point the implant must remain immobile.Step 815The flap margins are repositioned and sutured in a tension free manner.Elevating the Sinus Floor During Implant PlacementIf there is less than 7 mm (and a minimum of 3 mm) of subantral bone existing below the sinusat an intended implant site and the operator wishes to place a 7 mm long <strong>Endopore</strong> implant,the sinus floor may be locally elevated <strong>with</strong> the osteotome tips at the time of implant placement<strong>with</strong> the following procedural modifications.Step 1Using the appropriate pre-operative radiographs, the height ofsubantral bone at the intended implant site is determined. With thisinformation, it will be known how deeply the #1 osteotome tip can advance<strong>with</strong>out contacting the actual sinus floor. Generally, this first osteotome tipshould be advanced <strong>with</strong> the aid of the surgical mallet to a depth about 1 mmshort of touching the sinus floor. A distinct change in sound and feel wouldindicate that the osteotome has reached the denser sinus floor. A periapicalradiograph may be taken at any point in this step to verify the depth ofpenetration of the osteotome tip in relation to the sinus floor.
<strong>Endopore</strong> ®Elevating the Sinus Floor During Implant PlacementStep 2Step #1 should be repeated <strong>with</strong> the #2 and #3 osteotome tips,i.e., <strong>with</strong> site development still stopping short of the sinus floor.A plug of autogenous bone will have been collected andcompacted by the osteotome tips at the apex of this partiallydeveloped osteotomy. Once this partial depth (i.e., to <strong>with</strong>in~1 mm of the sinus floor) has been achieved <strong>with</strong> the #3osteotome tip, it is generally recommended that a particulategraft material be used to supplement the autogenous boneplug that has been developed at the osteotomy apex. Thisgraft material should be gently packed into the site usingsterile technique, and at this point the #3 osteotome tip andsurgical mallet used to “upfracture” the sinus floor at the site.Care should be taken not to advance more than 1 mm in sitedepth at this time in order to minimize the risk of damaging theSchneiderian membrane.16Step 3Once the sinus floor has been upfractured, it is wise to checkvisually to ensure that there remains a definitive “roof” of graftmaterial at the osteotomy apex. If an antral communicationhas been accidentally created by advancing too far apically,the procedure should likely be aborted and appropriate actiontaken.If as expected a definitive roof to the osteotomy can be seen,site development should continue by first adding more of theparticulate graft material, compacted it gently and thenadvancing to a further 1 mm of osteotomy depth <strong>with</strong> the #3osteotome tip and surgical mallet. This cycle of adding graftmaterial and advancing a further 1 mm should be continueduntil the full depth of the implant site (generally 7 mm has beenreached). It is NOT necessary to use an <strong>Endopore</strong> implantlonger than 7 mm for this application. Using a longer implantonly increases the risk of Schneiderian membrane damage.
Elevating the Sinus Floor During Implant PlacementBICORTICAL <strong>Endopore</strong>® ®Step 4Once the full depth (generally 7 mm) of the site has beenreached in Step #3, the appropriate trial-fit gage (see thechart on page 13) is used as the final osteotome tip and fullyseated <strong>with</strong> the surgical mallet. Once seated, the trial-fit gageshould be snug fitting and immobile if the implant is later to beproperly stabilized.Step 5The implant is carefully removed from the sterile packaging and delivered directly to the siteusing the attached white delivery tool only. The implant is pressed into the bleeding site <strong>with</strong>manual pressure and the delivery tool disconnected from the implant using a gentle rockingmotion. Care should be taken to avoid inadvertent contact of the porous surface of the implant<strong>with</strong> anything prior to its full seating into the prepared site. Such contamination could lead toforeign body reaction and failure of the implant to integrate.17Step 6The implant is driven to its final position <strong>with</strong> several firm taps <strong>with</strong> the punch tip and mallet,resulting in a tight fit of the implant into the bone. In all cases, the entire porous-surfacedregion of the implant must be submerged in bone (around the entire periphery of the implant).Step 7The tapping action of seating the implant may loosen the cover screw; therefore it is importantto manually tighten the cover screw using the 0.05” hex driver and finger pressure.At this point the implant must remain immobile.Step 8The flap margins are repositioned and sutured in a tensionfree manner.
<strong>Endopore</strong> ®Initial Healing Period and Postoperative Follow-upInitial Healing Period and Postoperative Follow-upInitial Healing Period• Any inadvertent loading of the implant should be eliminated, especially during the first weeksof healing in order to achieve optimal osseointegration.• Ideally, no prosthetics should be worn during the initial healing period of 7 to 10 days.However, if an overdenture is indicated, it must be generously lined <strong>with</strong> a soft liner.• The patient should be instructed to follow an appropriate diet dependent upon the range andscope of surgery.• The patient should rinse gently (starting 24 hours after surgery) <strong>with</strong> a mouthrinse whichdoes not contain alcohol, twice daily until the wound is healed.• Non-resorbable sutures are normally removed 7 to 10 days after surgery. Regular office visitsare recommended.Implant LoadingThe minimum healing period, prior to the commencement of prosthodontic work for the<strong>Endopore</strong> implant is 10 to 14 weeks in the anterior mandible and 16 to 20 weeks in the maxillaand posterior mandible. However, the time period is dependent on bone quality.18The longest healing intervals will be where the indirect sinus elevation has been done at thetime of implant placement in sites where the initial bone height was less than 5 mm below thesinus floor.Two-<strong>Stage</strong> Re-Entry Surgery1. Under sterile conditions the implant cover screw is exposed,by the use of a tissue punch or a conservative incision, andremoved using a 0.05” hex driver and finger pressure.2. A healing abutment is placed using the 0.05” hex driver,tightening only <strong>with</strong> finger pressure. The gingiva is thentightly sutured around the healing abutment. When usingan overdenture, the prosthesis is again relieved over theimplant sites and lined <strong>with</strong> a soft liner. Care is taken toavoid soft tissue insertion at the junction.3. Impressions should be taken 4 weeks after re-entry surgeryto allow tissue healing. For fixed prosthesis, the implant(s)are provisionally loaded for a period of 6 to 8 weeks. If afterthe 6 to 8 weeks of provisional loading the radiographicbone heights are unchanged, the clinician may proceed<strong>with</strong> the final prosthetic protocol. (Please consult the InnovaProsthetic Manual).
<strong>Endopore</strong> Key Protocol Features for First and Second <strong>Stage</strong> SurgeryBICORTICAL <strong>Endopore</strong>® ®<strong>Endopore</strong> Key Protocol Features for First <strong>Stage</strong> SurgeryDo• Use a handpiece <strong>with</strong> internal and externalsterile saline irrigation• Use sharp burs• Use a paralleling pin (occlusal guide pin) tocheck alignment• Expand osteotomy gradually by followingbur sequence• Ensure bleeding in osteotomy site to allow3-dimensional bone integration• Irrigate osteotomy site <strong>with</strong> sterile saline toevacuate bone chips• Ensure that the top of the trial-fit gage isflush or just below the crestal bone level• Remove the implant carefully from thepackaging and carry it directly into thesurgical site• Drive the implant into place <strong>with</strong> severalfirm taps creating a very tight fit• Tighten cover screw <strong>with</strong> finger pressureand 0.05” hex driver• Assure total immobility of implant at time ofplacement• Insure adequate occlusal loadingAvoid• Overheating of bone• Bur chatter, deformed osteotomy site• Undesired implant angulation• Creating an oversized osteotomy site whichwould result in poor initial implant stability• Placing the implant in a poorly vascularisedosteotomy site which might result in failureto integrate• Surgical gauze around the surgical site• Under-seating the implant• Contamination of the surface and ultimatefailure to integrate• Rotation of implant• Use of torque wrench might mobilize theotherwise stable implant• Rotating implant as it will not integrate• Avoid implant overload19<strong>Endopore</strong> Key Protocol Features for Second <strong>Stage</strong> SurgeryDo• Expose implant <strong>with</strong> small incision or tissuepunch• Remove cover screw <strong>with</strong> 0.05” hex driverusing only finger pressure• Place healing abutment <strong>with</strong> 0.05” hexdriver using only finger pressure• Record impression 4 weeks after re-entry,allowing gingiva to healAvoid• Full thickness flap• Use of torque wrench might mobilise theotherwise stable implant• Use of torque wrench might mobilise theotherwise stable implant• Record impression before gingiva hashealedPlease note this page is only a reminder of ‘key-points.’ We highly recommend to read theentire surgical manual before implant placement.
ENDOPORE ® Implant<strong>Internal</strong><strong>Connection</strong><strong>Internal</strong> HexOsteotome PROCEDURESpeRfectExternal HexINTERNAL HEXPerfeCT SURFACEEXTERNAL HEXNTERNALPERFECT SURFACEImplant Placement ProcedureSybron Implant SolutionsThe dental implant platform of Sybron Dental Specialties (SDS)brings together three (INNOVA – ORALTRONICS – ATTACHMENTS)organizations that have been leaders in implant manufacturing,design and development since the inception of implant dentistry.With our most respected, innovative implant systems – PITT-EASY ® ,and ENDOPORE ® – we are giving you access to a world of <strong>implants</strong>olutions.Manufacturer:Sybron Implant Solutions1717 West Collins AvenueOrange, California 92867 · United Stateswww.sybron<strong>implants</strong>.comDistributed by:Sybron Implant Solutions GmbHJulius-Bamberger-Straße 8a · 28279 Bremen · GermanyPhone +49 421 43939-0 · Fax +49 421 443936www.sybron<strong>implants</strong>.de · info@sybron<strong>implants</strong>.de07-0187: 06/07