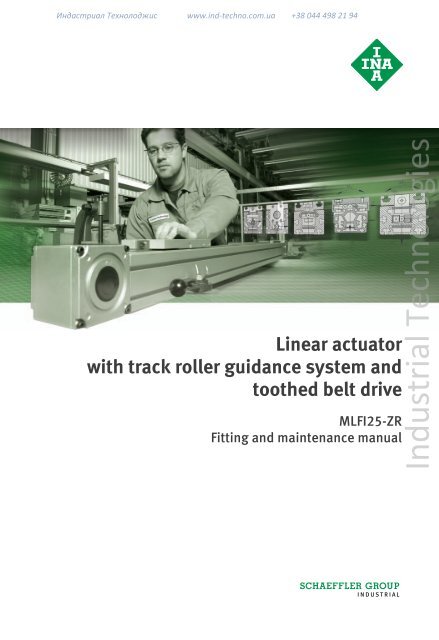
Linear actuator with track roller guidance system and toothed belt ...
Linear actuator with track roller guidance system and toothed belt ...
Linear actuator with track roller guidance system and toothed belt ...
- No tags were found...

You also want an ePaper? Increase the reach of your titles
YUMPU automatically turns print PDFs into web optimized ePapers that Google loves.
Индастриал Технолоджис www.ind-techno.com.ua +38 044 498 21 94Safety guidelines <strong>and</strong> symbolsHigh product safetyStatements to be observedDefinition of guidelines<strong>and</strong> symbolsWarningCautionNote!❏✓Our products correspond to the current level of research <strong>and</strong>technology. If the bearing arrangement is correctly designed,if the products are h<strong>and</strong>led <strong>and</strong> fitted correctly <strong>and</strong> as agreed<strong>and</strong> if they are maintained as instructed, they do not give riseto any immediate hazards.This publication gives descriptions of st<strong>and</strong>ard products.Since these are used in numerous applications, we cannot makea judgement as to whether any malfunctions will cause harm topersons or property.It is always <strong>and</strong> fundamentally the responsibility of the designer<strong>and</strong> user to ensure that all specifications are observed <strong>and</strong> that allnecessary safety information is communicated to the end user.This applies in particular to applications in which product failure<strong>and</strong> malfunction may endanger persons.The warning <strong>and</strong> hazard symbols are defined along the lines ofANSI Z535.6-2006.The meaning of the guidelines <strong>and</strong> symbols is as follows.If they are not observed, death or serious injury may occur.If they are not observed, minor or slight injury will occur.If they are not observed, damage or malfunctions in the productor the adjacent construction will occur.There follows additional or more detailed information that mustbe observed.Numbers <strong>with</strong>in a circle are item numbers.Squares <strong>with</strong> a shaded border are placed in front of instructions.Tick marks indicate preconditions.Industrial Technologies2 MON 73 Schaeffler Group Industrial
Индастриал Технолоджис www.ind-techno.com.ua +38 044 498 21 94ContentsSafety guidelines<strong>and</strong> symbolsPageHigh product safety ................................................................... 2About this manual The purpose of this manual ....................................................... 5Target group .............................................................................. 5Safety guidelinesfor linear <strong>actuator</strong>sOverviewof the linear <strong>actuator</strong>Fittingin the adjacent constructionFitting <strong>and</strong> mountingof accessoriesUse for the intended purpose .................................................... 6General safety guidelines .......................................................... 6Personnel selection <strong>and</strong> qualification ........................................ 7Use of replacement parts........................................................... 7Scope of delivery ....................................................................... 8Available designs ...................................................................... 10Location of the support rail on the adjacent construction........... 12Fixing the carriage to the adjacent construction ......................... 15Coupling housing ...................................................................... 16Coupling.................................................................................... 17Maintenance Maintenance requirements........................................................ 18Maintenance intervals ............................................................... 18Relubrication............................................................................. 19Cleaning .................................................................................... 21Removal <strong>and</strong> dismountingof componentsFitting <strong>and</strong> mountingof components<strong>Linear</strong> <strong>actuator</strong> .......................................................................... 22Toothed <strong>belt</strong> unit ....................................................................... 22Drive unit <strong>and</strong> return unit........................................................... 25Carriage..................................................................................... 27<strong>Linear</strong> <strong>actuator</strong> .......................................................................... 28Carriage..................................................................................... 29Drive unit <strong>and</strong> return unit........................................................... 32Toothed <strong>belt</strong> unit ....................................................................... 33Industrial TechnologiesSchaeffler Group Industrial MON 73 3
Индастриал Технолоджис www.ind-techno.com.ua +38 044 498 21 94ContentsPageVariants Available variant ....................................................................... 39Multiple carriages ..................................................................... 40Replacement parts Toothed <strong>belt</strong>.............................................................................. 41Drive unit .................................................................................. 41Return unit ................................................................................ 42Carriage .................................................................................... 42Support rail ............................................................................... 43Appendix Accessories............................................................................... 44Tightening torques .................................................................... 45Industrial Technologies4 MON 73 Schaeffler Group Industrial
Индастриал Технолоджис www.ind-techno.com.ua +38 044 498 21 94About this manualThe purpose of this manualHow to use the manualTarget groupThis fitting <strong>and</strong> maintenance manual is valid exclusively forthe linear <strong>actuator</strong> MLFI25-ZR.It describes the secure fitting <strong>and</strong> maintenance of thelinear <strong>actuator</strong>.❑ This manual should be read carefully in full before starting anyfitting or maintenance work.❑ The manual must be stored throughout the life of thelinear <strong>actuator</strong>.❑ Please ensure that the manual is accessible at all times tothe target group.❑ The manual must be forwarded to each subsequent owner oroperator of the linear <strong>actuator</strong> or the machine or equipment inwhich the linear <strong>actuator</strong> is fitted.The target group of this manual comprises the operator <strong>and</strong>trained skilled personnel charged <strong>with</strong> the fitting <strong>and</strong> maintenanceof the linear <strong>actuator</strong>s described.Industrial TechnologiesSchaeffler Group Industrial MON 73 5
Индастриал Технолоджис www.ind-techno.com.ua +38 044 498 21 94Safety guidelines for linear <strong>actuator</strong>sUse for the intended purposeGeneral safety guidelinesRisk reductionFundamental instructionsThe linear <strong>actuator</strong> is intended exclusively for moving machinecomponents connected to the carriage.Any other use is not for the intended purpose <strong>and</strong> is thereforeimpermissible. The Schaeffler Group accepts no liability for anydamage or loss arising therefrom.❑ Any actions <strong>and</strong> methods that endanger the safety of humanbeings must not be carried out.❑ In all fitting <strong>and</strong> maintenance work, the following must beobserved:– all nationally valid <strong>and</strong> relevant specifications forthe prevention of accidents– all generally recognised rules of safety practice <strong>and</strong>occupational medicine.The linear <strong>actuator</strong> is constructed in accordance <strong>with</strong> the currentlevel of technology <strong>and</strong> the recognised rules of safety practice.Nevertheless, while it is being used the user or third parties may beput at risk or the linear <strong>actuator</strong> <strong>and</strong> other material assets may beimpaired.Risks can be reduced by observing the following points:❑ The linear <strong>actuator</strong> should only be operated if it is free fromtechnical defects.❑ The linear <strong>actuator</strong> should only be used for the intended purpose<strong>and</strong> <strong>with</strong> an awareness of safety <strong>and</strong> hazards.❑ If any malfunctions occur that have safety implications,the linear <strong>actuator</strong> must be stopped immediately <strong>and</strong> themalfunction rectified by a person <strong>with</strong> appropriateresponsibility.The assembly <strong>and</strong> fitting of the linear <strong>actuator</strong> as well as the fitting<strong>and</strong> dismantling of the individual components must only be carriedout as described in this manual:❑ Carry out the operations in the specified sequence.❑ Use the listed tools <strong>and</strong> fitting accessories correctly.Tools <strong>and</strong> fitting accessories that are unsuitable, damaged orcontaminated will impair the function of the linear <strong>actuator</strong>.❑ Screws must only be tightened using a torque wrench <strong>and</strong>the specified torques must be observed.❑ Use rubber hammers only, not metal hammers.❑ Do not use pointed or sharp-edged tools.Industrial Technologies6 MON 73 Schaeffler Group Industrial
Индастриал Технолоджис www.ind-techno.com.ua +38 044 498 21 94Personnel selection<strong>and</strong> qualificationProviding information to personnelDisclaimer of liabilityUse of replacement partsUse of products from other sourcesDisclaimer of liabilityPersons charged <strong>with</strong> the fitting <strong>and</strong> maintenance of thelinear <strong>actuator</strong> must have adequate qualification. They mustreceive appropriate training <strong>and</strong> instruction before carrying outfitting or maintenance work.The fitting <strong>and</strong> maintenance manual must be available in a suitableform to the nominated persons (for example as a printout).This includes drawing explicit attention to the hazard <strong>and</strong> safetyguidelines in this manual.The Schaeffler Group does not accept any liability for harm tohuman beings, the linear <strong>actuator</strong> <strong>and</strong> the adjacent constructionthat can be attributed to:■ incorrect fitting■ incorrect or inadequate maintenance■ incorrect communication of the content to third parties ora failure to communicate the content.Special INA replacement parts have been developed for the linear<strong>actuator</strong> MLFI25-ZR. These ensure the reliable <strong>and</strong> long termfunction of the linear <strong>actuator</strong>.❑ Do not use replacement parts other than original replacementparts from INA, see page 41.The use of products from other sources instead of INA replacementparts can:■ change the characteristics of the linear <strong>actuator</strong> in a negativemanner■ endanger users or third parties■ cause impairment to the linear <strong>actuator</strong> <strong>and</strong> other materialassets.The Schaeffler Group accepts no liability for any damage or lossarising from the use of products from other sources.Industrial TechnologiesSchaeffler Group Industrial MON 73 7
Индастриал Технолоджис www.ind-techno.com.ua +38 044 498 21 94Overview of the linear <strong>actuator</strong> Support rail <strong>with</strong> raceway shafts Drive unit(return mechanism on drive side) Toothed <strong>belt</strong> unit Carriage <strong>with</strong> profiled <strong>track</strong> <strong>roller</strong>s Return unit(return mechanism on non-driven side)Figure 1Subassembliesof linear <strong>actuator</strong> MLFI25-ZR00015EFAScope of delivery ■ Support rail <strong>with</strong> raceway shafts .■ Drive unit .12Industrial Technologies8 MON 73 Schaeffler Group Industrial
Индастриал Технолоджис www.ind-techno.com.ua +38 044 498 21 9443Scope of delivery– continued■ Toothed <strong>belt</strong> unit .Toothed <strong>belt</strong> <strong>and</strong> <strong>toothed</strong> <strong>belt</strong> clamping devices:The <strong>toothed</strong> <strong>belt</strong> is fixed to the carriage by means of the twoclamping devices.■ Carriage <strong>with</strong> profiled <strong>track</strong> <strong>roller</strong>s .■ Return unit .5Industrial Technologies00015EFBSchaeffler Group Industrial MON 73 9
Индастриал Технолоджис www.ind-techno.com.ua +38 044 498 21 94Ordering designationOrdering exampleDesignThe ordering number can be found engraved on one side ofthe support rail.Ordering number MLFI25-ZR-AL/4 000-3 735Variants<strong>Linear</strong> <strong>actuator</strong> <strong>with</strong> enclosed<strong>track</strong> <strong>roller</strong> <strong>guidance</strong> <strong>system</strong>MLFISize 25Drive type: single <strong>toothed</strong> <strong>belt</strong>ZRDrive shaft on left sideALNumber of carriages 1Total length of <strong>actuator</strong>4 000 mmStroke length of <strong>actuator</strong>3 735 mmVariants of the st<strong>and</strong>ard designs are shown in the chapter Variants,see page 39.Industrial TechnologiesSchaeffler Group Industrial MON 73 11
Индастриал Технолоджис www.ind-techno.com.ua +38 044 498 21 94Fitting in the adjacent constructionThe linear <strong>actuator</strong> is fitted in two steps:■ the support rail is fixed to the adjacent construction■ the carriage is fixed to the adjacent construction.Location of the support railon the adjacent constructionNote!INA connecting bracketsThe support rail can be located on the adjacent construction usingthe following accessories:■ clamping lugs, see page 13■ fixing brackets, see page 13■ T-nuts to DIN 508, see page 14■ T-bolts to DIN 787, see page 14■ hexagonal nuts to DIN 934, see page 14.Under normal loads, location by means of clamping lugs,fixing brackets or T-nuts, T-bolts etc. is normally sufficient.Multi-axis h<strong>and</strong>ling <strong>system</strong>s comprising INA linear <strong>actuator</strong>s can beconstructed using INA connecting brackets.Detailed information on the connecting brackets can befound in INA publication Fasteners <strong>and</strong> connecting brackets forlinear <strong>actuator</strong>s (TPI 153).If linear <strong>actuator</strong>s are located incorrectly, this can damage thelinear <strong>actuator</strong> itself <strong>and</strong> the adjacent construction.❑ Note the maximum tightening torques for the fixing screws,see page 45.❑ Note the maximum spacings for the fasteners.❑ Ensure that the adjacent construction has adequate strength.Industrial Technologies12 MON 73 Schaeffler Group Industrial
Индастриал Технолоджис www.ind-techno.com.ua +38 044 498 21 94Location of the support railusing clamping lugsor fixing brackets❑ If the support rail is fully in contact <strong>with</strong> the adjacentconstruction, clamping lugs or fixing brackets should be fittedon the left <strong>and</strong> right sides of the support rail at intervalsof max. 333 mm.A = 73 mmB = 88 mmFigure 2Location using clamping lugs00015EF7ABmax. 1,0 m❑ Under high loads, the support rail should be fixed at shorterintervals or additionally by means of T-nuts or other accessoriesnamed on page 12.Industrial TechnologiesSchaeffler Group Industrial MON 73 13
Индастриал Технолоджис www.ind-techno.com.ua +38 044 498 21 94Fitting in the adjacent constructionFixing the support railby means of T-nuts❑ If the support rail is fully in contact <strong>with</strong> the adjacentconstruction, T-nuts should be fitted in both profiled slots atintervals of max. 300 mm.Note!The following accessories can be used instead of T-nuts:■ T-bolts■ hexagonal nuts.B = 40 mmFigure 3Fixing by means of T-nutsB❑ Under high loads, the support rail should be fixed at shorterintervals or additionally by means of clamping lugs or fixingbrackets.30030030000015EF8Industrial Technologies14 MON 73 Schaeffler Group Industrial
Индастриал Технолоджис www.ind-techno.com.ua +38 044 498 21 94Fixing the carriageto the adjacent constructionFixing the carriageThe carriage is fixed by means of:■ T-nuts to DIN 508■ T-bolts to DIN 787■ T-strips■ hexagonal nuts to DIN 934.If linear <strong>actuator</strong>s are located incorrectly, this can damage the linear<strong>actuator</strong> itself <strong>and</strong> the adjacent construction.❑ Note the maximum tightening torques for the fixing screws,see page 45.❑ Ensure that the adjacent construction has adequate strength.❑ Protect the raceway of the carriage against contamination.❑ Carriages must be fixed to the adjacent construction inaccordance <strong>with</strong> the loads <strong>and</strong> the forces acting on them.Industrial TechnologiesSchaeffler Group Industrial MON 73 15
Индастриал Технолоджис www.ind-techno.com.ua +38 044 498 21 94Fitting <strong>and</strong> mounting of accessoriesFor the linear <strong>actuator</strong> MLFI25-ZR, INA offers specially developedaccessories, see chapter Appendix, page 44.This chapter shows the fitting of the following accessories:■ coupling housing■ coupling.Coupling housingWarningFitting the coupling housingFigure 4Screw mounting of the couplingRemoving the coupling housingThe following tools are required:■ torque wrench■ Allen key or hex key inserts.Sudden start of the machine.Crushing of fingers between the linear <strong>actuator</strong> <strong>and</strong> machine parts.❑ Before starting work, disconnect the machine from the powersupply.❑ Secure the main switch of the machine against switching on.❑ Remove the black protective cap from the drive shaft,see Figure 11, page 25.❑ Slide the coupling housing over the drive shaft.The larger opening must face towards the adjacent construction.❑ Screw mount the coupling housing to the support rail usingfixing screws.– MLFI25-ZR: M5/5,5 Nm.✓ Coupling removed.❑ Loosen the fixing screws.❑ Remove the coupling housing in the direction of the drive shaft.00015EE6Industrial Technologies16 MON 73 Schaeffler Group Industrial
Индастриал Технолоджис www.ind-techno.com.ua +38 044 498 21 94CouplingWarningFitting the coupling Hole in the coupling housingFigure 5Screw mounting of the couplingRemoving the couplingThe following tools are required:■ torque wrench■ Allen key or hex key inserts.Sudden start of the machine.Crushing of fingers between the linear <strong>actuator</strong> <strong>and</strong> machine parts.❑ Before starting work, disconnect the machine from the powersupply.❑ Secure the main switch of the machine against switching on.✓ Coupling housing fitted.✓ Coupling firmly screw mounted on the motor side to the driveshaft.❑ Slide the coupling onto the drive shaft of the drive unit.There must be a gap of approx. 2 mm left between the coupling<strong>and</strong> the end face of the housing on the <strong>actuator</strong> side.❑ Rotate the coupling so that the fixing screw is accessible viathe hole in the coupling housing.❑ Fully tighten the fixing screw. The fixing screw <strong>and</strong> tighteningtorque will differ according to the coupling used, for informationsee INA publication ALE, Driven <strong>Linear</strong> Units.1❑ Rotate the coupling so that the fixing screw is accessible viathe hole in the coupling housing.❑ Loosen the fixing screw.❑ Remove the coupling in the direction of the drive shaft.Industrial Technologies00015EE7Schaeffler Group Industrial MON 73 17
Индастриал Технолоджис www.ind-techno.com.ua +38 044 498 21 94MaintenanceMaintenance requirementsVisual inspectionMaintenance intervalsMaintenance accordingto operating conditionsNote!Maintenance work is restricted to:■ relubrication■ cleaning.Maintenance work may require the removal <strong>and</strong> refitting ofcomponents, see page 22 onwards.In order to ensure exact function <strong>and</strong> a long operating life ofthe linear <strong>actuator</strong>, it must be visually inspected for damage <strong>and</strong>contamination at regular intervals.Maintenance intervals, especially the intervals betweenrelubrication, are influenced by:■ travel speed <strong>and</strong> drive torque■ loading■ temperature■ stroke length■ environmental conditions (cleanliness etc.).It is not possible to calculate all the influences on maintenanceintervals. The intervals can therefore only be determined preciselyunder operating conditions.The interval lengths stated in the following sections are maximummaintenance intervals. They must be shortened for each individualcase depending on the types of influences present.Industrial Technologies18 MON 73 Schaeffler Group Industrial
Индастриал Технолоджис www.ind-techno.com.ua +38 044 498 21 94RelubricationWhen should relubricationbe carried out?Note!What should be usedfor relubrication?Note!What is the relubrication quantity?Relubrication quantityCarriageNote!Relubrication is necessary for:■ carriages.The relubrication interval is dependent on the environmentalconditions. Relubrication times <strong>and</strong> quantities can only bedetermined precisely under operating conditions.Relubrication must be carried out:■ as a function of the applicationThis must be determined in accordance <strong>with</strong> the operatingconditions.■ as soon as fretting corrosion 1) occurs.If fretting corrosion occurs, the lubrication intervals shoulddefinitely be reduced.For relubrication of the carriage, oils CL <strong>and</strong> CLP to DIN 51 517 <strong>with</strong>a viscosity of ISO-VG 220 are recommended.Detailed information on recommended lubricants can be foundin the INA publication ALE, Driven <strong>Linear</strong> Units. The INA publicationcan be requested through info.linear@schaeffler.com.Guide values for the required quantity of oil are dependent onthe length of the carriage.Carriage lengthRelubrication quantity for carriage (guide values)130 mm approx. 1 ml to 2 ml250 mm approx. 2 ml to 3 ml500 mm approx. 2 ml to 3 mlIt is more advisable to carry out relubrication at several pointsduring the maintenance interval, using partial quantities in eachcase, than relubrication at the end of the interval using the entirequantity.1) Fretting corrosion can be identified by a reddish discolouration ofthe raceway shafts or the outside surface of the <strong>track</strong> <strong>roller</strong>s.Industrial TechnologiesSchaeffler Group Industrial MON 73 19
Индастриал Технолоджис www.ind-techno.com.ua +38 044 498 21 94MaintenanceRelubrication of carriagesHoles for relubricationThe carriage is lubricated via felt inserts integrated in the carriage.Relubrication is carried out via holes in the carriage.The holes are located on the longitudinal sides of the carriage. Holes for relubricationFigure 6Holes for relubricationWarningRelubrication of carriages1Relubrication can be carried out from either the left or right side.Sudden start of the machine.Crushing of fingers between the carriage <strong>and</strong> machine parts.❑ Before starting work, disconnect the machine from the powersupply.❑ Secure the main switch of the machine against switching on.✓ <strong>Linear</strong> <strong>actuator</strong> warm from operation.✓ Hole for relubrication clean <strong>and</strong> accessible.❑ Remove the grub screw from the hole.❑ Feed the required lubricant quantity into the hole.❑ If possible, move the carriage by h<strong>and</strong> during lubrication in orderto distribute the oil evenly.❑ Close the hole again using the grub screw.100015EDAIndustrial Technologies20 MON 73 Schaeffler Group Industrial
Индастриал Технолоджис www.ind-techno.com.ua +38 044 498 21 94CleaningWhen should cleaningbe carried out?Cleaning of componentsafter removalWhat should be usedfor cleaning?Cleaning must be carried out if heavy contamination is present.The cleaning requirements are dependent on the environmental<strong>and</strong> application conditions <strong>and</strong> can only be determined inthe operational state.If components must be removed or the linear <strong>actuator</strong> must bedismantled, the components should be cleaned before refitting.Damage due to unsuitable cleaning tools or cleaning agents.❑ Do not use pointed, hard or abrasive objects.❑ Do not dampen lubricated components during cleaning.❑ Do not use abrasives, petroleum spirit, oil etc.Suitable cleaning tools are:■ paint brush■ soft brush■ soft cloths.Industrial TechnologiesSchaeffler Group Industrial MON 73 21
Индастриал Технолоджис www.ind-techno.com.ua +38 044 498 21 94Removal <strong>and</strong> dismounting of components<strong>Linear</strong> <strong>actuator</strong>Note!Toothed <strong>belt</strong> unit Toothed <strong>belt</strong>Clamping device: Lower clamping piece Upper clamping piece Fixing screw Spacer Adjusting screwFigure 7Overview of <strong>toothed</strong> <strong>belt</strong> unitWarningThe linear <strong>actuator</strong> is dismantled in the following sequence:■ remove the <strong>toothed</strong> <strong>belt</strong>, see page 23 to page 24■ remove the drive unit or return unit, see page 25 to page 26■ remove the carriage, see page 27.It is only necessary in exceptional cases to completely disassemblethe linear <strong>actuator</strong>.The <strong>toothed</strong> <strong>belt</strong> unit comprises the <strong>toothed</strong> <strong>belt</strong> <strong>and</strong>two clamping devices. The clamping devices connect the <strong>toothed</strong><strong>belt</strong> to the carriage.213Sudden start of the machine.Crushing of fingers between the carriage <strong>and</strong> machine parts.❑ Before starting work, disconnect the machine from the powersupply.❑ Secure the main switch of the machine against switching on.45600015EE4Industrial Technologies22 MON 73 Schaeffler Group Industrial
Индастриал Технолоджис www.ind-techno.com.ua +38 044 498 21 94Removal <strong>and</strong> dismounting of componentsDetaching the second clampingdevice from the carriageNote!Removing the <strong>toothed</strong> <strong>belt</strong>Figure 10Removing the <strong>toothed</strong> <strong>belt</strong>❑ Detach the second clamping device from the carriage, but do notremove the clamping pieces from the <strong>toothed</strong> <strong>belt</strong>.The second clamping device must only be removed fromthe <strong>toothed</strong> <strong>belt</strong> if the clamping device itself or the <strong>toothed</strong> <strong>belt</strong>must be replaced. Dismounting of the second clamping device isnot necessary in order to remove the <strong>toothed</strong> <strong>belt</strong> unit.❑ Grip the <strong>toothed</strong> <strong>belt</strong> by the clamping device <strong>and</strong> pull it out ofthe support rail.00015EDEIndustrial Technologies24 MON 73 Schaeffler Group Industrial
Индастриал Технолоджис www.ind-techno.com.ua +38 044 498 21 94Drive <strong>and</strong> return unitThe drive unit <strong>and</strong> return unit differ according to the design.However, both components are dismounted in the same way. Toothed <strong>belt</strong> pulley <strong>with</strong> bearing Snap rings Protective caps End coverFigure 11Overview of drive unitRemoving the drive unitor return unitPreparing for removalFigure 12Removing the end coverThe following tools are required:■ snap ring pliers■ removal tool.4✓ Toothed <strong>belt</strong> removed, see page 23.✓ In the case of the drive unit: motor, coupling <strong>and</strong> couplinghousing removed, see page 17 <strong>and</strong> page 16.❑ Remove the black end cover from the support rail.13200015EE500015EE8Industrial Technologies❑ Remove the round protective caps.Schaeffler Group Industrial MON 73 25
Индастриал Технолоджис www.ind-techno.com.ua +38 044 498 21 94Removal <strong>and</strong> dismounting of componentsRemoving the <strong>toothed</strong> <strong>belt</strong> pulley❑ Remove the snap ring.Figure 13Removing the snap ringDamage to the <strong>toothed</strong> <strong>belt</strong> pulley <strong>and</strong> support rail due tounsuitable tools.❑ Do not use pointed or sharp-edged tools.❑ Do not use a hammer.❑ Remove the <strong>toothed</strong> <strong>belt</strong> pulley using a press-out tool.00015EF3Industrial Technologies26 MON 73 Schaeffler Group Industrial
Индастриал Технолоджис www.ind-techno.com.ua +38 044 498 21 94CarriageIt is only necessary to remove the carriage if it is to be replaced bya new carriage.Carriages differ according to the design. However, they are alldismounted in the same way. Hole for relubrication Protective cap for eccentric bolt Profiled <strong>track</strong> <strong>roller</strong>s Felt inserts for relubricationFigure 14Overview of carriageDamage due to contaminated lubricant.The characteristics of oil may change due to contamination.❑ The work area must be cleaned before removing the carriage.❑ Elements <strong>with</strong> oil must be laid only on a clean, lint-free underlay.Removal of carriage ✓ Drive unit or return unit removed, see page 25.Removing the carriage1 24Damage due to incorrect removal.❑ While removing the carriage, hold it concentric <strong>and</strong> parallel tothe support rail.❑ Push out the dowel pin at the open end of the support rail.❑ Remove the carriage carefully from the support rail.3Industrial Technologies00015EE2Figure 15Removing the carriage00015EDFSchaeffler Group Industrial MON 73 27
Индастриал Технолоджис www.ind-techno.com.ua +38 044 498 21 94Fitting <strong>and</strong> mounting of components<strong>Linear</strong> <strong>actuator</strong>A completely disassembled linear <strong>actuator</strong> is reassembled inthe following sequence:■ fit the carriage, see page 29 to page 31■ fit the drive unit <strong>and</strong> return unit, see page 32■ insert the <strong>toothed</strong> <strong>belt</strong>, see page 34 to page 35■ fix the <strong>toothed</strong> <strong>belt</strong> to the carriage, see page 36■ preload the <strong>toothed</strong> <strong>belt</strong>, see page 37 to page 38.Industrial Technologies28 MON 73 Schaeffler Group Industrial
Индастриал Технолоджис www.ind-techno.com.ua +38 044 498 21 94Carriage A component overview is shown in Figure 14, page 27.The following tools are required:■ torque wrench■ Allen key or hex key inserts■ ring wrench.Damage due to incorrect fitting.❑ Hold the profiled <strong>track</strong> <strong>roller</strong>s <strong>with</strong> the correct fit at the level ofthe raceway shafts.❑ Hold the carriage concentric <strong>and</strong> parallel to the support rail.❑ Ensure that the carriage runs <strong>with</strong>out clearance over the wholelength of the support rail.❑ After fitting, relubricate the raceway shafts.Fitting the carriage ✓ Drive unit or return unit removed, see page 25.✓ Dowel pin pushed out.Preparing the carriage Protective cap on eccentric boltFigure 16Protective cap on eccentric bolt❑ Remove the black protective cap on the eccentric bolt.1❑ Loosen the nut of the eccentric bolt until the eccentric bolt canbe turned.❑ Turn the profiled <strong>track</strong> <strong>roller</strong> of the eccentric bolt towardsthe centre of the carriage.Industrial Technologies00015EE3 Profiled <strong>track</strong> <strong>roller</strong> <strong>with</strong> eccentric boltFigure 17Turning the profiled <strong>track</strong> <strong>roller</strong>towards the centre of the carriage100015EF6Schaeffler Group Industrial MON 73 29
Индастриал Технолоджис www.ind-techno.com.ua +38 044 498 21 94Fitting <strong>and</strong> mounting of componentsSliding the carriageonto the support rail❑ Slide the carriage carefully onto the raceway shafts.Figure 18Sliding the carriageonto the raceway shafts00015EE0Industrial Technologies30 MON 73 Schaeffler Group Industrial
Индастриал Технолоджис www.ind-techno.com.ua +38 044 498 21 94Setting the profiled <strong>track</strong> <strong>roller</strong>sclearance-free❑ Turn the eccentric bolt until the carriage sits <strong>with</strong>out clearance onthe raceway shafts. While doing this, move the carriage by h<strong>and</strong>.Figure 19Turning the eccentric boltFigure 20Tightening the nuton the eccentric boltNote!Finishing the fitting procedure❑ Tighten the nut of the eccentric bolt to a tightening torqueof 15 Nm. Ensure that the eccentric bolt does not rotate as well.❑ Move the carriage by h<strong>and</strong> <strong>and</strong> check whether it can move<strong>with</strong>out clearance over the whole length of the support rail.If the carriage cannot move <strong>with</strong>out clearance over the wholelength of the support rail, please contact Application Engineeringat the <strong>Linear</strong> Technology Division.❑ Press the protective cap into the recess for the eccentric bolt.❑ Drive in the dowel pin on the support rail.00015EF400015EF5Industrial TechnologiesSchaeffler Group Industrial MON 73 31
Индастриал Технолоджис www.ind-techno.com.ua +38 044 498 21 94Fitting <strong>and</strong> mounting of componentsDrive unit <strong>and</strong> return unit A component overview is shown in Figure 11, page 25.The following tools are required:■ snap ring pliers.✓ Carriage fitted, see page 29 to page 31.Fitting the drive unitor return unitFitting the <strong>toothed</strong> <strong>belt</strong> pulleyFigure 21Fitting the snap ringFinishing the fitting procedureThe drive unit <strong>and</strong> return unit differ according to the design.However, both components are mounted in the same way.Damage to the <strong>toothed</strong> <strong>belt</strong> pulley <strong>and</strong> support rail due tounsuitable tools.❑ Do not use pointed or sharp-edged tools.❑ Do not use a hammer.❑ Press the <strong>toothed</strong> <strong>belt</strong> pulley into the support rail until it isin contact <strong>with</strong> the snap ring at the back.❑ Fit the front snap ring.❑ Fit the protective caps.00015EF3Industrial Technologies32 MON 73 Schaeffler Group Industrial
Индастриал Технолоджис www.ind-techno.com.ua +38 044 498 21 94Toothed <strong>belt</strong> unit A component overview is shown in Figure 7, page 22.Overview of fittingNote!Starting pointThe <strong>toothed</strong> <strong>belt</strong> is fitted in 3 steps:■ insert the <strong>toothed</strong> <strong>belt</strong>■ fix the <strong>toothed</strong> <strong>belt</strong> to the carriage■ preload the <strong>toothed</strong> <strong>belt</strong>.The following tools are required:■ torque wrench■ Allen key or hex key inserts■ screwdriver.If the <strong>toothed</strong> <strong>belt</strong> is refitted after removal, it must be set to the samepreload as before removal, see page 37.The following instructions are based on the assumption thatthe <strong>toothed</strong> <strong>belt</strong> is inserted into the support rail end of the drive unit.Industrial TechnologiesSchaeffler Group Industrial MON 73 33
Индастриал Технолоджис www.ind-techno.com.ua +38 044 498 21 94Fitting <strong>and</strong> mounting of componentsFitting the <strong>toothed</strong> <strong>belt</strong> ✓ Drive unit <strong>and</strong> return unit fitted, see page 32.Inserting the <strong>toothed</strong> <strong>belt</strong>❑ Insert the <strong>toothed</strong> <strong>belt</strong> into the lower hollow section ofthe support rail. The teeth of the <strong>toothed</strong> <strong>belt</strong> must face upwards.Figure 22Inserting the <strong>toothed</strong> <strong>belt</strong>into the support railFigure 23Feeding the <strong>toothed</strong> <strong>belt</strong>onto the <strong>toothed</strong> <strong>belt</strong> pulley❑ Insert the <strong>toothed</strong> <strong>belt</strong> until it reaches the <strong>toothed</strong> <strong>belt</strong> pulley ofthe return unit.Damage to the <strong>toothed</strong> <strong>belt</strong> due to unsuitable tools.❑ Do not use pointed or sharp-edged tools.❑ In the return unit, push the <strong>toothed</strong> <strong>belt</strong> upwards <strong>with</strong> the aid ofa screwdriver <strong>and</strong> feed it onto the teeth of the <strong>toothed</strong> <strong>belt</strong> pulley.❑ Feed the <strong>toothed</strong> <strong>belt</strong> over the <strong>toothed</strong> <strong>belt</strong> pulley <strong>and</strong> pull it outfar enough until its other end is below the drive unit.❑ Feed the <strong>toothed</strong> <strong>belt</strong> in the drive unit onto the teeth ofthe <strong>toothed</strong> <strong>belt</strong> pulley.❑ Feed the <strong>toothed</strong> <strong>belt</strong> pulley over the <strong>toothed</strong> <strong>belt</strong> pulley<strong>and</strong> pull it out.00015EF200015EE1Industrial Technologies34 MON 73 Schaeffler Group Industrial
Индастриал Технолоджис www.ind-techno.com.ua +38 044 498 21 94Fitting the end covers❑ Mount the black end covers on the ends of the support rail.Figure 24Fitting the end coverIndustrial Technologies00015EE8Schaeffler Group Industrial MON 73 35
Индастриал Технолоджис www.ind-techno.com.ua +38 044 498 21 94Fitting <strong>and</strong> mounting of componentsAttaching the <strong>toothed</strong> <strong>belt</strong>to the carriage❑ Screw mount the upper <strong>and</strong> lower clamping pieces of the firstclamping device to the <strong>toothed</strong> <strong>belt</strong>:– MLFI25-ZR: M4/2,7 Nm.Figure 25Screw mounting the clampingdevice to the <strong>toothed</strong> <strong>belt</strong>Figure 26Screw mounting the clampingdevice to the carriage❑ Screw mount the clamping device to the carriage usingthe adjusting screw:– MLFI25-ZR: M5/5,5 Nm.❑ Screw mount the second clamping device to the <strong>toothed</strong> <strong>belt</strong>:– MLFI25-ZR: M4/2,7 Nm.❑ Screw mount the clamping device to the carriage loosely enoughthat the <strong>toothed</strong> <strong>belt</strong> is not yet tensioned.00015EDC00015EDBIndustrial Technologies36 MON 73 Schaeffler Group Industrial
Индастриал Технолоджис www.ind-techno.com.ua +38 044 498 21 94Preloading the <strong>toothed</strong> <strong>belt</strong>during refittingPreloading a new <strong>toothed</strong> <strong>belt</strong>Figure 27Measurement length marked(not to scale)Figure 28Measurement length preloaded(not to scale)When refitting a <strong>toothed</strong> <strong>belt</strong> that has been removed:❑ Reinsert the stored spacer between the clamping device<strong>and</strong> the carriage.❑ Tighten the clamping device <strong>with</strong> a torque of M5/5,5 Nm tothe hard stop.When fitting a new <strong>toothed</strong> <strong>belt</strong>:❑ Mark a measurement length of 1 000 mm on the untensioned<strong>toothed</strong> <strong>belt</strong>.In order to increase the measurement accuracy,themeasurement length can be extended in the case oflonger linear <strong>actuator</strong>s (2 000 mm, 3 000 mm etc.).❑ Tighten the adjusting screw on the second clamping device untilthe measurement length is extended by 1 mm per 1 000 mm.Industrial Technologies00015ED800015ED9Schaeffler Group Industrial MON 73 37
Индастриал Технолоджис www.ind-techno.com.ua +38 044 498 21 94Fitting <strong>and</strong> mounting of componentsInserting the spacer❑ Measure the gap between the clamping device <strong>and</strong> carriage usinga vernier.❑ Select one spacer corresponding to the width of the gap.If a single spacer is not sufficient, select 2 or more spacers thattogether correspond to the width of the gap.❑ Insert the spacer in the gap between the carriage <strong>and</strong> clampingdevices.❑ Tighten both clamping devices <strong>with</strong> a torque of M5/5,5 Nm tothe hard stop.Industrial Technologies38 MON 73 Schaeffler Group Industrial
Индастриал Технолоджис www.ind-techno.com.ua +38 044 498 21 94VariantsAvailable variantCarriageSuffix inordering designation2 driven carriages W2Ordering exampleDesign<strong>Linear</strong> <strong>actuator</strong> <strong>with</strong> enclosed<strong>track</strong> <strong>roller</strong> <strong>guidance</strong> <strong>system</strong>MLFISize 25Carriage length250 mmDrive type: single <strong>toothed</strong> <strong>belt</strong>ZRDrive shaft on both sidesRLTwo carriagesW2Total length of <strong>actuator</strong>4 000 mmStroke length of <strong>actuator</strong>3 735 mmOrdering designation MLFI25-250-ZR-RL-W2/4 000-3 735Industrial TechnologiesSchaeffler Group Industrial MON 73 39
Индастриал Технолоджис www.ind-techno.com.ua +38 044 498 21 94VariantsMultiple carriagesFitting of multiple carriagesFixing the <strong>toothed</strong> <strong>belt</strong>between carriagesFigure 29Linking carriagesusing separate piece of <strong>toothed</strong> <strong>belt</strong>Fitting the <strong>toothed</strong> <strong>belt</strong>If the linear <strong>actuator</strong> has more than one carriage, these are linked byindividual pieces of <strong>toothed</strong> <strong>belt</strong>.The following tools are required:■ rubber hammer■ torque wrench■ Allen key or hex key inserts■ screwdriver.✓ All carriages slid onto raceway shafts, see page 29 to page 31.❑ Fit short pieces of <strong>toothed</strong> <strong>belt</strong> <strong>with</strong> clamping devices <strong>and</strong> usethese to link the carriages, see page 36.❑ Fit the long piece of <strong>toothed</strong> <strong>belt</strong>, see page 34 onwards.00015EFDIndustrial Technologies40 MON 73 Schaeffler Group Industrial
Индастриал Технолоджис www.ind-techno.com.ua +38 044 498 21 94Replacement partsNote!The precise design of your linear <strong>actuator</strong> is dependent on yourorder. When ordering replacement parts, please indicatethe ordering number of your linear <strong>actuator</strong>. The ordering numbercan be found engraved on one side of the support rail.Toothed <strong>belt</strong>Replacement parts listfor <strong>toothed</strong> <strong>belt</strong>Drive unitReplacement parts listfor drive unit<strong>Linear</strong> <strong>actuator</strong> Designation MATNRMLFI25-ZR ZHRI25-AT-5 001288261-0000<strong>Linear</strong> <strong>actuator</strong> Designation MATNRDrive shaft on left or right sideMLFI25-ZR WE.MLFI25-ZR-AR-7800 001256319-0000Drive shaft on both sidesMLFI25-ZR WE.MLFI25-ZR-RL-7800 002454599-0000Industrial Technologies00015F0100015EFCSchaeffler Group Industrial MON 73 41
Индастриал Технолоджис www.ind-techno.com.ua +38 044 498 21 94AppendixAccessoriesLocationCoupling, gearbox, motorSpecial INA replacement parts have been developed forthe linear <strong>actuator</strong>. These ensure the reliable <strong>and</strong> long term functionof linear <strong>actuator</strong>s.AccessoryClamping lugsT-nutsSlot closing stripsConnecting bracketsAs a <strong>system</strong> supplier, the Schaeffler Group also offers componentsincluding coupling housings, couplings, gearboxes <strong>and</strong> motors.These components are precisely matched to the linear <strong>actuator</strong>.1) i = ratio.Article numberSPPR2420MU-DIN508-M45MU-M55-POSMU-M68-POSNAD55,7See INA publication Fasteners <strong>and</strong> connectingbrackets for linear <strong>actuator</strong>s (TPI 153)Coupling Coupling housing Gearbox 1) MotorKUP50-40-2-12H7/16H7KGEH25/36000-MLFI-ZRPL 70..-i MOT-SMH60MOT-SMH82KUP50-40-MOT-SMH602-11H7/12H7KUP50-40-2-12H7/14H7KGEH25/36200-MLFI-ZRMOT-SMH82Comprehensive information can be found in INA publication ALE,Driven <strong>Linear</strong> Units <strong>and</strong> on the Internet at www.schaeffler.com.Industrial Technologies44 MON 73 Schaeffler Group Industrial
Индастриал Технолоджис www.ind-techno.com.ua +38 044 498 21 94Tightening torquesThe correct tightening torques are shown in the table.Screw Grade Tightening torqueNmM4 8.8 2,710.9 4,312.9 5,1M5 8.8 5,510.9 8,412.9 10,2M6 8.8 9,510.9 14,712.9 17,6M8 8.8 2310.9 35,312.9 42,2M10 8.8 4610.9 6712.9 78M12 8.8 8010.9 11512.9 135Industrial TechnologiesSchaeffler Group Industrial MON 73 45
Индастриал Технолоджис www.ind-techno.com.ua +38 044 498 21 94MON 73 / GB-D / 200910 / pdf onlySchaeffler KG<strong>Linear</strong> Technology DivisionBerliner Straße 13466424 Homburg/Saar (Germany)Internet www.ina.comE-Mail info.linear@schaeffler.comIn Germany:Phone 0180 5003872Fax 0180 5003873From other countries:Phone +49 6841 701-0Fax +49 6841 701-2625Every care has been taken to ensure thecorrectness of the information containedin this publication but no liability can beaccepted for any errors or omissions.We reserve the right to make technicalchanges.© Schaeffler KG · 2009, OctoberThis publication or parts thereof may notbe reproduced <strong>with</strong>out our permission.MON 73 GB-DIndustrial Technologies