Owner's Manual - Hunter Fan
Owner's Manual - Hunter Fan Owner's Manual - Hunter Fan
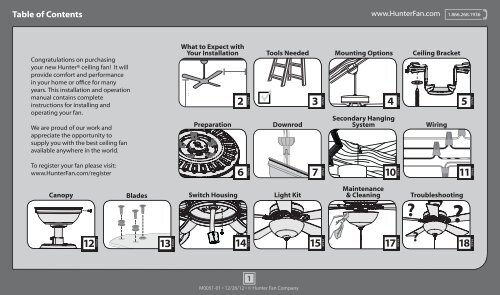
- Page 5: Ceiling Bracketwww.HunterFan.com1.8
- Page 8 and 9: Downrod (continued)www.HunterFan.co
- Page 10 and 11: Secondary Hanging Systemwww.HunterF
- Page 12 and 13: Canopywww.HunterFan.com 1.866.268.1
- Page 14 and 15: Switch Housingwww.HunterFan.com 1.8
- Page 16: Light Kit (continued)www.HunterFan.
Ceiling Bracketwww.<strong>Hunter</strong><strong>Fan</strong>.com1.866.268.1936For angled ceilings, pointopening toward peak.Turn PowerOFFMake sure all four (4) bumpersare still attached.Use wood screws(included) when securingto support structure withapproved electrical outletbox. Drill 9/64” pilot holesin support structure to aidin securing ceiling bracketwith hardware found inthe hardware bag.Use machine screws(provided with outletbox) when securing toexisting ceiling fan-ratedoutlet box. Make sureit is securely installedand is acceptable for fansupport of 31.8 kg (70 lbs)or less.If you are unable to do this,call Technical Support at1-888-830-1326.To avoid possible electrical shock, beforeinstalling your fan, disconnect the power byturning off the circuit breakers to the outletbox associated with the wall switch location.5M0051-01 • 12/26/12 • © <strong>Hunter</strong> <strong>Fan</strong> CompanyRefer to warning w.1 on pg. 2
Downrodwww.<strong>Hunter</strong><strong>Fan</strong>.com1.866.268.1936Option 1StandardDownrodfor ceilings 8-10’ highIf you need a different downrod length follow these steps:skip to next pageIncluded(pre-assembled)Option 3LongerDownrodfor angledceilings orceilings 10’ orhigherSteps 1-5 to remove standard downrod pipe1 2 3 4 5Option 2ShorterDownrodfor fans installedclose to ceilingSlideSlideIncludedSold Separately109Steps 6-10 to reassemble with new pipe8767M0051-01 • 12/26/12 • © <strong>Hunter</strong> <strong>Fan</strong> Company
Downrod (continued)www.<strong>Hunter</strong><strong>Fan</strong>.com1.866.268.19363/8”CUT& STRIPKEEP!8”(not to scale)KEEP!Remove the pre-installedsetscrew so that the downrodcan be inserted.Hand tighten the downrod (atleast 4-5 full turns) until it stops.The wires can be cut, butleave at least 8” extendingfrom the top of the downrod.Tighten the setscrewwith pliers. DO NOTHAND TIGHTEN.8” 3/8”8M0051-01 • 12/26/12 • © <strong>Hunter</strong> <strong>Fan</strong> CompanyIf the setscrew is not tightenedsecurely, the fan may fall.
Downrod (continued)www.<strong>Hunter</strong><strong>Fan</strong>.com1.866.268.1936Put the wires and downrod through thecanopy. Let the canopy sit loosely on topof the fan.DO NOT PICK THE FAN UP BY THECANOPY OR WIRES. Place the downrodball into the slot in the ceiling bracket.9M0051-01 • 12/26/12 • © <strong>Hunter</strong> <strong>Fan</strong> Company
Secondary Hanging Systemwww.<strong>Hunter</strong><strong>Fan</strong>.com 1.866.268.1936SupportBrace3mm (1/8")BraidedCableOutlet BoxCeilingInsert the looped end of thebraided cable through the ceilingbracket and one of the holes in theoutlet box into the ceiling. Accessthe support brace in the ceiling.You may not be able to do this frombelow the ceiling depending onyour installation site.Drive the wood screw andwasher found in the baginto the side of the supportbrace that holds the outlet box.Leave 3 mm (1/8”) of spacebetween the support braceand the washer.Wrap the braided cable aroundthe support brace once creatinga complete circle. Hook thelooped end of the cable over thewood screw so that the cablelies between the washer and thesupport brace.Tighten the loop and secure thescrew and washer all the waydown to the support brace. Coilup the excess cable.10M0051-01 • 12/26/12 • © <strong>Hunter</strong> <strong>Fan</strong> Company
WiringFROM CEILINGNote: To connect the wires,hold the bare metal leadstogether and place a wireconnector over them, then twistclockwise until tight.FROM CEILINGwww.<strong>Hunter</strong><strong>Fan</strong>.com 1.866.268.1936FROM CEILINGFROM FANUsing an orange wireconnector fromthe hardware bag,connect the 3 groundingwires (green, green/yellow stripe, or barecopper) coming from theceiling, downrod, andhanging bracket.Green/YellowStripe(Grounding) Green/YellowStripeFROM CEILING BRACKETFor a Single SwitchUsing the orange wireconnectors fromthe hardware bag, connectthe black wire (ungrounded)from the ceiling to the blackand the blue wires from thefan. Connect the white wire(grounded) from the ceiling tothe white wire from the fan.Blue(Grounded)White(Ungrounded)BlackF RO M FA NFor Dual SwitchesUsing orange wireconnectors fromthe hardware bag,connect the white wire(grounded) from theceiling to the white wirefrom the fan.Connect the black wire(ungrounded) from theceiling to the black wirefrom the fan. Connect thesecond (ungrounded) wirefrom the ceiling to the bluewire from the fan.(Ungrounded)(Ungrounded)(Grounded)BlackBlueWhiteFR O M FANRefer to CAUTION c.1 on pg. 211M0051-01 • 12/26/12 • © <strong>Hunter</strong> <strong>Fan</strong> CompanyTurn the splices upward and push them carefully back through the hanger bracketinto the outlet box. Spread the wires apart, with the grounded wires on one side ofthe outlet box and the ungrounded wires on the other side of the outlet box.
Canopywww.<strong>Hunter</strong><strong>Fan</strong>.com 1.866.268.1936ScrewHolesPosition the canopy so that, whenlifted into place, the canopy fits intothe hanging bracket as shown.Lift the canopy into place so thatthe screw holes are aligned.Insert the two canopy screwsfound in the hardware bag.12M0051-01 • 12/26/12 • © <strong>Hunter</strong> <strong>Fan</strong> CompanyNote: <strong>Fan</strong> style may vary.
Bladeswww.<strong>Hunter</strong><strong>Fan</strong>.com 1.866.268.1936Remember the screws thatyou kept after removing theshipping blocks (page 6)? Youneed them plus five more fromthe hardware bag for this step.Insert grommets found in the hardwarebag into the holes in the blades, thensecure each blade to a blade iron withscrews found in the hardware bag.Lightly attach the blade irons to themotor with screws found inthe hardware bag, then securelytighten after both screws are attached.13M0051-01 • 12/26/12 • © <strong>Hunter</strong> <strong>Fan</strong> CompanyYour blades are shielded with Dust Armor® whichis a nanotechnology coating that repels dust. Forcleaning the fan, use soft brushes or cloths to preventscratching. Cleaning agents may damage the finishes.
Switch Housingwww.<strong>Hunter</strong><strong>Fan</strong>.com 1.866.268.1936Screw two (2) housing assembly screwsfrom the hardware bag halfway intothe motor housing. It does not matterwhich two screw holes you choose.Feed the wire plug through the centerhole of the upper switch housing, thenwrap keyhole slots around the screws andtwist counterclockwise.theInsert the third screw, found inhardware bag, into place and thentighten all three (3) screws.14M0051-01 • 12/26/12 • © <strong>Hunter</strong> <strong>Fan</strong> CompanyMake sure the upper switch housing is securelyattached to the mounting plate. Failure to properlysecure all 3 assembly screws could result in the switchhousing fixture falling.
Light Kitwww.<strong>Hunter</strong><strong>Fan</strong>.com 1.866.268.1936ScrewHolesConnect the plugs from the upper andlower switch housings. Make sure to line upthe colored markings on the connectors.Lift the lower switch housing up until itsscrew holes are aligned with the screw holesin the upper switch housing.Install the three switch housing screwsfound in the hardware bag.Want to install your fan without a light kit?Go to www.<strong>Hunter</strong><strong>Fan</strong>.com/FAQs and click“How do I install my fan without the light kit?”15M0051-01 • 12/26/12 • © <strong>Hunter</strong> <strong>Fan</strong> CompanyMake sure the lower switch housing is securely attached tothe upper switch housing. Failure to properly secure all threeassembly screws could result in the light fixture falling.
Light Kit (continued)www.<strong>Hunter</strong><strong>Fan</strong>.com 1.866.268.1936MetalPlateLightPullChain<strong>Fan</strong>PullChainGlobeGlobeKeeperFinialCapFinialCONGRATULATIONS!YOU’RE DONE!Install a light bulb in each socket.Note: Globe style and number oflights may vary.Press the globe and globe keeperflush against the metal plate. Threadthe light pull chain through the holein the center of the finial cap andthread the fan pull chain through thehole in the side of the cap. Finally,thread only the light pull chainthrough the hole in the finial andscrew the finial onto the threaded rod.Connect the appropriate pullchain pendant to each of theshort chains coming from thefinial and finial cap. The fan pullchain controls the speed: high,medium, low, and off. The lightpull chain controls the lightfixture: on and off.16M0051-01 • 12/26/12 • © <strong>Hunter</strong> <strong>Fan</strong> CompanySee next page for fanoperation instructions.Note: In compliance with US federal energy regulations, this ceilingfan contains a device that restricts its light output. Exceeding thewattage limit marked on the MAX wattage sticker affixed to thelight socket(s) may result in fire hazard or improper operation.


