WoodPens - Woodsmith Woodworking Seminars
WoodPens - Woodsmith Woodworking Seminars
WoodPens - Woodsmith Woodworking Seminars
- No tags were found...

You also want an ePaper? Increase the reach of your titles
YUMPU automatically turns print PDFs into web optimized ePapers that Google loves.
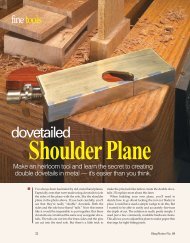
SMALLPROJECTWOOD PENSGot a few small scraps, a drill press, and an hour? That’s all it takes toturn out one of these elegant little pens.{ This barrel trimmersquares theends of the blanksto the barrels, sothe pen mechanismwill fit togetherwithout any gaps.Being one who appreciates a beautifulpiece of wood (no matter whatthe size), I’m always hanging on toscraps, some no bigger than my finger.But until recently, I didn’t knowwhat to do with these scraps except“squirrel” them away in a drawer.Then I ran across the perfect project:wood pens. Wood pens don’t takemuch time or material. And it’s a greatchance to try your hand at a little turning— even if you don’t have a lathe.I turned all the pens in this issue ona drill press with a simple shop-madejig, see page 26.Note: For a list of items you’ll need,see the box on page 25. For sourcesof pen-making supplies, see page 35.PREPARE BLANKS. The first task to makinga pen is to prepare the blanks forturning, see Steps 1-3. This involvescutting the wood blanks to size andadding the brass barrels that will holdthe pen mechanism.SQUARE ENDS. There’s nothing complicatedhere. But you do want to becareful when drilling the 7mm holesfor the barrels. These holes are centeredon the ends of the blanks andrun their full lengths, see Step 2.What’s important is that the holesare square to the ends of the blanks.Otherwise, you’ll end up with tinygaps when the pen is put together.SETUP. To get these holes as accurateas possible, I made a fence with a shallowdado cut in one face, see Step 2.This fence also speeds up the processsomewhat. Once it’s clamped in position,you won’t have to worry aboutcentering the bit for each blank.DRILL BIT. But besides the fence, Ialso used a drill bit designed specificallyto drill into end grain. (I didn’thave a 7mm bit and needed to buyone anyway.) What’s different aboutthis bit is that the point is steeper andthe flutes are wider to remove thechips more quickly.SUPER GLUE. To glue in the barrels, Ia.1To begin, cut two wood blanksslightly longer than the barrels.Then mark the centers on the ends.2With the blanks cut to size, thenext step is to drill a 7mm holethrough the blank to hold the barrel.3Now, glue the barrel in the blank.Then trim or sand the blanks tolength, keeping the ends square.24 <strong>Woodsmith</strong> No. 108
applied quick-set glue to the barrels,see Step 3. But don’t use the kind thatsets up instantly — you need a littlebit of time to push the barrel insidethe blank so it’s flush with one end.BARREL TRIMMER. If you don’t mindspending a little more money, a barreltrimmer does a neater job thansandpaper when it comes to squaringup the ends of the blanks, seemargin photo on page 24. This trimmerhas a shaft that fits inside the barrelafter it’s glued in place, see Step 3.As you twist it, the cutters scrape theend of the blank square to the barrel.TURN BLANKS. After the blanks aretrimmed to the right length, it’s timeto turn the blanks down to size, seeSteps 4-6. (I used a spindle gouge.)The blanks are mounted on a steelmandrel with three bushings thatmatch the finished diameter of thepen tip, center ring, and cap.STRAIGHT SIDES. Since I turned theblanks with the drill press, they’reheld upright rather than horizontal.With this orientation, it’s a little trickyto tell if you’re turning the blanksstraight. So you have to tilt your headoccasionally to check your progress.The goal here is to rough out theblanks until there’s a slight shoulderat the bushings, see detail ‘a’ in Step5. The sides should be straight orbowed out just slightly.SANDING BOARD. Now to keep theblanks straight while reducing themto their final diameter, I used 150-gritsandpaper mounted to a board, seeStep 6. Then when the blanks wereclose to final size (I used a calipers tocheck my progress), I set the boardaside and did the finish sanding byhand, working my way up to 600-grit.FINISH & ADD MECHANISM. All that’s leftnow is to apply the finish and thenpress the pen mechanism into thebarrels, see Steps 7 and 8.The nice thing about finishing theblanks is that you can do it whilethey’re turning on the drill press. Andthough you can apply almost any finish,there are special waxes and turningfinishes available.When you add the mechanism, theblanks can be oriented in any direction.And you may find that one endof each blank is just a hair larger thanthe other. I used my calipers to findthe end closest in diameter to the centerring. This produces the smoothestfit, since the center ring is the part ofthe pen you feel the most. Wa.a.4With the blanks secured to themandrel (see margin) mount itto the drill press and turning jig.5Next, turn the blanks slightly largerthan the bushings. Blanks can bestraight or bowed slightly, see detail.6Now the final shaping can bedone with 150-grit sandpapermounted to a board.7Set the sanding board aside andfinish sand the blanks to 600-grit.Reduce the speed and apply a finish.8To add the pen mechanism, usea wood vise, holding the piecesstraight as they’re pressed together.PEN SUPPLIES• %/8" x %/8" - 5" (rgh.) Wood Blank• Pen Mechanism Kit• 7mm Twist or Brad Point Drill Bit• Quick-set or Instant Glue• Turning Jig (see page 26) orLathe*• Mandrel w/Bushings*• Spindle Gouge• Vise with Wood Jaws• Barrel Trimmer (Optional)* To turn pens with a lathe, you’ll needa live center and a mandrel with aMorse taper.No. 108 <strong>Woodsmith</strong> 25
TIPS FROMOUR SHOPTALKING SHOP1a.Turning JigThe guys in the shoplooked a bit puzzled whenI showed up with this turningjig, see photo. But thisbare-bones jig really doesthe job. In fact, after seeingit work, they all got busymaking plans to turn somepens of their own.HOW IT WORKS. Thesecret to this jig is the“live center” that holdsthe mandrel. This issimply a common 1 / 4"-dia. dowel center that sitsin a bearing, see Fig. 1.As the drill press spinsthe mandrel, the dowel centerhelps keep the mandrelstraight, without creating alot of friction.And to support and guidethe gouge as the wood isturned, I added a tool restmade from a piece of 1 / 2"-dia. steel rod.CONSTRUCTION. To buildthe jig, I started out with abase cut from 1 3 / 4"-thickstock, see Figs. 1 and 1a.Then I drilled threeholes: a clearance hole forthe dowel center, a 1 / 4"-deep hole for the bearingthat allows the dowel centerto spin, and finally, a holefor the steel rod. Note: Idrilled these holes closerto one end to provide moreclearance for the gougewhen turning.With the holes drilled,the hardware is pressed inplace (I didn’t use any glue).JIG SETUP. To set up the jig,mount the pen blanks onthe mandrel and chuck itin the drill press. (Set thedrill speed at 2000 RPM.)Now position the jig sothe dowel center fits in thedimple on the tail end of themandrel and clamp the jigsecurely to the table.It’ll take a bit to figure outthe best way to hold thetool. Just play with its angleand position, and you’llsoon find something you’recomfortable with.TOMPKINS TURNERI’m a pushover when it comesto jigs. So when I saw this onefor making pens on a routertable, I just had to try it.The Tompkins Turner is aturning mandrel on wheels,see photo. The mandrel is arod threaded at each end. Thebushings are plastic. And tosecure the blanks and lift them offthe table, there are a pair of wheelsthat screw onto each end of the rod.The procedure is simple enough.The blanks are prepared just likeyou do when turning them. But thewood is removed by making multiplepasses over a straight bit.Each pass is made from right toleft, and the jig is rotated slightlybetween passes. To make sure youdon’t run the jig into the bit, thereare a couple stop blocks thatare attached to the table.. Note: The instructions recommendusing a 1 / 2" straightbit with a cutter across the end.(I used an ordinary straight bit,and it seemed to work fine.)I had no problems with theTompkins Turner and was surprisedat how smooth the blanksended up. Still, sanding and finishingare more work since the blanksaren’t spinning. And I still think it’smore fun to watch a pen take shapewhile turning, rather than routing.26 <strong>Woodsmith</strong> No. 108