Reading G1-G2sa Owner's Manual web site.cdr - Weaver Models
Reading G1-G2sa Owner's Manual web site.cdr - Weaver Models
Reading G1-G2sa Owner's Manual web site.cdr - Weaver Models
- No tags were found...

You also want an ePaper? Increase the reach of your titles
YUMPU automatically turns print PDFs into web optimized ePapers that Google loves.
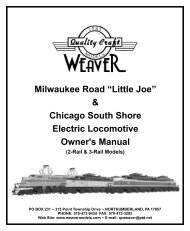
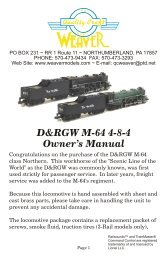
PO BOX 231 ~ RR 1 Route 11 ~ NORTHUMBERLAND, PA 17857PHONE: 570-473-9434 FAX: 570-473-3293Web Site: www.weavermodels.com ~ E-mail: qcweaver@ptd.net<strong>Reading</strong> <strong>G1</strong>/<strong>G2sa</strong> 4-6-2Owner’s <strong>Manual</strong>Congratulations on the purchase of the <strong>Weaver</strong> <strong>Reading</strong> <strong>G1</strong>/<strong>G2sa</strong>.This finely crafted scale brass representation is our previouslyreleased <strong>Reading</strong> Crusader with the shrouding removed. The<strong>Reading</strong> Railroad created the Crusader from the <strong>G1</strong> classlocomotives. There were 30 <strong>G1</strong>sa class locomotives built from1916 through 1924. The <strong>G1</strong>sa engines primarily serviced theAtlantic City to New York area. The <strong>G2sa</strong> locomotives were reliedon to service the Sellersville and Perkasie areas as these areas hadsteeper terrain. After a decline in railroad traffic, these engineswere taken out of service at the end of the steam era.The locomotive package contains a replacement packet of screws,smoke fluid, traction tires (3-Rail models only), and a wrench forPage 1Railsounds and TrainMaster®Command Control are registeredtrademarks of and licensed byLionel LLC.
the side rods for your convenience. Should you need additionalparts or service, contact our factory at the address listed on thefront of this booklet.Before You Use Your Engine:The <strong>Reading</strong> <strong>G1</strong>/<strong>G2sa</strong> has been tested and greased before leavingthe factory and is ready-to-run on any 0-54 layout or larger.However, it is recommended that all moving parts on this engineare lubricated lightly upon the first initial use and after a heavy orextended period of use, in order to enhance performance. Forspecific lubrication points please refer to the diagram in Figure 1.Maintaining Your Engine:The engine and tender should be maintained periodically to insureproper operation and performance. All moving parts should beoiled after 25 hours of operation. On heavily used engines, bearinggrease (or a similar lubricant) should be added to the gear box,located between the blind drivers on the drive train. To add grease,Figure 1Lubrication PointsLubrication PointsFigure 2Greasing PointsPage 2
emove the four small Phillips screws on the inspection cover andinsert the grease using a screw driver. For specific greasing points,please refer to the diagram in Figure 2. Reassemble and run theengine as normal.Smoke Unit Instructions:This engine is equipped with an operating smoke unit and is wiredwith an ON/OFF switch located under the cab directly behind thetrailing truck. If you decide not to use the smoke unit, then theON/OFF switch should be in the OFF position. This step is highlyrecommended as the smoke unit will heat up and could eventuallyburn out. To add fluid, simply pour about 10 drops of the smokefluid provided with your locomotive, into the smoke stack. Afteradding the smoke fluid, apply power to your track and after severalseconds the engine will begin to smoke.Battery Installation Instructions For ConventionalMode:To operate this engine successfully in conventional mode, a 9 voltalkaline battery (not included with the engine) needs to be installedin your tender. There are four 3mm screws, one on each corner ofthe tender floor. To install your battery, remove the four screwsfrom the bottom of the tender and the tender shell will then removeeasily. You will find a 9 volt battery connector end wrapped inblack electrical tape among the wires. Install the battery, place thetender shell back on the tender floor, and reinstall the four 3mmscrews.Sound System Operating Instructions (This SectionApplies Only To 3-Rail Locomotives With Sound):All our 3-Rail with sound engines are equipped with Railsoundsthe finest sound system available today and the industry's premierdigital operating control system, TrainMaster® Command Control.Page 3
This system will operate with a conventional transformer but theadditional sound features which include squealing brakes, couplersound, steam chuff, up and down whistle pitches, steam sound,bell, volume control, tower command, and crew talk will notfunction without the remote control and command base.In order to properly function all the additional featuresyou will need:6-12868 CAB-1 Remote Control6-12911 Command Base(CAB-1 and Base are available together as 6-12969 TrainMasterCommand set.)Installation is easy:1. Connect the base output wire to the outer rail. Plug Base intowall outlet.2. Set your transformer to 18 volts.TransformerCommand BaseCab-1Press , turn red throttle clockwise to go. To changedirections, press once. The train will stop. Turn the throttleclockwise to go.To operate Towercomm message, press , . Messagewill play in 4 seconds. To operate Crewtalk message, press, .Page 4
Horn, Bell, and F and R coupler should be self explanatory.Pressing speeds the engine up momentarily to climb agrade. slows or stops the engine momentarily. Theengine will resume its original speed after the or button is released.All engines come set as engine #1. To change the ID to anynumber between 1 and 99, move the "PROGRAM/RUN" switch onthe engine to PROG. Turn on track power. Press then then . The horn will blow. Move the switch to the RUNposition. To run, press then , and turn throttle.3-Rail With Sound in Conventional Mode:If you are running your 3-Rail with sound locomotive on aconventional transformer you will only receive a select number ofsounds. These sounds include steam chuff, bell, and up and downwhistle pitches.Service And Warranty Information:This item is warranted for one year from the date of purchase. Wewill repair or replace (at our option) the defective part withoutcharge for parts or labor, if the item is returned in the manner listedbelow within one year of the original date of purchase. Thiswarranty does not cover items that have been abused or damagedby careless handling. Transportation costs incurred by thecustomer are not covered under this warranty.For warranty repair, DO NOT return your product to the place ofpurchase. Instead, follow the instructions below to obtain warrantyservice as our dealer network is not prepared to service the productunder the terms of this warranty.1. First: WRITE, CALL or FAX <strong>Weaver</strong> <strong>Models</strong>, PO Box 231, RRPage 5
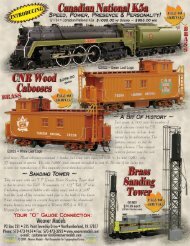
1 Route 11, Northumberland, PA 17857, 570-473-9434 (FAX#570-473-3293), requesting a Return Authorization Number andstating when the unit was purchased and a description of theproblem.2. CAUTION: Make sure the product is packed in its originalfactory packaging including its foam and plastic wrapping materialso as to prevent damage during shipping. The shipment must beprepaid and we recommend that it be insured. A cover letter,including your name, address, daytime phone number and afull description of the problem MUST be included to facilitatethe repairs. Please include the description regardless ofwhether you discussed the problem with one of our servicetechnicians when contacting <strong>Weaver</strong> <strong>Models</strong>.3. Please make sure you have followed the instructions carefullybefore returning any merchandise for service.• • • •We Also Offer Several Items To Compliment Your <strong>Reading</strong><strong>G1</strong>/<strong>G2sa</strong> LocomotivePage 6