Larry Stevenson Demonstration Myaporium The Pen Turners Corner ...
Larry Stevenson Demonstration Myaporium The Pen Turners Corner ...
Larry Stevenson Demonstration Myaporium The Pen Turners Corner ...
- No tags were found...

Create successful ePaper yourself
Turn your PDF publications into a flip-book with our unique Google optimized e-Paper software.
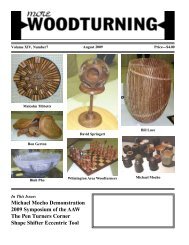
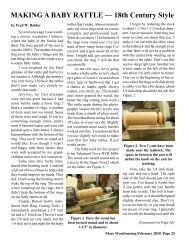
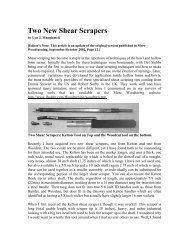
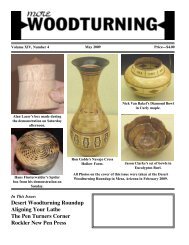
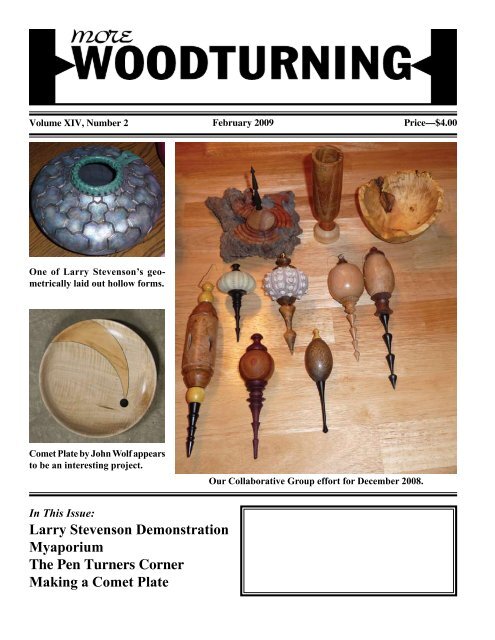
Volume XIV, Number 2 February 2009 Price—$4.00One of <strong>Larry</strong> <strong>Stevenson</strong>’s geometricallylaid out hollow forms.Comet Plate by John Wolf appearsto be an interesting project.Our Collaborative Group effort for December 2008.In This Issue:<strong>Larry</strong> <strong>Stevenson</strong> <strong>Demonstration</strong><strong>Myaporium</strong><strong>The</strong> <strong>Pen</strong> <strong>Turners</strong> <strong>Corner</strong>Making a Comet PlateMore Woodturning February 2009 Page 1
Note: We now offer subscriptioncopies as a Portable DocumentFile (*.PDF) that you can read onyour computer. You can archiveyour copies on your computer andsearch them for subjects of interest.This method provides quick deliveryof the issue. This is a cost savingsfor foreign subscribers who have topay a great deal extra for postage.If interested, e-mail me at:fred@morewoodturning.netNote 2: Anyone who owns acomputer and likes to read MoreWoodturning on their computer or toarchive it onto their computer, willbe pleased to learn that we now haveall issues (from Oct 1996) of MoreWoodturning ever published in PDFformat. While we offer individualyears on a CD-ROM for $25.00, wehave come up with a special pricewhich includes all issues publishedat the date that the order is placed ona single CD-ROM for just $95.00.This is a significant savings overthe single year price. Order from:More Woodturning, PO Box 2168,Snohomish, WA 98291 USA.Note: For people who have never visited our web site, go towww.morewoodturning.net<strong>The</strong>re is a lot of information at our site, including a sample magazinein PDF format.• FITS ALL LATHES• EASY & SAFE TO USE• SOLID CONSTRUCTION• CD ROM TRAINING VIDEOPage 2 More Woodturning February 2009
Contents<strong>Larry</strong> <strong>Stevenson</strong> <strong>Demonstration</strong>.4Questions and Answers from the Internet.............................................6Which hollowing tool? ...............6Sharpening Information Needed....................................................7Vacuum Hose Recommendation..............................................10Question on Article and DVR XP......................................................11Woodturning Collaborative Group.....................................................11<strong>Myaporium</strong>.................................12<strong>Pen</strong>Turner’s <strong>Corner</strong>...................14Making a Comet Plate...............17BowlSaw Testimonials...............22Collaborative Group Meeting Reportfor December 3, 2008 Meeting...............................................23Book Review: Tops Making theUniversal Toy.............................25<strong>The</strong> Why and How of Chapter GalleryShows..................................26Almost All About Rolling Pins..28New NOVA Sharpening CentreSystem........................................30<strong>The</strong> Process Involved In MakingGordon Pembridge Piece Of Woodturning........................................32A Welding Jig forRose Engine Belting...............................................34Coming Events..........................35<strong>The</strong> Market Place......................39About the Cover:<strong>The</strong> cover photos this month allcome from stories included inthis issue of More Woodturning.We have selected a piecefrom the <strong>Larry</strong> <strong>Stevenson</strong> story,one from John Wolf’s story onthe making of the Comet Plate,and a photo of the Collaborativeprojects submitted at theDecember 4, 2008 meeting.EDITORALThis editorial is the second written for a 2009 issue. <strong>The</strong> issue was astressful issue to put together, partially because I tried too hard to get allof the photos for a particular story onto a color page. After fighting thisissue, I have decided to go back to my original layout planning methodand quit conntinuing stories into several places in the issue. With the nextissue, I’m going to ignore color and black and white pages when I lay outa story. I will simply put the story all together if possibly. It is not worththe hassel that I went through with this issue. Color advertisement willwind up on color pages and as much as possible to keep things continuousso will photographs. If this bothers you, keep in mind that the electronicedition will have color photographs on every page.We’ve set ourselves a pretty heavy schedule of travel for February, soplease try not to call us with problems from February 4 through February23, there will be no one here to answer the telephone. We will be attendingthe Desert Woodturning Roundup in Mesa, Arizona in the first part of themonth. We’ll then bum around a bit visiting some friends and relativesand then fly to Orlando, Florida to do a bit of demonstrating and attendingthe International Wood Collector’s Society (IWCS) meeting at Lake YaleBaptist Conference Center in Eustis, Florida. Since I am a member of theboard for the IWCS and they have decided to hold their annual board meetingduring this meeting, I feel obligated to attend the meeting. Besides onenearly always is able to bring home some fine wood for turning.We were absent a large part of December, because we opted to purchaseourselves a Christmas /Anniversary Present of a week in Cancun,Mexico. This was purely a pleasure trip although we were able to bringhome a little wood from the area that we had never had an opportunity toturn. It was going to make us absent from the office for a bit over a week,but we hadn’t checked with Mother Nature. When we started home, ourplane was so heavily loaded that they couldn’t carry enough fuel to reachSeattle. This required us to stop in Boise, Idaho to refuel. <strong>The</strong>n before wecould get to Seattle, the airport was closed due to heavy snow. Our flightwas redirected to San Francisco. We spent three days in San Francisco,with our luggage checked. We were assured that our luggage would beon our flight to Seattle on the 23rd. We finally reached Seattle to find noluggage and Alaska Airlines couldn’t find it either. Seven days later, mysuitcase, which had my medicines in it arrived at our home. <strong>The</strong> two othersuitcases made it home a bit faster, but I was not impressed with AlaskaAirlines ability to keep track of the luggage. Other than the return hometrip, it was a lovely vacation and it was warm and cozy in Cancun withits weather in the high 70’ and low 80’. This is all of the story you willget on this trip. <strong>The</strong> two trips in Febraury will probably get covered in afollowing issue.Fred Holder, Editor and PublisherMore Woodturning February 2009 Page 3
<strong>Larry</strong> <strong>Stevenson</strong> <strong>Demonstration</strong>by Fred Holder<strong>Larry</strong> <strong>Stevenson</strong> from Canadadid an interesting demonstration oncoloring and texturing woodturningsat the Northwest Washington WoodturnersChapter of AAW meeting onSeptember 18. I am pleased to reporton that demonstration.<strong>Larry</strong> says, “My involvementin woodturning began in the 70’s aspart of a project in making myself abedroom suite. I purchased a usedlathe and a basic box of tools and naivelyset out and turned a set of postsfor a waterbed suite. I was entirelyself-taught at the beginning throughbooks and a basic instruction manual.As frustrating as it was I lovedthe process in sculpting somethingMore Woodturning is published monthlyexcept April and October for $35.00 peryear by Fred and Mildred Holder at 19805Fales Road, Snohomish, WA 98296. MailingAddress is P. O. Box 2168, Snohomish WA98291-2168. Telephone: (360) 668-0976.E-Mail: fred@morewoodturning.net, WEBPage URL: http://www.morewoodturning.net. Periodicals Postage paid at Snohomish,Washington and at additional mailing office.More Woodturning is sold by subscriptionat $35.00 for one year and at a singlecopy price of $4.00 plus $1.50 postageand handling. Editorial material submittedfor publication must be accompaniedby a stamped, self-addressed envelope toensure return if it is not accepted for use.More Woodtunring uses materials frommany sources and many authors, the viewsexpressed herein are, therefore, those ofthe authors and not necessarily those of thePublishers. More Woodturning receives anumber of products each year for evaluation,but accepts no responsibility for return ofthose products unless specifically requestedto do so, in advance!POSTMASTER: Send address changesto More Woodturning, P. O. Box 2168,Snohomish WA 98291-2168.USPS No. 015387Page 4 More Woodturning February 2009out of a piece of wood. I purchasedmany woodturning books througha mail order catalogue and startedlearning different techniques andprojects. At this time I was limitedby the usage of kiln dried woods. Iturned many Christmas presents outof laminated dimensional lumberbut was frustrated with its limitations.At some point I went out tomy firewood pile and found a pieceof figured poplar. I just couldn’tbring myself to burning it in thefireplace and decided to have a go atit with the lathe. I was hooked. <strong>The</strong>possibilities seemed endless withthis new source of wood. Figuresand grain patterns not normallyseen in dimensional lumber are awoodturners dream. New bookson “Working Green Wood withPEG” were being published and Iwas getting deeper and deeper intomy newfound obsession. Articlesin “Fine Woodworking” featuringDavid Ellsworth started appearingabout hollow vessels and that finishedme off. I was a full-fledgedwoodturning junkie at that point.”From the work that <strong>Larry</strong> hadon display, I would say that he hasprogressed considerably since thatfirst project. Apparently <strong>Larry</strong> isstill learning and has been doing alot of experimenting with burningand coloring of finished pieces. Iwas especially impressed with histhree dimensional effect with theburning of a geometric pattern onthe surface of a hollow form thatmakes it look like is has a threedimensional surface.He has experimented withmany coloring products includingacrylic paints and Prisma markingpens. Procion fabric dyes are currentlyhis interest. He describeddissolving the fabric dyes with waterand applying it to wet wood withsponges or stiff brushes. He usesInterference acrylic paints, whichcontain mica flakes, which reflectcolor.On his geometric designs hedemonstrated using three metallicInterference paints of copper, brass,and gold to make dark, medium,and light shadowing over the fabricdyed and burned design, as shownin Figure 6.<strong>Larry</strong> had a slide show thatpresented a number of his finishedpieces with various forms of texturingand coloring. I took pictures ofsome of these as presented on thescreen, but do not feel the qualitygood enough for presentation inthis story.<strong>Larry</strong> began by talking abouthis pieces as shown in Figure 1.Figure 1. <strong>Larry</strong> <strong>Stevenson</strong>talking about one of his pieces.This piece has a geometricpattern carved on it surfaceand is colored using a specialtechnique that he has developed.
<strong>Larry</strong> used the sketch pad toshow how he designed the patternfor his pieces by drawing a grid tolayout the design that could thenbe transferred to the surface ofthe vessel. He uses a home-madeflexible template to help draw thepattern on the surface of the vessel.He shows how he makes up the gridin Figure 2.<strong>Larry</strong> shows a vessel with apattern burned on it in Figure 3.He noted that one must change thelayout of the pattern to fit the shapeand diameter of the vessel.<strong>Larry</strong> then talked a bit aboutfinishing the vessel after any burningor carving has been done. He uses aspray on finish that he is holding inFigure 4.Figure 2. <strong>Larry</strong> showing howhe makes a grid to design hispatterns.Figure 3. Showing how to holda hollow form while discussingthe layout of the pattern on thevessel. He noted that the patternmust change as the diameter ofthe vessel changes to make itlook proportional.Figure 4. <strong>Larry</strong> holding up theUV Krylon Clear Gloss he uses.He applies several coats to finish.[Text Continued on Page 8]More Woodturning February 2009 Page 5
Questions and Answers from the InternetWhich hollowingtool?Question: What kind of hollowingtools should I use. I’ve neverattempted turning hollow forms before.What kind of tools are peopleusing for both face and end grainhollowings, and of various size? anydo’s, and don’ts, words of advice,tool recommendations??—Clay RoseFred’s Response: <strong>The</strong>re area great many hollowing tools onthe market and virtually all ofthem work for some applications.In 2004, Lyn Mangiameli wrote afive part series of articles for MoreWoodturning. That series and manyof Lyn’s other articles are at my website. Lyn did post regularly to rec.crafts.woodturning and this messageboard, until he became very illand could no longer turn wood andwrite articles.<strong>The</strong>re are some new hollowingtools on the market that did not existwhen Lyn wrote his series of articleson hollowing tools. <strong>The</strong>se tools usecarbide cutters. <strong>The</strong> first that I camein contact with was the Hunter toolin February 2006 when we wentto the first Desert WoodturningRoundup in Arizonia. Mike Hunterwas there and I purchased one ofhis tools for my wife to use in hollowingendgrain. I tried the tool andcalled Mike for more informationand then did a review on his tools.Mike has also come out with cuttersto use with the Jamieson StabilizedBoring Bar system and other similarsystems. <strong>The</strong>se work very well, Ipurchased one from Craft SuppliesPage 6 More Woodturning February 2009at the Utah Woodturning Symposiumthis last spring.Some time later, Jack McDanielin the Seattle area, came outwith a tool called <strong>The</strong> Eliminator,which uses the same carbide cutteras Mike Hunter. Jack’s Eliminatortools have larger shafts with flatsmilled on the shaft to make it easyto position the cutter.When we were in Australia inSeptember 2006, I was introducedto the Vermec hollowing rig whichis a stabilized boring bar that popsinto the tool post hole in the banjoand uses the same carbide cuttersfor hollowing. I had to add one ofthese to my extensive list of hollowingtools and like it very much. Itis designed to cut on the right sideof the vessel with the lathe turningin its normal forward rotationdirection.I highly recommend that youtake a look at Lyn’s series of articlesat www.morewoodturning.net/lyn.html.—Fred HolderLyle’s Response: This is atough question for me to answer. Idon’t want to appear to be writing abiased glowing review of my tools.I have a bias, I think my tools arethe best.As Fred said “all of themwork”. I think you need more infothan that to make an intelligent decision.Lyn’s articles are a lengthyresource but in my opinion did notgo far enough. He may have beenafraid to offend many of the toolmakers with an honest critique.<strong>The</strong>re are huge differences in hollowform systems. Most look greatin the beginning but you don’t seethe difficulties and obstacles to turninguntil you have used them forawhile. I highly recommend that youuse the tool that you are consideringto purchase before you buy. It is“buyers beware” out there. Who doyou trust to back the tool and be therein years to come for advancementsand attachments that will increaseyour turning injoyment?? My toolsare satisfaction guaranteed.I would break it down into twocategories. First hand held, blindhollow form boring bars and, secondsupported systems with laser assistedhollowing. <strong>The</strong> hand held bars comein all sorts of shapes and sizes. <strong>The</strong>3/4 inch diameter boring bar is thestandard these days. Smaller diameterbars fall short (no pun intended),even in relatively short vessels youget vibration when extended out overthe tool rest. When you buy boringbars you soon realize you have tobuy a bunch of them to get into avariety of shapes of hollow forms.One bar just can’t reach into all theshapes you want to turn. Anythingthat limits my accessibility or creativitydrives me crazy, I want toopen up possibilities not limit them.<strong>The</strong> Jamieson system gets into anyshape hollow form you want to do.I have gone back to hollowing somesmall items with a hand held barrecently and realized I don’t want towork that hard. I want to be turningwhen I’m 90, I don’t want to beat upmy body like that. Hollowing withhand held tools, even when you havelearned to use them correctly, is justplain hard work. I’m in it for the fun.And even more important is the factthat I can’t use a laser with a handheld boring bar, there are too manyvariables to be accurate.
<strong>The</strong> second category is supportedsystems. At the risk ofsounding like a Jamieson tool advertisementagain I will compare othersto mine. I won’t name names butfeatures. First the cutting tips. Fredmentioned the new carbide cutters.In the stabilized system they are reallya whole new ballgame. Bevelsupported slicing action produces ahighly superior surface, and it neverneeds sharpening. Grain orientationis a high priority to me so I havedeveloped the first reverse anglecarbide cutter for those advancedturners that want to do better insidesurfaces on even side grain vesselsor bowls without grain tear out. Youare the first to see this in print, it isbreaking news.I believe the swiveling cutterassembly is not optional butnecessary. <strong>The</strong> stationary cutterswill reach most shapes but the onelittle spot it won’t reach could ruina piece. Stability is critical. Someflimsy supports or articulating armswill move in use and could even bedangerous to use. <strong>The</strong> laser unitsare getting some creative ingenuityin their construction by manyof new boring bar sellers, but dothey work easily and will they workmonths from now when they get allbunged up with set screw notches?If I were this “twenty something”young stud that didn’t worry aboutbeating my body up hollowing Iwould still have a supported systemjust because of the laser capabilities.It is easier, faster and I can dothings with a laser that can not bedone with other measuring devices.<strong>The</strong>re are many torque arrestingmethods. <strong>The</strong> twisting forces aresevere. Some get in the way ofturning, some bind up when hoggingoff, some don’t allow accurateclean up of cuts and smooth insidesurfaces. I was the first one to bringthe supported hollowing systemonto the turning market. <strong>The</strong>re arelots of copy cats out there. <strong>The</strong>re issomebody in your club or area thathas one of my systems. <strong>The</strong>y willbe glad to give you a test run on itbefore you buy.—Lyle JamiesonSharpeningInformation NeededQuestion: Can anyone pointme in the direction of sharpening informationfor turning chisels please.I used to have a chart with picturesand angles etc, but it seems to havewalked and I can’t find it. Any goodhandouts or pamphlets on the subjectwould also be useful.—TallboyFred’s Response: <strong>The</strong>re issome good basic information locatedat this web site:Hope thishelps.—Fred HolderLyle’s Response: Thanks forbringing up the sharpening question.Sharpening is critical. <strong>The</strong>reare many turning tools and each canbe ground/sharpened many ways. It[Continued on Page 10]To Subscribe to More Woodturning:Check the Print Subscription Period Below:United States Canada Other Countries__One Year/$35 __One Year/$48 __One Year/$68__Two Years/$70 __Two Years/$100 __Two Years/$105__Three Years/$105 __Three Years/$145 __Three Years/$205All amounts in US Dollars! We Accept Visa/MC.Electronic Version (PDF): For People receiving Electronic issues,new priceby year only: $25.00/One year. We need an e-mail for the electronic version.Because of the significant postage increase for outside the United States,recommend the Electronic Version for all Foreign Subscribers.Thank You!!Please Enter Your Name and Address Below:Name: _________________________________________________Address: _______________________________________________City: ______________________ State: ______ ZIP: ____________E-Mail for Electronic Subscribers: ____________________________Clip and Mail with Your Check, Cash, or Charge Card Information to:More Woodturning, PO Box 2168, Snohomish, WA 98291More Woodturning February 2009 Page 7
Continued from Page 5.Figure 8 shows the actual mechanismof the holder.<strong>Larry</strong> then talked a bit abouthow he gets the various gradationsof color on his pieces. He basicallyuses one color and then uses metallicenhancers to give the variations incolor on the piece. He says that hedoes a lot of trials on sample boardsbefore he actually applies the finishto the vessel. He uses a special brushthat allows him to sort of stamp themetallic enhancers onto the paintedor dyed surface. Figure 5 shows<strong>Larry</strong> using one of these brushes.Figure 5 <strong>Larry</strong> applying color.<strong>The</strong> results of the work beingdone in Figure 5, is shown in thesample piece shown in Figure 6.Figure 7. Here <strong>Larry</strong> shows away to hold hollow forms forcarving and finishing.<strong>Larry</strong>’s mechanism shown inFigure 8 was a nice invention thathe chose to show us as a part of hisdemonstration. I thought this wasone of the most significant thingsthat he disclosed.Three of <strong>Larry</strong>’s pieces areshown in Figures 9, 10, and 11.Figure 6. Showing the effects ofadding metallic color over theblue paint.<strong>Larry</strong> noted that it is difficultto do this work on a vessel becauseit is hard to hold the vessel withouttouching the surface and transferringoil from your skin to the surface,which will affect the color andthe finish. He has devised a simplemethod of holding a vessel whileworking on it as shown in Figure 7.Figure 9. Here is a sample of<strong>Larry</strong> <strong>Stevenson</strong>’s work witha carved pattern and braidedleather around the rim, aspectacular piece.Figure 8. <strong>The</strong> hollow formholding apparatus that <strong>Larry</strong>uses. It consists of a piece ofall-thread, a piece of wood witha threaded hole in the center,that will fit inside the vessel withleather on top of the wood toprotect the surface of the vessel.A piece of wood, with a hole init, to accept the all-thread andprotect the bottom of the vessel.Finally, he covered the all-threadoutside of the vessel with a pieceof plastic tubing.Page 8 More Woodturning February 2009
<strong>Myaporium</strong>by Warren Aut<strong>The</strong> Arborist who dropped offthis log identified it as coming froma Myaproium tree which was plantedfor shade and privacy. This is anevergreen type tree that bears whiteflowers and small purplish berriesand presents an interesting piece ofArt work.Photo 4. <strong>Myaporium</strong> is anextremely dense tight grainedhard wood and is tough oncutting edges.<strong>The</strong> finished piece.Photo 1. In the rough not a verypretty piece of timber. This log isabout 14 inches in dia. and 20 +inches long.Photo 5. <strong>The</strong> external roundingprocess was normal. Used a 1inch roughing gouge aided byseveral trips to the grinder.Photo 3. Mounted on the latheit appears to have a challengingshape.Where <strong>Turners</strong> Turn FirstPhoto 2. As can be seen it wasnot cut with parallel ends. Iattached a 6 inch faceplate with12 1 1/2 inch sheet metal screws.INFORMATION AND RESOURCES FORWOODTURNERS WORLDWIDEFind articles, projects, new products, vendors, club listings,turner websites, courses and schools, discussion forum,books and videos and much more!WWW.WOODTURNINGONLINE.COMPage 12 More Woodturning February 2009
Photo 6. Having such andunusual basic shape broughtout the “Design Opportunity”to have part smooth and partnatural.Photo 8 Lesson learned --Again--over aggressively attackingany turning object can lead toproblems.Photo 10 Fortunately theturning stopped in a pile ofshavings against the lathe.Because I was end turning itmissed mePhoto 7. Satisfied with thebasic external shape whilebetween centers it was time tostart hollowing.Photo 9 As the timber left thelathe I did get a good look at theface plate and remaining screws[Continued on Page 16.]More Woodturning February 2009 Page 13
<strong>Pen</strong>Turner’s <strong>Corner</strong>by Don WardLast month I introduced sometools that make our penturning andpen making just a little bit easier. Ihope some found them to be newtools. I know there are several whouse some or all of the tools I mentionedon a regular basis. Maybesome who even use other tools that Idid not mention. Email me with anyspecial tools that are used and howthey are used and I will share themwith our readers. Tools can includeturning tools, both commerciallyavailable ones and home made ones.Also included can be tools used forassembly, disassembly, finishing,buffing, and presentation aids suchas boxes or stands. I look forwardto hearing about some of the clevertools used and maybe even seeingpictures of them.Last month I promised informationon books and videos. Hereis what I’ve decided to do. I want tomake this edition of the column onethat you can use over and over. I willbe compiling a list of all availablesources of information, sources ofpenturning kits and parts and alsosome wood sources that I’ve used.So, here goes.Internet Resources:<strong>The</strong>re are several websites thatoffer information on penturning. Ihave not even attempted to list all ofthe individual’s websites that havepenturning information. That list isway too long. <strong>The</strong>y can be found bydoing a google search for penturning.I’ve kept this list to the majorwebsites. <strong>The</strong> obvious ones are thepenturning forums. Membership isusually required but is rather automaticafter going through the joiningPage 14 More Woodturning February 2009process. Join and you will be approvedand then you will be able toaccess all resources of each forum.Each forum has several areas ofresources including tutorials, techniques,tips, tools, jigs, classifieds,Q and A, and even special help withsuch things as casting, stabilizing,advanced pen making, and metallathe use. Find one and join or jointhem all. Participation is voluntaryand each member can participate atthe level that he feels comfortable.Here they are in no special order:1. http://www.groups.yahoo.com/group/penturners This is oftencalled the Yahoo group and is theone that has been around the longest.Messages can be read withoutbeing a member but membership isrequired to access all of the forum2. http://www.penturners.orgThis is the group referred to as theIAP or the International Associationof <strong>Pen</strong>turners. Some areas can beaccessed without joining but fullaccess requires membership.3. http://www.penshop.netThis is the place where penturnerstalk shop. Well, that is what it sayson the home page. Actually, a lotof shop talking takes place daily onall three of the above forums. Also,some areas are available without“THE ELIMINATOR”being a member but full access isonly for members.4. http://www.groups.yahoo.com/group/penmakersguild Joiningthis group requires submitting a penand being voted in by an advisoryboard. Complete details are on thehomepage. Messages can be readwithout being a member.5. http://www.<strong>Pen</strong>Makers-Guild.com This is a website usedby the members of the <strong>Pen</strong> MakersGuild. It is not a forum. <strong>The</strong> websitecontains galleries of member’s pensand an area of articles and videos.All areas of the website are availableto anyone, including all galleriesof photos, articles, and videos.<strong>The</strong>re is no discussion on this site.6. http://www.woodturnerruss.comThis is the website ofRuss Fairfield, It is one of the fewindividual websites I will list here.I list it because it is such a greatwebsite and is chocked full ofvaluable information both to thepenturner and general woodturner.Russ has placed a lifelong wealthof information here for all of us touse. Thanks Russ for sharing yourvast knowledge with us and makingit so freely available.7. http://enewbold.com/pens/<strong>Pen</strong>TurningFAQ.htm I found thisHollowing ToolELIMINATES:CATCHES,TEAR OUT,SHARPENINGAvailable in three sizes: 1/4, 3/8, 1/2 inch cutters. Tool shafts aremilled with flats for both right and left hand cutting.Available from: Packard Woodworks and Craft Supplies USAwww.jewelwood.com
site while searching for information.I had not found this site before butdecided to list it here. It has someout of date information such as otherwebsites that no longer exist, butit does have some good Q&A andsome may find it useful.8. http://www.squidoo.com/penturning This site has some goodinformation on what is needed to getstarted in penturning.This is by no means an exhaustivelist. But the ones here representsome of the best penturning websitesthat I have found. Email meothers you have found and I’ll addthem to my list and maybe someday I’ll just list as many as I cancompile. Google “penturning” and aplethora of hits will be found. Happyhunting.Commercial sites selling kits,wood, and supplies <strong>The</strong> followinglist offers places to purchase kits,blanks, tools and most all suppliesrelated to penturning as well as bottlestoppersand other small turningprojects.1. http://www.ArizonaSilhouette.comArizona Silhouette, ownedby Bill and Kathy Baumbeck hasjust about anything one would needto start or continue in penturning.Arizona Silhouette has an excellentselection of both stabilized and nonstabilized pen blanks as well as stop-[Continued on page 18]Holland 4 Wheel Steady100% improvement over 3 wheelsteadies25% larger swing capacity, fits lathesizes, 12,14,16,18,20,24Easy to build of plywoodPlans for sale $20.00 + $2.00 s/hCustom Built $275.00 + s/hemail: wmhollan@optonline.netphone 631-281-0302Call or Write for your FREE Copy of our156 Page Color Catalog!Featuring:• <strong>Pen</strong> Kits and Supplies• Project Kits• Full Range of Lathes• All Major Brands of Chucks• Turning Squares• Dymondwood• Henry Taylor, Hamlet and Sorby Toolsall at the best prices!Order Your Free Woodturners Catalog TodayCraft Supplies USA1287 E. 1120 S.Provo, Utah 84606 USATEL: 800-551-8876Overseas Telephone: 001-801-373-0919More Woodturning February 2009 Page 15
Myaproium Continued from page13.Photo 14 Reverse mounted againin preparation for final shapingand sandingPhoto 11 Back to betweencenters and re turned the bottomin preparation for reinstallationPhoto 17 Finished inside and outwith several coats of Danish OilPhoto 12 Re mounting theturning on the lathe andturning at a slower speed plususing a Lyle Jamieson trappedhollowing system made the restof the action easyPhoto 15 Remounting was easybecause the tail stock centeringpoint was well defined and noteat the head stock flat plate wasused and secured by DUCTTAPEPhoto18 Original and one of akind as I could not duplicatewhat nature has presentedPhoto 13 Stopped several timesto re sharpen cutting edges. <strong>The</strong>turning ran true and stable withthe increased holding power ofthe screws I should have used inthe first place.Photo 16 <strong>The</strong> end result was avery natural edge unusual vesselPage 16 More Woodturning February 2009
Making a Comet Plateby John WolfMaking a comet plate is partband saw project and part turningproject. To achieve dramatic impactwith the finished piece it is necessaryto carefully select the woodthat will form the body of the plate.I’ve found that light colored figuredspecies work best. When I’ve madethese plates with “plain” wood, theylacked the visual appeal of thosemade with a figured board.circles and often leave a rougher cutsurface. I wouldn’t recommend anyblade over 1/2 inch for this work.Figure 2. Setting the cut to be onthe outside of the saw.Figure 3. This photo shows thebottom side of the bandsaw jig.gauge slots. This is probably overdoingit a bit since one will guide thesled with accuracy. It is also importantto make a stop block that limitshow deeply the cut can be made intothe board.Once you’ve made the basicsled board, turn on the saw andmake a cut in the sled until you havepushed it forward to the stop block.Turn off the saw and mark on the sledthe location of the middle of the sawblade when it is all the way forwardagainst the stop block. Remove thesled from the saw and draw a lineperpendicular to the saw cut fromthe spot you’ve previously marked.(see sled picture) This line is thecenterline for the circles you will cut.Determine the radius of circle youneed to cut by the width of the boardyou will be using. In my examplethe radius is 5 1/2 inches to make an11-inch diameter plate.[Continued on Page 21.]Figure 1. Begin by adjustingyour bandsaw.It is important to adjust yourbandsaw so that the blade is squarewith relationship to the table. Youwill be doing a stacked cut. Thatis, you will be cutting both the plateand the comet insert at the sametime. You can angle the blade, butthat is a more advanced approach.Start with a square blade. Andspeaking of blades, I find that a3/8 inch 5 or 6 teeth per inch bladeworks wonderfully for this. Widerblades will only work in largerI’ll take this momentto describe theband saw circle cuttingjig. It is nothing morethan a piece of material(plywood, MDF,plastic, etc) that coversthe band saw table withenough material besidethe blade to accommodatethe largest circleyou will be cutting.Most of the time it isbest to make the circleto the outside of thesaw rather than beinglimited by the throat asyou would with cuttingto the left of the blade.I make 2 runners to fitinto the table saw miterNew Video:Reviewed in the February2006 issue of More Woodturning.“Relief CarvedEmbellishments for WoodProjects”Available in:DVD for $30.00 plus $3.00 S/HVHS for $20.00 plus $3.00 S/HOrder from: Tony Cortese20850 NW 13th Street, Dunnellon, FL 34431PH: 352-489-5652E-Mail: romeowoodturner@msn.comWeb Site: www.tonycortese.orgMore Woodturning February 2009 Page 17
<strong>Pen</strong> <strong>Turners</strong> <strong>Corner</strong>Continuedfrom Page 15per blanks. Bill prides himself onmaking available to us the best “EyeCandy” pen blanks that can be had.Arizona Silhouette sells Berea kitsand blanks. Arizona Silhouette sellstooling, finishing supplies, booksand videos and has excellent pagesshowing finished pens made fromthe kits its sells as well as pictures ofthe “Eye Candy” wood sold there.2. http://www.woodturnerscatalog.comCraft Supplies USAsells items related to both woodturningand penturning. CSUSA has anexcellent selection of kits and blanksas well as books, videos, and anyother items needed to turn wood ormake pens.3. http://www.<strong>Pen</strong>nStateInd.com Another well known supplierof all things turning. If you needan item PSI will probably have it.Check out pen kits and blanks alongwith tooling and other penturningrelated items.4. http://www.woodturningz.com <strong>The</strong>se guys sell most everythingthat PSI sells related to penturningand at a little better price.If you don’t see what you want onthe site, call them. <strong>The</strong>y probablyhave it.5. http://www.WoodCraft.com A well known national chainstore for all general woodworkingsupplies and a really good placefor turning supplies, pen kits andblanks. Although, they may be a bitpricey.6. http://www.Rockler.comLike Wood Craft, a well knownational chain store of all generalwoodworking supplies and tools.And, they also have an ample selectionof kits and blanks. And, theycan also be a bit pricey.7. http://www.woodzone.com/I’m not familiar with this place, butthey do have some penturning kitsand other related materials.8. http://laulauwood.com Anindependent supplier of several ofthe better and higher end kits.9. http://www.BearTooth-Woods.com Ernie McFarlane offersseveral of the Berea pen kits, blanks,and other penturning supplies.10. http://www.BereaHardwoods.comI’ve mentioned Bereakits in other listings above. Thisis the home of one of our majormanufactures of pen kits sold byseveral independent dealers as wellas Woodcraft and Rockler. But, theydo sell to individuals.11. http://www.penmakingsupplies.comThis is the pen turningdivision of Steebar.12. http://www.augumspenworks.comThis is another smallindependent company in Oklahomathat offers all of the materials neededfor penturning. <strong>The</strong>y sell PSI kits.13. http://www.woodnwhimsies.comHere is another small independentdealer who sells PSI kitsand strives to give the best serviceavailable.]14. http://www.HUTproducts.com I suppose we all know aboutHUT Crystal Coat and the HUTPPP (perfect pen polish) sticks.<strong>The</strong>y have another excellent productcalled HUT UltraGloss PlasticPolish. And, of course, theysell allthings penturning.15. http://www.woodwriteltd.com/ Are you looking to changeyour penturning to a CNC lathe?This would be the place to look.<strong>The</strong>y also sell a full line of pen turningsupplies.16. http://www.woodpenpro.com Another excellent supplier ofpenturning supplies and a resellerof PSI kits.17. http://exoticblanks.comExotic certainly fits this site well.If you are looking for blanks thatno one else has then this site is amust visit. No wood blanks are soldhere but they have some really niceresins...and like I said...no one elsehas them. Some of the offerings includealternate ivory, zebra patternblanks, big cat pattern blanks, andcamo blanks. Take a look and you’llbe glad you did. <strong>The</strong>ir resin blanksare a dream to turn.18. http://www.harrisburlsupply.comAn excellent source forreally nice pen blanks.19. http://www.thegoldennib.com Fountain pen nibs, ink, andrefills for the pens we make.20. http://www.fountainpennibs.comAnother source for fountainpen nibs, ink, and pen accessories.I use the semi-flex steel nibs forevery fountain pen I make and sell.<strong>The</strong>y are great inexpensive fountainpen nibs.21. BigRob777 This guy sellspen blanks of all kinds. He does nothave a website but does advertiseat the IAP (http://www.penturners.org) site and is one of the sites ‘mostvalued vendors’.22. IAP classifieds: Instead oftrying to list all of the IAP memberswho sell blanks and other supplies Iwill just report that the classifieds ofIAP should be looked at regularly.Several members advertise some reallyunusual and unique blanks. I’venever purchased anything exceptfirst rate blanks from the classifiedsat IAP. Other merchandise is availablefor penturners such as tools,tooling, pen kits and much more.More Woodturning February 2009 Page 18
<strong>The</strong> list above is not exhaustiveand I’m sure I’ve left out someexcellent retailers. I apologize forthat. But, anyone left out was notleft out on purpose. This list is onlya starting place. Do some searchingand join the forums and happyshopping.<strong>Pen</strong>turning Books and Videos:Several books are available.Some are excellent. Some are outdated.Most of them are available atthe major woodturning or penturningstores both on line and brick andmortar stores. I’ll give availabilityinformation where necessary.<strong>Pen</strong>turning videos are becomingpopular. Surprisingly there aremore than several penturning videoson you-tube along with just as manyor more woodturning videos. Just goto http://www.youtube.com and startsearching. You’ll find enough videomaterial to keep entertained duringthese long winter nights.Here is a list of books and videosavailable:Turning <strong>Pen</strong>s and <strong>Pen</strong>cils Bookby Rex Burningham & Kip Christensen.Rex Burningham and KipChristensen have combined theirefforts to produce one the best penbooks on the market. Through cleartext and superb photography theydescribe various ways of approachingthe task. <strong>The</strong> beginner to the seasonedpen maker will find this booka valuable source of information. Inaddition to turning pens freehand,they demonstrate alternative methodsincluding using a router, Sherlinepen lathe, and an ornamentalmilling machine. 166 pages.<strong>Pen</strong>turner’s Workbook 2nd editionby Barry Gross. Contemporarydesigns and unique materials cometogether in this expanded book ofprojects, ideas, and shop talk forturning out fine writing implements.Six projects from the original editionare joined by new pens, moretroubleshooting, and new materialsgeared toward experimenting withnew media as well as making themost out of small pieces of stock. Anexpanded basics section offers newinformation on tools and adhesivesand a section on sharpening willkeep the blades of more experiencedturners honed. Fine finishes-fromsnake skin to 24-karat gold-are alsoexplained, as are other embellishmentssuch as laser engraving andplastic inserts. A seller’s sectionwith marketing advice and a galleryof inspiring samples make this collectionof functional art a valuableaddition to the workshop.<strong>The</strong> <strong>Pen</strong>turner’s Workbookrevised edition by Barry Gross. Thisexpanded edition provides in-depthinstructions and creative ideas forthe novice while including advancedtechniques for the experienced penmaker from segmented and crosspens to laser cut pen kits. This bookhas everything you need to know formaking pens start to finish. Includesa gallery of pens from various penmakers to inspire your creative side.125 pages<strong>Pen</strong>s From the Wood Lathe byDick Sing. <strong>Pen</strong>s are becoming a verypopular woodturning project and arethe sought after items at craft shows,or for gifts for family and friends.Detailed instructions include 273step-by-step color photographsshowing how twelve different stylesof pens can be made along withseveral design options. A nine-pagegallery shows finished pens in differentstyles, materials, and shapes.Advice on selection of materials,set-up, turning, finishing techniques,and tips for final assembly make thisbook the best source of instructionavailable. 64 pages.<strong>The</strong> Basics and Beyond by RexBurningham and Kip Chrisensen.After producing Turning <strong>Pen</strong>s and<strong>Pen</strong>cils they follow with two videosabout turning pens. Through detailedsteps, Kip and Rex cover basicfundamentals, advanced techniques,design variations, and material selection.Video IMore <strong>Pen</strong>s Plus Tips and Tricksby Rex Burningham and Kip Christensen.After producing Turning<strong>Pen</strong>s and <strong>Pen</strong>cils, they follow withtwo videos about turning pens.Through detailed steps, Kip and Rexcover basic fundamentals, advancedtechniques, design variations, andmaterial selection. Video IITurning <strong>Pen</strong>s and Desk Accessoriesby Mike Cripps. Handmadepens have regained their positionof fifty years ago when they werea valued and personal gift. AllowMike to show you how you can addindividual characteristics to Woodcraft’spen kits and truly create oneof a kind, collector pens, pencils,and desk accessories. All the stepsof pen production are covered - drilling,gluing, turning, and finishing.62 pg., softcover.Unique and Unusual <strong>Pen</strong>sby Dick Sing. If you liked Dick’sfirst book then you’ll love this oneas Dick shows you how to makepens that are more than just writinginstruments. Create an art piece, akeepsake, a unique one-of-a-kindgift or a personal treasure! New pensare introduced, along with inspirationalideas for creating variationson some of your old favorites. 64pg., softcover.[Continued on Page 22.]More Woodturning February 2009 Page 19
Editor’s Books for SaleBooks Written by the Editor of More WoodturningMaking the ChineseBallRevised 2008, by FredHolder.This revised booklet outlines Fred’strials and tribulations in conqueringthis project. Tells how to makethe tools needed to use the CrownChinese Ball Tools. Booklet nowcontains 64 pages of information.Price is $10.00 including shipping.Order from: Fred Holder, PO Box2168, Snohomish, WA 98291.Telephone 360-668-0976.Price: $28.00, plus $5.00s/hPrice: $27.00, plus $5.00 s/hI have purchased 25 copies of<strong>The</strong> Woodturner’s FAQ Book andhave them available as signedcopies for $19.95 plus $5.00for shipping by Priority Mail(Washington State residentsplease add 8% for sales tax.)We accept cash, check, orMasterCard and Visa creditbook, which is “required readingfor all new turners” directlyfrom the author:Fred HolderMore WoodturningPO Box 2168Snohomish, WA 98296 USA“Two Books in One”a CD-ROMThis CD-ROM contains Fred’snewest book, “<strong>The</strong> Turning Process”and the above book “Makingthe Chinese Ball” on one CD-ROM.Both books are in PDF format andrequire Adobe Acrobat Reader toread them on your computer. <strong>The</strong>Turning Process is a 105 pagebooklet designed for beginner tointermediate woodturners. It mighteven have something worthwhile forexperienced woodturners.Available by 9/10/2008Price for this CD-ROMis just $14.95 including postagewithin the United States.Order from: Fred Holder, PO Box2168, Snohomish, WA 98291.Telephone: 360-668-0976<strong>The</strong>se books seemedto be missing from most USSources. So I have purchased25 of each book for resale. Ifyou haven’t had an opportunityto purchase one, this isan opportunity to get a signedcopy. Books will be shippedby Priority Mail.Fred HolderMore WoodturningPO Box 2168Snohomish, WA 98291 USATEL: 360-668-0976Back Issues of More WoodturningAvailable on CD-ROMAnyone who owns a computer and likes to read More Woodturningon their computer or to archive it onto their computer, willbe pleased to learn that we now have all issues of More Woodturningever published in PDF format. While we offer individual yearson a CD-ROM for $25.00, we have come up with a special pricewhich includes all issues published from October 1996 to the datethat the order is placed on a single CD-ROM for just $95.00. ThisMore Woodturning, PO Box 2168, Snohomish, WA 98291 USA.Page 20 More Woodturning February 2009
Figure 4. Drilling a hole for thepivot pin.Drill a hole for the pivot pinperpendicular to the surface of thesled. I find the drill press is best forthis. I’m using a 1/4 inch diameteraluminum rod as the pivot in myproject, so I drill a 1/4 inch holein the jig. <strong>The</strong> circle cutting jig iscomplete and ready for use.Select your blank of wood forthe body of the plate. In this exampleI’m using curly soft maple.<strong>The</strong> board is almost 12 inches wide.I’ve selected the portion of it that Ithink will be most attractive whenfinished. I’ve marked what willbecome the center of the finishedpiece and sawed it oversized fromthe board.It is necessary to make a centerpivot point in the blank for the bandsaw circle cutting jig pivot. I’m usinga 1/4 inch diameter aluminumpin as the pivot in the jig, so I drilla 1/4 diameter hole about 1/4 inchdeep in the center of the blank. Thishole will be turned away as the plateis completed, so don’t make it toodeep!Mount the pivot pin in thecircle cutting sled so that it projectsabout 1/4 inch above the surface.Put the plate board on the pivot andturn on the saw. Hold the plate blankand advance the sled until it hits thestop block. Now, rotate the plateblank around the pivot pin. Voilà,a circle!Making the crescent shaped cutthat produces the comet’s tail couldbe accomplished by cutting along apattern. My hand isn’t that steady,so I use a secondary sled that makesthis an easy task.Figure 6. Making the CrescentShaped cut.<strong>The</strong> secondary sled is madefrom any flat sheet goods. Plywood,MDF or similar material is fine.Mine is made from plywood thatwas salvaged. In its previous use itwas finished. That isn’t necessary,but it does let it rotate along thecircle cutting jig with little effort.Select a rectangular piece that is atleast as wide as your circle. Drill ahole near one corner sized to fit thepivot pin in your circle cutting jig.This point will become the pivotpoint for the secondary sled. Attachthe sled to the pivot pin of the circlecutting jig. Turn on your saw andpivot the sled into the blade until acut across most of its width has beenproduced. Remove the sled fromthe circle cutting jig. At the drillpress make a hole the same size asyour pivot in the circle cutting jigand centered on the saw line. Thisis the locator pin hole.[Continued on Page 36.]Make 2-3 Bowls from 1 Blankwith My New BowlSawFigure 5. Cutting the Circularblank mounted on the pivot pin.Turn Nested Bowls from 6” or 8” bowl blanks with a $39.95hand-held tool I call the Bowlsaw.See my website bowlsaw.com for details.Steussy Creations415-897-1457 334 Atherton Ave., Novato, CA 94945More Woodturning February 2009 Page 21
<strong>Pen</strong> <strong>Turners</strong> <strong>Corner</strong> continuedfrom Page 19.Closed End <strong>Pen</strong>s: Design andTurning Techniques by Ed Davidson.This video contains the stepby step instructions necessary toturn a close end pen. Ed’s designsare quite unique. This video is onlyavailable from Arizona Silhouetteand possibly Ed’s website: http://www.yoyospin.com<strong>Pen</strong> Turning with Barry Gross:A Visual Guide to <strong>Pen</strong> Making byBarry Gross. Barry is the best sellingauthor of the books “Learn ToTurn”, “<strong>Pen</strong> Turner’s Workbook,First Edition”, “<strong>Pen</strong> Turner’s Workbook,Second Edition” and is theauthor of numerous articles in themajor woodturning magazines.Barry gives a new perspective onone of the fastest growing segmentsin woodturning. His easy manner,sense of humor and attention todetail make this video a definiteasset in your woodturning library.Everything you need to know aboutpen turning is found on one DVD:Tool selection, sharpening, toolcontrol, turning & finishing and tipson marketing & selling your pens.My Note: This is the mostcomprehensive video on penturningI’ve seen. Everything one needs toknow to continue or to start turningbeautiful and unique pens isincluded on this video.Russ Fairfield has penturningvideos available from his website.He even has a video on finishingand from previous articles youknow what I think of Russ’ knowledgeabout penmaking and finishes.Russ’ site is http://www.woodturnerruss.comBasic <strong>Pen</strong> Turning with BillBaumbeck. Bill has completed aninstructional pen turning videoPage 22 More Woodturning February 2009whose purpose is to guide a newturner through the entire processof creating a pen. Topics include:Identifying the different parts of apen, selecting a blank & markingfor grain orientation, cutting theblank using a band saw, drilling theblanks, gluing the tubes inside theblanks, squaring the blanks using apen mill, sharpening your tools usingthe Wolverine grinding jig system,turning a pen (I turn a 7mm slimlineand a 7mm European using a spindlegouge), finishing each pen (one bybuffing and the other using frictionpolish), and assembly. This videois available from Bill’s website athttp://www.arizonasilhouette.comFinished! Not nearly! I’m surethere are several other books andvideos relating to penturning. Dosome searching and let me knowwhen other books or videos arefound. I’ll add them to my evergrowing list.E-mail me with your comments...good,bad, or indifferent atdon@RedRiver<strong>Pen</strong>s.comBowlSaw TestimonialsHere are a few of the e-mails Ireceived concerning my BowlSaw.I’m reporting just as they wrote tome. Steussy Creations. Contact information:Steuss@aol.com or 415-897-1457 Steussy Creations, 334Atherton Ave., Novato, CA 94945“<strong>The</strong> BowlSaw arrived lateyesterday and I had to wait till todayto try it out. What a wonderfullittle tool!!! It performed just aseasily as you said it would. Followingthe instructions very carefullyand using a parting tool to cut thegroove, I pulled these two bowlsout of a six-inch diameter piece ofwalnut. Remember I told you I’ma real rookie at bowl turning. So,for what my opinion is worth, Ithink you have a real winner here.If I can use this tool and succeed onthe very first shot, anyone can. I’mlooking forward to getting two forthe price of one on a whole lot morebowl blanks. Again, thanks for awonderful little tool.”Kevin JonesFt. Myers, Florida“Here are my initial viewsbased on using the tool once-Itworks. I believe the maximum coreI can get out of a blank would beabout 5” by 2” deep. <strong>The</strong> sawingpart of the BowlSaw is pretty easyand goes quickly. One plus is thereis no setup compared to setting upthe McNaughton. I feel comfortablein saying that this tool works,but I will also say it is very limitedin what it can accomplish. <strong>The</strong>McNaughton gives you blanks thatcome out in the shape I prefer.Ron SardoDrums, PA“<strong>The</strong> tool cut much easier thanI would have guessed and the corecame out with no fanfare. So likemany others have indicated, it doeswork, and considerably better thanI would have guessed. I think alarger blank would have yielded alarger core. I was surprised at howquickly the core came out and howlittle rotational/twisting forces therewere and how easy it was once Ihad created an entry hole. WouldI buy one-nope. Does it work asadvertised? Yes, and probably betterthan advertised.”Steven AntonucciAndover, NJ“What I found positive wasthat there were no hazards in usingthe tool. When there was a catchthe lathe stalled and this was on a 2
hp 3520. <strong>The</strong> tool worked as advertised,a second bowl was obtainedfrom the original blank. On thenegative side, there is a limitationbecause of the shape of the bowls.I prefer sloping sides.”Bill KrammSun City, AZ“I didn’t have any difficultyonce I widened the trough enoughto insert and remove the tool withouthitting the side of the little core I wastrying to remove. I think this willbe a useful tool for those who useexpensive wood to craft miniatures.<strong>The</strong> larger version will be more usefulfor small bowls and such. Sofar, I’m having fun, and I’ll give ita good workout.”Brad VietjeNorthern Vermont“I found it to work very well.I had no problems with it at all. Iwas able to get my blank out by hittingthe inner blank on the edge andbreaking the tenon that was left bythe saw. No problems there. I feltno major pulling or pushing of thesaw. It felt very secure in my hand atall times. Once folks give your bowlsaw a try I believe that they will beglad they have it. <strong>The</strong> Moderatorteam here at WR is anxious to learnmore about the bowl saw. In fact, Iintend to send it around for them togive it a spin. I’ll be talking goodabout it for sure and look forward toseeing the new piece of literature.”Doug Miller, AdministratorWoodturners ResourceCollaborative Group Meeting Report forDecember 3, 2008 MeetingBy Fred Holder<strong>The</strong> Collaborative Group met at Fred and Mildred Holder’s homeon December 3, 2008 at 7:00 pm. All seven members of the group werepresent. A wide range of items were submitted that had been made fromthe numerous wood pieces furnished by Dan Robbins for this period plussome woods from their own inventory. Since Christmas was approaching,a number of the items made were Christmas Tree Ornaments.This is the complete group of items submitted . Top row (left toright) Dan Robbins’ box, Dan Blum’s small vase, Mildred’s bowlmade from the rough turned one in her wood supply from lastmeeting. Second row (left to right) Mildred’s ornament, Jan’sornament, Bob’s two ornaments. Bottom Row (left to right) Fred’sornament using all of the pieces of wood he received, Mildred’ssecond ornament, and Hal’s Ornament. Quite a collection of pieces.<strong>The</strong> next meeting is scheduled for January 7, 2009. Each personreceived two pieces of wood. <strong>The</strong> larger piece is to be used for the projectto be returned in January. <strong>The</strong> smaller piece of wood is scheduled tobe returned at the February meeting. <strong>The</strong> general feeling of the groupmembers was that these meeting are very beneficial and a lot of fun, plusit challenges each of us to come up with something from a given pieceof wood. Most of the wood furnished this time was red birch and at leastone piece was Mountain Mahogany, Fred drew that piece. <strong>The</strong> red birchgenerally turns very well.More Woodturning February 2009 Page 23
Follow-up to Bob Neill’s Article—Tossing and Turningby Lyle SolemI enjoyed reading Bob Neill’sarticle in your December issue.My wife and I with anothercouple from Rochester MN wereon that cruise and we really enjoyedit.I belong to two wood turningchapters, President of one and in mymonthly Presidents column I wrotethe following information about theCruise. I am also putting together aPower Point Presentation with manypictures of the trip, I have attacheda few pictures.Dennis and Marge Holt plusDonna and myself are now backfrom our Norwegian WoodturningCruise.<strong>The</strong> cruise was outstanding.I have attended 3 AAW Conferencesand I must say this cruisewas far superior to any of the 3conferences. <strong>The</strong> reason I say thisis that you would stand next to theprofessional like Richard Raffan,Dick Sing, Jimmy Clews, StuartMortimer or 12 others and you couldask a question and or either use theirtools to turn something. For exampleRichard Raffin stood next to me andhelped hold the chisel to show howhe uses a specific type chisel with aspecial grind on it. (It takes Richard17 minutes to turn and finish one ofhis bowls.)At the AAW Conferencesyou are setting in a chair more likea spectator and you do not get thishands on training like was availableon this cruise.Norwegian food is alwaysgood and the meals on the ship werealso very good. Some of the freshSalmon was outstanding and Dennisreally put down the deserts.Every day we were in a differentport and they had excursionsPage 24 More Woodturning February 2009you could take, we made 4 of them.One to the North Cape which is thefarthest northern point in Norway.Very interesting, no trees, cold andall rocks. This place is way north ofthe Arctic Circle.This cruise is put on every 3years and if you are interested inlearning more about wood turningI would recommend you start savingyour money and get your nameon the list.Picture #2. Stuart MortimerPicture #1. Shop AreaPicture #3. Jimmy ClewesPicture #4. Bob the burner, Neil
Book Review: TopsMaking the UniversalToyAuthor, Michael Cullen, hasundertaken a very complex set ofoperations to tell the reader how tomake a wide range of spinning tops.<strong>The</strong> book was published by LindenPublishing Company in Fresno,California and contains 128 pages oftext and full color photographs.<strong>The</strong> book is divided into threeParts: Part I Getting Started, Part IITurned and Non-Turned Tops, andPart III Finishing. In part 1, he coversthe Tools and Equipment thatwill be needed, talks about the importanceof sharpening the tools, thematerial needed, stock preparationand finally how to make a mandredto use in making tops.In Part II, the author describeshow he makes each of 13 differentTop Models in great detail. If youare a woodturner, you should be ableto make any of these tops by simplyfollowing his detailed description onhow to make the top. Something Ifound quite interesting was that hehas a detailed dimensioned drawingof each top style right up front inthe chapter.It is important to note that theauthor says that tops can be madefrom offcuts that cannot be usedin other operations. I was glad tosee him stress this, because I’vebeen making spinner tops fromsmall scrap pieces for many years.I simply add a piece of dowel toform the spindle of the top. I havenot personally made any tops fromthis book.Briefly, I will list herethe different tops covered inthe fascinating book:Disc TopCube topBead TopDreidleTornado topParty TopWizard Tophoop topBallerina Top<strong>Pen</strong>toganial TopMartini TopBehnam’s Top<strong>The</strong> Old timer TopChatter Top<strong>The</strong> Classic TopTippe Top<strong>The</strong> Tippe Top is onethat I’ve spent considerabletime playing with to consistentlymake that will alwayswork as it should. When Ihave a little time to play,I intend to use the TippeTop directions to determineif I can isolate why minedon’t always work, maybeI can make some that willalways work and not justsometimes.<strong>The</strong> author beiefly discussesfinishing techniquesto tops using various typesof paints and dyes.<strong>The</strong> author seems to like shellacfinishes at least as a sealer coatand the use of acrylic paints to addcolor to the finished top. Milk paintseems to be another option that helikes to use in finishing his tops.<strong>The</strong> booklists for $17.95 in theUnited States and is sold at a discountthrouth amazon.com. I highlyrecommend this book for anyoneinterested in making tops.• Solid, robust, 4 jaw self-centring Chuck• Fits largest range of accessories onthe market today including VicmarcVM90 & VM100, Teknatool, and ‘lookalike’versions of these chucks• Fast clockwise rotational clamping• Satin etch finish to prevent rust• Totally enclosed back with unique indexingplate with up to 144 divisions• Unique pinion design provides handleclearance for large work• Optional Indexing bracket to suit mostlathesCheck out our range of woodworkingequipment and accessories at:www.vermec.com39 Dalton Street, Kippa-Ring QLD 4021AUSTRALIAPh: +61 7 3284 3733 Fax: +61 7 32842733Email: vermec@netspace.net.auMore Woodturning February 2009 Page 25
Woodturning Books For SaleWe are pleased to offer the following books from Linden Publishing forsale through More Woodturning.Here are the titles we are offering:• All Screwed up!: Turned Puzzles and Boxes Featuring Chased threadsby John Berkeley $24.95• 500 Wood Bowls $24.95• Beyond Basic Turning: Off-Center, Coopered, and Laminated Work,by Jack Cox $28.95• Chris Child’s Projects for Woodturners, by Chris Child $16.95• Decorating Turned Wood: <strong>The</strong> Maker’s Eye, by Liz and MichaelO’Donnell $19.95• Fabulous Turned Wood Projects, by Hazeu Hiebert, et al $17.95• Richard Raffan Turning Guides, Slipcase Set, by Richard Raffan $59.95• Segmented Turning: A Complete Guide, by Ron Hampton $19.95• <strong>The</strong> Art of Segmented Wood Turning: A Step-by-Step Guide,by Malcolm Tibbetts $25.95• <strong>The</strong> Complete Illustrated Guide to Turning by Richard Raffan $39.95• <strong>The</strong> Lathe Book, by Ernie Conover $24.95• <strong>The</strong> Woodturner’s Workbook, by Ray Key $19.95• <strong>The</strong> Woodturner’s FAQ Book, by Fred Holder $19.95• Turn a Bowl: Getting Good Results the First Time Around,by Ernie Conover $19.95• Turned Boxes: 50 Designs, by Chris Stott $19.95• Turning Boxes with Richard Raffan: (revised and updated) $24.95• Turning Bowls with Richard Raffan, by Richard Raffan $24.95• Turning Boxes with Richard Raffan $24.95• Turning Green Wood, by Michael O’Donnell $17.95• Turning <strong>Pen</strong>s and <strong>Pen</strong>cils, by Kip Christensen & Rex Burningham $17.95• Turning Projects, by Richard Raffan $21.95• Turning Wood with Richard Raffan, by Richard Raffan $24.95• Wood for Woodturners by Mark Baker $19.95• Woodturning: A Foundation Course, by Keith Rowley $19.95• Woodturning: A Fresh Approach, by Robert Chapman $17.95• Woodturning Forms and Materials, by John Hunnex $19.95• Woodturning Projects, by Mark Baker $19.95• Woodturner’s Wooden Clock Cases by Tim Ashby $5.95Pay shipping of $4.25 for the first book plus $1.00 for each additional book.Priority Mail is $6.50 for the first book and $1.00 for each additonal book.Foreign Customers please request a quote for shipping costs.Order three books and take a 10 percent discount on the order.Note: Discount does not apply to postage.Master Card and Visa Charge Cards AcceptedSend Orders to:More WoodturningP. O. Box 2168Snohomish, WA 98291-2168Telephone: 360-668-0976Fax: 360-668-1798<strong>The</strong> Why and Howof Chapter GalleryShowsby Frank AmigoI will try to explain why galleryshows should be attempted by AAWchapters. I will also describe howmy first chapter, the ChesapeakeWoodturners (CW), ran severalgallery shows, and continue to doso successfully to this day.When I started the CW, we hadno professional turners, and noneof us wanted to be professionals.None-the-less most of us wantedto turn professionally. My classescovered basic wood turning, butonce a semester I brought in a wellknownturner like Al Stirt or DavidEllsworth to do a master class. <strong>The</strong>seclasses were much in demand soour club members could see andimitate the skills of professionals.As the club grew, we developed alarge group of mainly older men,many of whom had few skills asturners. At the same time a few ofus started doing gallery shows indifferent venues around Annapolis.We opened some of the shows to allour members.I noticed that theless experienced folksstarted to do betterand better so as notto be embarrassedwhen they were selectedfor a show.I noticed that the less experiencedfolks started to do better andbetter so as not to be embarrassedwhen they were selected for a show.Page 26 More Woodturning February 2009
Because of this most of the chapterstarted turning in a more professionalmanner and the esprit of ourmembers really took a rise. I thinkchapter gallery shows would do thesame for all chapters.Now, the how. First you shouldselect four to six folks who do goodwork. You could have a local artteacher or gallery owner look overthe work and pick the turners if youhave no one in your chapter whofeels qualified. <strong>The</strong>n you have tofind a venue and pick a date. Usuallythis would be six months to a yeardown the road. <strong>The</strong> next step is selectingand planning the advertising.This too can be far down the road.Depending on the venue, your membersmay need to make and paintstands for the show. A week or twobefore the show the local advertisingshould kick in. For the openingnight, depending on the venue, youshould plan to have finger foodsand drinks available. Most galleryshows last a month and if the itemsare for sale, the gallery will take acommission.First of all, most of you knowwho in your chapter are good turners.<strong>The</strong>se are the folks that youwant for the first show, but if youhave professionals in your club,make it a mix of professionals andamateurs. As I said, if no one inyour club wants to jury the items,try to get an art teacher or a galleryowner, someone who doesn’t knowthe entrants to select the items.In Annapolis we had manyvenues from which to select. <strong>The</strong>school where I taught was a community-basedart school with a wonderfulgallery. Our two neighboringcounties had similar facilities whichwe used, and still do. <strong>The</strong> MarylandFederation of Art, a non-profit, hasa gallery in Annapolis and one inBaltimore. <strong>The</strong>y are always lookingfor folks to fill their spaces.<strong>The</strong> local county park has a largeoffice building with a big room thatthey like to fill with gallery shows.<strong>The</strong>y especially like woodturners,since we would demonstrate ontheir porch on Earth Day, showingpeople finished pieces and the roughlogs they came from. This also gotus wood from the park when treeshad to be taken down. I am sure thisdoes not cover the myriad of venuesyou can find out there.For advertising youshould contact thearts person at the localnewspaper to doa story on the show,which usually comesout after the opening.<strong>The</strong>y can also do announcementsof the show, the week before.Six months to a year before, you canput write-ups in art magazines andflyers with tourist attractions. Youwill need a good group photo ofthe turnings for postcards announcingthe show. <strong>The</strong>se can be sent tofriends and relatives, but especiallyto local collectors. U.S. Press inValdosta, Georgia, and ModernPostcard in Carlsbad, California,are two very good postcard vendors.We mostly used Modern, their priceswere pretty good.Depending on the venue, youmay need to make stands. If any ofyou need help with that, I can getyou a set of good cutting diagramsusing 1/4” plywood and Luan plywood,designed by Phil Brown. Ourclub did a set for themselves andone for the park. Before a show wewould get together to repaint thestands. <strong>The</strong> venue owners may wantto set the show up, or may want youto set it up. If the latter, you shouldhave no more than three to do it,preferably only one person. Youwill probably have to order goodiesand drinks for the opening at least aweek in advance.Other things neededfor smaller showsare biographies andmaybe pictures of thefolks displaying.Other things needed for smallershows are biographies and maybepictures of the folks displaying. Wehad a nice framed (about 10” by 12”)write-up with picture. <strong>The</strong>se can beused again and again. You’ll alsoneed typed cards for each piece withthe maker’s name, title of the piece(if any), type of wood, and price (iffor sale). <strong>The</strong>se can be attached tothe stands below each piece.As I stated earlier, a commissionwill probably be charged forany sales, depending on the venue,anywhere from 25 to 50%. Work canusually be displayed “not for sale.”Depending on your ability to getlocal papers to write up the show,your chapter can get pretty wellknown in the area. This can bringin many new members and get theattention of local collectors. All ofwhich helps the local chapter and theAAW. In Annapolis the newspaperstories on our shows brought callsfrom people who had some prettynice trees down and wanted to giveaway the wood. <strong>The</strong> chapter alsogot wood from some historic trees;one very old one in downtown andparts of the Wye Oak on the easternshore. Good luck.More Woodturning February 2009 Page 27
Almost All About Rolling Pinsby Bob Heltman, CMW, AAW Copyright 11-2008Mac passed away 6 months ago. His wife, mywife’s sister, decided to sell her home and move to acondo. Recently my wife went to help with tag salesand moving...and returned with a number of sistergifts, including a rack with a couple old rolling pins.I had turned one back in the 1980s which was added,leaving two holders open. This is what led to the requestthat I make a couple rolling pins, AND one forher sister. This is the way life unfolds sometimes, andhow projects arise for woodturners.grip that catches and deflects most of the chips, usingmy left hand with elbow raised. <strong>The</strong> next two picturesshow the blank and deflection grip.Scouting about I located a 17” long quarter ofa maple log that had been curing, and mounted it inmy upgraded Nova 3000 DVR. It turned out that acouple of the rolling pins in the picture were 17” endto end, so luck was with me as I had some blanksabout that long.Of course, the rolling cylinder should be quiteeven in diameter, so I mounted a long tool rest I hadspecially made, and sighted it to be parallel to thelather’s bed. Next came the roughing gouge to bringthe blank down to size. Since the blank was 3 sidedthis meant knocking off the 3 edges, which caused alot of flying chips. To prevent wood chips from goingall over the shop I developed a special tool holdingNote that I also turn wearing a tight fitting glove todeflect sharp and hot chips. My little finger follows ontop of the tool rest and the next finger glides firmly alongthe side of the tool rest, giving a cut as straight as the toolrest is parallel to the lathe bed; a sort of cutting depthgauge. <strong>The</strong> other two fingers and thumb pin the gougeagainst the tool rest. By taking light cuts one can movealong rather smoothly and bring the blank to cylindricalform. I noticed the maple was nicely spalted, and decidedto take a break and think about next steps. let’s do a littleresearch on rolling pins and see what might be learned.”One nice brief history is at http://www.croppingcooks.com/rolling_pins.htm One learns that rolling pins havebeen made of marble, glass, bamboo (claimed as 16%harder than maple!), granite, stainless steel, aluminum,Page 28 More Woodturning February 2009
and nonstick silicone. Some are hollow, to be filled withcool water to help in working dough. Diameters rangefrom under 2” to over 4” and rubber band thicknessgauges can be added to regulate dough thickness from1//16”, to 1/8” to 1/4”. Some have no handles, othershave handles turned in place, some have handles withbearings of nylon or steel. A German version has thehandles at 90 degrees! Most rolling pins are smooth, butmesh sleeves can be added to give surface texture to thedough, and some rolling pens have patterns carved intotheir surfaces, or knobs or grooves.Some French rolling pins are tapered, being thickerin the center and made of poly plastic for making PuffPastry, and are longer at 20” to 22”. Prices range fromunder $10.00 to $170.00! How about all of that!would encapsulate any fungus spores from the spaltedareas. I know it isn’t good to breathe dust fromspalted wood, yet people eat various types of fungus,but to be safe this wood needs sealed. As a side commentI know that it would be “better” to start with apiece of perfect wood, but a lot of the fun I get outof woodturning comes from working with imperfectwood that presents various challenges.Who is perfect anyhow?! Given all those considerationsI put on a Nitrile glove, which does not stickto Superglue, and dribbled thin superglue all over thesurface of the rolling pin, including the edges. Afterthe Superglue fully cured the entire dough contactingsurface was sanded with 400 grit, followed by Scotchbritepads from an automotive supply store. <strong>The</strong>sepads come in three levels of “grit,” finishing with thewhite pad. This gave a VERY smooth finish, likelyto defeat the stickiest dough. Next came the two endhandles. <strong>The</strong>se were shaped with my Ellsworth bowlgouge except at the very ends where a small spindlegouge was used to follow the cutoff tool down to atiny diameter next to the end blocks left to hold theheadstock and tailstock centers.As I continued to turn my maple I left 4” at each endfor the two handles. And I began to discover some difficultgrain where a branch had existed. This latter problemareas I soaked in superglue to help keep a firm and moreconstant surface as I continued to reach a diameter ofabout 2 3/4” to fit into the rings of the holder (in the firstpicture). By keeping the handle areas a bit smaller thanthe main part of the roller I kept strength and stability forthe whole piece, yet was thereby allowed to concentratemore on the the major center section. I slowed the cuttingand did more slicing to get a smoother grain by usingthe side of my Ellsworth gouge as a skew.In that the wood was spalted I began to think ofhow to both have a smooth final surface, and one that[Continued on Next Page]More Woodturning February 2009 Page 29
Continued from Previous PageFor a touch of decoration, although the spaltinggave a fascinating pattern, I wire burned two circleson one handle and three on the other handle. This wasnothing but a touch of humor on my part. I could imagineone day being asked, “Why are there two circleson one handle and three on the other?”worked out just fine, and some minor variation adds tothe sense of hand crafted versus machine made.After wire burning the 5 grooves, then touchingthe handles with 400 grit sandpaper, they were wipedfree of dust and coated with thin Superglue, again usingmy Nitrile gloved finger to rapidly spread the glueevenly all over the handle and edges of the roller. <strong>The</strong>n400 gritsanding and buffing as before put me ready tofinish the very ends.First I turned very small diameters with a narrowcutoff tool, and used a fine spindle gouge to shape theends of the handles to end roundness. Since I didn’twant to drop the roller the lathe was stopped and useda fine saw to cut off the small supporting end pieces.A touch of sanding, and supergluing completed theproject.Of course, upon presenting it to my wife shestroked the rolling pin many times, proclaimed howsmooth and beautiful it was, and when she had sufficientlyelevated my ego sweetly asked, “When willyou be doing another one for my sister?”I mounted the rolling pin in the rack 2nd frombottom in the first picture). And reminded myself tolook for another blank for the next rolling pin. Such isa woodturner’s life.New NOVA Sharpening CentreSystemAccording to their Web Site this new systemis scheduled for release in stores in early February2009.<strong>The</strong> answer would involve a due pause, long lookintoouter space, and saying something profound like,“Well, some cooks just prefer it that way.” Or, “So thepastry chef can tell which end of the roller is which.”This would leave the questioner with a mixed look ofsatisfaction, having gotten an answer, and confusionas to what it all meant. One should pause to have a bitof fun from time to time.At first I thought I’d take caliper measurementsfrom the first handle to assure the two handles matched,but decided to just eyeball the second handle. That<strong>The</strong> Nova sharpening system attachment willtransform your standard bench grinder into a precisiongrinding machine, but without the cost. <strong>The</strong> NOVASharpening Centre combines the slideway grindingPage 30 More Woodturning February 2009
<strong>The</strong>se views show two of the adjustments that may be made on thisnew system.<strong>The</strong> New Nova Tool holderlooks similar to others on themarket with a couple of presisionadjustment.jig and the powerful finger grind jiginto one versatile sharpening tool. Ituses a sturdy platform and a uniquesliding base to achieve the ultimatein sharpening. This system turnsyour standard bench grinder into aprecision sharpening machine. <strong>The</strong>slideway is also used to precisiondress the grinding wheel essentialfor perfect grinding results.Features and Benefits• Precision sharpening with controlledslideway - <strong>The</strong> benefitsand precision of a grinding machineat your bench grinder fromprecision dressing of the wheelto the finest grinds. ( dresser notincluded as standard).• Finger Grind attachment includedas standard equipment,capacity for large chisels up to1” . Nova have paid particularattention to its design. It is light<strong>The</strong> Tool Holder in use sharpening what looks like a bowl gouge.weight so that it feels like anextension of your hand enablingthe feel and control that only thehand can impart.• Tru track ball and socket. <strong>The</strong>finger grinder end guide is a trueball fitting into a mating socketfor precise grinding with notransition marks.• Quick positive locking - veryeasy to adjust• Precise angle setting - notchedwith handy scales throughout,to quickly find your favoritegrinds.• Easy removal and reassemblytop plate for different types ofsharpening.• Easy precision wheel dressing.In designing the system werecognized that the conditionof the grinding wheel is one ofthe most important elements toperfect grinds , the slidewaymakes dressing easy , the wheelis perfectly parallel and flat ,most other systems rely on handdressing , this is like Woodturningwith a blunt chisel and expectinggreat turning results.• System is easy to customize andaccessorize, in common withthe usual Nova design intentwe strive for an open systemmaking it easy for the owner tocustomize.[Continued on Page 34]More Woodturning February 2009 Page 31
<strong>The</strong> Process Involved In Making AGordon Pembridge Piece Of Woodturningby Gordon PembridgeFirstly the timber is obtained from mainly stormfelled trees. Some of our timber has been buried undergroundfor thousands of years such as swamp kauri.For various reasons swamp kauri can be very hard onthe gear, particularly keeping a chainsaw sharp can bevery troublesome indeed. I use a wide variety of timberfor woodturning generally. <strong>The</strong> timber I use for my finepierced work is macrocarpa.Some of the wood is wet turned as a rough blankfor drying. <strong>The</strong> blank once dry is then remountedon the lathe for finishing. This process can takeyears depending on the type of wood.Here we are taking a break from sawing up alarge piece of swamp kauri.Each piece of macrocarpa is carefully cut withgrain orientation in mind for the final piece.Typically I turn the macrocarpa for my thinvessels when it is wet. <strong>The</strong> vessels in this pictureare all turned from macrocarpa, being only aboutone millimetre thick they dry quite quickly.Page 32 More Woodturning February 2009
After carving the feet and sanding the dryblank the design is measured out and drawndirectly onto the wood.Carefully selected colours are airbrushed toform an interesting colour composition.<strong>The</strong> design is carved out with a high speedengraver with careful attention to line and texture.A time consuming process.<strong>The</strong> finished piece.More information about the author can be foundat the following web site: www.timberly.co.nz or hecan be contacted by email: gmdesign@maxnet.co.nzph:+64 9 2989363My inspiration is derived from a wide variety ofphotographic studies that I take myself.More Woodturning February 2009 Page 33
Continued from Page31<strong>The</strong> NOVA Sharpening Centrecan be used to easily sharpen thefollowing tools:• Bowl Gouges - standard grind,modern side grind, fingernailgrind• Scrapers• Parting Tools• Skew Chisels• Carving Tools• Carpenters Chisels• With additional attachments:Plane blades and specialist boringand cutting tools.Standard Equipment• Sharpening Base• Sliding Sharpening Platform• Adjustable Arm• Finger Grind Unit• Manual• Fastenings<strong>The</strong> NOVA Sharpening CentreSystem is currently available topurchase online at NOVA OnlineOrdering page for USD $99.** Introductory price only. Limitedto USA and Canada market atthis stage.Editor’s Note: <strong>The</strong> above informationwas taken from Teknatool’sweb site and again puts anothersharpening system on the marketfor dry grinders. I have high respectfor Nova products and am alwayspleased to be able to bring up tothe minute information about theirproduct developments.Since I currently have severalsystem in use in my shop. I probablywill not add this one. I wouldhowever be willing to print a readersreport on the new system. So if youpurchase one, write up a report onthe systems performance in yourshop.Page 34 More Woodturning February 2009A Welding Jig forRose EngineBeltingby Fred HolderWhen we built our Rose Enginelathe, I had never used thebelting material that is being usedin the kits and that was used on thecutting frame that we purchased touse on the Rose Engine.<strong>The</strong> instructions that came withthe kit said to mount a knife verticaland heat it red hot then hold the twoends to be joined against the knifeblade, when their surfaces beginto melt, slide them off and holdtogether for a few minutes and thenlet it cool for awhile.Well, I had nothing but troublewith the process, put into use andmy belts would break. I tried abouteverything I could think of, butnothing seemed to help.Finally, I decided to design andbuild a fixture to hold the beltingwhile being welded and then I useda soldering iron, instant heat variety,to warm and soften the beltingbefore sticking it together where itis held in place in the fixture untilthe belting cools enough (generallyManufacturer’s of the Worlds Largest Range of FineWoodworking HandtoolsCROWN HAND TOOLS LTD.332-334 Coleford Road, DarnallSheffield, S9 5PH Englandovernight) to stand the high speedstresses of operation.This top view of the fixtureshows the two clamps that havebeen attached to two 1” x 2”boards, which have been joinedat the other end with a hinge. Acouple of rubber bands providesthe tension to press the two endsof the belting together while theycool.[Continued on Page 38]TEL: England 114 272 3366 FAX: 114 272 5252E-Mail: info@crowntools.ltd.uk Web Site: www.crownhandtools.ltd.uk
Coming Events<strong>The</strong> Florida Annual WoodturningSymposium will be January9-11, 2009 at the Lake YaleBaptist Conference Center nearEustis, Florida. Nationally knowndemonstrators are: Stuart Batty,Bobby Clemons, Jimmy Clewes,John Jordan, David Barriger, RaymondFerguson, Barrie Harding,and Richard Morris. Plus workshopswith Florida known turners, vendors,auctions. With free chance fornumerous scholorships. For moreinfo go to www.floridawoodturningsymposium.com.* * *<strong>The</strong> Arizona Woodturner’sAssociation will hold its thirdDesert Woodturning Roundup onFebruary 6, 7 & 8, 2009 at the MesaConvention Center, Mesa, AZ. Fordetails please go to: www.desertwoodturningroundup.com* * *Utah Woodturning Symposium2009 to be held May 14through 16, 2009 will mark the30th year that this symposium hasbeen held. Mike Mahoney is againthe symposium director and thelocation, I asume, is the same asfor the 2008 symposium. For moreinformation on this event, keep intouch with their web site: www.utahwoodturning.com.* * *<strong>The</strong> AAW 23rd Annual Symposiumwill be held June 26 through28, 2009 at the Albuquerque ConventionCenter, Albuquerque, NewMexico. <strong>The</strong> complete schedule willfeature more than 120 rotations,plus many more events. Featureddemonstratiors include: Nick Cook,Emmet Kane, Virginia Dotson,Peter Hromek, Mike Mahoney,Rolly Munroe, David Nittmann,David Springett, and John Wessels.For more information go to: www.woodturner.org.* * *North Carolina WoodturningSymposium will be held October23-25, 2009 in the GreensboroColiseum Special Events Center,Greensboro, NC. It will feature 63rotations by International, Nationaland Local area demonstrators. <strong>The</strong>demonstrator list includes: AllenBatty, Stewart Batty, Jimmy Clews,Ray Key, Stewart Mortimer, ChrisRamsey, and Nick Cook. For moredetails go to http://northcarolinawoodturning.com/and visit frequentlyto keep up to dateEditor’s Note: If you have anevent coming up such as the oneslisted on the left, please let us knowin time to let our readers knowthat it is coming. Send informationabout your forthcoming symposiumor event to fred@morewoodturning.net or to More Woodturning, POBox 2168, Snohomish, WA 98291USA.Woodturning Books For SaleWe are pleased to offer Schiffer Woodturning Books for Sale throughMore Woodturning. Here are the titles we are offering:• <strong>The</strong> Basics of Turning Spirals by Bill Bowers $14.95• Easy Turning Projects for the Smaller Lathes by Bill Bowers $14.95• Great Turning Projects for the Smaller Lathe by Bill Bowers $14.95• Turning Threaded Boxes by John Swanson $14.95• Turning Wooden Jewelry by Judy Ditmer $12.95• Basic Bowl Turning with Judy Ditmer $12.95• Dick Sing Turns Miniature Birdhouses by Dick Sing $14.95• Turning Humidors with Dick Sing by Dick Sing $14.95• <strong>Pen</strong>s From the Wood Lathe by Dick Sing $12.95• Dick Sing ReTurns: Unique and Unusual <strong>Pen</strong>s from theWood Lathe by Dick Sing $14.95• Wood Lathe Projects for Fun and Profit by Dick Sing $12.95• Useful Beauty: Turning Practical Items on a Wood Lathe by Dick Sing $12.95• Turning Bowls by Dick Sing (NEW) $14.95• Turning Ornaments and Eggs by Dick Sing (NEW) $14.95• Projects for the Mini Lathe by Dick Sing (NEW) $14.95• Turning Candlesticks by Mike Cripps $14.95• Turning Goblets by Mike Cripps $12.95• Turning <strong>Pen</strong>s and Desk Accessories by Mike Cripps $12.95• Wood Turning for the Garden, Projects for Outdoors by Michael Cripps $12.95• Segmented Wood Turning, by William Smith $14.95• Mini Lathe Magic: Big Projects from a Small Lathe, by Ron Hampton $14.95• A Turner’s Guide to Veneer Inlays, by Ron Hampton $14..95Pay shipping of $5.00 for each book.Foreign Customers please request a quote for shipping costs.Order three books and take a 10 percent discount on the order.Master Card and Visa Charge Cards AcceptedSend Orders to:More WoodturningP. O. Box 2168Snohomish, WA 98291-2168More Woodturning February 2009 Page 35
Comet Plate Continued fromPage 21.Figure 7. Drilling a locator pinhole through the plate blank.Select the point on your roundplate blank where you want the headof the comet to be. Drill a locatorpin hole completely through it atthis spot. Choose a board that isthe same thickness as your plateblank but of contrasting color orgrain pattern to become the comet’stail. Drill a 1/4 inch diameter holecompletely through it, too. Placethe circular blank on the locator pinof the secondary sled. Put a pieceof double-faced tape on top to helphold the comet’s tail piece in alignment.Figure 9. Put a piece of doubleback tape on top of the blank tohelp hold the comet’s tail.Now let me digress for a moment.You probably understandhow this process works and consequently,you are probably thinkingthat if you make both the plate andthe comet’s tail from circular blanksthe same size, you would end upwith two comet plate blanks by justexchanging the comet tail shapedparts. Well, I’ve done that severaltimes and ultimately thrown away allthe ones that had the darker comet’stail wood making up the body of theplate. Why? Well, for the desiredeffect the wood of the plate needs tobe showie. This is the opposite ofthe comet’s tail that needs to be dark.Now, I just use a dark colored boardthat is wide enough to accommodatethe comet’s tail.bland steady to the sled. This cutis continued until the blade is veryclose to the locater pin.I usually have no trouble makingthis first cut, but often encountersome small amount of movement ofthe blank on the sled when makingthe second cut. I therefore applytape at the edges of the blank(s) tohelp hold them in position on thesled. You might choose to do this onthe first as well as the second cut.Figure 11. Note the tape on theedges to prevent any slippage.After completing the first cut,rotate the sled so the blade comesout of the kerf and clear of the blank.Now rotate the stacked blank on thelocater pin of the secondary sled tothe other point that will establish thewidth of the comet’s tail. Securethe blanks to the sled, and make thesecond cut by rotating the secondarysled.Figure 8.Drilling a hole throughthe board to become the comet’stail.Locate the comet’s tail blankon the locator pin of the sled andpress the two pieces together so thetape can establish a strong hold.Figure 10. Making first cut onComet’s Tail.<strong>The</strong> first cut of the comet’stail is accomplished by rotating thesecondary sled on its pivot pin (notthe locator pin) while holding theFigure 12. Finishing the secondcut on the comet tail.Back the saw blade out of thekerf, and remove the blanks fromthe secondary sled. Remove thePage 36 More Woodturning February 2009
circle-cutting jig with its secondarysled from the saw. With the saw off,carefully advance the blade alongthe kerf of both blanks until it is nearthe end of the cut. Turn the saw onand complete the cut into the holethat was used for the locator pin.Repeat this for the other side. Nowyou should have a plate blank thatwill accept the comet’s tail piecequite precisely. You will notice inthe picture that there is a dark line oneither side of the comet’s tail.each side usually work perfectly forthis. I choose contrasting colors thathelp accent the piece. Since I makethe comet’s head from dark wood, Itypically use a black veneer againstthe light colored plate blank and alight colored strip along the comet’stail side.I cut the strips of veneer slightlywider than the width of the plateblank.you turn the comet’s head. Rememberthat end grain may look markedlydifferent than face grain.Once the comet’s head is gluedin place, you are ready to progress tothe actual turning of the plate.<strong>The</strong>re are a number of ways tohold this project onto the lathe. Aneasy approach is to slightly enlargethe hole that was used to bandsawthe blank round so that it will accommodatea center screw. Be carefulthat you don’t drill too deeply!You could also attach a glue block tothe face of the blank as I’ve done.Either approach makes it possible tomount the blank so that the bottomof the plate can be turned first.Figure 13. Dark void on eachside of the comet’s tail will befilled with veneer.Figure 14. This photo shows theveneer that will fill in the gapsmade by the bandsaw blade.That is a void that was createdby the width of the saw blade.This space must be filled to makethe parts fit together properly. I’vefound that two layers of veneer onFigure 15. Glued up blankBefore gluing up, I check thesurface finish produced by the bandsaw cut. It may or may not need alight sanding. When it is sufficientlysmooth, apply a coat of glue. (I useTitebond II glue.) Apply glue to bothsurfaces of each veneer strip and tothe mating surfaces of the comet’stail. Slide the messy slippery messtogether. It holds surprisinglywell with little effort. I use mildclamping pressure forcing the tailin toward the comet’s head if I useany clamps at all. After the glue hascured, drill a hole for the comet’shead. This can be almost any sizeyou want as long as it is at least aslarge as the original pivot pin hole.You will need to turn a piece of darkwood to become the comet’s head.Wenge, ebony, zircote and similarwoods work well. If the wood youchoose has distinctive grain patternyou should consider that grain asFigure 16. Attaching the glueblock for holding the bowl onthe lathe.Figure 17. Cleaning up the outeredge.I generally first turn the outeredge until the plate blank is round.[Continued on Next Page]More Woodturning February 2009 Page 37
Comet Plate continued fromPrevious Page.<strong>The</strong>n I clean up the bottom andcut a recess to hold the expandingjaws of my chuck. While the plate isin this position I rough out (and oftencomplete, including sanding) thecontour of the back of the plate.mine 1/4 inch thick for a plate thatis 11 inches in diameter.I like this “shallow bowl” contouras compared to a flatter rim as isfound on most dinner plates becauseI think the flat rim makes a break inthe visual continuity of the comet’stail. Your project - you choose theshape.higher. When you are satisfied thatthere are no sanding marks to beseen under close observation thatthe figured wood is sure to engender,apply the finish of your choice. Inthis example I’ve applied a coat ofsanding sealer while it was still onthe lathe followed by two coats ofpolyurethane. After that cured, Isanded it out and applied two morethin coats. I try to apply a finish thatcan stand some abuse even though itis unlikely that this plate will actuallybe used for food.Figure 18. Turning the bottom ofthe plate.(Note the use of a blunt plasticprotector over the sharp point ofthe live center. This allows extrasupport by the live center while removingwood at the perimeter of theplate without making a scar in thebottom since it is already sanded.)Figure 20. <strong>The</strong> finished CometPlateSand through the grits to thelevel you prefer for the wood andfinish you are using. I generallypower sand to 320 and hand sand,both on and off the lathe, to 600 orRose Engine Belting WeldingFixture Continued fromPage 34Figure 19. Blank reversed toturn and finish the top portion.Reverse the blank in yourchuck so it is possible to turn the topside of the plate. You will need tocut or turn off the glue block if youused that mounting method in theprevious step. Turn the top side ofthe plate to the desired contour andthickness. I generally like to makeChinese BallToolsI have recently become a dealerfor the Crown Chinese Ball Tools andhave an inventory of sets and extrahandles on hand for immediate shipment.A set includes one handle, fourcutters, a tool to make a taperedhole, and a pamplet written by DavidSpringett. <strong>The</strong>se are priced at $125.00for each set.<strong>The</strong> handles include a woodenhandle and a metal piece to attach thecutters and ride on the ball. <strong>The</strong>se arepriced at $36.20 each. I recommendthree additional handles.Fred HolderPO Box 2168Snohomish, WA 98291360-668-0976This photo shows the fixturewith 1/8” belting secured by theclamps. As the side being heldapart is released the two hotends of the belting are pressedtogether until they cool.I tried using a hot knife, butfound that the tip of a instant heatsoldering gun works extremelywell.I generally place the fixture ina vise to hold it while heating thebelting and getting it set up to coolproperly. This view that follows isthe way in which I do the actuallywelding of the two ends of the belttogether.Page 38 More Woodturning February 2009
This photo shows the beltingfixture clamped in a vise whilethe belting is being welded.I should also mention that I putpieces of wood inside the clampswith a 1/8” hole drilled throughboth clamps while they were heldtogether this helps to hold the beltingin proper alignment.I’ve also used this fixtureto hold 1/4” belting for welding.Larger than 1/4”, the wood wouldhave to be removed from the clampsor another fixture made to handle thelarger belting.Big Tree Tools, Inc.Innovative tools forwoodturnersSee our web site featuring our SharpeningSystem including the NEWVersa-Jig - sharpen all your tools onour system.bigtreetools.com1-888-turning (887-6464)PayPal accepted<strong>The</strong> Market Place<strong>The</strong> first 10 words of classified advertisementsare free to subscribers, additionalwords are 20-cents per word, no minimum.On non-subscriber advertisements, price is20-cents per word with a minimum billingof $4.00.Beginning and advanced woodturningclasses. Call Ted Bartholomew 253-927-6855,Tacoma, WA.Sharpening Machine for all Woodworkers- <strong>The</strong> Big Tree Tools machine is a flatplaten belt and buff machine for woodworkers,which allows a wide range of belt grits to beused, and belt changes take only a few seconds.Now our Versa-Jig is included with every machineallowing you to sharpen all the hand toolsin your shop! <strong>The</strong> convenience and accuracyare unequaled. Visit bigtreetools.com to viewphotos, see our other tools and read articles onturning by Jon Siegel. See ad in this issue orcall 1.888.TURNINGSuper Glue 2 0z. $5.50, Thin, Medium.Thick, Accelerator 2oz. $3.00. acwtinc@ameritech.net.PAYPAL, VISA & MASTERCARD.LOGLAMPS.COM ARTISTIC & CUSTOMWOODTURNING, INC. 1-800-894-8123Make pens using your drill press with aVertilathe. http://vertilathe.freeyellow.comWoodturning on a VB36 Lathe, atHigher Manaton Farm. SW England. Web Site:www.turning-wood.comFaceplates: Straight from manufacture,heavy duty aluminum, brightly colored anodize,most common sizes. Visit our website:www.minkcrafts.com or call toll free (866)956-2200.<strong>The</strong> Burl Source. Large supply of AustralianBurl Caps, turning blanks, pen blanks,and large jarrah burl slabs. Check us out at www.theburlsource.com or call 801-942-2616.Emory’s Woodturning E-Books www.asthewoodturns.com/books.html.Free Wet Grind/Hone Instant ChangeSharpening System Plans: http://www.DavidReedSmith.com.Maple Turning Blanks--PRICE $6-8PBF+S&H cut to size, call 360-942-3468 ore-mail: john@hamptonwoodcraft.com.<strong>Pen</strong> Finishing Kit: A must for all penturners! Obtain a scratch free remarkale shine onall surfaces including stabilized woods, acrylicsand solid surface materials using the new 2”x2”double sided foam backed sanding pads. Kit containsinstructions for use and seven color codedpads ranging from 300 to 12,000 grit. $13.95.BG Artforms. TEL: 888-717-4202.Easier, Faster Segmented Vessel Design,Web Site: www.segmentedturning.com.TEL: (805) 489-5309.Woodturning classes – Satisfactionguaranteed. Call <strong>Larry</strong> Miller 360-412-1583,Olympia, Washington”Cabochons for woodturners at www.yoyospin.com/cabWoodturning Instruction: Now that Ihave insurance through the AAW Craft WorkersInsurance Program, I can again offer trainingin my shop. If interested in basic woodturninginstruction or specialized training such as theChinese Ball, contact me at: 360-668-0976.Fred Holder.New Video--”Relief carved Embellishmentsfor Wood Projects”. DVD--$30.00plus $3.00 S/H. VHS $20.00 plus $3.00 S/H.Contact: Tony Cortese, 20850 NW 13th Street,Dunnellon, FL 34431. Ph 352-489-5652. E-mail:romeowoodturner@msn.com.NEW REDUCED PRICE: SimplifiedFluting with Al Caton. Video-$20.00 plus S&H$3.00. DVD-$30.00 plus S&H $3.00. Insturctionand inexpensive jigs for fluted works of art.Order from: Al Caton, PO Box 2360, Dunnellon,FL 34430. TEL: 352-465-0562. E-Mail: alcat@bellsouth.net.Making the Chinese Ball, Revised 2008,by Fred Holder. <strong>The</strong> revised booklet outlinesFred’s trials and tribulations in attempting toconquer this project. Tells how to make the toolsneeded to use the Crown Chinese Ball Tools.Booklet now contains 64 pages of information.Order from Fred Holder, PO Box 2168, Snohomish,WA 98291. Price is $10.00 includingshipping. Telephone 360-668-0976.Bowl Coring with the McNaughton.A DVD by Reed Gray (aka robo hippy). Everythingyou need to know about how to usethis tool, from will it work on your lathe, tothe laser pointer system that is available. $30including shipping in the US. Contact ReedGray 541-463-9634, or reedgray@comcast.net. (05-09)Limited quantities of Mountain Mahogany(curly leaf). Flat rate postal box (12x12 x5 1/2 inches) $50 and up depending onwhat you want. Green logs sections, or greenblanks, sealed, and plastic wrapped. ContactReed Gray 541-463-9634, or reedgray@comcast.net.(12-08)Jimmy Clewes says, “<strong>The</strong> tool worksreally well in a variety of situations but lendsitself particularly well to small detail work, finialsetc and miniature turning.” For perfect covesevery time, visit the Home of the Coving Tool at:www.jonathanhess.com. Or call 703-378-8508.Through 02-09For Sale: 24” Powermatic woodturninglathe, model 4224; used less than 20 hrs;Powermatic is asking $5200 for new purchase;I am asking $3,600. I am located in Moneta,VA. 24121. Phone 540-420-7462.Turn Nested Bowls from 6” or 8” bowlblanks with a $39.95 hand-held coring tool I callthe BowlSaw. Check bowlsaw.com for detailsor e-mail me at Steuss@aol.com. For questionscall 415-897-1457. Steussy Creations.More Woodturning February 2009 Page 39
MANUFACTURER OF QUALITY WOODTURNING LATHES, CHUCKS AND ACCESSORIESECCENTRIC CHUCK<strong>The</strong> Vicmarc Escoulen Chuck originallydesigned by Jean Francois Escoulen andmanufactured by Vicmarc expands thepossibilities for off centre turning. <strong>The</strong>accessories also allow eccentric turning.<strong>The</strong> main feature of the chuck is its infinitelyvariable axis setting capacity. With an offsetrange of 0 to 30mm, each setting gives adifferent turning axis. In addition to this therotating cup chuck allows you to create aneven wider variety of shapes, depending onthe chosen axis. <strong>The</strong> optional ball chuckallows the work piece to be swivelled upto 15° off axis for even more flexible turning.Check our website for the full range ofLathes, Chucks and AccessoriesFor your nearest Vicmarc ® dealer please contact us:Phone: + 61 7 3284 3103 Fax: + 61 7 3283 4656Web: www.vicmarc.comEmail: vicmarc@vicmarc.comPage 40 More Woodturning February 2009