
You also want an ePaper? Increase the reach of your titles
YUMPU automatically turns print PDFs into web optimized ePapers that Google loves.
NEED HELP WITH INSTALLATION,<br />
MAINTENANCE OR SERVICE?<br />
Nintendo Customer Service<br />
Service à la clientèle de Nintendo<br />
SUPPORT.NINTENDO.COM SUPPORT.NINTENDO.COM<br />
or call 1-800-255-3700<br />
ou composez le 1-800-255-3700<br />
NEED HELP PLAYING A GAME? BESOIN D’AIDE DANS UN JEU?<br />
Recorded tips for many titles are available on Des astuces préenregistrées pour de nombreux<br />
Nintendo’s Power Line at (425) 885-7529. titres sont disponibles sur la Power Line de<br />
This may be a long-distance call, so please ask Nintendo au (425) 885-7529 (en anglais<br />
permission from whoever pays the phone bill. seulement). Puisque l’appel pourrait être<br />
If the information you need is not on the Power interurbain, demandez la permission à la<br />
Line, you may want to try using your favorite personne qui paie les factures de téléphone<br />
Internet search engine to find tips for the game avant d’appeler. Vous pouvez aussi utiliser<br />
you are playing. Some helpful words to include in votre moteur de recherche préféré pour<br />
the search, along with the game’s title, are: “walk trouver des astuces sur Internet. Essayez<br />
through,” “FAQ,” “codes,” and “tips.”<br />
quelques-uns de ces mots clés dans votre<br />
recherche : « solution complète », « FAQ »,<br />
« codes », « trucs » et « astuces ».<br />
NINTENDO OF AMERICA INC.<br />
P.O. BOX 957, REDMOND, WA<br />
98073-0957 U.S.A.<br />
www.nintendo.com<br />
The Official Seal is your assurance<br />
that this product is licensed or<br />
manufactured by Nintendo. Always<br />
look for this seal when buying<br />
video game systems, accessories,<br />
games and related products.<br />
BESOIN D’AIDE POUR L’INSTALLATION,<br />
L’ENTRETIEN OU LA RÉPARATION?<br />
Ce sceau officiel est votre garantie que le<br />
présent produit est agréé ou manufacturé<br />
par Nintendo. Cherchez-le toujours sur<br />
les boîtes lorsque vous achetez des<br />
consoles de jeux vidéo, des accessoires,<br />
des jeux et d’autres produits apparentés.<br />
68748A<br />
¿NECESITAS AYUDA DE INSTALACIÓN,<br />
MANTENIMIENTO O SERVICIO?<br />
Servicio al Cliente de Nintendo<br />
SUPPORT.NINTENDO.COM<br />
o llama al 1-800-255-3700<br />
¿NECESITAS AYUDA CON UN JUEGO?<br />
Puedes escuchar consejos grabados para<br />
muchos títulos a través del servicio Power Line<br />
de Nintendo, llamando al (425) 885-7529. Esta<br />
puede ser una llamada de larga distancia, así<br />
que asegúrate de pedir permiso a la persona que<br />
paga la factura del teléfono. Si el servicio Power<br />
Line no tiene la información que necesitas, te<br />
recomendamos que uses el motor de búsqueda<br />
que prefieras para encontrar consejos para el<br />
juego. Algunas de las palabras que te ayudarán en<br />
tu búsqueda, además del título, son “instrucciones<br />
paso a paso”, “preguntas frecuentes”, “códigos”<br />
y “consejos”.<br />
El sello oficial es tu ratificación de que<br />
este producto está autorizado o ha sido<br />
fabricado por Nintendo. Busca siempre<br />
este sello al comprar sistemas de<br />
videojuegos, accesorios, juegos y otros<br />
productos relacionados.<br />
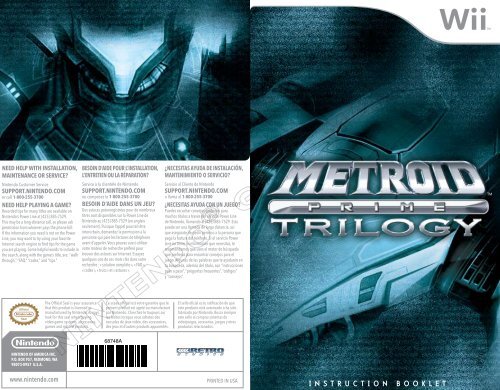
PRINTED IN USA<br />
INSTRUCTION BOOKLET INSTRUCTION BOOKLET<br />
TM
PLEASE CAREFULLY READ THE Wii OPERATIONS MANUAL COMPLETELY BEFORE USING YOUR<br />
Wii HARDWARE SYSTEM, GAME DISC OR ACCESSORY. THIS MANUAL CONTAINS IMPORTANT<br />
HEALTH AND SAFETY INFORMATION.<br />
IMPORTANT SAFETY INFORMATION: READ THE FOLLOWING WARNINGS BEFORE YOU OR YOUR<br />
CHILD PLAY VIDEO GAMES.<br />
WARNING – Seizures<br />
•Some people (about 1 in 4000) may have seizures or blackouts triggered by light flashes or<br />
patterns, and this may occur while they are watching TV or playing video games, even if they have<br />
never had a seizure before.<br />
•Anyone who has had a seizure, loss of awareness, or other symptom linked to an epileptic<br />
condition should consult a doctor before playing a video game.<br />
•Parents should watch their children play video games. Stop playing and consult a doctor if you or<br />
your child has any of the following symptoms:<br />
Convulsions Eye or muscle twitching Altered vision<br />
Loss of awareness Involuntary movements Disorientation<br />
• To reduce the likelihood of a seizure when playing video games:<br />
1. Sit or stand as far from the screen as possible.<br />
2. Play video games on the smallest available television screen.<br />
3. Do not play if you are tired or need sleep.<br />
4. Play in a well-lit room.<br />
5. Take a 10 to 15 minute break every hour.<br />
WARNING – Repetitive Motion Injuries and Eyestrain<br />
Playing video games can make your muscles, joints, skin or eyes hurt. Follow these instructions to<br />
avoid problems such as tendinitis, carpal tunnel syndrome, skin irritation or eyestrain:<br />
•Avoid excessive play. Parents should monitor their children for appropriate play.<br />
•Take a 10 to 15 minute break every hour, even if you don’t think you need it.<br />
•If your hands, wrists, arms or eyes become tired or sore while playing, or if you feel symptoms such<br />
as tingling, numbness, burning or stiffness, stop and rest for several hours before playing again.<br />
•If you continue to have any of the above symptoms or other discomfort during or after<br />
play, stop playing and see a doctor.<br />
CAUTION – Motion Sickness<br />
Playing video games can cause motion sickness in some players. If you or your child feel dizzy<br />
or nauseous when playing video games, stop playing and rest. Do not drive or engage in other<br />
demanding activity until you feel better.<br />
IMPORTANT LEGAL INFORMATION This Nintendo game is not designed for use with<br />
any unauthorized device. Use of any such device will invalidate your Nintendo product warranty.<br />
Copying of any Nintendo game is illegal and is strictly prohibited by domestic and international<br />
intellectual property laws. “Back-up” or “archival” copies are not authorized and are not necessary to<br />
protect your software. Violators will be prosecuted.<br />
REV–E<br />
WARRANTY & SERVICE INFORMATION<br />
You may need only simple instructions to correct a problem with your product. Try our website at<br />
support.nintendo.com or call our Consumer Assistance Hotline at 1-800-255-3700, rather than going<br />
to your retailer. Hours of operation are 6 a.m. to 7 p.m., Pacific Time, Monday - Sunday (times subject to change).<br />
If the problem cannot be solved with the troubleshooting information available online or over the telephone, you<br />
will be offered express factory service through Nintendo. Please do not send any products to Nintendo without<br />
contacting us first.<br />
HARDWARE WARRANTY<br />
Nintendo of America Inc. (“Nintendo”) warrants to the original purchaser that the hardware product shall be free<br />
from defects in material and workmanship for twelve (12) months from the date of purchase. If a defect covered<br />
by this warranty occurs during this warranty period, Nintendo will repair or replace the defective hardware product<br />
or component, free of charge.* The original purchaser is entitled to this warranty only if the date of purchase<br />
is registered at point of sale or the consumer can demonstrate, to Nintendo’s satisfaction, that the product was<br />
purchased within the last 12 months.<br />
GAME & ACCESSORY WARRANTY<br />
Nintendo warrants to the original purchaser that the product (games and accessories) shall be free from defects in<br />
material and workmanship for a period of three (3) months from the date of purchase. If a defect covered by this<br />
warranty occurs during this three (3) month warranty period, Nintendo will repair or replace the defective product,<br />
free of charge.*<br />
SERVICE AFTER EXPIRATION OF WARRANTY<br />
Please try our website at support.nintendo.com or call the Consumer Assistance Hotline at 1-800-255-3700 for<br />
troubleshooting information and repair or replacement options and pricing.*<br />
*In some instances, it may be necessary for you to ship the complete product, FREIGHT PREPAID AND INSURED FOR<br />
LOSS OR DAMAGE, to Nintendo. Please do not send any products to Nintendo without contacting us first.<br />
WARRANTY LIMITATIONS<br />
THIS WARRANTY SHALL NOT APPLY IF THIS PRODUCT: (a) IS USED WITH PRODUCTS NOT SOLD OR LICENSED BY<br />
NINTENDO (INCLUDING, BUT NOT LIMITED TO, NON-LICENSED GAME ENHANCEMENT AND COPIER DEVICES,<br />
ADAPTERS, AND POWER SUPPLIES); (b) IS USED FOR COMMERCIAL PURPOSES (INCLUDING RENTAL); (c) IS MODIFIED<br />
OR TAMPERED WITH; (d) IS DAMAGED BY NEGLIGENCE, ACCIDENT, UNREASONABLE USE, OR BY OTHER CAUSES<br />
UNRELATED TO DEFECTIVE MATERIALS OR WORKMANSHIP; OR (e) HAS HAD THE SERIAL NUMBER ALTERED, DEFACED<br />
OR REMOVED.<br />
ANY APPLICABLE IMPLIED WARRANTIES, INCLUDING WARRANTIES OF MERCHANTABILITY AND FITNESS FOR A<br />
PARTICULAR PURPOSE, ARE HEREBY LIMITED IN DURATION TO THE WARRANTY PERIODS DESCRIBED ABOVE (12<br />
MONTHS OR 3 MONTHS, AS APPLICABLE). IN NO EVENT SHALL NINTENDO BE LIABLE FOR CONSEQUENTIAL OR<br />
INCIDENTAL DAMAGES RESULTING FROM THE BREACH OF ANY IMPLIED OR EXPRESS WARRANTIES. SOME STATES<br />
DO NOT ALLOW LIMITATIONS ON HOW LONG AN IMPLIED WARRANTY LASTS OR EXCLUSION OF CONSEQUENTIAL OR<br />
INCIDENTAL DAMAGES, SO THE ABOVE LIMITATIONS MAY NOT APPLY TO YOU.<br />
This warranty gives you specific legal rights. You may also have other rights which vary from state to state or<br />
province to province.<br />
Nintendo’s address is: Nintendo of America Inc., P.O. Box 957, Redmond, WA 98073-0957 U.S.A.<br />
This warranty is only valid in the United States and Canada.<br />
Manufactured under license from Dolby Laboratories. Dolby, Pro Logic, and the double-D symbol are<br />
trademarks of Dolby Laboratories.<br />
This game is presented in Dolby® Pro Logic® II surround sound.<br />
Connect your game console to a sound system with Dolby Pro Logic,<br />
Dolby Pro Logic II, or Dolby Pro Logic IIx decoding to experience the<br />
excitement of surround sound. You need to enable “Surround” in<br />
the sound settings of the game console.<br />
© 2002 - 2009 Nintendo. TM, ® and the Wii logo are trademarks of Nintendo.<br />
© 2009 Nintendo.<br />
REV-Q
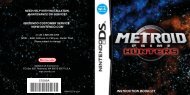
Metroid Prime: Trilogy is a deluxe version of the<br />
three original Metroid Prime games, with added<br />
control elements to unify the experience into a<br />
single story arc. All three adventures utilize the<br />
ultimate in first-person controls, as does the included<br />
multiplayer mode from Metroid Prime 2: Echoes.<br />
As an added bonus, the Art Booklet introduces<br />
previously unreleased concept art from the<br />
Metroid Prime series and sheds light on a story<br />
steeped in mystery.<br />
Samus Aran<br />
One of the most skilled bounty<br />
hunters in the galaxy.<br />
TM<br />
CONTENTS<br />
Getting Started 5<br />
METROID TM<br />
PRIME<br />
Story 10<br />
Controls 11<br />
Samus’s Actions 13<br />
Game Screens 19<br />
Saving 20<br />
Map Screen 21<br />
Pause Screen 22<br />
METROID TM<br />
PRIME 2: ECHOES<br />
Story 24<br />
Controls 25<br />
Samus’s Actions 27<br />
Game Screens 33<br />
Saving 34<br />
2 Worlds 35<br />
Map Screen 36<br />
Pause Screen 37<br />
Items 38<br />
METROID TM<br />
PRIME 3: CORRUPTION<br />
Story 40<br />
Controls 41<br />
Samus’s Actions 43<br />
Game Screens 49<br />
Saving 50<br />
Gunship 51<br />
Pause Screen 52<br />
Hypermode 54<br />
Multiplayer 56<br />
System Menu Update<br />
Please note that when first loading the Game Disc into the Wii console, the system will check<br />
if you have the latest system menu, and if necessary, a Wii system update screen will appear.<br />
Press OK to proceed.<br />
CAUTION: Wrist Strap Use<br />
Please use the wrist strap to help prevent injury to other people or damage to surrounding<br />
objects or the Wii Remote controller in case you accidentally let go of the Wii Remote during game play.<br />
Also remember the following:<br />
• Make sure all players put on the wrist strap properly when it is their turn.<br />
• Do not let go of theWii Remote during game play.<br />
• Dry your hands if they become moist.<br />
• Allow adequate room around you during game play and make sure that all areas you might move into are clear of other people and objects.<br />
• Stay at least three feet from the television.<br />
• Use theWii Remote Jacket.
GETTING STARTED<br />
Be sure to insert the Game Disc correctly into the Disc Slot on the Wii console. The power on the<br />
Wii console will come on, when the Game Disc is inserted<br />
1.<br />
When the screen at right is displayed, read the<br />
content carefully and press .<br />
*Even if you turn on the Wii console power first<br />
and then insert the Game Disc, the screen at<br />
right will still appear.<br />
2.<br />
Point to the Disc Channel on the Wii Menu<br />
and press .<br />
3.<br />
When the Disc Channel screen is displayed, point at<br />
Start and press .<br />
4.<br />
The strap-information screen will be displayed, so<br />
when you are ready, press . The title screen will<br />
then be displayed.<br />
File Selection<br />
If you press on the title screen, the screen at<br />
right will be displayed. When playing from the<br />
beginning of the game, point to New Game; when<br />
continuing a previous game, point to the file you<br />
already saved; then press . You will go to the<br />
main menu.<br />
New Game<br />
Copy Slot<br />
Erase Slot<br />
Main Menu<br />
Select a Mii character saved in the Wii console, and create a<br />
new file. (Or you can select a preset Mii in the game.) When<br />
this is complete, you will go back to the file-selection screen.<br />
You can copy a saved file to another location. However,<br />
please note that your Friend Vouchers (page 8) will not copy.<br />
You can also delete the saved file you selected.<br />
Please note that deleted files cannot be recovered,<br />
so be careful.<br />
5 6<br />
Start Single Player<br />
This mode is played by one person, progressing through the story. When playing for the first<br />
time, select “Normal” or “Veteran” for the level of difficulty. If you have already saved, you can<br />
continue from your previous game.<br />
• METROID PRIME (page 10)<br />
• METROID PRIME 2: ECHOES (page 24)<br />
• METROID PRIME 3: CORRUPTION (page 40)<br />
Play Metroid Prime 2: Echoes Multiplayer<br />
This mode can be enjoyed by two to four players. To play the game in this mode (page 56), you<br />
will need enough Wii Remote and Nunchuk controllers for each person playing.<br />
Options<br />
You can tweak the game’s settings here. Select from following options menu, and tweak the<br />
settings. If you select Defaults, you can return to the initial settings. When you make any change<br />
in Options, the game will automatically save when returning to the Main Menu.
Controls<br />
Sensitivity<br />
Lock On / Free Aim<br />
Rumble<br />
Swap Jump / Fire<br />
Swap Visor and<br />
Beam / Hyper<br />
Display<br />
Brightness<br />
HUD Lag<br />
Hint System<br />
Bonus Credit<br />
Messages<br />
Sound<br />
Sound FX<br />
Music<br />
Speech<br />
This sets the level of how much the viewpoint (camera) moves if<br />
you move where you aim with the pointer. Please select one of<br />
the following three settings.<br />
Basic: The angle doesn’t move unless you aim at the<br />
edge of the screen.<br />
Standard: Compared to Basic, the angle moves with less<br />
movement of the pointer.<br />
Advanced: If you move the pointer slightly, the angle<br />
will move.<br />
This sets whether you can move where you aim while locked on.<br />
The initial setting is ON, and your aiming cursor will move while<br />
locked on.<br />
This turns the Wii Remote controller’s vibration function ON / OFF.<br />
This switches the buttons you use for firing beams<br />
and jumping.<br />
This replaces the button you use for switching visors (page 16)<br />
with switching beams (page 14) or activating Hypermode<br />
(page 54).<br />
This sets the brightness of the screen from 0 (dark) to<br />
100 (bright).<br />
This sets whether to allow the visor frame to swing with<br />
your movement.<br />
This sets whether to display hints using the map.<br />
When you obtain credits, this sets whether that information<br />
will be displayed on screen.<br />
This sets the volume of sound effects from 0 (silent) to<br />
100 (maximum).<br />
This sets the volume of the music from 0 (silent) to<br />
100 (maximum).<br />
This sets the volume of the voices in Metroid Prime 3:<br />
Corruption from 0 (silent) to 100 (maximum).<br />
Extras<br />
In Extras, on the main menu, you can enjoy various bonuses by paying credits (page 9) to<br />
each gallery.<br />
Storyboard Art<br />
Bonus Gallery<br />
Soundtrack<br />
Gallery<br />
Friend Vouchers<br />
Configure<br />
WiiConnect24<br />
View concept art or storyboard art content.<br />
You can obtain special prizes, or view dioramas.<br />
Listen to the music in the game.<br />
You can send Friend Vouchers (page 9) you obtain during the<br />
game to friends registered on your Wii console. Only players<br />
that have the North American version of Metroid Prime:Trilogy<br />
can receive them. After you decide the number of Friend<br />
Vouchers to send to your friends, the game will<br />
automatically save.<br />
If you select Yes, you can inform friends registered on your Wii<br />
console that you got this software.<br />
7 Bonus Gallery<br />
8<br />
Screen-Shot Tool<br />
Fusion Suit<br />
Bumper Stickers<br />
Mii Bobblehead<br />
Some prizes you can earn in Extras can be enjoyed within the game.<br />
Press to capture a photograph of the screen. Screen shots<br />
will automatically be posted on the Wii Message Board. Please<br />
note that if you post too many screens, the Wii Message Board<br />
data will fill up quickly, and old messages will be deleted.<br />
Delete unneeded data on the Wii Menu.<br />
*For details about the Wii Message Board, please see the Wii<br />
Console Operations Guide.<br />
Metroid Prime only: Samus’s suit will change into the Fusion<br />
Suit, which first appeared in Metroid Fusion.<br />
Metroid Prime 3 only: If there is save data for a certain game in<br />
the Wii console, a sticker for that game will be stuck onto the<br />
hull of the Gunship.<br />
Metroid Prime 3 only: A bobblehead of the Mii will appear<br />
inside Samus’ s Gunship.
About Credits METROID PRIME<br />
During the game, when certain conditions are met, you will<br />
obtain Credits and Friend Vouchers. You can exchange credits<br />
for bonuses in Extras on the main menu.<br />
METROID PRIME METROID PRIME 2 METROID PRIME 3<br />
Orange Credit Silver Credit Purple Credit Silver Credit Blue Credit Yellow Credit<br />
About the Mii character<br />
Friend Voucher<br />
Red Credit<br />
A Mii character is personal data you can save in the Wii console, which you will use in the<br />
save file in this software. Even if you select Delete on the file- selection screen and delete this<br />
software file, the Mii character saved on the Wii console will not be deleted. Conversely, if the<br />
Mii character in the Wii console is deleted, you will need to re-register the Mii character that you<br />
registered in this software.<br />
Cosmo Dating System, Year 20X5, Galactic Federation exploratory vessel was attacked and<br />
destroyed by Space Pirates which transporting an unknown life form that was captures on SR388.<br />
The Metroid was taken to a stronghold on the planet Zebes.<br />
The Galactic Federation tasked a skilled bounty hunter named Samus Aran with the complete<br />
annihilation of the Space Pirates and the Metroids. Samus infiltrated the base on Zebes alone, and<br />
after a bitter struggle, she destroyed Mother Brain, the mechanical life form that controlled the<br />
planet, and completed the mission. It seemed that the Space Pirates’ plans had been foiled...<br />
Metroid<br />
A floating life-form that<br />
multiplies when exposed to<br />
beta rays, then attaches to other<br />
living things and sucks the<br />
energy from them.<br />
About the Friend Vouchers You Receive<br />
9<br />
You can exchange the Friend Vouchers you receive from<br />
friends for Friend Credits. If you receive Friend Vouchers,<br />
the number of Vouchers you received will be displayed<br />
after the save file selection, so select the number of<br />
Friend Credit<br />
However, the Space Pirates have not been wiped out. Some had slipped away in a ship that had<br />
been in orbit around the planet Zebes.<br />
10<br />
Vouchers you want to exchange for credits.<br />
They divided into two camps, with one camp returning to Zebes to begin rebuilding their facility,<br />
and the other going out to search for a new planet with powerful energy resources. It was this<br />
You can use Friend Credits for various things, in the same way as regular Credits.<br />
latter group that detected a powerful energy signature on the planet Tallon IV.<br />
*The Friend Voucher itself cannot be exchanged for bonuses in Extras on the<br />
main menu. Only after you have exchanged it to a Friend Credit, you can use it to<br />
exchange for bonuses.<br />
On this planet, they discovered many ruins bearing evidence of the Chozo civilization.<br />
Before long, they found pulses of energy emanating from a meteor sealed beneath the Chozo<br />
temple ruins.<br />
The substance of this meteor, called Phazon, had a peculiar capacity to mutate. The Space Pirates<br />
who identified that characteristic began to experiment, mutating the life forms of Tallon IV via<br />
Phazon. At the same time, to obtain the meteorite thought to be the Phazon core, they tried to<br />
breach the area beneath the temple. However, they were thwarted by a riddle that locked away<br />
the inner sanctum.<br />
And now, the radar on Samus’s Gunship identifies the ship of the Space Pirates in orbit above<br />
Tallon IV…
Controls<br />
Metroid Prime is played with a combination of the Nunchuk and the Wii Remote. You will be able to use<br />
the controls shown in red as the game progresses.<br />
You cannot use the Nintendo GameCube controller to operate this game.<br />
Nunchuk<br />
Pointing<br />
Facing the Wii Remote pointer toward the screen and<br />
indicating a certain location is called pointing. In this<br />
game, moving aiming point and changing the view<br />
angle are done by pointing.<br />
Control Stick<br />
• Move<br />
• [Pause screen] Select item<br />
C Button<br />
•Turn into Morph Ball / Change back<br />
Z Button<br />
• Fix viewpoint<br />
• Lock on<br />
• [In ScanVisor mode] Scan<br />
• Grapple Beam<br />
• [In Morph Ball mode] Spider Ball<br />
Wii Remote<br />
• Aim<br />
• (Point to edge of screen)<br />
Move viewing angle<br />
• Turn power ON / OFF<br />
Minus Button<br />
• (Press and hold) Switch visor<br />
• Display map screen<br />
Power Button<br />
+Control Pad<br />
• [Pause screen] Select item<br />
• Take screen shot<br />
• Shoot missile<br />
• (Press and hold until<br />
completely charged)<br />
Charge Combo<br />
• [In Morph Ball mode]<br />
Power Bomb<br />
1 Button<br />
Pointer<br />
Shaking the Wii Remote<br />
If you shake the Wii Remote in Morph Ball mode (once<br />
you have bombs), you can perform the Spring Ball,<br />
where you jump as a Morph Ball.<br />
B Button<br />
• Cancel<br />
• Jump<br />
• [During jump]<br />
Space Jump<br />
• [In Morph Ball mode]<br />
Boost Ball<br />
A Button<br />
• Confirm item<br />
• Shoot beam<br />
• (Press and hold) Charge<br />
• [In Morph Ball mode] Bomb<br />
+ Button<br />
• (Press and hold) Switch beam<br />
11 12<br />
HOME Button<br />
• Display HOME Button menu<br />
2 Button<br />
• Display pause screen
Samus’s Actions<br />
Move / Jump / Space Jump<br />
Samus will move in the direction is tilted. Press to make Samus jump. During the jump, if<br />
you press , Samus will then be able to do a Space Jump—a second midair jump.<br />
Aiming and Changing View<br />
You’ll aim beams or missiles at wherever you point with the Wii Remote. If you aim at the edge of<br />
the screen, the viewing angle will move in that direction.<br />
*Set up the movement sensitivity in “Sensitivity” in Controls (page 7).<br />
Reticule<br />
Lock-On<br />
You can lock onto nearby enemies and focus your<br />
field of vision by pressing down on . If you lock on<br />
and shoot missiles (page 14), they will fly toward the<br />
enemy. To cancel the lock-on, let go of .<br />
Beams<br />
Shoot beams with . If you press and hold it will charge, then when you let go, you will<br />
shoot the Charge Beam. Additionally, while charging, you can pull in Energy Balls or missiles.<br />
Power Beam<br />
Ice Beam<br />
You can use this beam from the beginning. The force of a single<br />
shot is low, but you can fire rapidly.<br />
This beam can stop some enemies by freezing them. It has a<br />
slower rate of fire and cannot do rapid-fire, but the force of<br />
each shot is more powerful than the Power Beam.<br />
13<br />
Wave Beam<br />
The Wave Beam fires 3 oscillating waves of energy. When you<br />
lock on and fire, the beam homes the target. Enemies hit by<br />
this beam may get a electric shock and be unable to move.<br />
14<br />
Aiming During Lock-on<br />
When the Lock-on Free Aim (page 7) is turned ON, you will be able to freely aim the arm<br />
cannon during lock-on. Beams will then fly toward where you aim, but missiles will still track<br />
the target you locked onto.<br />
Moving During Lock-on<br />
If you tilt while locked onto an enemy, you can move while remaining focused. Also, if you<br />
tilt right or left while locked on and lightly press , you can do a sidestep.<br />
Switching Beams<br />
If you press , the beam-selection screen<br />
will be displayed. Point to the beam you want<br />
to switch to and let go of to switch<br />
the beam.<br />
*When using beams other than the Power<br />
Beam, you can switch back to the Power<br />
Beam by quickly pressing .<br />
Plasma Beam<br />
Missile<br />
This beam launches streams of molten energy. It can ignite<br />
some enemies, and sometimes it can melt ice, but it is a shortrange<br />
weapon.<br />
If you press , you can shoot a missile. If you lock on to the enemy and shoot a missile, it will<br />
home in on the enemy. When you fire, your stock of missiles goes down.
Charge Combo<br />
As the game progresses and you obtain the Charge Combo for each beam, you will be able to<br />
combine missiles with the beams you are using to fire a very powerful attack. When you press<br />
and hold and charge it to its maximum, press on the while still holding down . The<br />
performance of the Charge Combo and the number of missiles it consumes will vary according to<br />
the beam you are using.<br />
Charge Combo Corresponding Missiles<br />
Name Beam Consumed<br />
Super Missile Power Beam 5 missiles<br />
Ice Spreader Ice Beam 10 missiles<br />
Wavebuster Wave Beam<br />
Flamethrower Plasma Beam<br />
Grapple Beam<br />
10 at launch + more<br />
consumed while holding<br />
down or .<br />
Visors<br />
Samus has four visors she can use, each with varying functions. Try to utilize the special<br />
characteristics of each one as you search the planet and defeat enemies.<br />
Visor-Select Screen<br />
If you press and hold , point to the visor you want to use, and let go of , you’ll change<br />
your visor. Try to move ahead in the game by utilizing each function. Additionally, while<br />
equipping visors other than CombatVisor, you can change back to CombatVisor by<br />
tapping on .<br />
Combat Visor<br />
Scan Visor<br />
15<br />
When you use the Grapple Beam, you will be able to latch onto a Grapple Point, gain momentum<br />
and fly through the air. If you lock onto the Grapple Point with , the beam will automatically<br />
launch and allow you to hang, and so just release with good timing to launch into the air.<br />
Thermal Visor<br />
X-Ray Visor 16<br />
Grapple Point<br />
Combat Visor<br />
The most basic visor. You will use this mainly during battle.
Scan Visor<br />
This visor reads information from creatures or computer terminals and collects data. While<br />
using the Scan Visor, you will not be able to use your weapons.<br />
Performing a Scan<br />
With the target caught within the aim cursor, press<br />
and hold to scan. Some devices can be activated<br />
by scanning. Also, when particularly important<br />
items are scanned, they are recorded in the Logbook<br />
(page 23).<br />
Thermal Visor<br />
This can detect the temperature of your surroundings. It<br />
may shows some enemy’s locations or weaknesses that<br />
you can’t see with the Combat Visor, and will show you<br />
areas where the temperature is abnormal.<br />
X-Ray Visor<br />
This allows you to see through walls and find hidden<br />
passages or invisible objects. It is also possible to use<br />
it to see enemies that use optical camouflage to make<br />
themselves invisible.<br />
Scan Targets<br />
Red scan icon will appear on important<br />
target, while other targets will be displayed<br />
as orange scan icon. For targets you have<br />
already scanned, their scan icons will be<br />
displayed in transparent manner.<br />
Aim Cursor<br />
You can scan creatures or various substances<br />
that are caught within this cursor.<br />
Morph Ball<br />
If you press , Samus will roll up into a ball and will be able to get through narrow passages, such<br />
as air vents or hidden passages.<br />
Bombs<br />
17<br />
You can set bombs with and damage your enemies with the blast or destroy certain floors or<br />
18<br />
walls. You can also jump as a Morph Ball using the blast.<br />
Bombs<br />
Energy Gauge<br />
Spring Ball<br />
If you shake the Wii Remote once you’ve gotten Bombs, you can jump while still in Morph<br />
Ball mode.<br />
Boost Ball<br />
As the game progresses, once you obtain the Boost Ball function, you will be able to do<br />
high-speed moves by pressing, holding, then letting go of . Note that the longer you hold<br />
, the longer you can move with the Boost Ball.<br />
Spider Ball<br />
(page 20)<br />
Once you obtain the Spider Ball, you will be able<br />
to magnetically attach yourself in Morph Ball<br />
mode to certain magnetic tracks by pressing and<br />
holding . If you move on a Spider Ball<br />
track, you can move along the track.<br />
Power Bomb<br />
Remaining Power Bombs<br />
Number of bombs set<br />
You can set up to 3 at a time.<br />
Once you find Power Bombs, you will be able to use a powerful bomb by pressing .<br />
Power Bombs deal major damage to enemies in a wide range. When you use a Power Bomb,<br />
your stock of Power Bombs is reduced by one.
Game Screens<br />
Basic Screen (when using Combat Visor)<br />
This is the basic screen when you’re using the Combat Visor (page 16). The map screen (page 21) is<br />
displayed with , and the pause screen (page 22) is displayed with .<br />
*The screen display may change depending on what is equipped or Samus’s status.<br />
Energy Gauge<br />
Radar<br />
Surrounding enemies appear as orange<br />
dots with Samus in the center.<br />
Warning Gauge<br />
When you get close to something<br />
dangerous in the environment, such as<br />
high temperature or poison, the gauge<br />
will stretch and warn you.<br />
Visor currently in use<br />
Missile Gauge<br />
The missile quantity is shown on the gauge.The numbers<br />
on the left are the current amount / maximum amount.<br />
Map<br />
This shows a 3-D map of your surroundings.<br />
Reticule<br />
Lock-on cursor & target scope<br />
When you get close to an object or enemy that can be locked onto, the lock-on cursor will appear,<br />
and when you lock on, it will change to a target scope.<br />
Lock-on cursor Target scope<br />
Beam currently in use<br />
Reading the Energy Gauge<br />
The energy gauge shows the life of Samus. You can restore energy by obtaining items such as Energy<br />
Balls or by using a save station or Samus’s Gunship.<br />
Game Over<br />
Energy Tank<br />
One of these will fill the energy gauge. A square is<br />
added each time you obtain an Energy Tank.<br />
The game is over when all Energy Tanks are empty and the energy gauge is at 0. To start from<br />
the last place you saved, select Yes with<br />
you’ll go back to the title screen.<br />
or , and confirm with . If you select No,<br />
Saving<br />
You can save the game’s progress by jumping onto a save station or Samus’s Gunship. In order to<br />
save, you will need two available blocks in the Wii console memory. Please note that once data is<br />
overwritten, it cannot be recovered, so please be careful.<br />
*For information on how to delete files within the Wii console memory, please see the<br />
Wii Operations Manual.<br />
Save Stations<br />
Save stations are devices installed in many locations.<br />
In addition to being able to save your status, you can<br />
also restore your energy.<br />
Gunship<br />
The Gunship is Samus’s vehicle. In addition to being<br />
able to restore energy, you can also restore missiles<br />
and Power Bombs here.<br />
Energy Gauge<br />
The number on the left is the current energy level. It<br />
goes down when you take damage, and when it gets<br />
to 0, one Energy Tank will be empty.<br />
19 20
Map Screen<br />
If you press , the current area map will be displayed, and the places you have visited so far will be<br />
displayed in orange. Also, if you display the world map with , you can check the worlds you have<br />
visited up to now.<br />
Additionally, if you download a map at the Map Station in each area, the areas you have not visited yet<br />
will appear in blue.<br />
Area Map World Map<br />
Map icons<br />
Items displayed with ??? will become<br />
clear as the game progresses.<br />
Map screen controls<br />
+<br />
/<br />
Samus’s current location<br />
Samus is facing the arrow’s direction.<br />
Rotate<br />
Move<br />
Enlarge map<br />
Shrink map<br />
Switch area map and world map<br />
Switch view/hide Key/Legend<br />
Exit<br />
About doors<br />
Each area has various doors set up. If you shoot the corresponding beam or<br />
missile at the door, you can unlock it and open it. In the case of Blast Shield<br />
doors, you must open the lock with a missile, it will then change to a blue door.<br />
Pause Screen<br />
If you press , the pause screen will be<br />
displayed, and you can switch between<br />
Inventory, Logbook, and Options with and<br />
. For the Menu, select with or and<br />
press to confirm.<br />
Menus<br />
Inventory<br />
This allows you to check the equipment Samus can use and an explanation of it. Select the<br />
equipment type, then select the equipment.<br />
Equipment type Equipment list<br />
21 22<br />
Item acquisition rate<br />
and scan rate<br />
Page 17<br />
Equipment Types<br />
Arm Cannon<br />
Morph Ball<br />
Suits<br />
Visors<br />
Secondary Items<br />
Samus’s various beams (page 14).<br />
Morph Ball upgrades (page 18).<br />
Power Suit upgrades.<br />
Samus’s various visors (page 16).<br />
Explanation of equipment<br />
Up/Down on switches between pages.<br />
Other equipment, such as missiles, Charge Combos (page 15)
Logbook<br />
This allows you to check the information you scanned (page 17). Select the type of information<br />
then the information itself.<br />
Options<br />
The settings are the same as the Options (page 7) you can select on the main menu, but on this<br />
screen, there is also visor setting for tweaking your visors. Also, if you select Quit Game, the<br />
game will end and you will go back to the title screen.<br />
*If you select Quit Game, any data after the last save place will disappear, so please be careful.<br />
METROID PRIME 2: Echoes<br />
Once, long ago, a race of creatures called the Luminoth settled on the planet Aether. For a time,<br />
they lived in a peaceful era, but soon, it became clear that the planet’s energy was being depleted.<br />
To survive this danger, the Luminoth built Energy Controllers in three areas and linked them to<br />
their Great Temple. Eventually, the risk passed, and the Luminoth once again thrived in an era of<br />
peace and prosperity.<br />
However, the peace did not continue for long. A meteor crashed into Aether. The explosion and<br />
the energy from the meteor opened up a dimensional rift in the planet,<br />
spawning a second planet that existed in a different dimension. It was<br />
a similar world to Light Aether—they called it Dark Aether, and an<br />
evil race of dark creatures the Luminoth called Ing ventured<br />
forth, spreading violence.<br />
The Ing were able to fight in the light world by possessing the<br />
creatures of Light Aether. The Luminoth were unable to<br />
fight in the noxious gases on Dark Aether. Eventurally,<br />
they were driven into a corner.<br />
Information Types<br />
Pirate Data Data you deciphered that was encrypted by the Space Pirates.<br />
Chozo Lore Messages left by the Chozo.<br />
Creatures Information about enemies. Some of them allow you to check their weaknesses.<br />
Luminoth<br />
23 Research Information about devices or items. You can also check the effects of the items.<br />
24<br />
Artifacts<br />
Information that allows you to check hints for finding Chozo Artifacts or read<br />
about the Chozo Artifacts you have already acquired.<br />
The planet’s energy was divided between the two worlds (Light Aether and<br />
Dark Aether), and if all of the energy was collected by Light Aether, Dark<br />
Aether would be extinguished. The Luminoth, who had realized this fact,<br />
About the Chozo Artifacts<br />
made a plan to take all of the energy from Dark Aether, and counterattack. However, the plan<br />
failed, and the Energy Transfer Module they developed was taken from them.<br />
Visors<br />
Helmet Opacity<br />
HUD Lag<br />
Visor Opacity<br />
Information Type<br />
Chozo Artifact information<br />
Chozo Artifacts that have been acquired are<br />
displayed in orange.<br />
Information List<br />
Chozo Artifacts are special messages left by the Chozo. If you scan a<br />
hologram somewhere, you will be able to get hints on the whereabouts<br />
of each Chozo Artifact.<br />
Explanation<br />
Switch pages with up/down<br />
on .<br />
This sets the transparency of the helmet displayed on the screen from 0<br />
(transparent) to 100 (dark).<br />
This switches whether you allow the visor frame to swing with your movement.<br />
This sets the transparency of each bit of data displayed on the screen from 0<br />
(transparent) to 100 (dark).<br />
The Ing began to take the energy from all of the temples of the Luminoth except for the Great<br />
Temple, putting the lives of the Luminoth and the existence of Light Aether in a precarious state.<br />
At this critical time, a Federation ship chased a Space Pirate vessel onto the surface and engaged<br />
them, only to be attacked and decimated by the Ing. The Federation dispatched Samus Aran<br />
to investigate why contact was lost.<br />
Ing
Controls<br />
Metroid Prime 2: Echoes is played with a combination of the Nunchuk and theWii Remote.You will be able<br />
to use the controls shown in red as the game progresses.<br />
You cannot use the Nintendo GameCube controller to operate this game.<br />
Nunchuk<br />
Pointing<br />
Facing the Wii Remote pointer toward the screen and<br />
indicating a certain location is called pointing. In this<br />
game, moving aiming point and changing the view<br />
angle are done by pointing.<br />
Control Stick<br />
• Move<br />
• [Pause screen] Select item<br />
C Button<br />
•Turn into Morph Ball / Change back<br />
Z Button<br />
• Fix viewpoint<br />
• Lock on<br />
• [In ScanVisor mode] Scan<br />
• Grapple Beam<br />
• [In Morph Ball mode] Spider Ball<br />
Wii Remote<br />
• Aim<br />
• (Point to edge of screen)<br />
Move viewing angle<br />
• Turn power ON / OFF<br />
+Control Pad<br />
Pointer<br />
• Take screen shot<br />
• Shoot missile<br />
• (Press and hold ) Seeker Missile<br />
• (Press and hold until<br />
completely charged)<br />
Charge Combo<br />
• [In Morph Ball mode] Power Bomb<br />
Minus Button<br />
• (Press and hold) Switch visor<br />
• Display map screen<br />
Power Button<br />
1 Button<br />
Shaking the Wii Remote<br />
If you shake the Wii Remote in Morph Ball (once you<br />
have bombs), you can perform the Spring Ball, where<br />
you jump as a Morph Ball.<br />
B Button<br />
• Cancel<br />
• Jump<br />
• [During jump]<br />
Space Jump<br />
• [During Space Jump]<br />
Screw Attack<br />
• [InWater, press and hold after<br />
Space Jump] Gravity Boost<br />
• [In Morph Ball mode] Boost Ball<br />
A Button<br />
• Confirm item<br />
• Shoot beam<br />
• (Press and hold) Charge<br />
• [In Morph Ball mode] Bomb<br />
25 26<br />
+ Button<br />
• (Press and hold) Switch Beam<br />
HOME Button<br />
• Display HOME Button menu<br />
2 Button<br />
• Display Pause screen
Samus’s Actions<br />
Move / Jump / Space Jump<br />
Samus will move in the direction is tilted. Press to make Samus jump. During the jump, if you<br />
press , Samus will then be able to do a Space Jump—a second midair jump.<br />
Aiming and Changing View<br />
You’ll aim beams or missiles at wherever you point with the Wii Remote. If you aim at the edge of<br />
the screen, the viewing angle will move in that direction.<br />
*Set up the movement sensitivity in “Sensitivity” in Controls (page 7).<br />
Reticule<br />
Power Beam<br />
Dark Beam<br />
You can use this beam from the beginning. The force of a single<br />
shot is low, but you can fire rapidly.<br />
This is a slower shot, but effective on the enemies in light side.<br />
When you fire it, you use dark ammo.<br />
This is a short-range weapon. However, this weapon is effective<br />
27 Light Beam<br />
28<br />
on dark enemies. When you fire it, you use light ammo.<br />
Lock-On<br />
You can lock onto nearby enemies and focus your<br />
field of vision by pressing down on . If you lock on<br />
and shoot missiles (page 28), they will fly toward the<br />
enemy. To cancel the lock-on, let go of .<br />
Aiming During Lock-on<br />
When the Lock-on Free Aim (page 7) is turned ON, you will be able to freely aim the arm<br />
cannon during lock-on. Beams will then fly toward where you aim, but missiles will still track<br />
the target you locked onto.<br />
Moving During Lock-on<br />
If you tilt while locked onto an enemy, you can move while remaining focused. Also, if you<br />
tilt right or left while locked on and lightly press , you can do a sidestep.<br />
Beams<br />
Shoot beams with . If you press and hold it will charge, then when you let go, you will<br />
shoot the Charge Beam. Additionally, while charging, you can pull in Energy Balls or missiles.<br />
Switching Beams<br />
If you press , the beam-selection screen will<br />
be displayed. Point to the beam you want to<br />
switch to and let go of to switch the beam.<br />
*When using beams other than the Power<br />
Beam, you can switch back to the Power Beam<br />
by quickly pressing .<br />
Annihilator<br />
Beam<br />
Missiles<br />
This is a powerful beam that consumes both light and dark<br />
ammo. It is effective against all enemies, and although the<br />
speed is slower, it has a homing function.<br />
If you press , you can fire missiles. If you lock onto the enemy and shoot a missile, it will<br />
home in on the enemy. Furthermore, when you fire, your stock of missiles goes down.<br />
Seeker Missiles<br />
You can fire missiles at up to five targets<br />
simultaneously. Take aim while pressing<br />
and holding . It locks onto the target<br />
automatically, so let go of to fire.<br />
Target Scope<br />
Displays on the target you’re locked onto.
Charge Combo<br />
As the game progresses and you obtain the Charge Combo for each beam, you will be able to<br />
combine missiles with the beams you are using to fire a very powerful attack. When you press<br />
and hold and charge it to its maximum, press on the while still holding down . The<br />
performance of the Charge Combo and the number of missiles or beam ammo it consumes will<br />
vary according to the beam you are using.<br />
Charge Combo Corresponding Missiles/Ammo<br />
Name Beam Consumed<br />
Super Missile Power Beam 5 missiles<br />
Darkburst Dark Beam 5 missiles, 30 dark ammo<br />
Sunburst Light Beam 5 missiles, 30 light ammo<br />
Sonic Boom Annihilator Beam<br />
Grapple Beam<br />
5 missiles, 30 dark ammo,<br />
30 light ammo<br />
Visors<br />
Samus has four visors she can use, each with varying functions. Try to utilize the special<br />
characteristics of each one as you search the planet and defeat your enemies.<br />
Visor Selection Screen<br />
If you press and hold , point to the visor you want to use, and let go of , you’ll change<br />
your visor. Try to move ahead in the game by utilizing each function. Additionally, while<br />
equipping visors other than CombatVisor, you can change back to CombatVisor by<br />
tapping on .<br />
29<br />
When you use the Grapple Beam, you will be able to latch onto a Grapple Point, gain momentum<br />
and fly through the air. If you lock onto the Grapple Point with , the beam will automatically<br />
launch and hang—just release with good timing to launch into the air. Also, you can fire beams<br />
Dark Visor<br />
Echo Visor 30<br />
with while hanging.<br />
Grapple Point<br />
Screw Attack<br />
After executing a Space Jump, press repeatedly and with<br />
good timing to initiate and perform Screw Attacks (a maximum<br />
of 6), which deals damage when you hit an enemy. Also, this<br />
will allow you to climb while jumping off some walls.<br />
Gravity Boost<br />
After doing a Space Jump in water, press and hold and you will be able to rise up through the<br />
water for a fixed time.<br />
Combat Visor<br />
Combat Visor<br />
The most basic visor. You will use this mainly during battle.<br />
Scan Visor
Scan Visor<br />
This visor reads information from creatures or computer terminals and collects data. While using<br />
the Scan Visor, you will not be able to use your weapons.<br />
Performing a Scan<br />
With the target highlighted with the aim cursor,<br />
press and hold to scan. Some devices can be<br />
activated by scanning. Also, when particularly<br />
important items are scanned, they are recorded in<br />
the Logbook (page 38).<br />
Dark Visor<br />
This visor will allow you to see objects and creatures<br />
that exist in the dimensional rift that can’t be seen<br />
with the naked eye. Targets, such as creatures, will be<br />
displayed in red.<br />
Echo Visor<br />
This visor allows you to visualize sound waves. You will<br />
be able to see and know the locations of objects and<br />
creatures emitting sound waves.<br />
Scan Targets<br />
Important targets are displayed in red, and<br />
other targets are displayed in blue. Green<br />
indicates targets already scanned.<br />
Aim Cursor<br />
You can scan creatures or various substances<br />
that are caught within this cursor.<br />
Morph Ball<br />
If you press , Samus will roll up into a ball and will be able to get through narrow passages, such<br />
as air vents or hidden passages, etc. To change back, press again.<br />
Bombs<br />
You can set bombs with , and damage your enemies with the blast or destroy certain floors or<br />
31 walls. You can also jump as a Morph Ball using the blast.<br />
32<br />
Bombs<br />
Energy Gauge<br />
Spring Ball<br />
If you shake the Wii Remote (when you have bombs), you can jump while still in Morph<br />
Ball mode.<br />
Boost Ball<br />
As the game progresses, if you obtain the Boost Ball function, you will be able to do high<br />
speed moves by pressing and holding , then letting go. Note that the longer you hold<br />
, the longer you can move with the Boost Ball.<br />
Spider Ball<br />
(page 34)<br />
Number of bombs set<br />
You can set up to 3 at a time.<br />
Remaining Power Bombs<br />
This is the current / maximum number<br />
of Power Bombs.<br />
As the game progresses, if you obtain the Spider<br />
Ball, you will be able to magnetically attach<br />
yourself in Morph Ball mode to certain magnetic<br />
tracks by pressing and holding . If you move<br />
on a Spider Ball track, you can move along<br />
the track. To release from the track, let go of . Also, you can launch off the track with the<br />
Boost Ball by pressing and holding , then letting go.<br />
Power Bomb<br />
As the game progresses, if you obtain Power Bombs, you will be able to use a powerful bomb by<br />
pressing and deal major damage to enemies in a wide range. When you use a Power Bomb,<br />
your stock of Power Bombs is reduced by one.
Game Screens<br />
Basic Screen (when using Combat Visor)<br />
This is the basic screen when you’re using the Combat Visor (page 30). The map screen (page 36) is<br />
displayed with , and the pause screen (page 37) is displayed with .<br />
*The screen display may change depending on what is equipped or Samus’s status.<br />
Energy Gauge<br />
Radar<br />
Surrounding enemies appear as orange<br />
dots with Samus in the center.<br />
Warning Gauge<br />
When you get close to something<br />
dangerous in the environment, such<br />
as poison gas and atmosphere of Dark<br />
Aether, the gauge will stretch and<br />
warn you.<br />
Number of Missiles<br />
This shows the current number/maximum number<br />
of missiles.<br />
Map<br />
Lock-on cursor Target scope<br />
This shows a 3-D map of your surroundings.<br />
Visor currently in use Beam currently in use<br />
Ammo Gauge<br />
Reticule<br />
Purple line on the left shows the amount of Dark Beam ammo<br />
remaining, and white line shows the amount of Light Beam<br />
ammo remaining. The numbers show the exact amount of<br />
each ammo remaining.<br />
Lock-on cursor & target scope<br />
When you get close to an object or enemy that can be locked onto, the lock-on cursor will be<br />
displayed, and when you lock on, it will change to a target scope.<br />
Reading the energy gauge<br />
The energy gauge shows the life of Samus. You can restore energy by obtaining items, such as Energy<br />
Balls or by using save stations or the Gunship.<br />
Energy Tank<br />
Game Over<br />
One of these will fill the energy gauge. A square is<br />
added each time you obtain an Energy Tank.<br />
The game is over when all Energy Tanks are empty and the energy gauge is at 0. To start from<br />
the last place you saved, select Yes with<br />
you’ll go back to the title screen.<br />
or and confirm with . If you select No,<br />
Saving<br />
You can save the game’s progress by jumping onto a save station or Samus’s Gunship. In order to<br />
save, you will need two available blocks in the Wii console memory. Please note that once data is<br />
overwritten, it cannot be recovered, so please be careful.<br />
*For information on how to delete files within the Wii console memory, please see the<br />
Wii Operations Manual.<br />
Save Stations<br />
Save stations are devices installed in many locations.<br />
In addition to being able to save your status, you can<br />
also restore your energy.<br />
Gunship<br />
The Gunship is Samus’s vehicle. In addition to being<br />
able to restore energy, you can also restore beam<br />
ammo, missiles and Power Bombs.<br />
Energy Gauge<br />
The number on the left is the current energy level. It<br />
goes down when you take damage, and when it gets<br />
to 0, one Energy Tank will be empty.<br />
33 34
Two Worlds<br />
The planet Aether is divided into Two worlds, Light Aether and Dark Aether.<br />
Light Aether<br />
This is the world where the Luminoth race exists. It<br />
has been ravaged by the appearance of Dark Aether.<br />
The story starts when Samus lands here.<br />
Portals<br />
Map Screen<br />
If you press , the current area map will be displayed, and the places you have visited so far will<br />
be displayed in orange. Also, if you display the world map with , you can check the worlds you<br />
have visited up to now, and you can switch between the Light Aether map and the Dark Aether<br />
map with .<br />
Additionally, if you download a map at the Map Station in each area, the areas you have not<br />
visited yet will be displayed in blue.<br />
Area Map World Map<br />
Map icons<br />
These are the doors that connect the two<br />
worlds. When you find and start up the<br />
Items displayed with ??? will become clear as the game progresses.<br />
35<br />
Light and Dark portals, Samus will be<br />
able to travel between the two worlds.<br />
Samus’s current location<br />
Samus is facing the direction of the arrow.<br />
36<br />
Dark Aether<br />
This is the mirror world of Light Aether, and the<br />
terrain is very similar. However, the atmosphere is<br />
toxic, and you can be damaged just by being there.<br />
Safe Zone<br />
On Dark Aether, when you start up the Light Crystals or<br />
Light Beacons, a Safe Zone will be created in that area.<br />
In Safe Zone, you do not take damage from toxin of the<br />
atmosphere. Also, you can restore energy as long as<br />
you don’t take any damage from enemies.<br />
*Safe Zones created with Light Beacons will disappear<br />
after a time. If that happens, reactivate the Light<br />
Beacons to make the Safe Zone reappear.<br />
Map screen controls<br />
+<br />
/<br />
Rotate<br />
Choose<br />
Enlarge map<br />
Shrink map<br />
Switch area map and world map<br />
Switch between Light Aether and Dark Aether<br />
Key<br />
Exit<br />
About doors<br />
Each area has various doors set up. If you shoot the corresponding beam or<br />
missile at the door, you can unlock it and open it. In the case of Blast Shield<br />
doors, you must open the lock with a missile, it will then change to a blue door.
Pause Screen<br />
If you press , the pause screen will be<br />
displayed. In the menu, select with , and<br />
press to confirm.<br />
Inventory<br />
This allows you to check the equipment Samus can use and an explanation of it. Select the<br />
equipment type, then select the equipment.<br />
Equipment Types<br />
Weapon Systems<br />
Morph Ball Systems<br />
Armor<br />
Visors<br />
Menus<br />
Item acquisition rate<br />
and scan rate<br />
Equipment type<br />
The blue gauge shows the information<br />
acquisition rate for that category.<br />
Movement Systems<br />
Miscellaneous<br />
All about beams (page 28) and missiles (page 28).<br />
Info on Morph Ball upgrades (page 32).<br />
Info on Power Suit upgrades.<br />
All about Samus’s visors (page 30).<br />
Equipment for moving, like the Space Jump.<br />
Equipment image<br />
You can enlarge by pressing<br />
down .<br />
Other equipment, such asTransfer Module or EnergyTanks.<br />
Logbook<br />
This allows you to check the information you scanned (page 31). Select the type of information,<br />
then the information itself.<br />
37 38<br />
Explanation<br />
Press to read through the explanation.<br />
Information Types<br />
Lore<br />
Creatures<br />
Research<br />
This allows you to check documents of the Luminoth or messages left by<br />
Federation troops or Space Pirates.<br />
This is data regarding the creatures you’ve scanned up to now. It will also allow<br />
you to check the weaknesses of your opponents.<br />
This is information about various mechanisms or worlds.
Options<br />
The settings here are the same as on the Options (page7) you can access on the main menu, but<br />
on this screen, there is a visor setting, where you can tweak the settings for the visor. Also, if you<br />
select Quit Game, the game will end and you will go back to the title screen.<br />
Visors<br />
Helmet Opacity<br />
HUD Lag<br />
Visor Opacity<br />
Dark ammo<br />
Light ammo<br />
This sets the transparency of the helmet displayed on the screen from<br />
0 (transparent) to 100 (dark).<br />
This switches whether you allow the visor frame to swing with your movement.<br />
This sets the transparency of each information displayed on the screen from<br />
0 (transparent) to 100 (dark).<br />
Replenishes Dark Ammo. Replenishment will vary according to the size.<br />
These appear when you defeat an enemy with a Light Beam.<br />
Replenishes Light Ammo. These appear when you defeat an enemy<br />
with a Dark Beam.<br />
METROID PRIME 3: Corruption<br />
Six months have passed since the events on the planet Aether. A serious situation is unfolding<br />
within the Federation.<br />
The Galactic Federation’s network computer, the Aurora Units, has suddenly become corrupted<br />
with something like a virus.<br />
The network is shut down, and during the investigation of the cause, it becomes clear that the<br />
situation is larger than this isolated incident.<br />
About four months ago, the Federation ship Valhalla was attacked by Space Pirates and went<br />
missing, and the Aurora Unit 313 on board theValhalla was taken.The virus was transmitted<br />
from this Aurora Unit, infecting other Aurora Units one by one.<br />
If the Space Pirates attack while the network is down, the Federation will take considerable<br />
damage.To restore the network as quickly as possible, the Federation urgently assembles<br />
bounty hunters to the Federation flagship Olympus.<br />
During the explanation of the situation, the Federation is viciously assaulted by the dreaded<br />
Space Pirates. Samus and the bounty hunters who were headed to the planet Norion<br />
must protect the Federation base, which appears to be the main target. They know<br />
that an object like a giant meteor, called a Leviathan, is coming to the planet.<br />
If the Leviathan hits, Norion will be destroyed.<br />
*If you select Quit Game, any data after the last save place will disappear, so please<br />
39 be careful.<br />
40<br />
Items<br />
To avoid this danger, Samus and the bounty hunters must fight to restore the<br />
Federation’s defense system that has been shut down by the pirates.<br />
To top things off, the agent behind<br />
the attack is Dark Samus, thought to<br />
have been killed by Samus on<br />
planet Aether…
Controls<br />
Metroid Prime 3: Corruption is played with a combination of the Nunchuk and theWii Remote.You will be<br />
able to use the controls shown in red as the game progresses.<br />
You cannot use the Nintendo GameCube controller to operate this game.<br />
Nunchuk<br />
Pointing<br />
Facing the Wii Remote pointer toward the screen and<br />
indicating a certain location is called pointing. In this<br />
game, moving aiming point and changing the view<br />
angle are done by pointing.<br />
Control Stick<br />
• Move<br />
C Button<br />
•Turn into Morph Ball / Change back<br />
Z Button<br />
• Fix viewpoint<br />
• Lock on<br />
• [In ScanVisor mode] Scan<br />
• [In Morph Ball mode] Spider Ball<br />
• [With CommandVisor] Send orders<br />
to Gunship<br />
*If you lock on to a Grapple Point and<br />
shake the Nunchuk, you will shoot the<br />
Grapple Beam.<br />
Wii Remote<br />
• [Pause screen] Select item<br />
• Aim<br />
• (Point to edge of screen)<br />
Move viewing angle<br />
• Turn power ON / OFF<br />
• Display pause screen<br />
Power Button<br />
+Control Pad<br />
Minus Button<br />
• (Press and hold) Switch visor<br />
1 Button<br />
Pointer<br />
• Take screen shot<br />
• Shoot missile<br />
• (Press and hold ) Seeker Missile<br />
Shaking the Wii Remote<br />
If you shake the Wii Remote in Morph Ball mode,<br />
you’ll perform a Spring Ball, where you jump as a<br />
Morph Ball.<br />
B Button<br />
• Cancel<br />
• Jump<br />
• [During jump]<br />
Space Jump<br />
• [During Space Jump]<br />
Screw Attack<br />
• [In Morph Ball mode] Boost Ball<br />
A Button<br />
• Confirm item<br />
• Shoot beam<br />
• (Press and hold) Charge<br />
• [In Morph Ball mode] Bomb<br />
41 42<br />
+ Button<br />
• (Press and hold)<br />
Start / End Hypermode<br />
HOME Button<br />
• Display HOME Button menu<br />
2 Button<br />
• Display hints or help<br />
*Use this when your game<br />
progress is stuck.
Samus’s Actions<br />
Move / Jump / Space Jump<br />
Samus will move in the direction is tilted. Press to make Samus jump. During the jump, if you<br />
press , Samus will then be able to do a Space Jump—a second midair jump.<br />
Aiming and Changing View<br />
You’ll aim beams or missiles at wherever you point with the Wii Remote. If you aim at the edge of<br />
the screen, the viewing angle will move in that direction.<br />
*Set up the movement sensitivity in “Sensitivity” in Controls (page 7).<br />
Reticule<br />
Lock-On<br />
You can lock onto nearby enemies and focus your<br />
field of vision by pressing down on . If you lock on<br />
and shoot missiles (page 44), they will fly toward the<br />
enemy. To cancel the lock-on, let go of .<br />
Aiming During Lock-on<br />
When the Lock-on Free Aim (page 7) is turned ON, you will be able to freely aim the arm<br />
cannon during lock-on. Beams will then fly toward where you aim, but missiles will still track<br />
the target you locked onto.<br />
Moving During Lock-on<br />
If you tilt while locked onto an enemy, you can move while remaining focused. Also, if you<br />
tilt right or left while locked on and lightly press , you can do a sidestep.<br />
Beams<br />
Shoot beams with . The beam you can use from the beginning is called the Power Beam,<br />
and it will become more powerful as you obtain new functions. Also, if you press and hold ,<br />
it will charge, and when you let go, you will shoot a powerful Charge Beam. Additionally, while<br />
charging, you can pull in Energy Balls or missiles.When player acquires the new beam it will<br />
merge with the previous beam, adding new abilities to the beam, while keeping the properties<br />
of the previous beam.<br />
Plasma Beam<br />
When you obtain the Plasma Beam, you will be<br />
able to burn or melt some enemies and obstacles.<br />
Nova Beam<br />
When you obtain the Nova Beam, your beam<br />
will be able to penetrate obstacles of a certain<br />
material. Also, if you combine it with the X-Ray<br />
Visor (page 47), you will be able to defeat some<br />
enemies with a single shot.<br />
43 44<br />
Missiles<br />
If you press , you can fire missiles. If you lock onto the enemy and shoot a missile, it will home<br />
in on the enemy. When you fire, your stock of missiles goes down.<br />
Ice Missile<br />
If you have the Ice Missile, when it hits some<br />
enemies whose life energy is down, you will be<br />
able to freeze them.<br />
Seeker Missiles<br />
You can fire missiles at up to five targets<br />
simultaneously. Take aim while pressing<br />
and holding . It locks onto the target<br />
automatically, so let go of to fire.<br />
Target Scope<br />
Displays on the target you’re locked onto.
Grapple Beam<br />
When you use the Grapple Beam, you will be able to latch onto and pull items, like enemy shields and<br />
some hatches. When you lock on to a Grapple Point, shake the Nunchuk to shoot the beam. When the<br />
beam connects to the target, pull the Nunchuk back.<br />
Grapple Point<br />
Grapple Swing<br />
If you have the Grapple Swing, you will be able to hang from a certain type of Grapple Point,<br />
gain momentum, and fly through the air. If you lock on to a specific Grapple Point with , it<br />
will automatically shoot the beam and hang, so just release with good timing to launch into<br />
the air.<br />
45 Grapple Voltage<br />
46<br />
If you obtain the Grapple Voltage, after you shoot the Grapple Beam, you will be able to<br />
exchange energy with the target of the beam. After you shoot the beam, tilt up on to send<br />
your energy to the target, and tilt down to absorb energy from the target.<br />
Screw Attack<br />
After obtaining the “Screw Attack”, if you press<br />
during a Space Jump, you will jump while rotating.<br />
If you press with good timing, you will be able to<br />
jump repeatedly (a maximum of 6), and if you hit an<br />
enemy, you will give damage. You will also be able to<br />
climb some walls while jumping back and forth.<br />
Visors<br />
Samus has four visors she can use, each with varying functions. Try to utilize the special<br />
characteristics of each one as you search the environment and defeat enemies.<br />
Visor Selection Screen<br />
If you press and hold , point to the visor you want to use, and let go of , you can change<br />
the visor. Try to move ahead in the game utilizing each visor’s function. Additionally, to go back<br />
to the basic screen (Combat Visor) from anything except the Combat Visor, point to the center of<br />
the visor-selection screen and let go of , or quickly press .<br />
Combat Visor<br />
X-Ray Visor<br />
Combat Visor<br />
The most basic visor. You will use this mainly during battle.<br />
Scan Visor<br />
Command Visor
Commands you can send to the Gunship:<br />
Landing<br />
Ship Missile<br />
Ship Grapple<br />
Scan Visor<br />
This visor reads information from creatures or computer terminals and collects data. While using<br />
the Scan Visor, you will not be able to use your weapons.<br />
Performing a Scan<br />
With the target caught within the aim cursor, press<br />
and hold to scan. Some devices can be activated<br />
by scanning. Also, when particularly important<br />
items are scanned, they are recorded in the Logbook<br />
(page 53).<br />
Call the Gunship and have it land on a landing site.<br />
If you obtain the Ship Missile, you will be able to fire it at some targets. Also,<br />
when an enemy is in a room where you can see the sky, you will be able to fire<br />
missiles to random locations in the room by pressing and holding .<br />
If you obtain the Ship Grapple, you will be able to lift and carry some targets<br />
using the Gunship.<br />
X-Ray Visor<br />
This visor has an x-ray function, and you will be able to use it after you obtain it. Basically, it<br />
display the same information as the basic screen (Combat Visor), but allows you to see through<br />
walls and find hidden targets or invisible objects. Additionally, the target’s weaknesses will be<br />
displayed in red, and if you lock on, it will zoom in on them.<br />
Morph Ball<br />
If you press , Samus will roll up into a ball and will be able to get through narrow passages, such<br />
as air vents or hidden passages, etc. To change back, press again.<br />
Energy Gauge<br />
(Page 50)<br />
Bombs<br />
47<br />
Command Visor<br />
You can set bombs with to damage your enemies with the blast or destroy certain floors or<br />
walls. You can also jump as a Morph Ball using the blast.<br />
48<br />
When you switch to the Command Visor and lock onto<br />
Spring Ball<br />
a command icon, you will have remote control of your<br />
Gunship and can execute various commands. You will be<br />
able to use it to make progress in the game.<br />
If you shake the Wii Remote, you can jump as a Morph Ball.<br />
Command Icon<br />
Scan Targets<br />
Important targets are displayed in red, and<br />
other targets are displayed in blue. Green<br />
indicates targets already scanned.<br />
Aim Cursor<br />
You can scan creatures or various substances<br />
that are caught within this cursor.<br />
Boost Ball<br />
As the game progresses, if you obtain the Boost Ball function, you will be able to do high speed<br />
moves by pressing and holding , then letting go. Note that the longer you hold , the longer<br />
you can move with the Boost Ball.<br />
Spider Ball<br />
Bombs<br />
Number of bombs set<br />
You can set up to 3 at a time.<br />
As the game progresses, if you obtain the Spider Ball, you will be able to magnetically attach<br />
yourself in Morph Ball mode to certain magnetic tracks by pressing and holding . If you<br />
move on a Spider Ball track, you can move along the track. To release from the track, let go<br />
of . Also, you can launch off the track with the Boost Ball by pressing and holding , then<br />
letting go.
Game Screens<br />
Basic Screen (when using Combat Visor)<br />
This is the basic screen when you’re using the Combat Visor (page 46). The pause screen (page 52)<br />
is displayed with .<br />
*The screen display may change depending on what is equipped or Samus’s status.<br />
Energy Gauge<br />
Lock-on cursor & target scope<br />
When you get close to targets that can be locked onto, the lock-on cursor will be displayed, and<br />
when you lock on, it will change to a target scope.<br />
Lock-on cursor Target scope<br />
Reading the energy gauge<br />
The energy gauge shows the life of Samus. You can restore energy by obtaining items such as Energy<br />
Balls, or by using save stations or the Gunship.<br />
Saving<br />
Game Over<br />
Radar<br />
The game is over when all Energy Tanks are empty and the energy gauge is at 0. To start from<br />
the last place you saved, point at Yes and confirm with . If you select No, you’ll go back to<br />
Surrounding enemies appear as orange<br />
dots with Samus in the center.<br />
the title screen.<br />
49 *The game will be over, also if Samus is completely corrupted while in Corrupt Hypermode<br />
(page 54)<br />
50<br />
Reticule<br />
Map<br />
This shows a 3-D map of your surroundings.<br />
Numbers of missiles<br />
This shows the current number /<br />
maximum number of missiles.<br />
You can save the game’s progress by jumping onto a save station or the Gunship. In order to save,<br />
you will need two available blocks in the Wii console memory. Please note that once data is<br />
overwritten, it cannot be recovered, so please be careful.<br />
*For information on how to delete files within the Wii console memory, please see the<br />
Wii Operations Manual.<br />
Save Stations<br />
Save stations are devices installed in many locations.<br />
In addition to being able to save your status, you can<br />
also restore your energy.<br />
Gunship<br />
If you stand on the hatch of the Gunship and select<br />
Save or Save and Enter Ship, you can save the<br />
game’s progress.<br />
Energy Tank<br />
One of these will fill the energy gauge. A square is<br />
added each time you obtain an Energy Tank.<br />
Energy Gauge<br />
The number on the left is the current energy level. It<br />
goes down when you take damage, and when it gets<br />
to 0, one Energy Tank will be empty.
Gunship<br />
When you stand on the hatch of the Gunship and select<br />
Save and Enter Ship, you can, you can save the game’s<br />
progress or restore energy and missiles. Additionally, if<br />
you enter the Gunship, you can move to other planets or<br />
use devices within the Gunship.<br />
*To use devices within the Gunship, point and press .<br />
Move to other planets<br />
If you use devices in front of Samus’s seat, you can move to other planets or other landing sites.<br />
Select in order of the planet you want to go to, then the landing site.<br />
Point to the devices in front of Samus’s<br />
seat and press .<br />
Landing Site<br />
Other devices<br />
Select the landing site where<br />
you want to land. indicates<br />
places you can’t land yet.<br />
The Gunship is prepared with a wireless<br />
communication device and a device that allow you<br />
to check your battle log. Use them according to the<br />
instructions or as the game progresses.<br />
When you enter the Gunship, select Save and<br />
Enter Ship.<br />
Galaxy Map<br />
This displays the galaxy map<br />
(entire galaxy).<br />
Pause Screen<br />
If you press during the game, you will go to the pause screen where you can check various<br />
kinds of information. Select Map, Logbook, Status, or Options and switch to that menu. You can<br />
check the details on how to control each screen by pressing .<br />
Menu<br />
Samus’s current location<br />
The arrow shows the direction Samus is facing.<br />
Map<br />
Map sub-menu<br />
This shows Samus’s current location.<br />
This shows a planet map of where you are.<br />
This shows a galaxy map.<br />
Sub-Menu<br />
51<br />
An area map focused on the current area<br />
is displayed. Areas where you have not yet<br />
landed are shown in blue, and areas where<br />
you have landed are shown in orange. You can<br />
check the meaning of each icon shown on the<br />
52<br />
map or the control method by pressing .<br />
*When you point a room and press while displaying the area map, map will change to<br />
room map and you can see the details of the room.<br />
You can select this only when a room map is displayed, and put<br />
a mark on that room.<br />
About doors<br />
Each area has various doors set up. If you shoot the corresponding beam or<br />
missile at the door, you can unlock it and open it. In the case of Blast Shield<br />
doors, you must open the lock with a missile, it will then change to a<br />
blue door.
Logbook<br />
This allows you to check your current goal or any information you scanned (page 47).<br />
Logbook sub-menu<br />
Inventory<br />
Check the latest information or missions already achieved.<br />
Check details such as enemies or people you scanned.<br />
Check details of important items or objects that you scanned.<br />
Check records left in each location.<br />
This allows you to check Samus’s or the Gunship’s equipment, or the number of credits.<br />
Inventory sub-menu<br />
Check Samus’s equipment.<br />
Hypermode<br />
After you obtain the PED Suit, you will be able to utilize Hypermode. However, if you stay in<br />
Hypermode past a certain amount of time, you will fall into Corrupt Hypermode, a dangerous<br />
situation, so be careful.<br />
Starting Hypermode<br />
When you obtain the PED Suit, you can use<br />
one Energy Tank and start up Hypermode by<br />
pressing and holding . While in Hypermode,<br />
you will be able to do powerful attacks, and will<br />
no longer take damage from enemy attacks.<br />
*If you don’t have any Energy Tanks, you will be<br />
unable to start up Hypermode.<br />
Check the Gunship’s usable equipment.<br />
Cancelling Hypermode<br />
53<br />
If you obtain an Energy Cell, they will be displayed, and you will be able<br />
to check the Energy Cell acquisition or usage status.<br />
You can cancel Hypermode by pressing and holding . Energy is restored depending on how<br />
much is left on the Phazon energy gauge. If 25 seconds pass after starting Hypermode, or if the<br />
54<br />
Check the current number of credits.<br />
Phazon energy gauge gets to 0, Hypermode is automatically cancelled.<br />
*If Hypermode is automatically cancelled, your energy is not restored, so be careful.<br />
Options<br />
This allows you to set up Options (page 7) or end the game.<br />
Options sub-menu<br />
Set the controls (page 7).<br />
In addition to items displayed when you select<br />
Main Menu ∞ Options ∞ Display, you can also set the visor<br />
opacity and helmet opacity from 0 (transparent) to 100 (dark).<br />
Change sound settings (page 7).<br />
This allows you to end the game and go back to the title screen.<br />
*Data not saved will be lost, so be careful.<br />
Phazon Energy Gauge<br />
This is spent when you use your weapons.<br />
Corrupt Hypermode<br />
When the game progresses to some extent, and<br />
you start up Hypermode, when a certain amount<br />
of time passes, the Phazon inside Samus’s body<br />
goes on a rampage, and she will enter Corrupt<br />
Hypermode. While in Corrupt Hypermode, the<br />
following phenomena will occur.<br />
• Even if you press and hold , you cannot cancel Hypermode. To cancel Hypermode, a<br />
certain amount of time needs to pass, or the Phazon energy gauge needs to get to 0 by<br />
using your weapons.<br />
•The Phazon energy gauge goes up with the passage of time and with enemy attacks.<br />
• If the Phazon energy gauge fills up and stays there for a certain amount of time, Samus will<br />
be completely corrupt and the game will be over.
Hypermode attacks<br />
When you start up Hypermode, you will be able to do Hypermode exclusive attacks.<br />
Hyper Beam<br />
If you press , you can consume Phazon energy and<br />
shoot a powerful beam. Additionally, there are some<br />
obstacles that can only be destroyed by the Hyper Beam.<br />
*The special properties of Plasma Beam and Nova Beam<br />
will not carry over to Hyper Beam, so be careful.<br />
Hyper Charge Beam<br />
If you press and hold then release , depending on<br />
how long you hold the button, you can continuously fire<br />
a powerful beam while consuming Phazon energy.<br />
*You can also pull in Energy Balls while charging.<br />
Hyper Missiles<br />
If you obtain the Hyper Missiles, by pressing , you can use Phazon energy and fire a<br />
powerful missile.<br />
Hyper Grapple<br />
If you obtain Hyper Grapple, you can use the same ability as the Grapple Voltage (page 45)<br />
while in Hypermode. While using the Grapple Beam (page 45) in Hypermode, tilt up or down<br />
on .<br />
MULTIPLAYER<br />
This mode allows you to play with two to four players based on Metroid Prime 2: Echoes.To play in<br />
this mode, you will need enough Wii Remote and Nunchuk controllers for the number of<br />
people playing.<br />
Starting Multiplayer<br />
When you select Multiplayer on the main menu,<br />
the screen at right will be displayed. Each player<br />
presses to enter.<br />
After entry, if you press , each player can set<br />
up rumble functions, sensitivity, and Lock-On<br />
Free Aim settings (page 7). Confirm each setting<br />
by tilting down on , and switch the setting by<br />
tilting right/left. When you select OK, the settings are done. When everyone has done their<br />
entries, go to the next screen with .<br />
55<br />
Hyper Ball<br />
If you obtain the Hyper Ball, while in Morph Ball mode, you can press and hold<br />
surroundings. While you press and hold the button, you will use Phazon energy.<br />
to attack your<br />
Game Mode Selection<br />
Select your game mode from Deathmatch or<br />
Bounty Mode. Rotate the menu with and<br />
confirm with . After you confirm, you can<br />
change the BGM and number of targets. When<br />
the settings are done, select OK.<br />
56<br />
Stage Selection<br />
Select the stage you will battle on with and<br />
confirm with . Press and the game<br />
will begin.<br />
Multiplayer Rules<br />
Aim at achieving the winning conditions and battle the other players (winning conditions vary<br />
with the game mode). If you take damage and your energy gauge gets to 0, or if you fall outside<br />
the stage, it will be a miss, and you will come back a few seconds later in another place.<br />
Also, you can use the following equipment in Multiplayer.<br />
Normal<br />
Morph Ball<br />
Power Beam, Grapple Beam, Charge Beam, Space Jump, Gravity Boost,<br />
Combat Visor, Dark visor<br />
Bomb, Boost Ball, Spider Ball
Deathmatch<br />
This mode has you fighting several other players. The game ends when someone achieves the<br />
winning number of defeats or when the remaining time gets to 0.<br />
Bounty Mode<br />
This mode has you competing for points, as you collect the coins that other players will drop<br />
when they take damage. The game ends when someone achieves the number of target points<br />
or when the remaining time gets to 0.<br />
Radar<br />
Coins<br />
Energy gauge<br />
This goes down as you take damage,<br />
and you’ll lose a life when it gets to 0.<br />
Player 1 is orange, Player 2 is white,<br />
Player 3 is green, and Player 4 is blue.<br />
White:<br />
Blue:<br />
Red:<br />
Green:<br />
Gold:<br />
1 point<br />
5 points<br />
10 points<br />
50 points<br />
100 points<br />
Multiplayer Screen<br />
Coin colors and number of points<br />
Current no. of defeats<br />
*If the game mode is Bounty Mode, the<br />
current number of points is displayed.<br />
This is the current number of, from the top, missiles,<br />
light ammo, and dark ammo.<br />
Pausing During Multiplayer<br />
If you press while playing multiplayer, you will pause<br />
the game. The player that pauses the game can end the<br />
game or change the music. To restart the game, press<br />
again or press .<br />
Results Screen<br />
When the time limit is up or when<br />
someone achieves the winning conditions,<br />
the scores and ranking will be displayed on<br />
the Results screen. Press after you check<br />
them. You will go back to the game-mode<br />
selection screen.<br />
Multiplayer Items<br />
57<br />
During a multiplayer game, the screen will be<br />
divided, as shown at right. Also, some of the displays<br />
58<br />
will be different from single-player mode.<br />
Player 1 Player 2<br />
Energy Ball<br />
Remaining Time<br />
This displays the current time left.<br />
Weapon display<br />
Player 3 Player 4<br />
When you get a purple Energy Ball, your energy will be restored by 10. If you get a red Energy<br />
Ball, it will be restored by 30.<br />
Missiles<br />
If you get one, it will restore 5 missiles. There are also Super Missiles that can do a more<br />
powerful attack than normal missiles.<br />
Randomizer<br />
When you go inside, you will be able to temporarily acquire various abilities, such as Invisible<br />
Mode, Invincible Mode, Hacker Mode (where you can plant a virus on opponents you scan<br />
and make them use their energy), and Death Ball (a Morph Ball that gives major damage to<br />
opponents it hits).<br />
Item Box<br />
Equipment such as Dark Beam, Light Beam, Annihilator Beam, and Power Bomb are inside<br />
these. If you destroy the box, the item inside will appear.