EN673+ISO 10077_Using THERM+WINDOW-LBNL_rev4.pdf
EN673+ISO 10077_Using THERM+WINDOW-LBNL_rev4.pdf
EN673+ISO 10077_Using THERM+WINDOW-LBNL_rev4.pdf
- No tags were found...

You also want an ePaper? Increase the reach of your titles
YUMPU automatically turns print PDFs into web optimized ePapers that Google loves.
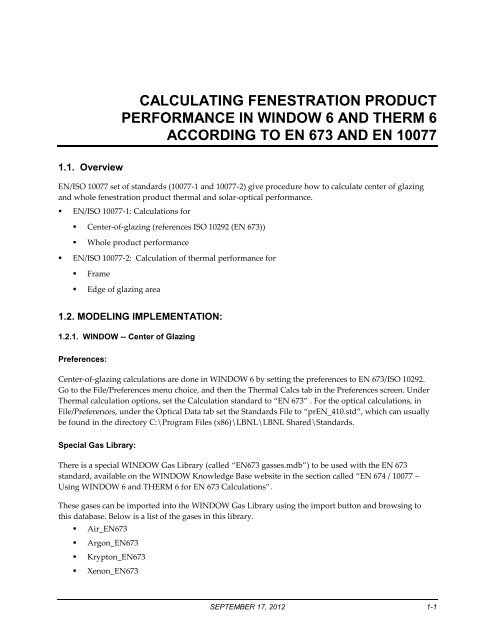
CALCULATING FENESTRATION PRODUCTPERFORMANCE IN WINDOW 6 AND THERM 6ACCORDING TO EN 673 AND EN <strong>10077</strong>1.1.1. OverviewEN/ISO <strong>10077</strong> set of standards (<strong>10077</strong>-1 and <strong>10077</strong>-2) give procedure how to calculate center of glazingand whole fenestration product thermal and solar-optical performance.• EN/ISO <strong>10077</strong>-1: Calculations for• Center-of-glazing (references ISO 10292 (EN 673))• Whole product performance• EN/ISO <strong>10077</strong>-2: Calculation of thermal performance for• Frame• Edge of glazing area1.2. MODELING IMPLEMENTATION:1.2.1. WINDOW -- Center of GlazingPreferences:Center-of-glazing calculations are done in WINDOW 6 by setting the preferences to EN 673/ISO 10292.Go to the File/Preferences menu choice, and then the Thermal Calcs tab in the Preferences screen. UnderThermal calculation options, set the Calculation standard to “EN 673” . For the optical calculations, inFile/Preferences, under the Optical Data tab set the Standards File to “prEN_410.std”, which can usuallybe found in the directory C:\Program Files (x86)\<strong>LBNL</strong>\<strong>LBNL</strong> Shared\Standards.Special Gas Library:There is a special WINDOW Gas Library (called “EN673 gasses.mdb”) to be used with the EN 673standard, available on the WINDOW Knowledge Base website in the section called “EN 674 / <strong>10077</strong> –<strong>Using</strong> WINDOW 6 and THERM 6 for EN 673 Calculations”.These gases can be imported into the WINDOW Gas Library using the import button and browsing tothis database. Below is a list of the gases in this library.• Air_EN673• Argon_EN673• Krypton_EN673• Xenon_EN673SEPTEMBER 17, 2012 1-1
1.2. MODELING IMPLEMENTATION:• Air (10%) / Argon (90%) Mix EN• Air (10%) / Krypton (90%) Mix EN• Air (10%) / Xenon (90%) Mix ENFigure 1-1. Export the special EN gases into the Gas Library from the “EN673 gasses.mdb” gases library.Environmental Conditions:Also, when making the glazing system in WINDOW, set the environmental conditions to CEN(predefined in the Environmental Conditions library) with the following characteristics:• U-factor: InsideInside Air Temperature = 20 o CModel = Fixed combined coefficientCombined Coefficient= 3.6 + (4.4 * / 0.837) W/m 2 Kwhere3.6 = convective component of the combined coefficient(4.4 * / 0.837) = radiative component of the combined coefficientEmissivity of the glass surface facing the inside condition.• U-factor: OutsideInside Air Temperature = 0 o CModel = Fixed combined coefficientCombined Coefficient= 23.00 W/m 2 K1-2 SEPTEMBER 17, 2012
1.2. MODELING IMPLEMENTATION:• SHGC: InsideInside Air Temperature = 25 o CModel = Fixed combined coefficientCombined Coefficient= 3.6 + (4.4·* / 0.837)W/m 2 Kwhere3.6 = convective component of the combined coefficient(4.4 * / 0.837) = radiative component of the combined coefficientEmissivity of the glass surface facing the inside condition.• SHGC: OutsideInside Air Temperature = 30 o CDirect Solar Radiation = 500 w/m2Model = Fixed combined coefficientCombined Coefficient= 23 W/m 2 KFigure 1-2. In WINDOW, make the glazing system and define the Boundary Conditions as “CEN”SEPTEMBER 17, 2012 1-3
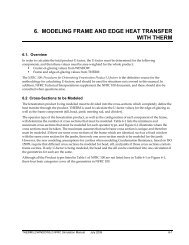
1.2. MODELING IMPLEMENTATION:1.2.2. THERM -- Frame and Edge of Glazing:Frame and edge of glazing calculations are done according to ISO/EN <strong>10077</strong>-2. When using the THERMprogram to model frames and edge of glazing according to this standard, the modeling is a two stepprocess:• Model the frames with the actual glazing/spacer configuration• Model the frames with a Calibration Panel in place of the glazing/spacer elementsModel the frames with the actual glazing/spacer configurationThe following steps need to be performed to accomplish frame and edge of glazing modeling:1. Draw the frame geometry.2. Frame Cavity definitions:(defined in the Material Library):• Frame Cavity,CEN SimplifiedThis Frame Cavity is already defined in the THERM 6 Material Library. It has the followingcharacteristics:Material type= Frame CavityRadiation Model = SimplifiedCavity Model = CENEmissivities for Side 1 and Side 2 = 0.9• Frame Cavity – CEN Slightly VentilatedThis Frame Cavity must be defined in the THERM 6 Material Library, with the followingcharacteristics:MaterialType =Frame CavityRadiation Model = SimplifiedCavity Mode = CEN (slightly ventilated)Emissivities for Side 1 and Side 2 = 0.93. Fill all of enclosed frame cavities with the “Frame Cavity – CEN Simplified”4. Follow the rules in the NFRC THERM 5.2 / WINDOW 5.2 Simulation Manual, Section 6.3.7, “SlightlyVentilated Exterior Cavities” for information on how to determine which cavities should be set toCEN Slightly Ventilated.1-4 SEPTEMBER 17, 2012
1.2. MODELING IMPLEMENTATION:Figure 1-3. In Schematic representation of surfaces with an increased surface resistancedue to a reduced radiation/convection heat transfer1-6 SEPTEMBER 17, 2012
1.2. MODELING IMPLEMENTATION:Set Edge of Glass Dimensionand Glazing System Height to190 mm.Set Exterior BoundaryCondition to “CEN – Outdoor”Set Interior BoundaryCondition to “CEN – Indoor”Figure 1-4. In THERM, insert the glazing system using CEN criteria for Edge of Glass Dimension,Glazing System Height, and Boundary Conditions.8. Set the boundary condition to “CEN – Outdoor” on all of outdoor surfaces (glazing and frame)9. Set the remaining boundary conditions to “CEN – Indoor” on the indoor side, including the glazingand frame.SEPTEMBER 17, 2012 1-7
1.2. MODELING IMPLEMENTATION:BC = CEN – IndoorU-factor Surface Tag = EdgeHeight = 190 mmBC = CEN – OutdoorU-factor Surface Tag = NoneBC = CEN – IndoorU-factor Surface Tag = FrameFigure 1-5. Boundary Condition definitions10. Set U-factor Tags to “Frame” for all indoor frame surfaces and to “Edge” for all indoor glazingsurfaces11. Retain U-Factor Tag of “None” for the outdoor surfaces (both glazing and frame)12. Save this model and perform the calculation(DCC – when I calculate this, I get a message in THERM 6 saying that CR can’t be calculated becausethere is not a radiation enclosure surrounding the interior glazing. So should we say to turn CR calcoff when inserting the glazing system ?1-8 SEPTEMBER 17, 2012
1.2. MODELING IMPLEMENTATION:Model the frames with a Calibration Panel in place of the glazing/spacer elements<strong>Using</strong> the previously created model with the glazing system, createa new model with the calibrationpanel replacing the glazing system.1. In the Material Library, create anew material called “CEN -- Calibration Panel”• Material Type = Solid• Conductivity = 0.035 W/mK• Emissivity = 0.90• Color = light yellow (optional)Figure 1-6. Defining the material for the Calibration Panel2. Replace all the glazing and spacer polygons with the Calibration Panel material (delete the glazingsystem and substitute one polygon of the same dimensions).3. Extend the top of calibration panel by 1 mm.4. Insert a point on the indoor side of the Calibration Panel 1 mm from the top. In the U-factor NamesLibrary, create a new U-Factor Tag called “Center of Glass”, and apply that U-factor tag to the 1 mmsegment at the top of the interior side of the Calibration Panel.5. Define the rest of the U-factor surfaces in the same way as in glazing case6. Save this model and perform calculationSEPTEMBER 17, 2012 1-9
1.2. MODELING IMPLEMENTATION:BC = CEN – IndoorU-factor Surface Tag = Center of GlazingHeight = 1 mmBC = CEN – IndoorU-factor Surface Tag = EdgeHeight = 190 mmBC = CEN – OutdoorU-factor Surface Tag = NoneBC = CEN – IndoorU-factor Surface Tag = FrameFigure 1-7. Defining the Boundary Conditions for the Calibration Panel1-10 SEPTEMBER 17, 2012
1.2. MODELING IMPLEMENTATION:Calculate the Whole Product results in the <strong>EN673+ISO</strong><strong>10077</strong> spreadsheet1. Open sheet “Frames” in “<strong>EN673+ISO</strong><strong>10077</strong>” spreadsheet and select appropriate product for whichthese frame and edge of glazing sections are calculated. There are three types of products:• Single Lite• Dual Lite – Vertical• Dual Lite – HorizontalFigure 1-8. The Frames tab of the spreadsheet for calculation the Frame and Edge-of-Glazing U-factor according to ISO 1007from the THERM and WINDOW results.The cells highlighted in yellow are those that need to be filled in from the THERM and WINDOW results,as discussed below. The other cells are defaults based on the ISO/CEN <strong>10077</strong> documentation.SEPTEMBER 17, 2012 1-11
1.2. MODELING IMPLEMENTATION:2. Open the Center of Glazing tab in the spreadsheet and input the following dataFrom WINDOW6 Glazing System Library:“Ug ” Center of glazing U-factor, calculated earlier in WINDOW 6.2 (see section 1.2.1).U gFigure 1-9. Glazing system results for Sample GlzSys, which are then entered into the spreadsheet.1-12 SEPTEMBER 17, 2012
1.2. MODELING IMPLEMENTATION:3. Open the Frames tab in the spreadsheet, and input the following data for each frame member (fromthe THERM results):From the model with the Glazing System and Spacer:U fbfU cogFigure 1-10. Results from the model with the actual glazing system.“bf”“Uf ”“Ueog ”(Projected Frame Dimension) in THERM is Length (mm) for “Projected in GlassPlane” for FrameFrame U-factor with glazing/spacer system inserted (use Frame U-factor tag onindoor frame surfaces in THERM)Edge of Glazing U-factor (use Edge U-factor tag on indoor glazing surface 190 mmfrom sightline in THERM).From the model with the Calibration Panel:U’ fU’ pU pFigure 1-11. Results from the model with the calibration panel“U’f ”“U’p ”“Up ”Frame U-factor (use Frame U-factor tag on indoor frame surfaces in THERM)Edge U-factor (use Edge U-factor tag on indoor calibration panel surface 190 mmfrom sightline in THERM).1-D Calibration panel U-factor (can be calculated by using center of glass tag onindoor calibration panel surface starting at 190 mm from sightline andapproximately 1 mm high in THERM)SEPTEMBER 17, 2012 1-13
4. Open sheet “Products” in “<strong>EN673+ISO</strong><strong>10077</strong>” spreadsheet and select the appropriate product (thesame product as in the “Frames” sheet). Input the following data (highlighted in yellow in thespreadsheet):• “H”: Overall product height• “W”: Overall product widthThe results in terms of the U-factor for the whole product are displayed in the column “Ut”.Figure 1-12. The Products tab of the spreadsheet for calculation the Whole Produce U-factor according to ISO 1007from the THERM and WINDOW results.1-14 SEPTEMBER 17, 2012