User Manual CONVISION Center
User Manual CONVISION Center User Manual CONVISION Center
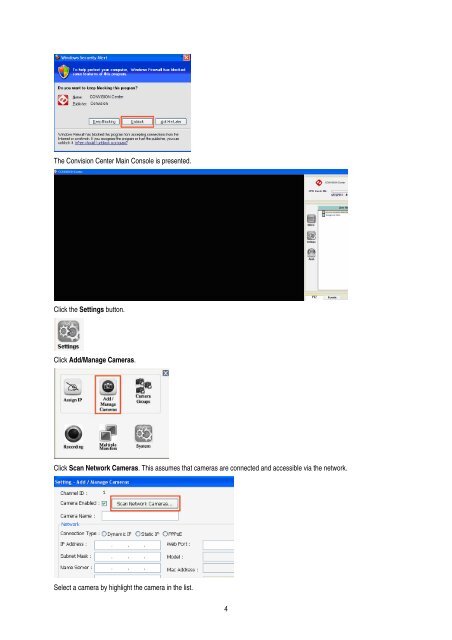
The Convision Center Main Console is presented. Click the Settings button. Click Add/Manage Cameras. Click Scan Network Cameras. This assumes that cameras are connected and accessible via the network. Select a camera by highlight the camera in the list. 4
Change the camera name, password if necessary. Back in the Main Console, click the Convision Center Live View Default group to display video in the Main Console window. This assumes that the camera group setting was not changed in the previous step. If so, then click the group which the camera was added to. After adding additional cameras, double click the group to refresh and display newly added cameras. By default, only 1 pane is presented. If more than 1 camera is present in a group, click the Matrix icon to change the pane layout. 5
- Page 1 and 2: User Manual CONVISION Center Softwa
- Page 3: Introduction Convision Center is Ce
- Page 7 and 8: Main Console The Main Console provi
- Page 9 and 10: Fix Ratio switches from fix ratio t
- Page 11 and 12: PTZ and Events The PTZ panel provid
- Page 13 and 14: Camera Groups After creating the gr
- Page 15 and 16: Mass IP Assignment Click Next to co
- Page 17 and 18: Recorded files (AVI) can be found i
- Page 19 and 20: Access Control Convision Center’s
- Page 21: User Permission Users can be added,
The Convision <strong>Center</strong> Main Console is presented.<br />
Click the Settings button.<br />
Click Add/Manage Cameras.<br />
Click Scan Network Cameras. This assumes that cameras are connected and accessible via the network.<br />
Select a camera by highlight the camera in the list.<br />
4


