Peer Review Guide
Peer Review Guide
Peer Review Guide
You also want an ePaper? Increase the reach of your titles
YUMPU automatically turns print PDFs into web optimized ePapers that Google loves.
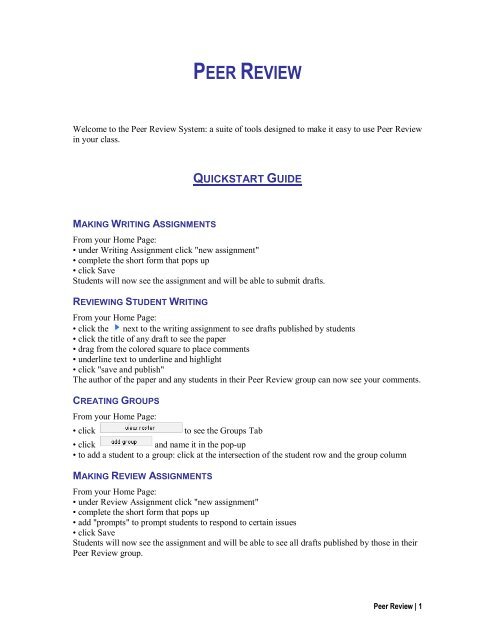
PEER REVIEWWelcome to the <strong>Peer</strong> <strong>Review</strong> System: a suite of tools designed to make it easy to use <strong>Peer</strong> <strong>Review</strong>in your class.QUICKSTART GUIDEMAKING WRITING ASSIGNMENTSFrom your Home Page:• under Writing Assignment click "new assignment"• complete the short form that pops up• click SaveStudents will now see the assignment and will be able to submit drafts.REVIEWING STUDENT WRITINGFrom your Home Page:• click the next to the writing assignment to see drafts published by students• click the title of any draft to see the paper• drag from the colored square to place comments• underline text to underline and highlight• click "save and publish"The author of the paper and any students in their <strong>Peer</strong> <strong>Review</strong> group can now see your comments.CREATING GROUPSFrom your Home Page:• clickto see the Groups Tab• clickand name it in the popup• to add a student to a group: click at the intersection of the student row and the group columnMAKING REVIEW ASSIGNMENTSFrom your Home Page:• under <strong>Review</strong> Assignment click "new assignment"• complete the short form that pops up• add "prompts" to prompt students to respond to certain issues• click SaveStudents will now see the assignment and will be able to see all drafts published by those in their<strong>Peer</strong> <strong>Review</strong> group.<strong>Peer</strong> <strong>Review</strong> | 1
REVIEWING STUDENT COMMENTSFrom your Home Page:• click the next to the writing assignment to see drafts published by students• click the title of any draft to see the paper• select any name from the drop down to see their comments<strong>Peer</strong> <strong>Review</strong> | 2
HOME PAGEHOME PAGE FEATURESIn the upper left hand corner, you can see the name under which you are logged in. If you areworking in a lab or otherwise sharing a computer, this is an easy way confirm that the systemrecognizes you.Just beneath that is a button which you can click to see Help for that specific page. To theright of that is a quick line of instruction to get you going. You will find these two features onevery page of <strong>Peer</strong> <strong>Review</strong>.To create peer review groups or to see student responses to current assignments, clickin the upper left.The Home Page is also where you create, edit and manage Assignments and navigate to studentwork.WRITING ASSIGNMENTSTo create a Writing Assignment, click "create new assignment" under Writing Assignments.On the right hand side of your screen a form loads.Click in the grey title bar to name your assignment. This is the text students will see when theassignment appears on their home page.Length can be specified any way you like. But keep in mind the <strong>Peer</strong> <strong>Review</strong> system has anintegrated word counter, but does not include page breaks.<strong>Peer</strong> <strong>Review</strong> | 3
Select a deadline from the popup calendar.You can navigate to other months using the black arrows in the top corners. You can edit what isdue on that date in the text field to the right.The description field allows you to provide a complete description of the assignment. Whenstudents are writing they will be able to see this description on screen.NOTE: While you can paste in from a text editor such as Word this field does not support richtext formatting. If your description has formatting in Word, be sure to read over it again afterpasting to make sure all characters are appearing properly and things look appropriate in thedescription field.When you have completed the assignment, click . Some fields are mandatory including:title, deadline and description. If these are not changed from their default settings, the system willprompt you to complete them. After you have edited the fields, click "save" again.Once saved the assignment will appear as a Writing Assignment on the left of your home pagesorted by due date. It also now appears on your students' Home Pages. As new students join theclass, they will also see this assignment on their home pages.To edit an assignment, click on the title of the assignment as listed on your home page, and theWriting Assignment editor will open again. Edit and save.To delete an assignment, click the name of the assignment to open the panel, then click.REVIEW ASSIGNMENTSTo create a <strong>Review</strong> Assignment, start by clickingOn the left hand side of your screen a form loads. Clickto name your assignment.This is the text students will see when the assignment appears on their home page.Each <strong>Review</strong> Assignment is an assignment for students to review a specific writing assignment.Use theto select the specific Writing to which this<strong>Review</strong> applies. This is a mandatory field, so you'll need to create the Writing Assignment first.<strong>Peer</strong> <strong>Review</strong> | 4
Select a deadline from the popup calendar.You can navigate to other months using the black arrows in the top corners. You can edit what isdue on that date in the text field to the right.You are not required to use any prompts as students can comment without specific prompts. Butif you do want students to respond to specific questions or critera, you'll want to use prompts. Tocreate a new prompt click . Delete the default text of "insert prompt" and type the questionyou want students to consider. (e.g.; Can you identify the thesis statement?)When you have completed the assignment, click . The assignment now appears on theright, sorted by due date. It also now appears on your student's Home Pages.To edit a <strong>Review</strong> Assignment, click on the name of the assignment and it will open in the <strong>Review</strong>Assignment panel. Edit and save. To delete an assignment, click the name of the assignment toopen the panel, then click .SEEING STUDENT WORKTo see Student Writing in response to an assignment, click the adjacent to the WritingAssignment title to reveal a list of students who have published their papers. Click the name of apaper to review the writing and the comments made on that writing.<strong>Peer</strong> <strong>Review</strong> | 5
REVIEWING PUBLISHED DRAFTSMAKING COMMENTSOn the right you see a draft from a student.Above the draft you see a line that says "insert blank comment." To insert a comment, click thecolored square adjacent to that line and drag it into the wide lefthand margin. Drop it. Now youcan type your comment.Click in the text box (which says "insert blank comment" by default) and type your comment.You can begin by selecting and deleting that text and then typing your own. A scroll bar allowsyou to type comments longer than the allotted screen space.You can reposition a comment by grabbing the title bar and dragging it up or down to a newlocation. Each comment has a corresponding "page point" on the edge of the paper. Drag the noteto precisely place this pointer. You can see where others have made comments by their pagepoints and you can view their comments by clicking one of their points.To change the color of your comments and page points, select "change my color" from the"comments made by" drop down. It is a good idea to select a color and stick with it all semesterand to encourage students to selecte a different color. When you change your color, it changes thecolor of all your previouslymade comments systemwide, on every paper.Clicking "public" toggles the note into "private" mode. Private comments can only be seen byyourself (the author of the comment) and the author of the paper. When a student makes a privatecomment to another student you, as the instructor, are also able to see it. This feature allows youto "whisper" to the author of the paper without everyone else in the peer group seeing thecomment. It is particularly useful for grading information.As you make comments, they will be counted and the total displayed near the top of the page<strong>Peer</strong> <strong>Review</strong> | 6
You can delete a comment by clicking thein the upper right of the comment window.When you have finished making comments, click "save and publish." The author of the paper, aswell as all in the student's peer group can now see your comments.INSERTING LINKSClick "link" in the comment header to insert a link into your comment. "Link Text" defines thewords that appear blue and underlined in the comment. The "URL" is the web address to whichyou're linking (e.g.; http://www.mhhe.com). "Recent" is a list of the five most recent links youhave entered for anyone. "Favorites" is a list of your favorite links. To add a link to favorites,enter the URL in the URL box and then click "add to favorites."When you have completed this dialogue, click insert. The link will be inserted whereever yourcursor was when you first clicked "link." You can now edit the link text in the comment window.But to change the URL, you'll need to delete the link and start over. For you the link is editable,but for the author of the paper the link is clickable.HIGHLIGHTINGYou can highlight specific parts of the paper. Click on a comment to select it and you'll see thetitle bar change from grey to yellow. Then click and drag to underline the relevant passage. You'llsee a black line as you drag indicating where the bracket and highlighting will be placed. Releasethe mouse button to complete the line.Once drawn you can reposition the highlight but you can not change the size. To delete ahighlight, select it and press "delete" on your keyboard. If you draw your line vertically, you willhighlight everything to the right of the bracket, which makes it easier to highlight multilinepassages. Highlights are only visible when the associated note is selected. But brackets are visibleeven when other notes are selected.<strong>Peer</strong> <strong>Review</strong> | 7
EDITING SYMBOLSJust under the "comments made by:" line is this symbol:editing symbols.. Click this to open a palette ofYou can drag these onto the paper to indicate a common mistake. You can reposition these tiles,or select and hit "delete" on your keyboard to remove them.When the author of the paper reviews your comments the author will be able to click on theediting symbol to open a new page on McGrawHill's site to learn more about this particularissue. You can move this palette around by dragging the grey title bar. To close this pallette, clickthe in the upper right.RESPONDING TO PROMPTSIf you have provided prompts (as part of the review assignment) to guide the review you can usethese in responding. Click the arrow next to "insert blank comment" and any available promptswill drop down. Click a prompt to select it. Now drag from your colored square and yourcomment will be "seeded" with the text of the prompt. You can leave the prompt in the commentso that the reader will know the prompt to which you are responding.SEEING THE COMMENTS OF OTHERSTo see comments made by students on this same paper, click the drop down to the right ofand select the name. Alternatively, you can just clickany page point to see the associated comments.<strong>Peer</strong> <strong>Review</strong> | 8
ROSTERSTATUSThe Status Tab of the Roster provides you with a quick overview of each student's progress oneach assignment. The first time a student logsin to the <strong>Peer</strong> <strong>Review</strong> system, the student is addedto the list on the left hand side. Assignments are listed across the top as you create them.STATUS OF WRITING ASSIGNMENTSOn each Writing Assignment you can see how many drafts have been started by each student.Click on the number (e.g.; 2nd) to see the paper.STATUS OF REVIEW ASSIGNMENTSFor each <strong>Review</strong> Assignment you can see how many comments each student has made and howmany papers each student has commented on. For example, "3 on 1 " indicates a total of threecomments made on one paper.Aindicates no drafts yet started or no comments yet made.<strong>Peer</strong> <strong>Review</strong> | 9
GROUPSThe Groups Tab of the Roster is where you manage your peer review groups. The first time astudent logsin to the <strong>Peer</strong> <strong>Review</strong> system, the student's name will be added to the list on the lefthand side. Groups are listed across the top as you create them.HOW GROUPS WORKStudents can only review the papers of other students in their group. For example, in a group oftwo students, each will be able to review the papers of the other. And in a group of 30, eachstudent will be able to review the paper of all 29 other students.Your <strong>Review</strong> Assignments appear on each student's Home Page.Beneath the title, the student will see all papers published by other students in their peer reviewgroup. Students have no way to view the papers of students outside of their peer review groups.So for a student to be able to review the paper of a peer, those two students must be in the samegroup.CREATE A NEW GROUPTo create a new group clicksubmit.. In the popup dialogue name the group and click<strong>Peer</strong> <strong>Review</strong> | 10
To delete a group click thebelow the group name.To rename a group: delete the group, and create a new group with that name and then put thestudents into it.PUT STUDENTS IN GROUPSTo place a student in a particular group click the box that is adjacent to the student and beneaththe desired group.By default, all students are included in the first group.<strong>Peer</strong> <strong>Review</strong> | 11


