pH 510/ion 510 bench manual - BME Shared Labs
pH 510/ion 510 bench manual - BME Shared Labs
pH 510/ion 510 bench manual - BME Shared Labs

Create successful ePaper yourself
Turn your PDF publications into a flip-book with our unique Google optimized e-Paper software.
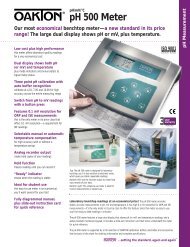
<strong>pH</strong>/mV/Ion/°C meterThe<strong>pH</strong> <strong>510</strong> and Ion <strong>510</strong> SeriesBenchtop MetersMIMR▲ ▼MODEHOLDCALMEASENTERON/OFF<strong>pH</strong> <strong>510</strong>—<strong>pH</strong>/mV/°C meterWD-35619-00, -02, -03, -05, -07,-08, -10, -12, -15, -17Ion <strong>510</strong>—<strong>pH</strong>/Ion/mV/°C meterWD-35619-20, -22, -23, -25, -27, -282/00 ©2000 00702-93
Table of contents1. Introduct<strong>ion</strong>............................................................................................................................................................................4-7• Keypad • Rear panels • Opt<strong>ion</strong>al Electrode Holder2. Starting up.................................................................................................................................................................................83. <strong>pH</strong> calibrat<strong>ion</strong> and measurement...................................................................................................................................9-13• Calibrat<strong>ion</strong> • Measurement (with <strong>manual</strong> or automatic temperature compensat<strong>ion</strong>) • Hold funct<strong>ion</strong>4. mV calibrat<strong>ion</strong> and measurement .................................................................................................................................14-15• Calibrat<strong>ion</strong> • Measurement • Hold funct<strong>ion</strong>5. Ion calibrat<strong>ion</strong> and measurement (Ion <strong>510</strong> only)......................................................................................................16-18• Calibrat<strong>ion</strong> • Measurement • Hold funct<strong>ion</strong>6. Memory Funct<strong>ion</strong>.....................................................................................................................................................................19• Memory input • Memory recall7. Temperature Calibrat<strong>ion</strong> .......................................................................................................................................................208. Setup mode ........................................................................................................................................................................21-23• Clear memory • Electrode data • Buffer select<strong>ion</strong> • Reset9. Electrode care...................................................................................................................................................................24-25• Electrode activat<strong>ion</strong> • Electrode maintenance • Storing <strong>pH</strong>/ORP electrode • Electrode cleaning10. Troubleshooting................................................................................................................................................................26-2711. Addit<strong>ion</strong>al informat<strong>ion</strong> .........................................................................................................................................................2812. Specificat<strong>ion</strong>s..........................................................................................................................................................................2913. Accessories .............................................................................................................................................................................3014. Warranty.....................................................................................................................................................................................3115. Return of items........................................................................................................................................................................31introduct<strong>ion</strong>starting up<strong>pH</strong> calibrat<strong>ion</strong>andmeasurementmV calibrat<strong>ion</strong>andmeasurementIon calibrat<strong>ion</strong>andmeasurementmemoryfunct<strong>ion</strong>temperaturecalibrat<strong>ion</strong>setupmodeelectrodecaretroubleshootingaddit<strong>ion</strong>alinformat<strong>ion</strong>specificat<strong>ion</strong>sQuick tipaccessorieslet the mini table of contents in the outermargins of this <strong>manual</strong> guide you instantlyto the right sect<strong>ion</strong>warrantyreturn ofitems3
1. Introduct<strong>ion</strong>MIMR▲ ▼MODE<strong>pH</strong>/mV/Ion°C meterHOLDCALMEAS ON/OFFENTERThank you for purchasing the OAKTON ® WD-35619-seriesBenchtop meters. These meters are microprocessorcontrolled, user-friendly and reliable. The large customizedLCD allows clear, easy operat<strong>ion</strong>. The display has modeannunciators for <strong>pH</strong>, temperature, mV and <strong>ion</strong> readings.KeypadSee Figure 1.introduct<strong>ion</strong>A large membrane keypad with touch feedback makes themeter easy to use. Names and symbols describe thefunct<strong>ion</strong> button controls.starting up<strong>pH</strong> calibrat<strong>ion</strong>andmeasurementmV calibrat<strong>ion</strong>andmeasurementIon calibrat<strong>ion</strong>andmeasurementmemoryfunct<strong>ion</strong>MIFigure 1MR▲ ▼HOLDMODECALMEASON/OFFENTERKeyON/OFFCAL/MEASDescript<strong>ion</strong>Powers the meter ON/OFF. When the meter isswitched on, it starts in the mode the meterwas last in when powered down.Switches between the measurement and calibrat<strong>ion</strong>modes of the meter. In SETUP mode,CAL/MEAS returns to the measurement mode.MODE <strong>pH</strong> <strong>510</strong>:Measurement: MODE switches between <strong>pH</strong>and mV.Calibrat<strong>ion</strong>: MODE switches from <strong>pH</strong> to temperaturein the <strong>pH</strong> calibrat<strong>ion</strong> mode (if MODE ispressed again, it will NOT switch back to <strong>pH</strong>).temperaturecalibrat<strong>ion</strong>setupmodeelectrodecaretroubleshootingaddit<strong>ion</strong>alinformat<strong>ion</strong>specificat<strong>ion</strong>saccessorieswarrantyreturn ofitemsMI/▲MR/▼HOLDENTERIon <strong>510</strong>:Measurement: MODE switches between <strong>pH</strong>,mV and <strong>ion</strong>.Calibrat<strong>ion</strong>: MODE switches from <strong>pH</strong> to temperaturein the <strong>pH</strong> calibrat<strong>ion</strong> mode (if MODE ispressed again, it will NOT switch back to <strong>pH</strong>).▲ Scrolls values in mV and temperaturecalibrat<strong>ion</strong> mode. Selects calibrat<strong>ion</strong> points inthe <strong>ion</strong> calibrat<strong>ion</strong> mode (Ion <strong>510</strong>). Scrolls to thenext program in the SETUP mode.MI inputs measurements into memory andscrolls through memory values.▲ Scrolls values in mV and temperaturecalibrat<strong>ion</strong> mode. Selects calibrat<strong>ion</strong> points inthe <strong>ion</strong> calibrat<strong>ion</strong> mode (Ion <strong>510</strong>). Scrolls to theprevious program in the SETUP mode.MR recalls measurements from memory andscrolls through memory values.Freezes a measurement on the display. Pressagain to get current readings.Confirms and enters the value selected forcalibrat<strong>ion</strong>. Enter also funct<strong>ion</strong>s in the memorymode.4
Rear PanelSee Figure 2.The OAKTON ® WD-35619-series meters provide acomplete set of input connect<strong>ion</strong>s for the variousaccessories commonly used. Listed in the table beloware details of the connect<strong>ion</strong>s that you can make.Connect<strong>ion</strong> Funct<strong>ion</strong>ATC Phono jack connect<strong>ion</strong> from the temperatureprobe for Automatic TemperatureCompensat<strong>ion</strong>.INPUT For connect<strong>ion</strong> to sensor electrodes withBNC type connectors. The meteraccepts any <strong>pH</strong>, ORP or ISE with BNCconnector. Always make sure that theconnector is clean and dry.REF For connect<strong>ion</strong> to pin type referenceelectrode normally used with half cell(mono) type <strong>pH</strong> electrodes or ISEs.REC For connect<strong>ion</strong> to strip chart recorders.Use subminiature plug with positive tip.GND For connect<strong>ion</strong> to the earth ground jack(standard tip connectors).DCFor connect<strong>ion</strong> of the AC adapter powersupply (included).introduct<strong>ion</strong>starting up<strong>pH</strong> calibrat<strong>ion</strong>andmeasurementmV calibrat<strong>ion</strong>andmeasurementIon calibrat<strong>ion</strong>andmeasurementmemoryfunct<strong>ion</strong>temperaturecalibrat<strong>ion</strong>setupmodeATC INPUT REF REC GND DCelectrodecareFigure 2troubleshootingaddit<strong>ion</strong>alinformat<strong>ion</strong>specificat<strong>ion</strong>saccessorieswarrantyreturn ofitems5
Shipping posit<strong>ion</strong>Bottom of meterOpt<strong>ion</strong>al Electrode HolderIf you have purchased a <strong>bench</strong>top meterwith the opt<strong>ion</strong>al electrode holder, theelectrode holder is included in the samebox as the meter.introduct<strong>ion</strong>starting up<strong>pH</strong> calibrat<strong>ion</strong>andmeasurementmV calibrat<strong>ion</strong>andmeasurementIon calibrat<strong>ion</strong>andmeasurementmemoryfunct<strong>ion</strong>temperaturecalibrat<strong>ion</strong>setupmodeFigure 3Figure 4Bottom of meterTo attach the electrode holder to the meter:1. The electrode holder base attached tothe bottom of the meter comes in theshipping posit<strong>ion</strong>.— See Figure 3.2. Use a Phillips screwdriver to remove thescrew holding the electrode holder inshipping posit<strong>ion</strong>.— See Figure 3.3. Slide the electrode base away from themeter until the second screw slot linesup with the original screw hole. Use thescrew removed earlier to secureelectrode holder base into posit<strong>ion</strong>.— See Figure 4.4. The electrode holder arm is reversible. Ifdesired, remove screw holding electrodeholder base and slide base out ofbrackets. Slide base into brackets onopposite side and replace screw.— See Figure 5.electrodecaretroubleshootingBottom of meteraddit<strong>ion</strong>alinformat<strong>ion</strong>specificat<strong>ion</strong>saccessorieswarrantyreturn ofitemsFigure 56
<strong>pH</strong>/mV/Ion/°C meter5. To install the electrode arm, turn meterback to the upright posit<strong>ion</strong>.— See Figure 6.6. Line up the hole on the base of theelectrode holder arm with the peg onthe electrode holder base. Slide the holesecurely onto the electrode holder base.— See Figure 7.The electrode arm is now ready to swinginto desired posit<strong>ion</strong>.— See Figure 8.introduct<strong>ion</strong>starting upFigure 6<strong>pH</strong> calibrat<strong>ion</strong>andmeasurementmV calibrat<strong>ion</strong>andmeasurementIon calibrat<strong>ion</strong>andmeasurementmemoryfunct<strong>ion</strong>temperaturecalibrat<strong>ion</strong>setupmodeFigure 7electrodecaretroubleshootingThe electrode arm is nowready to swing intodesired posit<strong>ion</strong>.addit<strong>ion</strong>alinformat<strong>ion</strong>specificat<strong>ion</strong>saccessoriesMIMR▲ ▼MODEHOLDCALMEASENTERON/OFFwarrantyFigure 8return ofitems7
2. Starting UpAttent<strong>ion</strong>!Do not get water on the BNC connectorduring operat<strong>ion</strong>. Avoid touching theconnector with soiled or wet hands.introduct<strong>ion</strong>starting up<strong>pH</strong> calibrat<strong>ion</strong>andmeasurementmV calibrat<strong>ion</strong>andmeasurementIon calibrat<strong>ion</strong>andmeasurementmemoryfunct<strong>ion</strong>temperaturecalibrat<strong>ion</strong>setupmodeelectrodecaretroubleshootingBack panel connect<strong>ion</strong>sSee Figure 9 .1. Connect the AC adapter from an AC power source tothe power jack (DC). Slide in the adapter jack of the A/Cadapter into the meter until it is firmly seated. Voltage isset at 9V and the current is at 500 mA, (center positiveconnector).2. Connect a sensor electrode to the BNC inputconnector (INPUT). The meter can accept any <strong>pH</strong>, ORP,or Ion Selective Electrode with a BNC connector. Makesure the connector is clean and dry. Slide the electrodeconnector of the electrode over the BNC connectorsocket. Make sure the slots of the connector are in linewith the posts of the socket. Rotate and push the connectorclockwise until it locks. For separate referenceelectrodes, push electrode pin into jack marked “REF”.3. Connect a temperature probe to the input jackmarked ATC. Insert the probe into the jack markedwith ATC on the rear of the instrument panel.4. Connect your chart recorder to the jack marked RECYou can connect chart recorders or other data collect<strong>ion</strong>devices. Plug in the sub miniature (2.5 mm) connectorfrom the chart recorder into the jack marked with REC.Output signal is a mV signal equal to the measuredelectrode output. The tip of the connector is positive,the sleeve is negativeaddit<strong>ion</strong>alinformat<strong>ion</strong>specificat<strong>ion</strong>saccessoriesATC INPUT REF REC GND DCwarrantyfortemperatureprobefor sensorelectrodefor separatereferenceelectrodefor chartrecorderforgroundforAC adapterreturn ofitemsFigure 98
3. <strong>pH</strong> calibrat<strong>ion</strong> and measurementFor best accuracy calibrate at least a two points usingfresh <strong>pH</strong> buffers. Select calibrat<strong>ion</strong> buffers with calibrat<strong>ion</strong>values closest to the measurement range you expectto work in. A three point calibrat<strong>ion</strong> (USA buffers: 4.01,7.01, and 10.01 or NIST buffers: 4.01, 6.86 and 9.18)ensures maximum accuracy throughout the measurementrange.For quick checks with less accuracy, perform a one pointcalibrat<strong>ion</strong>. Select the buffer value closest to themeasurement range you will work in.introduct<strong>ion</strong>If you choose to calibrate to only 1 or 2 <strong>pH</strong> values, theolder calibrat<strong>ion</strong> values you do not calibrate to will remainstored. These old stored calibrat<strong>ion</strong> values may causeaccuracy loss when your readings are close to the oldstored calibrat<strong>ion</strong> values. To clear old calibrat<strong>ion</strong> data,reset the meter as shown in Sect<strong>ion</strong> 8, Program 4.0 onpage 23.For ATC measurements, attach the temperature probeto the meter. The ATC mode annunciator shows on thedisplay. —See Figure 10. Insert the probe into the solut<strong>ion</strong>to be measured so that the sample temperature can berecorded and <strong>pH</strong> readings automatically temperaturecompensate. If <strong>manual</strong> temperature compensat<strong>ion</strong> ispreferred, do not plug a temperature probe into themeter.Figure 10MEAS<strong>pH</strong>CATCstarting up<strong>pH</strong> calibrat<strong>ion</strong>andmeasurementmV calibrat<strong>ion</strong>andmeasurementIon calibrat<strong>ion</strong>andmeasurementmemoryfunct<strong>ion</strong>temperaturecalibrat<strong>ion</strong>DO NOT REUSE SOLUTIONS AFTER CALIBRATION.Contaminants in the solut<strong>ion</strong> can affect the calibrat<strong>ion</strong>,and eventually the accuracy of the measurements.All new <strong>pH</strong> calibrat<strong>ion</strong>s will over-ride existing stored <strong>pH</strong>calibrat<strong>ion</strong> data at these calibrat<strong>ion</strong> points. The meterretains stored <strong>pH</strong> calibrat<strong>ion</strong>s even when the meter isturned OFF.setupmodeelectrodecaretroubleshootingaddit<strong>ion</strong>alinformat<strong>ion</strong>specificat<strong>ion</strong>saccessorieswarrantyreturn ofitems9
<strong>pH</strong> calibrat<strong>ion</strong>MEAS<strong>pH</strong>CATCNOTE: We recommend that you perform at least a2-point calibrat<strong>ion</strong> using buffers that bracket (one aboveand one below) the expected sample range. You canperform a 1-point calibrat<strong>ion</strong>, but make sure that thebuffer value is close to the sample value you are measuring.Select <strong>pH</strong> 4, 7, or 10 buffers in pouches or bottlesfrom the OAKTON standard buffer solut<strong>ion</strong>s.introduct<strong>ion</strong>starting up<strong>pH</strong> calibrat<strong>ion</strong>andmeasurementmV calibrat<strong>ion</strong>andmeasurementIon calibrat<strong>ion</strong>andmeasurementmemoryfunct<strong>ion</strong>temperaturecalibrat<strong>ion</strong>setupmodeelectrodecaretroubleshootingaddit<strong>ion</strong>alinformat<strong>ion</strong>specificat<strong>ion</strong>saccessorieswarrantyFigure 11Figure 12READYCALCAL<strong>pH</strong><strong>pH</strong><strong>pH</strong><strong>pH</strong>1. Press the ON/OFF key. All the LCD segments displayfor a few seconds. The LCD switches to the last modethe meter was turned OFF in when powered downfrom the key pad. —See Figure 11The customized LCD display will indicate the following:Display RemarksMEAS Measurement mode is selected.<strong>pH</strong> Unit of measurement°C Unit of temperature measurementATC Automatic Temperature Compensat<strong>ion</strong>(if temperature probe or ”All-in-One“ probeis connected)<strong>pH</strong> Calibrat<strong>ion</strong>1. Make sure the meter is ON and if necessary, press theMODE key to select <strong>pH</strong> mode. The <strong>pH</strong> indicatorappears in the upper right hand corner of the display.—See Figure 11.2. Rinse the electrode in de<strong>ion</strong>ized water or rinse solut<strong>ion</strong>.If using the ATC funct<strong>ion</strong> with a separate temperatureprobe, rinse the temperature probe as well. DO NOTWIPE THE <strong>pH</strong> OR TEMPERATURE PROBES DRY!Wiping the probes causes static, and will create calibrat<strong>ion</strong>and measurement instability.3. Select the <strong>pH</strong> buffer and pour some into a CLEANcontainer.4. Dip the probe into the calibrat<strong>ion</strong> buffer. The end of theprobe must be completely immersed into the sample.Stir the probe gently to create a homogeneous sample.5. Press CAL/MEAS to enter the <strong>pH</strong> calibrat<strong>ion</strong> mode.The CAL indicator appears. The primary display willshow the measured reading while the smallersecondary display will indicate the <strong>pH</strong> standard buffersolut<strong>ion</strong>. —See Figure 12.The meter automatically recognizes the buffers in the setyou have selected in the SETUP mode (see page 23 forinstruct<strong>ion</strong>s on how to select buffer sets): USA (4.01,7.00 or 10.01) or NIST (4.01, 6.86, or 9.18) buffers.return ofitemsFigure 137. Wait for the measured <strong>pH</strong> value to stabilize (when theREADY indicator displays in the left hand corner)—See Figure 13.10
8. Press the ENTER button. The primary display flashesthe calibrat<strong>ion</strong> value. The calibrat<strong>ion</strong> point is nowstored in the meter. —See Figure 14.• If you are performing a one-point calibrat<strong>ion</strong>, pressCAL/MEAS to return to the measurement modeand start taking <strong>pH</strong> readings.READYCAL<strong>pH</strong><strong>pH</strong>• If you are performing a multi-point calibrat<strong>ion</strong> go tostep 9.9. Rinse the probe with de-<strong>ion</strong>ized water or a rinsesolut<strong>ion</strong>, and place it in the next <strong>pH</strong> buffer. The meterautomatically switches to the next buffer solut<strong>ion</strong>selected in the secondary display.Figure 14introduct<strong>ion</strong>10. Wait for the measured <strong>pH</strong> value to stabilize (when theREADY indicator displays in the left hand corner)11. Press the ENTER button. The primary display flashesthe calibrat<strong>ion</strong> value. The calibrat<strong>ion</strong> point is nowstored in the meter.• If you are performing a two-point calibrat<strong>ion</strong>, pressCAL/MEAS to return to the measurement modeand start taking <strong>pH</strong> readings.• If you are performing a three-point calibrat<strong>ion</strong> goto step 12.12. Rinse the probe with de-<strong>ion</strong>ized water or a rinsesolut<strong>ion</strong>, and place it in the next <strong>pH</strong> buffer.starting up<strong>pH</strong> calibrat<strong>ion</strong>andmeasurementmV calibrat<strong>ion</strong>andmeasurementIon calibrat<strong>ion</strong>andmeasurementmemoryfunct<strong>ion</strong>13. Wait for the measured <strong>pH</strong> value to stabilize (when theREADY indicator displays in the left hand corner).temperaturecalibrat<strong>ion</strong>14. Press the ENTER button. The primary display flashesthe calibrat<strong>ion</strong> value. The calibrat<strong>ion</strong> point is nowstored in the meter. The meter automatically returnsto the <strong>pH</strong> measurement mode after a three-pointcalibrat<strong>ion</strong> is performed.NOTES:To exit from <strong>pH</strong> calibrat<strong>ion</strong> mode without confirmingcalibrat<strong>ion</strong>, DO NOT press ENTER in step 8. PressCAL/MEAS instead.If the selected buffer value is not within the acceptedwindow (see below) from the measured <strong>pH</strong> value: theelectrode and buffer icon blink and ERR annunciatorappears next to the secondary display. Press CAL/MEASto exit the ERR condit<strong>ion</strong>.—See Figure 15.Window of Accepted Values:USA 4.01 ±1.007.00 ±1.5010.01 ±1.00Figure 15ERRCAL<strong>pH</strong><strong>pH</strong>setupmodeelectrodecaretroubleshootingaddit<strong>ion</strong>alinformat<strong>ion</strong>specificat<strong>ion</strong>saccessorieswarrantyNIST 4.01 ±1.006.86 ±1.259.18 ±1.00return ofitems11
<strong>pH</strong> Measurementintroduct<strong>ion</strong>starting up<strong>pH</strong> calibrat<strong>ion</strong>andmeasurementmV calibrat<strong>ion</strong>andmeasurementIon calibrat<strong>ion</strong>andmeasurementFigure 16MEASCAL<strong>pH</strong>CATCCThis meter is capable of taking measurements withautomatic or <strong>manual</strong> temperature compensat<strong>ion</strong>. Automatictemperature compensat<strong>ion</strong> only occurs when a temperaturesensor is plugged into the meter. If there is no temperaturesensor plugged into the meter, the default setting is automatically25°C (if the meter has never been <strong>manual</strong>ly set fortemperature) or the last <strong>manual</strong>ly set value will display. Youcan <strong>manual</strong>ly set the temperature to match your workingcondit<strong>ion</strong>s using a separate thermometer.Automatic Temperature Compensat<strong>ion</strong>For automatic temperature compensat<strong>ion</strong> (ATC) simplyplug the temperature probe into the meter (see page 8 fordirect<strong>ion</strong>s). The ATC indicator will light on the LCD.—See Figure 16..NOTE: If you are using a temperature probe, the probemust be submersed in the liquid you are measuring.Manual Temperature Compensat<strong>ion</strong>IMPORTANT: For <strong>manual</strong> compensat<strong>ion</strong>, you mustdisconnect the temperature probe.memoryfunct<strong>ion</strong>Figure 171. Switch the meter on. Press the MODE key to select <strong>pH</strong>mode.temperaturecalibrat<strong>ion</strong>setupmodeelectrodecaretroubleshootingaddit<strong>ion</strong>alinformat<strong>ion</strong>Figure 18MEASCALC<strong>pH</strong>2. Press the CAL/MEAS key to enter <strong>pH</strong> calibrat<strong>ion</strong> mode.The CAL indicator will appear above the primary display.3. While the <strong>pH</strong> calibrat<strong>ion</strong> mode, press the MODE key toenter temperature calibrat<strong>ion</strong> mode. The primary displayshows the current temperature setting and thesecondary display shows the default value 25°C (if themeter has never been <strong>manual</strong>ly set for temperature) orthe last <strong>manual</strong>ly set value if the meter has previouslyset for <strong>manual</strong> temperature compensat<strong>ion</strong>. If you havenot set the current temperature setting the primarydisplay will also show the default value of 25°C.—See Figure 17.4. Check the temperature of your sample using an accuratethermometer.specificat<strong>ion</strong>sC5. Press the ▼ or ▲ keys to offset the temperature to themeasured value from step 4. —See Figure 18.accessoriesFigure 196. Press ENTER to confirm the selected temperature andto return to the <strong>pH</strong> measurement mode.warrantyThe meter will now compensate <strong>pH</strong> reading for the<strong>manual</strong>ly set temperature. —See Figure 19.return ofitemsNOTE: To exit this program without confirming the<strong>manual</strong> temperature compensat<strong>ion</strong> value, DO NOT pressENTER in step 6. Press CAL/MEAS instead.12
Taking <strong>pH</strong> MeasurementsBe sure to remove the electrode soaker bottle or protectiverubber cap on the electrode before measurement.To take readings:1. Rinse the probe with de<strong>ion</strong>ized or distilled water beforeuse to remove any impurities adhering to the probebody. If the <strong>pH</strong> electrode had dehydrated, soak it for30 minutes in OAKTON electrode storage solut<strong>ion</strong> or a2M-4M KCl solut<strong>ion</strong>.MEAS<strong>pH</strong>2. Press ON to switch on meter. The MEAS annunciatorappears on the top center of the LCD. The ATC indicatorappears in the lower right hand corner to indicateAutomatic Temperature Compensat<strong>ion</strong> if temperatureprobe is plugged. (For Manual TemperatureCompensat<strong>ion</strong> see page 12)—See Figure 20.3. Dip the probe into the sample. When dipping the probeinto the sample, the sensor or the glass bulb of theelectrode must be completely immersed into thesample. Stir the probe gently in the sample to create ahomogenous sample.4. Allow time for the reading to stabilize. When thereadings stabilize, a READY indicator displays. TheREADY mode shows the readings are stable within arange of ±0.01 <strong>pH</strong>. When this occurs, READY appearson the top left corner of your display.—See Figure 21.Figure 20READYFigure 21MEASCATC<strong>pH</strong>CATCintroduct<strong>ion</strong>starting up<strong>pH</strong> calibrat<strong>ion</strong>andmeasurementmV calibrat<strong>ion</strong>andmeasurementIon calibrat<strong>ion</strong>andmeasurementmemoryfunct<strong>ion</strong>temperaturecalibrat<strong>ion</strong>5. To toggle between <strong>pH</strong> and mV in the <strong>pH</strong> <strong>510</strong>, or totoggle between <strong>pH</strong>, mV and <strong>ion</strong> in the Ion <strong>510</strong>, pressthe MODE key.setupmodeelectrodecareHOLD Funct<strong>ion</strong>This feature lets you freeze the value of <strong>pH</strong> and temperature,mV and temperature or Ion and mV (Ion <strong>510</strong> only).HOLD can be used anytime when in MEAS mode.1. To hold a measurement, Press the HOLD key while inmeasurement mode. ”HOLD“ will appear on thedisplay. —See Figure 22.HOLDFigure 22<strong>pH</strong>CATCtroubleshootingaddit<strong>ion</strong>alinformat<strong>ion</strong>specificat<strong>ion</strong>s2. To release the held value, press HOLD again. Continueto take measurements.accessorieswarrantyreturn ofitems13
4. mV calibrat<strong>ion</strong> and measurementintroduct<strong>ion</strong>starting upFigure 23MEASCALmVCATCmVmV calibrat<strong>ion</strong>The customized LCD display will indicate the following:Display RemarksMEAS Measurement mode is selected.R.mV Unit of measurement°C Unit of temperature measurementATC Automatic Temperature Compensat<strong>ion</strong>(if temperature probe or ”All-in-One“ probeis connected)mV Calibrat<strong>ion</strong><strong>pH</strong> calibrat<strong>ion</strong>andmeasurementmV calibrat<strong>ion</strong>andmeasurementFigure 241. Make sure the meter is ON and if necessary, press theMODE key to select mV mode. The mV indicatorappears in the upper right hand corner of the display.—See Figure 23.Ion calibrat<strong>ion</strong>andmeasurementmemoryfunct<strong>ion</strong>temperaturecalibrat<strong>ion</strong>setupmodeelectrodecaretroubleshootingFigure 25MEASCALmVR.mV2. Press the CAL/MEAS key The CAL indicator appearsabove the primary display. The primary display showsthe relative mV reading and the secondary displayshows the absolute mV value. —See Figure 24.NOTE: If you have never calibrated relative mV or if themeter has been reset, the value shown in the primarydisplay is the same as the absolute mV value.3. Press the ▲ or ▼ keys to enter the relative mV valuethat matches your desired reading. —See Figure 25.4. Press the ENTER key to confirm the reading and toreturn to the measurement mode. The primary displaynow shows the relative mV reading. The R.mV indicatorappears in the upper hand corner. The meter automaticallyreturns to the mV measurement mode the ENTERkey is pressed. —See Figure 26.addit<strong>ion</strong>alinformat<strong>ion</strong>specificat<strong>ion</strong>sFigure 26CATCNOTE: New mV calibrat<strong>ion</strong>s will over-ride existing thestored mV calibrat<strong>ion</strong> data. The meter retains stored mVcalibrat<strong>ion</strong>s even when the meter is turned OFF.accessorieswarrantyreturn ofitems14
mV Measurement1. Make sure you are in the mV measurement mode.Press the MODE key to choose the mV mode.2. Dip the electrode into the sample. The sensor or glassbulb of the electrode must be completely immersedinto the sample. Stir the electrode gently to create ahomogeneous sample.READYMEASR.mV4. Allow time for the reading to stabilize. The primarydisplay will show the mV reading, and the secondarydisplay will show the current temperature reading. Whenthe readings stabilize, a READY indicator displays. TheREADY mode shows the readings are stable within±0.1 mV. When this occurs, READY appears on the topleft corner of your display.—See Figure 27.5. To toggle between <strong>pH</strong> and mV in the <strong>pH</strong> <strong>510</strong>, or totoggle between <strong>pH</strong>, mV and <strong>ion</strong> in the Ion <strong>510</strong>, pressthe MODE key. —See Figure 28.Figure 27MEASCATCppmintroduct<strong>ion</strong>starting up<strong>pH</strong> calibrat<strong>ion</strong>andmeasurementmV calibrat<strong>ion</strong>andmeasurementHOLD Funct<strong>ion</strong>Figure 28Ion calibrat<strong>ion</strong>andmeasurementThis feature lets you freeze the value of <strong>pH</strong> and temperature,mV and temperature or Ion and mV (Ion <strong>510</strong> only).HOLD can be used anytime when in MEAS mode.1. To hold a measurement, Press the HOLD key while inmeasurement mode. ”HOLD“ will appear on thedisplay. —See Figures 29 and 30.2. To release the held value, press HOLD again. Continueto take measurements.HOLDR.mVmemoryfunct<strong>ion</strong>temperaturecalibrat<strong>ion</strong>setupmodeelectrodecareCATCtroubleshootingFigure 29addit<strong>ion</strong>alinformat<strong>ion</strong>specificat<strong>ion</strong>sHOLDppmaccessoriesFigure 30warrantyreturn ofitems15
5. Ion calibrat<strong>ion</strong> and measurement (Ion <strong>510</strong> only)introduct<strong>ion</strong>Ion calibrat<strong>ion</strong>This instrument is capable of up to three-point <strong>ion</strong> calibrat<strong>ion</strong>with a minimum of two-point calibrat<strong>ion</strong>. Calibrat<strong>ion</strong>values are 0.10, 1.0, 10.0 or 100.0. All calibrat<strong>ion</strong> shouldbe one decade apart. For example you may perform threepointcalibrat<strong>ion</strong> to 0.10, 1.0 and 10.0, or two-point calibrat<strong>ion</strong>to 10.0 and 100.0. Do NOT perform two-pointcalibrat<strong>ion</strong> to 1.0 and 100.0 the meter will display ”Er4“.For best accuracy calibrate your meter to points withsimilar concentrat<strong>ion</strong>s to the solut<strong>ion</strong>s you want to test.starting up<strong>pH</strong> calibrat<strong>ion</strong>andmeasurementION Calibrat<strong>ion</strong>The customized LCD display will indicate the following:Display RemarksMEAS Measurement mode is selected.ppm Unit of measurementmV calibrat<strong>ion</strong>andmeasurementFigure 311. Connect an Ion Selective Electrode (ISE) to the BNCinput connector on the back of the meter (See page 8)and turn the meter ON.Ion calibrat<strong>ion</strong>andmeasurementmemoryfunct<strong>ion</strong>temperaturecalibrat<strong>ion</strong>setupmodeelectrodecaretroubleshootingFigure 32READYCALCALppmppm2. Press MODE to select <strong>ion</strong> measurement mode. If themeter has not been previously calibrated in the Ionmode, the display will read ”- - -“ in the primary display—See Figure 31.3. Dip the electrode into the first calibrat<strong>ion</strong> standard.Make sure to start with the calibrat<strong>ion</strong> standard that hasthe lowest concentrat<strong>ion</strong> and move up to the standardsthat have higher concentrat<strong>ion</strong>s.4. Press CAL to enter the <strong>ion</strong> calibrat<strong>ion</strong> mode. The CALindicator appears above the primary display and primarydisplay reads ”0.10“ —See Figure 32.5. The first calibrat<strong>ion</strong> point of 0.10 ppm appears on thedisplay. If you do NOT wish to calibrate to this point,press ▲ (up arrow) to skip and continue to the nextcalibrat<strong>ion</strong> point of 1.0 ppm or 10.0 ppm.addit<strong>ion</strong>alinformat<strong>ion</strong>specificat<strong>ion</strong>saccessorieswarrantyFigure 33READYCALppm6. If you DO wish to calibrate to 0.10 ppm, make sure theelectrode is in the 0.10 calibrat<strong>ion</strong> standard. The meterwill display the mV output of your electrode in the standardsolut<strong>ion</strong> in the lower display. Allow the mV readingto stabilize. When the reading stabilizes the READYindicator will appear on the display. —See Figure 33.Stabilizat<strong>ion</strong> may take a few minutes depending onelectrode and standard concentrat<strong>ion</strong>. Electrode responsein low concentrat<strong>ion</strong>s is much slower than response inhigh concentrat<strong>ion</strong>s.16return ofitemsFigure 347. Press ENTER to confirm your calibrat<strong>ion</strong>. The primarydisplay will flash for a few seconds —See Figure 34. Themeter will move on to the next calibrat<strong>ion</strong> standard of1.0 ppm.
8. Rinse off the electrode with de<strong>ion</strong>ized water beforeplacing it in the next calibrat<strong>ion</strong> standard.9. Allow meter to stabilize in the next calibrat<strong>ion</strong> standard.Wait for the READY indicator to appear before youpress the ENTER key to confirm the second calibrat<strong>ion</strong>point. The primary display flashes for a few secondsthen moves to the next calibrat<strong>ion</strong> point of 10.0 ppm.If you are performing a 2-point <strong>ion</strong> calibrat<strong>ion</strong>, pressCAL/MEAS. ”SLO“ appears in the primary display with themV indicator, the number in the secondary display is theactual electrode slope in mV. —See Figure 35. After a fewseconds the meter reverts to the measurement mode. Youare now ready to take <strong>ion</strong> measurements. If the slope isoutside acceptable limits or if incorrect standards have beenused the primary display will show Er3. —See Figure 36.If you are performing a 3-point <strong>ion</strong> calibrat<strong>ion</strong>, rinse off theelectrode with de<strong>ion</strong>ized water and place it in the nextcalibrat<strong>ion</strong> standard.10. Allow meter to stabilize in the next calibrat<strong>ion</strong> standard.Wait for the READY indicator to appear before youpress the ENTER key to confirm the third calibrat<strong>ion</strong>point. The primary display flashes for a few secondsthen ”SLO“ appears in the primary display with the mVindicator, the number in the secondary display is theaverage electrode slope in mV. —See Figure 35. After afew seconds the meter reverts to the measurementmode. You are now ready to take <strong>ion</strong> measurement.NOTES: You may compare the average electrode slopevalue with the expected slope value for your electrodefrom your electrode <strong>manual</strong> to verify electrode operat<strong>ion</strong>.If you want to leave the calibrat<strong>ion</strong> mode prior to confirmingtwo calibrat<strong>ion</strong> points, press the CAL/MEAS key to exit thecalibrat<strong>ion</strong> mode. The meter will revert to back to the earliercalibrat<strong>ion</strong> curve. If you have calibrated to two points pressingCAL/MEAS will confirm the new calibrat<strong>ion</strong>You must calibrate to at least two points in order forcalibrat<strong>ion</strong> to take effect. If you only confirm the onecalibrat<strong>ion</strong> point, the meter will display ”Er2“ when youexit the calibrat<strong>ion</strong> mode, and the meter will revert back tothe earlier calibrat<strong>ion</strong> curve.—See Figure 37.Figure 35Figure 36READYCALERRCALERRmVintroduct<strong>ion</strong>starting up<strong>pH</strong> calibrat<strong>ion</strong>andmeasurementmV calibrat<strong>ion</strong>andmeasurementIon calibrat<strong>ion</strong>andmeasurementmemoryfunct<strong>ion</strong>temperaturecalibrat<strong>ion</strong>setupmodeelectrodecaretroubleshootingaddit<strong>ion</strong>alinformat<strong>ion</strong>specificat<strong>ion</strong>sNew <strong>ion</strong> calibrat<strong>ion</strong>s will over-ride existing the stored <strong>ion</strong>calibrat<strong>ion</strong> data. The meter retains stored <strong>ion</strong> calibrat<strong>ion</strong>seven when the meter is turned OFF.Ion calibrat<strong>ion</strong>s will be erased if the power cord isunplugged or power is cut off to the AC adapter even if themeter is turned off.Figure 37accessorieswarrantyreturn ofitems17
MEASIon measurement1. Turn meter ON. Press MODE to select <strong>ion</strong>measurement mode. —See Figure 38.ppm2. Prepare samples as necessary (i.e. add Ionic StrengthAdjuster). Sample preparat<strong>ion</strong> varies depending on <strong>ion</strong>type—see your electrode <strong>manual</strong> for details on thespecific electrode that you are using.introduct<strong>ion</strong>Figure 383. Dip electrode into the sample. The sensor or glass bulbof the electrode must be completely immersed into thesample.starting up<strong>pH</strong> calibrat<strong>ion</strong>andmeasurementmV calibrat<strong>ion</strong>andmeasurementIon calibrat<strong>ion</strong>andmeasurementmemoryfunct<strong>ion</strong>READYFigure 39MEASppm4. Allow time for the reading to stabilize. When the readingsstabilize, a READY indicator displays. The READYindicator shows when the readings are stable. Whenthis occurs, READY appears on the top left corner ofyour display. The reading holds until the measured valuefluctuat<strong>ion</strong> exceeds the set limits. —See Figure 39.NOTE: The lower display in the <strong>ion</strong> measurement modeshows mV that correlates to the electrode output. Changein mV will typically be 59.7 mV for monovalent <strong>ion</strong>s (1 + or1 - charge) and 29.8 mV for divalent <strong>ion</strong>s (2 + or 2 - charge).HOLD Funct<strong>ion</strong>temperaturecalibrat<strong>ion</strong>setupmodeelectrodecaretroubleshootingThis feature lets you freeze the value of <strong>pH</strong> and temperature,mV and temperature or Ion and mV (Ion <strong>510</strong> only).HOLD can be used anytime when in MEAS mode.1. To hold a measurement, Press the HOLD key while inmeasurement mode. ”HOLD“ will appear on thedisplay—See Figure 40.2. To release the held value, press HOLD again. Continueto take measurements.addit<strong>ion</strong>alinformat<strong>ion</strong>HOLDppmspecificat<strong>ion</strong>sFigure 40accessorieswarrantyreturn ofitems18
6. Memory funct<strong>ion</strong>sMemory InputYour meter can store up to 50 sets of data in anycombinat<strong>ion</strong> of values:<strong>pH</strong> <strong>510</strong> meter:• <strong>pH</strong> and temperature• mV (or relative mV) and temperature.Ion <strong>510</strong> meter:• <strong>pH</strong> and temperature• mV (or relative mV) and temperature.• <strong>ion</strong> and mVFor example, you can store 32 <strong>pH</strong> and 18 mV values for the<strong>pH</strong> <strong>510</strong> or 15 <strong>ion</strong>, 12 mV and 23 <strong>pH</strong> values for the Ion <strong>510</strong>.MEMMEMintroduct<strong>ion</strong>starting upTo store a readings:1. During any measurement or HOLD funct<strong>ion</strong>, press theMI key to input any data into the memory2. MEM, “StO” and memory number will flash. Themeter then returns to measurement mode.—See Figure 41.NOTE: If the memory is full, the first value stored will beerased to create space for the new value.Figure 41<strong>pH</strong> calibrat<strong>ion</strong>andmeasurementmV calibrat<strong>ion</strong>andmeasurementIon calibrat<strong>ion</strong>andmeasurementMemory RecallMEMmemoryfunct<strong>ion</strong>This funct<strong>ion</strong> recalls the previous readings stored in thememory. You can only access MR from the measurementmode. Memory recall is in “Last In First Out” order.temperaturecalibrat<strong>ion</strong>To recall readings:1. Press the MR key once to retrieve the last readingstored. The memory locat<strong>ion</strong> screen—MEM, “LOC”and the memory number—will flash on the display. ——See Figure 42.Figure 42MEMsetupmodeelectrodecare2. Press the ENTER key to recall the reading storedunder that memory number. —See Figure 43.<strong>pH</strong>troubleshooting3. Press the ENTER key again to return to the memorylocat<strong>ion</strong> screen. The display automatically moves tothe next memory locat<strong>ion</strong> screen. —See Figure 44.4. If necessary, press the ▲ key to select the nextmemory locat<strong>ion</strong> screen; press the ▼ key to selectthe previous memory locat<strong>ion</strong> screen.5. Repeat steps 2-4 to review addit<strong>ion</strong>al stored data sets.Figure 43MEMCaddit<strong>ion</strong>alinformat<strong>ion</strong>specificat<strong>ion</strong>saccessories6. To exit Memory Recall, press the MEAS key to returnto the measurement mode.warrantyNOTES: Readings stored in memory are retained even ifthe unit is turned off. To erase all readings stored inmemory, see program P1.0 on page 21.Figure 44return ofitems19
7. Temperature calibrat<strong>ion</strong>introduct<strong>ion</strong>starting up<strong>pH</strong> calibrat<strong>ion</strong>andmeasurementmV calibrat<strong>ion</strong>andmeasurementIon calibrat<strong>ion</strong>andmeasurementmemoryfunct<strong>ion</strong>temperaturecalibrat<strong>ion</strong>Figure 45Figure 46MEASCAL<strong>pH</strong>CATC<strong>pH</strong><strong>pH</strong>Temperature Calibrat<strong>ion</strong>In this calibrat<strong>ion</strong> procedure, the ATC probe is attachedto the meter and the ATC annunciator displays onthe right hand side of the LCD.—See Figure 45.1. Dip the temperature probe into a solut<strong>ion</strong> of knowntemperature, such as a temperature bath for a fewminutes until the temperature probe stabilizes.2. To perform temperature calibrat<strong>ion</strong>, you must be in the<strong>pH</strong> measurement mode.3. Press MODE to switch to the <strong>pH</strong> measurement mode ifyou are in the mV or <strong>ion</strong> measurement modes.4. Press CAL/MEAS to enter <strong>pH</strong> calibrat<strong>ion</strong> mode.—See Figure 46.5. Press MODE again to switch to temperature calibrat<strong>ion</strong>—See Figure 47.6. Press ▲ and ▼ to scroll to the correct temperaturevalue corresponding to the known solut<strong>ion</strong>temperature. The meter allows a limit of ±5°Cvariat<strong>ion</strong> (with 0.1°C resolut<strong>ion</strong>) of the input reading,and of the original displayed reading.7. Once you select the correct temperature, press ENTERto confirm. The meter automatically returns to the <strong>pH</strong>measurement mode.NOTE: The meter will not allow input values that exceedthe allowable limit of ±5°C of the original displayedreading.setupmodeCALelectrodecareCATCtroubleshootingFigure 47addit<strong>ion</strong>alinformat<strong>ion</strong>specificat<strong>ion</strong>saccessorieswarrantyreturn ofitems20
8. Setup ModeThe advanced SETUP mode lets you customize yourmeter’s preferences and defaults:P1.0: Memory clear (CLr)P2.0: Viewing electrode data (ELE)P3.0: Selecting buffer sets (bUF)P4.0: Reset to factory default settings (rSt)To enter the SETUP mode:1. Turn meter OFF.2. With meter off, press and hold the MODE key.Continue to hold down the MODE key while pressingand releasing the ON key. The will show the SETUPindicator. —See Figure 48. Release the MODE key if theSETUP indicator is present. If the display indicates youare in the measurement mode (MEAS indicator) turnthe meter off and try step 2 again until SETUPappears.SETUPFigure 48MEMintroduct<strong>ion</strong>starting up<strong>pH</strong> calibrat<strong>ion</strong>andmeasurementNOTE: To exit the SETUP mode at anytime withoutconfirming changes press CAL/MEAS until themeasurement mode reappears. If the meter is inside aprogram, press CAL/MEAS two times to revert themeter to the measurement mode.P1.0: Memory ClearUse this program to clear all memory values when youneed to store a new series of values. This lets you avoidconfusing the old values with the new ones. NO is thedefault setting.1. Enter the SETUP mode as described above. The meterautomatically goes to program P1.0. CLr appears in theprimary display and P1.0 in the secondary display.—See Figure 48.2. Press the ENTER key to enter program P1.0.3. Press ▲ and ▼ keys to toggle between NO and YES.—See Figures 49 and 50.• NO retains current memory values.• YES clears all memory4. Press ENTER to confirm select<strong>ion</strong> and return to theSETUP mode. Press CAL/MEAS to return to themeasurement mode.To continue to the next SETUP program, press the ▲ or▼ keys to select a new program.SETUPFigure 49SETUPFigure 50MEMMEMmV calibrat<strong>ion</strong>andmeasurementIon calibrat<strong>ion</strong>andmeasurementmemoryfunct<strong>ion</strong>temperaturecalibrat<strong>ion</strong>setupmodeelectrodecaretroubleshootingaddit<strong>ion</strong>alinformat<strong>ion</strong>specificat<strong>ion</strong>saccessorieswarrantyreturn ofitems21
introduct<strong>ion</strong>SETUPFigure 51SETUP<strong>pH</strong>mVP2.0: Viewing electrode dataThis program lets you check the electrode parameters fordiagnostic purposes.1. Enter the SETUP mode as described on page 21. Themeter automatically goes to program P1.0.2. Press ▲ and ▼ keys to scroll through the programsuntil you view ELE in the primary display and P2.0 inthe secondary display. The electrode annuciator alsoappears.—See Figure 51.3. Press the ENTER key to enter program P2.0. Thesecondary display will read P2.1starting up<strong>pH</strong> calibrat<strong>ion</strong>andmeasurementmV calibrat<strong>ion</strong>andmeasurementIon calibrat<strong>ion</strong>andmeasurementmemoryfunct<strong>ion</strong>temperaturecalibrat<strong>ion</strong>setupmodeFigure 52SETUPFigure 53SETUP<strong>pH</strong>%<strong>pH</strong>R.mVThe informat<strong>ion</strong> you will see in program P2.0 will dependupon which MODE the meter was in prior to shutting themeter off:From the <strong>pH</strong> measurement MODE:P2.1 shows the mV offset of the electrode.Press ENTER to go to P2.2P2.2 shows the slope in % of the electrode.—See Figures 52 and 53.From the mV measurement MODE:P2.1 shows the mV offset of the electrode—See Figure 54.From the <strong>ion</strong> measurement MODE (Ion <strong>510</strong> only):P2.1 show the slope in mV of the electrode—See Figure 55.4. To exit P2.0 program press ENTER until ELE is in theprimary display and P2.0 is in the secondary display—See Figure 51. press the ▲ or ▼ keys to select a newprogram OR press CAL/MEAS to return to themeasurement mode.electrodecaretroubleshootingFigure 54addit<strong>ion</strong>alinformat<strong>ion</strong>SETUPmVppmspecificat<strong>ion</strong>saccessoriesFigure 55warrantyreturn ofitems22
P3.0: Selecting buffer setsThis program lets select between two standard calibrat<strong>ion</strong>buffer sets, depending upon your requirements.The available sets are USA and NIST.1. Enter the SETUP mode as described on page 21. Themeter automatically goes to program P1.0.2. Press ▲ and ▼ keys to scroll through the programs untilyou view bUF in the primary display and P3.0 in thesecondary display. The buffer annuciator also appears.—See Figure 56.3. Press the ENTER key to enter program P3.0. Thesecondary display will read read either USA or nSt.4. Press the ▲ and ▼ keys to select the buffer set yourequire:• USA buffers: 4.01, 7.00 and 10.01USA in the secondary display—See Figure 57.• NIST buffers: 4.01, 6.86 and 9.18nSt in the secondary display—See Figure 58.5. To confirm the buffer set, press ENTER. All thecharacters on the display will flash for about a secondthen returns to P3.0.6. To exit P3.0 program press the ▲ or ▼ keys to select anew program OR press CAL/MEAS to return to themeasurement mode.P4.0: Resetting to factory default settingsThis program resets and clears all calibrat<strong>ion</strong> data andmemory data EXCEPT the offset value in temperaturecalibrat<strong>ion</strong> and <strong>manual</strong>ly set temperature for <strong>manual</strong>temperature compensat<strong>ion</strong>. NO is the default setting.1. Enter the SETUP mode as described on page 21.The meter automatically goes to program P1.0.2. Press ▲ and ▼ keys to scroll through the programsuntil you view rSt in the primary display and P4.0 inthe secondary display. The mV and <strong>pH</strong> annuciators alsoappear. —See Figure 59.3. Press the ENTER key to enter program P4.0. Thesecondary display will read NO. —See Figure 60.4. Press the ▲ and ▼ keys to select NO or YES. SelectingYES erases all calibrat<strong>ion</strong> values for all modes (<strong>pH</strong>, mVand <strong>ion</strong>) and all memory values. —See Figures 60 and 61.5. To confirm the reset, make sure YES is selected andpress ENTER. All the characters on the display willflash for about a second then the meter returns to themeasurement mode.NOTE: Once YES is selected and the ENTER key ispressed, the reset program clears all old calibrat<strong>ion</strong> dataand memory data. The data is no longer retrievable.You must calibrate the meter before taking any newmeasurements. Meter will however retain buffer setselect<strong>ion</strong> (NIST or USA).SETUPFigure 56SETUPFigure 57SETUPFigure 58SETUPFigure 59SETUPFigure 60SETUPFigure 61<strong>pH</strong><strong>pH</strong> mV<strong>pH</strong> mV<strong>pH</strong> mVintroduct<strong>ion</strong>starting up<strong>pH</strong> calibrat<strong>ion</strong>andmeasurementmV calibrat<strong>ion</strong>andmeasurementIon calibrat<strong>ion</strong>andmeasurementmemoryfunct<strong>ion</strong>temperaturecalibrat<strong>ion</strong>setupmodeelectrodecaretroubleshootingaddit<strong>ion</strong>alinformat<strong>ion</strong>specificat<strong>ion</strong>saccessorieswarrantyreturn ofitems23
9. Electrode Careintroduct<strong>ion</strong>starting up<strong>pH</strong> calibrat<strong>ion</strong>andmeasurementmV calibrat<strong>ion</strong>andmeasurementIon calibrat<strong>ion</strong>andmeasurementmemoryfunct<strong>ion</strong>temperaturecalibrat<strong>ion</strong>setupmodeelectrodecaretroubleshootingaddit<strong>ion</strong>alinformat<strong>ion</strong>specificat<strong>ion</strong>saccessorieswarrantyFigure 62Electrode Activat<strong>ion</strong>DO NOT touch or rub the glass bulb. If you follow thestoring and maintenance procedure, you can use yourelectrode immediately. If the electrode respondssluggishly or drifts, the bulb may be dehydrated.Immerse the electrode in an ideal storage solut<strong>ion</strong>such as electrode storage solut<strong>ion</strong> or <strong>pH</strong> 4 buffer solut<strong>ion</strong>for 1-2 hours to hydrate it. See Storing <strong>pH</strong>/ORPelectrodes below.If this procedure does not hydrate the electrode,reactivate or replace it.Use 2 or 3 point calibrat<strong>ion</strong> to test your electrodeperformance. If you do not get good readings, use adifferent <strong>pH</strong> electrode to confirm the meter is workingproperly. If the results are still not satisfactory, consultyour OAKTON distributor.Electrode Maintenance<strong>pH</strong> electrodes are susceptible to dirt dehydrat<strong>ion</strong> andcontaminat<strong>ion</strong>. Clean them regularly depending on theextent and condit<strong>ion</strong> of use.Storing <strong>pH</strong>/ORP electrodesFor best results, always keep the <strong>pH</strong> bulb wet, preferablyin <strong>pH</strong> 4 buffer with 1% saturated KCl. Other <strong>pH</strong> buffers ortap water are also acceptable storage solut<strong>ion</strong>s. Do notstore in de-<strong>ion</strong>ized water. The protective rubber cap filledwith buffer solut<strong>ion</strong> is an adequate method for storing<strong>pH</strong> electrodes.OAKTON ® offers a complete line of low cost electrodestorage and cleaning solut<strong>ion</strong>s and containers.After Use1. After each series of measurements, wash theelectrode and reference junct<strong>ion</strong> in de<strong>ion</strong>ized water.2. If using a refillable electrode, close the refilling hole byreturning its rubber sleeve or stopper plug over theopening in the side of the electrode. —See Figure 62.3. Store the electrode as ment<strong>ion</strong>ed above.return ofitems24
Electrode CleaningElectrodes that are mechanically intact can often berestored to normal performance by one or a combinat<strong>ion</strong>of the following opt<strong>ion</strong>s.Some suggest<strong>ion</strong>s for:a. Salt deposits which are normal on all electrodes.Dissolve the deposit by immersing the electrode intap water for ten to fifteen minutes. Thoroughly rinsewith de-<strong>ion</strong>ized water.b. General dirt and light oil coatings.Soak the electrode for several hours in OAKTONgeneral purpose electrode cleaning solut<strong>ion</strong>s.Rinse in de<strong>ion</strong>ized or distilled water.c. Oil/Grease FilmsWash the electrode <strong>pH</strong> bulb in a little dish washingdetergent and water. Rinse the electrode tip withde-<strong>ion</strong>ized water.d. Clogged reference junct<strong>ion</strong>Heat a dilute 1% KCl solut<strong>ion</strong> or <strong>pH</strong> 4.01 buffersolut<strong>ion</strong> to 60-80°C. Place the sensing port<strong>ion</strong> of the<strong>pH</strong> electrode into the heated KCl solut<strong>ion</strong> forapproximately 30 minutes. Allow the electrode tocool while immersed in some unheated KCl solut<strong>ion</strong>or <strong>pH</strong> 4.01 buffer solut<strong>ion</strong>. Rinse with de<strong>ion</strong>ized water.introduct<strong>ion</strong>starting up<strong>pH</strong> calibrat<strong>ion</strong>andmeasurementmV calibrat<strong>ion</strong>andmeasurementIon calibrat<strong>ion</strong>andmeasurementmemoryfunct<strong>ion</strong>temperaturecalibrat<strong>ion</strong>setupmodeelectrodecaretroubleshootingaddit<strong>ion</strong>alinformat<strong>ion</strong>specificat<strong>ion</strong>saccessorieswarrantyreturn ofitems25
10. TroubleshootingError MessagesThe following table provides a guideline to enablediagnosis of possible problems indicated by themessages generated by the OAKTON WD-35619-series.The table also provides possible solut<strong>ion</strong>s to theproblems encountered.introduct<strong>ion</strong>starting upError Message Indicates Cause Corrective Act<strong>ion</strong>Err. 2 (In primary display)During Ion calibrat<strong>ion</strong> Too few calibrat<strong>ion</strong> Meter calibrated with only Recalibrate using 2 or more pointsREADYCALpoints1-point in <strong>ion</strong> calibrat<strong>ion</strong>ERR<strong>pH</strong> calibrat<strong>ion</strong>andmeasurementmV calibrat<strong>ion</strong>andmeasurementIon calibrat<strong>ion</strong>andmeasurementmemoryfunct<strong>ion</strong>temperaturecalibrat<strong>ion</strong>Err. 3 (In primary display)During Ion calibrat<strong>ion</strong> Slope error Calibrat<strong>ion</strong> solut<strong>ion</strong> not within Recalibrate using fresh <strong>ion</strong>acceptable rangesolut<strong>ion</strong>sERRBad electrodeReplace electrodeErr. 4 (In primary display)During Ion calibrat<strong>ion</strong> Calibrat<strong>ion</strong> points Calibrat<strong>ion</strong> points more than Recalibrate using calibrat<strong>ion</strong> pointsmore than 1 decade 1 decade apart 1 decade apartCALREADYapartERRCALsetupmodeelectrodecaretroubleshootingErr (In secondary display) Wrong keypad input. Button does not work Release key. Selectin the currentvalid buttonsMEASREADY<strong>pH</strong>operat<strong>ion</strong> mode.depending on mode.ERR CATCElectrode icon (Indicator) Calibrat<strong>ion</strong> error Buffer value does not match Use fresh buffer or checkvalue displayed or electrode electrode connect<strong>ion</strong>.CAL<strong>pH</strong>is disconnected or failing. Possibly replace electrodes.addit<strong>ion</strong>alinformat<strong>ion</strong>ERR<strong>pH</strong>specificat<strong>ion</strong>sUr or Or Measured value Electrode not connected Make sure electrode is connected(In primary display) out of rangeMeter not calibratedRecalibrate meterMEASaccessoriesppmElectrode clogged, dirty orbrokenClean or replace electrodewarrantyMEAS<strong>pH</strong>Measurement is under rangeor over rangeTreat samples to bring withinmeter measuring rangereturn ofitemsCATC26
TroubleshootingProblem Cause Solut<strong>ion</strong>Nothing is displayed when a. AC outlet power not a. Switch on the power supplythe ON/OFF key is selected.switched on.b. AC adapter socket not b. Re-insert Ac adapter socket.inserted properly.Unstable reading a. Insufficient reference a. Fill electrode with referenceelectrolyte in electrode.electrolyte.b. Broken electrode. b. Replace electrode.c. Electrical field c. Remove or switch offinterference (electricalinterfering device.noise caused by anearby motor orultrasonic device).d. Dirty electrode d Clean the electrode.Hydrate if needed.Slow response a. Dirty electrode a. Clean electrode. Hydrateif needed.No response a. HOLD mode in operat<strong>ion</strong> a. Cancel HOLD mode. Pressfrom keypad. Hold displayed. See LCD. Hold button.b. Internal program error. b. Reset all internal programsby removing A/C adapterfrom meter and re-insertingintroduct<strong>ion</strong>starting up<strong>pH</strong> calibrat<strong>ion</strong>andmeasurementmV calibrat<strong>ion</strong>andmeasurementIon calibrat<strong>ion</strong>andmeasurementmemoryfunct<strong>ion</strong>temperaturecalibrat<strong>ion</strong>setupmodeelectrodecaretroubleshootingaddit<strong>ion</strong>alinformat<strong>ion</strong>specificat<strong>ion</strong>saccessorieswarrantyreturn ofitems27
11. Addit<strong>ion</strong>al Informat<strong>ion</strong>introduct<strong>ion</strong>starting up<strong>pH</strong> calibrat<strong>ion</strong>andmeasurementmV calibrat<strong>ion</strong>andmeasurementIon calibrat<strong>ion</strong>andmeasurementmemoryfunct<strong>ion</strong>temperaturecalibrat<strong>ion</strong>setupmodeelectrodecaretroubleshootingaddit<strong>ion</strong>alinformat<strong>ion</strong>specificat<strong>ion</strong>saccessorieswarrantyreturn ofitems<strong>pH</strong> and TemperatureThe <strong>pH</strong> electrode is affected by temperature changes. Automatic TemperatureCompensat<strong>ion</strong> (ATC) compensates for temperature changes. Some solut<strong>ion</strong>s show anincrease while others a decrease in <strong>pH</strong> with the same temperature change. Record thesolut<strong>ion</strong> temperature along with the <strong>pH</strong> value, or the measurement may be meaningless.Temperature changes also affect the signal the <strong>pH</strong> electrode sends to the meter and causesa loss of accuracy for the reading. To limit the loss of accuracy during calibrat<strong>ion</strong>, make thetemperature of the <strong>pH</strong> buffer calibrating solut<strong>ion</strong>s and the sample solut<strong>ion</strong> the same.<strong>pH</strong> Buffer Calibrat<strong>ion</strong> Solut<strong>ion</strong>Use standard buffer solut<strong>ion</strong>s to calibrate a <strong>pH</strong> meter before you measure the <strong>pH</strong> of a sample.Calibrat<strong>ion</strong> solut<strong>ion</strong>s serve as basis of comparison between measurements. The mostcommon standard buffers are the <strong>pH</strong> 4.01, <strong>pH</strong> 7.00 and <strong>pH</strong> 10.01. For 1-point calibrat<strong>ion</strong>,use a standard buffer of <strong>pH</strong> 7.00 or a standard buffer whose <strong>pH</strong> value is close to that of thesample. Use 2-point calibrat<strong>ion</strong> when you know the sample is acidic (low <strong>pH</strong>) or basic (high<strong>pH</strong>). For acidic samples, use standard buffers of <strong>pH</strong> 7.00 and <strong>pH</strong> 4.01. For basic samples,use standards of <strong>pH</strong> 7.00 and <strong>pH</strong> 10.01. Use a 3-point calibrat<strong>ion</strong> when the sample <strong>pH</strong> iscompletely unknown. Use all <strong>pH</strong> 7.00, <strong>pH</strong> 4.01 and <strong>pH</strong> 10.01 calibrat<strong>ion</strong> solut<strong>ion</strong>s. Contactyour OAKTON ® distributor for informat<strong>ion</strong> on <strong>pH</strong> buffer and calibrat<strong>ion</strong> solut<strong>ion</strong>s.Standard <strong>pH</strong> BuffersThe following table shows the various <strong>pH</strong> values atdifferent temperature of the solut<strong>ion</strong> during calibrat<strong>ion</strong>.The table also illustrates why a calibrat<strong>ion</strong> value maybe different from the buffer value at 25°C.Temperature <strong>pH</strong> buffer values°C °F 4.01 7.00 10.00(phthalate) (neutral (carbonate)phosphate)0 32 4.01 7.12 10.335 41 4.01 7.09 10.2<strong>510</strong> 50 4.00 7.06 10.1815 59 4.00 7.04 10.1120 68 4.00 7.02 10.0525 77 4.01 7.00 10.0030 86 4.01 6.99 9.9535 95 4.02 6.98 9.9240 104 4.03 6.98 9.8845 113 4.04 6.97 9.8550 122 4.06 6.97 9.8255 131 4.07 6.98 9.8060 140 4.09 6.98 9.7770 158 4.12 6.99 9.7380 176 4.16 7.00 9.6990 194 4.20 7.02 9.6628
12. Specificat<strong>ion</strong>sMode <strong>pH</strong> <strong>510</strong> Ion <strong>510</strong><strong>pH</strong> Range 0.0 to 14.0 <strong>pH</strong>Resolut<strong>ion</strong>0.01 <strong>pH</strong>Accuracy±0.01 <strong>pH</strong>Calibrat<strong>ion</strong>1 to 3 pointsUSA: 4.01, 7.00, 10.01NIST: 4.01, 6.86, 9.18mV Range -1999 to 1999 mVResolut<strong>ion</strong>0.1 mV between ±199.9 mV1 mV beyond ±199.9 mVAccuracy±0.2 mV between ±199.9 mV±2 mV beyond ±199.9 mVCalibrat<strong>ion</strong>Offset up to ±150 mVIon Range 0.01 to 1999 ppmResolut<strong>ion</strong>0.01 ppm for 0.01 to 0.99 ppm0.1 ppm for 1.0 to 199.9 ppm1 ppm for 200 to 1999 ppmAccuracy±0.5% of full scale for monovalent <strong>ion</strong>s1% of full scale for divalent <strong>ion</strong>sCalibrat<strong>ion</strong>2 to 3 points0.1, 1, 10, 100 ppmMinimum slope15 mVMaximum slope90 mVTemp Range 0 to 100°CResolut<strong>ion</strong>0.1°CAccuracy±0.3°CCalibrat<strong>ion</strong> Offset in 0.1°C increments; Offset range: ±5°Cintroduct<strong>ion</strong>starting up<strong>pH</strong> calibrat<strong>ion</strong>andmeasurementmV calibrat<strong>ion</strong>andmeasurementIon calibrat<strong>ion</strong>andmeasurementmemoryfunct<strong>ion</strong>temperaturecalibrat<strong>ion</strong>Temperature compensat<strong>ion</strong>: automatic (ATC) or <strong>manual</strong> from 0 to 100°COperating temperature: 0 to 50°CPower: 9V DC adapter for 110 or 220 VACDisplay: Dual LCDConnectors: <strong>pH</strong>/mV/Ion uses BNC connector, temperature usesmini-phono plug, recorder uses mini-pin (sub-mini phono plug)Memory: Stores up to 50 readingsRecorder Output: ±1999 mV directly proport<strong>ion</strong>al to inputPower Requirements: 110 or 220 VAC depending upon model.Input Impedance: 10 12 ΩInstrument Drift: < 50 uV/°CInput Bias Current: 50 pA max. at 25°CHold funct<strong>ion</strong>: YESATC Funct<strong>ion</strong>: 0.0 to 100.0°CREADY Indicator: YESMeter Dimens<strong>ion</strong>s: 7.2” L x 9.2” W x 2.52” H (180 x 230 x 63 mm)Shipping weight: 1.4 lbs (0.64 kg)setupmodeelectrodecaretroubleshootingaddit<strong>ion</strong>alinformat<strong>ion</strong>specificat<strong>ion</strong>saccessorieswarrantyreturn ofitems29
13. AccessoriesTo order some accessories, contact your OAKTON ®distributor and describe the items listed below.introduct<strong>ion</strong>starting up<strong>pH</strong> calibrat<strong>ion</strong>andmeasurementmV calibrat<strong>ion</strong>andmeasurementIon calibrat<strong>ion</strong>andmeasurementmemoryfunct<strong>ion</strong>temperaturecalibrat<strong>ion</strong>setupmodeelectrodecareWD-35613-05 ATC probeWD-35615-07 110 VAC adapterWD-35615-08 220 VAC adapterWD-35801-00 OAKTON general purpose <strong>pH</strong> electrodeWD-35805-04 OAKTON general purpose double junct<strong>ion</strong>refillable liquid filled <strong>pH</strong> electrode. Glassbody.WD-35805-15 OAKTON general purpose double junct<strong>ion</strong>ORP electrode. Epoxy body.WD-35811-71 OAKTON All-in-One single junct<strong>ion</strong> sealedgel filled general purpose <strong>pH</strong> electrodewith temperature sensor. Epoxy body.WD-00654-00 <strong>pH</strong> 4.01 buffer calibrat<strong>ion</strong> solut<strong>ion</strong>, 1 pintWD-00654-04 <strong>pH</strong> 7.01 buffer calibrat<strong>ion</strong> solut<strong>ion</strong>, 1 pintWD-00564-08 <strong>pH</strong> 10.00 buffer calibrat<strong>ion</strong> solut<strong>ion</strong>, 1 pintWD-35653-00 De-<strong>ion</strong>ized rinse water pouches 20/boxWD-35653-01 <strong>pH</strong> 4.01 buffer calibrat<strong>ion</strong> solut<strong>ion</strong> pouches20/boxWD-35653-02 <strong>pH</strong> 7.01 buffer calibrat<strong>ion</strong> solut<strong>ion</strong> pouches20/boxWD-35653-03 <strong>pH</strong> 10.00 buffer calibrat<strong>ion</strong> solut<strong>ion</strong>pouches 20/boxWD-35653-04 Buffer pouches assortment pack,5 each <strong>pH</strong> 4, 7, 10 and rinse watertroubleshootingaddit<strong>ion</strong>alinformat<strong>ion</strong>specificat<strong>ion</strong>saccessorieswarrantyreturn ofitems30
14. WarrantyOAKTON warrants this meter to be free from significantdeviat<strong>ion</strong>s in material and workmanship for a period ofthree years from date of purchase. OAKTON warrants thisprobe to be free from significant deviat<strong>ion</strong>s in material andworkmanship for a period of six months from date ofpurchase. If repair or adjustment is necessary and has notbeen the result of abuse or misuse within the warrantiedtime period, please return—freight prepaid—and correct<strong>ion</strong>will be made without charge. OAKTON alone will determineif the product problem is due to deviat<strong>ion</strong>s or customermisuse.introduct<strong>ion</strong>starting up15. Return of itemsAuthorizat<strong>ion</strong> must be obtained from our Customer ServiceDepartment before returning items for any reason. Whenapplying for authorizat<strong>ion</strong>, please include data regarding thereason the items are to be returned. For your protect<strong>ion</strong>,items must be carefully packed to prevent damage in shipmentand insured against possible damage or loss. We willnot be responsible for damage resulting from careless orinsufficient packing. a restocking charge will be made on allunauthorized returns.NOTE: We reserve the right to make improvements indesign, construct<strong>ion</strong>, and appearance of products withoutnotice<strong>pH</strong> calibrat<strong>ion</strong>andmeasurementmV calibrat<strong>ion</strong>andmeasurementIon calibrat<strong>ion</strong>andmeasurementmemoryfunct<strong>ion</strong>temperaturecalibrat<strong>ion</strong>setupmodeelectrodecaretroubleshootingaddit<strong>ion</strong>alinformat<strong>ion</strong>specificat<strong>ion</strong>saccessorieswarrantyreturn ofitems31