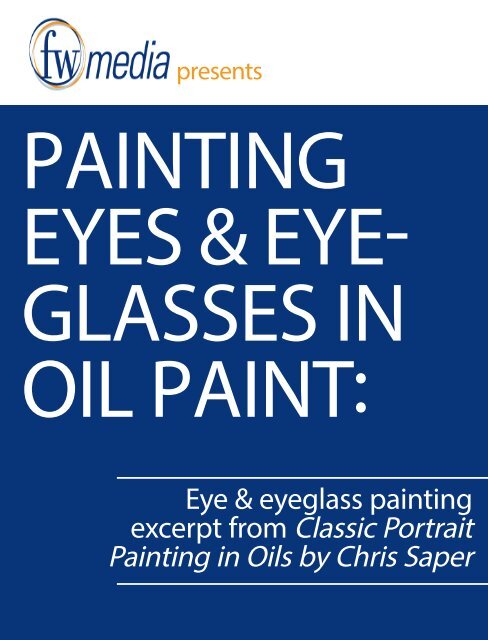
excerpt from Classic Portrait Painting in Oils by Chris Saper
excerpt from Classic Portrait Painting in Oils by Chris Saper
excerpt from Classic Portrait Painting in Oils by Chris Saper
- No tags were found...

You also want an ePaper? Increase the reach of your titles
YUMPU automatically turns print PDFs into web optimized ePapers that Google loves.
presentspa<strong>in</strong>t<strong>in</strong>geyes & eyeglasses<strong>in</strong>oil pa<strong>in</strong>t:Eye & eyeglass pa<strong>in</strong>t<strong>in</strong>g<strong>excerpt</strong> <strong>from</strong> <strong>Classic</strong> <strong>Portrait</strong><strong>Pa<strong>in</strong>t<strong>in</strong>g</strong> <strong>in</strong> <strong>Oils</strong> <strong>by</strong> <strong>Chris</strong> <strong>Saper</strong>
EXERCISE<strong>Pa<strong>in</strong>t<strong>in</strong>g</strong> the EyesFor many portrait pa<strong>in</strong>ters, the eyes are not just the dest<strong>in</strong>ation, butthe most fun part of the portrait’s journey—no doubt because theyare so frequently the focal po<strong>in</strong>t of the portrait. The <strong>in</strong>f<strong>in</strong>ite color andpattern variety <strong>in</strong> the human iris is truly beautiful, and the <strong>in</strong>dividualityof the muscles and tissues that surround the eye delivers tremendousexpression. In this exercise, my model is a young woman with deep-setblue eyes.Reference Photo1 Set Up the Basic Shapes2 Set the Irises and Pa<strong>in</strong>t the ScleraUse a small cat’s tongue brush and Raw Umber, th<strong>in</strong>ned with a bitof medium, to lightly draw the structural shapes on a ground ofFlesh (light) and Flesh + Raw Umber (shadow). With a 7 ⁄8 viewpo<strong>in</strong>t,where the head is angled to show very little of the far side of theface, be sure to draw the perspective of the distant eye—with the<strong>in</strong>ner corner of the eye hidden beh<strong>in</strong>d the nose—which provides aclear view of the structure of its lower lid.With Raw Umber, pa<strong>in</strong>t the <strong>in</strong>itial upper lash l<strong>in</strong>es. Pa<strong>in</strong>t the lids’creases (any area where sk<strong>in</strong> touches sk<strong>in</strong>) very dark and very warmwith Asphaltum + Alizar<strong>in</strong> + Transparent Earth Red. Once youplace the <strong>in</strong>itial lash l<strong>in</strong>es, it’s easier to identify where to “hang” theiris. Here, the iris on our right hangs <strong>from</strong> the lashes at about 11:00and 2:00. Fill <strong>in</strong> the irises with the specialty color Indigo, whichworks well for blue eyes. Place the sclera (the white of the eyeball)with small strokes of Foundation Greenish and Raw Umber.Lighten the Indigo with Foundation Greenish to pa<strong>in</strong>t the iris<strong>in</strong>side the outer, darker blue rim. The darkest part of the iris willsit directly under the highlight’s location. Use your smallest cat’stongue brush to place Ivory Black ovals to represent the pupils.Indicate the tear duct’s shape with a small stroke of Flesh + RawUmber. Correct the values of the left and right parts of the sclera,lett<strong>in</strong>g the top of the whites of the eyes run a little darker to suggestthe shadow cast upon them <strong>by</strong> the upper lashes.50 Watch a free video lesson <strong>by</strong> <strong>Chris</strong> <strong>Saper</strong> at artistsnetwork.com/portrait-pa<strong>in</strong>t<strong>in</strong>g48-57_Y1754.<strong>in</strong>dd 5010/12/11 11:49:35 AM
3 Place the HighlightsIt’s always better to understate rather than overstate highlights.There isn’t a brush t<strong>in</strong>y enough to pa<strong>in</strong>t the eye highlight properly,so experiment us<strong>in</strong>g the pushp<strong>in</strong> trick. Dip the po<strong>in</strong>t of a pushp<strong>in</strong>(or safety p<strong>in</strong> or other f<strong>in</strong>e-po<strong>in</strong>t object) <strong>in</strong>to your highlight color, <strong>in</strong>this case, Flake White. The pa<strong>in</strong>t should form a soft peak extend<strong>in</strong>gpast the po<strong>in</strong>t of the p<strong>in</strong>, similar to the peaks that are madewhen you whip cream or egg whites. Touch only the pa<strong>in</strong>t to theexact place of the highlight. You’ll need a mahlstick or your littlef<strong>in</strong>ger to stabilize your hand for this step. If you accidentally makethe highlight too large or place it <strong>in</strong>correctly, just start over <strong>from</strong>the previous step.4 Complete the Highlights and Adjust the LashesUse a small comb brush with Raw Umber and medium to drag a small counterclockwisestroke <strong>from</strong> the lash l<strong>in</strong>e over the sclera and lower lid. (If you still have enough wet pa<strong>in</strong>t<strong>from</strong> the lash l<strong>in</strong>e, you can just drag some of the pa<strong>in</strong>t already there.) Pa<strong>in</strong>t the ledge ofsk<strong>in</strong> that holds the lower lashes us<strong>in</strong>g a stroke of Flesh.Add the highlights to the iris and lower lash l<strong>in</strong>e on the eye on the left. There’s often asmall highlight <strong>in</strong> the shapes that make up the tear duct, but it’s best to use Flesh <strong>in</strong>steadof Titanium White so it doesn’t become too prom<strong>in</strong>ent. Make any small adjustments to thelashes, but keep them smudgy and resist pa<strong>in</strong>t<strong>in</strong>g <strong>in</strong>dividual lashes.Visit artistsnetwork.com/portrait-pa<strong>in</strong>t<strong>in</strong>g for a free demonstration on pa<strong>in</strong>t<strong>in</strong>g a vignette5148-57_Y1754.<strong>in</strong>dd 5110/12/11 11:49:48 AM
Examples of EyesBlue EyesI’ve pa<strong>in</strong>ted iris #1 with Ultramar<strong>in</strong>eBlue <strong>in</strong>stead of Indigo. The saturationof the Ultramar<strong>in</strong>e Blue makes the irislook unconv<strong>in</strong>c<strong>in</strong>g, and it almost seemsto float <strong>in</strong> front of the picture plane. Iris#2 was pa<strong>in</strong>ted with Ivory Black + FlakeWhite. Because the Ivory Black has a bluecast to it, the iris still reads as blue, butis more realistic. The Ivory Black + FlakeWhite mixture is a suitable alternative tous<strong>in</strong>g Indigo.1 2Asian EyesMy Japanese model <strong>in</strong> this life studywas lit <strong>by</strong> warm light, positioned justslightly off center. Characteristic of Asiansubjects, the bridge of her nose is flatterthan typical Caucasian subjects, so a rak<strong>in</strong>glight source helps def<strong>in</strong>e the shapes.Prom<strong>in</strong>ent epicanthal folds on the lidscreate deep-set eyes whose roundedforms show beneath the upper lid. Herbrows sit rather flat on her forehead, dueto a slightly high brow ridge.Brown, Shallow-Set EyesMost of the young children I’ve pa<strong>in</strong>tedhave deep-set eyes, but this little guy hasbig, brown, shallow-set eyes that showa lot of lid. With a light<strong>in</strong>g source <strong>from</strong>above, the lids above the upper lasheswill always be a bit lighter <strong>in</strong> value thanthe parts of the lids just below the eyebrows.Look for the structure and amountof depth you’ll need to properly renderthe structure of the lower lid, betweenwhere it touches the sclera and sproutsthe lower eyelashes. In the eye on ourright, that little ledge hold<strong>in</strong>g the lashesis lighter <strong>in</strong> value than the sclera as itmoves away and out of sight. To make aniris lum<strong>in</strong>ous, light it opposite the highlightwith a touch of Cadmium Red Lightadded to its basic dark brown. Here, thehighlights come <strong>from</strong> both directions, butI’ve emphasized the light <strong>from</strong> our left,consistent with the highlight on the nose.One light source needs to be dom<strong>in</strong>ant<strong>in</strong> your pa<strong>in</strong>t<strong>in</strong>g, even if it’s ambiguous <strong>in</strong>the reference photo.52 Watch a free video lesson <strong>by</strong> <strong>Chris</strong> <strong>Saper</strong> at artistsnetwork.com/portrait-pa<strong>in</strong>t<strong>in</strong>g48-57_Y1754.<strong>in</strong>dd 5210/12/11 11:49:57 AM
3 Pa<strong>in</strong>t the Found Edges of the Frames <strong>in</strong> One Stroke 4 Create the Shadow Under the FrameWet the canvas with a little medium and pa<strong>in</strong>t the found edge Turn the canvas right-side up, and use a small, clean comb brush, wetof the frames <strong>in</strong> a s<strong>in</strong>gle glid<strong>in</strong>g stroke with a small cat’s tongue very slightly with medium, to pull the stroke downward <strong>in</strong> the directionbrush us<strong>in</strong>g a bit of Transparent Earth Red + Flesh. Actually, you’ll of the form of the cheek. Aga<strong>in</strong>, one stroke is all you need.be f<strong>in</strong>d<strong>in</strong>g the edge of the sk<strong>in</strong> it touches, not the edge of theframe itself. If the found edge you pa<strong>in</strong>t <strong>in</strong> one stroke is wrong,you’ll need to take the sk<strong>in</strong> tones back to the previous step. If youprefer to pa<strong>in</strong>t wet-<strong>in</strong>to-wet, lay more fresh pa<strong>in</strong>t over the mistakenstroke. If the tones are dry, it’s much easier to wipe off the errantl<strong>in</strong>e. Don’t fight the natural arc of your hand; as a right-handedpa<strong>in</strong>ter, my natural arc runs <strong>from</strong> about 7:00 to 11:00, so I turnedthe pa<strong>in</strong>t<strong>in</strong>g on its side for just that one stroke. Lefties may have aneasier time turn<strong>in</strong>g the canvas upside down.5 F<strong>in</strong>alize the EyeglassesThe only parts of the eyeglasses thatare actually pa<strong>in</strong>ted are the h<strong>in</strong>ge, theearpiece and the highlights. Everyth<strong>in</strong>gelse is suggested <strong>by</strong> illusion—the pa<strong>in</strong>t<strong>in</strong>gof negative shapes created <strong>by</strong> light andshadow.54 Watch a free video lesson <strong>by</strong> <strong>Chris</strong> <strong>Saper</strong> at artistsnetwork.com/portrait-pa<strong>in</strong>t<strong>in</strong>g48-57_Y1754.<strong>in</strong>dd 5410/12/11 11:50:11 AM
Examples of EyeglassesFull-Frame Glasses, Older StyleThis is an older photograph of the subject <strong>in</strong> the exercise onpa<strong>in</strong>t<strong>in</strong>g glasses. The darker, larger or more colorful the framestyle, the more it will compete with the face for the portrait’sfocal po<strong>in</strong>t. The challenge here is to keep as much of the frameas close as possible to the value and hue of the sk<strong>in</strong> tones.Wire-Rim GlassesIn this monochrome oil, the eyeglasses are far more abbreviated.A two-hour session doesn’t provide enough time to fussover details, and <strong>in</strong> some ways that’s better. These glasses werepa<strong>in</strong>ted with just twelve t<strong>in</strong>y strokes. The highlight on the lens ismuch bolder than the highlights <strong>in</strong> the eyes.Rimless GlassesI pa<strong>in</strong>ted this self-portrait life study <strong>from</strong> a mirror. The difficultyis that I am very nearsighted, so my eyes look much smallerwhen I’m wear<strong>in</strong>g glasses. I first pa<strong>in</strong>ted the entire study withoutglasses, then added them later. I gave up a bit of likeness <strong>in</strong>exchange for emphasiz<strong>in</strong>g the eyes.A CASE AGAINST PAINTING EYEGLASSESI generally prefer to pa<strong>in</strong>t subjects without glasses for a couple of reasons.First, like fashion, styles of eyeglasses change over the years and can datethe portrait and dim<strong>in</strong>ish its timeless quality. Second, the eyes may appeardistorted because of prescription lenses—very nearsighted subjects’ eyeswill appear much smaller, and very farsighted subjects’ eyes will appearmuch larger. Try photograph<strong>in</strong>g your subject both with and without glassesso you’ll have an undistorted image of the eyes as well as an idea of howthe glasses sit on the face. In a half-fi gure or larger portrait, consider hav<strong>in</strong>gyour subject hold his glasses. You might fi nd that the eyeglasses areso much a part of an <strong>in</strong>dividual’s appearance that it’s best to pa<strong>in</strong>t themon the face.Visit artistsnetwork.com/portrait-pa<strong>in</strong>t<strong>in</strong>g for a free demonstration on pa<strong>in</strong>t<strong>in</strong>g a vignette5548-57_Y1754.<strong>in</strong>dd 5510/12/11 11:50:17 AM
Ideas. Instruction. Inspiration.Receive FREE downloadable bonusmaterials when you sign up for ourfree newsletter at artistsnetwork.com/newsletter_thanks.These and other f<strong>in</strong>e North Light products are available at yourfavorite art & craft retailer, bookstore or onl<strong>in</strong>e supplier. Visit ourwebsites at artistsnetwork.com and artistsnetwork.tv.Follow us!Follow North Light Books for the latestnews, free wallpapers, free demos andchances to w<strong>in</strong> FREE BOOKS!Visit artistsnetwork.com and get Jen’s North Light Picks!Get free step-<strong>by</strong>-step demonstrations along with reviews of the latestbooks, videos and downloads <strong>from</strong> Jennifer Lepore, Senior Editor andOnl<strong>in</strong>e Education Manager at North Light Books.144 Watch a free video lesson <strong>by</strong> <strong>Chris</strong> <strong>Saper</strong> at artistsnetwork.com/portrait-pa<strong>in</strong>t<strong>in</strong>g138-144_Y1754.<strong>in</strong>dd Sec1:14410/12/11 1:56:27 PM