- Page 1 and 2:
JabiruJ160ConstructorsManualfrom ki
- Page 3 and 4:
General>Constructors manualWelcome
- Page 5 and 6:
Jabiru J160 Constructors ManualGene
- Page 7 and 8:
Direction referencesJabiru J160 Con
- Page 9 and 10:
Optional tools and equipmentJabiru
- Page 11 and 12:
General>GlossaryJabiru J160 Constru
- Page 13 and 14:
General>Unpacking and supportJabiru
- Page 15 and 16:
Epoxy measuring and mixingQuality a
- Page 17 and 18:
General>Aircraft grade bolts and lo
- Page 19 and 20:
General>Rod endsJabiru J160 Constru
- Page 21 and 22:
Pre-Paint>Fuselage>Fit ventral fin
- Page 23 and 24:
Finish the ventral finJabiru J160 C
- Page 25 and 26:
Vertical fin stubJabiru J160 Constr
- Page 27 and 28:
Fit the header tank enclosureJabiru
- Page 29 and 30:
Jabiru J160 Constructors ManualPre-
- Page 31 and 32:
Jabiru J160 Constructors ManualPre-
- Page 33 and 34:
Assemble the brake calipersIn this
- Page 35 and 36:
Assemble the brake and wheelFirstly
- Page 37 and 38:
Jabiru J160 Constructors ManualPre-
- Page 39 and 40:
Jabiru J160 Constructors ManualPre-
- Page 41 and 42:
Pre-Paint>Fuselage>Firewall forward
- Page 43 and 44:
Fit the firewall plateJabiru J160 C
- Page 45 and 46:
Jabiru J160 Constructors ManualPre-
- Page 47 and 48:
Cabin heaterJabiru J160 Constructor
- Page 49 and 50:
Electrical componentsJabiru J160 Co
- Page 51 and 52:
Jabiru J160 Constructors ManualPre-
- Page 53 and 54:
Jabiru J160 Constructors ManualPre-
- Page 55 and 56:
Fit the nose leg housingJabiru J160
- Page 57 and 58:
Jabiru J160 Constructors ManualPre-
- Page 59 and 60:
Fit the engine to the engine mountJ
- Page 61 and 62:
Set the engine angle of incidenceJa
- Page 63 and 64:
Clean and prepare the screws and hu
- Page 65 and 66:
Jabiru J160 Constructors ManualPre-
- Page 67 and 68:
Jabiru J160 Constructors ManualPre-
- Page 69 and 70:
Jabiru J160 Constructors ManualPre-
- Page 71 and 72:
Jabiru J160 Constructors ManualPre-
- Page 73 and 74:
Jabiru J160 Constructors ManualPre-
- Page 75 and 76:
Pre-Paint>Fuselage>Fit windscreenJa
- Page 77 and 78:
Jabiru J160 Constructors ManualPre-
- Page 79 and 80:
Use a wire hook to pull the static
- Page 81 and 82:
Jabiru J160 Constructors ManualPre-
- Page 83 and 84:
Jabiru J160 Constructors ManualPre-
- Page 85 and 86:
Take care not to let the fin just s
- Page 87 and 88:
Fit the static probe assemblyJabiru
- Page 89 and 90:
Jabiru J160 Constructors ManualPre-
- Page 91 and 92:
Fit the elevator end capsJabiru J16
- Page 93 and 94:
Fit the stabiliserJabiru J160 Const
- Page 95 and 96:
Pre-Paint>Fuselage>Empennage>Fit ru
- Page 97 and 98:
Jabiru J160 Constructors ManualPre-
- Page 99 and 100:
Fit the rudder cable bracket clampJ
- Page 101 and 102:
Jabiru J160 Constructors ManualPre-
- Page 103 and 104:
Pre-fit the cowl hingesYou will nee
- Page 105 and 106:
Fit the hinge pin guidesJabiru J160
- Page 107 and 108:
Fit the cabin air inlet flangeJabir
- Page 109 and 110:
Fit the bearing blocksJabiru J160 C
- Page 111 and 112:
Jabiru J160 Constructors ManualPre-
- Page 113 and 114:
Jabiru J160 Constructors ManualPre-
- Page 115 and 116:
Jabiru J160 Constructors ManualPre-
- Page 117 and 118:
Jabiru J160 Constructors ManualPre-
- Page 119 and 120:
Fit the bushes to the consoleFit th
- Page 121 and 122:
Jabiru J160 Constructors ManualPre-
- Page 123 and 124:
Jabiru J160 Constructors ManualPre-
- Page 125 and 126:
Align the templateand mark the brac
- Page 127 and 128:
Pre-Paint>Fuselage>Interior>Fuel sy
- Page 129 and 130:
Jabiru J160 Constructors ManualPre-
- Page 131 and 132:
Pre-Paint>Fuselage>Interior>Fit sea
- Page 133 and 134:
Pre-Paint>Fuselage>Pre-fit doorsObj
- Page 135 and 136:
Final fit the doorJabiru J160 Const
- Page 137 and 138:
Pre-Paint>Fuselage>Fit windowsJabir
- Page 139 and 140:
Pre-Paint>Fuselage>Wheel alignmentO
- Page 141 and 142:
Pre-Paint>Fuselage>Pre-fit wheel sp
- Page 143 and 144:
Now both halves of the spat can be
- Page 145 and 146:
Pre-Paint>Wings>Fit fuel tank fille
- Page 147 and 148:
Jabiru J160 Constructors ManualPre-
- Page 149 and 150:
Jabiru J160 Constructors ManualPre-
- Page 151 and 152:
Jabiru J160 Constructors ManualPre-
- Page 153 and 154:
Pre-Paint>Wings>Cut aileron cable o
- Page 155 and 156:
Now look into the hole that you hav
- Page 157 and 158:
Jabiru J160 Constructors ManualPre-
- Page 159 and 160:
Jabiru J160 Constructors ManualPre-
- Page 161 and 162:
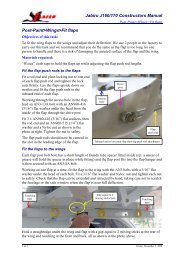
Take your time and get each flap ex
- Page 163 and 164:
Jabiru J160 Constructors ManualPre-
- Page 165 and 166:
Jabiru J160 Constructors ManualPre-
- Page 167 and 168:
Pre-Paint>Wings>Fit aileronsObjecti
- Page 169 and 170:
Jabiru J160 Constructors ManualPre-
- Page 171 and 172:
Jabiru J160 Constructors ManualPre-
- Page 173 and 174:
Jabiru J160 Constructors ManualPre-
- Page 175 and 176:
Pre-Paint>Wings>Test fit wingsObjec
- Page 177 and 178:
The important thing at this stage i
- Page 179 and 180:
Pre-fit the strut/main gear to fuse
- Page 181 and 182:
Sandpaper:Jabiru J160 Constructors
- Page 183 and 184:
Paint>Surface preparationJabiru J16
- Page 185 and 186:
Post-Paint>GeneralObjectives of thi
- Page 187 and 188:
Jabiru J160 Constructors ManualPost
- Page 189 and 190:
Post-Paint>Fuselage>Assemble instru
- Page 191 and 192:
Jabiru J160 Constructors ManualPost
- Page 193 and 194:
Jabiru J160 Constructors ManualPost
- Page 195 and 196:
Fit digital instrumentationJabiru J
- Page 197 and 198:
Jabiru J160 Constructors ManualPost
- Page 199 and 200:
Jabiru J160 Constructors ManualPost
- Page 201 and 202:
Post-Paint>Fuselage>Electrical wiri
- Page 203 and 204:
Jabiru J160 Constructors ManualPost
- Page 205 and 206:
Jabiru J160 Constructors ManualPost
- Page 207 and 208:
Post-Paint>Fuselage>Interior>Fit up
- Page 209 and 210:
Jabiru J160 Constructors ManualPost
- Page 211 and 212: Engine wiringJabiru J160 Constructo
- Page 213 and 214: Jabiru J160 Constructors ManualPost
- Page 215 and 216: Jabiru J160 Constructors ManualPost
- Page 217 and 218: Wire the fuel pumpJabiru J160 Const
- Page 219 and 220: Connect the multi pin connectorsJab
- Page 221 and 222: Connect the VHF antenna cableJabiru
- Page 223 and 224: Jabiru J160 Constructors ManualPost
- Page 225 and 226: Jabiru J160 Constructors ManualPost
- Page 227 and 228: Jabiru J160 Constructors ManualPost
- Page 229 and 230: Fit the steering yoke and pushrodsJ
- Page 231 and 232: Connect the rudder cableJabiru J160
- Page 233 and 234: Jabiru J160 Constructors ManualPost
- Page 235 and 236: Jabiru J160 Constructors ManualPost
- Page 237 and 238: Jabiru J160 Constructors ManualPost
- Page 239 and 240: Locate and fit the throttle cableJa
- Page 241 and 242: Jabiru J160 Constructors ManualPost
- Page 243 and 244: Jabiru J160 Constructors ManualPost
- Page 245 and 246: Jabiru J160 Constructors ManualPost
- Page 247 and 248: Jabiru J160 Constructors ManualPost
- Page 249 and 250: Connect the elevator cableFit the d
- Page 251 and 252: Jabiru J160 Constructors ManualPost
- Page 253 and 254: Jabiru J160 Constructors ManualPost
- Page 255 and 256: Jabiru J160 Constructors ManualPost
- Page 257 and 258: Jabiru J160 Constructors ManualPost
- Page 259 and 260: Jabiru J160 Constructors ManualPost
- Page 261: Pre-fit the spinnerJabiru J160 Cons
- Page 265 and 266: Connect the aileron cableJabiru J16
- Page 267 and 268: Jabiru J160 Constructors ManualPost
- Page 269 and 270: Fit the fuel gaugesJabiru J160 Cons
- Page 271 and 272: Fit the vent tubes to the fuel fill
- Page 273 and 274: Jabiru J160 Constructors ManualPost
- Page 275 and 276: Set the aileron cable lengthsJabiru
- Page 277 and 278: Jabiru J160 Constructors ManualPost
- Page 279 and 280: Tape the flap into position with a
- Page 281 and 282: Jabiru J160 Constructors ManualPost
- Page 283 and 284: Testing>Weight and balanceObjective
- Page 285 and 286: Weigh the aircraftJabiru J160 Const
- Page 287 and 288: Testing>Rigging checkObjectives of
- Page 289 and 290: Jabiru J160 Constructors ManualTest
- Page 291 and 292: Calibrate the fuel gaugesJabiru J16
- Page 293 and 294: Testing>Final inspection checklistJ
- Page 295 and 296: Jabiru J160 Constructors ManualTest
- Page 297 and 298: Jabiru J160 Constructors ManualTest
- Page 299 and 300: Jabiru J160 Constructors ManualTest
- Page 301 and 302: Instrument panelJabiru J160 Constru
- Page 303 and 304: Jabiru J160 Constructors ManualTest
- Page 305 and 306: Jabiru J160 Constructors ManualTest
- Page 307 and 308: Jabiru J160 Constructors ManualTest
- Page 309 and 310: Airfield selectionJabiru J160 Const
- Page 311 and 312: Sequence #1 - First start, ground r
- Page 313 and 314:
Compass swingJabiru J160 Constructo
- Page 315 and 316:
Flight testingTakeoff and climbUse
- Page 317 and 318:
1. Adjusting the Rudder Pedal Pushr
- Page 319 and 320:
Sequence #3 - Performance and handl
- Page 321 and 322:
Testing>FormsObjectives of this tas
- Page 323 and 324:
Jabiru J160 Constructors ManualTest
- Page 325 and 326:
Jabiru J160 Constructors ManualTest
- Page 327:
EquipmentVHF Comm #1VHF Comm #2oper


