Create successful ePaper yourself
Turn your PDF publications into a flip-book with our unique Google optimized e-Paper software.
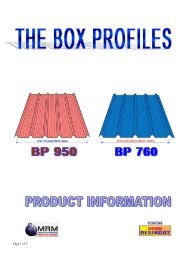
1.0 GENERAL INFORMATIONSAFLOK 700 is an angular interlocking triple pan rib profile utilizing a powerful clip system suitable forroofing and walling. It is manufactured from high strength steel sheets, either Galvanized or Aluminum-Zinccoated and pre-painted in a variety of dazzling colors. Apart from the beauty, it offers much more superiorprotection against leakage, thus increased life.2.0 TECHNICAL SPECIFICATIONS2.1 DIMENSIONAL DRAWING: (All dimensions in mm.) 2.2 STANDARD PRODUCT RANGERANGEMATERIALGalvanized Iron, Aluminum-Zinc coated steel, Resincot pre-painted GalvanizedIron and Resincot pre-painted Aluminum-Zinc coated sheetsTHICKNESSLENGTHSRESINCOT COLOURS0.40mm. 0.50mm and 0.60mm (Total coated thickness)Tolerance : ± 10%Any length from 2.0m and above in steps of 50mmMaximum Length:Due to transport limitation 12.5m maximum is generally recommendedMinimum Length:2.0mTolerance : +0.5%; -0%Top:Sky Blue, Bright Blue, Light Blue, Dark Green, Lagoon, Brick Red, Maroon, BrilliantWhite, and Lilac Haze.Bottom:Backer GreyMinimum order for Saflok 700 is 1000m 22
2.2 CLIPSSL700 clips are manufactured from high strength 0.6mm galvanized steel sheets able to resist stressexerted by the SAFLOK sheets. The fixing holes are pre-punched. End to end holes have dimples for locationof clips during laying. Anchor Quantity of clips:Number of clips per job = Number of purlins x Number of sheets.2.3 FASTENERS(i)(ii)Steel Purlin: Upto 3.0 mm. thickness – 10 x16mm Wafer head self –drilling, self-tappingscrewsFor purlins more than 3.0mm thick, 4.3mm diameter holes needs to bepre-drilledTimber purlins: 4 x 65mm Galvanized ring shank nails.Quantity of fasteners = 3 x The number of clips2.4 COVERAGE CALCULATOR:The formula below can be used to calculate the number of sheets (N) requiredN = L/0.7Where;L is the length of the roof to be covered in metersN is the number of sheets3
2.5 LOADING CHARTSLoad carrying capacity (Kgs/M 2 )Purlin centers1.00SIMPLY SUPPORTED OVERTWO SUPPORTSCONTINUOUS OVER ONEINTERNAL SUPPORTCONTINUOUS OVER TWOINTERNAL SUPPORTSTotal Coated Thickness in mm Total Coated Thickness in mm Total Coated Thickness in mm0.40 0.50 0.60 0.40 0.50 0.60 0.40 0.50 0.60618 769 921 850 1,057 1,266 966 1,201 1,4391.25396 492 589544 676 811618 769 9211.50275 342 409377 470 563429 534 6401.75202 251 301278 345 414315 392 4702.00154 192 230212 264 317241 300 3602.25122 192 182168 209 250191 237 2842.5099 123 147136 169 203155 192 2303.0069 85 10294 117 141107 133 1603.2559 73 8781 100 12091 114 1363.5050 63 7569 86 10379 98 1174.0039 48 5853 66 7960 75 90This information presented is intended as an aid to the Structural Engineer at the design stage.2.8 SECTIONAL PROPERTIESS.No.123PROPERTYTOTAL COATED THICKNESS (MM)0.40 0.50 0.60Moment of Inertia (I) mm 4111,830 139,198 167,198Bottom Section Modulus (Z Bot.) mm 3 7,9829,909 11,840Top Section Modulus (Z Top) mm 32,4583,057 3,6634
The concealed fixing3.0 INSTALLATION:The concealed fix concept of Saflok is as shown in figure 3.0The concealed fixing conceptDirection of laying3 rd Sheet2 nd Sheet1 st SheetClipClipClipClipPURLINFig. 3.03.1 General installation procedure:• Check flatness and slope of the roof.Before starting working ensure that:• The members of the building on which your sheeting will rest, are truly in the same plane:• Unless there is adequate positive fall in a roof there is a danger of ponding which lead to areduced service life therefore it is recommended to design a slope not less than 1 in 30 (2º)• Orient sheets before lifting• Consider which end of the building is best to start from. So that side laps are protected, werecommend that you start laying sheets from the end of the building that will be in the lee of theworst-anticipated or prevailing weather.•Sheet 3Sheet 2 Sheet 1Fig 3.1Prevailing weatherDirection of laying• Position first sheet• Ensure that the first sheet is correctly located in relation to other parts of the building like end –wall, gutters or flashings.5
3.2 Fix the first row of clips• Fix the first clip on the purlin with the clip pointing correctly in the direction of laying as shown in fig3.2• Using a string line (or the first sheet as a straightedge) to align the clips, fix them to all purlins forthe first sheet.Fig3.23.3 Fix the first sheet:• Locate the first sheet over the fixed clip as in fig 3.3• Using a measurement from the gutter-end of the sheet to the fascia of the fascia or purlin, position thesheet so that it overhangs the desired amount into the gutter(usually about 50mm). It is important thatyou keep the gutter –end of all sheets in a straight line.• If a spur on the edge of the sheet fouls a clip, flatten the spur with a rubber mallet to allow the clip tosit down over the rib.• Fully engage the sheet with the clips, using foot pressure on the ribs over each clip.Overlapping ribUnderlappingribFig. 3.33.4 Fix the next (and subsequent) clips & sheets:• Fix the clip for the next sheet as shown in fig 3.4 and place the next sheet over its clip also engagingthe edge of the preceding sheet as shown in fig 3.5• Remove the protective guard film on the underlapping rib of sheet already fixed before placing thenext row of clips and sheets.• Accurately position the sheets so that it over hangs the desired amount into the gutter. It isimportant that the gutter end of all sheets are kept in a straight line.Fig 3.46
• Fully engage the sheet on their clips using foot pressure on the ribs over each clip. Also apply footpressure to the top of the centre rib over each clip.• For walling applications use a rubber mallet instead of the weight on your feet.Fig 3.43.5 Repeat the procedure 3.4 to fix all remaining rows of clips and sheets.Do not forget to remove the protective guard film on the underlapping rib of the preceding sheetsbefore placing the next row of clips of sheets.3.6 Place the last sheet:If the space left between the last full sheet and the fascia or parapet is more than half the width of a sheet,one can cut a sheet along its length leaving the centre rib complete. Place the cut sheet onto a row of clips asfor a full sheet as shown in fig 3.6aIf the space left between the last full sheet and the fascia or parapet is less than half the width of thesheet, fix the edge of the sheet at each purlin, with a clip that has been cut. Cover the gap with the cappingor flashing as shown in fig 3.6b.Fig 3.6a7
Fig. 3.6b3.9 WallingThe installation procedure for walling is similar to that described in roofing except that a rubber mallet isused to engage the sheet instead of foot pressure. Also to prevent SL 700 from sliding downwards in thefixed clips, pierce-fix through each sheet under the flashing or capping along the top of the sheets.NOTE;• The guard film on the underlapping ribs of the sheets should be removed before fixing subsequentclips.• When laying of SL 700 is in progress, the work should end with a clip and NOT the sheet, to avoidpossibility of SL 700 sheets blown off by heavy wind, if any.• Foam fillers for SL700 are available on request.8
4.0 FINISHING ON ENDS OF SHEET:Ends of sheets require treatment to maximize waterproofing or stop vermin entry.4.1 End lapping:SL 700 sheets can be supplied in any length, the only limitation being the transport restriction. In most casestransport restrictions permit sheets long enough to cover roofs in a single piece.If roof span is more than the transport restriction, one needs to consider the roof slope as it affects theamount of overlap required. This is shown on the table below.End-lap length for SL700ROOFSLOPE ENDLAP MIN (mm) ENDLAP MAX(mm)Less than 1 in 4 (15°) 200 300Greater than 1 in 4 (15°) 150 250WALLS 100 200See the above tableFastened clip on purlin2 fasteners pertray self-drillingscrews withsealing washers.Concealed-fixed withpierce-fixing through valleyfig 3.7aTo make the end lapping of SL 700 easier ; remove, for the length of the lap, downturn of the under lappingribs of the top and the bottom sheets in each sheet run as shown in the picture below. The cutback ribs willbe covered by the sheets of the next sheet run.9
Fig 3.7 bOrder of laying;Lay each run of sheets in turn from bottom to top before moving onto the next run as shown in the schematicdiagram.2 41 3 5 Laying directionFig 3.7 cSaflok 700 sheetsEnd laps in pitches less than 15°End laps with roofs of l in 4 (15°) slope should be sealed with a sealant. Two runs of sealant should be used asshown in fig 3.7d belowTurn sheet over10
Fig 3.7 dWhen the sheets are lapped together and fixed, the compressed sealant should just appear at the end of thelap.1. With the top sheet upside down, extrude a 3 mm bead of sealant across the underside of thesheet about 25mm from the end. This is to prevent moisture being drawn in by capillary action.2. Position the bottom sheet, then extrude a 3 mm bead of sealant across the top of the sheetto encapsulate the cut end of the underlapping sheet. This is done to prevent condensationfrom running down the underside of the top sheet and entering the lap.3. Turn the top sheet over and fit it in place.4.2 TURNING DOWN (LIPPING):Water can run back the underside of the sheeting dueto wind or capillary action at the low end of the roofing.To minimize this problem, turn down the valleys(or pans) at the low ends of roofing.The process is calledturning down(or lipping)Lipping is usually doneafter the sheeting is fixed onthe roof, provided there is no obstructionto the operation of the lipping tool. The tool is Fig. 4.2held hard against the end of the pan while the handleis swung through an arc of 45° to form a lip on the end of the sheet. Repeat on every pan.4.3 TURNING-UP:Wind can drive water uphill under the flashing or capping into a building at the high ends of the roof. Tominimize this problem, turn up the valleys (or pans) at highends of the roofing. The process iscalled turning up.Best results areobtainedby firstcutting offthe cornerof theCompleted turn-updown-pointing legof each female rib.This should be done prior Fig 4.3to placing the sheets on the roof.With the hinged turn-up tool open;11
position the tool on the sheet with thelocating pins hard against the end of the sheet.Hold the handles together to clamp the tool onto the tray and pull them to turn-up the tray at 90°.5.0 FLASHINGS:Flashings are used to weatherproof the edges of the roofing and walling and to increase the aesthetics of thecompleted roof. The principle of flashing can be adopted to suit your applications. In all cases it is importantto have ample cover provided by the flashing and proper turn up of the sheeting underneath.Following are the standard range of flashing. Customized flashings are also available.2272274848227INTERNAL CORNER2274848EXTERNAL CORNER47207048CILL FLASHING48481955015WINDOW JAMB48227227RIDGE CAP1742804848APEX FLASHING100230SIDEWALL FLASHING4570259838DRIP FLASHING151423058COUNTER FLASHING1954827548501522710023045DOOR JAMB58HEADWALL FLASHINGBARGE(ROOF ONLY)12
5.1 Materials:It is very important that flashing be made from materials that are compatible with the sheeting. Materialsfor non-standard flashings and other accessories are available in Aluminum Zinc coated or galvanizedwith/without Resincot finishes.5.2 NOTCHINGA hand operated notching tool performs notching. This tool cuts one notch at a time. This is as illustratedbelowFig 5.2Using notching toolAfter sheeting is fixed and the turn-up finished, proceed as follows;• Place a flashing with the notch-edge resting on the ribs,• Locate your notching tool over a rib with the notching head against the flashing,• Push down on the handle to perform the notching,Repeat for all ribs checking in each case that the flashing is correctly positioned.6.0 SKY LIGHTING:This is the simplest method of getting natural light through a steel roof by the use of translucent sheetsthat match the steel profiles. Positive fixing is recommended for SL 700 all round the profile, to eliminateany possibility of leakage.Saflok 700 sheet Translucent sheet Saflok 700 sheetPurlin Fig 6.013
7.0 FEATURES AND BENEFITS:Features Effect BenefitNo holes ••Minimum chances of leakage asthere are no holes.Chances of corrosion near holeseliminated••Much longer life and veryhigh re-use valueGives a clean look andaesthetically pleasing.• No fasteners visibleClose fitting and locking endlaps• One may design for minimumoverlap length• No leakage from side overlaps• One may design a low pitchroof, reducing the cost of thestructure.• Saving material cost aswell as minimum chancesof leakageSimple clip on system. • Easy to fix • Reduce fixing time,Stronger profile, higherload-bearing capacity.Wider cover width • Fewer sheets needed to coverthe roof• Purlin spacing can be increased • Saving on structure cost• High resistance to deformation • Less damage duringinstallation• Saving in roof sheets costby up to 5%Clips overlap preceding rowof sheets.• Sheets once laid cannot beremoved especially in betweenthe roof.• High safety against roofpilferage.8.0 RECOMMENDATOINS:8.1 Maintenance:Life of a roof (or wall) is most affected by original design, the environment of installation and themaintenance. Maintenance is the biggest factor and includes• Regular checks for problems before they become major corrosion sites• Regular washing down especially near coastal or industrial influences• Removal of leaves and other debris from gutters• Keep wall free of soil, concrete, and debris near the ground• Don’t over spray pesticides.The paint system in Resincot steel sheets is durable. Simple maintenance of the finish enhances its life andattractiveness for longer periods. No additional maintenance is required where the paint finish is naturallywashed by rainwater e.g. roofs. However, areas to be washed include the underside of eave gutters, wall14
cladding and under eaves. Washing should be done at least every six months; more frequently in coastal areaswhere sea spray is prevalent and in areas where high level of industrial fall out occur.8.2 Storage:All SL 700 sheets must be stacked clear of the ground, covered and protected from damage. If sheetsbecome wet when stacked, storage stains forms and may affect the coating. If sheets do become wet dry allsheets with a clean rag and fillet stack to allow air circulation to complete the drying process.8.3 Handling:• Should be done with a lot of care to avoid scratching the colored sheets.• Never slide the sheets over other• Carry the sheets one at a time• Sheets of upto 3.0 m can be carried by two persons; one person at each end. For longer sheets atleast one more person is required to support the sheet at the centre.• Guard film is fixed on all the ribs of SL 700 sheets to provide protection during handling and erection.Guard film on underlapping ribs is removed during installation, when on all other ribs it is removedafter the roof/wall is completed.15