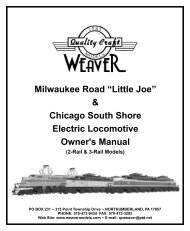
Ultra Line Manual.pdf - Weaver Models
Ultra Line Manual.pdf - Weaver Models
Ultra Line Manual.pdf - Weaver Models

Create successful ePaper yourself
Turn your PDF publications into a flip-book with our unique Google optimized e-Paper software.
ZACHODNIOPOMORSKI UNIWERSYTET TECHNOLOGICZNYWYDZIAŁ TECHNOLOGII I INŻYNIERII CHEMICZNEJInstytut Inżynierii Chemicznej i Procesów Ochrony Środowiskamgr inż. Anna SZMYTBADANIA DOŚWIADCZALNE I MODELOWANIEPROCESU BIOADSORPCJIMETALI CIĘŻKICH Z ROZTWORÓW WODNYCHRozprawa doktorska wykonanaw Zakładzie Inżynierii Procesowej,Informatyki Procesoweji Ochrony AtmosferyPromotor:dr hab. inż. Józef Nastaj, prof. ZUTRozprawa doktorska realizowanaw ramach projektu badawczegoN N209 215338Szczecin, 2012
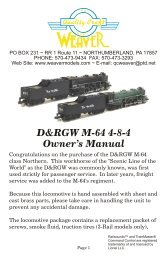
locomotive will return to its original speed.For the 128-speed step mode;ENG + ## + DIR + AUX1 + AUX1 + AUX1 + 2(The horn will sound after the 3rd AUX1 and after 2.)The 128-speed step mode works quite differently than any other TMCCequipped locomotive. The red thumbwheel on the Cab-1 will increase and decreasethe speed step 2 at a time. The BOOST key will increase the speed one step at a timeand the BRAKE key will decrease the speed one step at a time. Pressing and holdingeither the BOOST or BRAKE keys will not yield the same results as they do in the 32-speed step mode. The DIR key can be used for an absolute stop as well.What exactly does 128-speed steps mean? This means there are 128 stepsbetween a dead stop and full speed. 4 times the amount available with any non-cruiseequipped locomotive. 128-speed step mode provides much finer control of the speed.With this mode enabled you can actually make a locomotive start out so slow that youwill actually hear the coupler slack being pulled out of a long string of cars (instead ofbeing included in the sound system!). The results of this mode are absolutelymagnificent for fine slow speed control.For the Cruise Off mode;ENG + ## + DIR + AUX1 + AUX1 + AUX1 + 3(The horn will sound after the 3rd AUX1 and after 3.)The Cruise Off mode will provide 100% lash-up compatibility with non-cruiseequipped locomotives. In this mode the response to commands is exactly the same asany other command equipped locomotive without cruise control.Fine Tuning Your EOB Equipped Locomotive’s PerformanceIn addition to being able to select between the speed step modes you can alsotweak your locomotives’s performance using two embedded performance settings.These settings are called “pre-pulse” and “background pulse” and they are used toselect the amount of voltage applied to the motor and the amount of time that voltage isapplied. Your locomotive has been programmed from the factory with the settingsrequired to make the locomotive perform smoothly, however, after excessiveoperation and break in, it may become necessary to adjust these settings to improvethe performance of your locomotive. To access these settings follow the instructionson page 4.Page 3
Pre-Pulse SettingENG + ID Number + DIR + AUX1 + AUX1 + AUX1 + 5 + # (# = any number 1-8) (Thehorn will sound after the 3rd AUX1 and after #.)The lowest setting is 1 and the highest setting is 8. This setting is used to control theamount of power applied to the motor.Background Pulse SettingENG + ID Number + DIR + AUX1 + AUX1 + AUX1 + 4 + # + # (# = any number 1-20) (Thehorn will sound after the 3rd AUX1 and after the last #.)The lowest setting is 20 and the highest setting is 1. This setting is used to control theamount of time the motor voltage is applied. The higher the setting (lower number) thefaster the first speed step will be.3-Rail Without Sound (non-command mode)All 3-Rail non sound diesels contain an electronic reversing unit (e-unit). Theoperation of the e-unit is as follows: Each time the power to the locomotive isinterrupted, the e-unit changes states. This can be done by moving the transformercontrol to the off position, or pushing the direction button on your transformer (if thetransformer is equipped with a direction button). The sequence of operation is neutralforward-neutral-reverse.All 3-Rail without sound engines can be upgraded toRailsounds 4.0® and TrainMaster® Command Control. <strong>Weaver</strong> <strong>Models</strong> also offersRail Waves as a sound option which includes a diesel horn and bell sound. Contact ustoday to upgrade your engine. Rail Waves is your simple sounds for your diesellocomotive needs.3-Rail With Sound (non-command mode)This engine is equipped with Railsounds 4.0® and is also TrainMaster®Command Control ready. This diesel features digital samples from authentic dieselsfor the ultimate in realism. An engine running in a non command mode will have dieselidle sounds, and also diesel horn and bell. Also, listen for incidental locomotive soundsduring Railsounds 4.0® operation, as they are automatic and authentic. For evenmore authentic Railsounds 4.0® effects, operate in a TrainMaster® Command Controlenvironment. This engine will operate on 7-18 volts alternating current. Virtually anyalternating current transformer is suitable to operate your locomotive as well as theLionel® TrainMaster® Command Control system.NOTE: Do not power your locomotive with direct current (DC). Damage to electronicPage 4
components may occur.A 9-volt battery is only necessary when the engine is to be used with aconventional transformer such as the QW, TW, KW, etc. This will enable thelocomotive to maintain uninterrupted sound when the voltage drops below 8 volts. Toinstall the battery, there are four body screws, one at each corner of then engine floor.Remove the four screws from the bottom of the floor and the body shell will thenremove easily. There are two additional screws in the fuel tank area that also need tobe removed from the engine floor. You will find a 9 volt battery connector end wrappedin black electrical tape among the wires. Install the battery, place the shell back on thefloor, and reinstall the screws.When you first power up your track, the engine will wait 3 to 8 seconds as itlistens for the digital language from the TrainMaster® Command Base (soldseparately). When it's determined that it's on a conventional (non command) railroad,the headlights will illuminate and Railsounds 4.0® will fire up. At this point the engineis in neutral. (This occurs when placing the locomotive on your railroad for the firsttime. Thereafter, it starts in forward after every three second power interrupt).The e-unit in your locomotive alternates between three states: forward,neutral, and reverse. You may deactivate the operation of the e-unit by moving thePROGRAM/RUN switch to the PROGRAM position. This allows you to lock outdirectional control in conventional mode. The FULL/SIGNAL switch is used to selectbetween full Railsounds 4.0® and simple sounds (horn and bell only).Lionel® RailSounds4.0®All our 3-Rail with sound engines are equipped with RailSounds®, the finestsound system available today, and the industry's premier digital operating controlsystem, TrainMaster® Command Control. This system will operate with a noncommand control transformer but, the additional sound features which include couplersound, diesel idle up and down, diesel idle sound, volume control, tower command,and crew talk will not function without the remote control and command base.2-Rail With SoundYour 2-Rail with sound locomotive is equipped to run on standard AC like a 3-Rail with sound locomotive. For more information on 2-Rail TMCC operation pleaserefer to the sections on pages 5 through 9, the operation is the same as a 3-Rail withsound locomotive. For detailed on 2-Rail AC TMCC operation please visitwww.scalecommand.com.Page 5
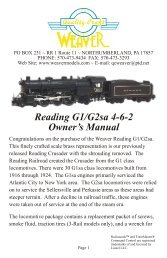
TrainMaster® Command OperationsLionel® TrainMaster® Command Control is the advanced model railroadcontrol system from Lionel. Your locomotive is equipped (if you chose to do so at thetime of purchase) with TAStudios Engineer On Board speed control (non EOBlocomotives feature TAStudios SAW Boards) and the modular Lionel R2LC commandreceiver and Railsounds 4.0®. TrainMaster® Command Control gives you power tooperate multiple Command equipped locomotives simultaneously on the same track.To operate in the Command mode you will need a Lionel Command Base and Cab-1remote control. These items can be purchased togther under Lionel part number 6-12969 at any authorized Lionel retailer.Make sure the power to the track is OFF, then place your locomotive on thetrack. Make sure your Lionel® Command Base is ON (verify the green light isilluminated) and there is a wire from the Command Base “U” post to the outside rail ofyour track. Once these are done apply full voltage to the track (approximately 18 VoltsAC).Address your diesel using the CAB-1 Remote Controller®. Press ENG and 1on the numeric keypad of your CAB-1 Remote Controler®. This command is sent bythe CAB-1 Remote Controller® to the Command Base, which then translates yourcommand into digital code. That code is sent around your railroad's outside rails in theform of a digital "halo". All command equipped engines listen to this digitalcommunication, but they do not respond until they hear their individual ID number - inthis case, 1. The digital language of TrainMaster Command - and not track power -controls the actions of command equipped engines.All command equipped engines come factory programmed with an ID# of 1.See page 9 for information on changing this ID#.To start the sounds of your locomotive press the HORN key. Your Railsounds4.0® sound system will come to life. To access all the features of your Railsounds®sound system see the tutorial on page 7.Page 6
CAB-1 Remote Controller® CommandsPress AUX1 to activate numerickeypadPress WSTL/HRN to activatehorn. Release it to discontinue.Press AUX2 to turn headlight onand offPress BELL once to activatethe bell, again to discontinue.Couple F/R buttons will releasecoupler and produce couplerrelease sounds.Press HALT to shut down allPowermaster® electricaloutlets on your railroad. Stopsall Command equippedengines in operation.Turn the THROTTLE to theright to accelerate, left todecelerate.Press DIR - the locomotivedecelerates to a complete stop;turn the throttle up, and thelocomotive will accelerate inthe new, opposite direction.There is no neutral state.Press and hold BOOST forextra power. Release BOOSTand return to the engine'sprevious speed.Press and hold BRAKE to slowdown or stop. Release BRAKEand return to previous speed.CAB-1 Remote Controller® Numeric Keypad CommandsWhen you press the AUX1 on CAB-1 Remote Controller®, you turn thenumeric keypad into 10 command buttons. The keypad lets you control extracommand features (until you press any top row button).0 Stops and resets the engine. Resets the direction to FORWARD. ResetsRailsounds 4.0® to automatic RPM. Horn Blows. RPM's return to automatic.1 Raises the volume of Railsounds 4.0®.2 CrewTalk is the sound of inaudible walkie talkie communication.3 Raises Railsounds 4.0® RPM level. Starts up Railsounds 4.0®. RPM's increase.Startup sequence commences.4 Lowers the volume of Railsounds 4.0®.5 Activates the Railsounds 4.0® shutdown sequence. Just like the real thing, yourlocomotive RPM's must be at idle for shutdown to occur. Press 6 repeatedly to lowerRPM's until they won't descend further. Your locomotive is now at idle. Press 5 toPage 7
initiate the shutdown sequence. Diesel shutdown commences. Remember, the horn,bell and RPM's will not sound until you restart Railsounds 4.0®.6 Lowers Railsounds 4.0® RPM level.7 TowerCom is an audible announcement from the tower.8 Turns the smoke unit off (only diesels with smoke).9 Turns the smoke unit on (only diesels with smoke).Turning Your Locomotive's Performance MomentumTrainMaster® Command's momentum feature simulates the laboredperformance of a locomotive pulling a heavy load. Press L,M, or H (located under theCAB-1 Remote Controller's® removable panel) for light, medium, or heavymomentum. The R2LC remembers the setting until you change it. For delayedresponse, use H. For quick response use L.Locomotives equipped with EOB Cruise Control do not respond to momentumsettings. Instead, the momentum is built into the EOB software. EOB is designed togradually increase speed, regardless of how fast you turn the red thumbwheel. This isdone to reduce derailments of long trains when starting from a dead stop. Only whenEOB is set to the 32-speed step mode, cruise off, will the momentum settings have anyaffect on the performance characteristics of the locomotive.Braking and BoostingThere's more to starting and stopping than just turning the CAB-1 RemoteController® throttle. Use the BOOST and BRAKE command buttons - they give youincremental control of speed and are the superior way to handle grades, gradual stopsand-startsand more. Plus, using BRAKE in the Command environment gives you abonus Railsounds 4.0® effect - the realistic sound of squealing brakes.You will not experience any performance differences using the BRAKE orBOOST keys when the locomotive is set to the 128-speed step mode, cruise on.Please refer to page 3 for operating instructions for EOB set to 128-speed steps, cruiseon.StallMake your locomotive feel more responsive by setting a stall voltage. Getyour locomotive moving, then press SET; the engine will stop. Turn the throttleclockwise to get the locomotive moving, then decrease the speed until the locomotivePage 8
just stops. Then press SET again; the LCRU remembers the stall setting until youchange it. To clear stall, press SET twice, holding it for one second each time.Locomotives equipped with EOB Cruise Control do not respond to “Stall”settings. Instead the stall is built into the EOB software. Only in the 32-speed step,cruise off mode will the stall settings be applicable.Assigning Your Locomotive A New ID#As your fleet of command equipped engines grows, new engines require adifferent ID#. Choose from any between 2 and 99. Remember, all command equippedengines ship as ID#1.We recommend that you choose an easy to remember ID# for your engine.Some possibilities are part of the engine road number, your age, or any two digitnumber that is not used by another engine. If you like, write the number on a smallpiece of tape and put this on the bottom of the engine chassis to aid in remembering.Step 1: Ensure the Command Base is ON (verify green light is illuminated).Step 2: Slide the PROGRAM/RUN switch to the PROGRAM position.Step 3: Place locomotive on track with power OFF.Step 4: Turn track power ON to 18 Volts AC.Step 5: Using the Cab-1 remote press ENG + ID number.Step 6: Press SET (located under the removable cover on the bottom of theremote).Step 7: The horn of the locomotive will sound when the SET key is pressed.Step 8: Using the Cab-1 remote press AUX1 + 5 (the horn will soundagain).Step 9: Slide the PROGRAM/RUN switch back to RUN.Your engine remembers its ID# forever, change it any time with these steps.Reprogramming R2LC Command Receiver to Restore Auxiliary OutputFunctionsYour locomotive may or may not be equipped with a smoke unit, marker lights,or strobe light. However, if they are and you reprogram the ID number of thelocomotive you may lose control of these functions. To restore these functions pleasefollow the steps below.Step 1: Ensure the Command Base is ON (verify green light is illuminated).Step 2: Slide the PROGRAM/RUN switch to the PROGRAM position.Step 3: Place locomotive on track with power OFF.Step 4: Turn track power ON to 18 Volts AC.Step 5: Using the Cab-1 remote press ENG + ID number.Page 9
Step 6: Press SET (located under the removable cover on the bottom of theremote).Step 7: The horn of the locomotive will sound when the SET key is pressed.Step 8: Using the Cab-1 remote press ENG + ID Number (the number youjust assigned to the locomotive) + AUX1 + ## (the horn will soundagain).Step 9: Slide the PROGRAM/RUN switch back to RUN.Step 10: Place locomotive back on the track and operate as usual.## - Denotes one of the codes listed below.5 = Strobe light (factory default)7 = Smoke unit on/off, DC polarity. Polarity reversed based on motor direction.8 = Smoke unit on/off.Service And Warranty InformationThis item is warranted for one year from the date of purchase. We will repair or replace (atour option) the defective part without charge for parts or labor, if the item is returned in the mannerlisted below within one year of the original date of purchase. This warranty does not cover itemsthat have been abused or damaged by careless handling. Transportation costs incurred by thecustomer are not covered under this warranty.For warranty repair, DO NOT return your product to the place of purchase. Instead, followthe instructions below to obtain warranty service as our dealer network is not prepared to servicethe product under the terms of this warranty.1. First: WRITE, CALL or FAX <strong>Weaver</strong> <strong>Models</strong>, PO Box 231, 315 Point Township Drive,Northumberland, PA 17857, 570-473-9434 (FAX #570-473-3293), requesting a ReturnAuthorization Number and stating when the unit was purchased and a description of the problem.2. CAUTION: Make sure the product is packed in its original factory packaging includingits foam and plastic wrapping material so as to prevent damage during shipping. The shipmentmust be prepaid and we recommend that it be insured. A cover letter, including you name,address, daytime phone number and a full description of the problem MUST be included tofacilitate the repairs. Please include the description regardless of whether you discussedthe problem with one of our service technicians when contacting <strong>Weaver</strong> <strong>Models</strong>.3. Please make sure you have followed the instructions carefully before returning anymerchandise for service.Lionel®, Railsounds 4.0®, CAB-1 Remote Controller®, Powermaster®, TowerCom, CrewTalk, and TrainMaster® Command Control areregistered trademarks of and licensed by Lionel LLC.Engineer On Board and EOB are registered trademarks of Train America Studios.Page 10
1 YearWarrantyRegistrationTo register your 1 year warranty with us, we ask that you fill in thisform (front and back) and return it to <strong>Weaver</strong> <strong>Models</strong>. We alsoask that you provide us with the following information so that wemay better serve you, our valued customer.Name:__________________________________________Address:________________________________________City:___________________ State:______ Zip:_________Phone:_____________________________Age Group (circle one): 0-18 yrs 19-30 yrs 31-40 yrs41-50 yrs 51-60 yrs 61 yrs & upWhat item did you purchase? _______________________What rail did you purchase (circle one):2-Rail 2-Rail with sound 3-Rail 3-Rail with soundWhere did you purchase your item?Company Name:__________________________________Address:________________________________________City:_________________ State:________ Zip:__________What are your average annual train expenses? $_________Do you primarily purchase (circle all that apply):Diesels Steam Brass Die CastFreight Cars All of the aboveWhat size is your track? 0-27 0-31 0-42 0-540-72 Other:_________Page 11
Is this your first <strong>Weaver</strong> purchase? _________Date purchased? ____________Do you read (circle all that apply): Classic Toy TrainsO Gauge Railroading Railroad Model CraftsmanRail Model Journal 48/ft O Scale NewsO Scale TrainsOther: ___________________Are you a Train Collectors Association member? _______How can we improve our catalog/web site?__________________________________________________________________________________________________________________________What new features would you like to see to help us improve ourproducts:_________________________________________________________________________________________________What new products would you like to see us offer? ________________________________________________________________What comments and suggestions do you have for us?_________________________________________________________________________________________________________________<strong>Weaver</strong> <strong>Models</strong>PO Box 231 ~ 315 Point Township Drive ~ Northumberland, PA 17857Phone: 570-473-9434 Fax: 570-473-3293Web Site: www.weavermodels.comE-mail: customerservice@weavermodels.comOpen Monday thru Friday 8:00 AM - 4:30 PM (eastern time)Page 12