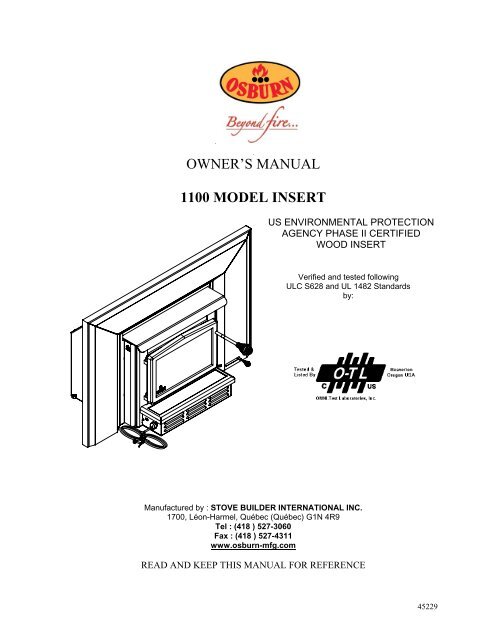
Owner's Manual Osburn 1100 Wood Stove Insert - Rural Energy ...
Owner's Manual Osburn 1100 Wood Stove Insert - Rural Energy ...
Owner's Manual Osburn 1100 Wood Stove Insert - Rural Energy ...

Create successful ePaper yourself
Turn your PDF publications into a flip-book with our unique Google optimized e-Paper software.
INTRODUCTIONSBI INC., one of the most important wood stove and fireplace manufacturers in Canada,congratulates you on your purchase and wishes to help you get maximum satisfaction from yourwood insert. In the pages that follow, we will give you advice on wood heating and controlledcombustion as well as technical specifications regarding installation, operation and maintenance ofthe model you have chosen.The instructions pertaining to the installation of your wood stove comply with ULC-S628 and UL-1482 standards.Read this entire manual before you install and use your new insert. If this insert is notproperly installed, a house fire may result. To reduce the risk of fire, follow the installationinstructions. Failure to follow instructions may result in property damage, bodily injury, oreven death.Consult your municipal building department or fire officials about restrictions andinstallations requirements in your area and the need to obtain a permit.Keep and save this instructions manual for future references.CAUTIONS:• HOT WHILE IN OPERATION. KEEP CHILDREN, CLOTHING AND FURNITURE AWAY. CONTACT MAY CAUSESKIN BURNS.• DO NOT USE CHEMICALS OR FLUIDS TO START THE FIRE.• DO NOT LEAVE THE STOVE UNATTENDED WHEN THE DOOR IS SLIGHTLY OPENED.• DO NOT BURN WASTES, FLAMMABLE FLUID SUCH AS GASOLINE, NAPHTHA OR MOTOR OIL.• DO NOT CONNECT TO ANY AIR DISTRIBUTION DUCT OR SYSTEM.• ALWAYS CLOSE THE DOOR AFTER THE IGNITION.REGISTER YOU WARRANTY ONLINETo receive full warranty coverage, you will needto show evidence of the date you purchased yourstove. Keep your sales invoice. We alsorecommend that you register your warranty onlineatwww.osburn-mfg.comRegistering your warranty online will help us trackrapidly the information we need on your insert.1
TABLE OF CONTENTSINTRODUCTION .................................................................................................................................................... 1Section 1.0 Pre-Installation Requirements............................................................................................................ 41.1 Masonry & Zero Clearance Requirements................................................................................................41.2 Venting Requirements .................................................................................................................................5Section 2.0 Installation ............................................................................................................................................ 62.1 Clearances To Combustibles (Measured From <strong>Insert</strong> Body)...................................................................62.1.1 Hearth Requirements................................................................................................................................72.2 Suitable Fireplace Dimensions ....................................................................................................................72.3 Safety Information .......................................................................................................................................82.4 Installation Instructions...............................................................................................................................92.5 Air control plate, faceplate and fan Assembly Instructions ..................................................................102.6 Decorative sides installation ......................................................................................................................11Section 3.0 Operation ............................................................................................................................................ 123.1 Safety Information .....................................................................................................................................123.2 Fuel ..............................................................................................................................................................133.2.1 Simple <strong>Wood</strong> Moisture Test...................................................................................................................143.3 Notes About First Firing............................................................................................................................143.4 Lighting A Fire ...........................................................................................................................................14The Use of a Custom Faceplate ............................................................................................................................ 153.5 Maintaining The Fire.................................................................................................................................163.6 Fan Operation.............................................................................................................................................16Section 4.0 Maintenance ....................................................................................................................................... 174.1 Care And Cleaning.....................................................................................................................................174.1.1 Glass Cleaning and maintenance...........................................................................................................174.2 Ash Removal...............................................................................................................................................184.3 Chimney Cleaning......................................................................................................................................184.4 Baffle Installation for <strong>Osburn</strong> <strong>1100</strong> <strong>Insert</strong>...............................................................................................194.5 Secondary Air Tube Replacement ............................................................................................................204.6 Fan Maintenance & Care ..........................................................................................................................214.7 Removal instructions .................................................................................................................................21Section 5.0 Specifications ...................................................................................................................................... 22OSBURN LIMITED LIFETIME WARRANTY................................................................................................232
<strong>Osburn</strong> <strong>1100</strong> <strong>Insert</strong> Dimensions3
Section 1.0 Pre-Installation Requirements1.1 Masonry & Zero Clearance RequirementsThe masonry fireplace must meet the minimum code requirements, or NFPA 211 or the equivalent for asafe installation. Contact your local Building Inspector for requirements in your area. An inspection ofthe fireplace should include the following:1. CONDITION OF THE FIREPLACE AND CHIMNEY: Examine the masonry fireplace andchimney prior to installation to determine that they are free from cracks, loose mortar, creosotedeposits, blockage, or other signs of deterioration. If evidence of deterioration is noted, the fireplaceor chimney should be upgraded prior to installation.2. ZERO CLEARANCE OR METAL HEATFORM FIREPLACE: These fireplaces and chimneysmust meet the conditions above, and the factory built zero clearance fireplace must be listed. Theymust be suitable for use with solid fuel. The chimney must be at least 1" (25mm) larger in diameterto accommodate a required continuous stainless steel liner running from the flue collar to the top ofthe chimney termination.Only readily detachable parts that are easily replaced, such as damper parts, screens, doors, and sideand back refractory panels, are to be removed from the fireplace. These parts must be stored nearbyand available for retrofit if the insert is ever removed. Removal of any parts which render thefireplace unfit for use with solid fuel requires the fireplace to be permanently labeled by the installeras being no longer suitable for solid fuel until the removed parts are replaced and the fireplace isrestored to its original certified condition.3. CHIMNEY CAPS: Mesh type chimney caps must have provision for regular cleaning, or the meshshould be removed to eliminate the potential of plugging.4. LINER: The chimney must have an acceptable masonry liner suitable for solid fuel, otherwise acontinuous stainless steel liner must be installed.5. ADJACENT COMBUSTIBLES: The fireplace should be inspected to make sure that there isadequate clearance to combustibles, both exposed combustibles to the top, side, and front as wellas concealed combustibles, in the chimney and mantel area. Your local inspector should haveinformation on whether older fireplaces are of adequate construction.6. OPENING SIZE: Refer to “Suitable Fireplace Dimensions” (Sec. 2.2) for suitable size fireplaceopenings.4
1.2 Venting RequirementsThe flue is a critical component to a satisfactory installation. Your <strong>Osburn</strong> insert will attain its bestperformance if installed with a chimney that generates its own draft. The minimum requirement of aflue will be the installation of a flue connector (the liner must conform to UL1777 chimney liners) fromthe insert into the first flue tile of the chimney (USA), see Figure 2.3 , or a continuous stainless steelliner (the liner must conform to the Class 3 requirements of CAN/ULC-S635) directly connected to theflue outlet (Canada), see Figure 2.2. A continuous 6" (152mm) stainless steel liner from the top of thechimney is the optimum system and will provide the best performance, as well as compensate for poordraft situations caused by large cross-sectional chimneys. The insert will not work without a positiveseal in the chimney.Chimneys constructed outside of the home, on an exterior wall, should be avoided if possible, especiallyin colder climates. Outside chimneys may not draw as well and may downdraft due to the difficulty inheating them up to operating temperature. Cooler chimneys will result in increased creosoteing, lessdraft, and poorer performance. Draft is proportional to overall chimney height as well as to stacktemperature. Draft can be increased by increasing chimney height, and by reducing heat loss from thechimney through an insulated liner.Ensure that all joints in the flue systems are tightly sealed, since any leaks will result in reducedperformance as well as a possible safety hazard.5
2.1.1 Hearth RequirementsIf the non-combustible hearth is flush with the floor, then the hearth must be 16”/406mm(18”/450mm in Canada) in front of the fan housing (see Figure 2.1.2). If the noncombustiblehearth is a minimum of 4” (102mm) above the floor, then the hearth can be 6”(152mm) out from the fan housing with a 10” (254mm) floor protection (sparks) extendedbeyond the hearth (see Figure 2.1.1). The non-combustible hearth must be a minimum of 8”(203mm) on each side of the unit (Canada & USA).Convert specification to R-value:k-factor is given with a required thickness (T) in inches: R=1/k x TC-factor is given: R=1/CExample:If the floor protector is 4” brick with a C-factor of 1.25 over 1/8” mineral board with a kfactor of 0.29 the total R-value of the system is:4” brick C=1.25, R=1/1.25=0.81/8” mineral board K=0.29, R=1/0.29 x 0.125=0.431Total R = Rbrick + Rmineral = 0.8 + 0.431 = 1.231Total R is greater than 1.0, the system is acceptable.Figure 2.1.1 Figure 2.1.22.2 Suitable Fireplace Dimensions<strong>Osburn</strong> <strong>1100</strong> <strong>Insert</strong>Measurement for :Opening Height (F)Opening Width (G)Opening Depth (H)Table 2.2Minimum22” (559 mm)26” (660 mm)14” (356 mm)7
2.3 Safety InformationNOTE:This appliance is not recommended for use in a home if an occupant has anyrespiratory or any other related problems.1. It is important to follow the installation and operation instructions. An improperly installed oroperated insert could result in a safety hazard or fire, or damage to the unit, which would not becovered by the warranty. Contact local building or fire officials about restrictions and installationrequirements in your area. You should be familiar with the installation and be sure that the work isdone in accordance with this manual.WARNING: DO NOT INSTALL THIS INSERT IN A SLEEPING ROOM.2. Where lesser clearances are desired, consult your local authority as regulations may vary regardingthe use of clearance reducing devices. Listed wall and floor shields are available to reduceclearances, and most building codes provide information on materials which may be used to reduceclearances.3. Maintain at least the minimum clearances to combustible material as specified in this manual.Clearances are measured to the nearest part of the insert (i.e. top edge on the side). Clearances toany combustibles, when measured directly out from the front, must be a minimum of 48" (1219mm).4. Maintain at least the minimum floor protection for combustible floor materials as specified in thismanual. Floor protection to the front is to be measured from the fuel loading door opening.5. <strong>Osburn</strong> recommends that you install a listed smoke detector or alarm in your home. Normaloperation of the insert will have no effect on the detector or alarm.6. The insert is to be connected only to a lined masonry chimney and masonry fireplace conformingto building codes for use with solid fuel. Do not remove bricks or mortar from the existingfireplace when installing the insert. This insert must be connected to a code-approved masonrychimney or listed factory-built fireplace chimney with a direct flue connector into the firstchimney liner section. The chimney size should not be less than or more than three times greaterthan the cross-sectional area of the flue collar7. Minimum chimney size is 6" (152mm) diameter. Maintain a 15' (4.5m) minimum overall heightmeasured from the base of the appliance. Chimneys should be inspected to check fordeterioration and to determine if they meet the minimum requirements, and be upgraded ifnecessary. The chimney must extend at least 3' (914mm) above the roof and at least 2' (610mm)above the highest point within an area of 10' (3m) of the chimney.8. Do not use makeshift compromises during installation as they could create a safety hazard and a firecould result.9. DO NOT CONNECT THIS APPLIANCE TO THE CHIMNEY OR FLUE SERVING ANOTHERAPPLIANCE.8
2.4 Installation Instructions1. Inspect the fireplace according to the safety information and fireplace requirements and have itcleaned and/or upgraded as necessary.2. If the installation of the unit renders the existing damper control inaccessible, it will be necessary toeither secure the damper wide open or remove it entirely. An inaccessible damper, which may close,could cause smoke to enter the room. This creates a potential health hazard.3. CONNECTOR INSTALLATION: A flue connector may provide acceptable performance, however,we recommend the use of a chimney liner to ensure satisfactory performance. Slip connectors forcontinuous liners should also be installed. Use Listed Chimney Liners – UL1777, CAN/ULC-S635.The connector must be secured with a minimum of three screws.4. ATTENTION INSTALLER: When positioning the unit in a fireplace opening prior to the flueinstallation, install the insert into the opening until the top lip of air jacket is flush with fireplacefacing.Figure 2.2 Figure 2.35. If lag-bolts and anchors are to be used to secure the insert, the hole locations should be markedwith the unit in place. Remove the insert and locate the anchors.9
6. Remove the faceplate panels from their box and assemble according to the followinginstructions.2.5 Air control plate, faceplate and fan Assembly Instructions1. Place the faceplate panels with the finished side down on a flat, soft, non-abrasive surface.2. Assemble the faceplate trim, attaching the mitered corners with the corner brackets.(see Figure 2.4)3. Line up the holes of the side and top panels and secure with the screws and nuts. (see Figure2.5a)4. Slide the assembled trim over the edges of the faceplate.5. Secure trim to faceplate using "U" shaped clips. (see Figure 2.5b)Figure 2.4 Figure 2.5aFigure 2.5b Figure 2.5c6. Fan is already attached to the unit at the factory with two tie straps. Remove the two tie strapsand clip the blower assembly back onto the unit.10
2.6 Decorative sides installationYour <strong>Osburn</strong> <strong>1100</strong> insert comes with decorative sides. To install, simply clip them back into place (seefigure 2.6 below).Figure 2.611
Section 3.0 Operation3.1 Safety Information1. This insert is designed for safe operation WHEN BURNING CORDWOOD ONLY. Altering or modifyingthe unit or the installation without proper authorization will void the certification, warranty, andsafety listing, and may result in a safety hazard.2. For safety reasons, never leave the unit unattended with the door open or ajar. An open door, andespecially a door partially open or cracked, if left for longer than required for good ignition canpotentially result in unsafe chimney temperatures, and if left unattended, hot embers or ignited fuelmay fall out of the unit. Prolonged door open operation is not necessary provided the unit hasbeen properly installed and dry kindling is used to start the fire.3. Do not abuse the unit, either by over firing or by using wood or combustibles with salt content, orharmful chemicals. Misuse is not covered by warranty.4. Even though your <strong>Osburn</strong> insert has been specifically designed and tested to prevent smokespillage, always open the door slowly as this will minimize the likelihood of smoke spillage or aback draft causing flame or smoke to spill into the room.5. Never use gasoline type lantern fuel, kerosene, solvents, charcoal lighter fluid, or inflammableliquids to start or "freshen" a fire in the insert. Keep all such liquids well away from the insertwhile it is in use.6. All insert surfaces become very hot during operation. Care is needed, especially with children, toavoid contacting these surfaces.7. Do not elevate the fire by means of grates, and irons or other means.8. CAUTION: DO NOT OVER FIRE THIS HEATER. Do not burn fuel in the insert at a rate higher than thatwhich will cause the ember bed level to exceed half the door opening height. If burning hot firesregularly, purchase an insert top thermometer, and do not exceed 840 o F (450 o C) as measured onthe cooktop. If the door handle of the insert becomes excessively hot to the touch, consider this tobe an indication of over firing. Over firing can result in a safety hazard and can permanentlydamage the insert and chimney. This damage is not covered by the warranty.9. Although the ceramic glass is extremely durable under any normal use, a few precautions arerequired. Do not attempt to push logs further into the fire by using the door, as the glass maybreak if it is heavily contacted by any solid object.10. Never operate the insert with the door open, or cracked slightly open, except briefly during thelighting operation, and during refuelling. Leaving the door open continuously could seriously12
overheat the chimney and adjacent combustibles. Do not operate the insert if there is an abnormalair leakage into the unit, such as through deteriorated gaskets or cracked or broken glass. Do notoperate the insert without a door gasket. Leakage can result in overheating, or in very airtighthomes, could possibly cause smoke spillage into the room. Smoke may contain carbon monoxide,which is poisonous, and in sufficient quantities is a health hazard.11. We recommend that you have a fresh air or make up air supply for the insert. In Canada this is abuilding code requirement. If this is not done, it could cause poor air quality in the home, poor andincomplete combustion, and poor efficiency in the insert. Adequate ventilation is required toreduce effects from room air starvation and exhaust fans.Outside combustion air may be required if:a. The solid-fuel-fired appliance does not draw steadily, smoke rollout occurs, fuel burnspoorly, or back-drafts occur whether or not there is combustion present.b. Existing fuel-fired equipment in the house, such as fireplaces or other heating appliances,smell, do not operate properly, suffer smoke roll-out when opened, or back-draft whether ornot there is combustion present.c. Opening a window slightly on a calm (windless) day alleviates any of the above symptoms.d. The house is equipped with a well-sealed vapour barrier and tight fitting windows and/or hasany powered devices that exhaust house air.e. There is excessive condensation on windows in the winter.f. A ventilation system is installed in the house.3.2 Fuel1. Fuel for the insert must not be stored closer than the required clearances to combustibles and not inthe space required for ash removal.2. Your <strong>Osburn</strong> insert is designed to burn CORDWOOD FUEL ONLY. Do not burn coal, charcoal, ortrash in the unit. Highly flammable items such as trash may ignite creosote in the chimney,resulting in a chimney fire. Never burn salt wood, beachwood, chemically treated wood, or woodremoved from salt water, since the deposits left will deteriorate the firebox. Damage caused bychemicals or salt is not covered under warranty.3. Seasoned dense wood is recommended. <strong>Wood</strong> should be air dried in a covered ventilated area forsix months to a year or more. This reduces the moisture content of the wood, resulting in betterinsert performance. <strong>Wood</strong> species with a moisture content of 20% or less are ideal. Dry seasonedwood can be distinguished from green wood by the checks or cracks in the ends.4. Wet or green wood will tend to cause the fire to smoulder, producing large amounts of creosote.Creosote build-up could result in a chimney fire. This wood will also prove difficult to keepburning properly, and fires will tend to go out. Green wood produces very little heat, andsometimes causes customers to think that the insert does not work. If you must burn wet wood,use only small amounts mixed with dry wood.5. Decayed wood or low density wood has very little energy content or heating value, and will not13
urn satisfactorily for long periods of time.An example of the energy values of some common wood fuels is given in Table 3.1For recommended wood sizes, refer to the specifications.Common Heating Values of CordwoodHardwoods Million Btu/Cord Softwoods Million Btu/CordBirch 23.6 Douglas Fir 20.6White Oak 28.3 Hemlock 17.1Alder 17.6 Jack Pine 18.4Table 3.13.2.1 Simple <strong>Wood</strong> Moisture TestAdd one large piece of wood to the top of an established fire. If it starts to burn on three sides withinone minute, it is dry and seasoned and right for burning. If it turns black and starts to burn in threeminutes, it is damp. If it turns black and does not start burning until after five minutes, it is green andwet. If it hisses at any time, the wood is soaked and will not burn until excess moisture is boiled away.3.3 Notes About First FiringBefore firing ensure that the room is well ventilated. Curing the paint is recommended to preserve thebest quality finish. Heating the insert too intensely on the first fire will dull and lighten the colour onoverheated areas, and cause smoke and odour to be emitted into the room. To cure the paint, the firsttwo fires should be burned for only about twenty minutes each.The paint curing process will produce a light fume with an unpleasant odour. Open windows. Leave theroom if the smell is too intense. The fume is non-toxic and will disappear completely after the unitwill have been used a few times at higher firing temperatures.Allow the insert to get warm only, but not hot, i.e. 250 o F (120 o C) as measured by an insert topthermometer, then allow the insert to cool down. Light a third fire and burn it for about forty minutes to450 o F (230 o C) or less. Once again cool the insert to room temperature, then operate it according to thefollowing instructions. This extra care will result in a more durable, and uniform finish.3.4 Lighting A Fire1. Place enough crumpled balls of newspaper or other paper into the insert to cover thebottom of the firebox.2. Place small dry kindling on the crumpled paper.3. Place larger dry kindling on top of the small kindling.4. Open the draft control fully to the right (located on the right side of the faceplate, Figure 3.1)5. Light a fire at the bottom of the crumpled paper and close the door. If the fire tends to go out,momentarily hold the door slightly ajar to fan the fire. As soon as the fire catches hold, close the14
OPENdoor.7. Ideally the large kindling should be burned until a thick bed of red embers is obtained. At that point,add cordwood fuel and continue to operate the draft control wide open until the fire is wellestablished. Once the firebox is hot, the draft control can be partially closed by moving the knob tothe left to adjust the intensity of the fire.Use Table 3.2 to adjust the draft control to the desired burn rate:Draft SettingsBurn RateLowMedium LowMedium HighHighDraft SettingPush Control to end of travel.Pull Control by 3/8” from closed position.Pull Control by 3/4” from closed positionPull Control to end of travel.Table 3.2Closing the draft control down too soon will lower combustion efficiency, and may result in creosotebuild-up in the chimney (which could lead to a chimney fire).CAUTION: THE ADJUSTMENT RANGE SHOULD NOT BE ALTERED FOR INCREASED FIRING FOR ANY REASON.ACLOSEThe Use of a Custom FaceplateFigure 3.1If you are making a custom faceplate for your <strong>1100</strong> insert, you will need to block the low combustionsetting by inserting a screw into the hole located on the air control rod as indicated by the letter A onfigure 3.1.15
3.5 Maintaining The FireYour <strong>Osburn</strong> insert will work best if a thick bed of hot embers is maintained in the bottom of thefirebox, and a minimum of two large pieces of seasoned fuel are added. Combustion efficiency islargely related to establishing a hot ember bed, and hot firebox temperatures. The quicker the insertand fuel get up to operating temperature, the better. A small intense fire is preferred to a largesmouldering fire, both to improve combustion efficiency and to reduce the amount of creosote emitted.The best performance will be achieved by adding relatively small amounts of fuel to a well establishedember bed, and then operating with the air inlet control open long enough to achieve a hot fire.Cordwood should be placed with air in between individual pieces. Use a poker to make an air channelin the embers below the wood, this will allow air to flow under the wood for a more efficient burn.Extended burn times can be accomplished by first operating the insert on a full load with the air inletcontrols wide open. Once the fire is well established, and the moisture has been driven out of thewood, reduce the air control to a lower setting. The unit should then burn cleanly withoutsmouldering. If the fire smoulders without flame, re-establish a hotter fire before moving the aircontrol to the lower setting. A yellow flame burning in the top of the firebox is a good indication of aclean efficiently burning fire.Refuelling technique is important for good performance. The best efficiency and performance fromyour insert can be achieved by adding partial loads of fuel and allowing them to get up to operatingtemperature before adding additional fuel. Adding a large amount of fuel at one time will increase thetime required to get the fuel up to its ignition temperature, and an extended time to reach optimalperformance. When refuelling, open the air control or hold the door partially open 1” (25 mm) or less,long enough (less than 5 minutes) so that the fire has well established flames. When refuelling, care isrequired to ensure that fuel or embers do not fall out of the door opening.3.6 Fan Operation1. The fan in your wood insert is heat-activated. The insert needs to be hot before the fanstarts working. This may take up to one hour, depending on how hot the fire is.NOTE: ENSURE THE FAN CORD IS NOT IN CONTACT WITH ANY SURFACE OF THE INSERT TOPREVENT ELECTRICAL SHOCK OR FIRE DAMAGE. DO NOT RUN CORD BENEATH THE INSERT.2. You may shut the fan OFF using the variable speed control knob located on the left side ofthe fan assembly.16
Section 4.0 Maintenance4.1 Care And CleaningClean the insert frequently so that soot, ash and creosote do not accumulate. Do not attempt to clean theinsert, glass or door when the unit is hot. Special care must be taken with plated surfaces in order tomaintain the finish at its original brilliance. Do not use an abrasive glass cleaner which will scratch theglass or plated finish. Use only a soft clean damp cloth on the door, since some cleaners may removethe plating or paint.4.1.1 Glass Cleaning and maintenanceUnder normal operation the stove is designed to keep the glass clean. Glass cleaning may be requiredwhen burning damp wood and/or when burning slow fires. Generally if the glass is not staying cleanthen the unit is being under fired. Dirty glass may be self-cleaned by burning a hot fire (i.e. dry woodand opened draft controls) for a couple of hours. Good burning techniques will result in clean glass.Hand clean the glass only when the fire is out and the insert is cold. A light film can usually be cleanedwith paper towel and water. If heavy cleaning is required, a ceramic glass cleaner or polish isrecommended, and should be rinsed off with water for best results.To change the glass remove the glass and gasket retainer secured with six screws. Remove damagedglass and install the new one in place. Make sure you have a gasket around the replacement glass.Reinstall the glass and gasket retainer and secure it with the six screws that you previously removed.Do not abuse the door glass by striking, slamming or similar trauma. Do not operate the stove with theglass removed, cracked or broken.The glass must be replaced by a genuine part only. Failure to follow instructions or useof different material may result in property damage, bodily injury, or even death.Glass specifications: Robax 5mm dimensions 16 ” x 10 1/8”DOOR GASKETGLASSGLASS AND GASKETRETAINERDOOR FRAME17
4.2 Ash RemovalCAUTION:Ashes can start fires, even after several days of inactivity. Never dispose ofashes in a combustible container. Remove ashes only when the insert andashes are cold.Ashes should be removed from the insert frequently. When ashes are removed, they should be placed ina metal container with a tightly fitting lid. The closed container of ashes should be placed on a noncombustiblefloor or on the ground, well away from all combustible materials, pending final disposal. Ifthe ashes are disposed of by burial in soil or otherwise locally dispersed, they should be retained in theclosed container until all cinders have thoroughly cooled. Do not place other waste materials in themetal ash container.4.3 Chimney CleaningRegular chimney maintenance, as well as good burning practices, are required to prevent chimney fires.The chimney and the chimney connector pipe must be maintained in good condition and be kept cleanfor optimal safety. The chimney should be checked regularly for creosote build-up. Inspection andcleaning of the chimney can be facilitated by removing the baffle.CAUTION: OPERATION OF YOUR OSBURN INSERT WITHOUT THE BAFFLE MAY CAUSE UNSAFE ANDHAZARDOUS TEMPERATURE CONDITIONS AND WILL VOID THE WARRANTY.Contact your local, municipal, state, or provincial fire authority for information on how to handle achimney fire before there is any chance that it may happen.Creosote – Formation And Need For RemovalWhen wood (especially green wood) is burned without adequate heat or air supply, it produces tar andother organic vapours (smoke), which combine with expelled moisture to form creosote.The creosote vapours condense in the relatively cool chimney flue of a slow-burning fire. As a result,creosote residue accumulates on the flue lining. When ignited, this creosote makes an extremely hotfire, which could be hazardous. Check frequently for creosote build-up. In the event of a insert orchimney component failure, replace only with equipment that is equivalent to the original, availablefrom your <strong>Osburn</strong> dealer.Your <strong>Osburn</strong> insert has been designed to reduce the amount of creosote produced. Even so, the chimneyconnector pipe and chimney should be inspected at least once every two months during the heatingseason to determine if a creosote build-up has occurred. If creosote has accumulated, it should beremoved to reduce the risk of chimney fire. Call a professional chimney sweep, or go to your local<strong>Osburn</strong> dealer and purchase a chimney brush, and have the chimney cleaned.18
4.4 Baffle Installation for <strong>Osburn</strong> <strong>1100</strong> <strong>Insert</strong>All firebrick and duraboard baffles must be properly in place for correct burning operation. Have anydamaged firebricks replaced. Check the firebricks annually for damage and replace if they are broken ordamaged. See Figure 4.2 for the firebrick layout. Install the side & back firebricks first, and then thebottom firebricks.42DESCRIPTIONQTY3212FIRE BRICKS 4.5'' X 9''VERMICULITE BAFFLE1223SECONDARY AIR TUBES24FRONT BAFFLE SUPPORT11 1 1111 11 1111Figure 4.2 – Firebrick layout for <strong>Osburn</strong> <strong>1100</strong> <strong>Insert</strong> model19
4.5 Secondary Air Tube Replacement(see Figure 4.3)1. Remove cotter pin at LH end of tube.2. Slide tube to right and lower tube end below LH plenum.3. Slide tube to left to remove.4. Reassemble in reverse order using a new cotter pin. The cotter pin is a hammerlock style andlocks into place by hitting the head sharply with a hammer.5. Note that any tube can be replaced without disturbing the baffle.Important Notes:The air tubes are identified for placement as follows:Front to back:Tube No. 1 26 Holes of .166” diameterTube No. 2 26 Holes of .166” diameterFigure 4.3 – Secondary Air Tube replacement20
4.6 Fan Maintenance & CareClean the fan air inlet louvres and squirrel cage impeller regularly. The fan should be kept clean anddust free. Life of the fan will be shortened if operated in a dust filled environment, or if the fan isoverheated by restricting air supply. Stalling the rotor, or over firing the insert with the fan turned offwill also damage the fan. The fan must not be overheated. Do not disassemble the fan. "ALTERINGOR TAMPERING WITH THE FAN WILL VOID THE WARRANTY".4.7 Removal instructionsTo remove your insert :• Remove the coil handle attached to the air intake control• Remove the four screws attaching the faceplate to the insert• Remove the faceplate by pulling on it• Unclip the ash pan• Unclip the blower assembly• Remove the three screws securing the pipe connectorFACEPLATEASH PANCOILHANDLEAIR INTAKECONTROLBLOWERASSEMBLY21
Section 5.0 Specifications5.1 <strong>Osburn</strong> <strong>1100</strong> <strong>Insert</strong> ModelFuel TypeTest StandardsCordwoodULC S628 & UL 1482 residential.Heat OutputRangeMax of 35000 BTU/Hr with EPA test wood (63% default efficiency)Will vary with usage depending on the type and condition of cord wood.Shipping Weight250lbs (113kg)Firebox Volume 1.6 cu.ft. (0.045 m 3 )Firebox Floor AreaDoor Opening SizeRecommendedLog Size18” x 15” (457mm x 381mm)15.5” wide x 8.5” high (400 mm wide x 222 mm high)16” x 6” Dia. (406 mm x 152 mm) if loading sidewaysFlue Outlet 6” (152 mm) diameter (45°)OptionalComponents- 29” x 44” Faceplate- 29” x 44” Faceplate trim kit22
OSBURN LIMITED LIFETIME WARRANTYThe warranty of the manufacturer extends only to the original consumer purchaser and is not transferable. This warranty coversbrand new products only, which have not been altered, modified nor repaired since shipment from factory. Proof of purchase (datedbill of sale), model name and serial number must be supplied when making any warranty claim to your OSBURN dealer.This warranty applies to normal residential use only. Damages caused by misuse, abuse, improper installation, lack ofmaintenance, over firing, negligence or accident during transportation are not covered by this warranty.This warranty does not cover any scratch, corrosion or discoloration caused by over firing, abrasives or chemical cleaners. Anydefect or damage caused by the use of unauthorized parts or others than original parts void this warranty. An authorized qualifiedtechnician must perform the installation in accordance with the instructions supplied with this product and all local and nationalbuilding codes. Any service call related to an improper installation is not covered by this warranty.The manufacturer may require that defective products be returned or that digital pictures be provided to support the claim. Returnedproducts are to be shipped prepaid to the manufacturer for investigation. If a product is found to be defective, the manufacturer willrepair or replace such defect and reasonable transportation fees will be refund. Repair work covered by the warranty, executed at thepurchaser domicile by an authorized qualified technician requires the prior approval of the manufacturer. Labour cost and repairwork to the account of the manufacturer are based on predetermined rate schedule and must not exceed the wholesale price of thereplacement part. All labour and freight costs covered by this warranty are limited according to the table below.The manufacturer at its discretion may decide to repair or replace any part or unit after inspection and investigation of the defect. Themanufacturer may, at its discretion, fully discharge all obligations with respect to this warranty by refunding the wholesale price ofany warranted but defective parts The manufacturer shall in no event be responsible for any special, indirect, consequential damagesof any nature, which are in excess of the original purchase price of the product.WARRANTY APPLICATIONDESCRIPTIONLABOUR &PARTSFREIGHTCombustion chamber (welds only), castings, and convector airmate Lifetime 5 yearsPlating (defective manufacture) – subject to limitations above Lifetime n/aSecondary air tubes, vermiculite baffle, C-Cast baffle and handleassembly5 years n/aStainless steel baffle and parts 5 years 3 yearsCarbon steel baffle and parts 2 years 1 yearBlowers, thermal switches, rheostat, and other controls 2 years 1 yearPaint, refractory bricks, gaskets, insulation, and ceramic glass (thermalbreakage only)1 year n/aShall your unit or a components be defective, contact immediately your OSBURN dealer. Prior to your call make sure youhave the following information necessary to your warranty claim treatment:• You name, address and telephone number;• Bill of sale and dealer’s name;• Serial number and model name as indicated on thenameplate fixed to the back of your unit;• Nature of the defect and any relevant information.Before shipping your unit or defective component to our plant, you must obtain from yourOSBURN dealer an Authorization Number. Any merchandise shipped to our plant withoutauthorization will be refused automatically and returned to sender.23