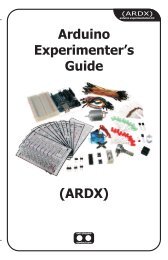
ARDX-experimenters-g.. - Oomlout
ARDX-experimenters-g.. - Oomlout
ARDX-experimenters-g.. - Oomlout
- No tags were found...
You also want an ePaper? Increase the reach of your titles
YUMPU automatically turns print PDFs into web optimized ePapers that Google loves.
Code (no need to type everything in just)File > Sketchbook > Examples > Analog > AnalogInput(example from the great arduino.cc site check it out for other great ideas)CIRC-08/** AnalogInput* by DojoDave ** Turns on and off a light emitting diode(LED) connected to digital * pin 13. The amount oftime the LED will be on and off depends on* the value obtained by analogRead(). In the easiest case we connect* a potentiometer to analog pin 2.** http://www.arduino.cc/en/Tutorial/AnalogInput*/int potPin = 2;int ledPin = 13;int val = 0;// select the input pin for the potentiometer// select the pin for the LED// variable to store the value coming from the sensorvoid setup() {pinMode(ledPin, OUTPUT); // declare the ledPin as an OUTPUT}void loop() {val = analogRead(potPin); // read the value from the sensordigitalWrite(ledPin, HIGH); // turn the ledPin ondelay(val);// stop the program for some timedigitalWrite(ledPin, LOW); // turn the ledPin offdelay(val);// stop the program for some time}Not Working? (3 things to try)Sporadically WorkingThis is most likely due to aslightly dodgy connection withthe potentiometer's pins. Thiscan usually be conquered bytaping the potentiometer down.The Control is BackwardThere are two ways to fix this,either switch the red and blackwires connected to thepotentiometer, or turn thepotentiometer around. (sorrysometimes the factory ships us abackwards potentiometer)Still BackwardYou can try operating thecircuit upside down. Sometimesthis helps.Making it BetterThreshold Switching:Then change the loop code to.Sometimes you will want to switch an output when avoid loop() {int value = analogRead(potPin) / 4;value exceeds a certain threshold. To do this with aanalogWrite(ledPin, value);}potentiometer change the loop() code to.Upload the code and watch as your LED fades in relation tovoid loop() {int threshold = 512;your potentiometer spinning. (Note: the reason we divide theif(analogRead(potPin) > threshold){ value by 4 is the analogRead() function returns a value from 0digitalWrite(ledPin, HIGH);}else{ digitalWrite(ledPin, LOW);}to 1024 (10 bits), and analogWrite() takes a value from 0 to}255 (8 bits) )This will cause the LED to turn on when the value isControlling a Servo:above 512 (about halfway), you can adjust the sensitivity This is a really neat example and brings a couple of circuitsby changing the threshold value.together. Wire up the servo like you did in CIRC-04, then openFading:the example program Knob (File > Sketchbook > ExamplesLets control the brightness of an LED directly from the> Library-Servo > Knob ), then change one line of code.potentiometer. To do this we need to first change the pin int potpin = 0; ----> int potpin = 2;the LED is connected to. Move the wire from pin 13 to Upload to your Arduino and then watch as the servo shaftpin 9 and change one line in the code.int ledPin = 13; ----> int ledPin = 9;turns as you turn the potentiometer.More, More, More:More details, where to buy more parts, where to ask more questions.http://tinyurl.com/cva3kq23


