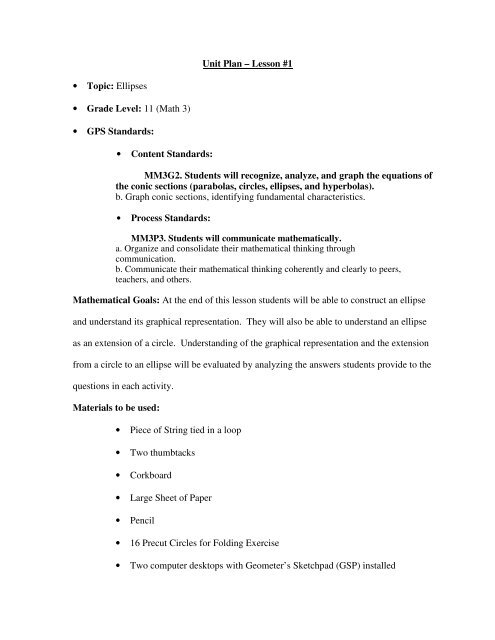
Unit Plan – Lesson #1 • Topic: Ellipses • Grade Level: 11 (Math 3 ...
Unit Plan – Lesson #1 • Topic: Ellipses • Grade Level: 11 (Math 3 ...
Unit Plan – Lesson #1 • Topic: Ellipses • Grade Level: 11 (Math 3 ...

Create successful ePaper yourself
Turn your PDF publications into a flip-book with our unique Google optimized e-Paper software.
<strong>Unit</strong> <strong>Plan</strong> <strong>–</strong> <strong>Lesson</strong> <strong>#1</strong><strong>•</strong> <strong>Topic</strong>: <strong>Ellipses</strong><strong>•</strong> <strong>Grade</strong> <strong>Level</strong>: <strong>11</strong> (<strong>Math</strong> 3)<strong>•</strong> GPS Standards:<strong>•</strong> Content Standards:MM3G2. Students will recognize, analyze, and graph the equations ofthe conic sections (parabolas, circles, ellipses, and hyperbolas).b. Graph conic sections, identifying fundamental characteristics.<strong>•</strong> Process Standards:MM3P3. Students will communicate mathematically.a. Organize and consolidate their mathematical thinking throughcommunication.b. Communicate their mathematical thinking coherently and clearly to peers,teachers, and others.<strong>Math</strong>ematical Goals: At the end of this lesson students will be able to construct an ellipseand understand its graphical representation. They will also be able to understand an ellipseas an extension of a circle. Understanding of the graphical representation and the extensionfrom a circle to an ellipse will be evaluated by analyzing the answers students provide to thequestions in each activity.Materials to be used:<strong>•</strong> Piece of String tied in a loop<strong>•</strong> Two thumbtacks<strong>•</strong> Corkboard<strong>•</strong> Large Sheet of Paper<strong>•</strong> Pencil<strong>•</strong> 16 Precut Circles for Folding Exercise<strong>•</strong> Two computer desktops with Geometer’s Sketchpad (GSP) installed
Prior Knowledge Needed:<strong>•</strong> Basic Proficiency in Navigating Geometer’s Sketchpad (including use ofmenus and the tools palette)<strong>•</strong> Properties of Segments (including definition, midpoint, perpendicularsegments)<strong>•</strong> Properties of Circles (including definition, radius, center)This task builds upon students’ previous exposure to and experience with constructingcircles. Whereas the circle has one focal point called the center, the ellipse has two “centers” orfocal points appropriately called foci. This is the basis for the extension of the concept of circlesinto the understanding of ellipses. This task will build on students’ prior exposure to topicscovered in science classes such as planetary motion and pendulum oscillation. Theseconnections are made in the closing discussion.Potential Challenges to Struggling Students or IEP/ELL StudentsAlthough much consideration has taken place to provide a thorough yet efficient lesson,there are potential challenges that might be met by students who struggle with basic concepts orby students who are either designated as English Language Learners (ELL) or have other SpecialEducation needs. The primary challenge that will be met will be in the usage of mathematicalterminology and vocabulary to describe the ideas and concepts covered in the lesson. This issuecan be addressed by restating mathematical terminology and vocabulary with simpler language.For example, if a student has difficulty understanding the meaning of the term “foci”, thenalternate terminology, such as focus points or middle points, can be utilized. When alternateterminology is employed along with drawings and other representations, this challenge can beminimized.There are also a multitude of potential challenges that can face students with Specific
Learning Disabilities (LD). The best method to pursue to address challenges to these studentsbegins with the teachers in the Special Education program. Collaboration with theseprofessionals will lead to strategies to address specific student concerns in the lesson.Classroom Setup:The classroom period is 50 minutes. After an introduction that provides the definition ofan ellipse and connections to other academic subjects and everyday life, the students will be splitinto four groups that will rotate through four stations. Each rotation will last one class period.One station will have the string, thumbtacks, corkboard, large paper, and pencil for manualconstruction. The second station will have precut paper circles for ellipse construction via afolding exercise. The remaining two stations will each consist of a desktop computer withGeometer’s Sketchpad installed for dynamic constructions. Since there are sixteen students ineach class, each group will have four students and each station will have four chairs. Eachstudent will be engaged in one of four roles utilized at each station: instruction reader, instructionfollower, question reader, and question answerer (writes answers to questions on suppliedworksheets). Students will switch roles as they rotate from station to station and will fill eachrole once.<strong>Lesson</strong> StructureI. IntroductionTo introduce the lesson, properties of a circle are reviewed, focusing on the center andreintroducing it as a focus point from which the entire circle is created. The followingquestion is then posed: “What happens to a circle when the focus point (center) of the circlesplits into two points?” Students are given an opportunity to make conjectures that arewritten on the board. The students are instructed to keep these ideas in mind as they progressthrough the lesson tasks. The tasks will be introduced along with the steps required to
complete the tasks. Each group will be handed a packet of four pages, each page having thesteps and questions to be answered at the end of each task.The review of the basic properties of a circle ensures access to all students, since thestudents, by the time they have reached <strong>Math</strong> III, have had multiple exposures to circles,circle construction, and properties of circles in middle school math as well as in <strong>Math</strong> II.Cognitive demand is maintained throughout the task by focusing students’ attention onprocedures that are utilized to develop a better understanding of ellipses. By following thestep-by-step procedures and by answering the questions that follow them, connections areestablished between students’ prior knowledge and the underlying concepts involved withunderstanding ellipses. The tasks result in graphical representations of ellipses that, in laterdiscussions, will lead to algebraic representations with greater awareness of the connectionbetween the two. The questions that follow the procedures force students to engage with theideas and concepts so that the task can be completed successfully and understanding iscreated.II. InvestigationDuring the investigation, each group goes to the assigned starting station. The students inthe group are allowed to pick the role they will assume in their starting station, with theunderstanding that each group member must fill a different role at each station until eachmember has filled all four roles. This change of roles will help to keep students engaged andminimize frustration with the task. Whenever possible, the teacher will have extra steps tofollow to extend the activity for students who finish the activity quickly. During theinvestigation the teacher will monitor group work, only joining the groups and throwing inquestions when needed, as well as making notes to select student responses for whole classdiscussion. Since the students are following “procedures with connections” tasks, steps are
followed during the investigation phase that lead to solution strategies which are shared anddiscussed during the Whole Class Discussion Phase.The tasks for each station are as follows:Station 1 takes the string, the two thumbtacks, the corkboard, paper, and pencil. The paper isplaced on the corkboard and the thumbtacks are stuck into it. The string is then tied to eachthumbtack, making sure that the string has some slack in it. Each thumbtack will serve as thefocal points of the ellipse. The loose string is then pulled taut with the pencil, with the stringlying near the tip of the pencil. With the string taut, the pencil is swung around the focal pointsletting the tip of the pencil trace its path. The pencil is then repositioned to draw the remainderof the curve.The following questions are asked at Station 1:<strong>•</strong> What symmetries are observed in the ellipse? Draw a picture to illustrate any lines ofsymmetry.<strong>•</strong> Move the thumb tacks farther apart. Redraw the ellipse and compare the shape toyour original ellipse.<strong>•</strong> Move the thumb tacks closer together. Redraw the ellipse and compare the shape toyour original ellipse.<strong>•</strong> If you move the thumb tacks far apart and make the string taut, what shape will yourpencil draw?<strong>•</strong> If you attach both ends of the string to one thumbtack, what shape will your pencildraw?Possible Solution Strategies for Station 1
Students will probably easily see the symmetry formed by the major axis. It may be moredifficult to see the symmetry formed by the minor axis. The other questions leave little roomfor multiple solutions or strategies since the task consists of step-by-step instructions.Station 2 uses a desktop workstation with Geometer’s Sketchpad (GSP) installed on it. Anew GSP sketch is opened and a horizontal line is drawn at the top of the screen. Points A, B,and C are constructed on the line with point C located between A and B. The line is hidden andtwo segments are constructed, AC and CB. Below the two segments, two points, F1 and F2, arecreated to represent to foci of an ellipse. Two circles are constructed, one using F1 as the centerand AC as the length of the radius, the second circle using F2 as the center and CB as the lengthof the radius. The intersections of both circles are created and traced using the TraceIntersections function in the Display menu. Point C is dragged back and forth between points Aand B and, as a result the intersection points move leaving a traced path that is observed as anellipse. This ellipse construction is repeated after changing the distance between the focal pointsF1 and F2 and erasing the previous traces. Several new ellipses are traced, each time changingthe distance between the focal points. Finally, the Locus function is used to automatically adjustthe traces as F1 and F2 are moved.The following questions are asked at Station 2:<strong>•</strong> When point C is dragged between points A and B, the radii of both circles change, butthere is still a relationship between the two radii. What is that relationship?<strong>•</strong> Why do the two intersection points trace an ellipse?<strong>•</strong> How far apart can the focal points be before they no longer trace an ellipse?Possible Solution Strategies for Station 2
Most students will probably see the relationship between the radii by looking at thesegments used to create the circles. Since the segment is the same length, the radii have toadd up to the same constant number represented by the segment AB.The intersections trace an ellipse because as C moves from A to B the distance from A toC becomes larger and the distance from B to C becomes smaller. This creates the curve thatis the ellipse.By moving the circles around and tracing the intersections (or alternatively using theLocus tool), it can be observed that the circles must intersect to create an ellipse. So to tracean ellipse, the foci cannot be moved any farther apart than the sum of the radii.Station 3 utilizes the precut circles to construct an ellipse. The instruction follower, thequestion reader, and the question answerer at the station will each take one of the precut circlesand mark the center as point A. Another random point will be placed inside the circle and becalled point B. The circle is folded so that the edge of the circle lands on point B. A sharpcrease is created to mark the fold and the circle is unfolded. Several different folds and creasesare created in the same way, where the edge of the circle lands directly on point B. After 12 ormore creases have been made, they are examined to see if any pattern can be observed. Aftermaking several more folds, the creases are observed and discussed within the group, comparingeach of the three folded circles.The following questions are asked at Station 3:<strong>•</strong> What do the creases appear to form? What do points A and B represent?<strong>•</strong> If you move point B closer to the edge of the circle and fold another curve, howwould the shape compare to your original curve?
<strong>•</strong> If you move point B closer to the center of the circle and fold another curve, howwould the shape compare to your original curve?Possible Solution Strategies for Station 3If students are folding the circle correctly, then the creases should form an ellipse aroundthe center point A and the random point B. A and B represent the foci of the ellipse formedby the creases.This task requires at least two circles being folded so that the results can be seen from thealternate placement of the random point B. By comparing two or more circles, students cansee that placing point B closer to the center results in an ellipse that is rounder, and placingpoint B closer to the edge of the circle results in an ellipse that is thinner.Station 4 uses a desktop workstation with Geometer’s Sketchpad (GSP) installed on it tomodel the circle folding exercise performed at Station 3. A new blank sketch is opened and alarge circle is drawn using the Compass tool in the Tools Palette. The center of the circle islabeled as point A. A point B is constructed on the interior of the circle and point C isconstructed on the circle’s circumference using the Point Tool on the Tools Palette. Asegment is constructed between points B and C and a perpendicular bisector is created byconstructing a midpoint and then a perpendicular line. This perpendicular line serves as the“crease” created in the circle folding exercise. As point C is dragged along the circle’scircumference, the “crease” changes its location. The movement of the crease line can betraced by selecting the line and selecting Trace Line from the Display menu. As point C isdragged around the circle, a collection of crease lines is created. Point B can be repositioned
and a new collection of crease lines created. To have GSP automatically adjust the creaselines as B is changed, select point C and the crease line and use the Locus tool. Now B canbe moved and the collection of crease lines automatically adjusts.The following questions are asked at Station 4:<strong>•</strong> How does the shape of the curve change as you move point B closer to the edge of thecircle?<strong>•</strong> How does the shape of the curve change as you move point B closer to the center of thecircle?<strong>•</strong> Select point B and the circle, then select Edit/Merge to merge point B to the circle. Whathappens to the crease pattern? Does this remind you anything about your study of circlesin <strong>Math</strong> II?<strong>•</strong> Select Edit/Split to split point B from the circle. Now merge point B with the center ofthe circle. What happens to the crease pattern?Possible Solution Strategies for Station 4Since the activity at Station 4 is similar to the activity at Station 3, the results should besimilar. The difference between the two activities lies in the tool being used to show a dynamicrepresentation of the circle folding activity. As the random point B is moved inside the circle,the crease marks automatically adjust to reflect the changes resulting from relocating B.III. Whole Class Discussion of InvestigationOnce all four stations have been visited by all four groups, the students will return to theirown assigned seats in the class for a discussion of the findings. A representative from one of the
four groups (the group is preselected during teacher’s monitoring of the activities) will come tothe overhead (ELMO document camera) and demonstrate the group findings. The teacher willask the selected group for the reasoning behind their findings. The teacher will also ask the othergroups if their findings were similar or the same and will ask them to explain the reasoningbehind different outcomes. This process will repeat, beginning with Station 1 and ending withStation 4.After the findings from each activity are discussed, questions are posed to make sense of thefindings and connect them to the properties of ellipses, expand on the ideas suggested from thefindings, and begin to form generalizations from the patterns that are observed.Questions posed from the Station 1 Activity are:<strong>•</strong> When moving the thumbtacks closer together and further apart from each other, twoextremes were observed. What shape did you trace when the thumbtacks were movedapart and the string was taut? Why did your trace resemble a line?<strong>•</strong> When both ends of the string were tied to the same thumbtack, what shape did you trace?Why did your shape resemble a circle?Questions posed from the Station 2 Activity are:<strong>•</strong> When point C was dragged between points A and B, a relationship between the radiiof the two circles was observed. What was that relationship? How did you determinethat relationship?Questions posed from the Station 3 and 4 Activities are:<strong>•</strong> When point B was merged with the circle, what similar result was observed from the
Station 1 Activity using thumbtacks and string? What caused these results?<strong>•</strong> When point B was merged with the center, what similar result was observed from theStation 1 Activity? What caused these results?<strong>•</strong> Did anyone move point B outside of the circle? What happened to the crease/Locuspattern? What shape did it form?
IV. Closure and ExtensionTo wrap up discussion and close the lesson, the key properties of an ellipse are summarizedthrough analysis of conjectures posed during the introduction, applications of the ellipse arediscussed, including pendulum oscillation and planetary motion, and an assessment is usedwhich is based on the ellipse construction from Station 1. We use the Promethian Board andopen a premade GSP sketch that shows an ellipse with the major axis, minor axis, and focalpoints.Point P represents the pencil point that is pulling a taut string (represented by segments PF 1 andPF 2 ) . In this example, the length of the string is 10cm and the distance between the focal pointsis 8cm.The following questions are asked as a Ticket out of the Door:<strong>•</strong> What is the length of the major axis? Where did you position point P to determine this?<strong>•</strong> What is the length of the minor axis? Where did you position point P to determine this?
ReferencesScher, D. (2002). Exploring conic sections with the geometer's sketchpad. (pp. 3-13).Emeryville, CA: Key Curriculum Press.Conics & sketchpad . (20<strong>11</strong>, February 15). Retrieved fromhttp://www.youtube.com/watch?v=X3HhpS3m0Cw