MELGES 32 - the Melges 32 Class Association
MELGES 32 - the Melges 32 Class Association
MELGES 32 - the Melges 32 Class Association

Create successful ePaper yourself
Turn your PDF publications into a flip-book with our unique Google optimized e-Paper software.
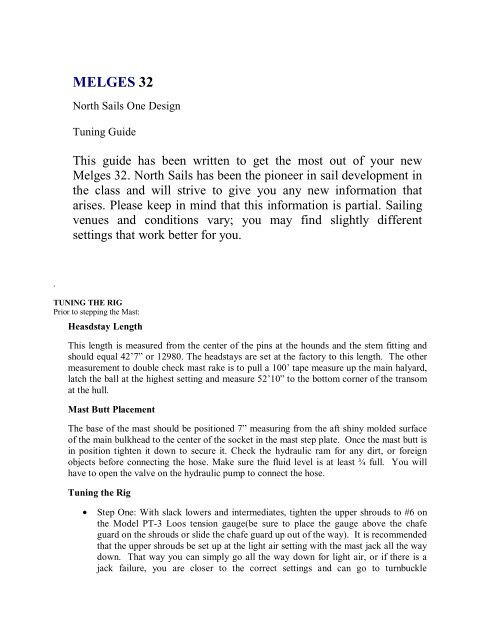
<strong>MELGES</strong> <strong>32</strong>North Sails One DesignTuning GuideThis guide has been written to get <strong>the</strong> most out of your new<strong>Melges</strong> <strong>32</strong>. North Sails has been <strong>the</strong> pioneer in sail development in<strong>the</strong> class and will strive to give you any new information thatarises. Please keep in mind that this information is partial. Sailingvenues and conditions vary; you may find slightly differentsettings that work better for you..TUNING THE RIGPrior to stepping <strong>the</strong> Mast:Heasdstay LengthThis length is measured from <strong>the</strong> center of <strong>the</strong> pins at <strong>the</strong> hounds and <strong>the</strong> stem fitting andshould equal 42’7” or 12980. The headstays are set at <strong>the</strong> factory to this length. The o<strong>the</strong>rmeasurement to double check mast rake is to pull a 100’ tape measure up <strong>the</strong> main halyard,latch <strong>the</strong> ball at <strong>the</strong> highest setting and measure 52’10” to <strong>the</strong> bottom corner of <strong>the</strong> transomat <strong>the</strong> hull.Mast Butt PlacementThe base of <strong>the</strong> mast should be positioned 7” measuring from <strong>the</strong> aft shiny molded surfaceof <strong>the</strong> main bulkhead to <strong>the</strong> center of <strong>the</strong> socket in <strong>the</strong> mast step plate. Once <strong>the</strong> mast butt isin position tighten it down to secure it. Check <strong>the</strong> hydraulic ram for any dirt, or foreignobjects before connecting <strong>the</strong> hose. Make sure <strong>the</strong> fluid level is at least ¾ full. You willhave to open <strong>the</strong> valve on <strong>the</strong> hydraulic pump to connect <strong>the</strong> hose.Tuning <strong>the</strong> Rig• Step One: With slack lowers and intermediates, tighten <strong>the</strong> upper shrouds to #6 on<strong>the</strong> Model PT-3 Loos tension gauge(be sure to place <strong>the</strong> gauge above <strong>the</strong> chafeguard on <strong>the</strong> shrouds or slide <strong>the</strong> chafe guard up out of <strong>the</strong> way). It is recommendedthat <strong>the</strong> upper shrouds be set up at <strong>the</strong> light air setting with <strong>the</strong> mast jack all <strong>the</strong> waydown. That way you can simply go all <strong>the</strong> way down for light air, or if <strong>the</strong>re is ajack failure, you are closer to <strong>the</strong> correct settings and can go to turnbuckle
adjustments to continue sailing. Cleat <strong>the</strong> jib halyard so <strong>the</strong> shackle touches <strong>the</strong> railat <strong>the</strong> chainplates using a light pull. Measure <strong>the</strong> same spot on <strong>the</strong> o<strong>the</strong>r side of <strong>the</strong>boat. If <strong>the</strong> mast is in centered, <strong>the</strong> shackle will touch evenly on each side. If not,adjust <strong>the</strong> uppers until it touches evenly.• Step two: Now that <strong>the</strong> mast is in centered and <strong>the</strong> upper shrouds are tensioned to 6,it is time to tune <strong>the</strong> intermediate shrouds. Tighten <strong>the</strong> intermediates so <strong>the</strong> slack istaken out and <strong>the</strong>y are hand tight plus 1 turn. Site up <strong>the</strong> aft side of <strong>the</strong> mast toinsure <strong>the</strong> tunnel is straight side to side. Final tuning of <strong>the</strong> intermediates needs tobe done on <strong>the</strong> water going to windward.• Step Three: Again sighting up <strong>the</strong> mainsail track to keep <strong>the</strong> rig straight, tighten <strong>the</strong>lower shrouds, to hand tight minus 1 complete turn. Given this tension <strong>the</strong> resultshould be approximately 1”of pre bend. Check <strong>the</strong> rig for overall straightness both at<strong>the</strong> dock and again while sailing by sighting up <strong>the</strong> mainsail track. Adjust <strong>the</strong>shrouds appropriately to get <strong>the</strong> mast straight. Secure <strong>the</strong> turnbuckles with <strong>the</strong>Velcro wrap provided.• The hydraulic ram should be completely slack. Take a plastic or wood ruler andsecurely attach it to <strong>the</strong> stringer directly beside <strong>the</strong> mast base. This will be used for areference tool while adjusting <strong>the</strong> ram under way. Make sure it is secure. Sail bagsand items left loose will knock it out. This needs to be a constant every time youtune. You will be looking at <strong>the</strong> base of <strong>the</strong> mast and <strong>the</strong> marks on <strong>the</strong> ruler.On <strong>the</strong> waterChanging BreezesTuning is now complete for 0-6 kts. See <strong>the</strong> Tuning Matrix below for detailed ram tensioninstructions.The simplicity of <strong>the</strong> ram allows you to leave <strong>the</strong> shrouds alone. Now all you will do is adjust <strong>the</strong>ram in increments of “pumps” on <strong>the</strong> ram.<strong>Melges</strong> <strong>32</strong> Tuning MatrixWind Speed 0-6 6-10 10-14 15-20 20+Ram Base, 6 on Loos 6 on Loos 10 on Loos 12 on Loos 14 on LoosVang Slack Slack Taught Tight Vang sheetCunningham Loose Loose 50% on Tight TightMain Sheet 5° twist if possible 5º twist, to no twist No twist to 5º twist 10º twist 15-25º twistHarder, but alwaysSoft, upper TTJib sheetkeep top TTSameSameflowingflowingSofter in big stuff,more twistMiddle to 25% Middle to 50%Traveler 50% to wea<strong>the</strong>r 50% wea<strong>the</strong>r MiddleDownDownForward, luff breakJib LeadSame Flatten foot slightly 2-3 aft of light 3-6 aft of lightevenlyJust pull outSlight Wrinkle inJib HalyardNo Wrinkles No wrinkles No wrinkleswrinkles luffMain outhaul off 2" off 1" Pull to band Pull to band Pull to band25% on whenBackstay None None50% on Maxoverpowered
SAIL TRIMUpwindMainsail TrimWithout getting overly detailed, because everybody sails to <strong>the</strong>ir own style, <strong>the</strong> following are basictips for trimming <strong>the</strong> 3DL main. " Twist is fast ". By this we mean that it is necessary to open up <strong>the</strong>top of <strong>the</strong> leech and maintain flow over <strong>the</strong> top of <strong>the</strong> sail. A good rule of thumb is to trim until <strong>the</strong>top leech telltale is just stalling and <strong>the</strong>n ease out two to three inches of sheet so that <strong>the</strong> telltale isflowing again. This is unlike many o<strong>the</strong>r one designs that like to have <strong>the</strong> top batten parallel to <strong>the</strong>boom in most conditions. In light air <strong>the</strong> traveler should be pulled to wea<strong>the</strong>r.As <strong>the</strong> breeze builds we need to maintain a balanced helm. Begin by pulling on <strong>the</strong> backstay toflatten <strong>the</strong> top of <strong>the</strong> main. Drop <strong>the</strong> traveler down in increments of 6" of every 3 knots over 10knots. As you drop <strong>the</strong> traveler, you need to pull more mainsheet on to tighten <strong>the</strong> leech andmaintain pointing ability. In big breeze, <strong>the</strong> top of <strong>the</strong> main is twisted well off and <strong>the</strong> bottom 1/3 of<strong>the</strong> main is doing most of <strong>the</strong> work. If <strong>the</strong> main is back winding from <strong>the</strong> jib you can keep <strong>the</strong> maintraveler closer to <strong>the</strong> center. If <strong>the</strong> waves are big it tends to work better to keep <strong>the</strong> traveler centeredand work <strong>the</strong> main sheet and fine tune <strong>the</strong> back stay.Jib SheetThree things control <strong>the</strong> jib shape: sheet tension, car placement, and halyard control. The sheettension has <strong>the</strong> most obvious effect, so we'll talk about that first. The sheet controls <strong>the</strong> leech twistand how far <strong>the</strong> sail is pulled in. If you look at <strong>the</strong> overall sail as it relates to <strong>the</strong> sheet it does twothings. Picture <strong>the</strong> boat on a close hauled course and <strong>the</strong> jib luffing, as you pull in <strong>the</strong> sheet, first <strong>the</strong>angle of <strong>the</strong> sail changes, <strong>the</strong>n as <strong>the</strong> last few inches are tensioned <strong>the</strong> leech gets tighter. In short, itpulls it in and <strong>the</strong>n down.It is important to try to match <strong>the</strong> leech profile of <strong>the</strong> jib to <strong>the</strong> profile of <strong>the</strong> lee side of <strong>the</strong> main.Try to envision how <strong>the</strong> sails would look from a motorboat trailing behind you. Place marks on <strong>the</strong>sheet to duplicate settings if necessary.Jib CarThe car placement controls how flat or round <strong>the</strong> jib is in <strong>the</strong> lower section of <strong>the</strong> sail and <strong>the</strong>amount of leech tension. The far<strong>the</strong>r aft <strong>the</strong> car is on <strong>the</strong> track <strong>the</strong> flatter <strong>the</strong> bottom third of <strong>the</strong> sailgets and <strong>the</strong> less leech tension you can get. Conversely, <strong>the</strong> far<strong>the</strong>r forward <strong>the</strong> car <strong>the</strong> more round<strong>the</strong> foot and <strong>the</strong> tighter <strong>the</strong> leech gets. When <strong>the</strong> lead is at its maximum aft desired position <strong>the</strong> footof <strong>the</strong> jib will crease as <strong>the</strong> middle batten comes parallel with <strong>the</strong> centerline of <strong>the</strong> boat. In short,rounder shape delivers more power, a flatter shape delivers more speed. Make marks on <strong>the</strong> deck tobe able to copy fast settings. Again, this can change with conditions and o<strong>the</strong>r variables. Below is arule of thumb:Flat Water = Flat sail. Bumpy Water = full / rounder sail.Finally lets address halyard tension. It very subtly changes <strong>the</strong> draft characteristics of <strong>the</strong> sail. Asone pulls <strong>the</strong> halyard tighter <strong>the</strong> draft of <strong>the</strong> jib moves forward and as one eases halyard <strong>the</strong> draftmoves aft again. In lighter air <strong>the</strong> halyard tension should be loose enough so that <strong>the</strong>re is a hint of
wrinkling in <strong>the</strong> luff of <strong>the</strong> sail. As <strong>the</strong> breeze builds <strong>the</strong> halyard must be pulled on harder toeliminate those wrinkles, but not so much that you over stretch <strong>the</strong> material!Crew PositionWhen sailing upwind in light air you need to move <strong>the</strong> crew forward and out of <strong>the</strong>transom of <strong>the</strong> boat. This reduces wetted surface and helps with <strong>the</strong> boat attitude through<strong>the</strong> water. As <strong>the</strong> breeze builds this is less critical and weight outboard and centeredaround <strong>the</strong> widest part of <strong>the</strong> boat is best and aft.DownwindBe sure to power up <strong>the</strong> mainsail when sailing downwind. Ease off <strong>the</strong> cunningham,outhaul, and backstay. Adjust <strong>the</strong> vang so <strong>the</strong> top batten is parallel to <strong>the</strong> boom or justslightly open. Be sure not to hook <strong>the</strong> battens to windward with a lot of vang tension.Remember to let off <strong>the</strong> vang while rounding <strong>the</strong> wea<strong>the</strong>r mark. This will allow <strong>the</strong> helmto get around <strong>the</strong> mark with more ease. KEEP THE CREW ON THE RAIL TILLTHE BOAT FLATTENS OUT!Have a forward crew sight up <strong>the</strong> mast to check <strong>the</strong> mast bend and backstay tension. Inlight air keep <strong>the</strong> crew weight low and forward until you are planing downwind. As youbegin to plane you need to start moving <strong>the</strong> weight aft in <strong>the</strong> boat. The windier it gets <strong>the</strong>more you need to move <strong>the</strong> weight aft to get <strong>the</strong> bow up and free up <strong>the</strong> rudder. Above15 we leave <strong>the</strong> jib up off <strong>the</strong> wind and trim it to a soft trim as to not effect <strong>the</strong> trim of <strong>the</strong>spinnaker.Spinnaker SetupWhen setting up <strong>the</strong> spinnaker gear, be sure that <strong>the</strong> tack line goes over <strong>the</strong> lazy sheet (<strong>the</strong>sheet going to <strong>the</strong> opposite side of <strong>the</strong> boat). This ensures that <strong>the</strong> spinnaker will gybe to<strong>the</strong> inside, between <strong>the</strong> heasdstay and <strong>the</strong> luff of <strong>the</strong> spinnaker as opposed to around <strong>the</strong>outside of <strong>the</strong> luff of <strong>the</strong> spinnaker and in front of <strong>the</strong> boat.Spinnaker TrimLike all spinnakers, <strong>the</strong> spinnaker sheet should be eased until <strong>the</strong> luff carries a slight curl.The real trick to flying <strong>the</strong> sail and having <strong>the</strong> best downwind performance is to maintainconstant dialogue between <strong>the</strong> skipper and trimmer to keep pressure in <strong>the</strong> sail withoutsailing too high and losing sight of VMG (velocity made good to <strong>the</strong> mark). As a generalrule <strong>the</strong> boat sails downwind at 125 degrees to <strong>the</strong> true wind, jibing through 90 degrees.As <strong>the</strong> breeze builds, it is possible to sail deeper angles while maintaining good speed. Inplaning conditions, keep <strong>the</strong> boat powered up. Planing and loosing 10 degrees of depthfar exceeds displacement sailing. Remember, when sailing in <strong>the</strong> deep mode, to heel <strong>the</strong>boat to windward and ease <strong>the</strong> sheet out. This rotates <strong>the</strong> chute out from behind <strong>the</strong>main's wind shadow, exposing maximum sail area to clear air. Keep <strong>the</strong> vang softgenerally downwind. Any time you can plane, do so. Be aggressive on crew placementaft. Have any non-essential people aft of <strong>the</strong> helm. Experiment with this a bit and youwill quickly get <strong>the</strong> "Feel" for how you can steer without having trouble with sight andfouling <strong>the</strong> rudder.With all sailing and maneuvers, do what feels good to you. “Tune” with any o<strong>the</strong>r <strong>32</strong>’syou can find, keep notes on all days you feel fast and also <strong>the</strong> opposite. If <strong>the</strong> boat feels
slow or you feel “ out of <strong>the</strong> groove” revert back to notes and what felt good last time youwent sailing.Tension Gauge Conversion Chart For PBO RiggingTension1000 1500 2000 2500 3000 3500 4000 4500 FiberNominalDiameter6 11 14 17 19 20.5 n/a n/a PBO 1/4"Gauge Reading12.5 18 22 25 27 29 30 <strong>32</strong> PBO 5/16"Sail Fast and Please feel free to contact your North Sailmaker withany tuning questions!harry@melges.comandy@melges.comeric@od.northsails.com