ToneLab ST Owner's Manual - Vox
ToneLab ST Owner's Manual - Vox
ToneLab ST Owner's Manual - Vox

Create successful ePaper yourself
Turn your PDF publications into a flip-book with our unique Google optimized e-Paper software.
Precautions<br />
ii<br />
Location<br />
Using the unit in the following locations can result in a malfunction.<br />
• In direct sunlight<br />
• Locations of extreme temperature or humidity<br />
• Excessively dusty or dirty locations<br />
• Locations of excessive vibration<br />
• Close to magnetic fields<br />
Power supply<br />
Please connect the designated AC adapter to an AC outlet of the<br />
correct voltage. Do not connect it to an AC outlet of voltage<br />
other than that for which your unit is intended.<br />
Handling<br />
To avoid breakage, do not apply excessive force to the switches<br />
or controls.<br />
Care<br />
If the exterior becomes dirty, wipe it with a clean, dry cloth. Do<br />
not use liquid cleaners such as benzene or thinner, or cleaning<br />
compounds or flammable polishes.<br />
Keep this manual<br />
After reading this manual, please keep it for later reference.<br />
Keeping foreign matter out of your equipment<br />
Never set any container with liquid in it near this equipment. If<br />
liquid gets into the equipment, it could cause a breakdown, fire,<br />
or electrical shock.<br />
Be careful not to let metal objects get into the equipment. If<br />
something does slip into the equipment, unplug the AC adapter<br />
from the wall outlet. Then contact your nearest VOX dealer or<br />
the store where the equipment was purchased.<br />
THE FCC REGULATION WARNING (for USA)<br />
This equipment has been tested and found to comply with the limits for a<br />
Class B digital device, pursuant to Part 15 of the FCC Rules. These limits<br />
are designed to provide reasonable protection against harmful interference<br />
in a residential installation. This equipment generates, uses, and can<br />
radiate radio frequency energy and, if not installed and used in accordance<br />
with the instructions, may cause harmful interference to radio<br />
communications. However, there is no guarantee that interference will not<br />
occur in a particular installation. If this equipment does cause harmful<br />
interference to radio or television reception, which can be determined by<br />
turning the equipment off and on, the user is encouraged to try to correct<br />
the interference by one or more of the following measures:<br />
• Reorient or relocate the receiving antenna.<br />
• Increase the separation between the equipment and receiver.<br />
• Connect the equipment into an outlet on a circuit different from that to<br />
which the receiver is connected.<br />
• Consult the dealer or an experienced radio/TV technician for help.<br />
Unauthorized changes or modification to this system can void the user’s<br />
authority to operate this equipment.
Notice regarding disposal (EU only)<br />
When this “crossed-out wheeled bin” symbol is displayed on the<br />
product, owner’s manual, battery, or battery package, it signifies<br />
that when you wish to dispose of this product, manual, package or<br />
battery you must do so in an approved manner. Do not discard<br />
this product, manual, package or battery along with ordinary<br />
household waste. Disposing in the correct manner will prevent<br />
harm to human health and potential damage to the environment.<br />
Since the correct method of disposal will depend on the applicable laws<br />
and regulations in your locality, please contact your local administrative<br />
body for details. If the battery contains heavy metals in excess of the<br />
regulated amount, a chemical symbol is displayed below the “crossed-out<br />
wheeled bin” symbol on the battery or battery package.<br />
IMPORTANT NOTICE TO CONSUMERS<br />
This product has been manufactured according to strict specifications and<br />
voltage requirements that are applicable in the country in which it is<br />
intended that this product should be used. If you have purchased this<br />
product via the internet, through mail order, and/or via a telephone sale,<br />
you must verify that this product is intended to be used in the country in<br />
which you reside.<br />
WARNING: Use of this product in any country other than that for which it<br />
is intended could be dangerous and could invalidate the manufacturer’s or<br />
distributor’s warranty.<br />
Please also retain your receipt as proof of purchase otherwise your product<br />
may be disqualified from the manufacturer’s or distributor’s warranty.<br />
*All product names and company names are the trademarks or registered trademarks<br />
of their respective owners.<br />
iii
Table of Contents<br />
iv<br />
Introduction ................................................. 1<br />
Main features........................................................ 1<br />
Panel Tour for the guitarist (Top and rear<br />
panels).......................................................... 2<br />
Top panel............................................................... 2<br />
Rear panel ............................................................. 7<br />
Making connections.................................... 8<br />
Trying out the programs ............................. 9<br />
Creating your own sounds ....................... 10<br />
Creating a sound................................................ 10<br />
Noise reduction settings .................................... 11<br />
Saving a program ...................................... 12<br />
About the amp models, cabinet models, and<br />
effect types ................................................ 13<br />
Amp models ....................................................... 13<br />
Cabinet models................................................... 17<br />
Effect types.......................................................... 18<br />
Tuner .......................................................... 23<br />
Tuning procedure ............................................... 23<br />
Calibrating the tuner .......................................... 23<br />
Using the expression pedal for control ... 24<br />
Expression pedal settings .................................. 24<br />
Assigning a function to the expression pedal<br />
(Quick Assign)..................................................... 24<br />
Expression pedal minimum and maximum values<br />
......................................................................... 25<br />
Adjusting the sensitivity of the expression pedal<br />
............................................................................... 27<br />
Connecting to your computer (USB connection)<br />
............................................................ 28<br />
Using librarian software .................................... 28<br />
Transferring audio data ..................................... 28<br />
Restoring the factory settings................. 29<br />
Troubleshooting........................................ 29<br />
Preset program list ................................... 31<br />
Specifications ........................................... 33
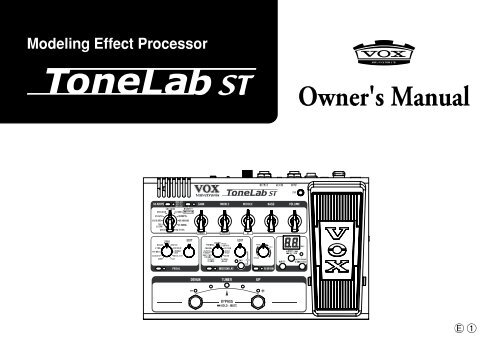
Introduction<br />
Thank you for purchasing the VOX Modeling Effect Processor<br />
<strong>ToneLab</strong> <strong>ST</strong>.<br />
In order to get the most out of your new gear, please read this<br />
owner’s manual carefully and use the product as directed. Keep<br />
the owner’s manual in a safe place for future reference.<br />
Main features<br />
• The <strong>ToneLab</strong> <strong>ST</strong> features a power amp circuit that uses a<br />
miniature triode 12AX7 (ECC83) vacuum tube normally<br />
used in preamps, generating the sound of a real tube amp,<br />
and capturing the feel and tone of the original amplifier<br />
(Valvetronix technology).<br />
• Thirty-three amp models using sophisticated modeling<br />
technology are built-in. There are also eleven speaker cabinet<br />
models, giving you an easy way to recall sounds ranging<br />
from vintage amps of the past to expensive high-end<br />
tube amps.<br />
• Twenty-five high quality effects are built-in, allowing you<br />
to simultaneously use up to eight effect types including<br />
noise reduction.<br />
• There are fifty preset sounds that take advantage of the<br />
amps and effects, together with fifty user-editable programs,<br />
giving you a total of one hundred programs that<br />
you can switch between by pressing a foot switch while<br />
you perform.<br />
• The expression pedal lets you control wah, volume, or<br />
many other parameters with your foot – a great asset during<br />
live performance.<br />
• The Quick Assign function makes it easy to assign parameters<br />
or other functions to the expression pedal.<br />
• The Amp/Line switch ensures that your sound is correctly<br />
optimized whether you’re using a guitar amp or line-level<br />
system as your audio output device.<br />
• An Auto Chromatic Tuner is built-in for easy tuning.<br />
• If you use a commercially available USB cable to connect<br />
the <strong>ToneLab</strong> <strong>ST</strong> to your computer, you’ll be able to use<br />
librarian software on your computer to manage user programs,<br />
or use the <strong>ToneLab</strong> <strong>ST</strong> as a USB audio interface.<br />
1
Panel Tour for the guitarist (Top and<br />
rear panels)<br />
2<br />
Here we’ll introduce you to the switches, controls, and connectors<br />
on the <strong>ToneLab</strong> <strong>ST</strong>’s top panel.<br />
Top panel<br />
1. Amp section<br />
Here you’ll create settings for the amp model.<br />
For details on each effect, refer to “Amp models” (p.13).<br />
a. AMP bank select switch and LED<br />
Use this to switch the bank, or to turn the amp model on/off.<br />
Each time you press the switch, the bank will cycle between <strong>ST</strong>D<br />
(Standard), SPL (Special), C<strong>ST</strong> (Custom), <strong>ST</strong>D ...<br />
The color of the LED will indicate the bank that’s selected.<br />
• <strong>ST</strong>D (Standard): green<br />
• SPL (Special): orange<br />
• C<strong>ST</strong> (Custom): red<br />
The LED will be lit if the amp model is on. By holding down this<br />
switch for about one second you can switch the amp model on/<br />
off.
. CABINET ON/OFF switch and LED<br />
This turns the cabinet model on/off. The LED will be lit if the<br />
cabinet model is on.<br />
By entering OPTION parameter setting mode you can set<br />
parameters for the cabinet model.<br />
OPTION parameter setting mode<br />
To enter OPTION parameter setting mode, hold down the CAB-<br />
INET ON/OFF switch for about one second. You’ll be in<br />
OPTION parameter setting mode, and the LED will blink.<br />
OPTION parameter setting mode lets you make the following<br />
settings.<br />
• GAIN control: cabinet model (CABINET)<br />
• TREBLE control: presence (PRESENCE)<br />
• MIDDLE control: noise reduction (NR)<br />
When you return to the previous operation, press the CABINET<br />
ON/OFF switch or the EXIT/TUNE switch.<br />
NOTE: In OPTION parameter setting mode, the BASS and<br />
VOLUME controls are disabled in this mode.<br />
c. AMP selector<br />
This selects the amp model.<br />
The amp model you select will determine the response of the<br />
gain circuit and tone controls, and the order in which they are<br />
located in the circuit.<br />
If the amp model is turned off, turning this selector will turn the<br />
amp model on.<br />
d. GAIN control<br />
This adjusts the gain of the selected amp model. In OPTION<br />
parameter setting mode, this control selects the cabinet model.<br />
If the cabinet model is turned off, turning this control in<br />
OPTION parameter setting mode will turn the cabinet model on.<br />
e. TREBLE, MIDDLE, BASS controls<br />
These adjust the tone of the high, mid, and low frequency<br />
ranges. In OPTION parameter setting mode, the TREBLE control<br />
adjusts the presence and the MIDDLE control adjusts the noise<br />
reduction.<br />
The way in which these controls affect the tone will depend on<br />
the amp model you’ve selected.<br />
NOTE: Depending on the selected amp model, there may be<br />
almost no sound if you turn all three of these controls to the<br />
far left.<br />
f. VOLUME control<br />
This adjusts the volume of the program.<br />
HINT: You can adjust the volume of the program even when<br />
the amp model is turned off.<br />
2. Pedal section<br />
Here you can make settings for the pedal<br />
effects.<br />
For details on each effect, refer to “Pedal<br />
types” (p.18).<br />
a. PEDAL ON/OFF switch and LED<br />
This turns the pedal effect on/off. The<br />
LED will be lit if the pedal effect is on.<br />
3
. PEDAL controller<br />
This selects the pedal type.<br />
If the pedal effect is turned off, turning this selector will turn the<br />
pedal effect on.<br />
c. EDIT knob<br />
This adjusts the parameters of each effect.<br />
3. MOD/DELAY section<br />
Here you can make settings for the modulation<br />
effect, delay effect, and other<br />
effects such as pitch shift.<br />
For details on each effect, refer to<br />
“Mode/Delay types” (p.20).<br />
a. MOD/DELAY ON/OFF switch and<br />
LED<br />
This turns the modulation effect, delay effect, or other effect on/<br />
off. The LED will be lit if the effect is on.<br />
b. MOD/DELAY selector<br />
This selects the modulation type, delay type, or other effect type.<br />
If the effect type is off, turning this selector will turn the effect<br />
type on.<br />
c. EDIT knob<br />
This adjusts the parameters of each effect.<br />
You can use this knob to adjust two different parameters, EDIT 1<br />
or EDIT 2. The specific parameters that are adjusted will depend<br />
on the selected effect. For details, refer to “Mode/Delay types”<br />
(p.20).<br />
• EDIT 1: turn the EDIT knob<br />
4<br />
• EDIT 2: hold down the TAP switch and turn the EDIT<br />
knob<br />
d. TAP switch and LED<br />
This is used to set the speed of the modulation effect or the delay<br />
time of the delay effect. The interval at which you press the TAP<br />
switch twice is assigned as the time.<br />
The LED will blink to indicate the specified speed or time.<br />
If you’ve selected PITCH SHIFTER, the pitch setting will change<br />
each time you press the TAP switch.<br />
If you’ve selected FILTRON, the envelope up/down setting will<br />
change each time you press the TAP switch. The LED will light if<br />
Up is selected.<br />
You can edit parameters such as SPEED or PITCH by holding<br />
down the TAP switch and turning the EDIT knob (EDIT 2). For<br />
details, refer to “Mode/Delay types” (p.20).<br />
4. Reverb section<br />
Here you can make settings for the reverb effect.<br />
For details on each reverb effect, refer to “Reverb<br />
types” (p.22).<br />
a. REVERB ON/OFF switch and LED<br />
This turns the reverb effect on/off.<br />
The LED will be lit if the reverb effect is on.<br />
b. REVERB knob<br />
Depending on the position of the knob, this selects the reverb<br />
type (SPRING, ROOM, or HALL) and adjusts the mix amount of<br />
the reverb sound.<br />
If the reverb effect is off, turning this knob will switch the reverb<br />
effect on.
5. Program Select / Tuner section<br />
a. UP/DOWN pedals and LEDs<br />
Selecting a program (p.9, “Trying out the programs”)<br />
Pressing the UP pedal will increment the program by one, and<br />
pressing the DOWN pedal will decrement the program by one.<br />
You can hold down the UP pedal and press the EXIT/TUNE key<br />
to increment the program by ten.<br />
You can hold down the DOWN pedal and press the EXIT/TUNE<br />
key to decrement the program by ten.<br />
Using the tuner (p.23, “Tuner”)<br />
If you press the UP and DOWN pedals simultaneously, all<br />
effects will be bypassed and you’ll be able to use the tuner.<br />
If you hold down the UP and DOWN pedals simultaneously for<br />
about two seconds, you’ll be able to use the tuner with the<br />
sound muted.<br />
When you’re using the tuner, the LEDs will indicate the tuning<br />
status.<br />
6. Setting/Display section<br />
a. Program (value) display<br />
Normally this shows the program number.<br />
When you’re using the tuner, this shows the<br />
note name.<br />
When you’re editing a parameter, this shows<br />
the parameter value you’re editing.<br />
If the parameter value matches the original<br />
value, the decimal point segment in the lower<br />
right of the LED will momentarily go dark<br />
(p.11, “Parameter original value indication”).<br />
b. WRITE switch<br />
Press this if you saves the sound you’ve edited (p.12, “Saving a<br />
program”).<br />
c. EXIT/TUNE switch<br />
Press this if you decide to cancel an operation (such as saving a<br />
program).<br />
When the CABINET switch LED, the QUICK ASSIGN LED, or<br />
the program display are not blinking, you can press this switch<br />
to use the tuner (p.23, “Tuning procedure”).<br />
By holding down this switch for about two seconds, you can activate<br />
the Key Lock function, which locks disables the operations<br />
of the switches, selectors, and knobs on the top panel. To deactivate<br />
this function, hold down the switch once again for about two<br />
seconds.<br />
5
d. EXP PARAM (Expression Parameter) switch<br />
This lets you specify the maximum value and minimum value of<br />
the parameter that’s assigned to the pedal. For details, refer to<br />
“Expression pedal minimum and maximum values” (p.25).<br />
If the QUICK ASSIGN LED is lit, holding down this switch for<br />
approximately two seconds will assign a effect parameter to the<br />
expression pedal (p.24, “Assigning a function to the expression<br />
pedal (Quick Assign)”).<br />
e. QUICK ASSIGN LED<br />
This will light when the Quick Assign function is available, and<br />
will blink when you’re specifying the variable range of the<br />
expression pedal.<br />
6<br />
7. Expression pedal section<br />
a. EXP LED<br />
This will light when the effect<br />
assigned to the expression pedal is on.<br />
b. Expression pedal<br />
This controls the function that’s<br />
assigned to the expression pedal (e.g.,<br />
volume or wah), or controls the<br />
parameter of some other effect.<br />
If you firmly advance the expression<br />
pedal all the way forward, the effect<br />
assigned to the pedal will be switched<br />
on/off.<br />
If volume is assigned to the expression<br />
pedal, advancing the pedal in<br />
this way will not turn off the volume<br />
pedal.
Rear panel<br />
1. Valve<br />
The internal 12AX7 (ECC83) vacuum tube is located here.<br />
NOTE: The vacuum tube may break if it is subjected to physical<br />
impact. Be careful not to subject the <strong>ToneLab</strong> <strong>ST</strong> to strong<br />
physical impact.<br />
2. USB connector (Type B)<br />
If you use a commercially available USB cable to connect the<br />
<strong>ToneLab</strong> <strong>ST</strong> to your computer, you’ll be able to use librarian software<br />
on your computer to manage user programs, or use the<br />
<strong>ToneLab</strong> <strong>ST</strong> as a USB audio interface.<br />
3. Cable hook<br />
Wrap the cable of the AC adapter around this hook to prevent<br />
the AC adapter from being accidentally disconnected.<br />
For details, refer to “Making connections” (p.8).<br />
4. DC12V connector<br />
Connect the included AC adapter here.<br />
NOTE: The included AC adapter is only for use with the<br />
<strong>ToneLab</strong> <strong>ST</strong>. Using it with any other device may cause malfunctions,<br />
so you must never do so.<br />
5. <strong>ST</strong>ANDBY switch<br />
This turns the power on or off.<br />
6. INPUT connector<br />
Connect your guitar cable here.<br />
7. AUX IN jack<br />
This is a stereo mini-jack to which you can connect the output<br />
(analog output) of an audio device.<br />
You can connect a CD or MP3 player here, and play along on the<br />
guitar while listening to your favorite songs. To adjust the volume,<br />
use the controls of the connected device.<br />
8. OUTPUT/PHONES jack<br />
Connect your guitar amp, mixer, or headphones here. This jack<br />
will accommodate either stereo or monaural connections.<br />
9. LEVEL knob<br />
This adjusts the output level of the OUTPUT/PHONES jack.<br />
10.AMP/LINE switch<br />
The correct setting of this switch will depend on what is connected<br />
to the OUTPUT/PHONES jack.<br />
For details, refer to “Making connections” (p.8).<br />
7
Making connections<br />
8<br />
Here’s how to make connections and start using your <strong>ToneLab</strong> <strong>ST</strong>.<br />
Mixer, recorder, etc.<br />
Audio system<br />
Guitar amp Headphones<br />
1. Set the AMP/LINE switch appropriately for the type of<br />
device you’ll be connecting to the OUTPUT/PHONES jack.<br />
Set the AMP/LINE switch as follows.<br />
AMP (VOX, F, M)<br />
If you’re connecting a guitar amp, choose the VOX, F, or M<br />
setting. This setting will compensate the output from the<br />
amp model as necessary. However, compensation will not<br />
be applied if the amp model is off.<br />
• VOX: Use this setting if the output is connected to an amp<br />
that has a distinctive mid-range such as the AC30 openbacked<br />
combo amp made by the VOX Corporation.<br />
• F: Use this setting if the output is connected to a typical<br />
clean-sounding US-made open-backed combo amp.<br />
VOX<br />
CD player, etc.<br />
OUTPUT/PHONES AUX INPUT<br />
IN<br />
Guitar<br />
DC12V<br />
AC adapter<br />
USB<br />
USB cable<br />
Computer<br />
• M: Use this setting if the output is connected to a stacktype<br />
amp such as a 4x12 closed-back cabinet.<br />
LINE<br />
Use this setting if the output is connected to your guitar<br />
amp’s power amp, to an audio system, mixer, or recorder,<br />
or to headphones.<br />
2. Use a cable to connect the <strong>ToneLab</strong> <strong>ST</strong>’s OUTPUT/PHONES<br />
jack to your guitar amp, mixer, or other device.<br />
NOTE: Lower the volume of your guitar amp or mixer before<br />
you make connections.<br />
The OUTPUT/PHONES jack is a stereo output. Use a phone<br />
plug to make connections.
If you use a monaural phone plug cable to connect this to<br />
your amp etc., only the sound of the L (left) channel will be<br />
output.<br />
If you want to connect this in stereo to a mixer or recorder,<br />
use a “stereo phone plug (output) -> monaural phone plug x<br />
2 (input)” adapter cable.<br />
3. Turn the rear panel LEVEL knob to “0” (all the way to the<br />
left as seen from the rear panel).<br />
4. Connect the plug of the included AC<br />
adapter to the DC12V jack, and plug the AC<br />
adapter into an AC outlet.<br />
Wrap the AC adapter cable around the<br />
cable hook.<br />
5. Connect the cable from your guitar to the<br />
INPUT jack.<br />
6. Make sure that the volume of your amp or mixer is turned<br />
down, and then turn the <strong>ST</strong>ANDBY switch on.<br />
7. Raise the volume controls of your amp or mixer, and turn<br />
the rear panel LEVEL knob to adjust the volume.<br />
NOTE: Since the <strong>ToneLab</strong> <strong>ST</strong> uses a vacuum tube, there<br />
might not be sound for a few seconds until the vacuum tube<br />
has warmed up.<br />
Trying out the programs<br />
The <strong>ToneLab</strong> <strong>ST</strong> has a total of one hundred programs, consisting<br />
of rewritable user programs (No.0–49) and preset programs<br />
(No.50–99).<br />
For details on the preset programs, refer to “Preset program list”<br />
(p.31).<br />
1. Press the UP or DOWN pedal to switch programs.<br />
Play your guitar, and try out the various programs.<br />
Each program contains settings that assign the expression<br />
pedal to control wah, volume, delay feedback, reverb input<br />
level, or some other effect parameter. Operate the expression<br />
pedal to try out the assignment for each program.<br />
HINT: To increment the program number by 10, hold down<br />
the UP pedal and press the EXIT/TUNE key. Similar, to decrement<br />
the program number by 10, hold down the DOWN<br />
pedal and press the EXIT/TUNE key.<br />
9
Creating your own sounds<br />
10<br />
There are two ways to create your own sound: you can start with<br />
a program that’s similar to what you have in mind and then edit<br />
the parameters as desired, or you can create a program from<br />
scratch.<br />
Creating a sound<br />
Here we’ll explain how to create a program from scratch.<br />
1. Turn off the cabinet model and effect types.<br />
If the CABINET on/off switch, MOD/DELAY on/off<br />
switch, and REVERB on/off switch LEDs are lit, press each<br />
switch to turn them off.<br />
2. Press the AMP bank select switch to select a bank, and use<br />
the AMP selector to select an amp model.<br />
Each time you press the AMP bank switch, the bank will<br />
cycle through <strong>ST</strong>D (Standard), SPL (Special), C<strong>ST</strong> (Custom),<br />
<strong>ST</strong>D ...<br />
For details on the amp models, refer to “Amp models”<br />
(p.13).<br />
3. Use the GAIN, TREBLE, MIDDLE, BASS, and VOLUME<br />
controls to adjust the tone and volume.<br />
The GAIN control adjusts the gain.<br />
The TREBLE, MIDDLE, and BASS controls adjust the high,<br />
mid, and low-frequency tone.<br />
The VOLUME control adjusts the volume.<br />
HINT: The sound might be distorted in an undesirable way<br />
depending on the settings of the TREBLE, MIDDLE, or BASS<br />
controls, or depending on other settings. If so, adjust the<br />
VOLUME control to an appropriate volume.<br />
4. If desired, select a cabinet model and adjust the high-frequency<br />
tone.<br />
To turn the cabinet model on<br />
Press the CABINET on/off switch. The LED will light.<br />
To change the cabinet mode<br />
Hold down the CABINET on/off switch for about one second<br />
to enter OPTION parameter setting mode (the CABI-<br />
NET on/off switch LED will blink). Then turn the GAIN<br />
control.<br />
For details on the cabinet models, refer to “Cabinet models”<br />
(p.17).
Adjusting the high-frequency tone (Presence)<br />
Hold down the CABINET on/off switch for about one second<br />
to enter OPTION parameter setting mode, and then<br />
turn the TREBLE control.<br />
5. Select and adjust the effects of other sections.<br />
For example if you want to add delay, turn the MOD/<br />
DELAY selector to select DELAY.<br />
If the selector is already positioned at DELAY, turn it to<br />
some other delay type and then back to re-select DELAY.<br />
Use the TAP switch or EDIT knob to set the delay time, delay<br />
level (the mix amount of delay sound), and feedback.<br />
To set the delay time<br />
Press the TAP switch twice (the time will be set to the<br />
interval at which you press the switch).<br />
To adjust the delay level or feedback<br />
Delay level: Turn the EDIT knob.<br />
Feedback: Hold down the TAP switch and turn EDIT.<br />
For details on the effect types, refer to “Effect types” (p.18).<br />
HINT: If you’ve selected a pedal effect, it might be easier to<br />
make adjustments if other effects are not being applied. If so,<br />
adjust the pedal effect after you’ve specified the amp model<br />
and cabinet model, but before you make settings for other<br />
effects.<br />
6. When you’ve come up with a sound that you like, save it as<br />
a program.<br />
For details, refer to “Saving a program” (p.12).<br />
NOTE: If you switch to a different program or turn off the<br />
power before saving, the changes you’ve made will be discarded,<br />
and the settings will revert to their original state.<br />
Parameter original value indication<br />
This is a way for you to check the original value of a parameter;<br />
i.e., the value that was saved in the preset program or user<br />
program.<br />
When you're using a knob to edit the value of a parameter, the<br />
decimal point in the lower left of the program display LED is lit<br />
momentarily when the edited value matches the original value.<br />
HINT: You can take advantage of this original value indication<br />
to find out the actual settings of a program that you like.<br />
NOTE: The settings of the rear panel LEVEL knob and AMP/<br />
LINE switch are not saved, and will not be shown by the original<br />
value indication. Nor will the original value of the<br />
SPEED parameter or TIME parameter be shown when you<br />
use the TAP switch to set the SPEED parameter or TIME<br />
parameter.<br />
Noise reduction settings<br />
Noise reduction reduces the unwanted noise that might be<br />
heard between notes. This setting is made independently for<br />
each program.<br />
HINT: High-gain amp models are particularly prone to noise,<br />
so we recommend using noise reduction in this case.<br />
1. Hold down the CABINET on/off switch for about one second<br />
to enter OPTION parameter setting mode.<br />
The CABINET on/off switch LED will blink.<br />
2. Turn the MIDDLE control to adjust the noise reduction sensitivity.<br />
11
12<br />
Turning the knob toward the right will increase the<br />
amount of noise reduction.<br />
Turning the knob all the way to the left will turn noise<br />
reduction off; it will have no effect.<br />
NOTE: Depending on the guitar you’re using, excessively<br />
high settings of noise reduction may cause notes to be cut off<br />
unnaturally.<br />
3. When you’ve finished making settings, press the EXIT/<br />
TUNE switch.<br />
Saving a program<br />
When you’ve come up with a sound you like, here’s how to save<br />
(write) it.<br />
NOTE: If you switch to a different program or turn off the<br />
power before saving, the changes you’ve made will be discarded,<br />
and the settings will revert to their original state.<br />
1. Press the WRITE switch.<br />
The program display and the UP/DOWN pedal LEDs will<br />
blink.<br />
2. Press the UP or DOWN pedal to select the user program<br />
(No.0–49) in which you want to save your settings.<br />
When selecting the save-destination, holding down the UP<br />
pedal and pressing the EXIT/TUNE key will increment<br />
the program number by ten. Similarly, holding down the<br />
DOWN pedal and pressing the EXIT/TUNE key will decrement<br />
the program number by ten.<br />
NOTE: Your settings will overwrite the program you select<br />
here. Take care not to overwrite an important program that<br />
you want to keep. You can’t save to a preset program (No.50-<br />
99).<br />
HINT: If you decide to cancel the Write operation, press the<br />
EXIT/TUNE switch. You will return to the previous mode,<br />
and the LED will stop blinking.<br />
3. Press the WRITE switch once again.<br />
Your settings will be written to the user program you<br />
selected in step 2, and the UP/DOWN LED will return to<br />
the steadily lit state.
About the amp models, cabinet<br />
models, and effect types<br />
This section provides details about the amp models and cabinet<br />
models, and on the pedal effects, mode/delay effects, and reverb<br />
effect.<br />
The following illustration shows the signal flow within the<br />
<strong>ToneLab</strong> <strong>ST</strong>.<br />
PEDAL<br />
TYPE<br />
GAIN<br />
PRE AMP<br />
AMP MODEL<br />
POWER AMP<br />
VALVE<br />
ECC83 (12AX7)<br />
VOLUME<br />
CABINET MODEL<br />
VOLUME<br />
PEDAL<br />
EFFECT TYPE<br />
MOD /<br />
DELAY REVERB<br />
OUTPUT<br />
SELECT<br />
Amp models<br />
Here we’ll explain the 33 different amp models.<br />
HINT: Each amp model’s GAIN (adjusted by the top panel<br />
GAIN control) can be assigned to the expression pedal for<br />
control. For details on how to assign a parameter to the<br />
expression pedal, refer to “Assigning a function to the expression<br />
pedal (Quick Assign)” (p.24).<br />
1. CLEAN<br />
<strong>ST</strong>D (Standard)<br />
This models the clean channel of a high-quality amp that was<br />
produced only on special order, and was known as the overdrive<br />
special. With a beautifully rounded low range, a sharp midrange<br />
attack, and a sweet treble register, this is ideal for single<br />
coil pickups.<br />
SPL (Special)<br />
This models the clean channel of a Japanese-made amp with 2 x<br />
12" speakers that went on sale in 1975. It is known for its clean<br />
full-range sound and its built-in stereo chorus, and is used on<br />
stages and in studios around the world.<br />
C<strong>ST</strong> (Custom)<br />
This models only a four-band tone control that produces an<br />
undistorted, pure, clean tone. The GAIN control is disabled. Setting<br />
BASS, MIDDLE, and TREBLE to the center and PRESENCE<br />
to the minimum setting will produce the same result as turning<br />
the amp model off. If you want to obtain a sparkling clean tone<br />
as when using a line input, turn the cabinet model off.<br />
2. CALI CLEAN<br />
<strong>ST</strong>D (Standard)<br />
The 6G5-A “Pro” amp was produced during the years 1960–<br />
1963, and was distinctive for its yellowish brown vinyl cover<br />
and round brown knobs. This 40W combo amp is known for its<br />
warm and clean tone.<br />
SPL (Special)<br />
This American-made tweed-covered 2x12" combo amp made in<br />
1957 is known for its rich and clean tone that’s ideal for classic<br />
rock, blues, and country. By raising the volume you can also produce<br />
a powerful and punchy overdrive sound.<br />
C<strong>ST</strong> (Custom)<br />
This modifies an American-made black-paneled amp that has<br />
been modified. With this modification, an already-superb amp<br />
gains even greater smoothness and additional warmth.<br />
13
3. US BLUES<br />
<strong>ST</strong>D (Standard)<br />
This models a 4x10" combo amp from 1959 that was originally<br />
designed for bass guitar. Its smooth and crisp overdrive sound<br />
will respond sensitively to your picking dynamics and to the<br />
volume of your guitar.<br />
14<br />
SPL (Special)<br />
This models the 22W Bruno Cowtipper Pro II 22 which owes its<br />
existence to a special friend of VOX, the custom amp designer<br />
Tony Bruno. It responds with extreme sensitivity to your playing<br />
touch, and its silky-sweet clean tone will become a crunch sound<br />
rich in overtones when you turn up the volume.<br />
C<strong>ST</strong> (Custom)<br />
This models a wood-finished 30W boutique amp head that cost<br />
more than $25,000. It delivers sparkling glassy clean tones, and<br />
raising the gain will produce overdrive sounds that are startlingly<br />
sweet in a musical way.<br />
4. US 2x12<br />
<strong>ST</strong>D (Standard)<br />
This models a black-faced 2x12" combo amp that has become an<br />
indispensible item for country and blues players. Its tight and<br />
clean sound provides deep piano-like bass tones, and will<br />
deliver the classic Chicago blues tone particularly when used<br />
with single coil pickups.<br />
SPL (Special)<br />
This models a beautiful 30W boutique amp head renowned for<br />
its peerless quality and true point-to-point wiring. Based on a<br />
concept similar to that of the VOX AC30, this amp is known for<br />
its rich overtones, sparkling clean tone, and great-sounding<br />
overdrive.<br />
C<strong>ST</strong> (Custom)<br />
Based on a crunch-distortion amp, this original amp model<br />
changes the tone control to an active circuit that is more powerful<br />
than the conventional one, allowing a wide range of tones to<br />
be created.<br />
Raise the TREBLE for sparkling chords or lower it for a tasteful<br />
blues setting, or turn up the MIDDLE for a rock backing sound.<br />
5. VOX AC15<br />
<strong>ST</strong>D (Standard)<br />
This models the AC15TB, which combines the beautifully sweet<br />
tonal character of the AC15’s low output power amp with the<br />
sound-creating flexibility of the AC30’s top boost channel.<br />
SPL (Special)<br />
This models channel 2 of the VOX AC15 (1x12", 15W), which<br />
was manufactured in 1962 and was a big hit for its compact cabinet,<br />
power, and great tone – along with then-popular British<br />
bands.<br />
C<strong>ST</strong> (Custom)<br />
This original amp model is based on an old British amp that<br />
delivers the ideal kind of powerful distortion for rock, but with<br />
the tone control changed to an active circuit that has a stronger<br />
effect than the conventional one, allowing a wide range of tones<br />
to be created.<br />
You can obtain basic distortion sounds at the flat setting, or take<br />
advantage of the active tone circuit to create highly distinctive<br />
lead sounds.
6. VOX AC30<br />
<strong>ST</strong>D (Standard)<br />
This models an AC30 amp with the “top boost” circuit that was<br />
included as standard starting with units produced in 1964. It<br />
delivers a smooth and refined top end, majestically deep overdrive,<br />
and a rich and brilliant clean sound.<br />
SPL (Special)<br />
This models is a hand-wired all-tube amp head sold to commemorate<br />
VOX’s fiftieth anniversary. This amp has no rival in<br />
its ability to create sparkling chime-like clean sounds and<br />
creamy warm overdrive sounds.<br />
C<strong>ST</strong> (Custom)<br />
This models the AC30BM Brian May signature model which<br />
faithfully reproduces every nuance of the legendary original<br />
AC30 from the 1950’s. This setting provides the screaming<br />
sound of the amp being overdriven with the treble booster<br />
turned on.<br />
7. UK ROCK<br />
<strong>ST</strong>D (Standard)<br />
This 45W amp head was originally manufactured from 1962 to<br />
1966, and was based on a tweed-covered bass amp. Its high-gain<br />
design was the beginning of the British amp tone revolution that<br />
continues to this day.<br />
SPL (Special)<br />
This models a UK-manufactured 100W single-channel head with<br />
master volume made in 1983. Turn the GAIN control all the way<br />
up to get that thick, snarling hard rock and heavy metal sound<br />
that dominated the 80’s.<br />
C<strong>ST</strong> (Custom)<br />
This models the high treble channel of a hand-wired amp head<br />
made in England during the early 60’s. Raising the volume of<br />
this 50W output amp all the way produces the crunch that will<br />
forever be the sound of rock ‘n’ roll.<br />
8. UK METAL<br />
<strong>ST</strong>D (Standard)<br />
This models the high-gain channel of a modern 100W amp.<br />
While individual notes are clearly defined, it delivers a monster<br />
sound that’s quite aggressive and arrogant.<br />
SPL (Special)<br />
This models an English-made 100W amp head released in 2007<br />
and boasting a four-channel design with powerful tone. We’ve<br />
used the “Overdrive 1” channel that produces a tight low-end<br />
and transparent high-gain metal sound.<br />
C<strong>ST</strong> (Custom)<br />
Based on a UK-made 100W head, this amp was created for a<br />
famous guitarist known for his amazing tone, slash rhythms,<br />
and liking for silk hats. If you have a desire for ultimate metal<br />
tones, this amp will be the perfect choice.<br />
9. US HIGH GAIN<br />
<strong>ST</strong>D (Standard)<br />
This models a 100W boutique amp head manufactured in North<br />
Hollywood. This amp can be switched between power tube class<br />
AB or class A modes; the class AB mode used on the <strong>ToneLab</strong> <strong>ST</strong><br />
produces rich overtones and highly musical response.<br />
15
16<br />
SPL (Special)<br />
This models the overdrive channel of a snakeskin-covered 100W<br />
amp head made in 1991. With an open low-end and a compressed<br />
mid/high range, its powerful and heavy sound delivers<br />
a forceful tone that will not break down even with the most<br />
extreme gain settings.<br />
C<strong>ST</strong> (Custom)<br />
This is an original amp model based on a recent high-gain amp,<br />
but with the tone control changed to an active circuit that has a<br />
stronger effect than the conventional one, allowing a wide range<br />
of tones to be created.<br />
A wide range of settings are possible; you can raise the BASS to<br />
bring out the ultra-lows, or raise or lower the MIDDLE to obtain<br />
hot lead sounds or a “scooped” sound.<br />
10.US METAL<br />
<strong>ST</strong>D (Standard)<br />
This models the modern high-gain channel from a wild beast of<br />
a high-gain amp. Its deep and loose low-end, sparkling highs,<br />
and monstrous gain are ideal for guitars tuned as low as possible,<br />
or for metal acts wielding seven-string guitars.<br />
SPL (Special)<br />
This models a California-made amp head with a three-channel<br />
design and versatile gain switches that produce a wide variety<br />
of sounds. We’ve modeled the lead channel that produces the<br />
ultimate high-gain tone.<br />
C<strong>ST</strong> (Custom)<br />
This two-channel 120W head manufactured in Mississippi was<br />
designed for a legendary guitar hero known for his “brown<br />
sound.” This amp models features a high-gain sound that’s ideal<br />
for the tapping performance technique.<br />
11.BOUTIQUE METAL<br />
<strong>ST</strong>D (Standard)<br />
This models the overdrive channel of a 100W high-quality amp<br />
that was produced only on special order, and known as the overdrive<br />
special. The wonderful sustain obtained by raising the<br />
GAIN control is smooth and soulful.<br />
SPL (Special)<br />
This models the crushing high-gain sound emanated from a<br />
German-made 100W four-channel amp head. We chose the<br />
“Heavy” channel that delivers a startling tightness when played<br />
with a dropped-D metal tuning.<br />
C<strong>ST</strong> (Custom)<br />
This is an original amp model based on a recent high-gain amp,<br />
marked by a rich and hot mid-range tone and extremely powerful<br />
sustain.<br />
Since active-circuit tone controls are used on this model as well,<br />
a wide range of tonal variety can be obtained.
Cabinet models<br />
These simulate the acoustical character of a guitar amp’s cabinet.<br />
1. TWEED 1x8<br />
This is an open back cabinet containing an 8-inch 3.2 ohm Alnico<br />
speaker, found in simple amplifiers with a 6V6 output tube.<br />
2. TWEED 1x12<br />
This cabinet has an important influence on the sound of the<br />
Tweed 1x12 amp. The speaker uses an Alnico magnet.<br />
3. TWEED 4x10<br />
This is an open back cabinet containing four 10-inch 8 ohm<br />
speakers connected in parallel for a 2 ohm impedance.<br />
4. BLACK 2x10<br />
This is the cabinet of a 35W open back combo amp containing<br />
two 10-inch ceramic magnet speakers.<br />
5. BLACK 2x12<br />
This contains two 12-inch ceramic magnet speakers, connected<br />
in parallel as a 4 ohm load.<br />
6. VOX AC15<br />
This is the cabinet of an open back combo amp containing one of<br />
the famous 12-inch “VOX blue Alnico speakers” made by the<br />
British company Celestion.<br />
7. VOX AC30<br />
The famous VOX sound is completed by this speaker cabinet<br />
which contains two 12-inch VOX blue Alnico speakers connected<br />
in series as a 16 ohm load.<br />
8. VOX AD120VTX<br />
This is the closed back cabinet VTX containing two customdesigned<br />
Celestion speakers with neodymium magnets.<br />
9. UK H30 4x12<br />
This is a heavy-duty cabinet containing 30W speakers from the<br />
late 60’s made by the same manufacturer as the UK T75 4x12<br />
described below.<br />
10.UK T75 4x12<br />
This is a more modern 4x12 cabinet containing 75-watt Britishmade<br />
speakers.<br />
11.US V30 4x12<br />
Known as the “black beast,” this cabinet uses British-made “Vintage”<br />
speakers, and is known for its deep low-range and welldefined<br />
highs.<br />
Examples of amp and cabinet combinations<br />
You can freely combine amp models with cabinet models to create<br />
a wide range of sounds, so be sure to try out various combinations.<br />
17
18<br />
Here are some typical combinations.<br />
CLEAN<br />
CALI CLEAN<br />
US BLUES<br />
US 2x12<br />
VOX AC15<br />
VOX AC30<br />
UK ROCK<br />
UK METAL<br />
US HIGAIN<br />
Amp model Cabinet model<br />
2 TWEED 1x12<br />
4 BLACK 2x10<br />
5 BLACK 2x12<br />
9 UK H30 4x12<br />
For the C<strong>ST</strong> amp model, we recommend that you turn<br />
the cabinet model off.<br />
1 TWEED 1x8<br />
2 TWEED 1x12<br />
4 BLACK 2x10<br />
5 BLACK 2x12<br />
2 TWEED 1x12<br />
3 TWEED 4x10<br />
5 BLACK 2x12<br />
9 UK H30 4x12<br />
4 BLACK 2x10<br />
5 BLACK 2x12<br />
6 VOX AC15<br />
7 VOX AC30<br />
8 VOX AD120VTX<br />
6 VOX AC15<br />
7 VOX AC30<br />
8 VOX AD120VTX<br />
9 UK H30 4x12<br />
10 UK T75 4x12<br />
9 UK H30 4x12<br />
10 UK T75 4x12<br />
10 UK T75 4x12<br />
11 US V30 4x12<br />
US METAL<br />
Amp model Cabinet model<br />
BOUTIQUE METAL<br />
10 UK T75 4x12<br />
11 US V30 4x12<br />
9 UK H30 4x12<br />
10 UK T75 4x12<br />
11 US V30 4x12<br />
Effect types<br />
Here we’ll explain the pedal types, mod/delay types, and reverb<br />
types.<br />
The illustration on page 13 shows the signal flow within the<br />
<strong>ToneLab</strong> <strong>ST</strong>.<br />
Pedal types<br />
The <strong>ToneLab</strong> <strong>ST</strong> provides eleven of the most popular types of<br />
pedal effect. You can use the EDIT knob to adjust the major<br />
parameters.<br />
HINT: Parameters that can be assigned to the expression<br />
pedal are marked by “*”.<br />
1. COMP<br />
This models a compressor pedal that is popular for its percussive<br />
clean sound. It’s perfect for the pop or funk music of the<br />
80’s and 90’s. It can also produce a singing, mellow sustain.<br />
Knob Parameter<br />
EDIT SENS*<br />
Adjusts the sensitivity. Turn the knob toward the<br />
right to increase the compression and sustain.
2. ACOU<strong>ST</strong>IC<br />
This is ideal when you want to play acoustic sounds. It’s a simulator<br />
that transforms the sound of an electric guitar into the<br />
sound of an acoustic guitar.<br />
We recommend that you use this with a single-coil (i.e., low output)<br />
neck (front) pickup.<br />
Knob Parameter<br />
EDIT TONE* Adjusts the tone.<br />
3. VOX WAH<br />
This models the legendary V848 Clyde McCoy VOX wah pedal.<br />
Its distinctive tone, and throats being wrung, have made this<br />
pedal a favorite with musicians.<br />
HINT: When you select VOX WAH, the expression pedal will<br />
automatically operate as a wah pedal.<br />
Knob Parameter<br />
EDIT MANUAL* Adjusts the tone.<br />
4. U-VIBE<br />
This models the famous phase/vibrato pedal unit. This effect<br />
simulates a rotary speaker, producing a seductive and emotional<br />
tone.<br />
Knob Parameter<br />
EDIT SPEED* Adjusts the vibrato speed.<br />
5. OCTAVE<br />
This models a pedal that adds weight to the sound by generating<br />
a sound one octave below, and mixing this with the original<br />
sound.<br />
Knob Parameter<br />
EDIT LEVEL*<br />
6. TREBLE BOO<strong>ST</strong><br />
This models the treble booster built into the VOX VBM-1, which<br />
was designed for use with the VOX AC30.<br />
It adds “crunch” to overdrive sound.<br />
Knob Parameter<br />
EDIT GAIN* Adjusts the gain.<br />
7. TUBE OD<br />
This models a well-known overdrive pedal with a green box; the<br />
inexpressible warmth of its sound has made it a classic effect.<br />
Knob Parameter<br />
EDIT GAIN* Adjusts the gain.<br />
Adjusts the mix amount of the octave-lower<br />
sound.<br />
8. BOUTIQUE<br />
This models an overdrive unit named after a half-human halfhorse<br />
being from Greek myth. When the gain is lowered, this acts<br />
as a booster that preserves the original sound of the guitar. Raising<br />
the gain makes this act as an overdrive with a rich mid-range.<br />
Knob Parameter<br />
EDIT GAIN* Adjusts the gain<br />
19
9. ORANGE DI<strong>ST</strong><br />
This is a classic Japanese-made distortion unit in an orange box.<br />
10.METAL DI<strong>ST</strong><br />
This is a distortion unit that’s idea for metal.<br />
11.FUZZ<br />
Retro, brazen, and rough-edged.<br />
Mode/Delay types<br />
The <strong>ToneLab</strong> <strong>ST</strong> provides eleven types of modulation effect,<br />
delay effect, and other effect.<br />
The SPEED parameter of modulation-type effects and the TIME<br />
parameter of delay-type effects can be easily adjusted by pressing<br />
the TAP switch twice.<br />
You can use the EDIT knob to adjust the most important parameter<br />
(EDIT 1). In addition, you can hold down the TAP switch<br />
and turn the EDIT knob to make more detailed settings (EDIT 2).<br />
HINT: Parameters that can be assigned to the expression<br />
pedal are indicated by “*”. For details on how to assign a<br />
parameter to the expression pedal, refer to “Assigning a function<br />
to the expression pedal (Quick Assign)” (p.24).<br />
20<br />
Knob Parameter<br />
EDIT GAIN* Adjusts the gain.<br />
Knob Parameter<br />
EDIT GAIN* Adjusts the gain.<br />
Knob Parameter<br />
EDIT GAIN* Adjusts the gain.<br />
1. CLASSIC CHORUS<br />
This models a standard rich-sounding analog chorus unit.<br />
Knob/Switch Parameter<br />
EDIT DEPTH* Adjusts the modulation depth.<br />
TAP SPEED*<br />
Adjusts the modulation speed in a range of<br />
0.1...15 Hz.<br />
TAP+EDIT SPEED* Adjusts the speed.<br />
2. MULTI TAP CHORUS<br />
This is a deep and spacious chorus with independent chorus<br />
taps at left, center, and right.<br />
Knob/Switch Parameter<br />
EDIT DEPTH* Adjusts the modulation depth.<br />
TAP SPEED*<br />
Adjusts the modulation speed in a range of<br />
0.1...15 Hz.<br />
TAP+EDIT SPEED* Adjusts the speed.<br />
3. CLASSIC FLANGER<br />
This models a truly classic analog flanger associated with a great<br />
guitarist of today who is honored by many as “the godfather of<br />
two-handed tapping.”<br />
Knob/Switch Parameter<br />
EDIT RESONANCE* Adjusts the amount of resonance.<br />
TAP SPEED*<br />
Adjusts the modulation speed in a range of<br />
0.1...15 Hz.<br />
TAP+EDIT SPEED* Adjusts the speed.
4. PHASER<br />
This models a popular analog phaser in a banana-colored box.<br />
Knob/Switch Parameter<br />
EDIT RESONANCE* Adjusts the amount of resonance.<br />
TAP SPEED*<br />
Adjusts the modulation speed in a range of<br />
0.1...15 Hz.<br />
TAP+EDIT SPEED* Adjusts the speed.<br />
5. TEXTREM<br />
This models the acclaimed tremolo circuit built into a US-made<br />
combo amp.<br />
Knob/Switch Parameter<br />
EDIT DEPTH* Adjusts the tremolo depth.<br />
TAP SPEED*<br />
Adjusts the modulation speed in a range of<br />
1.0...15 Hz.<br />
TAP+EDIT SPEED* Adjusts the speed.<br />
6. ROTARY<br />
This models a rotary speaker.<br />
Knob/Switch Parameter<br />
EDIT DEPTH* Adjusts the modulation depth.<br />
TAP SPEED*<br />
Adjusts the modulation speed in a range of<br />
0.8...15 Hz.<br />
TAP+EDIT SPEED* Adjusts the speed.<br />
7. PITCH SHIFTER<br />
This is a pitch shifter that allows you to play chords, and has a<br />
variable range of one octave upward or downward.<br />
Knob/Switch Parameter<br />
EDIT BALANCE*<br />
TAP PITCH*<br />
TAP+EDIT PITCH*<br />
Adjusts the balance between direct sound and<br />
effect sound.<br />
Specifies the amount by which the pitch of the<br />
effect sound will be shifted; an octave, a 4th, or a<br />
5th.<br />
Each time you press the switch, the setting will<br />
cycle between -12, -7, -5, DT (Detune), +5, +7,<br />
+12, -12.<br />
Specifies the amount by which the pitch of the<br />
effect sound will be shifted in semitone units (100<br />
cents).<br />
The setting will change as follows: -12, -11, ... -1,<br />
0, DT (Detune), +1, ... +12<br />
8. FILTRON<br />
This is an envelope-controlled filter (wah) that opens or closes a<br />
filter according to the input from the guitar.<br />
Knob/Switch Parameter<br />
EDIT SENS*<br />
Adjusts the sensitivity to the guitar's volume.<br />
If this parameter is assigned to the expression<br />
pedal, the cutoff frequency will be controlled by<br />
the expression pedal, meaning that the opening/<br />
closing of the filter will not be affected by the input<br />
from the guitar.<br />
TAP TYPE<br />
Specifies the direction of movement (up or down).<br />
If Up is selected, the TAP switch LED will light.<br />
TAP+EDIT RESONANCE* Adjusts the amount of resonance.<br />
21
9. ECHO PLUS<br />
This models an acclaimed analog tape echo. Originally, echo was<br />
created by a playback head, and the delay time was specified by<br />
changing the speed of the motor.<br />
10.DELAY<br />
This models an analog delay that uses a Bucket Brigade Device<br />
(BBD). Its audio quality is lo-fi, but is popular for its warm sound.<br />
11.CHORUS+DELAY<br />
This effect combines a chorus and a delay. The chorus depth is<br />
fixed; only the delay parameters can be adjusted.<br />
22<br />
Knob/Switch Parameter<br />
EDIT LEVEL*<br />
Adjusts the mix amount of the delay sound.<br />
If this parameter is assigned to the expression<br />
pedal, the input level to the delay will be controlled<br />
by the expression pedal.<br />
TAP TIME<br />
Specifies the delay time in a range of 40...1480<br />
ms.<br />
TAP+EDIT FEEDBACK* Adjusts the amount of feedback.<br />
Knob/Switch Parameter<br />
EDIT LEVEL*<br />
Adjusts the mix amount of the delay sound.<br />
If this parameter is assigned to the expression<br />
pedal, the input level to the delay will be controlled<br />
by the expression pedal.<br />
Knob/Switch Parameter<br />
TAP TIME<br />
Specifies the delay time in a range of 40...1480<br />
ms.<br />
TAP+EDIT FEEDBACK* Adjusts the amount of feedback.<br />
Reverb types<br />
Three types of reverb are provided.<br />
Depending on the position of the knob, this selects the reverb<br />
type (SPRING, ROOM, or HALL) and adjusts the mix amount of<br />
the reverb sound.<br />
HINT: If reverb is assigned to the expression pedal, the expression<br />
pedal will control the input level to the reverb. For details on how<br />
to assign a parameter to the expression pedal, refer to “Assigning<br />
a function to the expression pedal (Quick Assign)” (p.24).<br />
1. SPRING<br />
This simulates the spring reverb built into many guitar amps.<br />
2. ROOM<br />
This reverb type simulates a typical room that contains numerous<br />
early reflections.<br />
3. HALL<br />
This models the reverberation of a concert hall containing<br />
numerous echo components.
Tuner<br />
The <strong>ToneLab</strong> <strong>ST</strong> has a built-in auto chromatic tuner.<br />
Tuning procedure<br />
1. If you want to tune with the effects bypassed, press the UP<br />
pedal and DOWN pedal simultaneously.<br />
The program display will indicate “ ”.<br />
HINT: If the QUICK ASSIGN LED or the program display are<br />
not blinking, you can also press the EXIT/TUNE switch to<br />
tune with the effects bypassed.<br />
If you want to tune with the sound muted, hold down<br />
the UP pedal and DOWN pedal simultaneously for<br />
about two seconds.<br />
The program display will indicate “ ” for about one<br />
second, and will then indicate “ ”. If you’re tuning on<br />
stage, we recommend that you use this method.<br />
2. Play a single note on your guitar, and tune the string<br />
approximately so that the desired note name appears in the<br />
program display.<br />
The note name is shown as follows.<br />
C C� D D� E F F� G G� A A� B<br />
3. While watching the LEDs of the program section and tuner<br />
section, tune the guitar string precisely.<br />
Tune so that only the center LED is lit.<br />
The LEDs at the right will light if the pitch of your guitar is<br />
sharp, and the LEDs at the left will light if it is flat.<br />
4. When you’ve finished tuning, press the UP or DOWN pedal.<br />
HINT: You can also press the EXIT/TUNE switch to return to<br />
the previous operation.<br />
Calibrating the tuner<br />
Calibration specifies the reference pitch for tuning (expressed as<br />
the frequency of the middle ‘A’ note on a piano). You can adjust<br />
this in a range of 438 Hz–445 Hz.<br />
NOTE: The calibration setting you specify here will be discarded<br />
when you turn off the power. When you turn the<br />
power on again, it will automatically be set to 440 Hz.<br />
1. Activate the tuner as described in step 1 of “Tuning procedure”<br />
(p.23).<br />
2. While holding down the EXIT/TUNE switch, use the UP/<br />
DOWN pedals to adjust the reference pitch.<br />
The program display will indicate “38”–“45" (438 Hz–445<br />
Hz). Specify the desired reference pitch.<br />
3. Release the EXIT/TUNE switch to complete the calibration setting.<br />
23
Using the expression pedal for control<br />
Expression pedal settings<br />
The <strong>ToneLab</strong> <strong>ST</strong>’s programs assign various functions to the<br />
expression pedal, allowing you to control not only wah or volume<br />
but many other kinds of effect parameters with the expression<br />
pedal.<br />
HINT: If you select VOX WAH, the expression pedal will<br />
automatically function as a wah pedal.<br />
For each program, you can specify which parameter will be controlled<br />
by the expression pedal and how it will be controlled.<br />
When you save a program, the position (angle) of the expression<br />
pedal at that moment will be saved in the program as the parameter<br />
value. When you select that program, the value saved in the<br />
program will be recalled as the setting of the assigned parameter.<br />
In the following cases, however, the value is not saved.<br />
• Volume<br />
• Input level to the delay effect<br />
• Input level to the reverb effect<br />
• PITCH parameter of PITCH SHIFTER<br />
• Cutoff frequency of FILTRON<br />
24<br />
Assigning a function to the expression pedal<br />
(Quick Assign)<br />
On the <strong>ToneLab</strong> <strong>ST</strong>, it’s easy to assign an effect parameter or the<br />
effect input level to the expression pedal.<br />
HINT: For details on the effect parameters that you can<br />
assign, refer to “About the amp models, cabinet models, and<br />
effect types” (p.13).<br />
To assign a function to the expression pedal<br />
As an example, here’s how to assign the SPEED parameter of the<br />
U-VIBE pedal effect to the expression pedal.<br />
1. Turn on the effect.<br />
In this example, press the PEDAL on/off switch to turn<br />
the pedal effect on.<br />
2. Use the selector to select a effect, and then operate the EDIT<br />
knob.<br />
Use the PEDAL selector to select U-VIBE, and then turn<br />
the EDIT knob. The QUICK ASSIGN LED will light.<br />
3. Hold down the EXP PARAM switch for about two seconds.<br />
The SPEED parameter will be assigned to the expression<br />
pedal; the program display will indicate “ ” for one<br />
second, and will then show the program number.<br />
4. If desired, save this setting in the program.<br />
For details on how to save, refer to “Saving a program”<br />
(p.12).
NOTE: The settings you made will return to their original<br />
values if you switch programs or turn off the power before<br />
saving.<br />
To assign volume, gain, or the input level to the reverb or delay<br />
effect, proceed as follows.<br />
• Volume: Operate the VOLUME knob, and then hold<br />
down the EXP PARAM switch for about two seconds.<br />
• Gain: Turn on the AMP on/off switch, operate the GAIN<br />
knob, and then hold down the EXP PARAM switch for<br />
about two seconds.<br />
• Input level to the reverb effect: Turn on the REVERB<br />
on/off switch, operate the REVERB knob, and then hold<br />
down the EXP PARAM switch for about two seconds.<br />
• Input level to the delay effect: Turn on the MOD/<br />
DELAY switch, and use the MOD/DELAY selector to<br />
select “ECHO PLUS,” “DELAY,” or “CHORUS+DELAY.”<br />
Then operate the EDIT knob, and then hold down the EXP<br />
PARAM switch for about two seconds.<br />
To clear the expression pedal to an unassigned state<br />
Hold down the EXP PARM switch and press the EXIT/TUNE<br />
screen. The expression pedal assignment will be cleared, and the<br />
EXP LED will go dark.<br />
The expression pedal will also revert to an unassigned state if<br />
you switch to a different effect. However in the following cases,<br />
the setting will be maintained and the assignment will not<br />
change.<br />
• If the amp model’s GAIN parameter is assigned to the<br />
expression pedal, changing the amp model will leave the<br />
GAIN parameter assigned to the expression pedal.<br />
• If the input level to the reverb effect is assigned to the<br />
expression pedal, changing the reverb type will leave the<br />
reverb input level assigned to the expression pedal.<br />
• If the input level to the delay effect ECHO PLUS, DELAY,<br />
or CHORUS+DELAY is assigned to the expression pedal,<br />
changing between these three delay effects will leave the<br />
delay effect input level assigned to the expression pedal.<br />
Expression pedal minimum and maximum values<br />
The minimum value is when the expression pedal is fully<br />
returned toward yourself; the maximum value is when the<br />
expression pedal is fully advanced away from yourself.<br />
When you assign a parameter or volume to the expression<br />
pedal, the minimum and maximum values of the expression<br />
pedal will be set automatically.<br />
Adjusting the minimum and maximum parameter values<br />
When you assign an effect parameter to the expression pedal,<br />
the minimum and maximum values appropriate for that parameter<br />
will be assigned as the minimum and maximum values of<br />
the expression pedal. If you assign the PITCH parameter of the<br />
PITCH SHIFTER, the minimum value will be “0” (no pitch shift)<br />
and the maximum value will be the current value.<br />
You can adjust the minimum and maximum values as follows.<br />
NOTE: If the reverb effect input level is assigned to the<br />
expression pedal, the minimum and maximum values will be<br />
set automatically, and cannot be changed.<br />
1. Press the EXP PARAM switch.<br />
The QUICK ASSIGN LED will blink.<br />
25
26<br />
If an effect is assigned to the expression pedal<br />
The on/off switch LED of the assigned effect will blink,<br />
and the program display will indicate “ ”.<br />
If no function is assigned to the expression pedal<br />
The program display will blink “ ” and then the program<br />
number will be displayed. In this case, use Quick<br />
Assign to assign a function (p.24, “Assigning a function to<br />
the expression pedal (Quick Assign)”).<br />
2. Use the EDIT knob of the assigned effect (whose on/off<br />
switch LED is blinking), or the GAIN control to specify the<br />
minimum value.<br />
HINT: You can skip this step, if you do not change the minimum<br />
value.<br />
3. Press the EXP PARAM switch.<br />
The program display will indicate “ ”.<br />
4. Use the EDIT knob you operated in step 2, or the GAIN<br />
control to specify the maximum value.<br />
HINT: You can skip this step, if you do not change the maximum<br />
value.<br />
NOTE: If you decide to cancel the setting, press the EXIT/<br />
TUNE switch.<br />
5. Press the EXP PARAM switch.<br />
The program display will indicate “ ” for about one<br />
second, and will then indicate the program number.<br />
The QUICK ASSIGN LED will go dark.<br />
NOTE: The assignment of a function to the expression pedal,<br />
the minimum value, and the maximum value are specified<br />
independently for each program.<br />
6. If desired, save these settings to the program.<br />
For details on the procedure, refer to “Saving a program”<br />
(p.12).<br />
NOTE: The settings you made will return to their original<br />
values if you switch programs or turn off the power before<br />
saving.<br />
Adjusting the minimum and maximum volume<br />
If volume is assigned to the expression pedal, you can adjust the<br />
minimum and maximum values as follows.<br />
1. Press the EXP PARAM switch.<br />
The EXP LED and QUICK ASSIGN LED will blink, and<br />
the program display will indicate “ ”.<br />
2. Use the VOLUME control of the AMP section to specify the<br />
minimum value, and then press the EXP PARAM switch.<br />
The minimum value will be specified, and the program<br />
[DEC][INC] will indicate “ ”.
3. Use the VOLUME control to specify the maximum value,<br />
and then press the EXP PARAM switch.<br />
The maximum value will be specified; the program display<br />
will indicate “ ” for about one second, and will<br />
then indicate the program number.<br />
Adjusting the sensitivity of the expression pedal<br />
If the minimum and maximum values of the parameter are<br />
assigned as the minimum and maximum values of the expression<br />
pedal, but the effect or volume fails to reach the maximum<br />
(or minimum) setting when the expression pedal is fully<br />
advanced (or returned), you can adjust the sensitivity of the<br />
expression pedal as follows so that it will operate optimally.<br />
NOTE: When adjusting the sensitivity, you must operate the<br />
expression pedal with your foot; in some cases, it may not be<br />
possible to adjust the pedal sensitivity if you operate it with<br />
your hand.<br />
1. Turn the power off.<br />
2. While holding down the EXP PARAM switch and WRITE<br />
switch, turn the power on.<br />
3. When the program display indicates “ ,” release the<br />
switches.<br />
4. Advance the expression pedal so that<br />
the effect switches on/off.<br />
This will be assigned as the weight that<br />
will switch on/off the effect assigned to<br />
the expression pedal.<br />
5. Use your foot to slowly return the<br />
expression pedal toward yourself, and<br />
take your foot off when the pedal stops.<br />
6. Softly advance the expression pedal,<br />
and take your foot off when the pedal<br />
stops.<br />
NOTE: If you decide to cancel this sensitivity adjustment,<br />
press the EXIT/TUNE switch.<br />
7. Press the WRITE switch.<br />
The program display will indicate “ ” for about one<br />
second, and then the program number will appear.<br />
If the sensitivity adjustment could not be performed correctly,<br />
the program display will blink “ ”, and will then indicate<br />
“ ”. In this case, perform the procedure from step 4.<br />
NOTE: If you are repeatedly unsuccessful in adjusting the<br />
sensitivity, it is possible that the <strong>ToneLab</strong> <strong>ST</strong> has malfunctioned.<br />
Please contact your nearby VOX dealer.<br />
27
Connecting to your computer (USB<br />
connection)<br />
28<br />
If you use a commercially available USB cable to connect the<br />
<strong>ToneLab</strong> <strong>ST</strong> to your computer, you’ll be able to use librarian software<br />
on your computer to manage user programs, and use the<br />
<strong>ToneLab</strong> <strong>ST</strong> as a USB audio interface.<br />
Using librarian software<br />
If you install the USB-MIDI driver on your computer, you’ll be<br />
able to use the dedicated librarian software to back up programs<br />
and manage your data library.<br />
Download the USB-MIDI driver and the librarian software from<br />
the manufacturer’s website (www.voxamps.com).<br />
For details on using the librarian software, refer to the owner’s<br />
manual (PDF file) of the librarian software.<br />
Operating requirements<br />
Windows: Microsoft Windows XP SP3/Windows Vista SP1 or<br />
later<br />
Mac: OS X 10.4 or later (Power PC G4 or more/Intel CPU)<br />
Transferring audio data<br />
If the <strong>ToneLab</strong> <strong>ST</strong> is connected to your computer via a USB<br />
cable, the <strong>ToneLab</strong> <strong>ST</strong>’s effect output can be recorded directly<br />
into an audio track of your DAW software. You’ll also be able to<br />
monitor the audio playback of your software via the <strong>ToneLab</strong> <strong>ST</strong>.<br />
NOTE: If you’re using Windows, you’ll need to install the<br />
USB-ASIO driver in your computer in order to transfer audio<br />
data via the USB connector.<br />
Download the USB-ASIO driver from the manufacturer’s<br />
website (www.voxamps.com).<br />
The following illustration shows the signal flow when connected<br />
to your computer.<br />
INPUT<br />
<strong>ToneLab</strong> <strong>ST</strong><br />
Effect<br />
OUTPUT<br />
The <strong>ToneLab</strong> <strong>ST</strong>’s effects will not be applied to the audio input<br />
from the USB connector.<br />
Operating requirements<br />
Windows: Microsoft Windows XP SP3/Windows Vista SP1 or<br />
later<br />
Mac: OS X 10.4 or later (Power PC G4 or more/Intel CPU)<br />
USB
Restoring the factory settings<br />
Here’s how to restore the <strong>ToneLab</strong> <strong>ST</strong> to its factory-set state.<br />
NOTE: This operation will initialize the programs you’ve<br />
saved, returning all of them to the factory-set programs.<br />
1. Turn the power off.<br />
2. While holding down the EXIT/TUNE switch and EXP<br />
PARAM screen, turn the power on.<br />
3. When the UP/DOWN pedal LEDs blink, release the<br />
switches.<br />
HINT: If you decide to cancel this procedure, press the EXIT/<br />
TUNE switch.<br />
4. Press the WRITE switch.<br />
Initialization will be completed, the program display will<br />
indicate “0”.<br />
NOTE: Never turn the power off while initialization is being<br />
performed.<br />
Troubleshooting<br />
Power is not applied when you turn the <strong>ST</strong>ANDBY switch on<br />
• Is the AC adapter connected to the rear panel DC12V jack?<br />
• Is the AC adapter plugged into an AC outlet?<br />
• Is the AC outlet working properly?<br />
• Could the AC adapter be damaged?<br />
No sound<br />
• Could the volume of your guitar be turned down?<br />
• Is your guitar cable connected correctly?<br />
• Could your guitar cable be broken?<br />
• Could the rear panel LEVEL knob be set to the minimum<br />
value?<br />
• Could the top panel VOLUME and GAIN controls be set<br />
to the minimum value?<br />
• Check the settings of the TREBLE, MIDDLE, and BASS<br />
controls be set to the minimum value?<br />
For some amp models, there may be no sound from the<br />
amp if the TREBLE, MIDDLE, and BASS control values are<br />
low.<br />
• Make sure that your headphones or connection cable is<br />
not defective or broken.<br />
• Could the expression pedal be assigned as gain and volume,<br />
and returned all the way toward yourself?<br />
• Could you have activated the tuner in a muted state?<br />
Effects don’t apply<br />
• Could the effect setting be off?<br />
Use the selector to select the effect that you want to use, or<br />
use the effect on/off switch to turn the effect on.<br />
29
30<br />
• Could the tuner be active?<br />
The effects are bypassed if the tuner is active. Press the<br />
EXIT/TUNE switch to defeat bypass.<br />
• Could an EDIT knob be set to the minimum value?<br />
Adjust the EDIT knob.<br />
Something is wrong with the sound<br />
• Are the OPTION parameters set appropriately?<br />
Hold down the CABINET on/off switch about one second<br />
to enter OPTION parameter setting mode, and adjust the<br />
parameters to appropriate values.<br />
• Is the AMP/LINE switch set appropriately for the output<br />
destination that’s connected?<br />
Set the AMP/LINE switch correctly as described in step 1<br />
of “Making connections” (p.8).<br />
The sound does not change when you operate the switches,<br />
selectors, or knobs on the top panel<br />
• Could the effect setting be off?<br />
Use the selector to select the effect that you want to use, or<br />
use the effect on/off switch to turn the effect on.<br />
• Could you be in OPTION parameter setting mode?<br />
In OPTION parameter setting mode, the BASS, and VOL-<br />
UME controls do not change the sound. Press the EXIT/<br />
TUNE switch to exit OPTION parameter setting mode.<br />
• Could the tuner be active?<br />
The effects are bypassed if the tuner is active. Press the<br />
EXIT/TUNE switch to defeat bypass.<br />
• Could you be specifying the expression pedal’s minimum<br />
and maximum values?<br />
While you’re specifying the expression pedal’s minimum<br />
and maximum values, parameters other than the one<br />
assigned to the expression pedal will not change. Press the<br />
EXIT/TUNE switch to return to normal operation.<br />
• Could you have activated the Key Lock function?<br />
If the Key Lock function is active, you won’t be able to<br />
operate the switches, selectors, or knobs on the top panel.<br />
Hold down the EXIT/TUNE switch for about two seconds<br />
to defeat the Key Lock function.
Preset program list<br />
off: Turns on when you press the expression pedal<br />
: Effects that are enabled when the expression pedal is on<br />
No. Program Type PEDAL AMP CABINET MOD/DLY REVERB Expression Pedal<br />
50 Song off UK ROCK SPL ON off ROOM classic chorus<br />
51 Song BOUTIQUE US HIGAIN C<strong>ST</strong> ON ECHO PLUS SPRING VOLUME<br />
52 Song off US BLUES <strong>ST</strong>D ON off ROOM textrem<br />
53 Song FUZZ UK ROCK <strong>ST</strong>D ON DELAY off spring<br />
54 Song TUBE OD VOX AC15 C<strong>ST</strong> ON DELAY ROOM VOLUME<br />
55 Song off US 2x12 <strong>ST</strong>D ON off ROOM u-vibe<br />
56 Song off UK METAL C<strong>ST</strong> ON off SPRING vox wah<br />
57 Song off UK METAL <strong>ST</strong>D ON off SPRING phaser<br />
58 Song FUZZ US BLUES <strong>ST</strong>D ON off ROOM pitch shifter<br />
59 Song off US HIGAIN <strong>ST</strong>D ON off SPRING classic chorus<br />
60 Song ORANGE DI<strong>ST</strong> UK METAL <strong>ST</strong>D ON ECHO PLUS SPRING VOLUME<br />
61 Song COMP VOX AC15 SPL ON CLASSIC CHORUS ROOM VOLUME<br />
62 Song TUBE OD US BLUES <strong>ST</strong>D ON off ROOM textrem<br />
63 Song off US METAL C<strong>ST</strong> ON off ROOM classic flanger<br />
64 Song off UK ROCK <strong>ST</strong>D ON off ROOM vox wah<br />
65 Song off UK METAL <strong>ST</strong>D ON PITCH SHIFTER HALL PITCH SHIFTER<br />
66 Song TREBLE BOO<strong>ST</strong> VOX AC15 C<strong>ST</strong> ON ECHO PLUS ROOM VOLUME<br />
67 Song METAL DI<strong>ST</strong> US METAL <strong>ST</strong>D ON off ROOM classic flanger<br />
68 Song TREBLE BOO<strong>ST</strong> VOX AC30 C<strong>ST</strong> ON off SPRING echo plus<br />
69 Song off US METAL <strong>ST</strong>D ON ECHO PLUS HALL vox wah<br />
70 Clean COMP CLEAN C<strong>ST</strong> off CHORUS+DELAY HALL CHORUS+DELAY<br />
71 Crunch off VOX AC30 SPL ON MULTI TAP CHORUS ROOM boutique<br />
72 Heavy TUBE OD VOX AC30 C<strong>ST</strong> ON off ROOM pitch shifter<br />
73 Heavy TUBE OD US METAL C<strong>ST</strong> ON PHASER off PHASER<br />
74 Clean ACOU<strong>ST</strong>IC CALI CLEAN C<strong>ST</strong> ON CHORUS+DELAY ROOM CHORUS+DELAY<br />
31
32<br />
No. Program Type PEDAL AMP CABINET MOD/DLY REVERB Expression Pedal<br />
75 Crunch COMP CLEAN <strong>ST</strong>D ON off ROOM multi tap chorus<br />
76 Heavy off UK METAL SPL ON off off AMP GAIN<br />
77 Scifi OCTAVE US HIGAIN <strong>ST</strong>D ON PHASER off OCTAVE<br />
78 Clean COMP CLEAN SPL ON CHORUS+DELAY ROOM VOLUME<br />
79 Crunch TREBLE BOO<strong>ST</strong> UK ROCK <strong>ST</strong>D ON DELAY SPRING VOLUME<br />
80 Crunch METAL DI<strong>ST</strong> US 2x12 C<strong>ST</strong> ON TEXTREM SPRING TEXTREM<br />
81 Heavy BOUTIQUE UK ROCK SPL ON off SPRING SPRING<br />
82 Clean COMP US BLUES SPL ON PITCH SHIFTER HALL PITCH SHIFTER<br />
83 Crunch COMP VOX AC15 <strong>ST</strong>D ON ECHO PLUS SPRING SPRING<br />
84 Heavy VOX WAH US METAL SPL ON off SPRING VOX WAH<br />
85 Heavy off US HIGAIN C<strong>ST</strong> ON PITCH SHIFTER SPRING PITCH SHIFTER<br />
86 Scifi OCTAVE US METAL SPL ON PITCH SHIFTER HALL HALL<br />
87 Clean COMP CLEAN C<strong>ST</strong> off CLASSIC CHORUS SPRING VOLUME<br />
88 Clean COMP CLEAN C<strong>ST</strong> off PHASER HALL PHASER<br />
89 Crunch TUBE OD UK ROCK C<strong>ST</strong> off off SPRING echo plus<br />
90 Heavy COMP US HIGAIN <strong>ST</strong>D off DELAY off hall<br />
91 Scifi off VOX AC30 <strong>ST</strong>D off FILTRON off FILTRON<br />
92 Clean COMP CLEAN C<strong>ST</strong> off DELAY SPRING DELAY<br />
93 Heavy TREBLE BOO<strong>ST</strong> US BLUES SPL off off HALL phaser<br />
94 Clean(Scifi) off CLEAN C<strong>ST</strong> off FILTRON HALL FILTRON<br />
95 Crunch off CALI CLEAN <strong>ST</strong>D off DELAY SPRING vox wah<br />
96 Scifi U-VIBE CLEAN <strong>ST</strong>D off PITCH SHIFTER HALL U-VIBE<br />
97 Crunch U-VIBE VOX AC30 <strong>ST</strong>D off off SPRING U-VIBE<br />
98 Acoustic ACOU<strong>ST</strong>IC CLEAN C<strong>ST</strong> off off ROOM pitch shifter<br />
99 Heavy FUZZ UK ROCK SPL off ECHO PLUS SPRING ECHO PLUS
Specifications<br />
Amp models: 33<br />
Cabinet models: 11<br />
Pedal types: 11<br />
Mod/Delay types: 11<br />
Reverb types: 3<br />
Noise reduction: 1<br />
Programs: 100 (50 preset, 50 user)<br />
Audio input<br />
INPUT jack, AUX IN jack<br />
Audio output<br />
OUTPUT/PHONES jack (stereo/mono dual use)<br />
LEVEL knob, AMP/LINE switch<br />
USB<br />
USB connector (Type B)<br />
Tuner<br />
Detection range: A0–E6 (27.5Hz–1,318.5Hz)<br />
Calibration: A=438–445 Hz<br />
Other<br />
DC12V connector, <strong>ST</strong>ANDBY switch<br />
Signal processing<br />
A/D conversion: 24-bit<br />
D/A conversion: 24-bit<br />
Sampling frequency: 44.1kHz<br />
Power supply: AC adapter (DC12V, )<br />
Current consumption: 540mA<br />
Dimensions (W x D x H): 270 x 180 x 70 (mm)/10.63 x 7.09 x 2.76 (inches)<br />
Weight: 1.6kg/3.53lbs.<br />
Included items: AC adapter<br />
Specifications and appearance are subject to change without notice for improvement.<br />
33