Bosch GL... - LR2 Receiver Instructions - Toolbox
Bosch GL... - LR2 Receiver Instructions - Toolbox
Bosch GL... - LR2 Receiver Instructions - Toolbox

You also want an ePaper? Increase the reach of your titles
YUMPU automatically turns print PDFs into web optimized ePapers that Google loves.
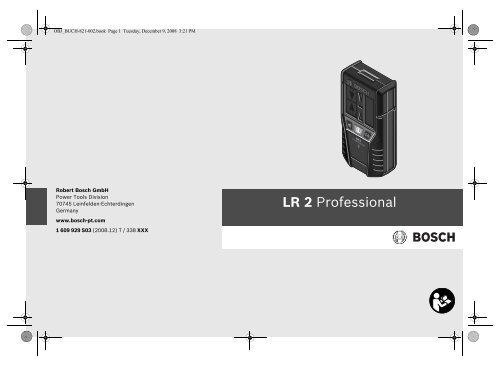
OBJ_BUCH-821-002.book Page 1 Tuesday, December 9, 2008 3:21 PMRobert <strong>Bosch</strong> GmbHPower Tools Division70745 Leinfelden-EchterdingenGermanyLR 2 Professionalwww.bosch-pt.com1 609 929 S03 (2008.12) T / 338 XXX
OBJ_BUCH-821-002.book Page 3 Tuesday, December 9, 2008 4:04 PM3 |Deutsch . . . . . . . . . . . . . . . . . . . . . . . . . . . . . . . . . Seite 6English . . . . . . . . . . . . . . . . . . . . . . . . . . . . . . . . . . Page 16Français . . . . . . . . . . . . . . . . . . . . . . . . . . . . . . . . . Page 30Español . . . . . . . . . . . . . . . . . . . . . . . . . . . . . . . Página 40Português . . . . . . . . . . . . . . . . . . . . . . . . . . . . . Página 51Italiano. . . . . . . . . . . . . . . . . . . . . . . . . . . . . . . . Pagina 61Nederlands . . . . . . . . . . . . . . . . . . . . . . . . . . . . Pagina 72Dansk. . . . . . . . . . . . . . . . . . . . . . . . . . . . . . . . . . . Side 81Svenska . . . . . . . . . . . . . . . . . . . . . . . . . . . . . . . . . Sida 90Norsk . . . . . . . . . . . . . . . . . . . . . . . . . . . . . . . . . . . Side 99Suomi . . . . . . . . . . . . . . . . . . . . . . . . . . . . . . . . . . Sivu 108Ελληνικά. . . . . . . . . . . . . . . . . . . . . . . . . . . . . . . . Σελίδα 117Türkçe . . . . . . . . . . . . . . . . . . . . . . . . . . . . . . . . . Sayfa 128Polski . . . . . . . . . . . . . . . . . . . . . . . . . . . . . . . . . Strona 137Česky . . . . . . . . . . . . . . . . . . . . . . . . . . . . . . . . . . Strana 148Slovensky. . . . . . . . . . . . . . . . . . . . . . . . . . . . . . . Strana 157Magyar . . . . . . . . . . . . . . . . . . . . . . . . . . . . . . . . . . Oldal 166Русский . . . . . . . . . . . . . . . . . . . . . . . . . . . . . Страница 175Українська. . . . . . . . . . . . . . . . . . . . . . . . . . . . Сторінка 186Română . . . . . . . . . . . . . . . . . . . . . . . . . . . . . . . Pagina 196Български . . . . . . . . . . . . . . . . . . . . . . . . . . . Страница 205Srpski . . . . . . . . . . . . . . . . . . . . . . . . . . . . . . . . . Strana 215Slovensko . . . . . . . . . . . . . . . . . . . . . . . . . . . . . . Stran 224Hrvatski . . . . . . . . . . . . . . . . . . . . . . . . . . . . . . Stranica 233Eesti. . . . . . . . . . . . . . . . . . . . . . . . . . . . . . . . . Lehekülg 242Latviešu . . . . . . . . . . . . . . . . . . . . . . . . . . . . . . Lappuse 251Lietuviškai . . . . . . . . . . . . . . . . . . . . . . . . . . . . Puslapis 260中 文 . . . . . . . . . . . . . . . . . . . . . . . . . . . . . . . . 页 269中 文 . . . . . . . . . . . . . . . . . . . . . . . . . . . . . . . . . . . . . . 頁 277한국어 . . . . . . . . . . . . . . . . . . . . . . . . . . . . . . 면 285ภาษาไทย . . . . . . . . . . . . . . . . . . . . . . . . . . . . . . . . . . . หน้า 293Bahasa Indonesia. . . . . . . . . . . . . . . . . . . . . . . Halaman 303Tiøng Vi·t . . . . . . . . . . . . . . . . . . . . . . . . . . . . . . . Trang 312. . . . . . . . . . . . . . . . . . . . . . . . . . . . . . . . . 321. . . . . . . . . . . . . . . . . . . . . . . . . . . . . . . . 329vÝ—U1 609 929 S03 | (9.12.08) <strong>Bosch</strong> Power Tools
OBJ_BUCH-821-002.book Page 4 Tuesday, December 9, 2008 5:24 PM4 |56e4dcbagf3278910141411137121 609 929 S03 | (9.12.08) <strong>Bosch</strong> Power Tools
OBJ_BUCH-821-002.book Page 5 Tuesday, December 9, 2008 4:04 PM5 |AB1 609 929 S03 | (9.12.08) <strong>Bosch</strong> Power Tools
OBJ_BUCH-821-002.book Page 16 Tuesday, December 9, 2008 4:04 PM16 | EnglishenSafety NotesWorking optimally with the measuring tool is possibleonly when the operating manual and workinginstructions are read completely, and the instructionscontained therein are strictly followed. SAVETHESE INSTRUCTIONS.Keep the measuring tool away from cardiac pacemakers.The magnet plate 5 generates a field thatcan impair the function of cardiac pacemakers. Keep the measuring tool away from magnetic data mediumand magnetically-sensitive equipment. The effect of the magnetplate 5 can lead to irreversible data loss.Functional DescriptionPlease unfold the fold-out page with the representation of themeasuring tool and leave it unfolded while reading the operatinginstructions.Intended UseThe measuring tool is intended for swift finding of pulsating laserbeams.1 609 929 S03 | (9.12.08) <strong>Bosch</strong> Power Tools
OBJ_BUCH-821-002.book Page 17 Tuesday, December 9, 2008 4:04 PMEnglish | 17Technical DataLaser <strong>Receiver</strong> LR 2ProfessionalArticle number 3 601 K69 100Working range 1)– with cross-line laser <strong>GL</strong>L 2-50 5–50 mReceiving angle 90°Measuring accuracy 2)– “Fine” adjustment– “Coarse” adjustment±1 mm±3 mmOperating temperature – 10 °C ... +50 °CStorage temperature – 20 °C ... +70 °CBattery1x9V(6LR61)Operating life time, approx.30 hWeight according toEPTA-Procedure 01/20030.2 kgDegree of protectionIP 54 (dust andsplash water protected)Dimensions150 x 74 x 41 mm1) The working range can be decreased by unfavourable environmentalconditions (e.g. direct sun irradiation).2) depends on distance between laser receiver and cross-line laserPlease observe the article number on the type plate of your measuringtool. The trade names of the individual measuring tools may vary.The measuring tool can be clearly identified with the serial number12 on the type plate.<strong>Bosch</strong> Power Tools 1 609 929 S03 | (9.12.08)
OBJ_BUCH-821-002.book Page 18 Tuesday, December 9, 2008 4:04 PM18 | EnglishProduct FeaturesThe numbering of the product features shown refers to the illustrationof the measuring tool on the graphic page.1 Button for adjustment of the measuring accuracy2 On/Off button3 Audio signal button4 Display5 Magnet plate6 Reception area for the laser beam7 Centre mark8 Direction LED “move downward”9 Centre-indication LED10 Direction LED “move upward”11 Latch of battery lid12 Serial number13 Battery lid14 Mounting hole for M6 threadAccessories shown or described are not part of the standard deliveryscope of the product. A complete overview of accessories can be found inour accessories program.Display Elementsa Audio signal indicatorb Direction indicator “move upward”c Centre indicatord Direction indicator “move downward”e Battery indicationf “Coarse” adjustment indicatorg “Fine” adjustment indicator1 609 929 S03 | (9.12.08) <strong>Bosch</strong> Power Tools
OBJ_BUCH-821-002.book Page 19 Tuesday, December 9, 2008 4:04 PMEnglish | 19Noise InformationThe A-weighted sound pressure level of the audio signal at onemeter distance is 85 dB(A).Do not hold the measuring tool close to your ear!AssemblyInserting/Replacing the BatteryUse only alkali-manganese batteries.Pull the latch 11 of battery lid outward and open the battery lid 13.When inserting batteries, pay attention to the correct polarity.When the battery indication e appears for the first time on the display4, the measuring tool can still be operated for approx. 2 h. Remove the batteries from the measuring tool when not usingit for extended periods. When storing for extended periods,the batteries can corrode and discharge themselves.<strong>Bosch</strong> Power Tools 1 609 929 S03 | (9.12.08)
OBJ_BUCH-821-002.book Page 20 Tuesday, December 9, 2008 4:04 PM20 | EnglishOperationInitial Operation Protect the measuring tool against moisture. Do not subject the measuring tool to extreme temperatures orvariations in temperature. As an example, do not leave it in vehiclesfor longer periods. In case of large variations in temperature,allow the measuring tool to adjust to the ambient temperaturebefore putting it into operation. In case of extremetemperatures or variations in temperature, the accuracy of themeasuring tool can be impaired.Setting Up the Measuring Tool (see figure A)Position the measuring tool at least 5 m away from the cross-linelaser. Switch on the pulsating function on the cross-line laser, andselect horizontal or vertical operation.Note: Do not select cross-line operation, as otherwise faulty indicationson the height of the laser beam can occur.Position the measuring tool in such a manner that the laser beamcan reach the reception area 6. Align the measuring tool in such amanner that the laser beam runs laterally through the receptionarea (as shown in the figure).Switching On and Off A loud audio signal sounds when switching on the measuringtool. Therefore, keep the measuring tool away from your earor other person when switching on. The loud audio signal cancause hearing defects.To switch on the measuring tool, press the On/Off button 2. All displayindicators as well as all LEDs light up briefly and an audio signalsounds.1 609 929 S03 | (9.12.08) <strong>Bosch</strong> Power Tools
OBJ_BUCH-821-002.book Page 21 Tuesday, December 9, 2008 4:04 PMEnglish | 21To switch off the measuring tool, press the On/Off button 2 again.Before switching off, all LEDs briefly light up.When no button is pressed on the measuring tool for approx.20 minutes and when no laser beam reaches the reception area 6for 20 minutes, the measuring tool automatically switches off in orderto save the battery. The switching off is indicated by brief lightingup of all LEDs.Selecting the Setting of the Centre IndicatorWith button 1, you can specify with which accuracy the position ofthe laser beam is indicated as central on the reception area:– “Fine” adjustment (indication g on the display),– “Coarse” adjustment (indication f on the display).Whenever switching on the measuring tool, the accuracy level“coarse” is set.Direction IndicatorsThe position of the laser beam on the reception area 6 is indicated:– via the direction indicators “move downward” d, “move upward”b or the centre indicator c on the display 4 on the frontand back side of the measuring tool,– via the LEDs “move downward” 8, “move upward” 10 or thecentre-indication LED 9 on the front side of the measuring tool,– optionally via the audio signal (see “Audio Signal for Indicationof the Laser Beam”, page 22).Measuring tool too low: When the laser beam runs through the tophalf of the reception area 6, the direction indicator b on the displayand the corresponding direction LED 10 light up.When the audio signal is switched on, a slow-beat signal sounds.Move the measuring tool upward in the direction of the arrow.<strong>Bosch</strong> Power Tools 1 609 929 S03 | (9.12.08)
OBJ_BUCH-821-002.book Page 22 Tuesday, December 9, 2008 4:04 PM22 | EnglishMeasuring tool too high: When the laser beam runs through thebottom half of the reception area 6, the direction indicator d on thedisplay and the corresponding direction LED 8 light up.When the audio signal is switched on, a fast-beat signal sounds.Move the measuring tool downward in the direction of the arrow.Measuring tool in centre position: When the laser beam runsthrough the reception area 6 at the centre mark 7, the centre indicatorc on the display and the corresponding centre-indication LED9 light up. When the audio signal is switched on, a continuous signalsounds.Audio Signal for Indication of the Laser BeamThe position of the laser beam on the reception area 6 can be indicatedvia an audio signal.After the measuring tool has been switched on, the audio signal isalways set to the low volume level.The volume level can be increased or switched off.To change the volume level or switch off the audio signal, push theacoustic signal button 3 until the requested volume level is indicatedon the display. At low volume level, the audio signal indicator aappears on the display with one bar; at high volume level, the indicatorappears with three bars. When the audio signal is set to off,the indicator goes out.Independent of the audio signal setting, a short beep sounds at lowvolume level each time a button is pressed on the measuring tool.1 609 929 S03 | (9.12.08) <strong>Bosch</strong> Power Tools
OBJ_BUCH-821-002.book Page 23 Tuesday, December 9, 2008 4:04 PMEnglish | 23Working AdviceMarkingWhen the laser beam runs through the center of the reception area6, its height can be marked at the centre mark 7 right and left on themeasuring tool.When marking, take care to align the measuring tool exactly vertical(for horizontal laser beam), or horizontal (for vertical laser beam), asotherwise the marks are offset with respect to the laser beam.Attaching with the Magnet (see figure B)When a positive-lock attachment is not absolutely required, themeasuring tool can be attached to steel parts via the face sideusing the magnet plate 5.Maintenance and ServiceMaintenance and CleaningKeep the measuring tool clean at all times.Do not immerse the measuring tool into water or other fluids.Wipe off debris using a moist and soft cloth. Do not use any cleaningagents or solvents.If the measuring tool should fail despite the care taken in manufacturingand testing procedures, repair should be carried out by anauthorized after-sales service centre for <strong>Bosch</strong> power tools.In all correspondence and spare parts orders, please always includethe 10-digit article number given on the type plate of themeasuring tool.<strong>Bosch</strong> Power Tools 1 609 929 S03 | (9.12.08)
OBJ_BUCH-821-002.book Page 24 Tuesday, December 9, 2008 4:04 PM24 | EnglishAfter-sales Service and Customer AssistanceOur after-sales service responds to your questions concerning maintenanceand repair of your product as well as spare parts. Explodedviews and information on spare parts can also be found under:www.bosch-pt.comOur customer consultants answer your questions concerning bestbuy, application and adjustment of products and accessories.Great BritainRobert <strong>Bosch</strong> Ltd. (B.S.C.)P.O. Box 98Broadwater ParkNorth Orbital RoadDenhamUxbridgeUB 9 5HJTel. Service: +44 (0844) 736 0109Fax: +44 (0844) 736 0146E-Mail: SPT-Technical.de@de.bosch.comIrelandOrigo Ltd.Unit 23 Magna DriveMagna Business ParkCity WestDublin 24Tel. Service: +353 (01) 4 66 67 00Fax: +353 (01) 4 66 68 881 609 929 S03 | (9.12.08) <strong>Bosch</strong> Power Tools
OBJ_BUCH-821-002.book Page 25 Tuesday, December 9, 2008 4:04 PMEnglish | 25Australia, New Zealand and Pacific IslandsRobert <strong>Bosch</strong> Australia Pty. Ltd.Power ToolsLocked Bag 66Clayton South VIC 3169Customer Contact CenterInside Australia:Phone: +61 (01300) 307 044Fax: +61 (01300) 307 045Inside New Zealand:Phone: +64 (0800) 543 353Fax: +64 (0800) 428 570Outside AU and NZ:Phone: +61 (03) 9541 5555www.bosch.com.auPeople’s Republic of ChinaWebsite: www.bosch-pt.com.cnChina Mainland<strong>Bosch</strong> Power Tools (China) Co., Ltd.567, Bin Kang RoadBin Jiang District 310052Hangzhou, P.R.ChinaService Hotline: 800 8 20 84 84Tel.: +86 (571) 87 77 43 38Fax: +86 (571) 87 77 45 02HK and Macau Special Administrative RegionsRobert <strong>Bosch</strong> Hong Kong Co. Ltd.21st Floor, 625 King’s RoadNorth Point, Hong KongCustomer Service Hotline: +852 (21) 02 02 35Fax: +852 (25) 90 97 62E-Mail: info@hk.bosch.comwww.bosch-pt.com.cn<strong>Bosch</strong> Power Tools 1 609 929 S03 | (9.12.08)
OBJ_BUCH-821-002.book Page 26 Tuesday, December 9, 2008 4:04 PM26 | EnglishIndonesiaPT. Multi TehakaKawasan Industri PulogadungJalan Rawa Gelam III No. 2Jakarta 13930IndonesiaTel.: +62 (21) 4 60 12 28Fax: +62 (21) 46 82 68 23E-Mail: sales@multitehaka.co.idwww.multitehaka.co.idPhilippinesRobert <strong>Bosch</strong>, Inc.Zuellig BuildingSen. Gil Puyat AvenueMakati City 1200, Metro ManilaPhilippinesTel.: +63 (2) 8 17 32 31www.bosch.com.phMalaysiaRobert <strong>Bosch</strong> (SEA.) Pte. Ltd.No. 8a, Jalan 13/646200 Petaling Jaya,Selangor,MalaysiaTel.: +6 (03) 7966 3000Fax: +6 (03) 7958 3838E-Mail: hengsiang.yu@my.bosch.comToll Free Tel.: 1 800 880 188Fax: +6 (03) 7958 3838www.bosch.com.sg1 609 929 S03 | (9.12.08) <strong>Bosch</strong> Power Tools
OBJ_BUCH-821-002.book Page 27 Tuesday, December 9, 2008 4:04 PMEnglish | 27ThailandRobert <strong>Bosch</strong> Ltd.Liberty Square BuildingNo. 287, 11 FloorSilom Road, BangrakBangkok 10500Tel.: +66 (2) 6 31 18 79 – 18 88 (10 lines)Fax: +66 (2) 2 38 47 83Robert <strong>Bosch</strong> Ltd., P. O. Box 2054Bangkok 10501, Thailand<strong>Bosch</strong> Service – Training Centre2869-2869/1 Soi Ban KluayRama IV Road (near old Paknam Railway)Prakanong District10110 BangkokThailandTel.: +66 (2) 6 71 78 00 – 4Fax: +66 (2) 2 49 42 96Fax: +66 (2) 2 49 52 99SingaporeRobert <strong>Bosch</strong> (SEA.) Pte. Ltd.38 C Jalan PemimpinSingapore 915701Republic of SingaporeTel.: +65 (3) 50 54 94Fax: +65 (3) 50 53 27www.bosch.com.sg<strong>Bosch</strong> Power Tools 1 609 929 S03 | (9.12.08)
OBJ_BUCH-821-002.book Page 28 Tuesday, December 9, 2008 4:04 PM28 | EnglishVietnamRobert <strong>Bosch</strong> (SEA) Pte. Ltd – VietnamRepresentative OfficeSaigon Trade Center, Suite 120637 Ton Duc Thang Street,Ben Nghe Ward, District 1HCMCVietnamTel.: +84 (8) 9111 374 – 9111 375Fax: +84 (8) 9111376DisposalMeasuring tools, accessories and packaging should be sorted forenvironmental-friendly recycling.Only for EC countries:Do not dispose of measuring tools into householdwaste!According the European Guideline 2002/96/EC forWaste Electrical and Electronic Equipment and its implementationinto national right, measuring tools thatare no longer usable must be collected separately anddisposed of in an environmentally correct manner.1 609 929 S03 | (9.12.08) <strong>Bosch</strong> Power Tools
OBJ_BUCH-821-002.book Page 29 Tuesday, December 9, 2008 4:04 PMEnglish | 29Battery packs/batteries:Do not dispose of battery packs/batteries into household waste,fire or water. Battery packs/batteries should be collected, recycledor disposed of in an environmental-friendly manner.Only for EC countries:Defective or dead out battery packs/batteries must be recycledaccording the guideline 91/157/EEC.Batteries no longer suitable for use can be directly returned at:Great BritainRobert <strong>Bosch</strong> Ltd. (B.S.C.)P.O. Box 98Broadwater ParkNorth Orbital RoadDenhamUxbridgeUB 9 5HJTel. Service: +44 (0844) 736 0109Fax: +44 (0844) 736 0146E-Mail: SPT-Technical.de@de.bosch.comSubject to change without notice.<strong>Bosch</strong> Power Tools 1 609 929 S03 | (9.12.08)