D-FL 220, manual, en, version 2011-11-15
D-FL 220, manual, en, version 2011-11-15
D-FL 220, manual, en, version 2011-11-15

You also want an ePaper? Increase the reach of your titles
YUMPU automatically turns print PDFs into web optimized ePapers that Google loves.
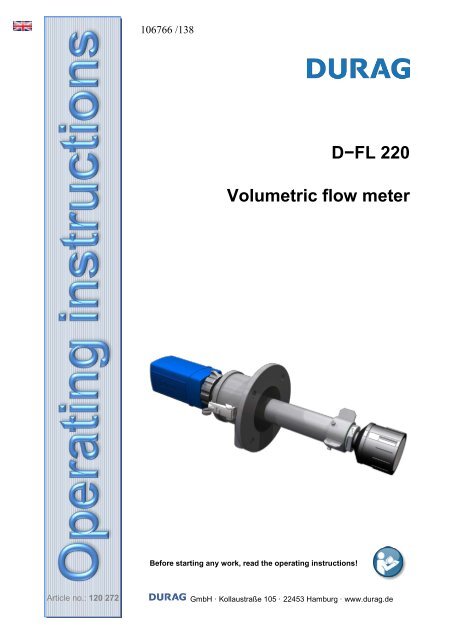
D−<strong>FL</strong> <strong>220</strong>Volumetric flow meterBefore starting any work, read the operating instructions!Article no.: 120 272GmbH · Kollaustraße 105 · 22453 Hamburg · www.durag.de
Translation of the operating instructions Volumetric flow meter D−<strong>FL</strong> <strong>220</strong>Docum<strong>en</strong>t:man_<strong>FL</strong> <strong>220</strong>_<strong>en</strong>.docxVersion: 13.12.<strong>20<strong>11</strong></strong>Last updated: 13.12.<strong>20<strong>11</strong></strong>Print date: 13.12.<strong>20<strong>11</strong></strong>Previous<strong>version</strong>:<strong>15</strong>.<strong>11</strong>.<strong>20<strong>11</strong></strong>Article number: 120 272DURAG GmbHPhone: +49 (40) 55 42 18 – 0Kollaustraße 105 Fax : +49 (40) 58 41 5422453 Hamburg e-mail: info@durag.deWebsite: www.durag.deThis docum<strong>en</strong>tation...• (approx. 138 pages) was prepared with very great care;• is not int<strong>en</strong>ded for the US market. Docum<strong>en</strong>tation to ANSI Z535 is available on request. Orderaddresses can be found on page 137;• or parts thereof may not be reproduced or distributed without express permission fromDURAG GmbH, irrespective of how this is done, in what language or by what medium,electronic or mechanical;• always relates to the complete device, ev<strong>en</strong> if individual program modules or parts have notbe<strong>en</strong> purchased;• relates to the curr<strong>en</strong>t design of the device at the time of update of this docum<strong>en</strong>tation (seeabove);• is subject to changes to its cont<strong>en</strong>t without notification;• contains figures which may differ due to further technical developm<strong>en</strong>ts or to the manageablescale of their actual appearance. No claims regarding the supply of id<strong>en</strong>tical products cantherefore be derived from the illustrations shown.
Cont<strong>en</strong>tsCont<strong>en</strong>ts1 G<strong>en</strong>eral information <strong>11</strong>1.1 Information on the operating instructions ................................................................................... <strong>11</strong>1.2 Explanation of symbols .............................................................................................................. 121.3 Limitation of liability .................................................................................................................... 131.4 Warranty information .................................................................................................................. 141.5 Spare parts ................................................................................................................................. 141.6 Customer service ....................................................................................................................... 141.7 Copyright .................................................................................................................................... 141.8 Trademarks ................................................................................................................................ <strong>15</strong>2 Safety 192.1 G<strong>en</strong>eral safety instructions ......................................................................................................... 192.2 Designated use .......................................................................................................................... 202.3 Responsibility of the operating company ................................................................................... 202.4 Personnel ................................................................................................................................... 212.4.1 Personnel, skills ......................................................................................................................... 212.4.2 Unauthorised personnel ............................................................................................................. 222.5 Personal protective equipm<strong>en</strong>t................................................................................................... 222.6 Fundam<strong>en</strong>tal hazards ................................................................................................................ 232.6.1 Hazards due to electrical equipm<strong>en</strong>t .......................................................................................... 232.6.2 Secure the device against reconnection .................................................................................... 242.6.3 Hazard due to hot, aggressive or explosive gases or high pressure of the measuring gas ...... 252.6.4 Hazard to the device due to purge air failure ............................................................................. 252.6.5 Avoidance of consequ<strong>en</strong>tial damage in the ev<strong>en</strong>t of a system fault .......................................... 262.7 Device-specific hazards and safety measures ........................................................................... 262.8 Behaviour in case of hazards and accid<strong>en</strong>ts ............................................................................. 262.9 Description and location of safety equipm<strong>en</strong>t and emerg<strong>en</strong>cy stop mechanisms ..................... 273 Delivery 313.1 Instructions for delivery .............................................................................................................. 313.2 Transportation, packaging and storage ..................................................................................... 313.2.1 Safety instructions for transportation ......................................................................................... 313.3 Standard items supplied ............................................................................................................. 333.4 Optional equipm<strong>en</strong>t .................................................................................................................... 344 Product description 394.1 Fundam<strong>en</strong>tal features ................................................................................................................ 394.2 Device description ...................................................................................................................... 394.3 Applications, designated use ..................................................................................................... 394.4 Conformity/approvals ................................................................................................................. 404.5 Designation of device compon<strong>en</strong>ts ............................................................................................ 414.6 Id<strong>en</strong>tification of the product ........................................................................................................ 434.6.1 Information about the rating plate .............................................................................................. 444.7 Functional description ................................................................................................................ 455 Installation, commissioning 495.1 Safety ......................................................................................................................................... 495.2 Transport to the place of installation .......................................................................................... 505.3 Skill levels of personnel for installation and commissioning ...................................................... 505.4 Preparation for assembly, assembly and installation ................................................................. 505.4.1 Installation sequ<strong>en</strong>ce for the measurem<strong>en</strong>t system................................................................... 5<strong>15</strong>.4.2 Preconditions for use ................................................................................................................. 5<strong>15</strong>.4.3 Transport .................................................................................................................................... 525.4.4 Instructions for planning the electrical connections to the system ............................................. 52D−<strong>FL</strong> <strong>220</strong> 3
Cont<strong>en</strong>ts5.4.5 Selection of the measurem<strong>en</strong>t point .......................................................................................... 535.4.6 Standard installation of the welding pipes with flange (D-<strong>FL</strong> 200 E)........................................ 545.4.7 Installation variants .................................................................................................................... 555.4.8 Installation of the terminal box ................................................................................................... 575.4.9 Electrical connection to the terminal box type D−TB 101 ......................................................... 585.4.10 Purge air unit (blower) D−BL ..................................................................................................... 605.4.<strong>11</strong> Selection of the purge air unit location ...................................................................................... 6<strong>15</strong>.4.12 Electrical installation of the purge air unit D−BL ....................................................................... 6<strong>15</strong>.4.13 Laying the purge air hoses ........................................................................................................ 625.4.14 Installation of the D−<strong>FL</strong> <strong>220</strong> measuring heads ......................................................................... 635.4.<strong>15</strong> Installation sequ<strong>en</strong>ce for the measuring heads ......................................................................... 645.4.16 Electrical connection to the measuring heads D−<strong>FL</strong> <strong>220</strong> .......................................................... 665.5 Configuration of the measuring heads ...................................................................................... 675.5.1 Defining the measuring head (A/B), setting the terminating resistor ......................................... 675.5.2 Defining the contact positions of the relays ............................................................................... 685.6 Meaning of the LEDs ................................................................................................................. 705.7 Commissioning .......................................................................................................................... 7<strong>15</strong>.7.1 Measures before initial commissioning ..................................................................................... 7<strong>15</strong>.8 Checking the measurem<strong>en</strong>t point.............................................................................................. 725.9 Active operation ......................................................................................................................... 725.10 Dismantling and disposal .......................................................................................................... 735.10.1 Dismantling ................................................................................................................................ 735.10.2 Disposal of the Volumetric flow meter ....................................................................................... 736 Parameterisation of the measuring heads 776.1 G<strong>en</strong>eral information on the DURAG Modbus protocol .............................................................. 786.1.1 Basic Modbus information ......................................................................................................... 786.2 Parameter checking and setting checklist ................................................................................. 796.3 Parameter checking and setting ................................................................................................ 806.3.1 Checking and setting the date and time .................................................................................... 806.3.2 Setting the DURAG Modbus address ....................................................................................... 816.3.3 Setting the Baud rate ................................................................................................................. 826.3.4 Variables setting of the D−<strong>FL</strong> <strong>220</strong> measurem<strong>en</strong>t channels (channel #1)… (channel #4) ........ 836.3.5 Principle of measured value correction ..................................................................................... 846.3.6 Assignm<strong>en</strong>t of the D−<strong>FL</strong> <strong>220</strong> device outputs ............................................................................ 876.3.7 Maint<strong>en</strong>ance settings ................................................................................................................ 896.3.8 Parameters for the measurem<strong>en</strong>t location (device installation) ................................................ 906.3.9 Further device settings .............................................................................................................. 917 Maint<strong>en</strong>ance 977.1 Customer service information .................................................................................................... 977.2 Safety ........................................................................................................................................ 977.3 Replacem<strong>en</strong>t material ............................................................................................................... 987.4 Maint<strong>en</strong>ance operations ............................................................................................................ 987.4.1 Visual inspection of the and cleaning of external parts ............................................................. 997.4.2 Check the purge air unit and the hose connections for leaks and secure fitting. ...................... 997.4.3 Check / change the filters .......................................................................................................... 997.4.4 Cleaning the measurem<strong>en</strong>t heads .......................................................................................... 1007.4.5 Removing deposits in the welding pipes ................................................................................. 1007.5 Faults (on the Volumetric flow meter D−<strong>FL</strong> <strong>220</strong>) .................................................................... 1007.5.1 (Fault) indications by LEDs ..................................................................................................... 1017.5.2 D−ESI 100(Fault) indications, output by the............................................................................ 1017.6 System messages ................................................................................................................... 1017.6.1 Curr<strong>en</strong>t message register (group 1) ........................................................................................ 1027.6.2 Curr<strong>en</strong>t warning register (group 2) .......................................................................................... 1027.6.3 Curr<strong>en</strong>t simple error register (group 3) ................................................................................... 1064 D−<strong>FL</strong> <strong>220</strong>
Cont<strong>en</strong>ts7.6.4 Curr<strong>en</strong>t critical error register (group 4) .................................................................................... 1067.7 Device functions ....................................................................................................................... 1077.7.1 Maint<strong>en</strong>ance and service functions .......................................................................................... 1087.7.2 Test and simulation functions ................................................................................................... 1097.7.3 Save parameters ...................................................................................................................... <strong>11</strong>07.8 D−<strong>FL</strong> <strong>220</strong> Firmware Update ..................................................................................................... <strong>11</strong>08 Measurem<strong>en</strong>t location questionnaire <strong>11</strong>49 Technical data <strong>11</strong>69.1 Technical data D−<strong>FL</strong> <strong>220</strong> application data............................................................................... <strong>11</strong>69.2 Technical dataD−<strong>FL</strong> <strong>220</strong> .......................................................................................................... <strong>11</strong>69.3 Technical data D−<strong>FL</strong> <strong>220</strong> MK measurem<strong>en</strong>t head .................................................................. <strong>11</strong>79.4 Technical data D−<strong>FL</strong> <strong>220</strong> SPF purge flange ............................................................................ <strong>11</strong>89.5 Technical data D-<strong>FL</strong> 200 E welding pipe with flange ............................................................... <strong>11</strong>89.6 Technical data D-TB 101 A terminal box ................................................................................. <strong>11</strong>89.7 Technical data D-BL blower unit (purge air unit) ...................................................................... <strong>11</strong>89.8 Factory settings as delivered ................................................................................................... <strong>11</strong>99.9 Technical data DURAG Modbus .............................................................................................. 1209.9.1 Setting addresses (slave addresses) ....................................................................................... 1209.9.2 Communications settings ......................................................................................................... 1209.9.3 Type of cabling, cross-section, max. l<strong>en</strong>gth of the cables used .............................................. 12010 Dim<strong>en</strong>sional drawings 12<strong>11</strong>0.1 Dim<strong>en</strong>sional drawing for the measuring head D−<strong>FL</strong> <strong>220</strong> MK .................................................. 12<strong>11</strong>0.2 Dim<strong>en</strong>sional drawing of purge flange D−<strong>FL</strong> <strong>220</strong> SPF .............................................................. 12<strong>11</strong>0.3 Dim<strong>en</strong>sional drawing of welding pipe D−<strong>FL</strong> <strong>220</strong> E .................................................................. 12210.4 Dim<strong>en</strong>sional drawing of purge air unit D-BL ............................................................................ 12310.5 Connection diagram of purge air unit D-BL .............................................................................. 12410.6 Dim<strong>en</strong>sional drawing of the terminal box D−TB 101 ................................................................ 12510.7 Dim<strong>en</strong>sional drawings - Weather protection hoods (optional) ................................................. 126<strong>11</strong> List of spare parts 12812 Declaration of Conformity 12913 Glossary 13<strong>11</strong>4 Index 133<strong>15</strong> DURAG GROUP company addresses 137TablesTable 5.2 Setting the DIP configuration switch S1 .............................................................................. 68Table 5.3 Setting of jumper X7 ............................................................................................................ 69Table 5.4 Meaning of the LEDs and their flash codes ........................................................................ 70Table 6.1 Parameter checking checklist.............................................................................................. 79Table 6.2 Baud rate settings ............................................................................................................... 82Table 6.3 Specified values for check measurem<strong>en</strong>ts .......................................................................... 90Table 6.4 List of the parameters to be checked (commissioning)....................................................... 91Table 6.5 List of the further device settings ........................................................................................ 92Table 7.1 Maint<strong>en</strong>ance work table ...................................................................................................... 99Table 7.2 Messages, curr<strong>en</strong>t messages (group 1) ............................................................................ 102Table 7.3 Messages, curr<strong>en</strong>t warnings (group 2) .............................................................................. 106Table 7.4 Table I Fault messages, curr<strong>en</strong>t simple faults ................................................................... 106Table 7.5 Table II Fault messages, curr<strong>en</strong>t critical faults .................................................................. 107Table 7.6 Table: Maint<strong>en</strong>ance and service functions ........................................................................ 108D−<strong>FL</strong> <strong>220</strong> 5
Cont<strong>en</strong>tsTable 7.7 Table: Simulation functions .............................................................................................. 109Table 7.8 Table: Test functions ........................................................................................................ 109Table 9.1 Application data ................................................................................................................ <strong>11</strong>6Table 9.2 Technical data .................................................................................................................. <strong>11</strong>7Table 9.3 Technical data D−<strong>FL</strong> <strong>220</strong> MK2 measurem<strong>en</strong>t head ......................................................... <strong>11</strong>7Table 9.4 Technical data D−<strong>FL</strong> <strong>220</strong> SPF purge flange .................................................................... <strong>11</strong>8Table 9.5 Technical data D-<strong>FL</strong> 200 E welding pipe with flange ....................................................... <strong>11</strong>8Table 9.6 Technical data D-TB 101 A terminal box .......................................................................... <strong>11</strong>8Table 9.7 Technical data D-BL blower unit (purge air unit) .............................................................. <strong>11</strong>8Table 9.8 Technical data specified values (default values) .............................................................. <strong>11</strong>9Table 9.9 DURAG Modbus address settings ................................................................................... 120Table 9.10 List of the DURAG Modbus communications settings...................................................... 120Table 9.<strong>11</strong> Cable specification for DURAG Modbus cable ................................................................. 120Table <strong>11</strong>.1 Spare parts list .................................................................................................................. 128FiguresFig. 4.1: Overall view of the device compon<strong>en</strong>ts of the measuring head D−<strong>FL</strong> <strong>220</strong> MK ................... 41Fig. 4.2: Overall view of the circuit board designation (numbering) ................................................... 42Fig. 4.3: Overall view of the device compon<strong>en</strong>ts of the terminal box D−TB 101 A ............................ 42Fig. 4.4: Overall view of the device compon<strong>en</strong>ts of the purge air unit D-BL ...................................... 42Fig. 4.5: Where do I find the rating plate ............................................................................................ 43Fig. 4.6: Example of a rating plate of a Volumetric flow meter D−<strong>FL</strong> <strong>220</strong> .......................................... 44Fig. 4.7: Example of a rating plate D−<strong>FL</strong> <strong>220</strong> ..................................................................................... 44Fig. 4.8: Measurem<strong>en</strong>t principle ......................................................................................................... 45Fig. 5.1: System layout (example) ...................................................................................................... 50Fig. 5.2: Selection of the measurem<strong>en</strong>t point ..................................................................................... 53Fig. 5.3: Standard l<strong>en</strong>gths of welding pipes........................................................................................ 55Fig. 5.4: Brick chimney installation welding pipe ................................................................................ 55Fig. 5.5: Gusset plate installation of welding pipe .............................................................................. 56Fig. 5.6: Double-walled installation of welding pipe ............................................................................ 56Fig. 5.7: Alignm<strong>en</strong>t of the D−TB 101 casing cover ............................................................................. 57Fig. 5.8: Attaching the D−TB 101 retaining plates .............................................................................. 57Fig. 5.9: D−TB 101 Connecting the cable scre<strong>en</strong>............................................................................... 58Fig. 5.10: D−TB 101 Connecting the cable .......................................................................................... 59Fig. 5.<strong>11</strong>: Connection diagram for terminal box D−TB 101 .................................................................. 60Fig. 5.12: Installation of the purge air reducers D−<strong>FL</strong> <strong>220</strong> ................................................................... 62Fig. 5.13: S<strong>en</strong>sor parameters ............................................................................................................... 63Fig. 5.14: Measurem<strong>en</strong>t system D−<strong>FL</strong> <strong>220</strong> parts drawing ................................................................... 65Fig. 5.<strong>15</strong>: Electrical connection of the measuring heads ...................................................................... 66Fig. 5.16: Configuration switch S1, jumper X7 ..................................................................................... 68Fig. 5.17: Measuring head casing assembly ........................................................................................ 69Fig. 6.1: Quick Info .............................................................................................................................. 77Fig. 6.2: Setting the date/time ............................................................................................................. 80Fig. 6.3: Setting the Modbus address ................................................................................................. 81Fig. 6.4: Setting the Modbus communications settings ...................................................................... 82Fig. 6.5: Setting the measurem<strong>en</strong>t channels variables ...................................................................... 83Fig. 6.6: Measured value output channel ........................................................................................... 83Fig. 6.7: Measured value correction ................................................................................................... 84Fig. 6.8: Diagram: Measured value correction by polynomial ............................................................ 85Fig. 6.9: Measured value output channel ........................................................................................... 86Fig. 6.10: Setting the curr<strong>en</strong>t output ..................................................................................................... 87Fig. 6.<strong>11</strong>: Setting the relay settings ...................................................................................................... 88Fig. 6.12: Relays, configuration of the outputs ..................................................................................... 88Fig. 6.13: Relays, configuration of the switching logic .......................................................................... 88Fig. 6.14: Setting the maint<strong>en</strong>ance settings ......................................................................................... 89Fig. 6.<strong>15</strong>: Diagram of check measurem<strong>en</strong>ts ......................................................................................... 896 D−<strong>FL</strong> <strong>220</strong>
Cont<strong>en</strong>tsFig. 6.16: Setting measurem<strong>en</strong>t location parameter ............................................................................. 90Fig. 6.17: Setting further device settings ............................................................................................... 92Fig. 6.18: Automatic ultrasonic signal positioning ................................................................................. 92Fig. 6.19: Simulation mode .................................................................................................................... 93Fig. 6.20: Ultrasonic signal .................................................................................................................... 93Fig. 7.1: D−ESI 100, Message groups .............................................................................................. 101Fig. 7.2: Function test for digital outputs ........................................................................................... <strong>11</strong>0Fig. 7.3: D-ISP connection to circuit board no. 3 ............................................................................... <strong>11</strong>1Fig. 7.4: D-ISP connection to adapter ............................................................................................... <strong>11</strong>1Fig. 10.1: Dim<strong>en</strong>sional drawing measuring head ................................................................................ 121Fig. 10.2: Dim<strong>en</strong>sional drawing of purge flange .................................................................................. 121Fig. 10.3: Dim<strong>en</strong>sional drawing of welding pipe .................................................................................. 122Fig. 10.4: Dim<strong>en</strong>sional drawing of purge air unit I ............................................................................... 123Fig. 10.5: Dim<strong>en</strong>sional drawing of purge air unit II .............................................................................. 124Fig. 10.6: Electrical connections to the purge air motor ...................................................................... 124Fig. 10.7: Dim<strong>en</strong>sional drawing of the terminal box ............................................................................ 125Fig. 10.8: Dim<strong>en</strong>sional drawing of the weather protection hood for measuring heads ....................... 126Fig. 10.9: Dim<strong>en</strong>sional drawing of weather protection hood for purge air unit D-BL .......................... 127D−<strong>FL</strong> <strong>220</strong> 7
D−<strong>FL</strong> <strong>220</strong>Volumetric flow meter1 G<strong>en</strong>eral information1.1 Information on the operating instructions1.2 Explanation of symbols1.3 Limitation of liability1.4 Warranty information1.5 Spare parts1.6 Customer service1.7 Copyright1.8 Trademarks
1. G<strong>en</strong>eral information1 G<strong>en</strong>eral informationWe hope that our products and services will make a significant contribution toyour success. We will be delighted if the information in these operatinginstructions operating instructions achieves this.Should you require information that is insuffici<strong>en</strong>tly covered in this docum<strong>en</strong>t,please request further information from the respective ag<strong>en</strong>t of DURAG GmbH.Our Support & Service departm<strong>en</strong>t is also available to answer any questionson DURAG GROUP products and services. You will find the addresses andtelephone numbers on page 137 (DURAG GROUP company addresses).If anything is unclear:please contact the manufacturer! Have your questions answered.Information on the company and the products can also be found on theInternet under www.durag.de1.1 Information on the operating instructionsThese operating instructions provide important information on how to use theVolumetric flow meter D−<strong>FL</strong> <strong>220</strong>. Compliance with all specified safetyinstructions and handling guidelines is a precondition for safe working.In addition, the locally applicable accid<strong>en</strong>t prev<strong>en</strong>tion regulations and g<strong>en</strong>eralsafety requirem<strong>en</strong>ts must also be complied with in relation to the Volumetricflow meter and its field of application.Before starting any work, read the operating instructions!In particular, read Section "Safety" and the respective safety instructions in full.The operating <strong>manual</strong> is an integral part of the product and must be kept in theimmediate vicinity of the Volumetric flow meter D−<strong>FL</strong> <strong>220</strong>. It must be availableto personnel at all times.• This docum<strong>en</strong>tation...• (approx. 140 pages) was prepared with very great care;• is not int<strong>en</strong>ded for the US market. Docum<strong>en</strong>tation to ANSI Z535 is availableon request. Order addresses can be found on page 139;• or parts thereof may not be reproduced or distributed without expresspermission from DURAG GmbH, irrespective of how this is done, in whatlanguage or by what medium, electronic or mechanical;• always relates to the complete device, ev<strong>en</strong> if individual program modulesor parts have not be<strong>en</strong> purchased;• relates to the curr<strong>en</strong>t design of the device at the time of update of thisdocum<strong>en</strong>tation (see above);• is subject to changes to its cont<strong>en</strong>t without notification;• contains figures which may differ due to further technical developm<strong>en</strong>ts orto the manageable scale of their actual appearance. No claims regardingthe supply of id<strong>en</strong>tical products can therefore be derived from theillustrations shown.D−<strong>FL</strong> <strong>220</strong> <strong>11</strong>
1. G<strong>en</strong>eral information1.2 Explanation of symbolsWarning noticesIn order to make the text in these operating instructions clear, text elem<strong>en</strong>tssuch as safety instructions, warnings, tips, keyboard symbols, m<strong>en</strong>uaddresses etc. are displayed differ<strong>en</strong>tly.Warning notices are repres<strong>en</strong>ted by symbols in these operating instructions.The instructions are introduced by signal words, which express the ext<strong>en</strong>t ofthe hazard.Comply strictly with these instructions and act responsibly to prev<strong>en</strong>taccid<strong>en</strong>ts, injury and damage.DANGER!... refers to an immediately hazardous situation, which if not prev<strong>en</strong>ted willresult in death or serious injury.WARNING!... refers to a possibly hazardous situation, which if not prev<strong>en</strong>ted may result indeath or serious injury.CAUTION!... refers to a possibly hazardous situation, which if not prev<strong>en</strong>ted may result inslight or minor injury.... refers to a situation which may result in damage to equipm<strong>en</strong>t and the<strong>en</strong>vironm<strong>en</strong>t if not prev<strong>en</strong>ted.Tips and recomm<strong>en</strong>dationsAn instruction or tip is shown as follows:... highlights useful tips and recomm<strong>en</strong>dations, as well as information aimed at<strong>en</strong>suring effici<strong>en</strong>t and fault-free operation.Specific safety instructionsTo draw att<strong>en</strong>tion to specific hazards, warning notices and signal words areused in conjunction with the following symbols:12 D−<strong>FL</strong> <strong>220</strong>
1. G<strong>en</strong>eral information• Use of unauthorised personnel (see Section 2.4.1 from page 21)• unauthorised modifications• technical changes• Use of unapproved spare parts• Use of defective and/or improperly repaired devicesFurthermore, the obligations agreed in the contract of sale, the g<strong>en</strong>eralconditions of business ("Conditions of supply for goods and services in theelectrical industry" (ZVEI)) and the manufacturer's Conditions of Supply,together with the statutory regulations in force at the date of signing thecontract are all applicable.1.4 Warranty informationThe terms of the warranty can be found as a separate docum<strong>en</strong>t in theG<strong>en</strong>eral Terms and Conditions of Business.Modifications and changes to the Volumetric flow meter are not permitted. Anyinterv<strong>en</strong>tion in the device shall r<strong>en</strong>der the warranty null and void.Fault-free and safe operation of the device dep<strong>en</strong>ds on appropriatetransportation, correct storage, installation and assembly as well as carefuloperation.1.5 Spare partsWARNING!Risk of injury due to incorrect spare parts!Incorrect or defective spare parts can lead to damage, malfunctions or totalfailure and may also impair safety.• Only use g<strong>en</strong>uine spare parts supplied by the manufacturer.• Spare parts can be obtained from an authorised ag<strong>en</strong>t or directly from themanufacturer.See page 2 for the manufacturer's address1.6 Customer serviceIf anything is unclear, contact the manufacturer. Our Service departm<strong>en</strong>t isavailable to provide technical information.Details of relevant offices or partners is available on the Internet at any time,see manufacturer's address on page 2, or DURAG GROUP companyaddresses see page 137.1.7 CopyrightThe operating instructions must be kept confid<strong>en</strong>tial. It is int<strong>en</strong>ded exclusivelyfor personnel working on the Volumetric flow meter. Passing on the operatinginstructions to third parties without the writt<strong>en</strong> cons<strong>en</strong>t of the manufacturer isnot permitted.The operating instructions , or sections thereof, may not be reproduced,disseminated or translated into other languages without the writt<strong>en</strong> cons<strong>en</strong>t ofthe manufacturer, regardless of the form in which this is done and the media -electronic or mechanical - involved.© DURAG GmbH <strong>20<strong>11</strong></strong> All rights reserved.14 D−<strong>FL</strong> <strong>220</strong>
D−<strong>FL</strong> <strong>220</strong>Volumetric flow meter2 Safety2.1 G<strong>en</strong>eral safety instructions2.2 Designated use2.3 Responsibility of the operating company2.4 Personnel2.4.1 Personnel, skills2.4.2 Unauthorised personnel2.5 Personal protective equipm<strong>en</strong>t2.6 Fundam<strong>en</strong>tal hazards2.6.1 Hazards due to electrical equipm<strong>en</strong>t2.6.2 Secure the device against reconnection2.6.3 Hazard due to hot, aggressive or explosive gases or high pressure of the measuring gas2.6.4 Hazard to the device due to purge air failure2.6.5 Avoidance of consequ<strong>en</strong>tial damage in the ev<strong>en</strong>t of a system fault2.7 Device-specific hazards and safety measures2.8 Behaviour in case of hazards and accid<strong>en</strong>ts2.9 Description and location of safety equipm<strong>en</strong>t and emerg<strong>en</strong>cy stop mechanisms
2. Safety2 SafetyBefore starting any work, read the operating instructions!Legislation requires us to provide you with important information to <strong>en</strong>sureyour safety and to draw your att<strong>en</strong>tion to how damage to this device and otherequipm<strong>en</strong>t can be avoided. If you do not comply with the information in this<strong>manual</strong> DURAG GmbH will not be liable for any damage resulting fromneglig<strong>en</strong>t or deliberate non-compliance with the instructions in this <strong>manual</strong>.Comply with the warning notices and safety instructions in this <strong>manual</strong>. Theyare there to help avoid hazards that could <strong>en</strong>danger life or cause injury topersonnel, and for avoidance of damage to property. They are also int<strong>en</strong>ded to<strong>en</strong>sure safe and fault-free operation.Commission the Volumetric flow meter D−<strong>FL</strong> <strong>220</strong> as described in Section 5"Installation, commissioning" starting on page 49.2.1 G<strong>en</strong>eral safety instructionsThe DURAG Volumetric flow meter D−<strong>FL</strong> <strong>220</strong> is designed and built using stateof the art technology and complies with the recognised safety regulations.Despite this, hazards can arise.Operate the product only wh<strong>en</strong> it is in good working order, and comply with theoperating instructions. Any change to normal operation should be tak<strong>en</strong>seriously as an indication of impaired functionality. In this connection, respondto:• emission of smoke or unusual smells,• unusual noises resulting from and during operation of the device (includingthe purge air blower),• unusual vibrations,• excessive temperatures of system compon<strong>en</strong>ts,• changes in power consumption without obvious cause,• tripping of monitoring devices,• unusual, pronounced fluctuations or shifts in measurem<strong>en</strong>t results.Improper use of handling can result in health hazards or damage. Follow theinstructions for all actions on the D−<strong>FL</strong> <strong>220</strong> and the safety instructions andwarning notices in the individual sections of this <strong>manual</strong>.The following warning and safety instructions apply in full to the Volumetricflow meter:• Wh<strong>en</strong> preparing and performing work:Comply with the legal requirem<strong>en</strong>ts applicable to the system and thecorresponding technical regulations. Comply with national safety andaccid<strong>en</strong>t prev<strong>en</strong>tion regulations.• Work in accordance with:…the local, plant-specific conditions,…hazards caused by operational processes…specifications.• The operating <strong>manual</strong> is an integral part of the product and must be kept inthe immediate vicinity of the Volumetric flow meter D−<strong>FL</strong> <strong>220</strong>. It must beD−<strong>FL</strong> <strong>220</strong> 19
2. Safetyavailable to personnel at all times. Ensure compliance with the instructionsset out for avoidance of hazards and damage.• Suitable protective mechanisms and personal protective equipm<strong>en</strong>t mustbe available in suffici<strong>en</strong>t quantities and used by the personnel inaccordance with the relevant pot<strong>en</strong>tial hazards.• The device may only be operated wh<strong>en</strong> in good working order, and incompliance with the safety instructions!• The device as a whole and also its individual compon<strong>en</strong>ts may be usedonly wh<strong>en</strong> in their original configuration.• Maint<strong>en</strong>ance work and repairs, other than those described in the operatinginstructions, may not be performed without prior approval of themanufacturer.2.2 Designated useCorrect use of the D−<strong>FL</strong> <strong>220</strong> is described in Section 4.3 from page 39.2.3 Responsibility of the operating companyThe Volumetric flow meter is int<strong>en</strong>ded for use in commercial operations. Theoperator of the Volumetric flow meter is therefore subject to the statutoryhealth and safety obligations, along with the applicable directives, legislationand standards.In addition to the health and safety instructions contained in these operatinginstructions, the safety regulations, accid<strong>en</strong>t prev<strong>en</strong>tion regulations and<strong>en</strong>vironm<strong>en</strong>tal protection regulations for the application in which the Volumetricflow meter is used must be complied with. The following rules in particular areapplicable:• The operator must obtain information about the applicable health andsafety regulations and perform a risk assessm<strong>en</strong>t to determine anyadditional hazards that arise due to the special working conditions at theplace of use of the Volumetric flow meter. He must implem<strong>en</strong>t these in theform of operating instructions for operation of the Volumetric flow meter.• Throughout the period of use of the Volumetric flow meter, the operatingcompany must check whether the operating instructions that he has writt<strong>en</strong>satisfy the latest issue of the regulations, and must update them asrequired.• The operator must clearly regulate and specify who has responsibility forinstallation, operation, maint<strong>en</strong>ance and cleaning.• The operator must <strong>en</strong>sure that all employees who deal with the Volumetricflow meter have read and understood the operating instructions. Inaddition, at regular intervals they must train the personnel and inform themabout the hazards.• Furthermore the operating company is responsible for <strong>en</strong>suring that theVolumetric flow meter is in good technical condition at all times, i.e. that themaint<strong>en</strong>ance work has be<strong>en</strong> performed (see Section 7).• The operator must provide the necessary protective equipm<strong>en</strong>t forpersonnel.20 D−<strong>FL</strong> <strong>220</strong>
2. Safety2.4 Personnel2.4.1 Personnel, skillsWARNING!Risk of injury due to insuffici<strong>en</strong>tly skilled personnel!Improper use can lead to severe injury and damage.Any actions should be performed only by appropriately trained specialistpersonnel. Ensure compliance with the skills and knowledge described inSection 2.4.1.This operating instructions assumes that the personnel performing the workhave the necessary training and knowledge. Only those personnel that havethis knowledge are considered to be skilled and authorised in the s<strong>en</strong>se of thisoperating instructions.For work on the D−<strong>FL</strong> <strong>220</strong>, authorised personnel have the following skills towhich refer<strong>en</strong>ce is made in this operating instructions for the various activities:• Operatorsare those who have had operational training, including instruction in theoperation of the D−<strong>FL</strong> <strong>220</strong> Volumetric flow meter and are in a position toperform the work assigned to them.• Specialist personnelare those who because of their specialist training and experi<strong>en</strong>ce, coupledwith knowledge of the applicable regulations, are in a position to performthe work assigned to them and make indep<strong>en</strong>d<strong>en</strong>t judgem<strong>en</strong>ts of thepot<strong>en</strong>tial hazards.• Electricianare those who because of their specialist training and experi<strong>en</strong>ce, coupledwith knowledge of the applicable regulations, are in a position to performwork on electrical equipm<strong>en</strong>t and make indep<strong>en</strong>d<strong>en</strong>t judgem<strong>en</strong>ts of thepot<strong>en</strong>tial hazards. Electricians are specially trained for the working <strong>en</strong>vironm<strong>en</strong>tin which they operate, and they know the local relevant standards andregulations. Electrical work may be performed only by skilled electricians.In addition, the operating company must <strong>en</strong>sure that the operators, skilledpersonnel and electricians are giv<strong>en</strong> up-to-date instructions on the following:• Precise knowledge of operational hazards and how to avoid them.• Knowledge of system conditions, applicable standards, regulations,directives, operating instructions and accid<strong>en</strong>t prev<strong>en</strong>tion regulations in thecontext of the work assigned to them.• Pot<strong>en</strong>tial hazards resulting from improper behaviour.• Suffici<strong>en</strong>t knowledge of the D−<strong>FL</strong> <strong>220</strong> (Volumetric flow meter)To acquire specialist knowledge of the device, DURAG offers appropriatecourses.Information on these is available on the Internet on the DURAG homepage orby telephone (see manufacturer's address on page 2).• Service <strong>en</strong>gineerswho because of their specialist training, knowledge and experi<strong>en</strong>ce of theapplicable standards and regulations are able to carry out work specificallyon DURAG GROUP equipm<strong>en</strong>t. Service <strong>en</strong>gineers are employees of theDURAG GROUP or employees of DURAG GROUP partners. Service<strong>en</strong>gineers have completed compreh<strong>en</strong>sive education and training on thesedevices.In order to <strong>en</strong>sure compliance with special local provisions and plantregulations, local skilled personnel or an electrician should accompanythem in their work as necessary.D−<strong>FL</strong> <strong>220</strong> 21
2. Safety2.4.2 Unauthorised personnelSuch personnel are accredited as persons who can be expected to performtheir work reliably.Persons whose responsiv<strong>en</strong>ess is compromised by substances such as drugs,alcohol or medications will not be accredited.Wh<strong>en</strong> selecting personnel, the local regulations regarding age andprofessional qualifications should be complied with.WARNING!Hazard to unauthorised personnel!Unauthorised personnel who do not meet the requirem<strong>en</strong>ts set out here ar<strong>en</strong>ot familiar with the hazards in the working area. Incorrect behaviour can leadto severe injury and damage.Therefore:• Ensure that unauthorised personnel do not <strong>en</strong>ter the working area.• In case of doubt, approach personnel and instruct them to leave the workingarea.• Stop all work as long as any unauthorised personnel are in the working area2.5 Personal protective equipm<strong>en</strong>tDuring work, it may be necessary to wear personal protective equipm<strong>en</strong>t tominimise health hazards.Detailed specifications must be set out by the operator dep<strong>en</strong>ding on thepot<strong>en</strong>tial plant-specific hazards.• The protective equipm<strong>en</strong>t necessary for the relevant work must be worn atall times.× Do not wear any rings, chains or other jewellery wh<strong>en</strong> working on theD−<strong>FL</strong> <strong>220</strong>.• Comply with any signs relating to personal protective equipm<strong>en</strong>t in theworking area, e.g.:Protective work clothingis tight fitting work clothing with low tear str<strong>en</strong>gth, with narrow sleeves and noprotruding parts. It is primarily int<strong>en</strong>ded to protect against burns.Wear a safety helmetfor protection against falling and flying parts, and also against sharp or pointededges.Safety shoesto protect against heavy falling parts and prev<strong>en</strong>t slipping on a slippery floorsurface.22 D−<strong>FL</strong> <strong>220</strong>
2. SafetyFace protectionto protect the eyes and the face against flames, sparks or embers, hot particlesor exhaust gases.Protective glovesto protect the hands against friction, abrasion, cuts or deeper wounds andcontact with hot surfaces.2.6 Fundam<strong>en</strong>tal hazardsThis section sets out the remaining risks id<strong>en</strong>tified by the risk assessm<strong>en</strong>t.The information set out here and the safety instructions and warning notices inthe other sections of this operating instructions must be adhered to, in order toprev<strong>en</strong>t health hazards and hazardous situations.2.6.1 Hazards due to electrical equipm<strong>en</strong>tThe personnel assigned to carry out installation, commissioning andmaint<strong>en</strong>ance must be totally familiar with all pot<strong>en</strong>tial hazards and repairmeasures as set out in this operating instructions.DANGER!High voltage. Risk of fatal injury due to electrical power!There is a risk of immediate fatal injury if live compon<strong>en</strong>ts are touched. Damageto the insulation or to individual compon<strong>en</strong>ts can lead to fatal injury.• Before servicing, cleaning or repairing the device, disconnect the powersupply and secure it against reconnection.• Before removing any casings or guards, de<strong>en</strong>ergise the devices and checkthat they are dead.• Permit only electricians to work on electrical equipm<strong>en</strong>t.• Keep moisture away from live compon<strong>en</strong>ts. Moisture can lead to shortcircuits.To avoid hazards:• Only connect the Volumetric flow meter to the supply voltage set out on therating plate.• Do not connect the operating voltage and switch on until the device hasbe<strong>en</strong> fully installed. Once the operating voltage is connected, theVolumetric flow meter will start immediately!• Cables must be routed so as exclude the possibility of pot<strong>en</strong>tial accid<strong>en</strong>tsby persons stumbling over them or becoming <strong>en</strong>tangled in them.This measuring system has be<strong>en</strong> manufactured so that rigorous separationbetwe<strong>en</strong> primary and secondary electric circuits is <strong>en</strong>sured. Low voltages thatare connected must therefore also be g<strong>en</strong>erated with safe separation.D−<strong>FL</strong> <strong>220</strong> 23
2. SafetyATTENTION!Damage to electronic compon<strong>en</strong>ts due toelectrostatic discharge (ESD)Electronic compon<strong>en</strong>ts are becoming increasingly small and complex. Theirsusceptibility to damage from electrostatic discharge is increased accordingly.To protect these compon<strong>en</strong>ts, measures to prev<strong>en</strong>t electrostatic dischargemust be tak<strong>en</strong> before starting any work on the op<strong>en</strong>ed device (ESDprotection).As a precaution against electrostatic discharge from the human body, serviceemployees may be equipped with a personal earthing system, for example. !2.6.2 Secure the device against reconnectionDANGER!Risk of fatal injury due to unauthorised reconnectionWh<strong>en</strong> work is being performed in the hazard area there is a risk that anunauthorised person may reconnect the power supply. This creates a risk offatal injury for personnel in the hazard area.• The instructions in the sections of the instructions for securing the deviceagainst reconnection must be complied with.• Always follow the procedure set out below to secure the device againstreconnection.Secure the device against reconnection:Switch secured with padlockon: ………….. at …….. o’clockDO NOT SWITCH ON!The padlock must be removed onlyby: ……………….after it has be<strong>en</strong> <strong>en</strong>sured that nopersons are inside the danger zone.1. Switch off the power supply.2. If practicable, secure the switch with a padlock, and hang aclearly visible notice on the switch.3. The key should be <strong>en</strong>trusted to the employee named on th<strong>en</strong>otice.Switched offton: ………….. at …….. o’clockDO NOT SWITCH ON!The equipm<strong>en</strong>t may be switched ononlyby: ……………….after it has be<strong>en</strong> <strong>en</strong>sured that nopersons are inside the danger zone.4. If it is not practicable to secure the switch with a padlock,hang a clearly visible notice on the switch.5. After all work has be<strong>en</strong> performed, check that the hazardarea is clear of people.6. Check that all guards have be<strong>en</strong> installed and are operatingcorrectly.7. Only th<strong>en</strong> remove the notice and if necessary the padlock,and switch the power supply back on.24 D−<strong>FL</strong> <strong>220</strong>
2. Safety2.6.3 Hazard due to hot, aggressive or explosive gases or high pressure of themeasuring gasDANGER!WARNING!Risk of explosion due to explosive atmosphere!An explosive atmosphere can <strong>en</strong>danger the health and safety of personnel.The operator must divide the areas in which an explosive atmosphere canoccur into zones and <strong>en</strong>sure compliance with the minimum organisational andtechnical requirem<strong>en</strong>ts set out in the directive.Burns hazardImproper use can lead to severe injury and damage. In particular, hot gasesmay issue at high pressure from unsealed duct access points.Wh<strong>en</strong> working on parts that may be hot, or at unsealed duct access points(welding pipes), never work without appropriate temperature-resistantequipm<strong>en</strong>t (such as a face mask, safety gloves, heat-resistant clothing etc.).Comply with the operating company's instructions!The ultrasonic s<strong>en</strong>sors of the D−<strong>FL</strong> <strong>220</strong> are mounted directly on the ductcarrying the gas to be measured. If these devices are detached from theflange tube, gases that are hot or hazardous to health can escape from theduct through the flange connection, particularly in the ev<strong>en</strong>t of over-pressure,and cause serious injuries to unprotected maint<strong>en</strong>ance personnel. Thereforebefore undoing the flange connections always take appropriate protectivemeasures, e.g. put on protective clothing etc. The operating company isrequired to provide suitable warning notices to this effect.The applicable regulations and safety provisions for the system must becomplied with.2.6.4 Hazard to the device due to purge air failureCAUTION!Possible damage to the measuring heads!Overheating the measuring heads due to hot gases in the measurem<strong>en</strong>t ductcan lead to malfunctions, damage or total failure.Before installing the measuring heads in the measurem<strong>en</strong>t duct, <strong>en</strong>sure thatthe purge air supply is working. The purge air is necessary for protection ofthe compon<strong>en</strong>t units. It shields the compon<strong>en</strong>ts from hot and/or aggressivegases. Loss of the purge air supply can ev<strong>en</strong> for a (very) short time can leadto damage or total write-off of the ultrasonic s<strong>en</strong>sors. In the ev<strong>en</strong>t of overpressure,the gas can also p<strong>en</strong>etrate the fan and filter through the purge airhose and damage those system parts. The purge air supply must thereforebe reliably <strong>en</strong>sured at all times wh<strong>en</strong>ever there are hot gases in themeasurem<strong>en</strong>t duct.The operating company must therefore <strong>en</strong>sure that:• the purge air supply operates reliably and without interruption,• any failure is detected immediately,• the ultrasonic s<strong>en</strong>sors are removed immediately from the duct and the ductop<strong>en</strong>ing (heat resistant) is covered in the ev<strong>en</strong>t of a purge air failure.D−<strong>FL</strong> <strong>220</strong> 25
2. Safety2.6.5 Avoidance of consequ<strong>en</strong>tial damage in the ev<strong>en</strong>t of a system faultIn order to prev<strong>en</strong>t and limit faults that can directly or indirectly result inphysical injuries or damage to property, the operator must <strong>en</strong>sure that:• responsible maint<strong>en</strong>ance personnel are available at short notice at anytime.• maint<strong>en</strong>ance personnel have be<strong>en</strong> trained to id<strong>en</strong>tify and rectify faults inthe D−<strong>FL</strong> <strong>220</strong> and the associated systems.• defective system compon<strong>en</strong>ts can be switched off immediately.• switching off the device will not lead to unpredictable consequ<strong>en</strong>tial faultsand damage.2.7 Device-specific hazards and safety measuresThe Volumetric flow meter is designed so that wh<strong>en</strong> properly used no hazardto the operators can arise.• All devices, where plug connectors are available, are supplied fitted withthe appropriate ready-made connection cables.For all connections and installations, that the operating company mustmake on the Volumetric flow meter:Comply with local regulations for installation of electrical devices!DANGER!Risk of explosion in an explosive atmosphere!Improper use will cause serious injury and damage.The D−<strong>FL</strong> <strong>220</strong> measuring system described here is not suitable for use inareas with a risk of explosion.2.8 Behaviour in case of hazards and accid<strong>en</strong>tsPrev<strong>en</strong>tive measuresIn case of emerg<strong>en</strong>cy: Correct actions• Always be prepared for accid<strong>en</strong>ts or fire. Note emerg<strong>en</strong>cy numbers.• First aid facilities (first aid kit, blankets etc.) and fire extinguishers must bekept in easy reach.• Familiarise personnel with accid<strong>en</strong>t reporting, first aid and emerg<strong>en</strong>cyequipm<strong>en</strong>t.• Keep access routes for emerg<strong>en</strong>cy vehicles clear.• Initiate first aid measures.• Rescue personnel from the hazard zone.• Notify the person responsible at the place of use.• Notify a doctor and/or the fire brigade.• Clear access routes for emerg<strong>en</strong>cy vehicles.26 D−<strong>FL</strong> <strong>220</strong>
2. SafetyEmerg<strong>en</strong>cy reporting - Doing it correctly!Dial the emerg<strong>en</strong>cy call number.Speak slowly, loudly and clearly, <strong>en</strong>suring the information you give is clear:• Where did it happ<strong>en</strong>? - Exact location information is required:• What happ<strong>en</strong>ed? - Is it a fire, an explosion or an operational accid<strong>en</strong>t. Areany people trapped or buried?• How many people are injured?• What injuries do they have? - Is the pati<strong>en</strong>t responsive? Are there anybreathing or circulation problems? Is anyone bleeding heavily?• Wait for any queries.Measures for accid<strong>en</strong>ts involving high voltage• Notify the person responsible at the place of use.• Notify a doctor and/or the fire brigade.• Wh<strong>en</strong> providing assistance, take care not to <strong>en</strong>danger yourself!Ensure the system is de<strong>en</strong>ergised.Disconnect plant and devices from the power supply by pressing theemerg<strong>en</strong>cy stop button or pulling the fuses. Merely switching off the deviceor the live cable does not <strong>en</strong>sure it is de<strong>en</strong>ergised.• If someone is still in contact with the high t<strong>en</strong>sion supply, never touch themwithout protection. Use a safety device or non-conducting insulating material.• Use a non-conducting object (such as a dry wood<strong>en</strong> broom handle) to pullaway live cables (or ignition lance) from the injured person.• If the pati<strong>en</strong>t is unconscious, after switching off the power supply,establishing breathing and heartbeat are the first priority. If necessaryperform heart-lung resuscitation immediately.If there is a flicker of activity in the heart chambers, trained paramedics canperform defibrillation. There are also publicly available defibrillators for nonexpertuse.• If a pati<strong>en</strong>t with burns is responsive, cool them and cover the injury with aclean non-linting dressing.Ev<strong>en</strong> if the pati<strong>en</strong>t feels completely well, do not leave them unsupervised untilthe conclusions of an electrocardiogram performed by a doctor (to check fordamage to the heart) are known.Further measures are g<strong>en</strong>erally performed by the rescue services in responseto the alarm.G<strong>en</strong>eral advice on treatm<strong>en</strong>t after an accid<strong>en</strong>t is always available from trainedfirst-aiders on site. The measures listed above are no substitute for training asa first-aider or for professional medical services.2.9 Description and location of safety equipm<strong>en</strong>t and emerg<strong>en</strong>cystop mechanismsThe operating company must incorporate safety measures for the Volumetricflow meter into the safety concept for the overall system. This includes alsosetting up and describing safety and emerg<strong>en</strong>cy stop devices, includingstatem<strong>en</strong>ts of the position of the relevant emerg<strong>en</strong>cy stop buttons.D−<strong>FL</strong> <strong>220</strong> 27
D−<strong>FL</strong> <strong>220</strong>Volumetric flow meter3 Delivery3.1 Instructions for delivery3.2 Transportation, packaging and storage3.2.1 Safety instructions for transportation3.3 Standard items supplied3.4 Optional equipm<strong>en</strong>t
3. Delivery3 DeliveryThis section contains information about the items delivered, specialaccessories, approvals, warranty and applications of the D−<strong>FL</strong> <strong>220</strong>.3.1 Instructions for deliveryThe items delivered, according to the valid sales contract, are listed on theshipping docum<strong>en</strong>ts <strong>en</strong>closed with the delivery. On receipt, check the deliverywithout delay for complet<strong>en</strong>ess and damage in transport.3.2 Transportation, packaging and storage3.2.1 Safety instructions for transportationIncorrect transportationThe Volumetric flow meter D−<strong>FL</strong> <strong>220</strong> is an electronic measuring device. Itmust be handled with the necessary care.If there are major temperature or humidity fluctuations, cond<strong>en</strong>sation can leadto the formation of moisture inside the Volumetric flow meter. This can cause ashort circuit.After transporting the device, wait before commissioning until the device hasreached the ambi<strong>en</strong>t temperature, including its internal compon<strong>en</strong>ts.WARNING!Risk of injury due to incorrect transportation!Incorrect transportation can lead to serious injuries and material damage.• Wh<strong>en</strong> unloading the packages, following delivery and internal transportation,exercise caution and comply with the symbols and information on thepackaging.• Where necessary, use appropriate lifting gear to unload the packages. Thesafe working load of the lifting gear must be at least the total weight of theitems delivered.• Use only the specified slinging points• Do not stand underneath susp<strong>en</strong>ded loads; keep out of the hazard area.Transport inspectionUpon receipt, immediately check the delivery for complet<strong>en</strong>ess and transportdamage. If any external damage in transport is evid<strong>en</strong>t:1. Submit a claim immediately to the carrier and to theDURAG GROUP(DURAG GROUP company addresses see page 137)2. Grant the delivery only qualified acceptance.3. Endorse the transport docum<strong>en</strong>ts or the carrier's delivery note withparticulars of the damage.4. Submit the claim.Lat<strong>en</strong>t transport damage must be the subject of a claim within 7 days.D−<strong>FL</strong> <strong>220</strong> 31
3. DeliverySubmit a claim for every defect as soon as it is detected. Claims for damagescan only be made within the contractual time limits for claims.PackagingHandling packaging materialsThe individual packages are packed according to the anticipated transportationconditions.The packaging is designed to protect the individual compon<strong>en</strong>ts fromtransportation damage, corrosion and other types of damage up until they areinstalled. Do not destroy the packaging and only remove it shortly beforeinstallation.Where possible, use the original packaging for future transportation. Thematerials and any moulded packing used is designed to <strong>en</strong>sure safetransportation.If no return agreem<strong>en</strong>t has be<strong>en</strong> made for the packaging, separate thematerials by type and size and either store for further use or s<strong>en</strong>d for recycling.CAUTION!Incorrect disposal can pollute the <strong>en</strong>vironm<strong>en</strong>t!Packaging materials are valuable raw materials and in many cases can bereused or processed and recycled.Dispose of packaging materials responsibly.The locally applicable disposal regulations must be adhered to.(see also Section 5.10.2 / page 73)Storage conditionsStore the Volumetric flow meter and spare parts under the followingconditions:• Do not store outdoors.• Store in a dry, dust-free location.• No not expose to aggressive media.• Avoid storage below the dew point.• Protect the Volumetric flow meter against mechanical damage.• Storage temperature: -20°C to 50°C• Relative humiditymeasuring head: 20 % to 80 % (non-cond<strong>en</strong>sing)purge air unit: 20 % to 60 % (non-cond<strong>en</strong>sing)• If stored for longer than 3 months, regularly check the g<strong>en</strong>eral condition ofall parts and the packaging. If required, top up or replace the anti-corrosionag<strong>en</strong>t. The transport packaging is not normally suitable for long-termstorage.Under some circumstances, the packages may display additional storageinstructions to the requirem<strong>en</strong>ts set out here. These must be complied with.32 D−<strong>FL</strong> <strong>220</strong>
3. Delivery3.3 Standard items suppliedThe actual delivery may differ from the standard items supplied listed here forspecial designs, selection of additional ordering options or due to the latesttechnical modifications from the explanations and illustrations in this <strong>manual</strong>.The Volumetric flow meter delivered is detailed on the delivery note.The Volumetric flow meter to be delivered is listed in the following table,together with its features.Scope of supply of the typical overall system D−<strong>FL</strong> <strong>220</strong>:Quantity requiredper systemEquipm<strong>en</strong>tComplete measuring system D−<strong>FL</strong> <strong>220</strong>consisting of:2 pieces D−<strong>FL</strong> <strong>220</strong> MK measuring head2 pieces D−<strong>FL</strong> <strong>220</strong> SPF purge flange2 pieces D-<strong>FL</strong> 200 E welding pipewith sealing ring1 piece D-BL purge air unit 1~/<strong>11</strong>5/230V 50/60Hzoutput:40/60m³/h@+50/25hPapermissible ambi<strong>en</strong>t temperature:-20…+50°C1 Set Purge air hose, l<strong>en</strong>gth 10 mØ 40mm, temperature range – 25 to + 80°Cwith hose clips, 4 piecesD−<strong>FL</strong> <strong>220</strong> 33
3. DeliveryScope of supply of the typical overall system D−<strong>FL</strong> <strong>220</strong>:Quantity requiredper systemEquipm<strong>en</strong>t2 pieces Purge air reducer 30m³/h(incl. O-ring)1 piece D−TB 101 terminal boxl<strong>en</strong>gth of the connected cable approx. 2 m1 piece D−TB 101 C cablel<strong>en</strong>gth approx. 6 m(the actual device may vary from that illustrated)operating instructions (order separately for all systems):Language German EnglishState thelanguage *Item number 120 271 120 272* Check availability!Standard for delivery outside the EC is English, unless specified otherwise!3.4 Optional equipm<strong>en</strong>tItem number L<strong>en</strong>gth Equipm<strong>en</strong>t120 028 410 mm D−<strong>FL</strong> <strong>220</strong> MK measuring headinsertion depth (LMK*) 100 mml<strong>en</strong>gth (L*)*) see Fig. 10.1 page 12<strong>11</strong>19 573 610 mm D−<strong>FL</strong> <strong>220</strong> MK measuring headinsertion depth (LMK*) 300 mm120 029 810 mm D−<strong>FL</strong> <strong>220</strong> MK measuring headinsertion depth (LMK*) 500 mm120 273 1010 mm D−<strong>FL</strong> <strong>220</strong> MK measuring headinsertion depth (LMK*) 700 mm120 274 1210 mm D−<strong>FL</strong> <strong>220</strong> MK measuring headinsertion depth (LMK*) 900 mm34 D−<strong>FL</strong> <strong>220</strong>
3. DeliveryItem number L<strong>en</strong>gth Equipm<strong>en</strong>t120 275 1410 mm D−<strong>FL</strong> <strong>220</strong> MK measuring headinsertion depth (LMK*) <strong>11</strong>00 mmD-<strong>FL</strong> 200 E welding pipe*with sealing ring, nuts, washers* order 2 pieces per system;(!) measuring heads must matchthe tube l<strong>en</strong>gth108 296 335 mm Welding pipe, description seeabove, material 1.457<strong>11</strong>16 728 535 mm Welding pipe, description seeabove, material 1.457<strong>11</strong>16 729 735 mm Welding pipe, description seeabove, material 1.457<strong>11</strong>16 730 935 mm Welding pipe, description seeabove, material 1.457<strong>11</strong>16 731 1 135 mm Welding pipe, description seeabove, material 1.457<strong>11</strong>16 425 1 335 mm Welding pipe, description seeabove, material 1.457<strong>11</strong>16 732 1 535 mm Welding pipe, description seeabove, material 1.457<strong>11</strong>16 905 1 735 mm Welding pipe, description seeabove, material 1.457<strong>11</strong>16 932 1 935 mm Welding pipe, description seeabove, material 1.457<strong>11</strong>16 884 2 135 mm Welding pipe, description seeabove, material 1.457<strong>11</strong><strong>15</strong> 170 335 mm Welding pipe, description seeabove,material FRP(Fibre-reinforced plastic)<strong>11</strong>8 042 ~ 2 m D−TB 101 terminal boxl<strong>en</strong>gth of the connected cable, seeleft<strong>11</strong>8 044 ~ 5 m D−TB 101 terminal boxl<strong>en</strong>gth of the connected cable, seeleft<strong>11</strong>8 045 ~ 10 m D−TB 101 terminal boxl<strong>en</strong>gth of the connected cable, seeleftD−<strong>FL</strong> <strong>220</strong> 35
3. DeliveryItem number L<strong>en</strong>gth Equipm<strong>en</strong>t<strong>11</strong>8 047 ~ 6 m D−TB 101 cable;l<strong>en</strong>gth of the connected cable, seeleft<strong>11</strong>8 048 ~ 12 m D−TB 101 cable;l<strong>en</strong>gth of the connected cable, seeleft<strong>11</strong>8 049 ~ 25 m D−TB 101 cable;l<strong>en</strong>gth of the connected cable, seeleft108 368 D-BL purge air unit 1~/<strong>11</strong>5/230V50/60Hzoutput:40/60m³/h@+50/25hPapermissible ambi<strong>en</strong>t temperature:-20…+50°C121 732 Purge air reducer 30m³/h(incl. O-ring)set120 276 Weather protection hood formeasuring heads*; material 1.4571* order 2 pieces per system107176 Weather protection hood for purgeair unit 1~/240V;<strong>en</strong>closed on three sides,material 1.457<strong>11</strong>19 341 D-ESI 100 SETparameterisation softwareconsisting of:- lic<strong>en</strong>ce for one workstation,- software on USB memory stick, -special USB cable(the actual device may vary from that illustrated)36 D−<strong>FL</strong> <strong>220</strong>
D−<strong>FL</strong> <strong>220</strong>Volumetric flow meter4 Product description4.1 Fundam<strong>en</strong>tal features4.2 Device description4.3 Applications, designated use4.4 Conformity/approvals4.5 Designation of device compon<strong>en</strong>ts4.6 Id<strong>en</strong>tification of the product4.6.1 Information about the rating plate4.7 Functional description
4. Product description4 Product descriptionThis section describes the basis characteristics of the Volumetric flow meter,defines the designations of the device compon<strong>en</strong>ts, describes the device andwhere necessary explains differ<strong>en</strong>t <strong>version</strong>s.4.1 Fundam<strong>en</strong>tal features• continuous gas velocity measurem<strong>en</strong>t, without necessitating anymeasurem<strong>en</strong>t s<strong>en</strong>sors within the flowing medium• (→) in situ measurem<strong>en</strong>t process• measurem<strong>en</strong>t ev<strong>en</strong> in moist and dust-burd<strong>en</strong>ed exhaust gases• can be calibrated for measurem<strong>en</strong>t of the volumetric flow• Can also be installed in thick-walled stone/insulated ducts• automatic zero point and refer<strong>en</strong>ce point checking• s<strong>en</strong>sors are purged and are not in contact with the gas to be measured• easy commissioning, adjustm<strong>en</strong>t and maint<strong>en</strong>ance• system can be operated with or without an external control unit• very low maint<strong>en</strong>ance requirem<strong>en</strong>t• 0…20 mA curr<strong>en</strong>t output• 2 relay outputs• RS-485 bus interface for DURAG Modbus ((→) Modbus)• USB interface for on-site parameterisation of the device4.2 Device descriptionThe measurem<strong>en</strong>t is performed largely without influ<strong>en</strong>ce on the flowingmedium, since no projecting fittings are necessary. The D−<strong>FL</strong> <strong>220</strong> measuringsystem consists of two id<strong>en</strong>tical ultrasonic measuring heads, each with anintegral microprocessor unit in a casing suitable for outdoor use. Themeasuring heads are easy to install, using plug connectors to connect to thesystem. The measuring head of each measuring unit is supply with therequisite voltage and connected to the other measuring head via a terminalbox. The terminal box also contains the terminal strips by which the measuredvalues are communicated. If necessary the Volumetric flow meter can beconnected via an external control unit or directly to a monitoring system.The system is typically ext<strong>en</strong>ded by a purge flange and a welding pipe foreach measuring head.A purge air unit is connected for provision of the purge air.The detailed technical data for all the devices listed can be found frompage <strong>11</strong>6.4.3 Applications, designated useUltrasonic s<strong>en</strong>sor system for continuous velocity and/or volumetric flowmeasurem<strong>en</strong>t• of exhaust gas, air or process gas• in ducts, pipes or flues• on v<strong>en</strong>tilation units g<strong>en</strong>erallyD−<strong>FL</strong> <strong>220</strong> 39
4. Product description• on incineration plants g<strong>en</strong>erally• on waste, special waste and sewage sludge incineration plants,• on cem<strong>en</strong>t manufacturing plants• on power stations with gas, oil, coal or mixed fuel firing• on plants for incineration of biomassNot suitable for:× use in explosive atmospheres× use as a climbing foothold or for standing on!WARNING!Danger wh<strong>en</strong> using for any other than the int<strong>en</strong>ded application!Any use other than or beyond the stipulated application of the Volumetric flowmeter can lead to hazardous situations.There is a risk of personal injury and material damage.Only ever operate the Volumetric flow meter in compliance with theinformation stated on the rating plate and the Technical data parametersm<strong>en</strong>tioned in the starting on page <strong>11</strong>6. All specifications in this operatinginstructions must be strictly complied with.No claims of any kind whatsoever may be asserted on the basis of damagecaused by misuse.The operator bears sole liability for all damage caused by non-designated use.The reliable and safe operation of this Volumetric flow meter dep<strong>en</strong>ds onappropriate transport, correct storage, installation and installation as well ascareful operation and maint<strong>en</strong>ance by qualified personnel.4.4 Conformity/approvalsThe D−<strong>FL</strong> <strong>220</strong> has be<strong>en</strong> developed, manufactured, inspected anddocum<strong>en</strong>ted in compliance with the pertin<strong>en</strong>t safety standards. If theregulations and safety instructions for planning, installation, proper use andmaint<strong>en</strong>ance are complied with, the device should normally pose no hazardsin terms of material damage or pot<strong>en</strong>tial health risks.The declaration of conformity can be found in the App<strong>en</strong>dix from page 129.40 D−<strong>FL</strong> <strong>220</strong>
4. Product description4.5 Designation of device compon<strong>en</strong>tsA Rear view 8 Pressure comp<strong>en</strong>sation diaphragmB Rear view detail 9 Clamping ringC Overall view 10 Locking screw for the clamping ring (hexagon socket-head)1 Purge flange (SPF) <strong>11</strong> O-ring seal2 Clamping lock on the purge flange 12 Flat gasket3 Polyamide casing (IP 65)containing the device electronics13 Welding pipe (E) with 4 threaded studs M124 Device connector (plug) 14 Distance piece5 Purge air connection <strong>15</strong> Ultrasonic transducer (→) Transducer6 USB port cover 16 Hexagon socket-head screw7 Viewing window for 4 LEDs 17 Purge air reducerFig. 4.1:Overall view of the device compon<strong>en</strong>ts of the measuring head D−<strong>FL</strong> <strong>220</strong> MKD−<strong>FL</strong> <strong>220</strong> 41
4. Product descriptionFig. 4.2:Overall view of the circuit board designation (numbering)1 Terminal box 2 Connection > measuring head A 3 Connection < measuring head BFig. 4.3:Overall view of the device compon<strong>en</strong>ts of the terminal box D−TB 101 A1 Connection for blower (unit) 2 Blower 3 FilterFig. 4.4: Overall view of the device compon<strong>en</strong>ts of the purge air unit D-BL42 D−<strong>FL</strong> <strong>220</strong>
4. Product description4.6 Id<strong>en</strong>tification of the productThe rating plate is located:on the D−<strong>FL</strong> <strong>220</strong> MK measuring headon the underside of the deviceon the D−TB101 A terminal boxon the side of the devicebeside the D-BL purge air uniton the base plateFig. 4.5:Where do I find the rating plateD−<strong>FL</strong> <strong>220</strong> 43
4. Product description4.6.1 Information about the rating plateThe information on the rating plate has the following meaning:Fig. 4.6: Example of a rating plate of a Volumetric flow meter D−<strong>FL</strong> <strong>220</strong>1 DURAG Manufacturer2 www.durag.de Manufacturer's address, homepage3 D-<strong>FL</strong> <strong>220</strong> Device type designation4 MK2 Module (MK, SPF, E)5 L06106 LMK0300L<strong>en</strong>gth of the complete measuring head(here: 610mm; L see Fig. 10.1 page 121)Device l<strong>en</strong>gth in the welding pipe(here: 300mm; LMK see Fig. 10.1 page 121)7 PN: Order number8 SN: Serial number9 U: 24VDC Permitted operating voltage10 IP65 Protection type (IP code)<strong>11</strong> Tu: permissible ambi<strong>en</strong>t temperature (here: -40 ... 70°C)12 Material: 1.4571 (here: stainless steel)13Before starting any work, read the operatinginstructions!14 Declaration of conformity and type approval supplied<strong>15</strong> Date Date (year ) of manufactureFig. 4.7: Example of a rating plate D−<strong>FL</strong> <strong>220</strong>44 D−<strong>FL</strong> <strong>220</strong>
4. Product description4.7 Functional descriptionTwo id<strong>en</strong>tical measuring heads alternately transmit and receive ultrasonicpulses and measure their transit time. There is a directionally-dep<strong>en</strong>d<strong>en</strong>tdiffer<strong>en</strong>ce in the transit time of the ultrasonic pulses, from which the systemprecisely calculates the gas velocity and the temperature of the gas that ismeasured. By refer<strong>en</strong>ce to the cross-section, the temperature of the gas that ismeasured and the absolute pressure, the system calculates the volumetricflow and the standardised volumetric flow. The measurem<strong>en</strong>t principle isshown schematically in Fig. 4.8. The D−<strong>FL</strong> <strong>220</strong> performs internal selfmonitoringroutines and is extremely low-maint<strong>en</strong>ance.Configurable limit value infringem<strong>en</strong>ts are reported immediately. Interv<strong>en</strong>tionsin the control of the plant may th<strong>en</strong> be necessary. The D−<strong>FL</strong> <strong>220</strong> system issuitable both for exhaust gas measurem<strong>en</strong>ts below the dewpoint and foraggressive media (combustion systems or waste incineration plants). In suchcases the s<strong>en</strong>sors are fully shielded by means of purge air from the gas to bemeasured.The results of measurem<strong>en</strong>t on the principle of the differ<strong>en</strong>ce in transit timeare affected neither by changes in the temperature nor in the pressure of thegas to be measured.The volumetric flow s<strong>en</strong>sing is performed along the <strong>en</strong>tire flow profile.For standardised volumetric flow measurem<strong>en</strong>t, the temperature and airpressure are both stored as constants in the system.In an ext<strong>en</strong>ded system, instead of this the actual air pressure and the actualtemperature of the gas that is measured can be used for the calculation of thestandardised volumetric flow. For this it is necessary to connect the relevants<strong>en</strong>sors (available as options) to the evaluation unit that is used.Fig. 4.8:Measurem<strong>en</strong>t principleDuring measurem<strong>en</strong>t, a correction of the measured velocity can be made inrespect of the duct geometry (if there is a non-linear flow profile or there arechanges in the duct cross-section or the like).D−<strong>FL</strong> <strong>220</strong> 45
4. Product descriptionThis calculation correction for determining the factual air velocity can beachieved by the D−<strong>FL</strong> <strong>220</strong> measuring system in three differ<strong>en</strong>t ways.The simplest type of correction is by application of an (→) offset. A secondoption is by application of a correction factor . And finally, a characteristiccurve can also be input. These various types of correction can also beapplied in combination.46 D−<strong>FL</strong> <strong>220</strong>
D−<strong>FL</strong> <strong>220</strong>Volumetric flow meter5 Installation, commissioning5.1 Safety5.2 Transport to the place of installation5.3 Skill levels of personnel for installation and commissioning5.4 Preparation for assembly, assembly and installation5.5 Configuration of the measuring heads5.6 Meaning of the LEDs5.7 Commissioning5.8 Checking the measurem<strong>en</strong>t point5.9 Active operation5.10 Dismantling and disposal
5. Installation, commissioning5 Installation, commissioningIn this section, we explain the key points for installing the Volumetric flowmeter and how to connect the device.5.1 SafetyDANGER!High voltage. Danger of fatal injuries due to electrical curr<strong>en</strong>t!Touching live parts directly risks fatalinjury. Damage to the insulation or toindividual compon<strong>en</strong>ts can lead to fatalinjury.• Before starting work, switch off the power supply and secure against itbeing inadvert<strong>en</strong>tly switched back on.• Before removing the casing or guard, check that the devices arede<strong>en</strong>ergised.• Permit only electricians to work on electrical equipm<strong>en</strong>t.• Keep moisture away from live compon<strong>en</strong>ts. Moisture can lead to shortcircuits.DANGER!Risk of explosion with loss of life!The use of the Volumetric flow meter D−<strong>FL</strong> <strong>220</strong> in explosion hazard areasand its use for measurem<strong>en</strong>t of explosive gas mixtures is not permissible!CAUTION!CAUTION!Health hazard from gases in the ductContact with hot compon<strong>en</strong>ts can cause burns. Gases that are hot and /orhazardous to health can lead to serious injuries and material damage.If themeasurem<strong>en</strong>t duct is carrying gases that are hazardous to health or are at hightemperatures or high pressures, the Volumetric flow meter (measuring heads)may be installed and removed only wh<strong>en</strong> the plant has be<strong>en</strong> shut down! Theapplicable provisions and safety regulations for the system must be compliedwith and any necessary and appropriate protective measures tak<strong>en</strong>.Material damage due to unauthorised personnelIncorrect handling of the equipm<strong>en</strong>t can lead to serious material damage.Permit only appropriately skilled and trained personnel to work on this device.CAUTION!Damage to electronic compon<strong>en</strong>ts due toelectrostatic discharge (ESD)Electronic compon<strong>en</strong>ts are becoming increasingly small and complex. Theirsusceptibility to damage from electrostatic discharge is increased accordingly.To protect these compon<strong>en</strong>ts, measures to prev<strong>en</strong>t electrostatic dischargemust be tak<strong>en</strong> before starting any work on the op<strong>en</strong>ed device (ESDprotection).As a precaution against electrostatic discharge from the human body, serviceemployees may be equipped with a personal earthing system, for example.D−<strong>FL</strong> <strong>220</strong> 49
5. Installation, commissioningComply also with the instructions in Section 2.7 Device-specific hazards andsafety measures.You will find the technical docum<strong>en</strong>ts necessary for commissioning the systemon the following pages. Technical data can be found in the app<strong>en</strong>dix startingon page <strong>11</strong>4.5.2 Transport to the place of installationAvoid heavy impacts. Wherever possible, use the original packaging fortransportation: The packaging used is designed to <strong>en</strong>sure safe transportation.Comply also with the instructions in Section 3.2.1 Safety instructions fortransportation.5.3 Skill levels of personnel for installation and commissioningInstallation and commissioning of the Volumetric flow meter must be carriedout by skilled personnel (see section 2.4.1 starting on page 21):Skilled personnel and for electrical work ElectriciansService <strong>en</strong>gineers can be involved for support as necessary.5.4 Preparation for assembly, assembly and installationThe standard system illustrated (Fig. 5.1) consists of:• the two measuring heads (s<strong>en</strong>sors A and B) incl. purge flange and welding pipe,• the purge air unit (D-BL) and• the terminal box (D-TB 101) with one <strong>en</strong>d of a cable attached and with aplug connector (for s<strong>en</strong>sor A) at the other <strong>en</strong>d of the cable and• a separate cable (D-TB 101 C) with plug connectors (for s<strong>en</strong>sor B) at both<strong>en</strong>ds of the cable.Power supplyDURAG–Modbus,curr<strong>en</strong>t output andrelay contactsPurge air hose Ø 40mmCable with plugconnectorsD−<strong>FL</strong> <strong>220</strong>betwe<strong>en</strong> the D−TB 101 andmeasuring headsFig. 5.1:System layout (example)50 D−<strong>FL</strong> <strong>220</strong>
5. Installation, commissioning5.4.1 Installation sequ<strong>en</strong>ce for the measurem<strong>en</strong>t system1. Check the application requirem<strong>en</strong>ts – work through the checklist (see below)2. Comply with the instructions for planning the electrical connections –Section 5.4.43. Select the measurem<strong>en</strong>t point(s): Section 5.4.44. Standard installation of the D-<strong>FL</strong> 200 E welding pipes with flange, <strong>en</strong>suregood alignm<strong>en</strong>t – Section 5.4.65. Note on the mounting location of the terminal box and its installation –Section 5.4.86. Lay the connection cables and connect them to the terminal box – Section5.4.97. Select the purge air unit location (– Section 5.4.<strong>11</strong>),install and connect it – Section 5.4.128. Comply with instructions on laying the purge air hoses – Section 5.4.139. Connect the purge air hoses to the s<strong>en</strong>sor units, commission the purge airunit, check it for correct operation and only th<strong>en</strong>:10. Fit the measuring heads to the flanges and install th<strong>en</strong> on the measurem<strong>en</strong>tduct – Section 5.4.14 ff.At this time if necessary fit the attachm<strong>en</strong>t plate for the weather protectionhood (measuring heads) on the purge flange.<strong>11</strong>. Lay the connection cables and connect the measuring heads to the terminalbox – Section 5.4.1612. Parameterising the s<strong>en</strong>sors - Section 5.5, 5.5.<strong>11</strong>3. Perform an operational check - Section 5.85.4.2 Preconditions for useCertain preconditions for the use of the Volumetric flow meter D−<strong>FL</strong> <strong>220</strong>should be checked. Based on the following checklist the suitability of thedevice can quickly and easily be determined.Checklist: Preconditions for the operation of the D−<strong>FL</strong> <strong>220</strong>Is the measurem<strong>en</strong>t locationwithin explosion hazard areas,or are measurem<strong>en</strong>ts to beundertak<strong>en</strong> in explosive gasmixtures?How large is themeasurem<strong>en</strong>t distance to themeasurem<strong>en</strong>t point?What temperatures are to beexpected?What air speeds can beexpected?Which further duct parametersat the measurem<strong>en</strong>t pointlocation must be considered?The D−<strong>FL</strong> <strong>220</strong> system is not suitable forthis application.The D−<strong>FL</strong> <strong>220</strong> is suitable for distances of□1 m to <strong>15</strong> mThe D−<strong>FL</strong> <strong>220</strong> measuring head can beused at temperatures of -40 ... 70°C.The system is suitable for a air velocityrange of up to 40 m/s.e.g. -20 … +20 m/s or 0 …40 m/sRefer to Measurem<strong>en</strong>t locationquestionnaire on page <strong>11</strong>4.□□□□D−<strong>FL</strong> <strong>220</strong> 51
5. Installation, commissioningIs suitable purge air available? The fresh air sucked in by the fan for thepurging air must be free of dust and oiland have a temperature of-20 to +40 °C.Is the measurem<strong>en</strong>t pointlocated outdoors?Is the planned installationlocation safe for servicepersonnel?Is there suffici<strong>en</strong>t spaceavailable to performmaint<strong>en</strong>ance work on thecompon<strong>en</strong>ts?In this case, a weather protection hoodshould be fitted to protect thecompon<strong>en</strong>ts that are located outdoors(see page 33 ff).The working platform should beapproximately 1.5 m below themeasurem<strong>en</strong>t op<strong>en</strong>ing. All parts of themeasuring system must be accessiblewithout danger. The valid countryspecificregulations on accid<strong>en</strong>tprev<strong>en</strong>tion must be complied with.At each measuring head there should besuffici<strong>en</strong>t space to withdraw the unit fromthe duct after the purge flange has be<strong>en</strong>released (dep<strong>en</strong>ding on the respectivemeasuring head l<strong>en</strong>gth, see page 121).□□□□5.4.3 TransportThe D−<strong>FL</strong> <strong>220</strong> is a measuring device system. As with all measuring devices itmust be handled with the necessary care. No further measures need be tak<strong>en</strong>for transport to the installation location. Other than the built-in electronics, itdoes not contain any particularly s<strong>en</strong>sitive compon<strong>en</strong>ts. However, avoid heavyimpacts.5.4.4 Instructions for planning the electrical connections to the systemThe electrical connection of the D−<strong>FL</strong> <strong>220</strong> measuring system is performed inthe terminal area of the terminal box, at a terminal strip in accordance with theconnection diagram Fig. 5.<strong>11</strong> (see page 60). The connection diagram canalso be found inside the respective terminal box.The cables for the power and data conductors should be laid separately.The mains power supply cable to the terminal box should be 3 x 1.5 mm².Select the conductor and sheath material to suit the conditions at therespective place of use. To protect the supply conductor a 16A automaticcircuit breaker should be installed as near to the measuring system aspossible. The individual conductors of the mains supply cable should besecured in such a way that they cannot touch neighbouring terminals whilstbeing disconnected (e.g. using cable ties).The cabling betwe<strong>en</strong> the terminal box and the customer interface ((→) PLC) inthe control room should be performed with scre<strong>en</strong>ed data cables; e.g. LiHCH(TP) 8 x 2 x 0.5 mm², with twisted pairs of fine-wire flexible cores, operationalcapacitance approx. 80 nF/km. Connect one <strong>en</strong>d of the scre<strong>en</strong> in the terminal box.A connection for the purge air unit is also required.The purge air unit is available in a <strong>11</strong>5/230 V <strong>version</strong> or 400 V <strong>version</strong>,dep<strong>en</strong>ding on the output required. The <strong>11</strong>5/230 V variant is the standard.Select the cables, fuses and motor protection switch to suit the selected52 D−<strong>FL</strong> <strong>220</strong>
5. Installation, commissioningvariant. Select conductor and sheath material suitable for conditions at therespective application location.Note that it may be necessary to <strong>en</strong>sure continuation of the purge air supplyev<strong>en</strong> wh<strong>en</strong> the measuring system and/or plant is switched off.5.4.5 Selection of the measurem<strong>en</strong>t pointThe selection of the installation location for the measurem<strong>en</strong>t s<strong>en</strong>sors isgoverned by the available space. Check the planned measurem<strong>en</strong>t point forthe space available to install the purge air unit and the terminal box; ifinstallation is outdoors, there must also be space for the weather protectionhoods for the measuring system and the purge air unit.Fig. 5.2:Selection of the measurem<strong>en</strong>t pointAt the measurem<strong>en</strong>t point for the D−<strong>FL</strong> <strong>220</strong> in the duct, the flow profile shouldbe as nearly symmetrical as possible. The measurem<strong>en</strong>t point should ifpossible not be just before or just after b<strong>en</strong>ds in the duct or changes in itscross-section. The upstream section (duct section leading up to themeasurem<strong>en</strong>t point) and the downstream section (duct section leading awayfrom the measurem<strong>en</strong>t point)) should be at least 2 × D (D = internal diameterof the duct). If no such location is available, the upstream section (A) shouldbe longer than the downstream section. On flues with round internal crosssections,"D" means the internal diameter. In the case of square or rectangularcross-sections, the hydraulic diameter is used.D = 4FEquation 10UDFUhydraulic diameterAreaScopeD−<strong>FL</strong> <strong>220</strong> 53
5. Installation, commissioningThe measuring path is arranged at an angle of 45° to the direction of flow ofthe gas to be measured. If measurem<strong>en</strong>t at 45° cannot be arranged, angleswithin the range 30 to 60° are acceptable.For horizontal ducts it is preferable to install the measuring heads in ahorizontal measuring plane. If they are installed in a vertical plane the lowers<strong>en</strong>sor can easily become dirty and there may a t<strong>en</strong>d<strong>en</strong>cy for cond<strong>en</strong>sation toform on the measuring head.The installation location should be as free from vibrations and oscillations aspossible. If this is not possible, it is recomm<strong>en</strong>ded that the installation it keepaway from draughts that might induce vibration, so that the measuring systemis not subject to stresses.The measurem<strong>en</strong>t location must not only be accessible without hazard forcommissioning and calibration work, but also for subsequ<strong>en</strong>t maint<strong>en</strong>ance andservice activities.In any case, <strong>en</strong>sure that the maximum measuring path l<strong>en</strong>gth for the acousticsignals (as specified in the project configuration) is not exceeded.5.4.6 Standard installation of the welding pipes with flange (D-<strong>FL</strong> 200 E)1. Mark out the installation locations for the welding pipes with flanges,2. Create an op<strong>en</strong>ing, using a technique appropriate to the material andsituation of the measurem<strong>en</strong>t duct.Possible material damage wh<strong>en</strong> cutting the op<strong>en</strong>ing in the duct.Parts that fall may damage the duct wall or its coating.Do not allow cut out parts to fall into the duct.The tube <strong>en</strong>ds should project approx. 30 mm (dim<strong>en</strong>sion S) into the duct at theshort <strong>en</strong>d (see diagram). This avoids any moisture that runs down carrying dirtinto the inside of the welding pipes. In special cases, welding pipes mayhowever project further into the duct (if necessary there may be a comm<strong>en</strong>t inthe project configuration data sheet for the job).The welding pipes are inserted into the duct so that the gas flow has a vectorcompon<strong>en</strong>t in the direction of the acoustic pulses g<strong>en</strong>erated by thetransducers ((→) transducer) that will subsequ<strong>en</strong>tly be fitted (see diagram). Inpractice the ultrasonic s<strong>en</strong>sors are fitted at an angle of about 45° (acceptableangle range 30°...60°) to the axis of the flue. Flues with very large internaldiameters may require a more obtuse installation angle, but in any case it mustnot exceed 60° to the direction of flow.3. Before finally securing the welding pipes with the flanges, align them toeach other. The deviation in the flange axes must not exceed ±1°.4. The red dot on the flange must always face upwards.The flange D–<strong>FL</strong> 200 E –D108 –L0335 –FRP can be supplied for glass fibrereinforcedplastic ducts.This type of tube is laminated into the glass fibre-reinforced plastic duct.54 D−<strong>FL</strong> <strong>220</strong>
5. Installation, commissioningView from aboverP = red dotStandard l<strong>en</strong>gths available for L<strong>FL</strong> [mm] (see also from page 34)335 535 735 <strong>15</strong>35 935 <strong>11</strong>351335 1735 1935 2135Fig. 5.3:Standard l<strong>en</strong>gths of welding pipes5.4.7 Installation variantsExample for a brick chimneyWith brick chimneys also an initial op<strong>en</strong>ing is made in the chimney, after whichan anchor plate with a suitable hole is fitted, on to which the welding pipe withthe flange is welded. Alternatively a flanged tube can be obtained fromDURAG, complete with welded-on anchor plate (specify the size of the Platte,angle and angular direction in relation to the anchor plate). Comply also withthe instructions and specifications as for the standard installation.Fig. 5.4:Brick chimney installation welding pipeExample for thin-walled measurem<strong>en</strong>t ductsReinforcing gusset plates should be used for thin-walled ducts (see Fig. 5.4).For flues with flue gas temperatures over 250°C, it is advisable to fit heatshields for thermal insulation in front of the measuring heads. Comply also withthe instructions and specifications as for the standard installation.D−<strong>FL</strong> <strong>220</strong> 55
5. Installation, commissioningFig. 5.5:Gusset plate installation of welding pipeExample for double-walled fluesFor double-walled or multiple-walled flues the first op<strong>en</strong>ing is made in the outerwall. If the installation is on the inner wall the op<strong>en</strong>ing in the outer wall shouldbe somewhat larger. An appropriate op<strong>en</strong>ing is th<strong>en</strong> made in the inner wall.Procedure dep<strong>en</strong>ding on materials described as under the previous examples.The anchor plate, welding or the gusset plate for the welding pipes withflanges should ideally be installed on the inner wall, so as to retain the gaseswithin the duct. Seal the installation op<strong>en</strong>ing in the outer wall, leavingclearance to allow movem<strong>en</strong>t of the welding pipe due to thermal expansion.Any additional mounting of the welding pipe on the outer wall must also allowthis movem<strong>en</strong>t.Comply with the maximum l<strong>en</strong>gth of the welding pipes and the tube crosssectionsassociated with it! Comply with the safety instructions andspecifications as described in the standard installation!Fig. 5.6:Double-walled installation of welding pipe56 D−<strong>FL</strong> <strong>220</strong>
5. Installation, commissioning5.4.8 Installation of the terminal boxThe terminal box D−TB 101 is installed close to the measurem<strong>en</strong>t point(<strong>en</strong>sure the ready-made connection cable reaches it; see delivery note). Thedim<strong>en</strong>sional drawing for the terminal box D−TB 101, showing the positions ofthe attachm<strong>en</strong>t holes, can be found on page 125 in Section 10.6.Always install terminal boxes with the cable glands facing downwards! Unusedop<strong>en</strong>ings must be sealed to prev<strong>en</strong>t the ingress of moisture and protectagainst corrosion inside the box.Fig. 5.7:Alignm<strong>en</strong>t of the D−TB 101 casing coverCarefully note the alignm<strong>en</strong>t of the casing cover (Fig. 5.7). The casing gasketis not symmetrical betwe<strong>en</strong> the directions. If the alignm<strong>en</strong>t is wrong the gasketwill be damaged and the terminal box will not longer satisfy protection typeIP 66 (NEMA 4.4x).If necessary, both the mounting plates can be aligned vertically. The plates areth<strong>en</strong> no longer flush with the casing. The space required changes from231 x 160 to 180 x 231 mm (W x H, excl. the cable gland). For a dim<strong>en</strong>sionaldrawing see page 125.Fig. 5.8:Attaching the D−TB 101 retaining platesD−<strong>FL</strong> <strong>220</strong> 57
5. Installation, commissioning5.4.9 Electrical connection to the terminal box type D−TB 101DANGER!High voltage. Danger of fatal injuries due to electrical curr<strong>en</strong>t!Touching live parts directly risks fatal injury. Damage to the insulation or toindividual compon<strong>en</strong>ts can lead to fatal injury.• If there is any damage to the insulation, switch off the power and have itrepaired.• Before servicing, cleaning or repairing the device, disconnect the powersupply and secure it against reconnection (see page 24).• Before removing the housing or contact guard, disconnect the devices fromthe mains supply and check that they are no longer live.• Permit only electricians to work on electrical equipm<strong>en</strong>t.• Keep moisture away from live compon<strong>en</strong>ts. Moisture can lead to shortcircuits.ATTENTION!In all installations, <strong>en</strong>sure compliance with the applicable VDE regulationsand any supplem<strong>en</strong>tary regulations issued by the local power supplycompanies (EVU).Undo the four (captive) screws and op<strong>en</strong> the terminal box. Make connectionsto the box as shown in Fig. 5.<strong>11</strong>.1 Tapped holes2 Recess in the spring terminalFig. 5.9:D−TB 101 Connecting the cable scre<strong>en</strong>Spring terminals are provided in the terminal boxes for connecting the datacable scre<strong>en</strong>. These terminals can be released using a hexagon L-wr<strong>en</strong>ch,moved if required to a differ<strong>en</strong>t tapped holeFig. 5.9 on their rail and alsochanged to a differ<strong>en</strong>t direction. Th<strong>en</strong> strip back the insulation from the scre<strong>en</strong>for about 20 mm. Use a suitable tool (e.g. a screwdriver) to depress the springterminal into the recess Fig. 5.9 provided and insert the scre<strong>en</strong> betwe<strong>en</strong> thejaws of the terminal.The terminal box delivers the measurem<strong>en</strong>t data prepared by the measuringhead to the customer interface and provides the power supply to theconnected s<strong>en</strong>sors.58 D−<strong>FL</strong> <strong>220</strong>
5. Installation, commissioningFig. 5.10: D−TB 101 Connecting the cableFor connection of the individual cores, the retaining springs in the terminal stripare pushed back using a screwdriver. This is done by inserting the screwdriverinto the rectangular op<strong>en</strong>ing (see Fig. 5.10) and b<strong>en</strong>ding the spring back. Thecores should be stripped back and provided with <strong>en</strong>d sleeves, th<strong>en</strong> insertedinto the round op<strong>en</strong>ing (below) as far as the stop. Remove the screwdriver,and g<strong>en</strong>tly tug the core to check it is firmly seated.For customer's connections, the terminals X1, X3 and where necessary X2(Fig. 5.10 and Fig. 5.<strong>11</strong>) are provided.D−<strong>FL</strong> <strong>220</strong> 59
5. Installation, commissioningFig. 5.<strong>11</strong>: Connection diagram for terminal box D−TB 101X1 is used to connect the terminal box D−TB 101 to the mains.Terminal X3 is used to transmit the customer's analogue and status signals.X2 is for the customer's bus connection to the system.The cables to terminals X4 and X10 are pre-wired by the factory for themeasuring heads. The actual connection of the measuring heads by the useris performed using the plug connectors, which are also pre-wired.Wh<strong>en</strong> connecting the conductors to the terminals, be sure to use therespective twisted pairs of conductors within the cable for paired circuits (e.g.RS 485 A and B, 4..20mA+ and –, relay 1 NC and COM etc.)!5.4.10 Purge air unit (blower) D−BLClose the terminal box and tight<strong>en</strong> the four (captive) screws. In order tomaintain protection type IP 66 (NEMA 4.4x) any cable glands that are not usedmust be securely sealed using suitable plugs.The use of the purge air unit on the D−<strong>FL</strong> <strong>220</strong> is to provide thermal protection ofthe devices against hot exhaust gases and to keep the ultrasonic transducersclean.The standard arrangem<strong>en</strong>t is to mount the purge air unit on a compactstainless steel base plate (→ material no. 1.4301) (see diagram on the left).The dim<strong>en</strong>sional drawings and the electrical connection diagram for this purgeair unit can be found in Section 10.4 from page 123.The scope of supply of the purge air unit includes 10m purge air hose,60 D−<strong>FL</strong> <strong>220</strong>
5. Installation, commissioningØ 40mm, temperature range – 25 to + 80°C. The two (purge air) reducersrequired, with O-rings, are in the scope of supply of the purge flange.During the electrical installation, note the following:• Permit only skilled personnel to perform the work.• Perform all work only in the de<strong>en</strong>ergised condition.• Compare the mains voltage and frequ<strong>en</strong>cy with the data on the name plate.• Perform the connection and arrangem<strong>en</strong>t of the jumpers according to theconnection schematics in the terminal box lid.• Connect the protective earth conductor to the earthing terminal.• Set the motor protection switch (not supplied) to the rated curr<strong>en</strong>t of the motor.• Check the direction of rotation of the blower motor (arrow on the blower casing).• The power supply to the motor must be separate from that to other devices,since the purge air must remain in operation at all times.Refer to the instructions provided with the devices before installing them andalso before making the electrical connections to them.We will gladly provide advice on the selection of the optional available purgeair units to suit the physical area of application of the D−<strong>FL</strong> <strong>220</strong>, the requiredair output and the available power supply.5.4.<strong>11</strong> Selection of the purge air unit locationThe following points must be complied with in the selection of the installationlocation:• The intake air must be as free of dust and as dry as possible.• The temperature of the intake air must be within a maximum of 40 °C (313 K).• During installation, <strong>en</strong>sure that the filter are mounted vertically, and that thedust valve faces downwards.• Suffici<strong>en</strong>t clear space must be available for filter replacem<strong>en</strong>t (see page123, Section 10.4).A weather protection hood is available for outdoor installation of the purge air unit.Like the base plate for the purge air unit, it is made of stainless steel (materialno. 1.4301). The dim<strong>en</strong>sional drawings for this optional weather protectionhood can be found in Section 10.7 from page 126.5.4.12 Electrical installation of the purge air unit D−BLDuring the electrical installation, make sure the following points are complied with:• Compare the mains voltage and frequ<strong>en</strong>cy with the data on the name plate.• Connect and arrange the jumpers as shown in the connection schematicsin the terminal box lid (see also Fig. 10.6 from page 124).• Connect the protective earth conductor to the earthing terminal.• Set the motor protection switch (not supplied) to the rated curr<strong>en</strong>t of the motor.• Be sure to check the direction of rotation of the blower motor, if necessaryswitch over the electrical connections.Since g<strong>en</strong>erally purging air must be supplied ev<strong>en</strong> wh<strong>en</strong> the plant is shutdown, it is advisable that the blower motor is provided with a power supply withits own indep<strong>en</strong>d<strong>en</strong>t electrical fusegear, separate from the measuring system.D−<strong>FL</strong> <strong>220</strong> 61
5. Installation, commissioningFor compreh<strong>en</strong>sive technical data about the mains voltage and powerconsumption see the App<strong>en</strong>dix in Section 9.7 from page <strong>11</strong>8.Damage to the measuring heads due to overheating!The purge air unit must remain switched on at all times as long as themeasuring heads for the D−<strong>FL</strong> <strong>220</strong> are installed at the measurem<strong>en</strong>t point andexposed to hot gas to be measured. Ev<strong>en</strong> wh<strong>en</strong> the plant is switched off thereremains the danger of overheating.5.4.13 Laying the purge air hosesAfter installation and connection to the power supply, switch on the purge airunit and check that it is working properly.Wh<strong>en</strong> laying the purge air hoses, note that:The purge air hoses are designed for a maximum ambi<strong>en</strong>t temperature ofapprox. – 25 to + 80°C. Temperatures outside this range compromise thereliability of purge air provision.Do not b<strong>en</strong>d the hoses in too tight a radius in comparison to the hosediameter (risk of kinking, leading to: loss of purge air and irreparable damageto the measuring heads due to overheating).The hoses are not resistant to t<strong>en</strong>sion. Therefore:• Do not hang the hoses in free loops under their own weight. Fit supports atreasonable intervals.• Do not use force, e.g. to drag them through narrow op<strong>en</strong>ings in walls.• Do not use hoses as attachm<strong>en</strong>ts or supports for other objects.Do not introduce the measuring heads into the measurem<strong>en</strong>t duct yet! Onlyafter the purge air unit and purge air hoses have be<strong>en</strong> installed, and activepurge air is flowing in the measurem<strong>en</strong>t duct. Otherwise there is a risk ofoverheating the measuring heads, and consequ<strong>en</strong>t damage beyond repair.Fig. 5.12: Installation of the purge air reducers D−<strong>FL</strong> <strong>220</strong>1. Before installing the purge air hoses, push the purge air reducers (for anoverview see Fig. 5.14 on page 65) into the respective connectors on thepurge flange of the measuring heads (Fig. 5.12-1). Make sure the O-rings arecorrectly seated.2. Slide the hose over the purge air reducer and connector (Fig. 5.12-2).3. Tight<strong>en</strong> the hose clips (Fig. 5.12-3).62 D−<strong>FL</strong> <strong>220</strong>
5. Installation, commissioningThe purge air reducer reduces the purge air quantity at the measuring head toapprox. 30m³/h. This removes the differ<strong>en</strong>ce in available pressure that arisesfrom the differ<strong>en</strong>ce in hose l<strong>en</strong>gths from the purge air unit to the twomeasuring heads. In addition it avoids excessive purge air affecting themeasurem<strong>en</strong>t signal value.4. Lay the purge air hoses to the purge air unit (see also Fig. 5.1 on page 50)and secure each purge air outlet from the Y-piece using hose clips.Lay the purge air hoses securely so that there is no risk anyone may trip overthem and fall.5.4.14 Installation of the D−<strong>FL</strong> <strong>220</strong> measuring headsBefore installation, first check the s<strong>en</strong>sor parameters (Fig. 5.13) to which thedevices were set in the factory. Correct them if necessary (see Section 6Parameterisation of the measuring heads from page 77).Original Textmarke S<strong>en</strong>sorparameterbild nicht lösch<strong>en</strong>.LAActive measuring pathl<strong>en</strong>gthLO Offset (LO) LTTA PA AngleFig. 5.13: S<strong>en</strong>sor parametersA CS Cross-section areaSMeasuring path l<strong>en</strong>gth(calculated from the D−<strong>FL</strong> <strong>220</strong>)Minimum projection of the welding pipes (forprotection against falling moisture within theduct wall ) 2-3 cmIf wh<strong>en</strong> the order is placed a completed measurem<strong>en</strong>t location questionnaire issubmitted (see page <strong>11</strong>4), the data provided there are loaded and the devicesare supplied pre-configured.The two measuring heads are in principle id<strong>en</strong>tical. The id<strong>en</strong>tification A and Bis required later to <strong>en</strong>sure correct connection. S<strong>en</strong>sor A acts as the master andstores certain parameters such as the installation angle (A PA ), duct width (ID),setting of the output parameters etc., and synchronises the pair of s<strong>en</strong>sorsduring measurem<strong>en</strong>t. The s<strong>en</strong>sors are configured by an internal DIP switch ass<strong>en</strong>sor A or s<strong>en</strong>sor B (see Section 5.5.1 from page 67).For installation of the measuring heads, it is normal to provide welding pipeswith a flange for installation in the steel duct walls. Thick insulation of the ductD−<strong>FL</strong> <strong>220</strong> 63
5. Installation, commissioningand brickwork chimneys or high exhaust gas temperatures require suitablymodified flanges, which are either manufactured on site or which can bedesigned and made by DURAG.5.4.<strong>15</strong> Installation sequ<strong>en</strong>ce for the measuring headsCAUTION!Possible damage to the measuring heads!Overheating the measuring heads due to hot gases in the measurem<strong>en</strong>t ductcan lead to malfunctions, damage or total failure.Before installing the measuring heads in the measurem<strong>en</strong>t duct, <strong>en</strong>sure thatthe purge air supply is working. The purge air is necessary for protection ofthe compon<strong>en</strong>t units. It shields the compon<strong>en</strong>ts from hot and/or aggressivegases. Loss of the purge air supply can ev<strong>en</strong> for a (very) short time can leadto damage or total write-off of the ultrasonic s<strong>en</strong>sors. In the ev<strong>en</strong>t of overpressure,the gas can also p<strong>en</strong>etrate the fan and filter through the purge airhose and damage those system parts. The purge air supply must thereforebe reliably <strong>en</strong>sured at all times wh<strong>en</strong>ever there are hot gases in themeasurem<strong>en</strong>t duct.WARNING!Burns hazardImproper use can lead to severe injury and damage. In particular, hot gasesmay issue at high pressure from unsealed duct access points.Wh<strong>en</strong> working on parts that may be hot, or at unsealed duct access points(welding pipes), never work without appropriate temperature-resistantequipm<strong>en</strong>t (such as a face mask, safety gloves, heat-resistant clothing etc.).Comply with the operating company's instructions!64 D−<strong>FL</strong> <strong>220</strong>
5. Installation, commissioning1 Purge flange (SPF) 9 Clamping ring2 Clamping lock on the purge flange 10 Locking screw for the clamping ring (hexagon socket-head)3 Purge air tube <strong>11</strong> Flat gasket4 Device connector (plug) 12 Welding pipe (E)5 Purge air connection 13 Threaded studs M12 (4 pieces)6 Hose clip 14 Washer7 Ultrasonic transducer((→) Transducer)<strong>15</strong> Nut M128 Measuring head complete 16 Flange on the measuring head with O-ring17 Purge air reducer 30m³/h with O-ringFig. 5.14: Measurem<strong>en</strong>t system D−<strong>FL</strong> <strong>220</strong> parts drawingDuring assembly of the measuring heads on to the flanges of the weldingpipes, work to the following sequ<strong>en</strong>ce:1. Undo the nuts (<strong>15</strong>) on the threaded studs (13) of the welding pipe flange (12).2. Place the gasket (<strong>11</strong>) over the threaded studs (13) of the welding pipe flange.3. Now slide the purge flange (1), with reducer and purge air hose, on to thethreaded studs (13), as described in Section 5.4.13. (If necessary, also slidethe mounting plate for the weather protection hood (measuring head) on tothe studs). Th<strong>en</strong> place the washers (14) on the studs and tight<strong>en</strong> theassembly ev<strong>en</strong>ly with the nuts (<strong>15</strong>).D−<strong>FL</strong> <strong>220</strong> 65
5. Installation, commissioning4. Switch on the purge air unit (for installation of the purge air unit D-BL seepage 60 ff).5. Slide the complete measuring head (8) with the ultrasonic transducer (7)foremost through the purge flange and into the measurem<strong>en</strong>t duct.6. Securely clip the measuring head to the flange (16), by means of theclamping locks (2). The O-ring in the measuring head flange must liecorrectly in the guide. The clamping locks must be fully home with the hookpart <strong>en</strong>gaged over the bead on the flange of the measuring head. The lockinggrips lie completely on the casing. The lock is secure wh<strong>en</strong> the latches have<strong>en</strong>gaged in the spring (see arrow in illustration to the left). In some cases thehook part must be l<strong>en</strong>gth<strong>en</strong>ed or short<strong>en</strong>ed by turning it.5.4.16 Electrical connection to the measuring heads D−<strong>FL</strong> <strong>220</strong>7. D−<strong>FL</strong> <strong>220</strong> Measuring heads electr. connections (Fig. 5.<strong>15</strong>):For this, insert the device plug attached to the cable (2) from the terminal boxsecurely into measuring head A. Also securely insert the connection cableDTB 101 C (3) with the coupling into measuring head B and with the deviceplug into the terminal box.The terminal box and its plug connectors satisfy protection type IP 66(NEMA 4.4x). In order to maintain this protection type, each connection isprovided with a screw sleeve. These should be screwed up finger-tight withoutusing a tool. This <strong>en</strong>sures that the plug can be withdrawn without problems,ev<strong>en</strong> after a long time.1 Terminal box 2 Connection of s<strong>en</strong>sor A 3 Connection of s<strong>en</strong>sor BFig. 5.<strong>15</strong>: Electrical connection of the measuring headsThe electrical connection betwe<strong>en</strong> the measuring heads and the associatedterminal box is performed by means of these cables. The cable l<strong>en</strong>gth of thecable that is perman<strong>en</strong>tly connected to the terminal box is approx. 2.0 m (asstandard). This cable l<strong>en</strong>gth, as also the l<strong>en</strong>gth of the separate cable (D-TB 101 C) to the second measuring head, can be selected from variousstandard l<strong>en</strong>gths (see Section 3.4 / page 34).ATTENTION!In all installations, <strong>en</strong>sure compliance with the applicable VDE regulationsand any supplem<strong>en</strong>tary regulations issued by the local power supplycompanies (EVU).66 D−<strong>FL</strong> <strong>220</strong>
5. Installation, commissioning5.5 Configuration of the measuring headsBefore commissioning the measuring heads must be configured. The settingslisted here can only be performed on the device itself, and cannot beperformed remotely using the relevant configuration software. As a rulehowever, the devices as supplied have already be<strong>en</strong> configured in accordancewith the data on the measurem<strong>en</strong>t location questionnaire submitted, andtherefore all that is needed is to check that the settings are correct. Thefollowing sections explain how to do this.The DIP switch S1 defines the measuring head as measuring head A ormeasuring head B. The factory (pre-)setting is shown on the sticker on thecasing (see diagram on the left).The DIP switch S1 can also be set to deactivate the terminating resistor for theDURAG Modbus (pre-setting: activated).The procedure is explained in Section 5.5.1; an overview of the availablesettings of the DIP switch can be found in Table 5.2 on page 68.The meaning of the LED indications (visible on the rear of the s<strong>en</strong>sor casing)is explained in Section 5.6.5.5.1 Defining the measuring head (A/B), setting the terminating resistorATTENTION!Damage to electronic compon<strong>en</strong>ts due toelectrostatic discharge (ESD)Electronic compon<strong>en</strong>ts are becoming increasingly small and complex. Theirsusceptibility to damage from electrostatic discharge is increased accordingly.To protect these compon<strong>en</strong>ts, measures to prev<strong>en</strong>t electrostatic dischargemust be tak<strong>en</strong> before starting any work on the op<strong>en</strong>ed device (ESDprotection).As a precaution against electrostatic discharge from the human body, serviceemployees may be equipped with a personal earthing system, for example. !For a pair of measuring heads, one head is factory-configured as s<strong>en</strong>sor A andthe other as S<strong>en</strong>sor B, and labelled accordingly.The DURAG Modbus terminating resistors are factory-set to "on". If additionalpairs of measuring heads are connected to a bus for measurem<strong>en</strong>t purposes(i.e. 4, 6, 8 or max. 10 measuring heads), the customer should <strong>en</strong>sure thatonly the last measuring head A in the series has its terminating resistor set to"on". All of the others must have their DIP switch 3 set to "off". For measuringheads B (slaves) there is no need to change this switch setting, since it is presetto "off".D−<strong>FL</strong> <strong>220</strong> 67
5. Installation, commissioningFig. 5.16: Configuration switch S1, jumper X7To op<strong>en</strong> the blue measuring head casing , undo the four 2.5 mm hexagonsocket-head screws. Carefully pull the casing straight back off the circuitboards. The configuration switch S1 (see Fig. 5.16), is located on the rear ofthe circuit board no. 3 (for the circuit board designation see Fig. 4.2 onpage 42). Set the switches to the setting shown in Table 5.2.Function DIP 3 Function DIP 4 S1 Switch settingTerminating resistorfor the DURAGModbusMeasuring head DIP position 1 2 3 4is ON is A off off on onis ON is B off off on offis OFF is A off off off onis OFF is B off off off offThe value is preset in the factory - The factory preset value is printed in bold.DIP switches 1 and 2 are always in the "off" position.Table 5.2 Setting the DIP configuration switch S1See page 69 for closing the casing.5.5.2 Defining the contact positions of the relaysOn the D−<strong>FL</strong> <strong>220</strong> contact positions of the relays (normally closed/normallyop<strong>en</strong>) can be configured.For ori<strong>en</strong>tation to the jumpers please refer to the dot (see diagram on the left).The contacts are counted from here, beginning with 1. The number printed inthe diagram do not exist on the circuit board, only the dot is pres<strong>en</strong>t there.Contacts 1-3 configure relay 1, contacts 4-6 are for relay 2. The jumperpositions and their functions can be se<strong>en</strong> in Table 5.3.To op<strong>en</strong> the blue measuring head casing , undo the four 2.5 mm hexagonsocket-head screws. Carefully pull the casing straight back off the circuitboards. You can find jumper X7 (see68 D−<strong>FL</strong> <strong>220</strong>
5. Installation, commissioningFig. 5.16) on the rear of the circuit board no. 3 (for the circuit board designationsee Fig. 4.2 on page 42). The jumpers are set according to Table 5.3.RelaysContactpositionDIPpositionsRelaysContactpositionDIPpositions2 no 2 nc1 nc 1 no2 no 2 nc1 no 1 ncfactory pre-set - the factory pre-setting is printed in bold.normally closed = nc, normally op<strong>en</strong> = no.Table 5.3 Setting of jumper X7Closing the measuring head casingCAUTION!Pot<strong>en</strong>tial damage to the measuring heads due to incorrect assembly!If the circuit boards have come loose after the hood was removed, be sure notto transpose the terminal strips on the circuit boards wh<strong>en</strong> plugging them inagain. Otherwise the measuring head may be seriously damaged.Wh<strong>en</strong> closing the casing again:Check the correct position of the seal before screwing the two halves of thecasing back together. Remove any sand and dirt from the seal seating groove.Discard any seals that are defective or perished.This avoids damage and a leaky s<strong>en</strong>sor casing.Wh<strong>en</strong> closing the D−<strong>FL</strong> <strong>220</strong> measuring head casing, first check that theori<strong>en</strong>tation is correct.Ori<strong>en</strong>tationFig. 5.17: Measuring head casing assemblyGuide groovesPosition the casing so that the displays of the LED module can subsequ<strong>en</strong>tlybe se<strong>en</strong> through the viewing window in the rear panel of the casing (see Fig.5.17 on the left). Th<strong>en</strong> carefully insert the two circuit boards into the respectiveD−<strong>FL</strong> <strong>220</strong> 69
5. Installation, commissioningguide grooves (see Fig. 5.17 on the right) and slide the casing down on to thebase. Tight<strong>en</strong> the four 2.5 mm hexagon socket head screws (tight<strong>en</strong><strong>manual</strong>ly / 0.7 Nm). Be sure not to damage the seal betwe<strong>en</strong> the casing andits base.Before commissioning the D−<strong>FL</strong> <strong>220</strong> measuring system, the measuring headsmust be parameterised (see Section 6 from page 77).5.6 Meaning of the LEDsAt the rear of the measuring head casing there is a viewing window allowing 4LEDs to be viewed. The signals of these LEDs have the following meaning:No. LED Behaviour Function1 Perman<strong>en</strong>tly lit during operation Ready for operation2Lights up continuously wh<strong>en</strong> the measuring headis in maint<strong>en</strong>ance modeFlashes at a 1-second interval (duty ratio 50/50)wh<strong>en</strong> the measuring head has a warning /information in the memoryMaint<strong>en</strong>anceWarning3Flashes at a 1-second interval (duty ratio 50/50)wh<strong>en</strong> the measuring head has saved a defect/faultFlashes alternately red/gre<strong>en</strong> (4) wh<strong>en</strong> a defectiveDURAG Modbus telegram has be<strong>en</strong> receivedDefect/faultsee Sections 7.5and 7.6.Data errors1 gre<strong>en</strong>2 yellow 3 red 4 gre<strong>en</strong>(illustrations similar)4Table 5.4Flashes wh<strong>en</strong> a DURAG Modbus telegram hasbe<strong>en</strong> receivedFlashes alternately gre<strong>en</strong>/red (3) wh<strong>en</strong> a defectiveDURAG Modbus telegram has be<strong>en</strong> received (seeabove)Meaning of the LEDs and their flash codesDURAGModbusactiveData errors70 D−<strong>FL</strong> <strong>220</strong>
5. Installation, commissioning5.7 Commissioning5.7.1 Measures before initial commissioningAre the preconditions for operation satisfied?Is the purge air unit installed, is it supplied with power and in operation? Are measuring headsprovided with purge air?Are the measuring heads installed as pairs (A/B and master/slave) and have they be<strong>en</strong>, asdescribed in Section 5.4.6 from page 54, aligned to each other?Has the terminal box be<strong>en</strong> installed and has the cabling work be<strong>en</strong> performed, as described inSection 5.4.9 ff from page58?Are the measuring heads connected to the terminal boxes via the plug connectors?Have the union nuts on the plugs be<strong>en</strong> tight<strong>en</strong>ed, thereby <strong>en</strong>suring the connection and sealing itagainst moisture?Is the D−<strong>FL</strong> <strong>220</strong> Volumetric flow meter supplied with power and in operation?Have the parameter settings be<strong>en</strong> made and saved, as described in Section 5.4.14 ff frompage 63?Valid values specific to the measurem<strong>en</strong>t point must be input for:(A PA ) angle ◦(LA) active measuring path l<strong>en</strong>gth(LO) offset(A CS ) cross-section areapower settingDoes the connection to the customer's interface ((→) PLC - Programmable Logic Controller) inthe control room exist?Has the data transmission via the customer's interface (PLC) be<strong>en</strong> tested and found to be OK?Are the measured values that are determined and displayed plausible?□□□□□□◦◦◦□□WARNING!Risk of injury due to insuffici<strong>en</strong>tly skilled personnel!Improper use can lead to severe injury and damage.Any actions should be performed only by appropriately trained specialistpersonnel. Ensure compliance with thein Section 2.4.1.CAUTION!Possible damage to the measuring heads!Overheating the measuring heads due to hot gases in the measurem<strong>en</strong>t ductcan lead to malfunctions, damage or total failure.Before installing the measuring heads in the measurem<strong>en</strong>t duct, <strong>en</strong>sure thatthe purge air supply is working. The purge air is necessary for protection ofthe compon<strong>en</strong>t units. It shields the compon<strong>en</strong>ts from hot and/or aggressivegases. Loss of the purge air supply can ev<strong>en</strong> for a (very) short time can leadto damage or total write-off of the ultrasonic s<strong>en</strong>sors. In the ev<strong>en</strong>t of overpressure,the gas can also p<strong>en</strong>etrate the fan and filter and damage thosesystem parts. The purge air supply must therefore be reliably <strong>en</strong>sured at alltimes wh<strong>en</strong>ever there are hot gases in the measurem<strong>en</strong>t duct.D−<strong>FL</strong> <strong>220</strong> 71
5. Installation, commissioning5.8 Checking the measurem<strong>en</strong>t pointPlausibility testing:After the D−<strong>FL</strong> <strong>220</strong> measuring system has be<strong>en</strong> fully installed, the system canbe calibrated by an indep<strong>en</strong>d<strong>en</strong>t test institute specialising in this area ofapplication.Irrespective of this, the functionality can be checked by some simpletechniques.In addition to determining the gas velocity, the D−<strong>FL</strong> <strong>220</strong> can also determinethe gas temperature, based on the ultrasonic signal transit times. This functionallows the plausibility of the measurem<strong>en</strong>t to be checked.In the system as delivered, the gas temperature is g<strong>en</strong>erally output on outputchannel 3. If this is not the case, one of the four output channels can beparameterised, as described in Section 6.3.4.2 from page 84.For plausibility checking, the gas temperature at the measurem<strong>en</strong>t point mustbe known or determined indep<strong>en</strong>d<strong>en</strong>tly by another measurem<strong>en</strong>t device.The gas temperature determined by the D−<strong>FL</strong> <strong>220</strong> is compared with the gastemperature at the measurem<strong>en</strong>t point. The two values should not differ bymore than ±5°C from each other.If the differ<strong>en</strong>ce is greater, the following points should be checked at themeasurem<strong>en</strong>t point:Device parameterisation• Active measuring path l<strong>en</strong>gth (LA)• Offset (LO)• Parameterisation of the output channels(including those for the gas temperature output channel)• Correct adjustm<strong>en</strong>t of the installation angle (A PA )The installation angle cannot be checked by means of the temperaturemeasurem<strong>en</strong>t. It must be determined using a measuring tool. The resultmust be adjusted in the device parameterisation.If the installation angle was correctly parameterised and the gas temperaturemeasured by the D−<strong>FL</strong> <strong>220</strong> matches the comparison temperature, themeasurem<strong>en</strong>t point is working correctly.5.9 Active operationOnce the power for the purge air unit and terminal box has be<strong>en</strong> switched on,the D−<strong>FL</strong> <strong>220</strong> measuring system is in operation. No special operator control isrequired while the system is in operation. To stop operation, switch off thepower.72 D−<strong>FL</strong> <strong>220</strong>
5. Installation, commissioning5.10 Dismantling and disposal5.10.1 DismantlingDANGER!Danger of fatal injuries due to electrical curr<strong>en</strong>t!Improper use can lead to serious injuries. Once the housing or accid<strong>en</strong>talcontact guards of the terminal box have be<strong>en</strong> op<strong>en</strong>ed, live parts areaccessible. Wh<strong>en</strong> working on the device, the mains power leads musttherefore be disconnected and secured against unauthorised reconnection.1. Disconnect the Volumetric flow meter from the mains and check that there isno voltage.2. Undo all plug connectors connected to the measuring heads.3. Unscrew the four screws on the casing cover and pull the casing cover off.4. Disconnect the Volumetric flow meter from the electrical power bydisconnecting the wires at the terminal strip.5. Use a suitable tool (e.g. a screwdriver) to depress the spring terminal into therecess provided. Pull the cable and scre<strong>en</strong> from the clamping jaws.6. Uninstall the cables that were used,7. Remove the Volumetric flow meter and the measuring heads from theoperating company's overall system at an organisational level.5.10.2 Disposal of the Volumetric flow meterDisposal of used electrical and electronic devices (to be applied inEuropean Union countries and other European countries with a separatecollection system for these devices)The symbol on the product or its packaging indicates this product cannot betreated as normal household waste, but must be tak<strong>en</strong> to a collection point forthe recycling of electrical and electronic devices. Your contribution to thecorrect disposal of this product protects the <strong>en</strong>vironm<strong>en</strong>t and the health of yourfellow man. Irresponsible disposal places the <strong>en</strong>vironm<strong>en</strong>t and our health atrisk. Material recycling helps to reduce the consumption of raw materials.Curr<strong>en</strong>t information on the recycling of this product can be obtained from yourlocal authority and municipal waste managem<strong>en</strong>t ag<strong>en</strong>cy.The DURAG Volumetric flow meter D−<strong>FL</strong> <strong>220</strong> conforms to the (→) RoHS!D−<strong>FL</strong> <strong>220</strong> 73
D−<strong>FL</strong> <strong>220</strong>Volumetric flow meter6 Parameterisation of the measuring heads6.1 G<strong>en</strong>eral information on the DURAG Modbus protocol6.1.1 Basic Modbus information6.2 Parameter checking and setting checklist6.3 Parameter checking and setting6.3.1 Checking and setting the date and time6.3.2 Setting the DURAG Modbus address6.3.3 Setting the Baud rate6.3.4 Variables setting of the D−<strong>FL</strong> <strong>220</strong> measurem<strong>en</strong>t channels (channel #1)… (channel #4)6.3.5 Principle of measured value correction6.3.6 Assignm<strong>en</strong>t of the D−<strong>FL</strong> <strong>220</strong> device outputs6.3.7 Maint<strong>en</strong>ance settings6.3.8 Parameters for the measurem<strong>en</strong>t location (device installation)6.3.9 Further device settings
6. Parameterisation of the measuring heads6 Parameterisation of the measuring headsAfter the measuring heads have be<strong>en</strong> configured in the device (Section 5.5from page 67), the parameterisation of the measuring heads can beperformed by software. As a rule, the devices as supplied have already be<strong>en</strong>parameterised in accordance with the data on the measurem<strong>en</strong>t locationquestionnaire submitted, and therefore all that is needed is to check thatthese data were correctly loaded.Before commissioning the Volumetric flow meter, the parameters necessaryfor operation must be saved and checked.DURAG–Service <strong>en</strong>gineers will be glad to assist you if required. They havethe necessary equipm<strong>en</strong>t and software. You will find the addresses andtelephone numbers of the service <strong>en</strong>gineers on page 137 (DURAG GROUPcompany addresses).Specific hardware and software is required for inputting and checkingparameters. We recomm<strong>en</strong>d the use of the deliverable option(→) D−ESI 100 SET (see optional equipm<strong>en</strong>t; page 34ff, article no. <strong>11</strong>9 341).Alternatively a PC with Windows operating system (XP or later) is required.The usual interface for parameterisation is the USB port.Using a coin such as a 1 p<strong>en</strong>ny piece, first unscrew the cover cap at the rearof the D−<strong>FL</strong> <strong>220</strong> measuring head (see diagram on the left). TheDESI 100 SET includes a USB cable with a Mini-B 5–pin plug. Insert thisplug into the USB plug connector accessible at the rear of the casing; it isth<strong>en</strong> connected to the measuring head. Insert the other <strong>en</strong>d of the USB cableinto the PC to make the connection.Using the USB port allows only one device, the one actually connected, to beaddressed at a timeFor parameterisation, the software for the D-ESI 100 SET is used D−ESI 100(from the suite supplied on the USB memory stick). More details onD−ESI 100 and how to perform the following settings with the D−ESI 100 canbe found in the D−ESI 100 <strong>manual</strong>.Help wh<strong>en</strong> using the program and inputting the data can be obtained fromthe Quick Info. Just hover the cursor over the pictogram about whosefunction you would like to be informed.Fig. 6.1:Quick InfoFurther information on topics such as inputting parameters can also beobtained as Quick Info if you hover the cursor over the " symbol".All parameters that are changed must th<strong>en</strong> be perman<strong>en</strong>tly saved. For this,see Section 7.7.3 from page <strong>11</strong>0.D−<strong>FL</strong> <strong>220</strong> 77
6. Parameterisation of the measuring headsAfter the parameters have be<strong>en</strong> input or checked, unplug the USB cableagain and screw the cover cap on at the rear of the measuring head to coverthe USB port.Optionally the connection can also be established via the DURAG Modbus.The DURAG Modbus connection is performed via the terminals in theterminal box D−TB 101 (see the connection diagram Fig. 5.<strong>11</strong> on page 60). Ifthe DURAG Modbus connection is used, all devices correctly addressed inthe bus are listed and can be addressed if desired.For parameterisation, the software for the D-ESI 100 SET is used D−ESI 100(from the suite supplied on the USB memory stick). More details onD−ESI 100 and how to perform the following settings with the D−ESI 100 canbe found in the D−ESI 100 <strong>manual</strong>.6.1 G<strong>en</strong>eral information on the DURAG Modbus protocol6.1.1 Basic Modbus informationThis section summarises the principal DURAG Modbus information foroperating and managing the DURAG devices, and especially for theD−<strong>FL</strong> <strong>220</strong> system. This section is int<strong>en</strong>ded for operators and maint<strong>en</strong>ancepersonnel who already have the necessary basic information technology andnetworking knowledge. We have summarised information sources for basicinformation on the Modbus in the following section.The Modbus protocol is a communications protocol. Since 1979, Modbus,because of its op<strong>en</strong> structure, has become a de facto standard in theindustry. The data are transmitted in binary form. This form of Modbus isreferred to as RTU. The DURAG Modbus is based on this Modbus protocol, anddefines additional information over and above it, such as register assignm<strong>en</strong>ts.The D−<strong>FL</strong> <strong>220</strong> uses a serial interface (RS-485) to provide connections tothe DURAG Modbus specification. The corresponding communicationconnection is made, like the other connections to the D−<strong>FL</strong> <strong>220</strong> measuringheads, by a cable with a plug connector to the D−TB 101 terminal box and thereto the terminals provided (for the terminal assignm<strong>en</strong>t see Fig. 5.<strong>11</strong> on page 60).Basic information about Modbus can be obtained from the Internet at thehome page of the Modbus Indep<strong>en</strong>d<strong>en</strong>t User Organisation (IDA)*.• "Modbus Protocol Specifications"http://www.modbus.org/docs/Modbus_Application_Protocol_V1_1b.pdf(describes the data telegrams (protocol data units) that are exchangedbetwe<strong>en</strong> master and slave).• "Modbus over Serial Line Specification and Implem<strong>en</strong>tation Guide"http://www.modbus.org/docs/Modbus_over_serial_line_V1_02.pdf(describes how the data are packed into telegrams (application dataunits)).The specifications of the cables to be used for operating the Modbus can befound on the Internet under the address*• http://www.modbus.org/docs/Modbus_over_serial_line_V1_02.pdfin Section 3.6 "Cables".We have summarised the most important data for you in the App<strong>en</strong>dix (seeSection 9.9 from page 120.*(DURAG GmbH offers no guarantee of the correctness of the Internetaddresses. DURAG GmbH takes no liability for the cont<strong>en</strong>ts of the pages listed.The pres<strong>en</strong>ters of those pages take sole responsibility for them).78 D−<strong>FL</strong> <strong>220</strong>
6. Parameterisation of the measuring heads6.2 Parameter checking and setting checklistTable 6.1 shows you which parameters must be checked and set. Theindividual operations are listed in functional sequ<strong>en</strong>ce. The right-handcolumn in the table indicates the section which contains detailed informationabout the respective check / setting.At the start of that section you will find a box "D−ESI 100 setting path" whichshows the path to the relevant m<strong>en</strong>u in the setting software in which you canperform the listed checks/settings.StepKey word Range Compon<strong>en</strong>t see:section/page1 Date, time* Bus information curr<strong>en</strong>t date/time• set (<strong>manual</strong>ly)• synchronise the time2 Digital communication(DURAG Modbus)*3 Measured value outputseparately for channels1…44 Curr<strong>en</strong>t output andrelay settingsBus informationVariable settingCurr<strong>en</strong>t output andrelay settings5 Maint<strong>en</strong>ance settings* Maint<strong>en</strong>ancesettings6 Measurem<strong>en</strong>t locationparameters7 further devicesettings*********D−<strong>FL</strong> <strong>220</strong> DeviceinstallationD−<strong>FL</strong> <strong>220</strong> DevicesettingsModbus addressModbus communication settingsLimit valuesType codeIntegration timeMeasured value correctionSignal rangeOutput the checking cycle (settings)Zero rangeCurr<strong>en</strong>t output settings• Channel for curr<strong>en</strong>t output• Curr<strong>en</strong>t output range**Relay settings• Relay 1• Relay 2• Relay logicRefer<strong>en</strong>ce point test setpointCheck cycle step durationCheck cycle intervalFault indication suppressionAngle (A PA )Offset (LO)Measuringt path l<strong>en</strong>gth (LA)Cross-section area (A CS )Calculation mode<strong>manual</strong> ultrasonic power settingUltrasonic signal minimum levelUltrasonic signal filter widthonly if necessaryEquival<strong>en</strong>t to the setting of the signal range of the channel for curr<strong>en</strong>t outputAdjust only if measurem<strong>en</strong>t conditions are difficult!Table 6.1 Parameter checking checklist6.3.1/806.3.2/816.3.3/826.3.4.2/846.3.4.1/836.3.5.1/846.3.5.2/85to6.3.5.5/866.3.5.6/866.3.6.1/876.3.6.1/876.3.6.2/876.3.6.3/887.7/107ff6.3.8/906.3.9/91ffD−<strong>FL</strong> <strong>220</strong> 79
6. Parameterisation of the measuring heads6.3 Parameter checking and settingThe parameter settings for the measuring heads using the optional softwareD−ESI 100 are described in the following sections. At the start of that sectionyou will find a box "D−ESI 100 setting path" which shows the path to therelevant m<strong>en</strong>u in the setting software in which you can perform the listedchecks/settings.6.3.1 Checking and setting the date and timeD−ESI 100 Setup path:Device (D−<strong>FL</strong> <strong>220</strong>) > > Common Parameter > Bus-information > Actual date / time >Fig. 6.2:Setting the date/timeThe D−<strong>FL</strong> <strong>220</strong> has an internal clock (in the measuring head). The correctlyset clock is necessary for recording messages in the message logbook andfor access to settings.ParametersCurr<strong>en</strong>t date/timeDescriptionStandard format:22.08.<strong>20<strong>11</strong></strong> 13:29:28In order to achieve synchronous time input betwe<strong>en</strong> the time data for themonitoring system that may be used and the time data for the messagelogbook, the device time can be synchronised with the system time (PCtime). To do this, op<strong>en</strong> the D−ESI 100 initial scre<strong>en</strong>, click on deviceparameters and th<strong>en</strong> on the "Synchronise time" button.A specific desired date/time input can be saved in the device (e.g. thesystem works in more than one time zone). After this has be<strong>en</strong> input, thetime can however no longer be synchronised (see above); otherwise theinput is overwritt<strong>en</strong> by the system time!The detailed procedure for setting parameters is described in the D−ESI 100<strong>manual</strong>.All parameters that are changed must th<strong>en</strong> be perman<strong>en</strong>tly saved. For this,see Section 7.7.3 from page <strong>11</strong>0.80 D−<strong>FL</strong> <strong>220</strong>
6. Parameterisation of the measuring heads6.3.2 Setting the DURAG Modbus addressD−ESI 100 Setup path:The available address range is from 1 to 247 decimal.The default address is: 22.Device (D−<strong>FL</strong> <strong>220</strong>) > >Common Parameter > Bus-information > Modbus-address, Value >Fig. 6.3:Setting the Modbus addressThe procedure for inputting the Modbus address and also the Baud rate of theDURAG is differ<strong>en</strong>t from that for all other data inputs. So as not to break offModbus communications betwe<strong>en</strong> the device and PC, the new address is atfirst writt<strong>en</strong> only to the register. It is not yet brought into use! Only wh<strong>en</strong> th<strong>en</strong>ew address has be<strong>en</strong> saved in the non-volatile memory of the device(EEPROM) is it loaded. And only after a restart of the D−<strong>FL</strong> <strong>220</strong> is the newaddress also active i.e. used (see below, saving parameters, restarting thedevice).D−ESI 100 Setup path:Device (D−<strong>FL</strong> <strong>220</strong>) >Device (D−<strong>FL</strong> <strong>220</strong>) >> Save parameter in device> Restart deviceSave parameter in deviRestart deviceClicking on the "Save parameters" button causes the data to be loaded to th<strong>en</strong>on-volatile memory of the device. The parameters are now retained, ev<strong>en</strong>after a restart.In order that the new DURAG Modbus address comes into effect, finallypress the "Restart device" button. From now on, the device will use the newaddress.D−<strong>FL</strong> <strong>220</strong> 81
6. Parameterisation of the measuring heads6.3.3 Setting the Baud rateD−ESI 100 Setup path:There is a choice of four settings available for the Baud rate of the RS-485interface. The default is 19200 Baud.Device (D−<strong>FL</strong> <strong>220</strong>) > > Common Parameter > Bus-information > Modbus-communication setting >Value >(Change the value <strong>manual</strong>ly) or(Select setting from the binary table)Fig. 6.4:Setting the Modbus communications settings9600 bd19200 bd38400 bdoff - 9600bd | on - 19200bd | off – 38400bd | on -57600bdoff - 9600bd | off - 19200bd | on – 38400bd | on -57600bdoff - 9600bd | on - 19200bd | off – 38400bd | on -57600bdoff - 9600bd | off - 19200bd | on – 38400bd | on -57600bdoff - 9600bd | on - 19200bd | off – 38400bd | on -57600bdoff - 9600bd | off - 19200bd | on – 38400bd | on -57600bd☐☐☑☐☐☑Table 6.257600 bdBaud rate settingsoff - 9600bd | on - 19200bd | off – 38400bd | on -57600bdoff - 9600bd | off - 19200bd | on – 38400bd | on -57600bd☑☑The procedure for inputting the Baud rate and also the Modbus address ofthe DURAG is differ<strong>en</strong>t from that for all other data inputs. So as not to breakoff Modbus communications betwe<strong>en</strong> the device and PC, the new Baud rateis at first writt<strong>en</strong> only to the register. It is not yet brought into use! Only wh<strong>en</strong>the new Baud rate has be<strong>en</strong> saved in the non-volatile memory of the device(EEPROM) is it loaded. And only after a restart is the new Baud rate alsoactive i.e. used (see below, saving parameters, restarting the device).82 D−<strong>FL</strong> <strong>220</strong>
6. Parameterisation of the measuring headsD−ESI 100 Setup path:Device (D−<strong>FL</strong> <strong>220</strong>) >Device (D−<strong>FL</strong> <strong>220</strong>) >> Save parameter in device> Restart deviceSave parameter in deviRestart deviceClicking on the "Save parameters" button causes the data to be loaded to th<strong>en</strong>on-volatile memory of the device. The parameters are now retained, ev<strong>en</strong>after a restart.In order that the new Baud rate comes into effect, finally press the "Restartdevice" button. From now on, the device will use the new Baud rate.6.3.4 Variables setting of the D−<strong>FL</strong> <strong>220</strong> measurem<strong>en</strong>t channels (channel #1)…(channel #4)D−ESI 100 Setup path:Device (D−<strong>FL</strong> <strong>220</strong>) > > Common Parameter > Variable setup > [PARAMETER] >Fig. 6.5:Setting the measurem<strong>en</strong>t channels variables6.3.4.1 Type codeThe D−<strong>FL</strong> <strong>220</strong> has 4 output channels for measured variables. In eachchannel the output of the relevant measured value (Fig. 6.6) isparameterised by clicking on the appropriate radio button.Close ≘ (abort and) close the windowFig. 6.6:Measured value output channelS<strong>en</strong>d ≘ load (temporarily)The detailed procedure for setting parameters is described in the D−ESI 100<strong>manual</strong>.D−<strong>FL</strong> <strong>220</strong> 83
6. Parameterisation of the measuring heads6.3.4.2 Limit values (channel #1)… (channel #4)Each channel can monitor four limit values (two upper limit values and twolower limit values).6.3.5 Principle of measured value correctionIn most cases there is no need to perform correction of the measured value.If necessary however the real measured value determined by the D−<strong>FL</strong> <strong>220</strong>can be modified to suit the physical characteristics of the duct in which themeasurem<strong>en</strong>t was performed, and to suit the purpose to which the signal isto be put (dep<strong>en</strong>ding on the plant or evaluation process). The corrections ofthe measured value are performed according to the following diagram:The measurem<strong>en</strong>t supplies raw dataMeasured value integration(factory pre-setting: 30 s)Measured value correctionif necessary with third degree polynomial(factory pre-setting: OFF)Zero Range correctionif necessary(factory pre-setting: OFF)Measured value output(output at curr<strong>en</strong>t output 4…20mA)Fig. 6.7:Measured value correction6.3.5.1 Integration timeA measured value correction can be performed separately for each channel.The correction is categorised into various steps (see Fig. 6.7).(→) Integration timeEach channel has an integration memory which can be set to a valuebetwe<strong>en</strong> 1 s and 180 s (factory pre-setting: 30 s).84 D−<strong>FL</strong> <strong>220</strong>
6. Parameterisation of the measuring heads6.3.5.2 Offset a0(→) Offsetis added to the measured value or subtracted from it (see Fig. 6.8).6.3.5.3 Gradi<strong>en</strong>t a1, a2, a3Example:The measured value correction is described as a third degree polynomial:K 1’a0 = (→) offset ● a1 = linear correction factor ● a2 = quadratic correction factor ● a3 = cubic correction factora0 = 0.1a1 = 1a2 = 0a3 = 0K 2’a0 = 0a1 = 0.97a2 = 0a3 = 0K 3’a0 = 0a1 = 1a2 = 0.0012a3 = 0K 4’a0 = 0a1 = 1a2 = 0a3 = 0.00003K1‘…K4‘Measured values with correction by polynomialsFig. 6.8:Diagram: Measured value correction by polynomial6.3.5.4 Signal rangeEach channel must be assigned a measurem<strong>en</strong>t range with a start and <strong>en</strong>d(D−ESI 100 designation: signal range start / signal range <strong>en</strong>d). The refer<strong>en</strong>cecheck value must be specified based on the measurem<strong>en</strong>t range setting (e.g.70% of the measurem<strong>en</strong>t range) as must the range for the 4..20mA curr<strong>en</strong>toutput (4mA = signal range start, 20mA = signal range <strong>en</strong>d). The dim<strong>en</strong>sionsof the signal range settings correspond to the settings in the type code(Section 6.3.4.1/83).D−<strong>FL</strong> <strong>220</strong> 85
6. Parameterisation of the measuring heads6.3.5.5 Settings6.3.5.6 Zero rangeIt is specified in the channel whether the last measured value or therefer<strong>en</strong>ce check value should be output during the check measurem<strong>en</strong>t.Each channel has available a zero range correction function. This allowsspecification of which measured values are set to zero. The options are:measured values zerorange (negative active) or measured valueszero range. This functionallows suppression of fluctuations around the zero point, of negative values(positive active) or of positive values (negative active).1. "zero range: positive active"-> y = x if x > +1×|ZR|y = 0 if x ≤ +1×|ZR|(measured values ≤ +1×|ZR| are set to 0)2. "Zero range: negative active"-> y = x if x < -1×|ZR|y = 0 if x ≥ -1×|ZR|(measured values ≥ -1×|ZR| are set to 0)3. "Zero range: positive active" and"zero range: negative active"-> y = x if x > +1×|ZR| or x < -1×|ZR|y = 0 if x ≤ +1×|ZR| and x ≥ -1×|ZR|(combination of the two functions above)A MeasuredvalueFig. 6.9:B corrected measured value in thezero rangeMeasured value output channelC Zero range86 D−<strong>FL</strong> <strong>220</strong>
6. Parameterisation of the measuring heads|ZR| = value Zero RangeVariable: zero range (value)6.3.6 Assignm<strong>en</strong>t of the D−<strong>FL</strong> <strong>220</strong> device outputsD−ESI 100 Setup path:Device (D−<strong>FL</strong> <strong>220</strong>) > > Common Parameter > Curr<strong>en</strong>t output and relays setup > [PARAMETER] >6.3.6.1 Curr<strong>en</strong>t outputThe D−<strong>FL</strong> <strong>220</strong> has available a curr<strong>en</strong>t output (0)4..20mA with "live zero"Fig. 6.10: Setting the curr<strong>en</strong>t outputAny one of the four measurem<strong>en</strong>t ducts can be assigned to the curr<strong>en</strong>toutput. The output value of this measurem<strong>en</strong>t duct is th<strong>en</strong> output at thecurr<strong>en</strong>t output. The curr<strong>en</strong>t output range is determined by the signal rangestart/<strong>en</strong>d setting in the measurem<strong>en</strong>t duct or by the setting of the curr<strong>en</strong>toutput range start/<strong>en</strong>d in the curr<strong>en</strong>t output settings.Signal range start:Signal range <strong>en</strong>d:Measured value for4 mAMeasured value for20 mA6.3.6.2 Relay settingsD−ESI 100 Setup path:The D−<strong>FL</strong> <strong>220</strong> has available two pot<strong>en</strong>tial-free relay outputs. The relayoutputs can be assigned to an ev<strong>en</strong>t or a combination of ev<strong>en</strong>ts.Device (D−<strong>FL</strong> <strong>220</strong>) > > Common Parameter > Curr<strong>en</strong>t output and relays setup > Relay setup >[PARAMETER] >(Change the value <strong>manual</strong>ly) / (Select setting from the binary table)D−<strong>FL</strong> <strong>220</strong> 87
6. Parameterisation of the measuring headsFig. 6.<strong>11</strong>: Setting the relay settingsThe relays switch wh<strong>en</strong> triggered by the ev<strong>en</strong>ts assigned to them.Close ≘ (abort and) close the windowFig. 6.12: Relays, configuration of the outputsS<strong>en</strong>d ≘ load (temporarily)6.3.6.3 Relay logicThe switching logic of the relays can be set using the relay logic function.Close ≘ (abort and) close the windowFig. 6.13: Relays, configuration of the switching logicS<strong>en</strong>d ≘ load (temporarily)88 D−<strong>FL</strong> <strong>220</strong>
6. Parameterisation of the measuring heads6.3.7 Maint<strong>en</strong>ance settingsD−ESI 100 Setup path:The choice is available betwe<strong>en</strong> negative logic (the relay switches wh<strong>en</strong> noev<strong>en</strong>t is active) and positive logic (the relay switches wh<strong>en</strong> an ev<strong>en</strong>t is active).Cyclical refer<strong>en</strong>ce point/zero point measurem<strong>en</strong>ts can be performed by thedevice for checking the measurem<strong>en</strong>t function.Device (D−<strong>FL</strong> <strong>220</strong>) > > Common Parameter > Maint<strong>en</strong>ance setup >Fig. 6.14: Setting the maint<strong>en</strong>ance settings6.3.7.1 Refer<strong>en</strong>ce point test setpointDuring the refer<strong>en</strong>ce point/zero point measurem<strong>en</strong>ts, staggered ultrasonicsignals are s<strong>en</strong>t and received by the measuring heads. These staggeredmeasurem<strong>en</strong>t signals determine the refer<strong>en</strong>ce point/zero point actual value.R Refer<strong>en</strong>ce point test setpoint 75% M Measured valueTC Variable type code N Zero point check valueS A Signal range start S E Signal range <strong>en</strong>dt 3 Check cycle interval [0...720h] S Signal range 100%t 1 =t 2 Check cycle step duration [30...240sec]Y-axis dim<strong>en</strong>sion dep<strong>en</strong>d<strong>en</strong>t of the TC (type code) settingFig. 6.<strong>15</strong>: Diagram of check measurem<strong>en</strong>tsD−<strong>FL</strong> <strong>220</strong> 89
6. Parameterisation of the measuring headsThe refer<strong>en</strong>ce point test setpoint can be betwe<strong>en</strong> 5 and 95 [%] of the value<strong>en</strong>tered in the signal range(signal range start signal range <strong>en</strong>d;see Section 6.3.5.4 from page 85).The zero point setpoint (fixed, i.e. cannot be adjusted or changed) is 0.In addition the control cycle step duration (see Fig. 6.<strong>15</strong>-t 1 and t 2 ) and thecheck cycle interval (0=autom. check cycle is switched off; see also Fig.6.<strong>15</strong>-t 3 ) can be set for the control measurem<strong>en</strong>ts. Performing the setting(g<strong>en</strong>erally 12 or 24 h) is useful if the system is integrated into a monitoringsystem. This system can be programmed to respond if the values deviatefrom the specified values.ParametersDefault value UnitCheck cycle step duration 60 SecondsCheck cycle interval 0 HoursFault indication suppression 10 SecondsTable 6.3Specified values for check measurem<strong>en</strong>ts6.3.7.2 Fault indication suppressionDetection of a fault by the system results in a programmed response. Inaddition, the system saves the appropriate (fault) report (see Section 7.6 /page 101). The report is saved in the memory of the message logbook (inthe measuring head) and can be accessed by the maint<strong>en</strong>ance technician asnecessary for information wh<strong>en</strong> performing device maint<strong>en</strong>ance.The fault indication suppression designates the time period (in seconds) forwhich the system will first pause. Only if after expiry of the specified time thefault still persists is the system response initiated. This means transi<strong>en</strong>t faultscan be ignored without triggering a system response.6.3.8 Parameters for the measurem<strong>en</strong>t location (device installation)Before commissioning the Volumetric flow meter, the parameters listed inTable 6.4 (measuring path l<strong>en</strong>gth, cross-section area etc.) must be saved atthe measurem<strong>en</strong>t location. As a rule, the devices as supplied have alreadybe<strong>en</strong> parameterised in accordance with the data on the measurem<strong>en</strong>tlocation questionnaire submitted, and therefore all that is needed is to checkthat these data were correctly loaded.D−ESI 100 Setup path:Device (D−<strong>FL</strong> <strong>220</strong>) > > Specific Parameter > D−<strong>FL</strong> <strong>220</strong> device assembly > …Fig. 6.16: Setting measurem<strong>en</strong>t location parameter90 D−<strong>FL</strong> <strong>220</strong>
6. Parameterisation of the measuring heads* K-BezParametersA PA Angle 30° to 60°DescriptionLA Active measuring 1000 mm to 25000 mm (1.0 m to 25 m)path l<strong>en</strong>gthThe l<strong>en</strong>gth is measured from the <strong>en</strong>d of one weldingpipe to the <strong>en</strong>d of the other welding pipe (seediagram above).For the maximum value see Technical data Table 9.2LO Offset 0 to 1000 mmIf the measuring head offsets are differ<strong>en</strong>t at thetwo sides of the duct, the average is <strong>en</strong>tered.Example:Offset of the right hand measurem<strong>en</strong>t s<strong>en</strong>sor 30 mmOffset of the left hand measurem<strong>en</strong>t s<strong>en</strong>sor 50 mm(30 + 50) / 2 =40 (input in mm)A CS Area cross section from 0.1 to 500 m²LTT Measuring path The measuring path l<strong>en</strong>gth (LTT) is calculated froml<strong>en</strong>gththe device based on the offset (LO) and the activemeasuring path l<strong>en</strong>gth (LA).The value is read-only.Table 6.4* K-Bez = AbbreviationList of the parameters to be checked (commissioning)The abbreviations used in the graphics and tables also appear at theappropriate place in the parameterisation software D−ESI 100 at theparameter designation.6.3.9 Further device settingsD−ESI 100 Setup path:Device (D−<strong>FL</strong> <strong>220</strong>) > > Specific Parameter > D−<strong>FL</strong> <strong>220</strong> device settings > … /D−<strong>FL</strong> <strong>220</strong> 91
6. Parameterisation of the measuring headsFig. 6.17: Setting further device settingsParametersDescriptionCalculation mode Automatic ultrasonic signal positioning (Fig. 6.18/92)ON = no check ☐ (default)*OFF (= check ☑ )Simulation mode (Fig. 6.19/93)ON = check ☑OFF = no check ☐ (default)*Ultrasonic<strong>manual</strong>ly powered(transmission power)Ultrasonicminimum signal level0…<strong>15</strong> (>6≘ 6)0 = automatic setting, step 6 (default)*the device adjusts itself as required!0…10,000 (Fig. 6.20/93)100 (default)*, without dim<strong>en</strong>sionUltrasonicsignal filter widthTable 6.52…50 (Fig. 6.20/93)12 (default)*, without dim<strong>en</strong>sion* factory pre-settingList of the further device settings6.3.9.1 Calculation mode - automatic ultrasonic signal positioningA S<strong>en</strong>d pulse range: StartB Received pulse range: StartD S<strong>en</strong>t ultrasonic pulseE received pulse rangeC automat. ultrasonic signal positioningFig. 6.18: Automatic ultrasonic signal positioningThe D−<strong>FL</strong> <strong>220</strong> measures the flow velocity by means of ultrasonic pulses.Measuring head A s<strong>en</strong>ds this pulse D at time A. Measuring head B isswitched to receipt mode at time B. The pulse transit time through themedium dep<strong>en</strong>ds amongst other things on the temperature of the mediums92 D−<strong>FL</strong> <strong>220</strong>
6. Parameterisation of the measuring heads(variable). In the example in Fig. 6.18, the temperature is 200°C (Fig. 6.18 -top) and the pulse is received within the reception window B. If thetemperature of the medium falls to <strong>15</strong>0°C (Fig. 6.18 - middle), the pulse Erequires a longer transit time and misses the reception window B. Themeasurem<strong>en</strong>t cannot be performed.If the parameter for the "Automatic ultrasonic signal positioning" is set to ON,the reception window B is delayed by the period C (Fig. 6.18 - top). Thepulse is once again received within the reception window B and themeasurem<strong>en</strong>t can be performed correctly.The s<strong>en</strong>se and amount of the delay C dep<strong>en</strong>ds on the requirem<strong>en</strong>ts, and isdetermined automatically by the measuring system.6.3.9.2 Calculation mode - simulation modeIf simulation mode is active, no measurem<strong>en</strong>t results are available. instead asawtooth curve is g<strong>en</strong>erated. This allows downstream systems to bechecked (switching thresholds and the like).6.3.9.3 Ultrasonic signalFig. 6.19: Simulation modeA Measurem<strong>en</strong>t signalB 1 Ultrasonic raw signalB 2 filtered ultrasonic raw signalFig. 6.20: Ultrasonic signalC Ultrasonic signal minimum levelD 1 Measurem<strong>en</strong>t signal min. levelD 2 Measurem<strong>en</strong>t signal max. level6.3.9.4 Ultrasonic signal: Minimum levelThe minimum level (Fig. 6.20-C) defines the pulse size that is to beconsidered noise/faulty signal. All signals above the ultrasonic signalminimum level are th<strong>en</strong> considered to be measurem<strong>en</strong>t signals.6.3.9.5 Ultrasonic signal filter widthThe B 1 curve shown in Fig. 6.20 is the ultrasonic raw signal. G<strong>en</strong>erally thesignal exhibits small fault peaks. The "ultrasonic signal filter width" parameterspecifies the ext<strong>en</strong>t of signal smoothing (see curve B 2 ).D−<strong>FL</strong> <strong>220</strong> 93
D−<strong>FL</strong> <strong>220</strong>Volumetric flow meter7 Maint<strong>en</strong>ance7.1 Customer service information7.2 Safety7.3 Replacem<strong>en</strong>t material7.4 Maint<strong>en</strong>ance operations7.4.1 Visual inspection of the and cleaning of external parts7.4.2 Check the purge air unit and the hose connections for leaks and secure fitting.7.4.3 Check / change the filters7.4.4 Cleaning the measurem<strong>en</strong>t heads7.4.5 Removing deposits in the welding pipes7.5 Faults (on the Volumetric flow meter D−<strong>FL</strong> <strong>220</strong>)7.5.1 (Fault) indications by LEDs7.5.2 D−ESI 100(Fault) indications, output by the7.6 System messages7.6.1 Curr<strong>en</strong>t message register (group 1)7.6.2 Curr<strong>en</strong>t warning register (group 2)7.6.3 Curr<strong>en</strong>t simple error register (group 3)7.6.4 Curr<strong>en</strong>t critical error register (group 4)7.7 Device functions7.7.1 Maint<strong>en</strong>ance and service functions7.7.2 Test and simulation functions7.7.3 Save parameters7.8 D−<strong>FL</strong> <strong>220</strong> Firmware Update
7. Maint<strong>en</strong>ance7 Maint<strong>en</strong>anceThe D−<strong>FL</strong> <strong>220</strong> is an easily maintained Volumetric flow meter.In this section the necessary work such as visual inspections, replacem<strong>en</strong>t offilters etc. will be explained.7.1 Customer service informationIf desired the maint<strong>en</strong>ance can also be undertak<strong>en</strong> by DURAG GmbH. We willgladly explain the advantages of a maint<strong>en</strong>ance contract for your company toyou. Also the installation and commissioning of the D−<strong>FL</strong> <strong>220</strong> measuringdevice can be performed by DURAG. Welding-in of the flange tubes and theelectrical installation as far as the system compon<strong>en</strong>ts must be carried out byapproved specialist companies. We will gladly provide you with details ofthese. Our service addresses and telephone numbers are listed in theapp<strong>en</strong>dix on page 137.7.2 SafetyDANGER!High voltage. Risk of fatal injury due to electrical power!There is a risk of immediate fatal injury if live compon<strong>en</strong>ts are touched. Damageto the insulation or to individual compon<strong>en</strong>ts can lead to fatal injury.• Before servicing, cleaning or repairing the device, disconnect the powersupply and secure it against reconnection.• Before removing any casings or guards, de<strong>en</strong>ergise the devices and checkthat they are dead.• Permit only electricians to work on electrical equipm<strong>en</strong>t.• Keep moisture away from live compon<strong>en</strong>ts. Moisture can lead to shortcircuits. Original Textmarke HochspannungWARNING!Risk of injury due to insuffici<strong>en</strong>tly skilled personnel!Improper use can lead to severe injury and damage.Any actions should be performed only by appropriately trained specialistpersonnel. Ensure compliance with thein Section 2.4.1.WARNING!Burns hazardImproper use can lead to severe injury and damage. In particular, hot gasesmay issue at high pressure from unsealed duct access points.Wh<strong>en</strong> working on parts that may be hot, or at unsealed duct access points(welding pipes), never work without appropriate temperature-resistantequipm<strong>en</strong>t (such as a face mask, safety gloves, heat-resistant clothingetcoperating company's instructions!D−<strong>FL</strong> <strong>220</strong> 97
7. Maint<strong>en</strong>anceATTENTION!WARNING!Damage to electronic compon<strong>en</strong>ts due toelectrostatic discharge (ESD)Electronic compon<strong>en</strong>ts are becoming increasingly small and complex. Theirsusceptibility to damage from electrostatic discharge is increased accordingly.To protect these compon<strong>en</strong>ts, measures to prev<strong>en</strong>t electrostatic dischargemust be tak<strong>en</strong> before starting any work on the op<strong>en</strong>ed device (ESDprotection).As a precaution against electrostatic discharge from be equipped with apersonal earthing system, for example. !Risk of injury due to incorrect spare parts!Incorrect or defective spare parts can lead to damage, malfunctions or totalfailure and may also impair safety.• Only use g<strong>en</strong>uine spare parts supplied by the manufacturer.• Spare parts can be obtained from an authorised ag<strong>en</strong>t or directly from themanufacturer's addressOperate the product only wh<strong>en</strong> it is in good working order, and comply with theoperating instructions. Any change to normal operation should be tak<strong>en</strong>seriously as an indication of impaired functionality.Damage to the measuring heads due to hot gases in the ductIf one of the measuring heads is temporarily removed and disconnected fromthe purge air supply, the appropriate purge air hose must still be connected.Only by this means can the second (remaining) measuring head continue to besupplied with suffici<strong>en</strong>t purge air.7.3 Replacem<strong>en</strong>t materialsee List of spare parts on page 128.7.4 Maint<strong>en</strong>ance operationsThe D−<strong>FL</strong> <strong>220</strong> is a low maint<strong>en</strong>ance measuring system whose maint<strong>en</strong>anceintervals dep<strong>en</strong>d on the installed system and must be specified by theoperating company. They dep<strong>en</strong>d on:• the type of the medium being measured• the pressure relationships• the g<strong>en</strong>eral ambi<strong>en</strong>t circumstances (e.g. climatic conditions at themeasurem<strong>en</strong>t point)It is best to start with a short maint<strong>en</strong>ance interval (typically 4 weeks). Themaint<strong>en</strong>ance interval can th<strong>en</strong> be increased step by step, in accordance withthe prevailing conditions, up to 6 months.Maint<strong>en</strong>ance should be performed during an inspection of the plant beingmonitored, i.e. wh<strong>en</strong> the plant is not in operation.98 D−<strong>FL</strong> <strong>220</strong>
7. Maint<strong>en</strong>anceIrrespective of this however, a verification should be undertak<strong>en</strong> every fourweeks. The check is to look for external changes such as deposits, faultyseals, colour changes on the housing etc. Also the firm seating of boltedconnections, connectors and devices is checked.Activity Who Wh<strong>en</strong>Visual inspection of the and cleaning ofexternal parts.Check the clamps and screw connectionsCheck the purge air unit and the hoseconnections for leaks and secure fitting.Operatingpersonnel*Operatingpersonnel*Operatingpersonnel**see abovesee abovesee aboveCheck / change the filters in the purge air unit Specialistpersonnel*see aboveCleaning the measurem<strong>en</strong>theadsRemoving deposits in the welding pipesSpecialistpersonnel*Specialistpersonnel*see abovesee above* For definition see Section 2.4.1 page 21Table 7.1Maint<strong>en</strong>ance work table7.4.1 Visual inspection of the and cleaning of external partsThe Volumetric flow meter is subjected firstly to a regular visual inspectionaccording to the maint<strong>en</strong>ance intervals set by the operator. The check is tolook for external changes such as deposits, faulty seals, colour changes on thehousing etc. Also the firm seating of bolted connections, connectors anddevices is checked.If visible deposits have be<strong>en</strong> formed, these should be removed with oil-freecompressed air or a soft lint-free cloth, if necessary with water and alcohol.7.4.2 Check the purge air unit and the hose connections for leaks and securefitting.7.4.3 Check / change the filters• Check the purge air unit, including the purge air hoses, for damage.• Check the hose connections for leaks and secure fitting.The filter cartridge can be cleaned several times, before it has to be replaced.The maint<strong>en</strong>ance intervals of the filters (as a rule every 3 months) aredep<strong>en</strong>d<strong>en</strong>t on the quality of the intake air.CAUTION!As long as the measuring heads are mounted in the dust-carrying duct andthe plant is running, the supply of purge air must be <strong>en</strong>sured at all times. Inthe abs<strong>en</strong>ce of purge air the measuring heads can be damaged beyondrepair in a very short time.D−<strong>FL</strong> <strong>220</strong> 99
7. Maint<strong>en</strong>ancer290-04-001• It is best to change the filters during an inspection of the plant beingmonitored, i.e. wh<strong>en</strong> the plant is not in operation.• Switch off the power supply to the purge air unit (blower) (having checkedthat there are no longer any hot gases in the dust-carrying duct! Otherwise,first remove the measuring heads!)• Checking the purge air filter.To do this, op<strong>en</strong> the retaining clip on the filter casing. If there are loose dirtparticles pres<strong>en</strong>t within the casing, remove the filter cartridge. Clean thefilter housing (and the filter if required). Insert a (new) filter cartridge. Wh<strong>en</strong>closing the filter housing make sure that the interlock <strong>en</strong>gages.• Reconnect the power supply to the purge air unit.7.4.4 Cleaning the measurem<strong>en</strong>t headsWARNING!Burns hazardImproper use can lead to severe injury and damage. In particular, hot gasesmay issue at high pressure from unsealed duct access points.Wh<strong>en</strong> working on parts that may be hot, or at unsealed duct access points(welding pipes), never work without appropriate temperature-resistantequipm<strong>en</strong>t (such as a face mask, safety gloves, heat-resistant clothingetcoperating company's instructions!1. Undo the quick release fast<strong>en</strong>ers, and pull the measuring heads out of thewelding pipes.2. Caution! The measuring heads may be hot. Before cleaning the measuringheads, allow them to cool down as necessary.3. Clean the measuring heads with a brush (be careful of the ultrasonictransducers, there is a risk of damaging them), a soft cloth, compressed air,water and alcohol as necessary.4. Slide the measuring heads back into the welding pipes and close the quickrelease fast<strong>en</strong>ers again.7.4.5 Removing deposits in the welding pipes1. In accordance with the instructions of the operating company and dep<strong>en</strong>dingon the type, pressure and temperature of the gas to be measured, switch offthe plant if necessary. Make sure there is no longer any toxic gas to bemeasured in the duct.2. Undo the quick release fast<strong>en</strong>ers, and pull the measuring heads out of thewelding pipes.3. Caution! measuring heads and welding pipes may be hot; before cleaningthem, allow them to cool down as necessary.4. Remove any deposits from the welding pipes Clean them with a brush, a softcloth, compressed air, water and alcohol as necessary.5. Slide the measuring heads back into the welding pipes and close the quickrelease fast<strong>en</strong>ers again.7.5 Faults (on the Volumetric flow meter D−<strong>FL</strong> <strong>220</strong>)Information on system faults is giv<strong>en</strong> by the LEDs on the measuring heads andafter calling up the respective device fault logs by for instance (→) D−ESI 100.100 D−<strong>FL</strong> <strong>220</strong>
7. Maint<strong>en</strong>ance7.5.1 (Fault) indications by LEDsAt the rear of the measuring head casing there is a viewing window allowing 4LEDs to be viewed. The display status of the LEDs allows the curr<strong>en</strong>tstatus/operating status of the system to be read. If everything is OK and thesystem is ready for operation, LED 1 will light up gre<strong>en</strong>. If there is a fault,LED 3 flashes (red) at 1-second intervals. The measuring head has th<strong>en</strong>recorded a defect / fault (see Section 7.5.2).For (fault) indications by the LEDs see Table 5.4 from page707.5.2 D−ESI 100(Fault) indications, output by theD−ESI 100 Setup path:More detailed information about the defect / fault reports can be called up byestablishing a connection to measuring head A using the USB port or DURAGModbus. Using an appropriate display device (such as a Windows PC) anddeliverable software option (→) D−ESI 100 (see Section 3.4 Optionalequipm<strong>en</strong>t) you can now view the device messages in plain text. More detailson this can be found in the D−ESI 100 <strong>manual</strong> (part of the D−ESI 100 set;article number <strong>11</strong>9 341).In the following sections, the information provided for maint<strong>en</strong>ance and thecapabilities of the software are docum<strong>en</strong>ted. The box "D−ESI 100 setting path"gives you the path to the required m<strong>en</strong>u from which you can call up the listedinformation or perform checks and settings. More information on theD−ESI 100 and a detailed description of how to use the program can also befound in the D−ESI 100 <strong>manual</strong>.Device (D−<strong>FL</strong> <strong>220</strong>) > > Common Parameter > Messages >The messages output by the software are divided into four groups. The firsttwo groups contain mostly instructions, the last two groups deal with defectsand faults (it is only these defects and faults that cause the red LED 3 to flash).The messages in all the groups are described in the following sections.Fig. 7.1:D−ESI 100, Message groupsThe detailed procedure for setting parameters is described in the D−ESI 100 <strong>manual</strong>.7.6 System messagesThe D−<strong>FL</strong> <strong>220</strong> has available a fault log with a maximum of 200 <strong>en</strong>tries. Devicemessages and faults are recorded in the message logbook and can bereferred to for diagnostic purposes. We recomm<strong>en</strong>d that there messages(saved in the measuring head) are consulted before starting any plannedD−<strong>FL</strong> <strong>220</strong> 101
7. Maint<strong>en</strong>ancemaint<strong>en</strong>ance work or at maint<strong>en</strong>ance intervals. In many cases you will finduseful information on existing and foreseeable system faults.7.6.1 Curr<strong>en</strong>t message register (group 1)MessageStartup (power on)Startup (external reset)Startup (watchdog reset)(→) Watchdog TimerCause •Pot<strong>en</strong>tial actions • S<strong>en</strong>sor was switched on (Power ON) none necessary• A reset was triggered at the ISP programming plug (during asoftware update) none necessary• A reset was triggered by a software error. If this error occurs frequ<strong>en</strong>tly, there is a fault in the electronics,and the s<strong>en</strong>sor must be s<strong>en</strong>t in to the Service Dept for repair.by whom*./../.S<strong>en</strong>d in thedeviceStartup (brown-out detect reset) • Mains voltage has fall<strong>en</strong> below the minimum voltage level andtriggered a reset. Check the 24V power supply.Startup (with default jumper)Zero point check• The s<strong>en</strong>sor was switched on with the default jumper pluggedin at X3. none necessary• The s<strong>en</strong>sor has performed a zero point check measurem<strong>en</strong>t.The occurr<strong>en</strong>ce of this message is increm<strong>en</strong>ted. none necessaryRefer<strong>en</strong>ce point check • The s<strong>en</strong>sor has performed a refer<strong>en</strong>ce point checkmeasurem<strong>en</strong>t. The occurr<strong>en</strong>ce of this message is increm<strong>en</strong>ted. none necessarySimulation / function test • A simulation was started or a function test performed. Theoccurr<strong>en</strong>ce of this message is increm<strong>en</strong>ted. none necessaryMaint<strong>en</strong>ance• The device has performed a maint<strong>en</strong>ance function (such as acheck measurem<strong>en</strong>t,..). none necessaryParameter modification saved • Parameters were modified and saved none necessary* Personnel skills, see section 2.4.1/page 21Table 7.2 Messages, curr<strong>en</strong>t messages (group 1)Specialistpersonnel./../../../../../.7.6.2 Curr<strong>en</strong>t warning register (group 2)MessageMeasured value 1:upper limit value 1 activeCause •Pot<strong>en</strong>tial actions • The upper limit value 1 of measurem<strong>en</strong>t duct 1 was exceeded. The output can be routed to a relayby whom*./.Measured value 1:lower limit value 1 active• The lower limit value 1 of measurem<strong>en</strong>t duct 1 was undershot. The output can be routed to a relay./.102 D−<strong>FL</strong> <strong>220</strong>
7. Maint<strong>en</strong>anceMessageMeasured value 1:upper limit value 2 activeCause •Pot<strong>en</strong>tial actions • The upper limit value 2 of measurem<strong>en</strong>t duct 1 was exceeded. The output can be routed to a relayby whom*./.Measured value 1:lower limit value 2 active• The lower limit value 2 of measurem<strong>en</strong>t duct 1 was undershot. The output can be routed to a relay./.Measured value 2:upper limit value 1 active• The upper limit value 1 of measurem<strong>en</strong>t duct 2 was exceeded. The output can be routed to a relay./.Measured value 2:lower limit value 1 active• The lower limit value 1 of measurem<strong>en</strong>t duct 2 was undershot. The output can be routed to a relay./.Measured value 2:upper limit value 2 active• The upper limit value 2 of measurem<strong>en</strong>t duct 2 was exceeded. The output can be routed to a relay./.Measured value 2:lower limit value 2 active• The lower limit value 2 of measurem<strong>en</strong>t duct 2 was undershot. The output can be routed to a relay./.Measured value 3:upper limit value 1 active• The upper limit value 1 of measurem<strong>en</strong>t duct 3 was exceeded. The output can be routed to a relay./.Measured value 3:lower limit value 1 active• The lower limit value 1 of measurem<strong>en</strong>t duct 3 was undershot. The output can be routed to a relay./.Measured value 3:upper limit value 2 active• The upper limit value 2 of measurem<strong>en</strong>t duct 3 was exceeded. The output can be routed to a relay./.Measured value 3:lower limit value 2 active• The lower limit value 2 of measurem<strong>en</strong>t duct 3 was undershot. The output can be routed to a relay./.Measured value 4:upper limit value 1 active• The upper limit value 1 of measurem<strong>en</strong>t duct 4 was exceeded. The output can be routed to a relay./.Measured value 4:lower limit value 1 active• The lower limit value 1 of measurem<strong>en</strong>t duct 4 was undershot. The output can be routed to a relay./.Measured value 4:upper limit value 2 active• The upper limit value 2 of measurem<strong>en</strong>t duct 4 was exceeded. The output can be routed to a relay./.Measured value 4:lower limit value 2 active• The lower limit value 2 of measurem<strong>en</strong>t duct 4 was undershot. The output can be routed to a relay./.S<strong>en</strong>sor A:Signal to noise ratio (SNR)critical• The quality of the ultrasonic signal received by measuringhead A is bad. Check the measuring path. Check the ultrasonic transducer inthe measuring head A for dirt. Clean it if necessary.SpecialistpersonnelD−<strong>FL</strong> <strong>220</strong> 103
7. Maint<strong>en</strong>anceMessageS<strong>en</strong>sor B:Signal to noise ratio (SNR)criticalS<strong>en</strong>sor A: Signal amplitudecriticalS<strong>en</strong>sor B: Signal amplitudecriticalCause •Pot<strong>en</strong>tial actions • The quality of the ultrasonic signal received by measuringhead B is bad. Check the measuring path. Check the ultrasonic transducer inthe measuring head B for dirt. Clean it if necessary.• The measurem<strong>en</strong>t signal received by measuring head A isvery low. Check the measuring path. Check the ultrasonic transducer inthe measuring head A for dirt. The temperature and the dust cont<strong>en</strong>t of the gas betwe<strong>en</strong> themeasuring heads influ<strong>en</strong>ce the signal amplitude. If the signalamplitude is too small, the measured velocity has reduced orthe device is defective.• The measurem<strong>en</strong>t signal received by measuring head B isvery low. Check the measuring path. Check the ultrasonic transducer inthe measuring head B for dirt. The temperature and the dust cont<strong>en</strong>t of the gas betwe<strong>en</strong> themeasuring heads influ<strong>en</strong>ce the signal amplitude. If the signalamplitude is too small, the measured velocity has reduced orthe device is defective.by whom*SpecialistpersonnelSpecialistpersonnelSpecialistpersonnelSelf-test failure detected • Collective fault message for errors that occurred during thedevice self-test.Startup failure detectedS<strong>en</strong>sor A: RTC fault [STUP]S<strong>en</strong>sor B: RTC fault [STUP]S<strong>en</strong>sor A:internal temperaturemeasurem<strong>en</strong>t fault [ST]S<strong>en</strong>sor B:internal temperaturemeasurem<strong>en</strong>t fault [ST] Check the exact cause of messages marked with [ST].• Collective fault message for errors that occurred during thedevice startup. Check the exact cause of messages marked with [STUP].• RTC in measuring head A is defective. Electronics fault. The consequ<strong>en</strong>ce of this fault is thatpassword-protected settings cannot be accessed.• RTC in measuring head B is defective. Electronics fault. This has no effect on the device operation.• The temperature measurem<strong>en</strong>t in the electronics <strong>en</strong>closure Ais not working. Electronics fault. If the maximum permissible temperature inthe electronics <strong>en</strong>closure of measuring head A is exceeded,this is no longer detected. This has no effect on the deviceoperation.• The temperature measurem<strong>en</strong>t in the electronics <strong>en</strong>closure Bis not working. Electronics fault. If the maximum permissible temperature inthe electronics <strong>en</strong>closure of measuring head B is exceeded,this is no longer detected. This has no effect on the deviceoperation.SpecialistpersonnelSpecialistpersonnelElectricianElectricianElectricianElectrician104 D−<strong>FL</strong> <strong>220</strong>
7. Maint<strong>en</strong>anceMessageS<strong>en</strong>sor A:transducer temperaturemeasurem<strong>en</strong>t fault [ST]S<strong>en</strong>sor B:transducer temperaturemeasurem<strong>en</strong>t fault [ST]S<strong>en</strong>sor A:max. internal temperatureexceededS<strong>en</strong>sor B:max. internal temperatureexceededS<strong>en</strong>sor A:max. transducer temperatureexceededS<strong>en</strong>sor B:max. transducer temperatureexceededInstallation parametersinconsist<strong>en</strong>tStartup with factory pre-setvaluesS<strong>en</strong>sor A:Transducer power criticalS<strong>en</strong>sor B:Transducer power criticalCause •Pot<strong>en</strong>tial actions • The temperature measurem<strong>en</strong>t in the ultrasonic transducer ofmeasuring head A is not working. The temperature s<strong>en</strong>sor in measuring head A, the connectioncable or the electronics is defective. Exchange the ultrasonictransducer, cable or electronics. The lack of temperature measurem<strong>en</strong>t can lead to adeterioration in performance of the measuring system, sincethe temperature comp<strong>en</strong>sation no longer works.• The temperature measurem<strong>en</strong>t in the ultrasonic transducer ofmeasuring head B is not working. The temperature s<strong>en</strong>sor in measuring head B, the connectioncable or the electronics is defective. Exchange the ultrasonictransducer, cable or electronics. The lack of temperature measurem<strong>en</strong>t can lead to adeterioration in performance of the measuring system, sincethe temperature comp<strong>en</strong>sation no longer works.• The maximum permissible temperature of 80°C in theelectronics <strong>en</strong>closure of measuring head A was exceeded. Check the place of installation of measuring head A. Perhapsfit a weather protection hood (D−<strong>FL</strong> <strong>220</strong> accessories).• The maximum permissible temperature of 80°C in theelectronics <strong>en</strong>closure of measuring head B was exceeded. Check the place of installation of measuring head B. Perhapsfit a weather protection hood (D−<strong>FL</strong> <strong>220</strong> accessories).• The maximum permissible temperature of the ultrasonictransducer of measuring head A was exceeded. Themaximum permissible temperature dep<strong>en</strong>ds on the type oftransducer. Check the operation of the purge air blower. Check the purgeair filter, hoses,...• The maximum permissible temperature of the ultrasonictransducer of measuring head B was exceeded. Themaximum permissible temperature dep<strong>en</strong>ds on the type oftransducer. Check the operation of the purge air blower. Check the purgeair filter, hoses,...• The D−<strong>FL</strong> <strong>220</strong> device installation settings are not correct. Check the settings(e.g. 2x offset >measuring path l<strong>en</strong>gth).• The function "Restore factory settings" was performed. Reload saved values for individual measurem<strong>en</strong>t pointparameters• The ultrasonic transmit/receive power of measuring head A islow. Exchange the ultrasonic transducer of measuring head A.• The ultrasonic transmit/receive power of measuring head B islow. Exchange the ultrasonic transducer of measuring head B.by whom*ElectricianElectricianSpecialistpersonnelSpecialistpersonnelSpecialistpersonnelSpecialistpersonnelSpecialistpersonnelSpecialistpersonnelElectricianElectricianD−<strong>FL</strong> <strong>220</strong> 105
7. Maint<strong>en</strong>anceMessageS<strong>en</strong>sor A:Ultrasonic transmit/receive unitfaultyS<strong>en</strong>sor B:Ultrasonic transmit/receive unitfaultyCause •Pot<strong>en</strong>tial actions • The ultrasonic transmit/receive unit of measuring head A isdefective. Exchange the electronics for measuring head A.• The ultrasonic transmit/receive unit of measuring head B isdefective. Exchange the electronics for measuring head B.* Personnel skills, see section 2.4.1/page 21Table 7.3 Messages, curr<strong>en</strong>t warnings (group 2)by whom*ElectricianElectrician7.6.3 Curr<strong>en</strong>t simple error register (group 3)MessageData connection s<strong>en</strong>sor A-BdisconnectedCause •Pot<strong>en</strong>tial actions • The data transmission betwe<strong>en</strong> measuring head A andmeasuring head B is not working. Check the cable betwe<strong>en</strong> measuring heads A and B. Measuring head electronics A or B defective.by whom*ElectricianUltrasonic measuring path faulty • No ultrasonic signals are being transmitted from measuringhead A to measuring head B.EEPROM checksum invalid The measuring heads are not aligned to each other. Dampingof the measuring path is too high.The temperature and the dust cont<strong>en</strong>t of the gas betwe<strong>en</strong> themeasuring heads influ<strong>en</strong>ce the damping of the measuringpath. The higher the temperature and the dust cont<strong>en</strong>t, thegreater the damping.• The settings held in the EEPROM for the device are invalid.The device is working with a default setting. Check the settings for the device, and correct them ifnecessary. After the correction, save the changes! If the fault persists, the electronics are defective.* Personnel skills, see section 2.4.1/page 21Table 7.4 Table I Fault messages, curr<strong>en</strong>t simple faultsSpecialistpersonnelElectrician7.6.4 Curr<strong>en</strong>t critical error register (group 4)MessageFirmware <strong>version</strong>s s<strong>en</strong>sors A-BincompatibleCause •Pot<strong>en</strong>tial actions • The firmware <strong>version</strong>s measuring head A and B areincompatible. Program measuring heads A and B with the same firmware.by whom*ElectricianS<strong>en</strong>sor A: RAM error [STUP] • The RAM memory test in measuring head A has detected afault. Exchange the electronics for measuring head A.Electrician106 D−<strong>FL</strong> <strong>220</strong>
7. Maint<strong>en</strong>anceMessageS<strong>en</strong>sor B: RAM error [STUP]Cause •Pot<strong>en</strong>tial actions • The RAM memory test in measuring head B has detected afault. Exchange the electronics for measuring head B.by whom*ElectricianS<strong>en</strong>sor A: EEPROM error[STUP]• The EEPROM memory test in measuring head A has detecteda fault. Exchange the electronics for measuring head A.ElectricianS<strong>en</strong>sor B: EEPROM error[STUP]• The EEPROM memory test in measuring head B has detecteda fault. Exchange the electronics for measuring head B.ElectricianS<strong>en</strong>sor A: FPGA software loaderror [STUP]• The FPGA in measuring head A could not be programmed atdevice start. Exchange the electronics for measuring head A.ElectricianS<strong>en</strong>sor B: FPGA software loaderror [STUP]• The FPGA in measuring head B could not be programmed atdevice start. Exchange the electronics for measuring head B.ElectricianS<strong>en</strong>sor A: Transducer faulty [ST] • The ultrasonic transducer of measuring head A is defective. Exchange the ultrasonic transducer of measuring head AS<strong>en</strong>sor B: Transducer faulty [ST] • The ultrasonic transducer of measuring head B is defective. Exchange the ultrasonic transducer of measuring head BElectricianElectrician* Personnel skills, see section 2.4.1/page 21** STUP startup self-test (performed at system start)*** ST Self-test (performed cyclically)Table 7.5 Table II Fault messages, curr<strong>en</strong>t critical faultsRectification of faults:After working on the measuring head electronics of measuring head A orreplacing it, make sure you check the device parameters saved in them. Ifnecessary, recreate the parameters or correct them.D−ESI 100 allows the parameters to be backed up externally before startingwork on the measuring head electronics, which means they can subsequ<strong>en</strong>tlybe reloaded.After rectifying the cause of the fault, no further actions are necessary; onswitching on the power the D−<strong>FL</strong> <strong>220</strong> measuring system is immediately readyfor use again.7.7 Device functionsUnder the "Functions" heading, the settings that are suitable for maint<strong>en</strong>ancepurposes are summarised.D−<strong>FL</strong> <strong>220</strong> 107
7. Maint<strong>en</strong>ance7.7.1 Maint<strong>en</strong>ance and service functionsD−ESI 100 Setup path:Device (D−<strong>FL</strong> <strong>220</strong>) > > Functions > Maint<strong>en</strong>ance / service functions >( = perform an action!)The maint<strong>en</strong>ance and service functions are:Maint<strong>en</strong>ance functionsStart automaticcontrol cycleStop automaticcontrol cycleStart zero point checkStop zero point checkStart refer<strong>en</strong>ce checkStop refer<strong>en</strong>ce checkSet maint<strong>en</strong>anceReset maint<strong>en</strong>anceA zero point measurem<strong>en</strong>t and a refer<strong>en</strong>cepoint measurem<strong>en</strong>t are performedand automatically terminated.The control cycle is abortedThe zero point check measurem<strong>en</strong>t is startedand continues to be performed until it isterminated <strong>manual</strong>ly.The zero point check measurem<strong>en</strong>t isstoppedThe refer<strong>en</strong>ce point check measurem<strong>en</strong>t isstarted and continues to be performed until itis terminated <strong>manual</strong>ly.The refer<strong>en</strong>ce point check measurem<strong>en</strong>t isstoppedThe device is set to maint<strong>en</strong>ance mode andremains in that status, until it is terminated<strong>manual</strong>ly.The device reverts to normal measurem<strong>en</strong>tmodeService functionsSave parameterLoad factory defaultsModified settings are saved.A default factory setting is createdRestore previousparametersTable 7.6Changes that have be<strong>en</strong> made but not saved arediscardedTable: Maint<strong>en</strong>ance and service functionsRestarting the device automatically switches off all maint<strong>en</strong>ance and servicefunctions.The detailed procedure for setting parameters is described in the D−ESI 100 <strong>manual</strong>.108 D−<strong>FL</strong> <strong>220</strong>
7. Maint<strong>en</strong>ance7.7.2 Test and simulation functionsD−ESI 100 Setup path:Test and simulation functions are available for checking the device installation.Device (D−<strong>FL</strong> <strong>220</strong>) > > Functions > Test / simulation functions >Simulation functions are:Simulation functionsCurr<strong>en</strong>t output:<strong>en</strong>ter / exit fixed outputmodeMeasured value 1:<strong>en</strong>ter / exit fixed outputmodeMeasured value 2:<strong>en</strong>ter / exit fixed outputmodeMeasured value 3:<strong>en</strong>ter / exit fixed outputmodeOutput a fixed value from the curr<strong>en</strong>toutput>0..20mA; 0=OFFOutput a fixed value from measurem<strong>en</strong>tchannel 1default=0; 0=OFFOutput a fixed value from measurem<strong>en</strong>tchannel 2default=0; 0=OFFOutput a fixed value from measurem<strong>en</strong>tchannel 3default!=0; 0=OFFMeasured value 4:<strong>en</strong>ter / exit fixed outputmodeTable 7.7Table: Simulation functionsOutput a fixed value from measurem<strong>en</strong>tchannel 4default=0; 0=OFFD−ESI 100 Setup path:Device (D−<strong>FL</strong> <strong>220</strong>) > > Functions > Test / simulation functions >The following test functions are available:Function test for relays 1 and 2Function test for display LEDs (see Section 5.6 from page 70).Test functionsFunction test: digital outputTable 7.8Table: Test functionssee Fig. 7.2D−<strong>FL</strong> <strong>220</strong> 109
7. Maint<strong>en</strong>anceClose ≘ (abort and) close the windowFig. 7.2:Function test for digital outputsS<strong>en</strong>d ≘ load (temporarily)Restarting the device automatically switches off all test and simulationfunctions.The detailed procedure for setting parameters is described in the D−ESI 100 <strong>manual</strong>.7.7.3 Save parametersD−ESI 100 Setup path:Device (D−<strong>FL</strong> <strong>220</strong>) >> Save parameter in deviceSave parameter in deviceFor reasons of safety, parameters that are changed (e.g. specific parameterssuch as angle, Offset, cross-section area etc.) are initially writt<strong>en</strong> only to theworking memory of the device. That means these data are curr<strong>en</strong>tly used orrefer<strong>en</strong>ced, but are discarded wh<strong>en</strong> the device is restarted (i.e. the device th<strong>en</strong>reverts to using the "old" parameters). This can be useful, since the restartoffers a handy way to undo changes that were made.Clicking on the Save parameter in device button causes the data to beloaded to the non-volatile memory of the device. Th<strong>en</strong> the parameters areretained and continue to be used wh<strong>en</strong> the device is restarted.7.8 D−<strong>FL</strong> <strong>220</strong> Firmware UpdateTo allow flexibility in the use of the D−<strong>FL</strong> <strong>220</strong>, it uses (→) firmware foroperation. This means modifications to the device functions can very easily beimplem<strong>en</strong>ted. The firmware update must be performed on both measuring heads.The following facilities are required for performing a firmware update of theD−<strong>FL</strong> <strong>220</strong>:<strong>11</strong>0 D−<strong>FL</strong> <strong>220</strong>
7. Maint<strong>en</strong>ance• D-ISP adapter set (article number: <strong>11</strong>8 020)consisting of:• D-ISP adapter (see diagram on the left)• Ribbon cable (adapter – measuring head)• USB cable (adapter – PC)• Software D-ISP update tool on a USB stick• Firmware as .hex file (file name.hex)• PC with Windows operating system (XP or newer)The performance of firmware updates for the D−<strong>FL</strong> <strong>220</strong> is described in detailin a separate <strong>manual</strong>.Do not connect the D-ISP adapter to the PC until the update software hasbe<strong>en</strong> installed!To op<strong>en</strong> the blue measuring head casing , undo the four 2.5 mm hexagonsocket-head screws. Carefully pull the casing straight back off the circuitboards (for the circuit board designation see Fig. 4.2 on page 42).The D-ISP adapter is connected betwe<strong>en</strong> the PC and D−<strong>FL</strong> <strong>220</strong> measuringhead (A/B), more precisely the circuit board no. 3, using the ribbon cable atport X3 (see Fig. 7.3 and Fig. 7.4).Fig. 7.3: D-ISP connection to circuit board no. 3Fig. 7.4:D-ISP connection to adapterD−<strong>FL</strong> <strong>220</strong> <strong>11</strong>1
7. Maint<strong>en</strong>anceClosing the measuring head casingCAUTION!Pot<strong>en</strong>tial damage to the measuring heads due to incorrect assembly!If the circuit boards have come loose after the hood was removed, be sure notto transpose the terminal strips on the circuit boards wh<strong>en</strong> plugging them inagain. Otherwise the measuring head may be seriously damaged.Wh<strong>en</strong> closing the casing again:Check the correct position of the seal before screwing the two halves of thecasing back together. Remove any sand and dirt from the seal seating groove.Discard any seals that are defective or perished.This avoids damage and a leaky s<strong>en</strong>sor casing.Wh<strong>en</strong> closing the D−<strong>FL</strong> <strong>220</strong> measuring head casing, first check that theori<strong>en</strong>tation is correct.Ori<strong>en</strong>tationFig. 5.17: Measuring head casing assemblyGuide groovesPosition the casing so that the displays of the LED module can subsequ<strong>en</strong>tly be se<strong>en</strong>through the viewing window in the rear panel of the casing (see Fig. 5.17 on the left). Th<strong>en</strong>carefully insert the two circuit boards into the respective guide grooves (see Fig. 5.17 onthe right) and slide the casing down on to the base. Tight<strong>en</strong> the four 2.5 mm hexagonsocket head screws (tight<strong>en</strong> <strong>manual</strong>ly / 0.7 Nm). Be sure not to damage the seal betwe<strong>en</strong>the casing and its base.<strong>11</strong>2 D−<strong>FL</strong> <strong>220</strong>
Maint<strong>en</strong>anceD−<strong>FL</strong> <strong>220</strong>Volumetric flow meter8 Measurem<strong>en</strong>t location questionnaire9 Technical data9.1 Technical data D−<strong>FL</strong> <strong>220</strong> application data9.2 Technical dataD−<strong>FL</strong> <strong>220</strong>9.3 Technical data D−<strong>FL</strong> <strong>220</strong> MK measurem<strong>en</strong>t head9.4 Technical data D−<strong>FL</strong> <strong>220</strong> SPF purge flange9.5 Technical data D-<strong>FL</strong> 200 E welding pipe with flange9.6 Technical data D-TB 101 A terminal box9.7 Technical data D-BL blower unit (purge air unit)9.8 Factory settings as delivered9.9 Technical data DURAG Modbus10 Dim<strong>en</strong>sional drawings10.1 Dim<strong>en</strong>sional drawing for the measuring head D−<strong>FL</strong> <strong>220</strong> MK10.2 Dim<strong>en</strong>sional drawing of purge flange D−<strong>FL</strong> <strong>220</strong> SPF10.3 Dim<strong>en</strong>sional drawing of welding pipe D−<strong>FL</strong> <strong>220</strong> E10.4 Dim<strong>en</strong>sional drawing of purge air unit D-BL10.5 Connection diagram of purge air unit D-BL10.6 Dim<strong>en</strong>sional drawing of the terminal box D−TB 10<strong>11</strong>0.7 Dim<strong>en</strong>sional drawings - Weather protection hoods (optional)<strong>11</strong> List of spare parts12 Declaration of Conformity13 Glossary14 Index<strong>15</strong> DURAG GROUP company addresses
8. Measurem<strong>en</strong>t location questionnaire8 Measurem<strong>en</strong>t location questionnaire<strong>11</strong>4 D−<strong>FL</strong> <strong>220</strong>
8. Measurem<strong>en</strong>t location questionnaireD−<strong>FL</strong> <strong>220</strong> <strong>11</strong>5
9. Technical data9 Technical dataNotes:* Variants** the max. measuring path l<strong>en</strong>gth is dep<strong>en</strong>d<strong>en</strong>t on the temperature of the gasthat is measured.*** other <strong>version</strong>s on requestWe reserve the right to make technical changes!9.1 Technical data D−<strong>FL</strong> <strong>220</strong> application dataMeasurem<strong>en</strong>t variableGas to be measuredGas flow velocityDuct diameter**Temperature of gas to bemeasured**Pressure of gas to bemeasured(relative to ambi<strong>en</strong>t)Humidity of gas to bemeasuredAmbi<strong>en</strong>t temperatureTable 9.1Application dataFlow velocityVolumetric flow, under operating conditionsor standardisedair, exhaust gas, non-combustible process gas0 .. 10 / 20 / 40 m/s0.5 - 13 m-20 to 120 / <strong>15</strong>0 / 200 / 250 / 300°C, ***-50 to +20 hPa, other values on request0 - 100 % rel. humidity,cond<strong>en</strong>sation permissible-20 to 50 °C, other values on request9.2 Technical dataD−<strong>FL</strong> <strong>220</strong>Measurem<strong>en</strong>t principleType of installationSystem compon<strong>en</strong>tsDetermination of the directionally-dep<strong>en</strong>d<strong>en</strong>tdiffer<strong>en</strong>ce in the transit time of ultrasonicpulses, from which the flow velocity and thevolumetric flow are calculatedInstallation externally to the flue,measurem<strong>en</strong>t transversely across the flue,s<strong>en</strong>sors purged and not in contact with thegas to be measuredD−<strong>FL</strong> <strong>220</strong> MK measurem<strong>en</strong>t headD−<strong>FL</strong> <strong>220</strong> SPF purge flangeD−<strong>FL</strong> <strong>220</strong> E welding pipe with flangeD-TB 101 terminal boxD-BL purge air unitAccessories<strong>11</strong>6 D−<strong>FL</strong> <strong>220</strong>
9. Technical dataMeasuring path**Alignm<strong>en</strong>t of the measuringpathMeasuring rangeResponse timeResolutionProcess connectionTable 9.2Technical data1 - <strong>15</strong> m30 - 60°C to the direction of flow,typically 45°0 to 40 m/s,0 - 4...5,000 × 1000 Nm3/hthe analogue output can be assigned anyinterval from the ranges stated above> 1s … 180s, parameterisable0.1 m/sD-<strong>FL</strong> 200 E welding pipe with flange,similar to DN80 PN6, tube DI=100mm9.3 Technical data D−<strong>FL</strong> <strong>220</strong> MK measurem<strong>en</strong>t headAmbi<strong>en</strong>t temperatureMeasured value outputs-40 ... 70°C Do not delete the originalTemp_Bereich text mark1x 4-20mA, 400 Ohm, isolated, assignm<strong>en</strong>tparameterisableDURAG–Modbus, bi-directionalcommunicationStatus outputs 2 x relay NC/NO, contact rating 48V, 0.5AFunction parameterisable; typically: fault,maint<strong>en</strong>anceSignal exchange(betwe<strong>en</strong> the measuring heads)1x intercom RS485 master-slavecommunicationService interface USB 1.1Service softwareTest cycleAuxiliary powerD−ESI 100, requires a PC withWindows XP ® or Windows 7 ® OSautomatic or on external request24 VDC +- 10%; 1 AProtection type IP 65Dim<strong>en</strong>sions (D x L)Weight<strong>11</strong>0 Ø x 410...2450mmthe l<strong>en</strong>gth dep<strong>en</strong>ds on the <strong>version</strong><strong>version</strong>-dep<strong>en</strong>d<strong>en</strong>tMaterialCasing:1.4571/316Ti, polyamide, approx. RAL5017Flammability rating: B1 (UL 94 V0)Process parts: 1.4571Ultrasonic transducers: (PA6.6, PBT, FRP) Valox 357UTable 9.3 Technical data D−<strong>FL</strong> <strong>220</strong> MK2 measurem<strong>en</strong>t headD−<strong>FL</strong> <strong>220</strong> <strong>11</strong>7
9. Technical data9.4 Technical data D−<strong>FL</strong> <strong>220</strong> SPF purge flangeFlangesimilar to DN80 PN6Purge air connectionDA=40mmPurge air demand30 m³/h per measuring headWeight4.5 kgMaterial1.4571 / 316TiDim<strong>en</strong>sions (DA x L)190mm x 90mmTable 9.4 Technical data D−<strong>FL</strong> <strong>220</strong> SPF purge flange9.5 Technical data D-<strong>FL</strong> 200 E welding pipe with flangeFlange similar to DN 80 PN 6TubeWeightMaterialTable 9.5DI=100mm, L=335...2135mm (pitch 200mm)<strong>version</strong>-dep<strong>en</strong>d<strong>en</strong>t1.4571 / 316Ti-optional- glass-reinforced plastic(Durabest 180)*Technical data D-<strong>FL</strong> 200 E welding pipe with flange9.6 Technical data D-TB 101 A terminal boxAmbi<strong>en</strong>t temperature -25 to 55°CAuxiliary powerDim<strong>en</strong>sions (H x W x D)Protection type IP 66Weight90 - 264 VAC, 48 - 62 Hz; 60 Wapprox. 160 x 160 x <strong>11</strong>0 mmapprox. 1.8 kgMaterial Polycarbonate, approx. RAL 7035Flammability rating: B1 (UL 94 V0)Method of fast<strong>en</strong>ing4 x installation anchors D= 8-10 mmTable 9.6 Technical data D-TB 101 A terminal box9.7 Technical data D-BL blower unit (purge air unit)Ambi<strong>en</strong>t temperature-20 to 50 °C, other values on requestPurge air quantity max. 80/90 m³/h at 1013 mbar ***Auxiliary powerProtection type IP 55Size (H x W x D)Weight<strong>11</strong>5 / 230 VAC, 50 / 60 Hz;Power: 0.37 / 0.43 kW480 x 450 x 320 mm12 kgMaterial 1.4301.Ambi<strong>en</strong>t temperature of thepurge air hoseTable 9.7approx. – 25 to + 80°CTechnical data D-BL blower unit (purge air unit)<strong>11</strong>8 D−<strong>FL</strong> <strong>220</strong>
9. Technical data9.8 Factory settings as deliveredvalueLODefault settings100 mmAPA 45°LA3000 mmACS 7.07 m²Transmission power Step 6Measurem<strong>en</strong>t channel 1Measurem<strong>en</strong>t channel 2Measurem<strong>en</strong>t channel 3Curr<strong>en</strong>t output onmeasurem<strong>en</strong>t channel 1Relay 1Relay 2m/s gas velocitym³/h volumetric flow°C temperature of the gas that is measured4…20 mA ≘ 0…40m/sFaultMaint<strong>en</strong>anceBus terminating resistorother values as specified on theorderTable 9.8ONTechnical data specified values (default values)(only standard specified valueswithout adaptation to the customer's parameters!)Notes:* Variants** the max. measuring path l<strong>en</strong>gth is dep<strong>en</strong>d<strong>en</strong>t on the temperature of the gasthat is measured.*** other <strong>version</strong>s on requestWe reserve the right to make technical changes!D−<strong>FL</strong> <strong>220</strong> <strong>11</strong>9
9. Technical data9.9 Technical data DURAG Modbus9.9.1 Setting addresses (slave addresses)Information about setting the DURAG Modbus address (slave address) can befound in Section 6.3.2 from page 81.Address range 1..247Default settings D−<strong>FL</strong> <strong>220</strong>Max. number of devices (busloads) per bus segm<strong>en</strong>tTable 9.99.9.2 Communications settingsDURAG Modbus address settings22 (factory default)32InterfaceBaud rateData bitsStop bits9.9.3 Type of cabling, cross-section,max. l<strong>en</strong>gth of the cables usedserial (RS-485)9600 Baud19200 Baud (factory default)38400 Baud57600 Baud8 (factory default)1 (factory default)2Paritynone (factory default)ev<strong>en</strong>oddTable 9.10 List of the DURAG Modbus communications settingsInformation about setting the Baud rate can be found in section 6.3.3 frompage 82.Cable typeCore structureSurge impedanceOperational capacitanceMax. segm<strong>en</strong>t l<strong>en</strong>gthscre<strong>en</strong>edtwisted pair100 Ohmapprox. 80nF/kmUp to 1000m, dep<strong>en</strong>ding on the Baudrate selectedRecomm<strong>en</strong>ded cable LiHCH (TP) 8x0.25mm 2Table 9.<strong>11</strong> Cable specification for DURAG Modbus cableThe DURAG Modbus must be fitted with a terminating resistor at each <strong>en</strong>d.The measuring heads can be configured by means of the DIP configurationswitch S1 to provide an appropriate terminating resistor (see Table 5.2,page 68).120 D−<strong>FL</strong> <strong>220</strong>
10. Dim<strong>en</strong>sional drawings10 Dim<strong>en</strong>sional drawings10.1 Dim<strong>en</strong>sional drawing for the measuring head D−<strong>FL</strong> <strong>220</strong> MKStandard l<strong>en</strong>gths suppliable for LMK [mm]100 300 500 700 900 <strong>11</strong>00Fig. 10.1: Dim<strong>en</strong>sional drawing measuring head10.2 Dim<strong>en</strong>sional drawing of purge flange D−<strong>FL</strong> <strong>220</strong> SPFrPRed dotFig. 10.2: Dim<strong>en</strong>sional drawing of purge flangeD−<strong>FL</strong> <strong>220</strong> 121
10. Dim<strong>en</strong>sional drawings10.3 Dim<strong>en</strong>sional drawing of welding pipe D−<strong>FL</strong> <strong>220</strong> EStandard l<strong>en</strong>gths available for L<strong>FL</strong> [mm] (see also page 34)335 535 735 935 <strong>11</strong>351335 <strong>15</strong>35 1735 1935 2135rPRed dotFig. 10.3: Dim<strong>en</strong>sional drawing of welding pipe122 D−<strong>FL</strong> <strong>220</strong>
10. Dim<strong>en</strong>sional drawings10.4 Dim<strong>en</strong>sional drawing of purge air unit D-BLFR = (installation/maint<strong>en</strong>ance) clearanceFig. 10.4: Dim<strong>en</strong>sional drawing of purge air unit ID−<strong>FL</strong> <strong>220</strong> 123
10. Dim<strong>en</strong>sional drawingsFig. 10.5: Dim<strong>en</strong>sional drawing of purge air unit II10.5 Connection diagram of purge air unit D-BLFig. 10.6: Electrical connections to the purge air motor124 D−<strong>FL</strong> <strong>220</strong>
10. Dim<strong>en</strong>sional drawings10.6 Dim<strong>en</strong>sional drawing of the terminal box D−TB 101Fig. 10.7: Dim<strong>en</strong>sional drawing of the terminal boxD−<strong>FL</strong> <strong>220</strong> 125
10. Dim<strong>en</strong>sional drawings10.7 Dim<strong>en</strong>sional drawings - Weather protection hoods (optional)Fig. 10.8: Dim<strong>en</strong>sional drawing of the weather protection hood for measuring heads126 D−<strong>FL</strong> <strong>220</strong>
10. Dim<strong>en</strong>sional drawingsFig. 10.9: Dim<strong>en</strong>sional drawing of weather protection hood for purge air unit D-BLD−<strong>FL</strong> <strong>220</strong> 127
<strong>11</strong>. List of spare parts<strong>11</strong> List of spare partsArticle numberDesignation122 516 D-<strong>FL</strong> <strong>220</strong> SP ART41B transducer, for D-<strong>FL</strong> <strong>220</strong> MK2, 41kHz107 163 Blower motor 1~ <strong>11</strong>5/230VAC 50/60Hz, 80/90 m3/h107 162 Filter casing L325x146mm107 247 Filter cartridge L300x105/59122 469 D-<strong>FL</strong> <strong>220</strong> PCB No. 1/40kHz for D-<strong>FL</strong> <strong>220</strong> MK2with 41 kHz transformer122 470 D-<strong>FL</strong> <strong>220</strong> SP PCB No. 2122 471 D-<strong>FL</strong> <strong>220</strong> SP PCB No. 3 and No. 4122 473 D-<strong>FL</strong> <strong>220</strong> SP casing incl. electronics122 487 D-<strong>FL</strong> <strong>220</strong> SP hood for measuring head- 1x hood incl. window- 4x casing screws- 1x pressure comp<strong>en</strong>sation plug- 1x plug for USB port122 520 D-<strong>FL</strong> <strong>220</strong> SP USB connecting cable 360 mmconnecting cable transducer, l<strong>en</strong>gth 360 mm122 522 D-<strong>FL</strong> <strong>220</strong> SP USB connecting cable 650 mmconnecting cable transducer, l<strong>en</strong>gth 650 mm122 523 D-<strong>FL</strong> <strong>220</strong> SP USB connecting cable 850 mmconnecting cable transducer, l<strong>en</strong>gth 850 mm122 526 D-<strong>FL</strong> <strong>220</strong> SP SET screws and gaskets- 3x screw M4x6- 1x O-ring 47x3- 1x O-ring 57x2- 1x O-ring 100x4.5- 3x O-ring 46x2- 1x D-<strong>FL</strong> <strong>220</strong> gasket Klingersil- 1x D-<strong>FL</strong> <strong>220</strong> casing gasket122 478 D-<strong>FL</strong> <strong>220</strong> SP battery lithium battery122 475 D-<strong>FL</strong> <strong>220</strong> SP pressure comp<strong>en</strong>sation plug122 477 D-<strong>FL</strong> <strong>220</strong> SP plug for USB port122 527 D-<strong>FL</strong> <strong>220</strong> SP tool kit- tool kit for tube assemblyTable <strong>11</strong>.1 Spare parts listOnly electronic fuses are used in the D−<strong>FL</strong> <strong>220</strong> system. There is therefore nolist of "device fuses".128 D−<strong>FL</strong> <strong>220</strong>
12. Declaration of Conformity12 Declaration of ConformityD−<strong>FL</strong> <strong>220</strong> 129
13. Glossary13 GlossaryASCIIAmerican Standard Code for InformationInterchangeis a 7-bit character code which includesthe Latin alphabet in upper and lowercase, the t<strong>en</strong> Arabic numbers and arange of special and control characters.Computers and other electronic devicesthat process text g<strong>en</strong>erally hold text inASCII format.Binary or Binary fileD−ESI 100FrameFirmwareA binary file is a file which, in contrast toa pure text file, also contains nonalphabeticcharacters. As such, any bytevalue may occur. Files in binary formatare g<strong>en</strong>erally used to store data andexecutable programs. Executable files ofcompiled programs are therefore oft<strong>en</strong>referred to simply as binaries.Binary formats can be read and savedmore quickly than text files and requireless storage space on mass storagemedia. Special editors are required forreading, editing and saving binary dataformats.D−ESI 100 is a PC program fromDURAG with a graphical interface forsystem configuration, operating andmanagem<strong>en</strong>t of DURAG s<strong>en</strong>sor devices.The D−<strong>FL</strong> <strong>220</strong> measuring heads can beoperated without using this software.in this <strong>manual</strong> g<strong>en</strong>erally means a datapackageis software that is embedded electronicdevices. It is mostly saved in flashmemories, EPROMs, EEPROMs orROMs and cannot be changed by theuser except by use of special tools orfunctions.Firmware is functionally tied to thehardware, i.e. neither can be usedwithout the other. Firmware acts as anintermediary betwe<strong>en</strong> hardware (i.e. thephysical parts of a device) and thesoftware (the exchangeable programs ona device).In situ measurem<strong>en</strong>t processThe term in situ (Latin for at the (original)location, on the premises, "on the spot")in <strong>en</strong>vironm<strong>en</strong>tal technology d<strong>en</strong>otes theexecution of defined procedures on thespot.Integration timeThe D−<strong>FL</strong> <strong>220</strong> system performs itmeasurem<strong>en</strong>ts at short intervals(
13. GlossaryRS485 interfaceSingleThe RS 485 interface is analogous to theRS 422 interface. It was developed forserial high-speed data transfer over longdistances and is becoming increasinglywidespread in the industrial sector.The data cables must be installed astwisted pairs.floating-point numbers are normallyrepres<strong>en</strong>ted in computers as sequ<strong>en</strong>cesof 32-bit (single ≙ "single precision") or64-bit (double ≙ "double precision")bytes.Transducer also called an oscillator or here anultrasonic transducerA sonic transducer is a device whichconverts electrical <strong>en</strong>ergy (in this case)by application of the piezo effect intoacoustic signals and vice versa, i.e. itacts as an (ultra-)sonic transmitter andreceiver.WNr (material number)A material number is a means of uniquelyid<strong>en</strong>tifying a material. The WNr. isdefined by EN 10027-2.Word Data word or just wordA data word is the basic processing unitof data in a computer, or more g<strong>en</strong>erallythe smallest addressable unit in anelectronic compon<strong>en</strong>t. A synonym for italso the expression binary word. The sizeof this data unit is expressed in bits,meaning the width or l<strong>en</strong>gth of the word,also tak<strong>en</strong> as the bus width.The expression "word" is oft<strong>en</strong> used in adiffer<strong>en</strong>t s<strong>en</strong>se. A word can th<strong>en</strong> mean a(platform-indep<strong>en</strong>d<strong>en</strong>tly) specified unit ofdata of a fixed size.Watchdog timerIs used in cases where the system mustcontinue to be operable after an error.For this purpose, the watchdog uses atimer which must be reset to zero eachtime by the application. If the applicationis not able to do this because of an error,the watchdog triggers a reset. Thesystem starts again and remainsoperational.132 D−<strong>FL</strong> <strong>220</strong>
13BIndex14 IndexAAccid<strong>en</strong>ts 26Address 120setting the Modbus 81Hazard due to gases 25Ambi<strong>en</strong>t temperature <strong>11</strong>6, <strong>11</strong>7, <strong>11</strong>8Approvals 40ASCII 131BBasic settings of all values <strong>11</strong>9Baud rate 82, 120Binary 131Binary file 131CCable l<strong>en</strong>gth, max. for Modbus 120Cable specification for Modbus 120Calculation correction 46Calculation mode 92Characteristic curve 46Check measurem<strong>en</strong>ts, diagram 89Checking the measurem<strong>en</strong>t point 72Checking the system functionality 72ChecklistPreconditions for operation 71Preconditions for use 51Chimneysbrick chimneys 55Circuit board designation 42Clamping lock 41Clamping ring 41Clearance 123Commissioning 71Communications settings 120Company addressesDURAG GROUP 137Configuration of the measuring heads 67Configuration switch S1 67, 68Connectiondiagram 52measuring head 66Connection D-ISP - adapter <strong>11</strong>1Connection D-ISP - circuit board no. 3 <strong>11</strong>1Consequ<strong>en</strong>tial damage 26Contact position of relay 69Correction factor 46Cross-section area 63Curr<strong>en</strong>t output <strong>11</strong>7, <strong>11</strong>9Customer service information 14, 97D−<strong>FL</strong> <strong>220</strong> 133DData cable, specification 52Date, setting of 80Declaration of Conformity 129Default settings <strong>11</strong>9Deposits 100D−ESI 100 77, 101, <strong>11</strong>7Message groups 101D−ESI 100 131Designation of system compon<strong>en</strong>ts 41Device compon<strong>en</strong>ts, Designation 41Device description D−<strong>FL</strong> <strong>220</strong> 39Device functions 107Device serial number 44Diagram measured value corrections, examples85Diameter, hydraulic 53Digital outputs, function test <strong>11</strong>0DIP switchS1 68DIP switches 63, 67Dismantling 73Disposal 73Dot, red 55DURAG Modbus 67, 68, 70EElectricians, definition 21Emerg<strong>en</strong>cy reporting 27Emerg<strong>en</strong>cy stop devices 27Explanation of symbols 12FFault messages 101by LED 70Faults, simple 106Features 39Fields of application 39
14. 13BIndexFilter width, ultrasonic signal 93Flowprofile 45, 53velocity <strong>11</strong>6Fluesdouble-walled 56measurem<strong>en</strong>t ducts, thin-walled 55FRP 35Functional description 45Further device settings 91Fuses 128GGas to be measuredpressure <strong>11</strong>6temperature 45Gas velocity 45Gasket, on the measuring head 41, 65Glass fibre-reinforced plastic ducts 54HHazard 26due to electrical operating equipm<strong>en</strong>t 23Hazard to the device due to purge air failure 25IIn situ 131Installationmeasuring head 63preparation 50purge air unit 61step by step 50terminal box 57Installation locationmeasurem<strong>en</strong>t point 53, 54terminal box 57Installation sequ<strong>en</strong>ceD−<strong>FL</strong> <strong>220</strong> Measurem<strong>en</strong>t system 51D−<strong>FL</strong> <strong>220</strong> Measuring heads 64Installation, electrical 50Instructionsfor <strong>en</strong>vironm<strong>en</strong>tal protection 13Instructions for delivery 31Instructions on warranty 14Interface 120Items suppliedStandard 33JJumper X7 68, 69LLEDs, meaning thereof 70Limit value infringem<strong>en</strong>ts 45Limitation of liability 13List of device fuses 128Locking screw 41MMaint<strong>en</strong>ance 97work 98work, not permissible 20work, table 99Maint<strong>en</strong>ance and service functions 108Material number 132Measured value corrections 84Measured value output channel, setting the 83,86Measured value outputs <strong>11</strong>7Measurem<strong>en</strong>t location questionnaire <strong>11</strong>4Measurem<strong>en</strong>t point, selection 53Measurem<strong>en</strong>t principle 45Measurem<strong>en</strong>t variable <strong>11</strong>6Measuring head parameters 63Measuring path l<strong>en</strong>gth, active 63, 91Messagescurr<strong>en</strong>t critical errors 106curr<strong>en</strong>t messages 102curr<strong>en</strong>t simple errors 106curr<strong>en</strong>t warnings 102in the fault log 101Minimum level 93Modbus 131Indep<strong>en</strong>d<strong>en</strong>t User Organisation (IDA) 78over Serial Line Specification and Implem<strong>en</strong>tationGuide 78Protocol Specifications 78setting the address 81setting the Baud rate 82Modbus address 120Motor protection switch 61OOffset 63Operating voltage 44, <strong>11</strong>8Operation 72Operators, definition 2<strong>11</strong>34 D−<strong>FL</strong> <strong>220</strong>
14. 13BIndexO-ring on the measuring head 41PParameter checking, checklist 79Parameterscurr<strong>en</strong>t output 87fault indication suppression 90gradi<strong>en</strong>t 85integration time 84limit values 84maint<strong>en</strong>ance settings 89measurem<strong>en</strong>t location 90Offset 85refer<strong>en</strong>ce point test 89relay logic 88relay settings 87setpoint 89setting the device outputs 87settings 86signal range 85type code 83zero range 86Personnel, skills 21Plausibility testing 72Power supply cable 52Preconditions for use 51Pressure comp<strong>en</strong>sation diaphragm 41Protection type 44measuring head <strong>11</strong>7purge air unit <strong>11</strong>8terminal box 66, <strong>11</strong>8Protective equipm<strong>en</strong>t, personal 22Purge air connection 41Purge air hoses, instructions on 62Purge flange 41QQuick Info 77RRating plate 43, 44meaning of the information 44Red dot 54RelayContact position 69Relays, outputs, configuration of the 88Relays, switching logic, configuration of the 88Replacem<strong>en</strong>t material 128Response time <strong>11</strong>7RoHS conformity 73RS485 interface 132SS1 (DIP switch) 67Safety instructionsspecific 12Safety instructions, g<strong>en</strong>eral 19Save parameters <strong>11</strong>0Save, parameters <strong>11</strong>0Scope of supplyoptional equipm<strong>en</strong>t 34Secure the device against reconnection 24S<strong>en</strong>sor parameters 63Service <strong>en</strong>gineers, definition 21Service software <strong>11</strong>7Settingcurr<strong>en</strong>t output 87date/time 80device settings 1 92maint<strong>en</strong>ance settings 89measurem<strong>en</strong>t channels variables 83measurem<strong>en</strong>t location parameters 90Modbus address 81Modbus communications settings 82relay settings 88Settings for parameterising the measuringheads 77Signal positioning 92Simulation mode 93Single 132Skilled personnel, definition 21Slave address 120Software 101Spare parts 14Spare parts list 128Specified values for check measurem<strong>en</strong>ts 90Spring terminal 58Standardised volumetric flow 45measurem<strong>en</strong>t 45Storage conditions 32Symbols, other 13System compon<strong>en</strong>ts, Designation 41System layout (example) 50TTechnical data <strong>11</strong>6D−<strong>FL</strong> <strong>220</strong> application data <strong>11</strong>6D−<strong>FL</strong> <strong>220</strong> MK measurem<strong>en</strong>t head <strong>11</strong>7D−<strong>FL</strong> <strong>220</strong> SPF purge flange <strong>11</strong>8D−<strong>FL</strong> <strong>220</strong> 135
14. 13BIndexDim<strong>en</strong>sional drawings for optional weatherprotection hoods 126DURAG Modbus 120Local power supply <strong>11</strong>8Technical data D-BL blower unit (purge air unit)<strong>11</strong>8Technical data D-<strong>FL</strong> 200 E welding pipe withflange <strong>11</strong>8Technical data D-TB 101 A terminal box <strong>11</strong>8Test and simulation functions 109Threaded studs 41Time, setting of 80Tips, recomm<strong>en</strong>dations 12Transducer 132Transport 50, 52damage 31Transport inspection 31UUltrasonic signal 93Ultrasonic transducer 41USB port 41Use, designated 20, 39VVisual checking 99Volumetric flow 45s<strong>en</strong>sing 45WWarning instructions, specificreadoperating instructions 13Warning remarks, g<strong>en</strong>eralHigh risk - danger 12Warning, specificexplosions 13Warningsspecific - electric power 13specific - ESD 13specific - g<strong>en</strong>eral warning symbol 13specific - hot surfaces 13Warnings, g<strong>en</strong>erallow risk - caution 12medium risk - warning 12risk of equipm<strong>en</strong>t/<strong>en</strong>vironm<strong>en</strong>tal damage - notice 12Warnings, specificmoisture 13Warranty 14Weather protection hoodmeasuring heads 36, 126purge air unit 36, 61, 127WNr 132Word (data word) 132XX1 60X10 60X2 60X3 60X4 60YYear of manufacture 44136 D−<strong>FL</strong> <strong>220</strong>
<strong>15</strong>. 14BDURAG GROUP company addresses<strong>15</strong> DURAG GROUP company addressesDURAG GmbH Kollaustr. 10522453 Hamburg GermanyTel. +49 (0)40 55 42 18 – 0Fax +49 (0)40 58 41 54E-Mail: info@durag.deDVN – DURAGVertrieb/Service NordDVO – DURAGVertrieb/Service OstDVS – DURAGVertrieb/Service SüdDVW – DURAGVertrieb/Service WestE-Mail: DURAG-Nord@durag.de E-Mail: DURAG-Ost@durag.de E-mail: DURAG-Sued@durag.de E-Mail: DURAG-West@durag.deKollaustr. 10522453 HamburgTel. +49 (0)40 55 42 18 – 0Fax +49 (0)40 58 41 54Halsbrücker Str. 3409599 FreibergTel. +49 (0)37 31 30 04 – 0Fax +49 (0)37 31 30 04 – 22Weid<strong>en</strong>weg 1673087 Bad BollTel. +49 (0)71 64 9 12 25 – 0Fax +49 (0)71 64 9 12 25 – 50An der Pönt 53a40885 Rating<strong>en</strong>Tel. +49 (0)21 02 74 00 – 0Fax +49 (0)21 02 74 00 – 28DURAG UK Office DURAG France Sarl DURAG Italia S.r.lE-Mail: durag.uk@durag.de E-Mail: info@durag-france.fr E-Mail: info@durag.itSuite 17Brookside Business ParkCold Meece,Stone ST<strong>15</strong> 0RZGreat BritainTel. +44 (0)17 85 76 00 07Fax +44 (0)17 85 76 00 1449 rue Léonard de VinciBP 7016695691 GoussainvilleFranceTel. +33 (0)1 30 18 <strong>11</strong> 80Fax +33 (0)1 39 33 83 60Via Carlo Panseri, <strong>11</strong>828100 NovaraItalyTel. +39 03 21 67 95 69Fax +39 03 21 47 41 65DURAG, Inc.Durag IndiaInstrum<strong>en</strong>tationPrivate LimitedE-Mail: info@durag.comE-Mail: info@duragindia.com1355 M<strong>en</strong>dota Heights Road,Suite 200M<strong>en</strong>dota Heights,Minnesota MN 55120USATel. +1 (0)65 14 51 – 17 10Fax +1 (0)65 14 57 – 76 84#143/16, 4th Main Road,IndustrialTown,RajajinagarBangalore 560 044IndiaTel.: + 91 (0)80 23 14 56 26Ext 20Fax: + 91 (0)80 23 14 56 27DURAG process &systems technology gmbhDURAG data systemsGmbHHegwein GmbHSmitsvonk Holland B.V.E-Mail: info@durag-process.de E-Mail: info@durag-data.de E-Mail: info@hegwein.de E-Mail: sales@smitsvonk.nlKollaustr. 10522453 HamburgGermanyTel. +49 (0)40 55 42 18 – 0Fax +49 (0)40 58 41 54Kollaustr. 10522453 HamburgGermanyTel. +49 (0)40 55 42 18 – 30 00Fax +49 (0)40 55 42 18 – 30 99Am Boschwerk 770469 StuttgartGermanyTel. +49 (0)7 <strong>11</strong> 13 57 88 – 0Fax +49 (0) 7 <strong>11</strong> 13 57 88 – 5P.O.Box 180 · 2700ADZoetermeerLoodstraat 57 · 2718 RVZoetermeerThe NetherlandsTel. +31 (0)79 361 35 33Fax +31 (0)79 361 13 78VEREWA Umwelt- undProzessmesstechnik GmbHE-Mail: verewa@durag.deKollaustr. 10522453 HamburgGermanyTel. +49 (0)40 55 42 18 – 0Fax +49 (0)40 58 41 54D−<strong>FL</strong> <strong>220</strong> 137
GmbH · Kollaustraße 105 · 22453 Hamburg · www.durag.de