


You also want an ePaper? Increase the reach of your titles
YUMPU automatically turns print PDFs into web optimized ePapers that Google loves.
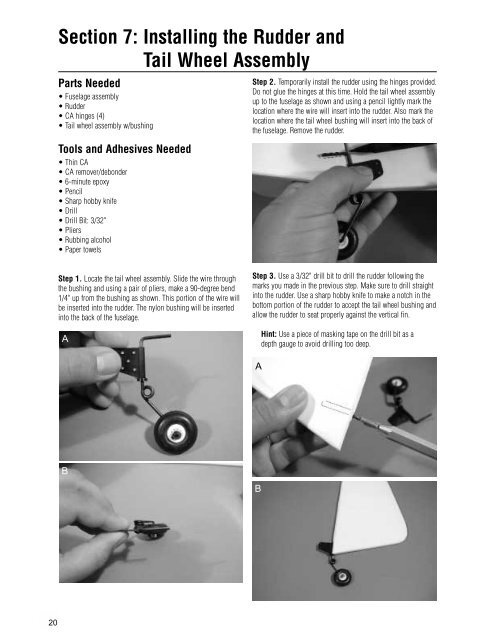
Section 7: Installing the Rudder andTail Wheel AssemblyParts Needed• Fuselage assembly• Rudder• CA hinges (4)• Tail wheel assembly w/bushingTools and Adhesives Needed• Thin CA• CA remover/debonder• 6-minute epoxy• Pencil• Sharp hobby knife• Drill• Drill Bit: 3/32"• Pliers• Rubbing alcohol• Paper towelsStep 2. Temporarily install the rudder using the hinges provided.Do not glue the hinges at this time. Hold the tail wheel assemblyup to the fuselage as shown and using a pencil lightly mark thelocation where the wire will insert into the rudder. Also mark thelocation where the tail wheel bushing will insert into the back ofthe fuselage. Remove the rudder.Step 1. Locate the tail wheel assembly. Slide the wire throughthe bushing and using a pair of pliers, make a 90-degree bend1/4" up from the bushing as shown. This portion of the wire willbe inserted into the rudder. The nylon bushing will be insertedinto the back of the fuselage.AStep 3. Use a 3/32" drill bit to drill the rudder following themarks you made in the previous step. Make sure to drill straightinto the rudder. Use a sharp hobby knife to make a notch in thebottom portion of the rudder to accept the tail wheel bushing andallow the rudder to seat properly against the vertical fin.Hint: Use a piece of masking tape on the drill bit as adepth gauge to avoid drilling too deep.ABB20


