installation and operation manual for electric tilting braising pans ...
installation and operation manual for electric tilting braising pans ...
installation and operation manual for electric tilting braising pans ...

Create successful ePaper yourself
Turn your PDF publications into a flip-book with our unique Google optimized e-Paper software.
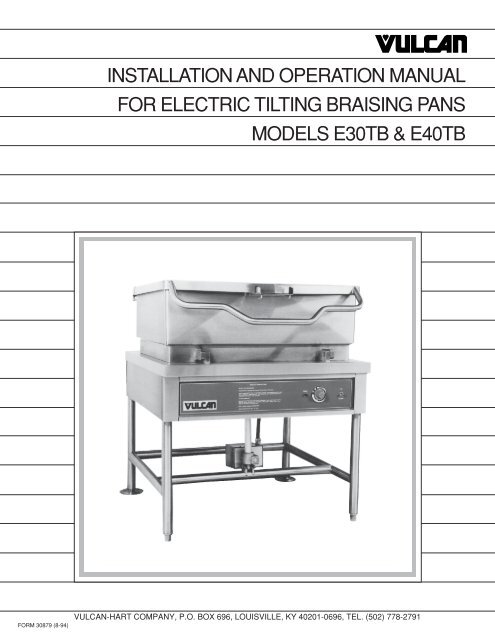
INSTALLATION AND OPERATION MANUALFOR ELECTRIC TILTING BRAISING PANSMODELS E30TB & E40TBFORM 30879 (8-94)VULCAN-HART COMPANY, P.O. BOX 696, LOUISVILLE, KY 40201-0696, TEL. (502) 778-2791
TABLE OF CONTENTSGENERAL. . . . . . . . . . . . . . . . . . . . . . . . . . . . . . . . . . . . . . . . . . . . . . . . . . . . . . . . . . . . . . . . . . . . . . 3INSTALLATION . . . . . . . . . . . . . . . . . . . . . . . . . . . . . . . . . . . . . . . . . . . . . . . . . . . . . . . . . . . . . . . . . 3Unpacking . . . . . . . . . . . . . . . . . . . . . . . . . . . . . . . . . . . . . . . . . . . . . . . . . . . . . . . . . . . . . . . . 3Location . . . . . . . . . . . . . . . . . . . . . . . . . . . . . . . . . . . . . . . . . . . . . . . . . . . . . . . . . . . . . . . . . 3Installation Codes <strong>and</strong> St<strong>and</strong>ards . . . . . . . . . . . . . . . . . . . . . . . . . . . . . . . . . . . . . . . . . . . . . 4Leveling <strong>and</strong> Anchoring Tilting Braising Pan . . . . . . . . . . . . . . . . . . . . . . . . . . . . . . . . . . . . 4Electrical Connections . . . . . . . . . . . . . . . . . . . . . . . . . . . . . . . . . . . . . . . . . . . . . . . . . . . . . . 4Installation Diagram . . . . . . . . . . . . . . . . . . . . . . . . . . . . . . . . . . . . . . . . . . . . . . . . . . . . . . . . 5OPERATION . . . . . . . . . . . . . . . . . . . . . . . . . . . . . . . . . . . . . . . . . . . . . . . . . . . . . . . . . . . . . . . . . . . 6Be<strong>for</strong>e First Use . . . . . . . . . . . . . . . . . . . . . . . . . . . . . . . . . . . . . . . . . . . . . . . . . . . . . . . . . . . 6Controls . . . . . . . . . . . . . . . . . . . . . . . . . . . . . . . . . . . . . . . . . . . . . . . . . . . . . . . . . . . . . . . . . 6Start-up Procedure . . . . . . . . . . . . . . . . . . . . . . . . . . . . . . . . . . . . . . . . . . . . . . . . . . . . . . . . . 6Daily Shutdown Procedure . . . . . . . . . . . . . . . . . . . . . . . . . . . . . . . . . . . . . . . . . . . . . . . . . . 7Tilting the Braising Pan . . . . . . . . . . . . . . . . . . . . . . . . . . . . . . . . . . . . . . . . . . . . . . . . . . . . . 7Cleaning . . . . . . . . . . . . . . . . . . . . . . . . . . . . . . . . . . . . . . . . . . . . . . . . . . . . . . . . . . . . . . . . . 8Cooking Guidelines . . . . . . . . . . . . . . . . . . . . . . . . . . . . . . . . . . . . . . . . . . . . . . . . . . . . . . . . 8MAINTENANCE . . . . . . . . . . . . . . . . . . . . . . . . . . . . . . . . . . . . . . . . . . . . . . . . . . . . . . . . . . . . . . . . 11Adjustments . . . . . . . . . . . . . . . . . . . . . . . . . . . . . . . . . . . . . . . . . . . . . . . . . . . . . . . . . . . . . 11Service <strong>and</strong> Parts In<strong>for</strong>mation . . . . . . . . . . . . . . . . . . . . . . . . . . . . . . . . . . . . . . . . . . . . . . . 11TROUBLESHOOTING . . . . . . . . . . . . . . . . . . . . . . . . . . . . . . . . . . . . . . . . . . . . . . . . . . . . . . . . . . . 12– 2 –
Installation, Operation <strong>and</strong> Care ofELECTRIC TILTING BRAISING PANSMODELS E30TB & E40TBKEEP THESE INSTRUCTIONS FOR FUTURE USEGENERALVulcan-Hart Electric Tilting Braising Pans are installed on a tubular base <strong>and</strong> are available in two sizes.Model E30TB has a 30-gallon capacity, <strong>and</strong> Model E40TB has a 40-gallon capacity. Both models areavailable <strong>for</strong> 208, 240 or 480 volt, single- or three-phase, 60 Hz <strong>electric</strong>al supply.The <strong>tilting</strong> <strong>braising</strong> pan is a versatile piece of equipment. It allows you to stew, simmer, pan fry, braise,grill or saute, <strong>and</strong> all with a very uni<strong>for</strong>m heat pattern.St<strong>and</strong>ard features include a <strong>tilting</strong> switch, solid state temperature control, removable strainer,receiving pan support, <strong>and</strong> a lid with full width, drop-type h<strong>and</strong>le that can be opened from any position.Optional accessories include stainless steel pan support, <strong>and</strong> steam pan insert.Vulcan-Hart Company suggests that you thoroughly read this entire <strong>manual</strong> <strong>and</strong> carefully follow all ofthe instructions provided.Your Vulcan-Hart Electric Tilting Braising Pan is produced with quality workmanship <strong>and</strong> material.Proper <strong>installation</strong>, usage <strong>and</strong> maintenance of your <strong>tilting</strong> <strong>braising</strong> pan will result in many years ofsatisfactory per<strong>for</strong>mance.INSTALLATIONUNPACKINGImmediately after unpacking, check <strong>for</strong> possible shipping damage. If the <strong>tilting</strong> <strong>braising</strong> pan is foundto be damaged, save the packaging material <strong>and</strong> contact the carrier within 15 days of delivery.Be<strong>for</strong>e installing, verify that the <strong>electric</strong>al service agrees with the specifications on the rating platelocated on the left side panel as you face the front of the <strong>braising</strong> pan. If the supply <strong>and</strong> equipmentrequirements do not agree, contact your dealer or Vulcan-Hart immediately.LOCATIONThe <strong>installation</strong> location must allow adequate clearances <strong>for</strong> servicing <strong>and</strong> proper <strong>operation</strong>. Aminimum front clearance of 36" is required.– 3 –
INSTALLATION CODES AND STANDARDSYour Vulcan Electric Tilting Braising Pan must be installed in accordance with:1. State <strong>and</strong> local codes, or in the absence of local codes, with:2. National Electrical Code ANSI/NFPA-70 (latest edition).3. ANSI NFPA St<strong>and</strong>ard #96, "Vapor Removal from Cooking Equipment," (latest edition), availablefrom the National Fire Protection Association, Batterymarch Park, Quincy, MA 02269.LEVELING AND ANCHORING TILTING BRAISING PAN1. Place <strong>tilting</strong> <strong>braising</strong> pan in the <strong>installation</strong> position.2. Place a carpenter's level on top of the <strong>braising</strong> pan <strong>and</strong> turn the adjustable feet to level <strong>braising</strong> <strong>pans</strong>ide-to-side <strong>and</strong> front-to-back.3. Mark hole locations on the floor through the anchoring holes provided in the rear flanged adjustablefeet.4. Remove <strong>tilting</strong> <strong>braising</strong> pan from <strong>installation</strong> position <strong>and</strong> drill holes in locations marked on the floor.(See INSTALLATION DIAGRAM in this <strong>manual</strong>.) Insert proper anchoring devices (not supplied).5. Place <strong>tilting</strong> <strong>braising</strong> pan back in the <strong>installation</strong> position.6. Place carpenter's level on top of <strong>braising</strong> pan <strong>and</strong> re-level side-to-side <strong>and</strong> front-to-back.7. Bolt <strong>and</strong> anchor <strong>tilting</strong> <strong>braising</strong> pan securely to the floor.8. Seal bolts <strong>and</strong> flanged feet with silastic or equivalent compound.ELECTRICAL CONNECTIONSWARNING: ELECTRICAL AND GROUNDING CONNECTIONS MUST COMPLY WITH THEAPPLICABLE PORTIONS OF THE NATIONAL ELECTRICAL CODE AND/OR OTHER LOCALCODES.WARNING: DISCONNECT THE ELECTRICAL POWER SUPPLY AND PLACE A TAG AT THEDISCONNECT SWITCH TO INDICATE THAT YOU ARE WORKING ON THE CIRCUIT.The wiring compartment is located behind the control panel. Remove the wiring compartment cover<strong>and</strong> make <strong>electric</strong>al connections per the wiring diagram located inside the control housing cover panel.The <strong>braising</strong> pan must be grounded in accordance with requirements of the National Electrical Codeor applicable local code.Replace wiring compartment cover.– 4 –
ELECTRICAL DATA CHARTMODEL PH 208V 240V 380V 415V 480VKW AMP KW AMP KW AMP KW AMP KW AMPE30TB 3 12.0 38.3 12.0 34.0 12.0 21.0 12.0 19.0 12.0 18.01 12.0 62.7 12.0 55.0E40TB 3 15.0 41.7 15.0 36.1 15.0 22.8 15.0 20.8 15.0 18.01 15.0 72.2 15.0 62.5The above in<strong>for</strong>mation is compiled in accordance with the National Electrical Code, latest edition.INSTALLATION DIAGRAMINCHES/MMMODEL CAPACITY A B CE30TB 30 gallons 36.0 30.0 68.0114 liters 914 762 1727E40TB 40 gallons 48.0 42.0 68.0152 liters 1219 1067 1727– 5 –
OPERATIONWARNING: THE TILTING BRAISING PAN AND ITS PARTS ARE HOT. USE CARE WHENOPERATING, CLEANING AND SERVICING THE TILTING BRAISING PAN.BEFORE FIRST USEUsing a non-corrosive, grease-dissolving commercial cleaner, clean the protective metal oils from allsurface parts <strong>and</strong> the interior of the <strong>tilting</strong> <strong>braising</strong> pan. Follow the cleaner manufacturer's directions.Rinse thoroughly <strong>and</strong> drain the pan. Wipe dry with a soft clean cloth.CONTROLS (Fig. 1)Red Temperature LightThermostatTilt Switch— Will light when heating elements are supplying heat to the <strong>tilting</strong><strong>braising</strong> pan.— Turns <strong>tilting</strong> <strong>braising</strong> pan ON <strong>and</strong> maintains set temperature bycontrolling power supply. Temperature settings range from 1 to 10.(See COOKING GUIDELINES in this <strong>manual</strong> <strong>for</strong> temperature ranges<strong>for</strong> settings 1-10.)— Push UP to raise <strong>tilting</strong> <strong>braising</strong> pan; push DOWN to lower <strong>tilting</strong><strong>braising</strong> pan.Red Temperature LightThermostatTilt SwitchTEMP21OFF109UP345687DOWNPL-51534Fig. 1START-UP PROCEDURE1. Ensure that the <strong>braising</strong> pan is in the DOWN position.2. Turn THERMOSTAT dial to HIGH (#10). The red TEMPERATURE LIGHT will come on.– 6 –
3. When <strong>braising</strong> pan has reached set temperature, the red TEMPERATURE LIGHT will go off <strong>and</strong>the heating elements will shut off. The heating elements will cycle on <strong>and</strong> off thereafter to maintainset temperature. The red TEMPERATURE LIGHT will be on when the heating elements are on <strong>and</strong>off when the heating elements are off.4. Preheat <strong>braising</strong> pan <strong>and</strong> allow it to cycle to equalize heat across the entire surface.5. Water should boil faster with the lid down.6. Turn THERMOSTAT to OFF when <strong>braising</strong> pan is not in use.DAILY SHUTDOWN PROCEDURETo turn <strong>tilting</strong> <strong>braising</strong> pan off, turn THERMOSTAT dial to OFF.TILTING THE BRAISING PAN1. DO NOT try to tilt <strong>braising</strong> pan with lid down.2. Make sure the receiving pan is in place.3. To tilt <strong>braising</strong> pan, push <strong>and</strong> hold TILT SWITCH in the UP mode until desired pan position has beenreached. The <strong>braising</strong> pan will empty when raised to the top tilt position.When the <strong>braising</strong> pan is raised 5° or more, the heating elements will be turned off automatically.The <strong>braising</strong> pan will not operate once the pan has been tilted.4. Food is poured through the removable strainer (Fig. 2) into a food receiving pan positioned underthe lip of the pouring spout (Fig. 2).5. To lower <strong>braising</strong> pan, push <strong>and</strong> hold TILT SWITCH in the DOWN mode.Removable StrainerPouring SpoutReceivingPan SupportPL-51537Fig. 2– 7 –
CLEANINGWARNING: DISCONNECT ELECTRICAL POWER SUPPLY BEFORE CLEANING.After each use, allow the <strong>tilting</strong> <strong>braising</strong> pan to cool <strong>and</strong> clean it. Keep exposed cleanable areas of the<strong>tilting</strong> <strong>braising</strong> pan clean at all times. Do not get water in <strong>electric</strong>al box or any <strong>electric</strong>al component.1. Thoroughly wash pan, pouring spout (see Fig. 2) , lid <strong>and</strong> exterior surfaces with detergent <strong>and</strong> warmwater. If necessary, soak pan to remove food that is stuck to pan surface. Rinse thoroughly <strong>and</strong>wipe dry with a soft clean cloth.2. Clean removable strainer <strong>and</strong> receiving pan support (Fig. 2) with detergent <strong>and</strong> warm water. Rinsethoroughly <strong>and</strong> wipe dry with a soft clean cloth.COOKING GUIDELINESThe guidelines given below are suggested quantities, temperature settings, <strong>and</strong> estimated numbersof orders per load <strong>and</strong> per hour. When two temperatures are given, the first is to start the product, <strong>and</strong>the second to finish the product.The following temperatures should be used:Temperature(°F)ThermostatSettingSimmering 200 Max. 1 – 4Sauteeing 225 – 275 5 – 6Searing 300 – 350 7 – 8Frying 325 – 375 8 – 9Grilling 350 – 450 9 – 10BATCHES E30TB E40TBPORTION TEMP. PER PER LOAD PER LOADITEM SIZE (°F) HOUR QTY. PORTIONS QTY. PORTIONSBREAKFAST FOODSBacon 3 Slices 350 12 2 lb. 10 3 lb. 15Eggs–Boiled-Hard 1 egg 225 5 50 eggs 50 75 eggs 75–Boiled-Soft 1 egg 225 8 50 eggs 50 75 eggs 75–Fried 1 egg 400 4 30 eggs 30 45 eggs 45–Poached 1 egg 225 5 36 eggs 36 60 eggs 60–Scrambled 1 1 /2 eggs 300–200 1 18 gal. 720 28 gal. 1100French Toast 3 slices 450 7 35 slices 12 50 slices 17Regular Oatmeal 1/2 cup 250 2 20 lb (100 cups) 500 40 lb (200 cups) 1000Pancakes 2 each 400 10 30 ea. 15 50 ea. 25– 8 –
BATCHES E30TB E40TBPORTION TEMP. PER PER LOAD PER LOADITEM SIZE (°F) HOUR QTY. PORTIONS QTY. PORTIONSFISHClams 1 pt. 400 10 10 qts. 20 15 qts. 30Fish Cakes 2–3 oz. 400 5 70 – 3 oz. 35 110 – 3 oz. 55Haddock Fillet 4 oz. 400 4 60 – 4 oz. 60 90 – 4 oz. 90Halibut Steak 5 oz. 450 3 60 – 4 oz. 60 90 – 4 oz. 90Lobster 1 – 1# 350 4 20 – 1 lb. 20 30 – 1 lb. 30Swordfish 5 oz. 450 3 50 – 5 oz. 50 75 – 5 oz. 75SAUCES, GRAVIES, SOUPSBrown Gravy 1 oz. 350 – 200 2 18 gal. 2300 35 gal. 4500Cream Sauce 2 oz. 250 – 175 1 18 gal. 1150 35 gal. 2250Cream Soup 6 oz. 200 1 18 gal. 375 35 gal. 725French Onion Soup 6 oz. 225 1 18 gal. 350 35 gal. 700Meat Sauce 4 oz. 350 – 200 1 18 gal. 575 35 gal. 1100VEGETABLESCANNED 3 oz. 400 6 30 lb. 125 45 lb. 200FRESHBeans, Wax, Green 3 oz. 400 3 25 lb. 125 50 lb. 250Beets 3 oz. 400 1 30 lb. 125 60 lb. 300Broccoli 3 oz. 400 3 25 lb. 125 40 lb. 200Cabbage 3 oz. 400 5 20 lb. 80 30 lb. 125Carrots 3 oz. 400 2 35 lb. 150 70 lb. 300Cauliflower 3 oz. 250 5 15 lb. 75 25 lb. 125Corn 1 Ear 400 8 50 ears 50 75 ears 75Potatoes 3 oz. 400 2 40 lb. 200 60 lb. 300Spinach 4 oz. 250 10 6 lb. 25 9 lb. 35Turnips 4 oz. 400 2 20 lb. 100 30 lb. 150FROZENBeans, French Green 3 oz. 400 6 15 lb. 60 22 1 /2 lb. 90Lima Beans 3 oz. 250 4 15 lb. 60 22 1 /2 lb. 90Broccoli 3 oz. 400 8 12 lb. 50 18 lb. 75Sliced Carrots 3 oz. 250 6 15 lb. 60 22 1 /2 lb. 90Small Whole Carrots 3 oz. 250 3 15 lb. 50 22 1 /2 lb. 90Corn 3 oz. 250 18 15 lb. 50 22 1 /2 lb. 90Small Whole Onions 3 oz. 250 7 15 lb. 50 22 1 /2 lb. 90Peas 3 oz. 400 10 15 lb. 75 22 1 /2 lb. 110Spinach 3 oz. 400 3 15 lb. 75 22 1 /2 lb. 110DESSERTS, PUDDINGS, SWEET SAUCESButterscotch Sauce 1 oz. 200 1 18 gal. 2300 35 gal. 4500Cherry Cobbler 3 oz. 200 1 18 gal. 750 35 gal. 1500Chocolate Sauce 1 oz. 200 1 18 gal. 2300 35 gal. 4500Cornstarch Pudding 4 oz. 200 1 18 gal. 575 35 gal. 1100Fruit Gelatin 3 oz. 250 2 18 gal. 750 35 gal. 1500– 9 –
BATCHES E30TB E40TBPORTION TEMP. PER PER LOAD PER LOADITEM SIZE (°F) HOUR QTY. PORTIONS QTY. PORTIONSMEAT – POULTRYBacon 3 Slices 350 12 2 lb. 10 3 lb. 15BEEFAmer. Chop Suey 6 oz. 400 – 225 2 18 gal. 350 35 gal. 700Beef Stew 8 oz. 300 — 18 gal. 280 35 gal. 560Corned Beef Hash 5 oz. 400 5 16 lb. 50 25 lb. 75Cheeseburger 3 oz. 300 12 7 lb. 35 10 lb. 50Hamburger 3 oz. 300 15 7 lb. 35 10 lb. 50Meatballs 1 oz. 400 – 225 3 12 1 /2 lb. 65 18 lb. 100Pot Roast 2 oz. 350 – 200 120 lb. 500 180 lb. 750Salisbury Steak 5 oz. 400 3 16 lb. 50 24 lb. 75Sirloin Steak 6 oz. 400 5 15 lb. 40 22 1 /2 lb. 60Swiss Steak 4 oz. 300 – 200 1 25 lb. 110 40 lb. 160CHICKENPan Fried 2 – 1 /4's 350 3 50 pieces 25 80 pieces 40Whole 2 oz. 350 – 200 16-5 lb. 200 24-5 lb. 265FRANKFURTERSGrilled 2 oz. 300 8 22 lb. 176 33 lb. 264Boiled 2 oz. 250 12 16 lb. 128 25 lb. 200PORKHam Steak 3 oz. 400 8 10 lb. 50 15 lb. 75Pork Chops 5 oz. 350 4 15 lb. 50 25 lb. 75Sausage Links 3 links 350 7 30 lb. 120 45 lb. 180TURKEYOff Carcass 2 oz. 400 – 200 — 3 26-30 lb. 200 4 26-30 lb. 275On Carcass 2 oz. 400 – 200 — 4 16-20 lb. 175 6 16-20 lb. 265MISCELLANEOUSGrilled Cheese S<strong>and</strong>wich 1 s<strong>and</strong>. 400 8 35 s<strong>and</strong>. 35 50 s<strong>and</strong>. 50Macaroni & Cheese 8 oz. 200 2 18 gal. 300 35 gal. 525Rice 4 oz. 350 – 225 1 20 lb. raw 320 40 lb. raw 650Spaghetti 4 oz. 350 – 225 2 8 lb. raw 200 12 lb. raw 300– 10 –
MAINTENANCEWARNING: THE TILTING BRAISING PAN AND ITS PARTS ARE HOT. USE CARE WHENOPERATING, CLEANING AND SERVICING THE TILTING BRAISING PAN.WARNING: DISCONNECT ELECTRICAL POWER SUPPLY AND PLACE A TAG AT THEDISCONNECT SWITCH TO INDICATE THAT YOU ARE WORKING ON THE CIRCUIT BEFOREPERFORMING ANY MAINTENANCE.ADJUSTMENTSAll <strong>tilting</strong> <strong>braising</strong> <strong>pans</strong> are adjusted at the factory.At least twice a year, have a Vulcan-Hart authorized service person clean <strong>and</strong> adjust the <strong>tilting</strong> <strong>braising</strong>pan <strong>for</strong> maximum per<strong>for</strong>mance.SERVICE AND PARTS INFORMATIONTo obtain service <strong>and</strong> parts in<strong>for</strong>mation concerning the <strong>tilting</strong> <strong>braising</strong> pan, contact the Vulcan-HartService Depot in your area (refer to listing supplied with the <strong>braising</strong> pan), or Vulcan-Hart CompanyService Department at the address or phone number shown on the front cover of this <strong>manual</strong>.– 11 –
TROUBLESHOOTINGPROBLEMHeating elements do not come on.POSSIBLE CAUSES1. Thermostat is not turned ON.2. Blown fuse in main <strong>electric</strong>al panel.3. Pan is not in lowest position.4. Problem with the heating elements. Contactyour Vulcan-Hart authorized servicer.FORM 30879 (8-94)– 12 –PRINTED IN U.S.A.