1998 Buick Riviera Owner's Manual
1998 Buick Riviera Owner's Manual
1998 Buick Riviera Owner's Manual

Create successful ePaper yourself
Turn your PDF publications into a flip-book with our unique Google optimized e-Paper software.
The <strong>1998</strong> <strong>Buick</strong> <strong>Riviera</strong> Owner’s <strong>Manual</strong>1-12-13-14- 15- 16- 17- 18- 19-1i
We support voluntarytechnician certification.GENERAL MOTORS, GM, the GM Emblem, BUICK,the BUICK Emblem and the name FUVIERA areregistered trademarks of General Motors Corporation.This manual includes the latest information at the time itwas printed. We reserve the right to make changes in theproduct after that time without further notice. Forvehicles first sold in Canada, substitute the name“General Motors of Canada Limited” for <strong>Buick</strong> MotorDivision whenever it appears in tlns manual.Please keep this manual in your vehicle, so it will bethere if you ever need it when you’re on the road. If yousell the vehicle, please leave this manual it in so the newowner can use it.WE SUPPORTVOLUNTARY TECHNICIANCERTIFICATION THROUGHNational Institute forAUTOMOTIVESERVICEEXCELLENCEFor Canadian Owners Who Prefer aFrench Language <strong>Manual</strong>:Aux propribtaires canadiens: Vous pouvez vousprocurer un exemplaire de ce guide en frangais chezvotre concessionaire ou au:DGN Marketing Services Ltd.1500 Bonhill Rd.Mississauga, Ontario L5T 1C7Litho in U.S.A. @Copyright General Motors Corporation 1997Part No. 25655110 A First Edition All Rights Reserved..11
How to Use this <strong>Manual</strong>Many people read their owner’s manual from beginningto end when they first receive their new vehicle. Ifyou do this, it will help you learn about the featuresand controls for your vehicle. In this manual, you’llfind that pictures and words work togetherexplainthings quickly.IndexA good place to look for what you need is the Index inback of the manual. It’s an alphabeticalist of what’s inthe manual, and the page number where you’ll find it.Safety Warnings and SymbolsYou will find a number of safety cautions in this book.We use a box and the word CAUTION to tell youabout things that could hurt you if you were to ignorethe warning.c -- -These mean there is something that could hurtyou or other people.In the caution area, we tell you what the hazard is. Thenwe tell you what to do to help avoid or reduce thehazard. Please read these cautions. If you don’t, you orothers could be hurt.You will also find a circlewith a slash through it inthis book. This safetysymbol means “Don’t,’’“Don’t do this” or “Don’tlet this happen.”iii
Vehicle Damage WarningsAlso, in this book you will find these notices: not be coveredIn the notice area, we tell you about something that candamage your vehicle. Many times, this damage wouldby your warranty, and it could beI I costly. But the notice to do to - will helpavoid the damage.IINOTICE:These mean there is something that coulddamage your vehicle.- -IWhen you read other manuals, yo-- - ght seeCAUTION and NOTICE warnings m differentcolors or in different words.You'll also see warning labels on your vehicle. They usethe same words, CAUTION or NOTICE.iv
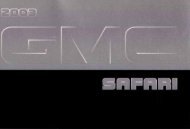
Vehicle SymbolsThese are some of the symbols you may find on your vehicle.LFor example,these symbolsare used on anoriginal battery:ACAUTIONPOSSIBLEINJURYPROTECTEYES BYSHIELDINGCAUSTICBATTERYACID COULDCAUSEBURNSAVOIDSPARKS ORFLAMESSPARK ORFLAMECOULDEXPLODEBATERY,\I/,These symbolsare importantfor you andyour passengerswhenever yourvehicle isdriven:DOOR LOCKUNLOCKFASTENSEATBELTSThese symbolshave to do withyour lamps:eTURNSIGNALS$0FOG LAMPSThese symbolsare on some ofyour controls:WINDSHIELDWIPERWINDSHIELDDEFROSTERWINDOWDEFOGGERVENTILATINGFANThese symbolsare used onwarning andindicator lights:-ENGINECOOLANTTEMPkr-BATTERYCHARGING I*]SYSTEM(0)HORN )trBRAKEENGINE OIL w,PRESSUREANTI-LOCK (@)BRAKESHere are someother symbolsyou may see:FUSEILIGHTER nSPEAKERbFUEL m
6 NOTESvi
Section 1 Seats and Restraint SystemsHere you’ll find information about the seats in your <strong>Buick</strong> and how to use your safety belts properly. You can alsolearn about some things you should not do with air bags and safety belts.1-21-81-121-131-131-201-211-211-27Seats and Seat ControlsSafety Belts: They’re for EveryoneHere are Questions Many People Ask AboutSafety Belts -- and the AnswersHow to Wear Safety Belts ProperlyDriver PositionSafety Belt Use During PregnancyRight Front Passenger PositionSupplemental Restraint System (SRS)Center Passenger Position1-291-321-351-381-521-551-551-56Rear Seat PassengersRear Safety Belt Comfort Guides for Childreand Small AdultsChildrenChild RestraintsLarger ChildrenSafety Belt ExtenderChecking Your Restraint SystemsReplacing Restraint System PartsAfter a Crash1-1
Seats and Seat ControlsThis section tells you about the seats -- how to adjustthem, and also about memory seats, reclining seatbacksand head restraints.Power SeatsThe power seat controls are located on the side of thedriver’s and passenger’s seats.Raise or lower the front of the seat cushion by holdingthe front part of the horizontal control up or down.Raise or lower the rear of the seat cushion by holdingthe rear part of the horizontal control up or down.Raise or lower the entire seat cushion by holding thewhole control up or down.Move the seat forward or back by holding the controlto the front or back.Power Lumbar Control (Option)If you have this option, the driver’s and passenger’sseatback lumbar support can be adjusted by moving thesingle switch located on the side of the seat. To increase ordecrease support, hold the switch forward or reward.
,Memory Seat and Mirrors (Option)To set your memory seat and mirrors:1. Adjust the driver’s seat cushion to your desiredposition. Adjust both outside mirrors to suit you. See“Mirrors” in the Index.When your vehicle is in PARK (P) with the ignition onor off, press the sane side of the MEMORY smitch torecall the seat and mirror-setting.To do the same thing for a second driver, fdow thepreceding steps, but press the other side of the ,.The memory function controls the driver’s seat cushion- MEMORY switch.ignition onor off, push EXIT and the seat will go all theway down and back.
Memory Seat and Mirrors Personal ChoiceFeature (Option)The transmitters can also be programmed to move thedriver’s seat and outside rnirrors to a set memoryposition when the transmitter’s UNLOCK buttonis pressed.To program the system:1. Adjust the driver’s seat cushion to a comfortableposition. Adjust both outside mirrors to suit you. See“Power Remote Control Mirror” in the Index.2. Press the SET button on the driver’s door armrest.You will hear one beep.3. Within five seconds, press one of the two memorybuttons on the armrest. You will hear two beeps toconfirm that the mirror and the seat positions areentered into memory.4. Press the UNLOCK button on the appropriatetransmitter within five seconds. You will heartwo beeps.The second transmitter can be programmed to recorda different seat and mirror position by following thesame steps.If you prefer to program the exit seat position, whichmoves the seat completely down and back, followthese steps:Press the SET button on the driver’s door armrest.You will hear one beep.Press the EXIT button on the armrest. You will hearone beep, but the seat will not move at this time.Press the UNLOCK button on the appropriatetransmitter within five seconds. You will heartwo beeps.This personal choice feature will work only when thevehicle is in PARK (P). A beep will sound inside thevehicle when the UNLOCK button on the transmitter ispressed to move the seat and mirrors.To turn this feature off, press SET and then UNLOCKwithin five seconds.
Heated Front Seat (Option)If your vehicle has thisoption, the switch is on thearmrest. With the ignition inACCESSORY or RUN,press the button once andthe seat will warm up. TheHI light on the button willcome on.Reclining Front SeatbacksThe front seatbacks can beadjusted by pressing thevertical control located onthe side of the seat. Push itforward to bring the seat toa more upright position.Push it rearward to reclinePress the button a second time and the LO light willcome on. The seat will warm to a lower temperature.Press the button a third time to turn off the heated seat.The heater will also turn off automatically when theignition is turned off.1-5
But don’t have a seatback reclined if your vehicleis moving.Sitting in a reclined position when your vehicle isin motion can be dangerous. Even if you buckleup, your safety belts can’t do their job whenyou’re reclined like this.The shoulder belt can’t its do job. In a crash youcould go into it, receiving neck or other injuries.The lap belt can’t do its job either. In a crash thebelt could go up over your abdomen. The beltforces would be there, not at your pelvic bones.This could cause serious internal injuries.For proper protection when the vehicle is inmotion, have the seatback upright. Then sitwell back in the seat and wear your safetybelt properly.1-6
Head RestraintsSlide the head restraint up or down so that the top of therestraint is closest to the top of your ears. This positionreduces the chance of a neck injury in a crash.If the seatback isn’t locked, it could moveforward in a sudden stop or crash. That couldcause injury to the person sitting there. Alwayspress rearward on the seatback to be sure itis locked.There’s one time the seatback may not fold withoutsome help from you. That’s if your vehicle is parkedgoing down a fairlv steet, hill.To fold a seatback forwardif it does lock in place, pushthe seatback toward the rearas you lift this latch. Thenthe seatback will foldforward. The latch mustbe down for the seat towork properly.The front seatback folds forward to let people get intothe back seat. Your seatback will move back and forthfreely, unless you come to a sudden stop. Then it willlock in place.1-7
Your vehicle has a lightthat comes on as a reminderto buckle up. (See “SafetyBelt Reminder Light’’ inthe Index.)Why Safety Belts WorkWhen you ride in or on anything, you go as fast asit goes.In most states and Canadian provinces, the law says towear safety belts. Here’s why: They work.You never know if you’ll be in a crash. If you do have acrash, you don’t know if it will be a bad one.A few crashes are mild, and some crashes can so beserious that even buckled up a person wouldn’t survive.But most crashes are in between. In many of them,people who buckle up can survive and sometimes walkaway. Without belts they could have been badly hurtor killed.After more than 30 years of safety belts in vehicles,the facts are clear. In most crashes buckling up doesmatter ... a lot!Take the simplest vehicle. Suppose it’s just a seaton wheels.
Put someone on it.Get it up to speed. Then stop the vehicle. The riderdoesn’t stop.1-10
The person keeps going until stopped by something.In a real vehicle, it could be the windshield ...or the instrument panel ...
or the safety belts!With safety belts, you slow down the as vehicle does.You get more time to stop. You stop over more distance,and your strongest bones take the forces. That’s whysafety belts make such good sense,Here Are Questions Many People AskAbout Safety Belts -- and the Answers&= Won’t I be trapped in the vehicle after anaccident if I’m wearing a safety belt?A: You could be -- whether you’re wearing a safetybelt or not. But you can unbuckle a safety belt,even if you’re upside down. And your chance ofbeing conscious during and after an accident, soyou cup2 unbuckle and get out, is much greater ifyou are belted.@’ If my vehicle has air bags, why should I have towear safety belts?A: Air bags are in many vehicles today and will be inmost of them in the future. But they aresupplemental systems only; so they work withsafety belts -- not instead of them. Every air bagsystem ever offered for sale has required the of usesafety belts. Even if you’re in a vehicle that has airbags, you still have to buckle up to get the mostprotection. That’s true not only in frontal collisions,but especially in side and other collisions.1-12
@ If I’m a good driver, and I never drive far fromhome, why should I wear safety belts?A: You may be an excellent driver, but if you’re in anaccident -- even one that isn’t your fault -- you andyour passengers can be hurt. Being a good driverdoesn’t protect you from things beyond yourcontrol, such as badrivers.Most accidents occur within 25 miles (40 km) ofhome. And the greatest number of serious injuriesand deaths occur at speeds of less than 40 mph(65 km/h).Safety belts are for everyone.How to Wear Safety Belts ProperlyAdultsThis part is only for people of adult size.Be aware that there are special things to know about safetybelts and children. And there are different rules for smallerchildren and babies. If a child will be riding in yourvehicle, see the part of this manual called “Children.”Follow those rules for everyone’s protection.vehicle has.We’ll start with the driver position.Driver PositionThis part describes the driver’s restraint system.Lap-Shoulder BeltThe driver has a lap-shoulder belt. The shoulder portionof the belt has an energy management loop. It isdesigned to open and help protect you in certain crasIf it opens, you will see a label on the safety belt thatsays to replace the belt. Be sure to so. do If you don’t,the safety belt won’t work properly and won’t protectyou in another crash. For more information on replacinsafety belts after a crash, see “Replacing Safety Belts”the Index.Here’s how to wear the lap-shoulder belt properly.1. Close and lock the door.2. Adjust the seat (to see how, see “Seats” in the Index)so you can sit up straight..vo
3. Pick up the latch plate and pull the belt across you.Don’t let it get twisted.4. Push the latch plate into the buckle until it clicks.pull up on the latch plate to make sure it is secure. Ifthe belt isn’t long enough, see “Safety BeltExtender” at the end of this section.Make sure the release button on the buckle ispositioned so you would be able to unbuckle thesafety belt quickly if you ever had to.1-14The lap part of the belt should be worn low and snug onthe hips, just touching the thighs. In a crash, this appliesforce to the strong pelvic bones. And you’d be less likelyto slide under the lap belt. If you slid under it, the beltwould apply force at your abdomen. This could causeserious or even fatal injuries. The shoulder belt should goover the shoulder and across the chest. These parts of thebody are best able to take belt restraining forces.The safety belt locks if there’s a sudden stop or crash.
J4. Let the belt go back all the way. You should hear aslight clicking sound. If you don't, the adjustment,.,feature won't set, and you'll have to start again.:. . , ,., i3. Just before it-reaches the end, give it a quick pull.
If you move around in the vehicle enough, pull out theshoulder belt, or open your door, the belt will becometight again. If this happens, you can reset it.@ What’s wrong with this?uuu U UYou can be seriou ~ J hurt if your shoulder belt istoo loose. In a crash, you would move forwardtoo much, which could increase injury. Theshoulder belt should fit against your body. Don’tallow more than 1 inch (25 mm) of slack.A: The shoulder belt is too loose. It won’t give nearlyas much protection this way.
A: The belt is buckled in the wrong place.
e." What's wrong with this?UYou can be seriously injured if you wear theshoulder belt under your arm. In a crash, yourbody would move too far forward, which wouldincrease the chance of head and neck injury.Also, the belt would apply too much force to theribs, which aren't as strong as shoulder bones.You could also severely injure internal organslike your liver or spleen.A: The shoulder belt is worn under the arm. It shouldbe worn over the shoulder at all times.1-18
@ What’s wrong with this?You can be seriously injured by a twisted belt. Ina crash, you wouldn’t have the full width of the--belt to spread impact forces. If a belt is twisted,make it straight so it can work properly, or askyour dealer fix it. to1IIIA: The belt is twisted across the body.1-19
To unlatch the belt, just push the button on the buckle.The belt should go back out of the wBefore you c1,as.e the door, be sure theway. If you slam the door on it, you can damage both the
The best way to protecthe fetus is to protect themother. When a safety belt is worn properly, it’s morelikely that the fetus won’t be hurt in a crash. Forpregnant women, as for anyone, the key to makingsafety belts effective is wearing them properly.Right Front Passenger PositionTo learn how to wear the right front passenger’ssafety belt properly, see “Driver Position” earlier inthis section.The right front passenger’s safety belt works the sameway as the driver’s safety belt -- except for one thing. Ifyou ever pull the lap portion of the belt out all the way,you will engage the child restraint locking feature. Ifthis happens, just let the belt go back all the way andstart again.If your vehicle has a center passenger position, sure beto use the correct buckle when buckling yourlap-shoulder belt. If you find thathe latch plate will notgo fully into the buckle, see if you are using the bucklefor the center passenger position.Supplemental Restraint System (SRS)This part explains the Supplemental Restraint System(SRS) or air bag system.Your vehicle has two air bags -- one air bag for thedriver and another air bag for the right front passenger.Here are the most important things to know about the airbag system:You can be severely injured or kiIled in a crash ifyou aren’t wearing your safety belt -- even if youhave air bags. Wearing your safety belt during acrash helps reduce your chance of hitting thingsinside the vehicle or being ejected from it. Airbags are “supplemental restraints” to the safetybelts. All air bags are designed to work withsafety belts, but don’t replace them. Air bags aredesigned to work only in moderate to severecrashes where the front of your vehicle hitssomething. They aren’t designed to inflate at allin rollover, rear, side or low-speed frontalcrashes. Everyone in your vehicle should wear asafety belt properly -- whether or not there’s anair bag for that person.1-21
AAir bags inflate with great force, faster than theblink of an eye. If you’re too close to an inflatingair bag, it could seriously injure you. Safety beltshelp keep you in position before and during acrash. Always wear your safety belt, even with airbags. The driver should sit as far back as possiblewhile still maintaining control of the vehicle.IChildren who are up against, or very close to, anair bag when it inflates can be seriously injuredor killed. Air bags plus lap-shoulder belts offerthe best protection for adults and older children,but not for young children and infants. Neitherthe vehicle’s safety belt system nor its air bagsystem is designed for them. Young children andinfants need the protection that a child restraintsystem can provide. Always secure childrenproperly in your vehicle. To read how, see thepart of this manual called “Children” and see thecaution labels on the sunvisors and the right frontpassenger’s safety belt.1-22
There is an air bag readinesslight on the instrumentpanel, which showsAIR BAG.How the Air Bag System WorksThe system checks the air bag electrical system formalfunctions. The light tells you if there is an electricalproblem. See “Air Bag Readiness Light” in the Indexfor more information.Where are the air bags?The driver’s air bag is in the middle of thesteering wheel.
The right -front passenger’s air bap is in the instrumentpanel on the passenger’s side. ;&$x I
1-25
When an air bag inflates, there is dust in the air.This dust could cause breathing problems forpeople with a history of asthma or otherbreathing trouble. To avoid this, everyone in thevehicle should get out as soon as it is safe to do so.If you have breathing problems but can’t get out’of the vehicle after an air bag inflates, then getfresh air by opening a window or door.In many crashes severe enough to inflate an air bag,windshields are broken by vehicle deformation.Additional windshield breakage may also occur from theright front passenger air bag.Air bags are designed to inflate only once. After theyinflate, you’ll need some new parts for your air bagsystem. If you don’t get them, the air bag systemwon’t be there to help protect you in another crash.A new system will include air bag modules andpossibly other parts. The service manual for yourvehicle covers the need to replace other parts.Your vehicle is equipped with a crash sensing anddiagnostic module, which records information aboutthe air bag system. The module records informationabout the readiness of the system, when the sensorsare activated and driver’s safety belt usage atdeployment.Let only qualified technmans worK on yourair bag system. Improper service can mean that yourair bag system won’t work properly. See your dealerfor service.I NOTICE:If you damage the covering for the driver’s or theright front passenger’s air bag, the bag may notwork properly. You may have to replace the airbag module in the steering wheel or both the airbag module and the instrument panel for theright front passenger’s air bag. Do not open orbreak the air bag coverings.1-26
If your vehicle ever gets into a lot of water -- such aswater up to the carpeting or higher -- or if water entersyour vehicle and soaks the carpet, the air bag controllercan be soaked and ruined. If this ever happens, and thenyou start your vehicle, the damage could make the airbags inflate, even if there’s no crash. You would have toreplace the air bags as well as the sensors and relatedparts. If your vehicle is ever in a flood, or if it’s exposedto water that soaks the carpet, you can avoid needlessrepair costs by turning off the vehicle immediately.Don’t let anyone start the vehicle, even to tow it, unlessthe battery cables are first disconnected.Servicing Your Air Bag-Equipped VehicleAir bags affect how your vehicle should be serviced.There are parts of the air bag system in several placesaround your vehicle. You don’t want the system toinflate while someone is working on your vehicle. Yourdealer and the <strong>Riviera</strong> Service <strong>Manual</strong> have informationabout servicing your vehicle and the air bag system. Topurchase a service manual, see “Service and OwnerPublications” in the Index.-7For up to 10 minutes after the ignition key isturned off and the battery is disconnected, an airbag can still inflate during improper service. Youcan be injured if you are close an to air bag whenit inflates. Avoid yellow connectors. They areprobably part of the air bag system. Be sure tofollow proper service procedures, and make surethe person performing work for you is qualifiedto do so.The air bag system does not need regular maintenance.Center Passenger PositionI1-27
Lap BeltIf your vehicle has a front split seat and a rearseat, someone can sit in the center positions.benchWhen you sit in a center seating position, you have lap asafety belt, which has no retractor. To make the beltlonger, tilt the latch plate and pull it along the belt.To make the belt shorter, pull its free end as shown untilthe belt is snug.Buckle, position and release it the s.ame way as the lappart of .a lap-shoulder belt. If the belt isn’t long enough,see “Safety Belt Extender” at the end of this section.Make sure the release button on the buckle is positionedso you would be able to unbuckle the safety belt quicklyif you ever had to.1-28
U1. Pick up the latch plate and pull the belt wross YOU.Don't let it get twisted.2. Push the latch plate into the buckle until it clicks.1-29
If the belt stops before it reaches the buckle, tilt thelatch plate and keep pulling until you can buckle it.Pull up on the latch plate to make sure it is secure.If the belt is not long enough, see “Safety BeltExtender” at the end of this section. Make sure therelease button on the buckle is positioned so youwould be able to unbuckle the safety belt quickly ifyou ever had to.3. To make the lap part tight, pull down on the buckleend of the belt as you pull up on the shoulder part.1-30
I n nThe safety belt locks if there’s a sudden stop or a crash.IYou can be seriously hurt if your shoulder belt istoo loose. In a crash, you would move forwardtoo much, which could increase injury. Theshoulder belt should fit against your body.The lap part of the belt should be worn low and snug onthe hips, just touching the thighs. In a crash, this appliesforce to the strong pelvic bones. And you’d be less likelyto slide under the lap belt. If you slid under it, the beltwould apply force at your abdomen. This could causeserious or even fatal injuries. The shoulder belt should goover the shoulder and across the chest. These parts of thebody are best able to take belt restraining forces.1-31
ChildrenEveryone in a vehicle needs protection! That includesinfants and all children smaller than adult size. Neitherthe distance traveled nor the age and size of the travelerchanges the need, for everyone, to use safety restraints.In fact, the law in every state in the United States and inevery Canadian province says children up to so ; agemust be restrained while in a vehicle.Smaller Children and BabiesIChildren who are up against, or very close to, anair bag when it inflates can be seriously injuredor killed. Air bags plus lap-shoulder belts offerthe best protection for adults and older children,but not for young children and infants. Neitherthe vehicle’s safety belt system nor its air bagsystem is designed for them. Young children andinfants need the protection that a child restraintsystem can provide. Always secure childrenproperly in your vehicle.1-35
Smaller children and babies should always berestrained in a child or infant restraint. Theinstructions for the restraint will say whether it isthe right type and size for your child. A veryyoung child’s hip bones are so small that aregular belt might not stay low on the hips, as itshould. Instead, the belt will likely be over thechild’s abdomen. In a crash, the belt would applyforce right on the child’s abdomen, which couldcause serious or fatal injuries. So, be sure thatany child small enough for one is always properlyrestrained in a child or infant restraint.Infants need complete support, including support for thehead and neck. This is necessary because an infant’s neckis weak and its head weighs so much compared with therest of its body, In a crash, an infant in a rear-facingrestraint settles into the reSbx.int, so the crash forces can bedistributed across the strongest part of the infant’s body,the back and shoulders. A baby should be secured in anappropriate infant restraint. This is so important that manyhospitals today won’t release a newborn infant to itsparents unless there is an infant restraint available for thebaby’s first trip in a motor vehicle.1-36
A rear-facing infant restraint (B) positions an infantto face the rear of the vehicle. Rear-facing infantrestraints are designed for infants of up to about20 lbs. (9 kg) and about one year of age. This typeof restraint faces the rear so that the infant’s head,neck and body can have the support they need in acrash. Some infant seats come in two parts -- thebase stays secured in the vehicle and the seat partis removable.1-39
Securing a Child Restrgint in a Re,arOutside ,Seat Position1. Pat the restraint on the seat.3. Tilt the latch plate to adjust the belt if needed.If the shoul.&r belt goes in front d the child’s face orneck, put it behind the child restraint.
Securing a Child Restraint in the CenterRear Seat PositionYou’ll be using the lap belt. Be sure to follow theinstructions that came with the child restraint. Securethe child in the child restraint when and as theinstructions say.A child in a child restraint in the center front seatcan be badly injured by the right front passengerair bag if it inflates. Never secure a child restraintin the center front seat. It’s always better tosecure a child restraint in the rear seat. You may,however, secure a forward-facing child restraintin the right front passenger seat, but only withthe seat moved all the way back.See the earlier part about the top strap if the childrestraint has one.
6. Push and pull the child restraint in differentdirections to be sure it is secure.To remove the child restraint, just unbuckle the vehicle’ssafety belt. It will be ready to work for an adult or largerchild passenger.Securing a Child Restraint in the RightFront Seat PositionYour vehicle has a right front passenger air bag. Neverput a rear-facing child restraintthis seat. Here’s why:A 1CAUTION:A child in a rearfacing child restraint can beseriously injured if the right front passenger’s airbag inflates. This is because the back of arearfacing child restraint would be very close tothe inflating air bag. Always secure rearfacing achild restraint in the rear seat.I
3. Pick up the latch plzate, and-fun the lap and shoulderportions of the vehicle’s safety belt through oraround the-restraiat. The child restm.int instructionswill show YOU how.neck, put it be&d the child restraint.
Never do this.Here two children are wearing the same belt. Thebelt can’t properly spread the impact forces. In acrash, the two children can be crushed togetherand seriously injured. A belt must be used byonly one person at a time.LWhat if a child is wearing a lap-shoulder belt,but the child iso small that the shoulder belt isvery close to the child’s face or neck?A: Move the child toward the center of the vehicle, butbe sure that the shoulder belt still is on the child’sshoulder, so that in a crash the child’s upper bodywould have the restraint that belts provide. If thechild is sitting in a rear seat outside position, see“Rear Safety Belt Comfort Guides” in the Index. Ifthe child is so small that the shoulder belt is stillvery close to the child’s face or neck, you mightwant to place the child in the center seat position,the one that. has only a lap belt.1-53
Safety Belt ExtenderIf the vehicle’s safety belt will fasten around you, youshould use it.But if a safety belt isn’t long enough to fasten, yourdealer will order you an extender. It’s free. When you goin to order it, take the heaviest coat you will wear, so theextender will be long enough for you. The extender willbe just for you, and just for the seat in your vehicle thatyou choose. Don’t let someone else use it, and use itonly for the seat it is made to fit. To wear it, just attach itto the regular safety belt.Checking Your Restraint SystemsNow .and then, make sure the safety belt reminder lightand all your belts, buckles, latch plates, retractors andanchorages are working properly. Look for any otherloose or damaged safety belt system parts. If you seeanything that might keep a safety belt system fromdoing its job, have it repaired.Torn or frayed safety belts may not protect you in acrash. They can rip apart under impact forces. If a belt istorn or frayed, get a new one right away.Also look for any opened or broken air bag covers, andhave them repaired or replaced. (The air bag systemdoes not need regular maintenance.)1-55
Replacing Restraint System PartsAfter a CrashIf you’ve had a crash, do you ---bed new belts?After a very minor collision, nothing may be necessary.But if the belts were stretched, as they would be if wornduring a more severe crash, then you need new belts.If you ever see a label on the driver’s or the right frontpassenger’s safety belt that says to replace the belt, besure to do so. Then the new belt will be there to helpprotect you in a collision. You would see this label onthe belt near the latch plate.If belts are cut or damaged, replace them. Collisiondamage also may mean you will need to have safety beltor seat parts repaired or replaced. New parts and repairsmay be necessary even if the belt wasn’t being used atthe time of the collision.If your seat adjuster won’t work a€ter a crash, the specialpart of the safety belt that goes through the to seat theadjuster may need to be replaced.If an air bag inflates, you’ll need to replace air bagsystem parts. See the part on the air bag system earlier inthis section.1-56
2-22-42-82-1 32- 1,42-152- 172-7 a 82- 192--202-.222-232-262-272-302-312-312-323-332-342-342-402-432-462-512-572-572-592-622-66
KeysLeaving young children in a vehicle with theignition key is dangerous for many reasons.A chiId or others could be badly injured oreven killed.They could operate power windows or othercontrols or even make the vehicle move. Don'tleave the keys in a vehicle with young children.2-2
The ignition key is forthe ignition only.
Door LocksUnlocked doors can be dangerous.Passengers -- especially children -- can easilyopen the doors and fall out. When a is doorlocked, the inside handle won’t open it.Outsiders can easily enter through an unlockeddoor when you slow down or stop your vehicle.This may not be so obvious: You increase thechance of being thrown out of the vehicle in acrash if the doors aren’t locked. Wear safety belbproperly, lock your doors, and you will be farbetter off whenever you drive your vehicle.To lock the door from the inside, move the lock controlon the door forward.To unlock the door, move the lock control toward therear of the vehicle. There is a red mark on the lockcontrol which shows when the door is unlocked.There are several ways to lock and unlock your vehicle.From the outside, use your door key.If your vehicle has a theft-deterrent system and it isIf the driver’s door key is held in the unlock positionfor more than one second, all doors will unlock.activated, unlock the doors only with the key orremote keyless entry system. This will avoid settingoff the alarm.2-4Central Door Unlocking System (Option)
Power Door LocksDoor Ajar Reminder
Custon.g Your Memory Door Locks FeatureYou can p ;ram the memory door locks feature tochange to me following modes:Mode Operation0 No automatic door lock or unlock.1 All doors automatically lock when shifted outof PARK (P). No automatic door unlock.2 All doors automatically lock when shiftedout of PARK (P). Only the driver’s doorautomatically unlocks when shifted intoPARK (P).3 All doors automatically lock when shifted outof PARK (P). All doors automatically unlockwhen shifted into PARK (P).Veh ’ ’es are delivered programmed in Mode 3.To cm :e the modes:1. Close both doors and turn the ignition on. Keep bothdoors closed throughout this procedure.2. Press and hold LOCK on the driver’s power doorlock switch through Step 4.3. Press the LOCK button on the remote keyless entrytransmitter. The memory door locks will remain inthe current mode.4. Press the LOCK button on the transmitter again.Each time the transmitter’s LOCK button is pressed,the mode will advance by one, going from Mode 3to 0 to 1, etc.NOTE: The door locks will cycle according to the modeentered while customizing memory door locks. (Mode“0” has no feedback.)5. Release the power door lock switch. The memory doorlocks will remain in the most recent mode selected.This procedure changes the mode for only thetransmitter used to change this setting. The procedurewill need to be repeated €or the second transmitter.
Delayed LockingThis Personal Choice feature lets the driver delay theactual locking of the vehicle. When the power doorlock switch is pressed with the key removed from theignition and the driver’s door open, a chime will soundthree times to signal that the lock delay mode is active.When all doors have been closed, the doors will lockautomatically after five seconds. If any door is openedbefore this, the five-second timer will reset itself onceall the doors have been closed again.Pressing the door lock switch twice within two secondswill override this feature.Personal Choice ProgrammingThe delayed locking feature can be turned on or offfor each driver’s remote keyless entry transmitter.To turn the feature on:1. Press and hold LOCK on the driver’s power doorlock switch throughout this procedure. Both doorswill lock.2. Press the UNLOCK button on the transmitter toenter the programming mode. The lock delay isstill off and both doors will remain locked.3. Press the UNLOCK button on the transmitter again.Lock delay is now active and both doors will unlock.4. Release the power door lock switch.To turn this feature off, repeat this procedure.This procedure changes the mode for only thetransmitter used to change this setting. The procedurewill need to be repeated for the second transmitter.Lockout ProtectionThe power door locks will not work if the key is leftin the ignition with the driver’s door open. You canoverride this feature by holding the power door lockswitch for more than three seconds, unless the engineis running.Leaving Your VehicleIf you are leaving the vehicle, take your keys, open yourdoor and sethe locks from the inside. Then get out andclose the door.If your vehicle has a theft-deterrent system, see“Universal Theft-Deterrent” in the Index.2-7
OperationThe driver’s door will unlock when UNLOCK ispressed. If UNLOCK is pressed again within fiveseconds, both doors will unlock. Pressing the UNLOCKbutton will also illuminate the interior lamps. See“Illuminated Entry” in the Index. Both doors willlock when LOCK is pressed.The trunk will unlock when the trunk button is pressedwhen the ignition is off. The trunk button will also workwhen the ignition is on, but only while the vehicle is inPARK (P) or NEUTRAL (N).Instant AlarmWhen the button with the horn symbol the on remotekeyless entry transmitter is pressed, the horn will soundand the headlamps and taillamps will flash for up to oneminute. This can be turned off by pressing the instantalarm button again or by turning the ignition on.If your vehicle is equipped with the UniversalTheft-Deterrent feature, you may also turn off theinstant alarm by unlocking the vehicle with a key.ResynchronizationIf only the instant alarm button works, the transmitterneeds to be resynchronized to the receiver. Do this bypressing and holding both the LOCK and UNLOCKbuttons on the transmitter for about eight seconds. Youmust be within range of the vehicle.Once the transmitter has been resynchronized, the hornwill chirp and the exterior lamps will flash once. Thesystem should now operate properly.Remote Keyless Entry Personal Choice FeaturesThe following list of features that are available on yourvehicle can be programmed the to driver’s preferencefor each transmitter.000Memory Door Locks: This feature programs yourdoor locks to automatically lock or unlock whenshifting in and out of PARK (P).Security Feedback: This feature provides feedbackto the driver when the vehicle receives a commandfrom the remote keyless entry transmitter.Delayed Locking: This feature lets the driver delaythe actual locking of the vehicle. When all doorshave been closed, the doors will lock automaticallyafter five seconds.2-9
Periineter Lighting: When the UNLOCK buttonon the transmitter is pressed, the headlamps, parkinglamps, back-up lamps and cornering lamps will turnon in dark conditions.Memory Seat and Mirrors: This feature programsyour driver’s seat and outside mirrors to a setmemory position when the UNLOCK button onthe remote keyless entry transmitter is pressed.For more detailed information and programminginstructions, refer to the Index for each individualfeature listed above.Security FeedbackThis personal choice feature provides feedback to thedriver when the vehicle receives a command from theremote keyless entry transmitter. The following modesmay be selected:Mode Security Feedback012345No response when locking orunlocking vehicle.No response when locking; headlamps,parking lamps and cornering lamps (ifequipped) flash when unlocking vehicle.Headlamps, parking lamps and Corneringlamps (if equipped) flash when locking;no response when unlocking vehicle.Headlamps, parking lamps and corneringlamps (if equipped) flash when locking andwhen unlocking vehicle.Headlamps, parking lamps and corneringlamps (if equipped) flash and hornchirps when locking; no response whenunlocking vehicle.Headlamps, parking lamps and corneringlamps (if equipped) flash and horn chirpswhen locking; exterior lamps flash whenunlocking vehicle.2-10
Vehicles are delivered programmed in Mode 5. Tochange to another mode, the ignition must be off. Then:1. Turn the ignition key to OFF.2. Press and hold LOCK on the driver’s power doorlock switch throughout the procedure.3. Press the trunk button on the transmitter to enter theprogramming mode. The transmitter will remain inits current mode.4. Press the trunk button again. Each time the trunkbutton is pressed, the horn will chirp and thetransmitter will advance to the next mode.5. Release the power door lock switch.This procedure changes the mode for only thetransmitter used to change this setting. The procedurewill need to be repeated for the second transmitter.Matching Transmitter(s) To Your VehicleEach remote keyless entry transmitter is coded toprevent another transmitter from unlocking your vehicle.If a transmitter is lost or stolen, a replacement can bepurchased through your dealer. Remember to bringany remaining transmitters with you when you go toyour dealer. When the dealer matches the replacementtransmitter to your vehicle, any remaining transmittersmust also be matched. Once your dealer has coded thenew transmitter, the lost transmitter will not unlock yourvehicle. Each vehicle can have only four transmittersmatched to it.See your dealer to match additional transmitters toyour vehicle.Battery ReplacementUnder normal use, the battery in your remote keylessentry transmitter should last about two years.You can tell the battery is weak if the transmitter won’twork at the normal range in any location. If you have toget close to your vehicle before the trslnsmitter worksit’s probably time to change the battery.2-11
To replace the battery:1.2.3.4.5.For battery replacement, use a Duracell@ battery, typeDL-2032, or a similar type.I NOTICE:When replacing the battery, use care not totouch any of the circuitry. Static from yourbody transferred to these surfaces may damagethe transmitter.2-12
TrunknIt can be dangerous to drive with the trunk lidopen because carbon monoxide (CO) gas cancome into your vehicle. You can’t see or smellCO. It can cause unconsciousness and even death.If you must drive with the trunk lid open or ifelectrical wiring or other cable connections mustpass through the seal between the body and thetrunk lid:Make sure all windows are shut.0 Thrn the fan on your heating or coolingsystem to its highest speed with the settingon VENT. That will force outside air intoyour vehicle. See “Comfort Controls” inthe Index.If you have air outlets on or under theinstrument panel, open them all the way.See “Engine Exhaust” in the Index.Trunk Lock ReleaseTo unlock the trunk from the outside, turn the lock coverto expose the key hole. Insert the door key and it. turnRemote Trunk ReleasePress the TRUNK releasebutton located below thedriver’s door handle torelease the trunk lid. Thetrunk will open if thetransaxle is in PARK (P)and if the trunk securityrelease is not in theoff position.If you have the remote keyless entry system, it also willunlock your trunk if the ignition is off, or if the ignitionis on and the transaxle is in PARK (P).
Remote Trunk Release LockoutWith the ignition off and the driver’s door open, you’llhear a chime reminding you to remove your key fromthe ignition and take it with you. Always do this. Yoursteering wheel will be locked, and so will your ignitionThe trunk release lockout switch in the glove box allows and transaxle. And remember to lock the doors.you to secure items in the trunk. Move the trunk releaseswitch off, lock the glove box and take the key with you.Parking at NightNow the trunk release on the driver’s door will not open Park in a lighted spot, close all windows and lock yourthe trunk.vehicle. Remember to keep your valuables out of sight.Put them in a storage area, or take them with you.Trunk Security OverrideThe remote keyless entry transmitter will open the trunkeven if the trunk release lockout switch is off.TheftVehicle theft is big business, especially in some cities.Although your vehicle has a number of theft-deterrentfeatures, we know that nothing we put on it can makeit impossible to steal. However, there are ways youcan help.Key in the IgnitionIf you leave your vehicle with the keys inside, it’s aneasy target for Joy riders or professional thieves -- sodon’t do it.
Parking LotsIf you park in a lot where someone will be watchingyour vehicle, it’s best to lock it up and take your keys.But what if you have leave to your ignition key?If possible, park in a busy, well lit area.0 Put your valuables in a storage area, like yourtrunk or glove box. Be sure to close and lockthe storage area.Close all windows.0 Move the trunk release lockout switch to OFF.0 Lock the glove box.0 Lock all the doors except the driver’s.0 Then take the door key and remote keyless entrytransmitter with you.Universal Theft-Deterrent (Option)If your vehicle has this option, it has a theft-deterrentalarm system. With this system, if your ignition is off,the SECURITY light will flash as you open the door.SECURITY1. Open the door.This light reminds you toactivate the theft-deterrentsystem. Here’s how to do it:2. Lock the door with the power door lock switch orremote keyless entry system. The SECURITY lightshould come on and stay on.3. Close both doors. The SECURITY light should gooff after about 30 seconds. The security system isnot armed until the SECURITY light is off. If theSECURITY light stays on or flashes when theignition is turned on, there is a problem with thesystem and the vehicle should be serviced.If the SECURITY light comes on for one minute andthen shuts off while the ignition is on, the securitysystem has detected a problem with itself. See yourdealer for service.2-15
If a door or the trunk is opened without the key orremote keyless entry system, the alarm will go off.It will also go off if the trunk lock or door locks aredamaged. Your vehicle’s lamps will flash and the hornwill sound for one minute, then will go off to savebattery power.Remember, the theft-deterrent system won’t be activated power door lock switch while the door is open, orif you lock the doors with a key or use the manual door with the remote keyless entry transmitter.lock. It only activates if you use a power door lock3. Get out of the car, close the door and wait for theswitch or remote keyless entry system. You should alsoSECURITY light to go out.remember that you can start your vehicle with thecorrect ignition key if the alarm has been set off, but this 4. Then reach in through the window, unlock the doordoes not shut off the alarm.with the manual door lock and open the door. ThisHere’s how to avoid setting off the alarm by accident:If you don’t want to activate the theft-detei-rentsystem, lock the door either using a key or themanual door lock switch.Always unlock a door with a key, or use the remotekeyless entry system. Unlocking a door any otherway will set off the alarm.If you set ofSthe alarm by accident, unlock either doorwith your key.You can also turn off the alarm by pressing UNLOCKon the remote keyless entry transmitter. The alarm won’tstop if you try to unlock a door any other way.2-16Testing the AlarmThe alarm can be tested by following these steps:1. From inside the vehicle, roll down the driver’swindow and open the driver’s door.2. Activate the system by locking the doors with theshould set off the alarm.If the alarm does not sound when it should, but thevehicle’s lamps flash, check to see if the horn works.The horn fuse may be blown. To replace the fuse, see“Fuses and Circuit Breakers” in the Index.If the alarm does not sound, or the vehicle’s lamps donot flash, the vehicle should be serviced an byauthorized service center.
PASS-Key@ I1Your vehicle is equippedwith the PASS-Key 11(Personalized AutomotiveSecurity System)theft-deterrent system.PASS-Key I1 is a passivetheft-deterrent system.It works when you insertor remove the key fromthe ignition.PASS-Key I1 uses a resistor pellet in the ignition keythat matches a decoder in your vehicle.When the PASS-Key II system senses that someone isusing the wrong key, it shuts down the vehicle’s starterand fuel systems. For abouthree minutes, the starterwon’t work and fuel won’t go to the engine. If someonetries to start your vehicle again or uses another keyduring this time, the vehicle will not start. Thisdiscourages someone from randomly trying differentkeys with different resistor pellets in an attempt tomake a match.The ignition key must be clean and dry before it’sinserted in the ignition or the engine may not start. If theengine does not start and the SECURITY light comeson, the key may be dirty or wet. Turn the ignition ofClean and dry the key. Wait about three minutes and tagain. The SECURITY light may remain on during thistime. If the starter still won’t work, and the key appeto be clean and dry, wait about three minutes and tryanother ignition key. At this time, you may also wancheck the fuse (see “Fuses and Circuit Breakers” in theIndex). If the starter won’t work with the other key, yvehicle needs service. If your vehicle does start, the firsignition key may be faulty. See your dealer or alocksmith who can service the PASS-Key II.If you accidentally use a key that has a damaged ormissing resistor pellet, the starter won’t work. TheSECURITY light will flash too. But you don’t have towait three minutes before trying another ignition key.See your dealer or a locksmith who can service thePASS-Key I1 to have a new key mac2-17
Ignition PositionsThe key with the black plastic head operates theignition lock.AWith the ignition key in the ignition switch, you can turnthe switch to five different positions:ACCESSORY (A): This is an on position in which youcan operate your electrical power accessories. Press theignition kev in as you turn the top of it toward you.CELOCK (B): This is the only position in whichyou can remove the key. This position locks yourignition, steering wheel and transaxle. It’s atheft-deterrent feature.OFF (C): This position lets you turn off the enginebut still turn the steering wheel. It doesn’t lock thesteering wheel like LOCK and it doesn’t send anyelectrical power to the accessories. Use OFF if youmust have your vehicle in motion while the engine isnot running.RUN (D): This is an on position that the switch returnsto after you start your engine and release the switch.This is the position for driving. Even when the engineis not running, you can use RUN to operate yourelectrical power accessories and to display someinstrument panel warning lights.START (E): This position starts your engine. When theengine starts, release the key. The ignition switch willreturn to RUN for normal driving.2-19
~ IfNOTICE:Holding your key in START for longer than15 seconds at a time will cause your battery to bedrained much sooner. And the excessive heat candamage your starter motor.2. If it doesn’t start right away, hold your key inSTART for about three to five seconds at a time untilyour engine starts. Wait about 15 seconds betweeneach try to help avoid draining your battery ordamaging your starter.3. If your engine still won’t start (or starts but thenstops), it could be flooded with too much gasoline.Try pushing your accelerator pedal all the way tothe floor and holding it there as you hold the key inSTART for about three seconds. If the vehicle startsbriefly but then stops again, do the same thing, butthisitime keep the pedal down for five or six seconds.This clears the extra gasoline from the engine.After waiting about 15 seconds, repeat the normalstarting procedure.INOTICE:Your engine is designed to work with theelectronics in your vehicle. If you add electricalparts or accessories, you could change the waythe engine operates. Before adding electricalequipment, check with your dealer. If you don’t,your engine might not perform properly.you ever have to have your vehicle towed, seethe part of this manual that tells how to do itwithout damaging your vehicle. See “TowingYour Vehicle’’ in the Index.2-21
Engine Coolant Heater (Option)I’ ugging the cord into an ungrounded outletcould cause an electrical shock. Also, the wrongkind of extension cord could overheat and causea fire. You could be seriously injured. Plug thecord into a properly grounded three-prong110-volt AC outlet. If the cord won’t reach, usea heavy-duty three-prong extension cord ratedfor at least 15 amps.In very cold weather, 0 O F (- 18 O C) or colder, the enginecoolant heater can help. You’ll get easier starting andbetter fuel economy during engine warm-up. Usually,the coolant heater should be plugged in a minimum offour hours prior to starting your vehicle.To Use the Engine Coolant Heater1. Turn off the engine.2. Open the hood and unwrap the electrical cord.3. Plug it into a normal, grounded 110-volt AC outlet.4, Before starting the engine, be sure to unplugand store the cord as it was before to keep it awayfrom moving engine parts. If you don’t, it couldbe damaged.How long should you keep the coolant heater pluggedin? The answer depends on the outside temperature, thekind of oil you have, and some other things. Instead oftrying to list everything here, we ask that you contactyour dealer in the area where you’ll be parking yourvehicle. The dealer can give you the best advice forthat particular area.-2-22
Automatic Transaxle OperationThere are several different positions for your shift lever.PARK (P): This position locks your front wheels. It’sthe best position to use when you start your enginebecause your vehicle can’t move easily.It is dangerous to get out of your vehicle ifshift lever is not fully in PARK (P) with theparking brake firmly set. Your vehicle can roll.Don’t leave your vehicle when the engine isrunning unless you have to. If you have left theengine running, the vehicle can move suddenly.You or others could be injured. To be sure yourvehicle won’t move, even when you’re on fairlylevel ground, always set your parking brake andmove the shift lever to PARK (P).See “Shifting Into PARK (P)” in the Index. Ifyou’re pulling a trailer, see “Towing a Trailer’’ inthe Index.Ensure the shift lever is fully in PARK (P) range beforestarting the engine. Your vehicle has a brake-transaxleshift interlock. You have to fully appZy your regularbrakes before you can shift from PARK (P) when theignition is in RUN.2-23
REVERSE (R): Use this gear to back up.NOTICE:Shifting to REVERSE (R) while your vehicle ismoving forward could damage your transaxle.Shift to REVERSE (R) only after your vehicleis stopped.To rock your vehicle back and forth to get out of snow.ice or sand without damaging your transaxle, see“Stuck: In Sand, Mud, Ice or Snow” in the Index.NEUTRAL (N): In this position, you! ngine doesn’tconnect with the wheels. To restart when you’realready moving, use NEUTRAL (N) only. Also, useNEUTRAL (N) when your vehicle is being towed.Shifting out of PARK (P) or NEUTRAL (N)while your engine is “racing” (running at highspeed) is dangerous. Unless your foot is fiimly onthe brake pedal, your vehicle could move veryrapidly. You could lose control and hit people orobjects. Don’t shift out of PARK (P) orNEUTRAL (N) while your engine is racing.I NOTICE:Damage to your transaxle caused by shifting outof PARK (P) or NEUTRAL (N) with the engineracing isn’t covered by your warranty.I2-24
AUTOMATIC OVERDRIVE (a): This position isfor normal driving. If you need more power for passing,and you’re:Going less than approximately 35 mph (55 km/h),push your accelerator pedal about halfway down.0 Going about 35 mph (55 km/h) or more, push theaccelerator all the way down.You’ll shift down to the next gear and have more power.THIRD (3): This position is also used for normaldriving, however, it offers more power and lower fueleconomy than AUTOMATIC OVERDRIVE (@).Here are some times you might choose THIRD (3)instead of AUTOMATIC OVERDRIVE (a):0 When driving on hilly, winding roads,0 When towing a trailer, so there is less shiftingbetween gears, or0 When going down a steep hill.SECOND (2): This position gives you more powerbut lower fuel economy than AUTOMATICOVERDRIVE (@) or THIRD (3). You can useSECOND (2) on hills. It can help control your speedas you go down steep mountain roads, but then youwould also want to use your brakes off and on.NOTICE:Don’t drive in SECOND (2) for more than 25 miles(41 km), or at speeds over 55 mph (88 km/h), oryou can damage your transaxle. Use AUTOMATICOVERDRIVE (0) or THIRD (3) as muchas possible.Don’t shift into SECOND (2) unIess y6u iWe=goingslower than 65 mph (105 km/h), or you candamage your engine.2-25
FIRST (1): This position gives you even more powerbut lower fuel economy than SECOND (2). You canuse it on very steep hills, or in deep snow or mud. Ifthe selector lever is put in FIRST (1)’ the transaxlewon’t shift into FIRST (1) until the vehicle is goingslowly enough.Parking BrakeNOTICE:If your front wheels can’t rotate, don’t try todrive. This might happen if you were stuck invery deep sand or mud or were up against a solidobject. You could damage your transaxle.Also, if you stop when going uphill, don’t holdyour vehicle there with only the acceleratorpedal. This could overheat and damage thetransaxle. Use your brakes or shift into PARK (P)to hold your vehicle in position on a hill.Setting the parking brake: Hold the regular brakepedal down with your right foot. Push down the parkingbrake pedal with your left foot. If the ignition is on, thebrake system warning light will come an and a singlechime will be heard.The parking brake uses the brakes on the rear wheels.2-26
Releasing the parking brake: You will need to use thePUSH TO RELEASE parking brake pedal. Hold theregular brake pedal down and push the parking brakepedal with your left foot. This will unlock the pedal.When you lift your left foot, the parking brake pedalwill follow it to the release position.11 ; 1 try to drive off with the parking brake on, thebrae light stays on and a chime sounds until you releasethe parking brake or recycle the ignition.NOTICE:Driving with the parking brake on can causeyour rear brakes to overheat. You may have toreplace them, and you could also damage otherparts of your vehicle.If you are towing a trailer and are parking on a hill, see“Towing a Trailer” in the Index. That section showswhat to do first to keep the trailer from moving.Shifting Into PARK (P)It can be dangerous to get out of your vehicle ifthe shift lever is not fully in PARK (P) with theparking brake firmly set. Your vehicle can roll. Ifyou have left the engine running, the vehicle canmove suddenly. You or others could be injured.To be sure your vehicle won’t move, even whenyou’re on fairly level ground, use the steps thatfollow. If you’re puIling a trailer, see “Towing aRailer” in the Index.Steering Column Shift Lever1. Hold the brake pedal down with your right foot andset the parking brake by pushing down the parkinbrake pedal with your left foot.2-27
2. Move the shift lever inter PARK (P) like this:Pull the lever toward you.Move the lever up as far as it will go.3. Turn the ignition key to LOCK.4. Remove the key and take it with you. If you canleave your vehicle with the ignition key in yourhand, your vehicle is in PARK (P).2-28
Console Shift Lever1. Hold the brake pedal down with your right foot andset the parking brake.2. Move the shift lever into PARK (P) like this:0 Hold in the button on the lever.0 Push the lever all the way toward the front ofyour vehicle.4. Remove the key and take it with you. If you canleave your vehicle with the ignition key in yourhand, your vehicle is in PARK (P).Leaving Your Vehicle With theEngine Running,rCrATJTTC)IN*It can be dangerous to 1eav;e you’r vehicle with the‘engine running. Your vehicle could movesuddenly if the shift lever is not fully in PARK (P)with the parking brake firmly set. And, if youleave the vehicle with the engine running, it couldoverheat and even catch fire. You or others couldbe injured. Don’t leave your vehicle with theengine running unless you have to.3. Turn the ignition key to LOCK.2-29
Parking Over Things , . That BurnEn.g2re Exhaust/? *l...l....l. ..-
Running Your Engine WhileYou’re ParkedIt’s better not to park with the engine running. But if youever have to, here : some things to know.; !,;= - !.-... . I i .: .:, . p;y&. ‘‘4 .tr’;* bf?,L:’ :,*. . I’ ,, il 1. .’ ._I. ~’; ‘2 1 . ~ :.. .. .W’”Idling the engine with the cli ate contlsystem off could allow dangerous exhaust intoyour vehicle (see the earlier Caution under“Engine Exhaust”).Also, idling in a closed-in place can let deadlycarbon monoxide (CO) into your vehicle even ifthe fan switch is at the highest setting. One placethis can happen is a garage. Exhaust -- withCO -- can come in easily. NEVER park in agarage with the engine running.Another closed-in place can be a blizzard. (See“Blizzard” in the Index.)It can be dangerous to get out of your vehicle ifthe shift lever is not fully in PARK (P) with theparking brake firmly set. Your vehicle can roll.Don’t leave your vehicle when the engine is ,running unless you have to. If you’ve left theengine running, the vehicle can move suddenly.You or others could be injured. To be sure yourvehicle won’t move, even when you’re on fairlylevel ground, always set your parking brake andmove the shift lever to PARK (P).Follow the proper steps to be sure your vehicle won’tmove. See “Shifting Into PARK (P)” in the Index.If you are parking on a hill and if you’re pulling atrailer, also see “Towing a Trailer” in the Index.I2-32
Express-Down WmdowSwitches on the driver's asmrest control each of thewindows while the ignition is on or retained accessorypower is active. In addition, the passenger's doorarmrest has a switch for its own window.To lower the passenger's window, pull back=on the fightswitch. The window will lower as long as the switch.isheld. To raise either window, push the switch forward.
Turn Signal and Lane Change IndicatorThe turn signal has two upward (for right) and twodownward (for left) positions. These positions allowyou to signal a turn or a lane change.To signal a turn, move the lever all the way up ordown. When the turn is finished, the lever willreturn automatically.An arrow on the instrumentpanel will flash in thedirection of the turn orlane change.To signal a lane change, just raise or lower the leveruntil the arrow starts to flash. Hold it there until youcomplete your lane change. The lever will return byitself when you release it.As you signal a turn or a lane change, if the arrowsdon’t flash but just stay on, a signal bulb may beburned out and other drivers won’t see your turn signal.If a bulb is burned out, replace it to help avoid anaccident. If the arrows don’t go on at all when yousignal a turn, check the fuse and check for burned-outbulbs. See “Fuses and Circuit Breakers” in the Index.nrn Signal ReminderIf your turn signal is left on for more than 3/4 of a mile,a chime will sound. To turn off the chime, move the turnsignal lever to the off position.Headlamp HighLow Beam ChangerTo change the headlamps from low beam high to orhigh to low, pull the turn signal lever toward you.Then release it.When the high beamsare on, this light on theinstrument panel willalso be on.2-35
'Windshield W1pcrsFor steady wiping at low speed, turn the bandl away
:WASHER.FLUID LowWhen the vehicle has a lowfluid condition, the LOWWASHER FLUID light willcome on to remind you toget more washer fluid soon.Cruise ControlIIn freezing weather, don't use your washer untilthe windshield is warmed. Otherwise the washerfluid can hrrn ice on the windshield, blockingyour vision.ITo get more fluid on the windshield, push andholdthe paddle. Spraying will continue as long as thepaddle is held.Ireally .help on long trips.Cruise control does not work at speeds below abcmt25 mph (40 km/h).2-37
When you apply your brakes, the cruise controlshuts off.Setting Cruise ControlCruise control can be dangerous where youcan’t drive safely at a steady speed. So,don’t use your cruise control on windingroads or in heavy traffic.Cruise control can be dangerous onslippery roads. On such roads, fast changesin tire traction can cause needless wheelspinning, and you could lose control. Don’tuse cruise control on slippery roads.If your vehicle is in cruise control when the optionaltraction control system begins to limit wheel spin, thecruise control will automatically disengage. (See“Traction Control System” in the Index.) When roadconditions allow you to safely use it again, you mayturn the cruise control back on.IIf you leave your cruise control switch on whenyou’re not using cruise, you might hit a buttonand go into cruise when you don’t want to. Youcould be startled and even lose control. Keep thecruise control switch off until you want to use it.1. Move the cruise control switch to ON.2. Get up to the speed you want.3. Push in the SET button at the end of the lever andrelease it. The CRUISE light on the instrumentpanel will come on.4. Take your foot off the accelerator pedal.2-38
Resuming a Set SpeedSetting the cruise control at a desired speed and thenapplying the brake will end the cruise control function.Once you’re going about 25 mph (40 Wh) or more,you can move the cruise control switch from ON toR/A (Resume/Accelerate) briefly to reset. This returnsyou to your desired preset speed.If you hold the switch at R/A longer than half a second,the vehicle will accelerate until you release the switch orapply the brake. So unless you want to go faster, don’thold the switch at R/A.Increasing Speed While Using Cruise ControlThere are two ways to go to a higher speed:0 Use the accelerator pedal to go to a higher speed.Push the SET button at the end of the lever, thenrelease the button and the accelerator pedal. You’llnow cruise at the higher speed. Or,0 Move the cruise switch from ON to WA. Hold itthere until you reach a desired speed and thenrelease the switch.To increase your speed in very small amounts, movethe switch to R/A for less than half a second and thenrelease it. Each time you do this, your vehicle will goabout 1 mph (1.6 km/h) faster.The accelerate feature will only work after you have setthe cruise control speed by pushing the SET button.Reducing Speed W1~” : Using Cruise ControlThere are two ways to reduce your speed while usingcruise control:Push in the button at the end of the lever until youreach a desired lower speed then release it.0 To slow down in very small amounts, push thebutton briefly. Each time you do this, you’ll go1 mph (1.6 km/h) slower.Passing Another Vehicle While Using Cruise ControUse the accelerator pedal to increase your speed. Wheyou take your foot off the pedal, your vehicle will slowdown to the cruise control speed you set earlier.2-39
Using Cruise Control on HillsHow well your cruise control will work on hills dependsupon your speed, load and the steepness of the hills.When going up steep hills, you may have to step on theaccelerator pedal to maintain your speed. When goingdownhill, you may have to brake or shift to a lower gearto keep your speed down. Of course, applying the braketakes you out of cruise control. Many drivers find this tobe too much trouble and don’t use cruise control onsteep hills.Ending Cruise ControlThere are two ways to turn off the cruise control:0 Step lightly on the brake pedal, orMove the cruise switch to OFF. The CRUISE lightwill also go out.Erasing Speed MemoryWhen you turn off the cruise control or the ignition,your cruise control set speed memory is erased.Exterior LampsHeadlamps-;g- This switch controls these systems:HeadlampsTaillampsParking LampsLicense Plate Lamps2-40
0 Sidemarker LampsDaytime Running Lamps0 Instrument Panel LightsDaytime Running Lamps (DRL) can make it easierInterior Courtesy Lampsfor others to see the front of your vehicle during theday. DRL can be helpful in many digerent drivingconditions, but they can be especially helpful in theshort periods after dawn and before sunset.A light sensor on top of the instrument panel makesthe DRL work, so be sure it isn’t covered.The DRL system will make your high-beam headlampscome on at reduced brightness in daylight when:0 The ignition is on,Pull the knob toward you to the first setting to turn on 0 The headlamp switch is off andthe parking lamps and other operating lamps without the0 The transaxle is not in PARK (P).headlamps. Pull the knob toward you to the secondsetting to turn on the headlamps as well as the other When DRL are on, only your high-beam headlampsoperating lamps.will be on. The parking lamps, taillamps, sidemarkerand other lamps won’t be on. Your instrument panelRotate the knob from left to right to control brightnessofwon’t be lit up either.the instrument panel lights.When it’s dark enough outside, your high-beamLamps On Reminderheadlamps will turn off and your low-beam and parkingIf the headlamp switch is left on, you’ll hear a warning lamps will become active. The other lamps that comechime when you turn the ignition off, remove the key with your headlamps will also come on. When it’s brighfrom the ignition and open the driver’s door. enough outside, the regular lamps will go off, and youhigh-beam headlamps change to the reduced brightnessof DRL.2-41
To idle your vehicle with the DRL off, shift thetransaxle into PARK (P). The DRL will stay off untilyou shift out of PARK (P).To turn off all exterior lamps at night when you arein PARK (P), turn off the headlamps and move thetwilight sentinel control, located on the lower area ofthe headlamp switch, all the way toward AUTO MIN.When released, the spring control will return to thetwilight sentinel minimum de€ay position, and allexterior lamps will turn off.As with any vehicle, you should turn on the regularheadlamp system when you need it.Cornering Lamps (Option)The cornering lamps are designed to come on whenyou signal a turn. This will provide more light forcornering at night.Twilight St- ~~tine1Twilight sentinel urns your neaalamps, taillamps andparking lamps on and off by sensing how dark it isoutside. The control is located on the lower area ofthe headlamp switch.To operate this feature, leave the headlamp switch off.The vehicle’s twilight sentinel is always enabled.Twenty-three seconds after entering a darkenedenvironment, the headlamps and parkmg lamps willturn on. If the ignition is turned on at night, the exteriorlamps will come on.To turn off all exterior lamps at night when you arein PARK (P), turn off the headlamps and move thetwilight sentinel control, located on the lower area of theheadlamp switch, all the way toward AUTO MIN. Whenreleased, the spring control will return to the twilightsentinel minimum delay position, and all exterior lampswill turn off.If you move the control all the way to AUTO MAX,your lamps will remain on for three minutes after youturn off your engine. If you move the control towardAUTO MIN, the lamps will go off quickly when youturn off your engine. You can set this delay time for onlya few seconds or up to three minutes.Light SensorYour twilight sentinel and daytime running lamps workwith the light sensor on top of the instrument panel.Don’t cover it up. If you do, it will read “dark” and theheadlamps will come on.2-42
Interior LampsInstrument Panel BrightnessBy rotating the headlamp knob you can make theinstrument panel lights bright or dim. See “Headlamps”in the Index.Courtesy LampsWhen any door is opened, several lamps go on. Theymake it easy for you to enter and leave the car. To turnon these lamps without opening the door, rotate theheadlamp knob to the right.Delayed Entry LightingWhen you open the door to enter your vehicle, theinterior lamps will come on. When you close the doorwith the ignition off, the interior lamps will stay on for25 seconds or until the ignition is turned to an onposition. Please note that locking the doors will overridethe delayed entry lighting feature and the lamm will turnoff right away.Theater DimmingThis feature allows for a three to five-second fade outof the courtesy larnps instead of immediate turn off.Parade DimmingThis feature prohibits the dimming of your instrumentpanel displays during daylight while your headlamps areon. This feature operates with the light sensor for thetwilight sentinel and is fully automatic. When the lightsensor reads darkness outside, you will be able to dimyour instrument panel displays once again.Delayed Exit LightingWith this feature, the interior lamps will come on for25 seconds after you remove the key from the ignition.This will give you time to find the door pull handle olock switches when you exit the vehicle.Illuminated EntryPress the UNLOCK button on the remote keyless entrytransmitter and the interior courtesy lamps will come onand stay on for up to a minute. The lamps will turn offimmediately when pressing the LOCK button on thetransmitter, starting the ignition or activating the powerdoor locks.2-43
Perimeter LightingThis is a Personal Choice feature of your vehicle,When the UNLOCK button on the remote keyless entrytransmitter is pressed, the headlamps, parking lamps,back-up lamps and cornering lamps will come on it if isdark enough outside according to the twilight sentinel.This option can be programmed on or off for eachdriver’s transmitter.To turn the feature off1. Turn the ignition key to OFF.2.3.4.5.Press and hold LOCK on the driver’s power doorlock switch throughout this procedure. All doorswill lock.Press the instant alarm button on the transmitter.Perimeter lighting remains on at this time and thehorn will chirp two times.Press the instant alarm button on the transmitteragain. Perimeter lighting is disabled and the hornwill chirp one time.Release the door lock switch. The perimeter lightingoption is now off.To turn the feature on:1. Turn the ignition key to OFF.2. Press and hold LOCK on the driver’s power doorlock switch throughout this procedure. All doorswill lock.3. Press the instant alarm buttonthe transmitter.Perimeter lighting remains off at this time and thehorn will chirp one time.4. Press the instant alarm button on the transmitteragain. Perimeter lighting is now enabled and thehorn will chirp two times.5. Release the door lock switch. The perimeterlighting option is now on.This procedure changes the mode for only thetransmitter used to change this setting. The procedurewill need to be repeated for the second transmitter.2-44
Front Reading LampsThese lamps and the interior courtesy lamps will comeon when you open a door, and turn off when you turnthe ignition on. To turn on the reading lamps when thedoors are closed, press the button behind the lamp youwant on. Press it again to turn the lamp off.Trunk LampWhen you open the trunk to its full open position, alamp will come on inside the trunk. This lamp willautomatically turn off when the trunk is closed.Battery Rundown ProtectionThisfeature automatically shuts off the interior lampsif any are left on for more than 10 minutes when theignition is off. This will keep your batterv fromrunning down.This feature also shuts off the exterior lamps if they areleft on for more than 10 minutes when the ignition is off.You may override this feature for the exterior lamps byturning the lamps off and then back on after the ignitionis turned to off. If you do this, the exterior lamps willstay on until you manually turn them off.If the feature is enabled for the interior and exteriorlamps, all lamps should turn off at approximately thesame time.2-45
Mirror OperationThe right side of the switch located at the bottom of themirror turns the electrochromic mirror on and off. Toturn on the automatic dimming feature, press MIRROR.To turn off automatic dimming, press MIRROR again.The green indicator light will be illuminated when thisfeature is active.Compass OperationPress the COMPASS switch once to turn the compasson or off.When the ignition and the compass feature are on, thecompass will show two character boxes forapproximately two seconds. After two seconds, themirror will display the compass heading.If, after two seconds, the display does not show acompass heading (“N’ for North, for example), theremay be a strong magnetic field interfering with thecompass. Such interference may be caused by amagnetic antenna mount, magnetic note pad holderor a similar magnetic item.Compass VarianceThe mirror is set in zone eight upon leaving the factory.It will be necessary to adjust the compass to compensatefor compass variance if you live outside zone eight.Under certain circumstances, as during a long distancecross-country trip, it will be necessary to adjust forcompass variance. Compass variance is the differencebetween earth’s magnetic north and true geographicnorth. If not adjusted to account for compass variance,your compass could give false readings.2-48
2-49
Pa rerRemote Control MirrorYour vehicle has an electric mirror control located onthe driver’s door armrest.Move the inner switch to the right (R) or left (L) tochoose either the driver’s or passenger’s side mirror.Press any of the four arrow buttons to move the mirrorin the direction desired.Adjust each-mirror so you can see the side of yourvehicle and the area behind your vehicle. When theinner switch is in the center position, the mirrorscannot be adjusted.I r vehicle may be equipped with the memoryfunction. These mirror positions, along with the driver sseat cushion position, can be stored into memory. See“Memory Seats and Mirrors” in the Index.Automatic Dimming Outside RearviewMlirror (Option)If you have this option, the driver’s side outside mirrorwill adjust for the glare of headlamps behind you. Thisfeature is controlled by the on and off settings on theautomatic electrochromic dayhight rearview mirror. See“Automatic Electrochromic Daymight RearviewMirror” earlier in this section.Parallel Park Assist Mirror (Option)The passenger’s outside rearview mirror also includes atilt-down feature that operates when the shift lever is inreverse. This feature assists the driver with improvedrear obstacle detection.To enable this feature, move the power remote mirrorswitch to the left (L) or center position. Move the switchto the right (R) to turn this feature off.2-50
~~Convex Outside MirrorYour passenger’s side mirror is convex. A convexmirror’s surface is curved so you can see more fromthe driver’s seat.Storage CompartmentsGlove BoxUse the door key to lock and unlock the glove box. Toopen, pull the latch on the front of the glove box door.Installing a Garage Door OpenerA convex mirror can make things (like othervehicles) look farther away than they really are.If you cut too sharply into the right lane, youcould hit a vehicle on your right. Check yourinside mirror or glance over your shoulder beforechanging lanes.Heated Outside Rearview MirrorWhen you operate the rear window defogger, a defoggeralso warms the heated driver’s and passenger’s outsiderearview mirrors to help clear them of ice and snow.The garage door opener storage area is located in theheadliner near the reading lamps. The following chartand instructions will help you install your garage dooopener in the overhead storage area.2-51
1. Push the extended tab (above the GARAGE button)or insert a screwdriver between the tab and outeredge of the cover. The garage door opener cover willflip down.2. Remove the square height adapters from the cover.Refer to the chart to determine the number andlocation of the height adapters for your garage dooropener. If your unit does not appear on the chart, youwill have to try different adapter number andlocation combinations.LINEAR ET-2 1 6 4LINEAR D22B 1 6 32 6 32-52
~~Your Garage Door TransmitterI Vehicle Console DoorYour Garage Door Transmitter I Vehicle Console Door IIName --ModelName ModelLINEAR3033l-I MULTIELMACLTI ELMACMULTIELMACt-MUI MULTIELMACLMULTIELMACD4B1 3 I 3 I 3 1 3 641~~~ ~~34ESP-T-9R 1ESP-T-9 3 61301013089 1110164333 8 23 333 63070 I 1 I 6 1 4 I3032105412166333 633MULTIELMAC 1048MULTIELMAC 1087MULTIELMAC 3060MULTIELMAC 1098OVERHEADDOOROVERHEADDOOROVERHEADDOOROVERHEADDOOR1 -BTN 2232-BTN 265PULSAR 92 1PULSAR4- -1 41 5 21 61 5 22 71 1 OR 10 31 10 33-BTN 242 1 10 32 10 31 3 I4-BTN 232 1 1 10 I 3 I3 3 I 1 --I ~4 11 4 3I93 1 1 I 4 I 3 I
~~~ ~~Vehicle Console Door .3 1 3 19 1 3 I3. Place the height adapters on the proper peg using thesuggested combinations or by lining up the heightadapters and the transmitter button on your garagedoor opener.432 1 2 I4 1 3 ISTANLEY 1047 1 5 3STANLEY 1050 1 6 3STANLEY 1076 1 6 3I STANLEY I 10792 6 31 6 32 6 3STANLEY 1075 1 6 32 6 31 STANLEY I 331-1052 I 1 I 6 I 4 I2-5421I l l5 6 74. Use the Velcro@ found in the storage area andattach the garage door opener securely inside theconsole. Line up the transmitter button with theheight adapters.5. Close the cover and test the GARAGE button.If your garage door opener doesn’t work after it isinstalled, try another combination.
Front Storage ArmrestCenter Console CupholderI
Compact Disc StorageThe area between the ashtray and cupholder is additionalstorage space for your compact discs. hsh on the raisedportion of the slot, and your compact disc will extendfrom the storage space. Push the dropped door back in tostore your compact disc.Convenience NetYour vehicle has a convenience net. You’ll see it justinside the back wall of the trunk.Put small loads, like grocery bags, behind the net. It canhelp keep them from falling over during sharp turns orquick starts and stops. For heavier loads, store them inthe trunk as far forward as you can.There are six retainers to secure the convenience net,allowing two different placements for the net. You canunhook the net so that it will lie flat when you’re notusing it. When reinstalling the net, make sure the labelpoints toward the upper retainer.Ashtrays and Cigarette LighterFront AshtrayThe front ashtray is behind a panel above the compactdisc storage area. Press on the panel door to reveal theashtray and cigarette lighter.The front center ashtray may be lifted for out cleaning.Press the tabs on each side of the ashtray and pull up toremove. It snaps back into place.Rear AshtrayTo remove the rear ashtray for cleaning, open the lid andease the ashtray upward until the edge be can grasped topull the ashtray up and out,2-56
Cigarette LighterTo use me cigarette lighter, push it all the way in and letit go. When it is hot, it will pop back by itself.NOTICE:If you hold a cigarette lighter in with your handwhile it is heating, it won’t be able to back awayfrom the heating element when it’s ready. Thiscan make it overheat, damaging the lighter andthe heating element.Sun VisorsTo block out glare, you can swing down the visors. Youcan also remove them from the center mount and swingthem to the side, while the auxiliary visor remains toblock out glare from the front.Illuminated Visor Vanity MirrorThis mirror is on the larger of the passenger’s sunvisors. It may also be on the larger of the dnver’s sunvisors. When you open it, the lamps turn on. Thebrightness of the lamps can be adjusted by sliding theswitch up or down.Accessorv Power OutletAn auxiliary power receptacle is located on the lowerright side of the console. When the ignition on, is youcan plug in accessories requiring electrical power.If your vehicle does not have a console, the auxiliarypower receptacle is opposite the cigarette lighter inthe ashtray area.Garment HooksRear garment hooks are available for your .convenience.Garment hooks are not designed to support clothingbars. Use assist straps for this if possible.Rear License Plate HolderTo use it, open the trum lid and slide your license plateinto the slot. Always close the trunk to prevent theft ofthe plate.Cellular Telephone (Option)If your vehicle is equipped with the cellular telephonereadiness package, it has been pre-wired for installationof a cellular telephone. If you choose to install a cellulartelephone, contact your dealer.2-57
OnStar System (Option)This system may be ordered if you have the optionalfixed cellular telephone. The following services areavailable 24 hours a day:Roadside Service with LocationEmergency Services ButtonRemote Door UnlockTheft DetectiordNotification and Stolen-\ kh .icleTrackingAuto--_. : Notification of Air Bag DeploymentConcierge/Customer Conveniences ServicesFor more information, contact your dealer.Assist HandlesAn assist handle above each door can be used to helpyou get in or out of your vehicle.Astroroof (Option)If your vehicle has theastroroof option, the switchis on the roof between thesun visors. It will open theastroroof when the ignitionis on, or when retainedaccessory power is active.To fully open the glass panel and sunshade, press theswitch rearward and release. To stop the panel in apartially open position, press the switch again at thedesired point. To continue to open fully, press theswitch rearward again and release. The sunshade canbe opened manually.To close the glass panel, press and hold the switchforward. The sunshade must be manually closed.Once the astroroof is closed, it can be opened to a ventposition. Press the switch forward to vent. To close,press the switch rearward.2-58
Universal Transmitter (Option)This transmitter allows you to consolidate the functions ofup to three individual hand-held transmitters. It willoperate garage doors and gates, or other devices controlledby radio frequency such as home/office lighting systems.The transmitter will learn and transmit the frequenciesof most current transmitters and is powered by yourvehicle’s battery and charging system.This device complies with Part 15 of the FCC Rules.Operation is subject to the following two conditions:(1) this device may not cause harmful interference,and (2) this device must accept any interference received,including interference that may cause undesired operation.lks device complies with RSS-210 of Industry Canada.Operation is subject to the following two conditions:(1) this device may not cause interference, and (2) thisdevice must accept any interference, including interferencethat may cause undesired operation of the device.Changes and modifications to this system by other thaan authorized service facility could void authorizationto use this equipment.Programming the TransmitterDo not use the universal transmitter with any garagedoor opener that does not have the “stop and reverse”safety feature. This includes any garage door openermodel manufactured before April 1, 1982.-e sure that people and objects are cl- c of the garagedoor you are programming.2-59
Your velucle’s engine should be turned off whileprogramming your transmitter. Follow these steps toprogram up to three channels:1. If you have previously programmed a universaltransmitter channel, proceed to Step 2. Otherwise,hold down the two outside buttons on the universaltransmitter until the red light begins flash to rapidly(approximately 20 seconds). Then release thebuttons. This procedure initializes the memory anderases any previous settings for all three channels.2. Hold the end of your hand-held transmitter againstthe bottom surface of the universal transmitter sothat you can still see the red light.3. Decide which one of the three channels you wantto program. Using both hands, press the hand-heldtransmitter button and the desired button on theuniversal transmitter. Continue to hold both buttonsthrough Step 4.4. Hold down both buttons until you see the redlight on the universal transmitter flash slowly thenrapidly. The rapid flashing, which could take up to90 seconds, indicates that the universal transmitterhas been programmed. Release both buttons threeseconds after the light starts to flash rapidly.If you have trouble programming the universaltransmitter, make sure that you have followed thedirections exactly as described and that the batteries inthe hand-held transmitter are not dead. If you stillcannot program it, rotate your hand-held transmitterend over end and try again. The universal transmittermay not be compatible with a limited number of olderinstallations due to legislated changes in transmissionfrequencies. If you cannot program the transmitter afterrepeated attempts, consult your dealer.Be sure to keep your original hand-held transmitter in caseyou need to erase and reprogram the universal transmitter.Note to Canadian Owners: During programming, yourhand-held transmitter may stop transmitting after one ortwo seconds. If you are programming from one of thesetransmitters, you should press and re-press the buttonon the hand-held transmitter every two seconds withoutever releasing the button on the universal transmitter.Release both buttons three seconds after the red lighton the universal transmitter begins to flash rapidly.Operating the TransmitterPress and hold the appropriate button on the universaltransmitter. The red light comes on while the signal isbeing transmitted.2-60
Note that the effective transmission range of theuniversal transmitter may differ from your hand-heldtransmitter and also from one channel to another.Training a Garage Door Opener Equippedwith “Rolling Codes”If you programmed the universal transmitter, but thegarage door will not open, and if your garage door openerwas manufactured after 1995, your garage door may have You may now use either the universal transmitter ora security feature that changes the “code” of your garage the hand-held transmitter to open your garage door. Ifdoor opener every time it is opened or closed.you still have difficulty in programming and requireassistance, please call your dealer.To determine if your garage door opener has this rollingcode feature, press and hold the appropriate button on Erasing Channelsthe universal transmitter that was programmed. the Ifred light flashes rapidly for one to two seconds, then To erase all three programmed channels, hold down theturns solid, your garage door opener has this feature. two outside buttons until the red light begins to flash.To program a garage door opener with the rolling codefeature, do the following:1. Program your hand-held transmitter to the universaltransmitter by following the steps provided under“Programming the Transmitter” earlier.2. Locate the training button on the garage door openerreceiver. The exact location and color will vary mongbrands. Refer to your garage door opener manufacturer’sowner’s manual to locate the training button.3. Press the training button on the garage door openerreceiver for one to two seconds.4. Return to your vehicle and press the programmedbutton on the universal transmitter until the redlight flashes rapidly (about two seconds).5. Release the b,utton, then press it again to confirm itwas programmed to the garage door opener receiver.Individual channels cannot be erased, but can bereprogrammed using the procedure for programmingthe transmitter explained earlier.AccessoriesAccessories for your universal transmitter are availablefrom the manufacturer of the unit. If you would likeadditional information, please call 1-800-355-3515.
The Instrument Panel2-62
Your instrument panel is designed to let you know at a glance how your car is running. You’ll know how fast you’rgoing, how much fuel you’re using, and many other things you’ll need to know to drive safely and economically.The main components of your instrument panel are:A. Warning Lights L. Steering Wheel Touch Controls for Au&o SystemB TachometerM. Tilt Steering Wheel LeverC .. Fuel GageN. HornD .. Engine Temperature Gage0. Steering Wheel Touch Controls forE. SpeedometerAudio/Climate Control SystemP. Traction ControVTrip Reset ButtonE Warning LightsQ.G. Climate ControlsAshtray and Cigarette LighterH. Audio SystemR. Dual CupholderS.I.Compact Disc Storage CompartmentHeadlampflnstrurnent Panel IntensityControVTwilight SentinelT. Gearshift LeverJ. Hood ReleaseU. Air OutletsK. Turn SimaVMultifunction LeverV. Glove Box2-63
Instrument Panel ClusterYour vehicle is equipped with this instrument panel cluster. It includes indicator warning lights and gages are thatexplained on the following pages.2-64
Speedometer and OdometerYour speedometer lets you see your speed in both milesper hour (mph) and kilometers per hour (km/h). Yourodometer shows how far your vehicle has been driven,in either miles (used in the United States) or kilometers(used in Canada).Trip OdometerA trip odometer can tell you how many miles you havedriven since you last reset it back to zero.To reset the tripodometer, push theTRIP RESET button.TachometerI NOTICE:The tachometer tells you3 4 how fast the engine isrunning. It displays engine5 speed in revolutions perminute (rpm).67 1Do not operate the engine with the tachometer inthe red area, or engine damage may occur..2-65
Warning Lights, Gagesand IndicatorsThis part describes the warning lights and gages thatmay be on your vehicle. The pictures will help youlocate them.Warning lights and gages can signal that something iswrong before it becomes serious enough to cause anexpensive repair or replacement. Paying attention toyour warning lights and gages could also save you orothers from injury.Warning lights come on when there may be is or aproblem with one of your vehicle’s functions. Asyou will see in the details on the next few pages,some warning lights come on briefly when you startthe engine just to let you know they’re working. Ifyou are familiar with this section, you should not bealarmed when this happens.Gages can indicate when there may be is or a problemwith one of your vehicle’s functions. Often gages andwarning lights work together to let you know whenthere’s a problem with your vehicle.When one of the warning lights comes on and stayson when you are driving, or when one of the gagesshows there may be a problem, check the section thattells you what to do about it. Please follow this manual’sadvice. Waiting to do repairs can be costly -- and evendangerous. So please get to know your warning lightsand gages. They’re a big help.Safety Belt Reminder LightWhen the key is turned to RUN or START, a chimewill come on for about eight seconds to remind peopleto fasten their safety belts.The safety belt light WMalso come on and stay onfor about 70 seconds. Ifthe driver’s belt is alreadybuckled, neither the chimenor the light will come on.2-66
Air Bag Readiness LightThere is an air bag readiness light on the instrumentpanel, which shows AIR BAG. The system checks theair bag's electrical system for malfunctions. The lighttells you if there is an electrical problem. The systemcheck includes the air bag sensors, the air bag modules,the wiring and the crash sensing and diagnostic module.For more information on the air bag system, see "AirBag" in the Index.AIR BAG \This light will come onwhen you start your engine,and it will flash for a fewseconds. Then the lightshould go out. This meansthe system is ready.The air bag readiness light should flash for a fewseconds when you turn the ignition key RUN. to If thelight doesn't come on then, have it fixed so it will beready to warn you if there is a problem.Battery Light1+1When you turn the keyto RUN, this light willcome on briefly, to showthat your generator andbattery charging systemsare working.If the light stays on, your vehicle needs service and youshould take your vehicle to the dealer at once. To saveyour battery until you get there, turn off all accessories,and set your climate control system to OW.If the air bag readiness light stays on after you start theengine or comes on when you are driving, your air bagsystem may not work properly. Have your vehicleserviced right away.2-67
5 System Warning Lightyour vehicle’s hydraulic brake system is divided intotwo parts. If one part isn’t working, the other part canstill work and stop you. For good braking, though, youneed both parts working well.If the warning light comes on, there could be a brakeproblem. Have your brake system inspected right away.This light should come onwhen you turn the key toSTART. If it doesn’t comeon then, have it fixed so itwill be ready to warn you ifthere’s a problem.If the light and chime come on while you are driving,pull off the road and stop carefully. You may notice thatthe pedal is harder to push. Or, the pedal may go closerto the floor. It may take longer to stop. If the light is stillon, have the vehicle towed for service. (See “TowingYour Vehicle” in the Index.)-IYour brake system may not be working 1 Iperlyif the brake system warning light is on. Drivingwith the brake system warning light on can leadto an accident. If the light is still on after you’vepulled off the road and stopped carefully, havethe vehicle towed for service.When the ignition is on, the brake system warninglight will also come on when you set your parkingbrake. The light will stay on if your parking brakedoesn’t release fully. If you try to drive off with theparking brake set, a chime will also come on until yourelease the parking brake. If the light and chime stay onafter your parking brake is fully released, it means youhave a brake problem.
Anti-Lock Brake System Warning Light1 11 ANTI -LOCK IWith the anti-lock brakesystem, the light(s) willcome on when you startyour engine and may stayon for several seconds.That’s normal.If the light stays on, turn the ignition OFF. to Or, if thelight comes on when you’re driving, stop as soon aspossible and turn the ignition off. Then start the engineagain to reset the system. If the light still stays on, orcomes on again while you’re driving, your vehicleneeds service. If the regular brake system warninglight isn’t on, you still have brakes, but you don’t haveanti-lock brakes. If the regular brake system warninglight is also on, you don’t have anti-lock brakes andthere’s a problem with your regular brakes. See “BrakeSystem Warning Light” earlier in this section.The anti-lock brake system warning light should comeon briefly when you turn the ignition key to RUN. If thelight doesn’t come on then, have it fixed so it will beready to warn you if there is a problem.Traction Control System WarningLight (Option)OFFThis warning light shouldcome on briefly as youstart the engine.If the warning light doesn’t come on then, have it fixedso it will be ready to warn you if there’s a problem. Ifit stays on, or comes on when you’re driving, theremay be a problem with your traction control system andyour vehicle may need service. When this warning ligis on, the system will not limit wheel spin. Adjust yourdriving accordingly.3 69
The traction control system warning light may come onfor the following reasons:000If you turn the system off by pressing the TRACCONT button located on the instrument panel, thewarning light will come on and stay on. To turn thesystem back on, press the button again. The warninglight should go off. (See “Traction Control System”in the Index for more information.)If there’s a brake system problem that is specificallyrelated to traction control, the traction control systemwill turn off and the warning light will come on. Ifyour brakes begin to overheat, the traction controlsystem will turn off and the warning light will comeon until your brakes cool down.If the traction control system is affected by anengine-related problem, the system will turn offand the warning light will come on.If the traction control system warning light comes onand stays on for an extended period of time when thesystem is turned on, your vehicle needs service.Engine Coolant Temperature Warning LightWTEMPThis light tells you thatyour engine coolant hasoverheated or your radiatorcooling fan is not working.If you have been operating your vehicle under normaldriving conditions, you should pull off the road, stopyour vehicle and turn the engine off as soon as possible.The section “Problems on the Road” in this manualexplains what to do. See “Engine Overheating” inthe Index.2-70
Engine Coolant Temperature GageFA 200WTEMPYour vehicle has a gage thatshows the engine coolanttemperature. If the gagepointer moves into the redarea, your engine is too hot!This reading means the same thing as the warning light.It means that your engine coolant has overheated. If youhave been operating your vehicle under normal drivingconditions, you should pull off the road, stop yourvehicle and turn off the engine as soon as possible.The “Problems on the Road” section in this manualexplains what to do. See “Engine Overheating” inthe Index.Low Coolant Warning LightLOWCOOLANTWhen this light comes on,the cooling system is lowon coolant. As a bulb check,it will come on for two tofour seconds and then gooff when the ignition isin RUN. If the light doesn’tcome on, have thevehicle serviced.If the coolant level is low, the light will come backon and a warning chime will sound. If this happens,see “Engine Coolant” in the Index for proper coolingsystem fill.After the coolant level is returned to its proper level, theLOW COOLANT light will go off after 20 seconds orremain off during the next ignition cycle.
Malfunction Indicator Lamp(Service Engine Soon Light)SERVICEENGINE SOONYour vehicle is equippedwith a computer whichmonitors operation of thefuel, ignition and emissioncontrol systems.This system is called OBD 11 (On-BoardDiagnostics-Second Generation) and is intended toassure that emissions are at acceptable levels for thelife of the vehicle, helping to produce a cleanerenvironment. The SERVICE ENGINE SOON lightcomes on to indicate that there is a problem andservice is required. Malfunctions often will be indicatedby the system before any problem is apparent. Thismay prevent more serious damage to yow vehicle.This system is also designed to assist your servicetechnician in correctly diagnosing any malfunction.I NOTICE:If' you keep driving your vehicle with this lighton, after a while, your emission controls may notwork as well, your fuel economy may not be asgood and your engine may not run as smoothly.This could lead to costly repairs that may not becovered by your warranty.This light should come on, as a check to show it is youworking, when the ignition is on and the engine is notrunning. If the light doesn't come on, have it repaired.This light will also come on during a malfunction inone of two ways:9 Light Flashing -- A misfire condition has beendetected. A misfire increases vehicle emissions andmay damage the emission control system on yourvehicle. Dealer or qualified service center diagnosisand service may be required.Light On Steady -- An emission control systemmalfunction has been detected on your vehicle.Dealer or qualified service center diagnosis andservice may be required.2-72
If the Light Is FlashingThe following may prevent more serious damage toyour vehicle:0 Reducing vehicle speed.0 Avoiding hard accelerations.Avoiding steep uphill grades.If you are towing a trailer, reduce the amount ofcargo being hauled as soon as it is possible.If the light stops flashing and remains on steady, see “Ifthe Light Is On Steady” following.If the light continues to flash, when it is safe to do so,stop the vehicle. Find a safe place to park your vehicle.Turn the key off, wait at least 10 seconds and restart theengine. If the light remains on steady, see “If the LightIs On Steady” following. If the light is still flashing,follow the previous steps, and drive the vehicle to yourdealer or qualified service center for service.If the Light Is 4‘--dyYou may be able to correct the emission systemmalfunction by considering the following:Did you recently put fuel into your vehicle?If so, reinstall the fuel cap, making sure to fully installthe cap. The diagnostic system can determine if the fuelcap has been left off or improperly installed. A loose ormissing fuel cap will allow fuel to evaporate into theatmosphere. A few driving trips with the cap properlyinstalled should turn the light off.Did you just drive through a deep puddle of water?If so, your electrical system may be wet. The conditionwill usually be corrected when the electrical systemdries out. A few driving trips should turn light the off.Are you low on fuel?As your engine starts to run out of fuel, your enginemay not run as efficiently as designed since smallamounts of air are sucked into the fuel line causing amisfire. The system can detect this. Adding fuel shouldcorrect this condition. Make sure install to the fuelcap properly. It will take a few driving trips to turnthe light off.2-73
Oil Pressure LightThis light tells you if therecould be a problem withyour engine oil pressure.When this light comes on and stays on, it means oil isn’tgoing through your engine properly. You could be lowon oil, or you might have some other oil problem.Ion’t keep driving j he I pressure is low !you do, your engine can become so hot that itcatches fire. You or others could be burned.Check your oil as soon as possible and haveyour vehicle serviced.2-74
NOTICE:Damage to your engine from neglected oilproblems can be costly and is not covered byyour warranty.Check Oil Level LightCHECK OILLEVELThe CHECK OIL LEVELlight is lit for two to fourseconds as a bulb checkeach time the ignition keyis turned to RUN.Door Ajar LightDOOR AJARFuel GageWhen the ignition is on,this light will stay on untilboth doors are closed andcompletely latched.The fuel gage showsabout how much fuel isin your tank.If the light doesn’t come on, have your vehicle serviced.If the engine oil is more than one quart (0.95 L) low, thislight will turn on for about one minute and then willremain off until the next time you start the vehicle onlyif the vehicle has been shut off for at least eight minutes.If the CHECK OIL LEVEL light comes back on,the engine oil should be checked at the dipstick thenbrought up to the proper level if necessary. See“Engine Oil” in the Index.WFUELIt works only when the ignition is on. When theindicator nears Empty (E) you still have a little fuel left.There is a reserve of about 1.5 gallons (5.6 L) in the fueltank. You need to get more fuel right away.2-75
Here are some concerns some owners have had aboutthe fuel gage. All these situations are normal andindicate nothing wrong with the fuel gage.0000At the gas station, the gas pump shuts off before thegage reads Full (F).It takes more (or less) gas to fill up than the gageindicated. For example, the gage may have indicatedhalf full, but it took more (or less) than half of thetank's capacity to fill it.The gage moves a little when you. turn a corner,speed up or stop your vehicle.When you turn the engine off, the gage doesn't goall the way back to Empty (E).Low Fuel LightWFUELA yellow light near theEmpty (E) mark on the fuelgage comes on when yourvehicle is low on fuel. Youhave less than 3 gallons(1 1.7 L) remaining in yourfuel tank.2-76
Section 3 Comfort Controls and Audio SystemsIn this section, you’ll find out how to operate the comfort control and audio systems offered with your vehicle. Besure to read about the particular systems supplied with your vehicle.3-23-23-53-53-63-73-83-93-93-10Comfort ControlsDual Automatic ComforTemp Climate ControlAir ConditioningHeatingVentilation SystemDefogging and DefrostingRear Window DefoggerSteering Wheel Controls for ClimateControl (Option)Passenger Zone Comfort ControlSetting the Clock3-103-153-183-193- 193-203-213-213-21AM-FM Stereo with Cassette Tape andCompact Disc Player with AutomaticTone ControlTheft-Deterrent FeatureAudio Steering Wheel Controls (Option)Understanding Radio ReceptionTips About Your Audio SystemCare of Your Cassette Tape PlayerCare of Your Compact DiscsCare of Your Compact Disc PlayerPower Antenna Mast Care3-1
Comfort ControlsThis section describes how to operate your climatecontrol system. Your climate control system usesozone-friendly R- 134a refrigerant.Dual Automatic ComforTempClimate ControlYour vehicle has the Dual Automatic ComforTempClimate Control system. The following information tellsyou how it works.You will hear a beep each time a button is pushed and a If the display is flashing after the climate control systemsmall light on the button will indicate which buttons are is started, there is a problem with the system and youactive. The lights are on all buttons except TEMP, FAN should see your dealer for service.and AIR ELOW. The display will show fan speed,comfort level setting and airflow direction for a fewSun and temperature sensors automatically adjust the airseconds whenever AUTO is selected, and then it willtemperature, the airflow direction and the fan speed todisplay the outside temperature. The outside temperaturemaintain your comfort setting. The system may supplyreading is most accurate when the vehicle is moving.cooler air to the side toward the sun. Be careful not toDuring stops, the display shows the previousput anything over the sensors on top of the dash.temperature for best accuracy and system control.3-2
Temperature ButtonTo adjust the comfort level you want maintained insidethe car, push the TEMP button. If you want a warmercomfort level, push the red arrow. If you want a coolercomfort level, push the blue arrow. Your comfort settingis shown in the display.Fan ButtonThe speed of the blower fan is controlled automaticallyif you have the system set for AUTO. Pressing theFAN button will display and hold the current blowerfan setting.If you want the blower fan to run at a lower speed, pushthe bottom of the FAN button. The fan speed willdecrease with every push of the button until the lowestspeed is reached. If you want to increase the fan speed,push the top of the FAN button. Notice the fanj icators in the display.Mode ControlsPress the AIR FLOW button to deliver air through thefloor, middle or windshield outlets. The system will stayin the selected mode until the AUTO button is pushed.Press the up arrow on the AIR FLOW button to cyclethrough the available modes.Automatic OperationPress the AUTO button when you want the system toautomatically adjust the interior temperature to yourpreference. When the system is set for automaticoperation, air will come from the floor, middle orwindshield outlets depending on the temperature insidethe vehicle, the outside temperature and sun load. Fanspeed will vary as the system gets to and maintains thecomfort setting you have selected through the use of theTEMP button.To find your comfort setting, start with the system inAUTO mode and the TEMP button adjusted to a displayof 75 O F (24" C), give the vehicle about 20 minutes tostabilize, then readjust your comfort setting if necessary.The display will show the comfort setting for a fewseconds and then it will display the outside temperature.If you want to see your current automatic fan speed,airflow direction and comfort setting, press theAUTO button.In cold weather, the system will delay turning on thefan, to avoid blowing cold air. The length of the delaydepends on the engine coolant temperature and theoutside temperature. Pushing the FAN, AIR FLOWor FRONT buttons will override this delay, turn off theAUTO setting and change the fan speed.3-3
<strong>Manual</strong> OperationThe ventilation system always allows fresh air to flowYou may also manually adjust the air delivery or fan speed.through the interior when the vehicle is moving evenwith the system in the OFF mode.AIR FLOW This button is used to change the directionof the airflow. The airflow choices available are FLOOR,VENT The VENT button allows outside air to flowthrough your vehicle without the air conditioningFLOOR-MID, MID and WINDSHIELD-FLOOR.If the system is set for AUTO, pressing AIR the FLOWcompressor working. Selecting VENT and the AUTObutton will display the current airflow direction and thebutton at the same time allows the system to controlcomfort setting. Press the AIR FLOW up or downautomatically without the use of the air conditioningbutton again to change the direction of the airflow.compressor or the use of the RECIRC mode. To turnoff the VENT selection, push the VENT button again.If the AIR FLOW up button is selected while in theFRONT defrost mode, the system will direct the airRECIRC: When RECIRC is selected, the system willtoward the WINDSHIELD. If the AIR FLOW downlimit the amount of outside air entering your vehicle.button is selected while in the FRONT defrost mode, theThis is helpful when you are trying to cool the interiorsystem will direct the air toward the FLOOR, and theof the vehicle quickly or limit the amount of outside airFRONT defrost mode will cancel. Notice the arrows inentering your vehicle for some other reason. RECIRCthe display.and AUTO may be selected at the same time. Thesystem will remain in RECIRC until the ignition isOFF: If the passenger's comfort control is turned on, it turned off, then the system will return back to thecan be turned off by pressing the OFF button once. previously selected mode. RECIRC can be selected inPressing the OFF button a second time will turn off the all manual airflow modes except FRONT defrost.main system. Turning off the main system causes the fan RECIRC cannot be selected with the VENT button.to turn off and the airflow to be directed to the FLOOR.The system will still try to keep the interior of theOperating RECIRC in cold temperature or under highvehicle at the previously chosen comfort setting. Thehumidity conditions may cause moisture to form on theoutside temperature will show on the display when theinside of the windshield. If this condition occurs,system is set to OFF.deselect the RECIRC button.3-4
FRONT This selection is used to defrost thewindshield by directing the airflow toward the windshield.If FRONT is selected while in the AUTO mode,the fan speed and the air temperature from the frontdefroster will vary. If a manual fan speed setting isselected, the fan speed will remain at that selectionuntil another fan speed selection is made or the AUTOmode is selected. To turn off FRONT, press the AUTOor AIR FLOW button.FRONT defrost will work better if any ice or snow iscleared from the hood and the air inlet area between thebase of the windshield and the hood.Air ConditioningOn very hot days, open the windows long enough to letthe hot air out. This reduces the time required to cool theinterior of the vehicle to a comfortable level. If thesystem is in the AUTO mode on very hot days, thesystem will automatically enter the RECIRC mode andthe temperature door will be positioned at the full coldposition for maximum cooling. If the system is not inthe AUTO mode, RECIRC should be selected to providmaximum cooling. You can choose the extreme comfortsetting of 60°F (16"C), but the system will not cool anyfaster by choosing the extreme comfort setting.HeatingOn cold days, if the AUTO mode is selected, the systemwill automatically directhe air toward the floor and thetemperature door will be positioned at the full hotposition. You can choose the extreme comfort setting of90°F (32°C) but the system will not warm up any fasby selecting the extreme comfort setting. If the outsidetemperature is cold, the fan will be delayed to avoid. r-blowing cold air. Pushing the FAN, AIR FLOW or'FRONT buttons will override this delay, turn off theAUTO mode and change the fan speed..3-5
Adjust the direction of airflow by moving the louveredfti+ nutlets.
Defogging and DefrostingUse the FRONT button to quickly remcw fog, &ost
The lines you see on therear window warm theglass. Press the button tostart warming your window.An indicator light in thebutton will glow whilethe rear window defoggeris operating.I NOTICE:Scraping the inside of your rear window couldcut and damage the heater. Your warranty wouldnot cover this damage. Don't put decals therebecause you might have to scrape them off.At speeds above 30 mph (48 km/h), the rear defoggerwill stay on until you press the REAR defogger buttonagain. At speeds below 30 mph (48 km/h), the rearwindow defogger will turn off automatically after about10 minutes of use. If you press it again, the defogger'will operate for about five minutes only. You can alsoturn the defogger off by turning off the ignition.3-8
iteering Wheel Controls for Climate2ontrol (Option)If your vehicle has thisfeature, you can control thetemperature comfort settingby using the control buttonon your steering wheel.Passenger Zone Comfort ControlTEMP: Press either arrow once and the current comfortsetting will be displayed. Press the up arrow again tochoose a warmer comfort setting and press the downarrow again to choose a cooler comfort setting.The front seat passenger can control the air temperaturein their seating area.This system can be activated by turning the COMFORTCONTROL knob on the passenger’s door.3-9
Adjust the temperature using the COMFORTCONTROL knob. Turn the control toward COOLER orWARMER. This control can be set up to 5 OF (- 15 "C)cooler or warmer than the primary setting. Notice thelighted display above the control which indicates thedifference from the main temperature setting.Push the OFF button on the main control panel once toturn off this part of the system.dio Systemsyour uelco Electronics audio system has been designedto operate easily and give years of listening pleasure.You will get the most enjoyment of out it if you acquaintyourself with it first. Find out what your DelcoElectronics system can do and how to operate its allcontrols, to be sure you're getting the most out of theadvanced engineering that went into it.Setting the ClockPress and hold HRS until the correct hour appears.Press and hold MIN until the correct minute appears.You may set the clock with the ignition off if youpress RECALL first and follow the same proceduredescribed abc :.AM-FM Stereo with Cassette Tape andCompact Disc Player with AutomaticTone ControlPlaying the RadioVOLUME: Press this knob to turn the system on andoff. To increase volume, turn the knob to the right. Turnit to the left to decrease volume.3-10
RECALL: Press this button briefly to recall the stationbeing played or to display the clock. To change what isnormally shown on the display (station or time), pressthe RECALL button until you see the display you want,then hold the RECALL button until the display flashes.If you press the button when the ignition is off, the clockwill show for a few seconds.Finding a StationAM-FM: Press this button to switch between AM,FM1 and FM2. The display shows your selection.TUNE: Press the up or down arrow to chooseradio stations.SEEK: Press the up or down arrow to go to the nexthigher or lower station and stay there. The sound willmute while seeking.SCAN: Press one of the SEEK arrows for two secondsand SCAN will appear on the display. Use SCAN tolisten to stations for a few seconds. The radio will go toa station, stop for a few seconds, then go on the to nextstation. Press one of the SEEK arrows again to stopscanning. The sound will mute while scanning.PUSHBUTTONS: The six numbered pushbuttons letyou return to your favorite stations. You can set up to18 stations (six AM, six FM1 and six FM2). Just:1.2.3.4.5.6.Turn the radio on.Press AM-FM to select the band.Tune in the desired station.Press TONE to select the setting you prefer.Press and hold one of the six numbered buttons. Thesound will mute. When it returns, release the button.Whenever you press that numbered button, thestation you set will return and the tone you selectewill be automatically selected for that button.Repeat the steps for each pushbutton.P SCAN: Press this button to listen to each of yourpreset stations for a few seconds. The radio will go tothe first preset station, stop for a few seconds, then goon to the next preset station. Press P SCAN again tostop scanning. If a preset station has weak reception, theradio will not stop at the preset station.AUTO SET Press this button and the system will seekand set the 12 strongest FM or the 6 strongest AMstations on your preset buttons. AUTO SET will flashwhile seeking and will remain on until this function iscomplete. To return to the stations you manually set,press AUTO SET again.3-11
Setting the ToneBASS: Press this knob lightly so it extends. Turn theknob to increase or decrease bass.TREB: Press this knob lightly so it extends. Turn theknob to increase or decrease treble. If a station is weakor noisy, you may want to decrease the treble.Push these knobs back into their stored positions whenyou’re not using them.TONE: This feature allows you to choose preset bassand treble equalization settings designed for classical,pop, rock, jazz, talk and country/western stations.CLASS will appear on the display when you first pressTONE. Each time you press it, another setting willappear on the display.!Press it again after C & Wappears and MANUAL will appear. Tone control willreturn to the BASS and TREB knobs. Also, if you usethe BASS and TREB knobs, control will return to themand MANUAL will appear.Adjusting the SpeakersBAL: Press this knob lightly so it extends. Turn the knobto move the sound to the left or right speakers. The middleposition balances the sound between the speakers.FADE: Press this knob lightly so it extends. Turnthe knob to move the sound the to front or rear speakers.The middle position balances the sound betweenthe speakers.Push these knobs back into their stored positions whenyou’re not using them.Playing a Cassette TapeThe longer side with the tape visible should face to theright. If the ignition and the radio are on, the tape can beinserted and will begin playing. If you hear nothing orhear a garbled sound, the tape may not be in squarely.Press EJECT to remove the tape and start over.While the tape is playing, use the VOLUME, FADE,BAL, BASS and TREB controls just as you do for theradio. Other controls may have different functions whena tape is inserted. The display will show an arrow toshow which side of the tape is playing.If you want to insert a tape when the ignition or is radiooff, first press EJECT or RECALL.Your tape bias is set automatically.3-12
44 (3): Press this button to reverse the tape rapidly.Press it again to return to playing speed. The radio willplay while the tape reverses.bb (4): Press this button to advance quickly to anotherpart of the tape. Press the button again to return to playmgspeed. The radio will play while the tape advances.SIDE (5): Press this button to change the side of thetape that is playing.RAND (6): Press this button to reduce backgroundnoise. The double-D symbol will appear in the displayDolby Noise Reduction is manufactured under a licensefrom Dolby Laboratories Licensing Corporation. Dolbyand the double-D symbol are trademarks of DolbyLaboratories Licensing Corporation.SOURCE: Press this button to change to the tape ordisc function when the radio is on. If both a tape and adisc are installed, the system will first go to tape play;TAPE SIDE and an arrow will appear on the display. IfSOURCE is pressed again, the system will go to discplay; CD PLAY will appear on the display.EJECT The system has two EJECT buttons. Pressthe button near the CD slot to remove a disc. Press thbutton near the tape slot to remove a tape and the radiwill play.3-13
CLN: If this message appears on the display, thecassette tape player needs to be cleaned. It will still playtapes, but you should clean it as soon as possible toprevent damage to the tapes and player. See “Care ofIf any error occurs repeatedly or if an error can’t becorrected, please contact your dealer. If your radiodisplays an error number, writedown and provide it toyour dealer when reporting the problem.Your Cassette Tape Player” in the Index. After you cleanPREV (1): Press this button to go to the start of thethe player, press and hold EJECT for five seconds tocurrent track, if more than eight seconds have played. Ifreset the CLN indicator. The radio will display --- toyou hold the button or press it more than once, theshow the indicator was reset.player will continue moving back through the disc. TheYour cassette tape player automatically ~~ lucessound will mute while seeking.background noise from tapes encoded wlm Dolby ~USC.NEXT (2): Press this button to go to the next track.Yau may turn Dolby off by pressing the number six preset.If you hold the button or press it more than once, thePlaying a Compact Discplayer will continue moving forward through the disc.The sound will mute while seeking.Insert a disc partway into the slot, label side up. Theplayer will pull it in. The disc should begin playing.The SEEK down and up arrows will also find theprevious and next selections on the disc.If you want to insert a CD while the ignition or the radiois off, first press EJECT or RECALL.44 (3): Press and hold this button to quickly reversewithin,a track. You will hear sound.If you’re dnving on a very rough road or if it’s very hot,the disc may not play and an error code may appear on (4): Press and hold this button to quickly advancethe display. When things get back to normal, the disc within a track. You will hear sound.should play. If the disc comes out, it could be that: RAND (6): Press this button to hear the tracks inrandom, rather than sequential, order. Press RANDagain to turn off random play,E20: The disc is upside down.E20: It is dirty, scratched or wet.0 E20: There’s too much moisture in the air.(Wait about an hour and try again.)
RECALL: Press this button to see which track isplaying. Press it again within five seconds to see howlong it has been playing. To change what is normallyshown on the display (track or elapsed time), press theRECALL button until you see the display you want,then hold the RECALL button until the display flashes.AM-FM: Press this button to play the radio when a discis in the player.SOURCE: Press this button to change to the disc functionwhen the radio is on. When a disc is inserted, the disc willplay until you press AM-FM. Then the disc will stopplaying and the radio will play. Press SOURCE again toplay a disc again. CD PLAY will show on the display.EJECT: Press this button to re we the disc. Theradio will play.If you turn off the ignition or radio with a disc in theplayer, it will stay in the player. When you turn on theignition or system, the disc will start playing where itstopped, if it was the last-selected audio source.Also, as a protection feature, if a CD is ejected and leftin the player, it will be pulled back in the player with theignition on or off.Theft-Deterrent FeatureTHEFTLOCK@ is designed to discourage theft of yourradio. It works by using a secret code to disable all radiofunctions whenever battery power is removed.If THEFTLOCK is active, the THEFTLOCK indicatorwill flash when the ignition is off.The THEFTLOCK feature for the radio may be used orignored. If ignored, the system plays normally and theradio is not protected by the feature. If THEFTLOCK isactivated, your radio will not operate if stolen.When THEFTLOCK is activated, the radio will displayLOC to indicate a locked condition anytime batterypower is removed. If your battery loses power for anyreason, you must unlock the radio with the secret codebefore it will operate.3-15
Activating the Theft-Deterrent FeatureThe instructions which follow explain how to enter yoursecret code to activate the THEFTLOCK system. It isrecommended that you read through all nine stepsbefore starting the procedure.NOTE: If you allow more than 15 seconds to elapsebetween any steps, the radio automatically reverts totime and you must start the procedure over at Step 4.1. Write down any three or four-digit number from000 to 1999 and keep it in a safe place separate fromthe vehicle.2. Turn the ignitjon to ACCESSORY or RUN.3. Turn the radio off.4. Press the 1 and 4 buttons together. Hold them downuntil --- shows on the display. Next you will use thesecret code number which you have written down.5. Press MIN and 000 will appear on the display.6. Press MIN again to make the last two digits agreewith your code.7. Press HRS to make the first one or two digits agreewith your code.8. Press AM-FM after you have confirmed that thecode matches the secret code you have written down.The display will show REP to let you know that youneed to repeat Steps 5 through 7 to confirm yoursecret code.9. Press AM-FM and this time the display will showSEC to let you know that your radio is secure.Unlocking the Theft-Deterrent Feature After aPower LossEnter your secret code as follows; pause no more than15 seconds between steps:1. LOC appears when the ignition is on.2. Press MIN and 000 will appear on the display.3. Press MIN again to make the last two digits agreewith your code.4. Press HRS to make the first one or two digits agreewith your code.5. Press AM-FM after you have con€irmed that thecode matches the secret code you have written down.The display will show SEC, indicating the radio isnow operable and secure.3-16
If you enter the wrong codeight times, INOP willappear on the display. You will have to wait an hourwith the ignition on before you can try again. Whenyou try again, you will only have three more chances(eight tries per chance) to enter the correct code beforeINOP appears.If you lose or forget your code, contact your dealer.Disabling the Theft-Deterrent FeatureEnter your secret code as follows; pause no more than15 seconds between steps:1. Turn the ignition to ACCESSORY or RUN.2. Turn the radio off.3. Press the 1 and 4 buttons together. Hold themdown until SEC shows on the display.4. Press MIN and 000 will appear on the display.5. Press MIN again to make the last two digits agreewith your code.6. Press HRS to make the first one or two digits agreewith your code.7. Press AM-FM after you have confirmed that thecode matches the secret code you have written down.The display will show ---, indicating that the radio isno longer secured.If the code entered is incorrect, SEC will appear on tnedisplay. The radio will remain secured until the correctcode is entered.When battery power is removed and later applied to asecured radio, the radio won’t turn on and LOC willappear on the display.To unlock a secured radio see “Unlocking theTheft-Deterrent Feature After a Power Loss” earlierin this section.3-17
Audio Steering Wheel Controls (Option)If your vehicle has this feature, you can control certainradio and comfort control functions using the buttons onyour steering wheel.VOL: Press me up or aownarrow to increase ordecrease volume.SEEK: Press the SEEKdown arrow to go to a lowerfrequency station and theSEEK up arrow to go to ahigher frequency station.If you press and hold the SEEK button for two seconds,SCAN will appear on the display. It will go to a station,stop for a few seconds and go on to the next station.Press the SEEK button to stop scanning. SEEK alsofunctions as PREV and NEXT when playing a cassetteTEMP: Press the up arrow to increase the settape or compact disc.temperature on your comfort control system or the down SCAN/AM-FM: Press the SCAN button and SCANarrow to decrease the -temperature.will appear on the display. SCAN works as the PSCANbutton on your radio. It will scan through each of thepreset radio stations. If a preset radio station has weakreception, the radio will not stop at the preset station.Press SCAN again to stop scanning. Press the AM-FMbutton to choose the AM, FM1 or FM2 band.3-18
To help avoid hearing loss or darnage:Adjust the volume control to the lowest setting.Increase volume slowly until you hear comfortablyand clearly.NOTICE:Before you add any sound equipment to yourvehicle -- like a tape player, CB radio, mobiletelephone or two-way radio -- be sure you canadd what you want. If you can, it’s veryimportant to do it properly. Added soundequipment may interfere with the operation ofyour vehicle’s engine, Delco Electronics radio orother systems, and even damage them. Yourvehicle’s systems may interfere with theoperation of sound equipment that has beenadded improperly.So, before adding sound equipment, check withyour dealer and be sure to check Federal rulescovering mobile radio and telephone units.
3-20
Care of.lr Compact IHandle discs carefully. Store them in their original casesor other protective cases and away from direct sunlightand dust. If the surface of a disc is soiled, dampen aclean, soft cloth in a mild, neutral detergent solutionand clean it, wiping from the center to the edge.Be sure never to touch the signal surface when handlingdiscs. Pick up discs by grasping the outer edges or theedge of the hole and the outer edge.Care of Your Compact Disc PlayerThe use of CD lens cleaner discs is not advised, due tothe risk of contaminating the lens of the CD optics withlubricants internal to the CD mechanism.Power Antenna Mast CareYour power antenna will look its best and workwell if it’s cleaned from time to time. To clean theantenna mast:1. Turn on the ignition and radio to raise the antenna.2. Darnpen a clean cloth with mineral spirits orequivalent solvent.3. Wipe the cloth over the mast sections, removingany dirt.4. Wipe dry with a clean cloth.5. Make the antenna go up and down by turning theradio or ignition off and on.6. Repeat if necessary.NOTICE:Don’t lubricate the power antenna. Lubricationcould damage it.NOTICE:Before entering an automatic car wash, turn offyour radio to make the power antenna go down.This will prevent the mast from possibly gettingdamaged. If the antenna does not go down whenyou turn the radio off, it may be damaged orneed to be cleaned. In either case, lower theantenna by hand by carefully pressing theantenna down.If the mast portion of your antenna is damaged, you caneasily replace it. See your dealer for a replacement kitand follow the instructions in the kit.3-21.
@% NOTES3-22
fi NOTES
@% NOTES3-24
Section 4 Your Driving and the RoadHere you’ll find information about driving on different kinds of roads and in varying weather conditions. We’ve alsoincluded many other useful tips on driving.4-24-24-54-64- 104- 124- 124- 144- 15Defensive DrivingDrunken DrivingControl of a VehicleBrakingSteeringOff -Road RecoveryPassingLoss of ControlDriving at Night4- 164-194-204-2 14-2 14-224-24, 4-284-3 1Driving in Rain and on Wet RoadsCity DrivingFreeway DrivingBefore Leaving on a Long TripHighway HypnosisHill and Mountain RoadsWinter DrivingLoading Your VehicleTowing a Trailer4-1
Defensive DrivingThe best advice anyone can give about driving is:Drive defensively.Please start with a very important safety device in your<strong>Buick</strong>: Buckle up. (See “Safety Belts” in the Index.)Defensive driving really means “be ready for anything.”On city streets, rural roads or freeways, it means“always expect the unexpected.”4-2Assume that pedestrians or other drivers are going to becareless and make mistakes. Anticipate what they mightdo. Be ready for their mistakes.Rear-end collisions are about the most preventable ofaccidents. Yet they are common. Allow enoughfollowing distance. It’s the best defensive drivingmaneuver, in both city and rural driving. You neverknow when the vehicle in front of you is going to brakeor turn suddenly.Drunken DrivingDeath and injury associated with drinking and driving isa national tragedy. It’s the number one contributor tothe highway death toll, claiming thousands of victimsevery year.Alcohol affects four things that anyone needs to drivea vehicle:JudgmentMuscular Coordination0 VisionAttentiveness.
0 The length of time it has taken the drinker toconsume the alcohol.According to the American Medical Association, a180-lb. (82 kg) person who drinks three 12-ounce(355 ml) bottles of beer in an hour will end up with aBAC of about 0.06 percent. The person would reach thesame BAC by drinking three 4-ounce (120 ml) glassesof wine or three mixed drinks if each had 1-1/2 ounces(45 ml) of a liquor like whiskey, gin or vodka.4-3
4-4
BrakingBraking action involves perception time andreaction time.First, you have to decide to push on the brake pedal.That’s perception time. Then you have to bring up yourfoot and do it. That’s reaction time.Average reaction time is about 314 of a second. Butthat’s only an average. It might be less with one driverand as long as two or three seconds or more withanother. Age, physical condition, alertness, coordinationand eyesight all play a part. So do alcohol, drugs andfrustration. But even in 314 of a second, a vehiclemoving at 60 mph (100 km/h) travels 66 feet (20 m).That could be a lot of distance in an emergency, sokeeping enough space between your vehicle and othersis important.And, of course, actual stopping distances vary greatlywith the surface of the road (whether it’s pavement orgravel); the condition of the road (wet, dry, icy); tiretread; the condition of your brakes; the weight of thevehicle and the amount of brake force applied.Avoid needless heavy braking. Some people drive inspurts -- heavy acceleration followed by heavybraking -- rather than keeping pace with traffic. This is amistake. Your brakes may not have time to cool betweenhard stops. Your brakes will wear out much faster if youdo a lot of heavy braking. If you keep pace with thetraffic and allow realistic following distances, you willeliminate a lot of unnecessary braking. That meansbetter braking and longer brake life.If your engine ever stops while you’re driving, brakenormally but don’t pump your brakes. If you do, thepedal may get harder to push down. If your enginestops, you will still have some power brake assist. Butyou will use it when you brake. Once the power assist isused up, it may take longer to stop and the brake pedalwill be harder to push.
Anti-Lock BrakesYour vehicle has anti-lock brakes (ABS). ABS is anadvanced electronic braking system that will helpprevent a braking skid.When you start your engine and begin to drive away,your anti-lock brake system will check itself. You mayhear a momentary motor or clicking noise while this testis going on, and you may even notice that your brakepedal moves a little. This is normal.IANTI - LOCKIf there’s a problem with theanti-lock brake system, thiswarning light will stay on.See “Anti-Lock BrakeSystem Warning Light’’ inthe Index.Here’s how anti-lock works. Let’s say the road is wet.You’re driving safely. Suddenly an animal jumps out infront of you.You slam on the brakes. Here’s what happens with ABS.A computer senses that wheels are slowing down. If oneof the wheels is about to stop rolling, the computer willseparately work the brakes at each front wheel and atboth rear wheels.4-7
7The anti-lock system can change the brake pressurefaster than any driver could. The computer isprogrammed to make the most of available tire androad conditions.You can steer around the obstacle while braking hard.As you brake, your computer keeps receiving updates onwheel speed and controls braking pressure accordingly.Remember: Anti-lock doesn't change the time you needto. get your foot up to the brake pedal or always decreasestopping distance. If you get too close to the vehicle infront of you, you won't have time to apply your brakesif that vehicle suddenly slows or stops. Always leaveenough room up ahead to stop, even though you haveanti-lock brakes.Using Anti-LockDon't pump the brakes. Just hold the brake pedal downfirmly and let anti-lock work for you. You may hear amotor or clicking noise during a hard stop, this butis normal.W - A '.on Contl ~Sys' (If Equippl- -1)rour vehicle may have a traction control system thatlimits wheel spin. This is especially useful in slipperyroad conditions. The system operates only if it sensesthat one or both of the front wheels are spinning orbeginning to lose traction. When this happens, thesystem works the front brakes and reduces engine powerto limit wheel spin.You may feel or hear the system working, but thisis normal.4-8
If your vehicle is in cruise control when the tractioncontrol system begins to limit wheel spin, the cruisecontrol will automatically disengage. When roadconditions allow you to safely use it again, you mayreengage the cruise control. (See “Cruise Control” inthe Index.)TRACTIONOFFThis light should come onbriefly when you start theengine. If it stays on orcomes on while you aredriving, there’s a problemwith your tractioncontrol system.See “Traction Control System Warning Light” in theIndex. When this warning light is on, the system will notlimit wheel spin. Adjust your driving accordingly.The traction control system automatically comes onwhenever you start your vehicle. To limit wheel spin,especially in slippery road conditions, you shouldalways leave the system on. But you can turn thetraction control system off if you ever need to. (Youshould turn the system off if your vehicle ever gets stuckin sand, mud, ice or snow. See “Rocking Your Vehicle”in the Index.)To turn the system off,press the TRAC CONTbutton located on theinstrument panel.The traction control system warning light will come onand stay on. If the system is limiting wheel spin whenyou press the button, the warning light will comeon -- but the system won’t turn off right away. It willwait until there’s no longer a current need to limitwheel spin.You can turn the system back on at any time by pressingthe button again. The traction control system warninglight should go off.Braking in EmergenciesWith anti-lock, you can steer and brake at the sametime. In many emergencies, steering can help you morethan even the very best braking.4-9
4-10
Steering in EmergenciesThere are times when steering can be more effectivethan braking. For example, you come over a hill andfind a truck stopped in your lane, or a car suddenly pullsout from nowhere, or a child darts out from betweenparked cars and stops right in front of you. You canavoid these problems by braking -- if you can stop intime. But sometimes you can’t; there isn’t room. That’sthe time for evasive action -- steering aroundthe problem.Your vehicle can perform very well in emergencies likethese. First apply your brakes. (See “BrakingEmergencies” earlier in this section.) It is better toremove as much speed as you can from a possiblecollision. Then steer around the problem, to the left orright depending on the space available.An emergency like this requires close attention and aquick decision. If you are holding the steering wheel atthe recornended 9 and 3 o’clock positions, you canturn it a full 180 degrees very quickly without removingeither hand. But you have to act fast, steer quickly, andjust as quickly straighten the wheel once you haveavoided the object.The fact that such emergency situations are alwayspossible is a good reason to practice defensive drivingall times and wear safety belts properly.4-11
Off-Road RecoveryYou may find that your right wheels have dropped off theedge of a road onto the shoulder while you’re driving.OFF-ROAD RECOVEedge of paved surfweIf the level of the shoulder is only slightly below thepavement, recovery should be fairly easy. Ease off theaccelerator and then, if there is nothing in the way, steerso that your vehicle straddles the edge of the pavement.You can turn the steering wheel up to one-quarter turnuntil the right front tire contacts the pavement edge.Then turn your steering wheel to go straight downthe roadway.4-12PassingThe driver of a vehicle about to pass another on atwo-lane highway waits for just the right moment,accelerates, moves around the vehicle ahead, then goesback into the right lane again. A simple maneuver?Not necessarily! Passing another vehicle on a two-lanehighway is a potentially dangerous move, since thepassing vehicle occupies the same lane as oncomingtraffic for several seconds. A miscalculation, an error injudgment, or a brief surrender to frustration or anger cansuddenly put the passing driver face to face with theworst of all traffic accidents -- the head-on collision.So here are some tips for passing:“Drive ahead.” Look down the road, to the sides and tocrossroads for situations that might affect your passingpatterns. If you have any doubt whatsoever aboutmaking a successful pass, wait for a better time.Watch for trac signs, paverr t markings # - - - 1 lines.If you can see a sign up aheau mat might inuGate aturn or an intersection, delay your pass. A brokencenter line usually indicates it’s all right to pass(providing the road ahead is clear). Never cross a solidline on your side of the lane or a double solid line,even if the road seems empty of approaching &a&.
e Check your mirrors, glance over your shoulder, andstart your left lane change signal before moving outof the right lane to pass. When you are far enoughahead of the passed vehicle to see its front in yourinside mirror, activate your right lane change signaland move back into the right lane. (Remember thatyour right outside mirror is convex. The vehicle youjust passed may seem to be farther away from youthan it really is.)Try not to pass more than one vehicle at a timeon two-lane roads. Reconsider before passing thenext vehicle.Don’t overtake a slowly moving vehicle too rapidly.Even though the brake lamps are not flashing, it maybe slowing down or starting to turn.0 If you’re being passed, make it easy for thefollowing driver to get ahead of you. Perhaps youcan ease a little to the right.4-13
Loss of ControlLet’s review what driving experts say about whathappens when the three control systems (brakes, steeringand acceleration) don’t have enough friction where thetires meet the road to do what the driver has asked.In any emergency, don’t give up. Keep tqmg to steer andconstantly seek an escape route or area of less danger.SkiddingIn a skid, a driver can lose control of the vehicle.Defensive drivers avoid most skids by taking reasonablecare suited to existing conditions, and not by“overdriving” those conditions. But skids arealways possible.If you do not have traction control, or if the system isoff, then an acceleration skid is also best handled byeasing your foot off the accelerator pedal.If your vehicle starts to slide, ease your off foot the.accelerator pedal and quickly steer the way you want thevehicle to go. If you start steering quickly enough, yourvehicle may straighten out. Always be ready for asecond skid if it occurs.Of course, traction is reduced when water, snow, ice,gravel or other material is on the road. For safety, you’llwant to slow down and adjust your driving to theseconditions. It is important to slow down on slipperysurfaces because stopping distance will be longer andvehicle control more limited.While driving on a surface with reduced traction, tryyour best to avoid sudden steering, acceleration orbraking (including engine braking by shifting to a lowergear). Any sudden changes could cause the tires to slide.You may not realize the surface is slippery until yourThe three types of skids correspond to your vehicle’sthree control systems. In the braking skid, your wheelsaren’t rolling. In the steering or cornering skid, toomuch speed or steering in a curve causes tires to slip andlose cornering force. And in the acceleration skid, toovehicle is skidding. Learn to recognize warningmuch throttle causes the driving wheels to spin.clues -- such as enough water, ice or packed snow onA cornering skid is best handled by easing your foot off the road to make a “mirrored surface” -- and slowthe accelerator pedal.down when you have any doubt.If you have the traction control system, remember: It Remember: Any anti-lock brake system (ABS) helps’ helps avoid only the acceleration skid.avoid only the braking skid.4-14
Driving at Night....AWhat you do in the daytime can also affect your nightNight driving is more dangerous than day driving. One vision. For example, if you spend the day in brightreason is that some drivers are likely be to impaired -- by sunshine you are wise to wear sunglasses. Your eyes willalcohol or drugs, with night vision problems, or by fatigue. have less trouble adjusting to night. But if you’reHere are some tips on night driving.driving, don’t wear sunglasses at night. They may cutdown on glare from headlamps, but they also make a loDrive defensively.of things invisible.Don’t drink and drive.00e00Adjust your inside rearview &or to reduce theglare from headlamps behind you.Since you can’t see as well, you may need toslow down and keep more space between you andother vehicles.Slow down, especially on higher speed roads. Yourheadlamps can light up only so much road ahead.In remote areas, watch for animals.If you’re tired, pull off the road in a safe placeand rest.Night VisionNo one can see as well at night as in the daytime. But aswe get older these differences increase. A 50-year-olddriver may require at least twice as much light to see thesame thing at night as a 20-year-old.4-15
You can be temporarily blinded by approachingheadlamps. It can take a second or two, or even severalseconds, for your eyes to readjust to the dark. When youare faced with severe glare (as from a driver whodoesn't lower the high beams, or a vehicle withmisaimed headlamps), slow down a little. Avoid staringdirectly into the approaching headlamps.Keep your windshield and all the glass on your vehicleclean -- inside and out. Glare at night is made muchworse by dirt on the glass. Even the inside of the glasscan build up a film caused by dust. Dirty glass makeslights dazzle and flash more than clean glass would,making the pupils of your eyes contract repeatedly.Remember that your headlamps light up far less of aroadway when you are in a turn or curve. Keep youreyes moving; that way, it's easier to pick out dimlylighted objects. Just as your headlamps should bechecked regularly for proper aim, so should your eyesbe examined regularly. Some drivers suffer from nightblindness -- the inability to see in dim light -- and aren'teven aware of it.Driving in Rain and on Wet Roads./ li m4-16
........... ~ ---IDriving too fast through large water puddles or evengoing through some car washes can cause problems, toThe water may affect your brakes. Try to avoid puddles.But if you can't, try to slow down before you hit them.4-17
Wet brakes can cause accidents. They won’t workas well in a quick stop and may cause pulling toone side. You could lose control of the vehicle.After driving through a large puddle of water ora car wash, apply your brake pedal lightly untilyour brakes work normally.HydroplaningHydroplaning is dangerous. So much water can build upunder your tires that they can actually ride on the water.This can happen if the road is wet enough and you’regoing fast enough. When your vehicle is hydroplaning,it has little or no contact with the road.Hydroplaning doesn’t happen often. But it can if yourtires do not have much tread or if the pressure in one ormore is low. It can happen if a lot of water is standing onthe road. If you can see reflections from trees, telephonepoles or other vehicles, and raindrops “dimple” thewater’s surface, there could be hydroplaning.Hydroplaning usually happens at higher speeds. Therejust isn’t a hard and fast rule about hydroplaning. Thebest.advice is to slow down when it is raining.Driving Through Deep Standing WaterNOTICE:If you drive too quickly through deep puddles orstanding water, water can come in through yourengine’s air intake and badly damage yourengine. Never drive through water that is slightlylower than the underbody of your vehicle. If youcan’t avoid deep puddles or standing water, drivethrough them very slowly.Some Other Rainy Weather TipsBesides slowing down, allow some extra followingdistance. And be especially careful when you passanother vehicle. Allow yourself more clear roomahead, and be prepared to have your view restrictedby road spray.Have good tires with proper tread depth. (See“Tires” in the Index.)4-18
Citv DrivingHere are ways to increase your safety in city driving:Know the best way to geto where you are going.Get a city map and plan your trip into an unknownpart of the city just as you would for across-country trip.Try to use the freeways that rim and crisscross mostlarge cities. You’ll save time and energy. (See thenext part, “Freeway Driving.”)Treat a green light as a warning signal. A traffic lightis there because the corner is busy enough to need it.When a light turns green, and just before you start tomove, check both ways for vehicles that have notcleared the intersection or may be running thered light.One of the biggest problems with city streets is theamount of traffic On them. You’ll wanto watch out forwhat the other drivers are doing and pay attention totraffic signals.4-19
Freeway DrivingMile for mile, freeways (also called thruways, parkways,expressways, turnpikes or superhighways) are the safestof all roads. But they have their own special rules.rne most important advice on freeway driving is: Keepup with traffic and keep to the right. Drive at the samespeed most of the other drivers are driving. Too-fast ortoo-slow driving breaks a smooth traffic flow. Treat theleft lane on a freeway as a passing lane.4-20At the entrance, there is usually a ramp leads that to thefreeway. If you have a clear view of the freeway as youdrive along the entrance ramp, you should begin tocheck traffic. Try to determine where you expect toblend with the flow. Try to merge into the gap at close tothe prevailing speed. Switch on your turn signal, checkyour mirrors and glance over your shoulder as often asnecessary. Try to blend smoothly with the traffic flow.Once you are on the freeway, adjust your speed to theposted limit or to the prevailing rate if it’s slower. Stayin the right lane unless you want to pass.Before changing lanes, check your mirrors. Then useyour turn signal.Just before you leave the lane, glance quickly over yourshoulder to make sure there isn’t another vehicle in your“blind” spot.Once you are moving on the freeway, make certain youallow a reasonable following distance. Expect to moveslightly slower at night.When you want to leave the freeway, move to the properlane well in advance. If you miss your exit, do not,under any circumstances, stop and back up. Drive on tothe next exit.The exit ramp can be curved, sometimes quite sharply.
The exit speed is usually posted.Reduce your speed according to your speedometer, notto your sense of motion. After driving for any distanceat higher speeds, you may tend to think you are goingslower than you actually are.Before Leaving on a Long TripMake sure you’re ready. Try be to well rested. If youmust start when you’re not fresh -- such as after a day’swork -- don’t plan to make too many miles that first partof the journey. Wear comfortable clothing and shoes youcan easily drive in.Is your vehicle ready for a long trip? If you keep itserviced and maintained, it’s ready to go. If it needsservice, have it done before starting out. Of course,you’ll find experienced and able service experts in<strong>Buick</strong> dealerships all across North America. They’ll beready and willing to help if you need it.Here are some things you can check before a trip:0 Windshield Washer Fluid: Is the reservoir full? Areall windows clean inside and outside?0 Wiper Blades: Are they in good shape?Fuel, Engine Oil, Other Fluids: Have you checkedall levels?0000Lamps: Are they all working? Are the lenses clean.!Tires: They are vitally important to a safe,trouble-free trip. Is the tread good enough forlong-distance driving? Are the tires all inflated to therecommended pressure?Weather Forecasts: What’s the weather outlookalong your route? Should you delay your trip a shorttime to avoid a major storrn system?Maps: Do you have up-to-date maps?Highway HypnosisIs there actually such a condition as “highway hypnosis”?Or is it just plain falling asleep at the wheel? Call ithighway hypnosis, lack of awareness, or whatever.There is something about an easy stretch of road withthe same scenery, along with the hum of the tires on theroad, the drone of the engine, and the rush of the windagainst the vehicle that can make you sleepy. Don’t let ithappen to you! If it does, your vehicle can leave theroad in less than a second, and you could crash andbe injured.What can you do about highway hypnosis? First, beaware that it can happen.4-21
Then here are some tips:Make sure your vehicle is well ventilated, with acomfortably cool interior.eKeep your eyes moving. Scan the road ahead and tothe sides. Check your rearview mirrors and yourinstruments frequently.If you get sleepy, pull off the road into a rest, serviceor parking area and take a nap, get some exercise, orboth. For safety, treat drowsiness on the highway asan emergency.Hill and Mountain RoadsDriving on steep hills or mountains is different fromdriving in flat or rolling terrain.4-22
If you drive regularly in steep country, or if you’replanning to visit there, here are some tips that can makeyour trips safer and more enjoyable.0 Keep your vehicle in good shape. Check all fluidlevels and also the brakes, tires, cooling systemand transaxle. These parts can work hard onmountain roads.0 Know how to go down hills. The most importantthing to know is this: let your engine do some of theslowing down. Shift to a lower gear when you g~odown a steep or long hill.If you don’t shift down, your brakes could get sohot that they wouldn’t work well. You would thenhave poor braking or even none going down ahill. You could crash. Shift down to let yourengine assist your brakes on a steepdownhill slope.0000Coasting downhill in NEUTRAL (N) or with theignition off is dangerous. Your brakes will have todo all the work of slowing down. They could getso hot that they wouldn’t work well. You wouldthen have poor braking or even none going downa hill. You could crash. Always have your enginerunning and your vehicle in gear when yougo downhill.Know how to go uphill. Drive in the highestgear possible.Stay in your own lane when driving on two-laneroads in hills or mountains. Don’t swing wide or cutacross the center of the road. Drive at speeds that letyou stay in your own lane.As you go over the top a of hill, be alert. There could besomething in your lane, like stalled a car or an accident.You may see highway signs on mountains that warn ofspecial problems. Examples are long grades, passing orno-passing zones, a falling rocks area or windingroads. Be alert to these and take appropriate action.4-23
Winter DrivingHere are some tips for winter driving:Have your vehicle in good shape for winter.You may want to put winter emergency supplies inyour trunk.Include an ice scraper, a small brush or broom, a supplyof windshield washer fluid, a rag, some winter outerclothing, a small shovel, a flashlight, a red cloth and acouple of reflective warning triangles. And, if you willbe driving under severe conditions, include a small bagof sand, a piece of old carpet or a couple of burlap bagsto help provide traction. Be sure you properly securethese items in your vehicle.4-24
Driving on Snow or IceMost of the time, those places where your tires meet theroad probably have good traction.However, if there is snow or ice between your tires andthe road, you can have a very slippery situation. You’llhave a lot less traction or “grip” and will need be tovery careful.. ..What’s the worst time for this? “Wet ice.” Very coldsnow or ice can be slick and hard to drive on. But wetice can be even more trouble because it may offer theleast traction of all. You can get wet ice when it’s aboutfreezing (32°F; OOC) and freezing rain begins to fall.Try to avoid driving on wet ice until salt and sand crewscan get there.Whatever the condition -- smooth ice, packed, blowingor loose snow -- drive with caution.If you have traction control, keep the system on. It willimprove your ability to accelerate when driving on aslippery road. Even though your vehicle has a tractioncontrol system, you’ll want to slow down and adjustyour driving to the road conditions. See “TractionControl System” in the Index.If you don’t have the traction control system, accelerategently. Try not to break the fragile traction. If youaccelerate too fast, the drive wheels will spin and polishthe surface under the tires even more.4-25
Your anti-lock brakes improve your vehicle’s stabilitywhen you make a hard stop on a slippery road. Eventhough you have the anti-lock braking system, you’llwant to begin stopping sooner than you would on drypavement. See “Anti-Lock” in the Index.0 Allow greater following distance on anyslippery road.Watch for slippery spots. The road might be fineuntil you hit a spot that’s covered with ice. On anotherwise clear road, ice patches may appear inshaded areas where the sun can’t reach: aroundclumps of trees, behind buildings or under bridges.Sometimes the surface of a curve or an overpass mayremain icy when the surrounding roads are clear. Ifyou see a patch of ice ahead of you, brake before youare on it. Try not to brake while you’re actually onthe ice, and avoid sudden steering maneuvers.it in a Blizzard4-26
If you are stopped by heavy snow, you could be in aserious situation. You should probably stay with yourvehicle unless you know for sure that you are near helpand you can hike through the snow. Here are somethings to do to sumon help and keep yourself and yourpassengers safe:Turn on your hazard flashers.Tie a red cloth to your vehicle to alert police thatyou’ve been stopped by the snow.Put on extra clothing or wrap a blanket around you.If you have no blankets or extra clothing, make bodyinsulators from newspapers, burlap bags, rags, floormats -- anything you can wrap around yourself ortuck under your clothing to keep warm.You can run the engine to keep warm, but be careful.4-27
Snow can trap exhaust gases under your vehicle.This can cause deadly CO (carbon monoxide) gasto get inside. CO could overcome you and killyou. You can’t see it or smell it, so you might notknow it is in your vehicle. Clear away snow fromaround the base of your vehicle, especially anythat is blocking your exhaust pipe. And checkaround again from time to time to be sure snowdoesn’t collect there.Open a window just a little on the side of thevehicle that’s away from the wind. This will helpkeep CO out.Run yo^-'- :ngine only as lo&g as you must. This savesfuel. When you run the engine, make it go a little fasterthan just idle. That is, push the accelerator slightly. Thisuses less fuel for the heat that you get and it keeps thebattery charged. You will need a well-charged battery torestart the vehicle, and possibly for signaling later on.with your headlamps. Let the heater run for a while.4-28T n, shut the engine off and close the window almostall the way to preserve the heat. Start the engine againand repeat this only when you feel really uncomfortablefrom the cold. But do it as little as possible, Preserve thefuel as long as you can. To help keep warm, you can getout of the vehicle an do some fairly vigorous exercisesevery half hour or so until help comes.Loading Your Vehicle@ITIRE-LOADING INFORMATIONOCCUPANTS VEHICLE CAP. WT.FRT. CTR. RR. TOTAL LBS. KGMAX. LOADING & GVWR SAME AS VEHICLECAPACITY WEIGHT XXX COLD TIRETIRE SIZE SPEED PRESSURERTG PSI/KPaFRT.RR.SPA.IF TIRES ARE HOT, ADD 4PSli28KPaSEE OWNER’S MANUAL FOR ADDITIONALINFORMATIONTwo labels on your vehicle show how much weight itmay properly carry. The Tire Loading Information labelfound on the rear edge of the driver’s door tells you theproper size, speed rating and recommended inflation\
Electronic Level ControlThis feature keeps the rear of your vehicle level as theload changes. It’s automatic -- you don’t need toadjust anything.If you don’l $e the correct equi- lent and driveproperly, you can lose control when you pull atrailer. For example, if the trailer is too heavy, thebrakes may not work well -- or even at all. Youand your passengers could be seriously injured.You may also damage your vehicle; the resultingrepairs would not be covered by your warranty.Pull a trailer only if you have followed all thesteps in this section. Ask your dealer for adviceand information about towing a trailer withyour vehicle.4-31
~If You Do Decide To Pull A TrailerIf you do, here are some important points:00There are many different laws, including speed limitrestrictions, having to do with trailering. Make sureyour rig will be legal, not only where you live butalso where you'll be driving. A good source for thisinformation can be state or provincial police.Consider using a sway control. You can ask a hitchdealer about sway controls.0 Don't tow a trailer at all during the first 1,000 miles(1 600 km) your new vehicle is driven. Your engine,axle or other parts could be damaged.0 Then, during the first 500 miles (800 km) that youtow a trailer, don't drive over 50 mph (80 km/h) anddon't make starts at full throttle. This helps yourengine and other parts of your vehicle wear in at theheavier loads.0 Obey speed limit restrictions when towing a trailer.Don't drive faster than the maximum posted speedfor trailers (or no more than 55 mph (90 km/h))tosave wear on your vehicle's parts.Three important considerations have to do with weight:the weight of the trailer,the weight of the trailer tongueand the total weight on your vehicle's tires.Weight of the TrailerHow heavy can a trailer safely be?It should never weigh more than 1,000 pounds (450 kg).But even that can be too heavy.It depends on how you plan to use your For rig.example, speed, altitude, road grades, outsidetemperature and how much your vehicle is used to pull atrailer are all important. And, it can also depend on anyspecial equipment that you have on your vehicle.You can ask your dealer for our trailering information oradvice, or you can write us at:<strong>Buick</strong> Motor DivisionCustomer Relations Center902 E. Hamilton AvenueFlint, MI 48550In Canada, write to:General Motor 4 Canada LimitedCustomer Communication Centre1908 Colonel Sam DriveOshawa, Ontario L1H 8P74-32 - ..
Weight of the Trailer ’lneueThe tongue load (A) of any trailer 1s an importantweight to measure because it affects the total capacityweight of your vehicle. The capacity weight includes thecurb weight of the vehicle, any cargo you may carry init, and the people who will be riding in the vehicle. Andif you tow a trailer, you must subtract the tongue loadfrom your vehicle’s capacity weight because yourvehicle will be carrying that weight, too. See “LoadingYour Vehicle” in the Index for more information aboutyour vehicle’s maximum load capacity.If you’re using a weight-carrying hitch, the trailertongue (A) should weigh 10 percent of the total loadedtrailer weight (B). If you have a weight-distributinghitch, the trailer tongue (A) should weigh 12 percent ofthe total loaded trailer weight (B).After you’ve loaded your trailer, weigh the trailer andthen the tongue, separately, to see if the weights areproper. If they aren’t, you may be able to get them righsimply by moving some items around the in trailer.Total Weight on Your Vehicle’s TiresBe sure your vehicle’s tires are inflated to the upperlimit for cold tires. You’ll find these numbers on theTire-Loading Information label at the rear edge of thedriver’s door or see “Loading Your Vehicle” in theIndex. Then be sure you don’t go over GVW the limitfor your vehicle, including the weight of thetrailer tongue.B4-33
HitchesIt’s important to have the correct hitch equipment.Crosswinds, large trucks going by and rough roads are afew reasons why you’ll need the right hitch. Here aresome rules to follow:0 The rear bumper on your vehicle is not intended forhitches. Do not attach rental hitches or otherbumper-type hitches to it. Use only a frame-mountedhitch that does not attach to the bumper.e Will you have to make any holes in the body of yourvehicle when you install a trader hitch? If you do, then besure to seal the holes later when you remove the If hitch.you don’t seal them, deadly carbon monoxide (CO) fromyour exhaust can get into your vehicle (see “CarbonMonoxide” in the Index). Dirt and water can, too.Safety ChainsYou should always attach chains between your vehicleand your trailer. Cross the safety chains under the tongueof the trailer so that the tongue will not drop to the roadif it becomes separated from the hitch. Instructionsabout safety chains may be provided by the hitchmanufacturer or by the trailer manufacturer. Follow themanufacturer’s recommendation for attaching safetychains and do not attach them to the bumper. Alwaysleave just enough slack so you can turn with your rig.And, never allow safety chains to drag on the ground.4-34
Following DistanceStay at least twice as far behind the vehicle ahead as youwould when driving your vehicle without a trailer. Thiscan help you avoid situations that require heavy brakingand sudden turns.PassingYou’ll need more passing distance up ahead whenyou’re towing a trailer. And, because you’re a good deallonger, you’ll need to go much farther beyond thepassed vehicle before you can return to your lane.Backing UpHold the bottom of the steering wheel with one hand.Then, to move the trailer to the left, just move that handto the left. To move the trailer to the right, move yourhand to the right. Always back up slowly and, ifDossibleS have someone guide you.Making TurnsNOTICE:Making very sharp turns while trailering couldcause the trailer to come in contact with thevehicle. Your vehicle could be damaged. Avoidmaking very sharp turns while trailering.When you’re turning with a trailer, make wider turnsthan normal. Do this so your trailer won’t strike softshoulders, curbs, road signs, trees or other objects.Avoid jerky or sudden maneuvers. Signal wellin advance.”urn Signals When Towing a TrailerThe green arrows on your instrument panel will flashwhenever you signal a turn or lane change. Properlyhooked up, the trailer lamps will also flash, telling othedrivers you’re about to turn, change lanes or stop.4-35
When towing a trailer, the green arrows on yourinstrument panel will flash for turns even if the bulbs onthe trailer are burned out. Thus, you may think driversYou really should not park your vehicle, with a trailerbehind you are seeing your signal when they are not. It’sattached, on a hill. If something goes wrong, yourigimportant to check occasionally to be sure the trailercould start to move. People can be injured, and bothbulbs are still working.your vehicle and the trailer can be damaged.Your vehicle has bulb warning lights. When you plug aBut if you e\ __ have to park your rig on a hill, here’strailer lighting system into your vehicle’s lightinghow to do it:system, its bulb warning lights may not let you know if 1. Apply your regular brakes, but don’t shift intoone of your lamps goes out. So, when you have a trailer PARK (P) yet.lighting system plugged in, be sure to check your2. Have someone place chocks under the trailer wheels.vehicle and trailer lamps from time to time to be surethey’re all working. Once you disconnect the trailer 3. When the wheel chocks are in place, relea;- thelamps, the bulb warning lights again can tell you if one regular brake until the chocks absorb the load.of your vehicle lamps is out.4. Reapply the regular brakes. Then apply your parkingbrake, and then shift to PARK (P).Driving On GradesReduce speed and shift to a lower gear before you startdown a long or steep downgrade. If you don’t shiftdown, you might have to use your brakes so much thatthey would get hot and no longer work well.On a long uphill grade, use the highest gear possible. Ifyou cannot maintain posted speeds, driving a at lowerspeed may help avoid overheating your engineand transaxle.Parking on Hills5. Release the regular brakes.4-36
When You Are Ready to Leave AfterParking on a Hill1. Apply your regular brakes and hold the pedal downwhile you:0 Start your engine;0 Shift into a gear; and0 Release the parking brake.2. Let up on the brake pedal.3. Drive slowly until the trailer is clear of the chocks.4. Stop and have someone pick up and store the chocks.Maintenance When Trailer TowingYour vehicle will need service more often when you’repulling a trailer. See the Maintenance Schedule for moreon this. Things that are especially important in traileroperation are automatic transaxle fluid (don’t overfill),engine oil, belts, cooling system and brake adjustment.Each of these is covered in this manual, and the Indexwill help you find them quickly. If you’re trailering, it’sa good idea to review these sections before you startyour trip.Check periodically to see that all hitch nuts 2nd boltsare tight.Engine Coormg When Trailer TowingYour cooling system may temporarily overheat duringsevere operating conditions. See “Engine Overheating”in the Index.4-37
,@% NOTES4-38
Section 5 Problems on the RoadHere you’ll find what to do about some problems that can occm on the road.5-25-35-35-85-13Hazard Warning FlashersOther Warning DevicesJump StartingTowing Your VehicleEngine Overheating5-21 If a Tire Goes Flat5-22 Changing a Flat Tire5-3 1 Compact Spare Tire5-32 If You’reStuck:In Sand, Mud, Ice or Snow
Hazard Warning FlashersPress down on the buttonlocated on top of thesteering column to makeyour front and rear turnsignal lamps flash onand off.AThe hazard light on theinstrument panel will alsocome on.Your hazard warning flashers let you warn others. Theyalso let police know you have a problem. Your front andrear turn signal lamps will flash on and off.Your hazard warning flashers work no matter whatposition your key is in, and even if the key isn’t in.To turn off the flashers, press down on the button again.When the hazard warning flashers are on, your turnsignals won’t work.5-2
Other Warning DevicesIf you carry reflective triangles, you can set one up atthe side of the road about 300 feet (100 m) behindyour vehicle.Jump StartingIf your battery has run down, you may want to useanother vehicle and some jumper cables to start yourvehicle. But please use the following steps do toit safely.A CAUTION:Batteries can hurt you. They can bedangerous because:0 They contain acid that can burn you.They contain gas that can explode or ignite.0 They contain enough electricity toburn you.If. you don’t follow these steps exactly, some or a11of these things can hurt you.INOTICE:Ignoring these steps could result in costlydamage to your vehicle that wouldn’t be coveredby your warranty.Trying to start your vehicleby pushing or pullingit won’t work, and it could damage your vehicle.1. Check the other vehicle. It must have a 12-voltbattery with a negative ground system.NOTICE:If the other system isn’t a 12-volt system with anegative ground, both vehicles can be damaged.5-3
2. Get the vehicles close enough so the jumper cablescan reach, but be sure the vehicles aren’ttouchingeach other. If they are, it could cause a groundconnection you don’t want. You wouldn’t be able tostart your vehicle, and the bad grounding coulddamage the electrical systems.To avoid the possibility of the vehicles rolling, setthe parking brake firmly on both vehicles.involved inthe jump start procedure. Put an automatic transaxlein PARK (P) before setting the parking brake.An electric fan can start up even when the engineis not running and can injure you. Keep hands,clothing and tools away from any underhoodelectric fan.3. Turn off the ignition on both vehicles. Unplugunnecessary accessories plugged into the cigarettelighter or accessory power outlet. Turn off all lampsthat aren’t needed as well as radios. This will avoidsparks and help save both batteries. In addition, itcould save your radio.NOTICE:If you leave your radio on, it could be badlydamaged. The repairs wouldn’t be covered byyour warranty.4. Open the hoods and locate the batteries. Find thepositive (+) and negative (-) terminals on eachbattery. Your vehicle has a remote positive (+)terminal for this purpose. (The battery is under theback seat.)5-4
A CAUTION:Using a match near a battery can cause batterygas to explode. People have been hurt doing this,and some have been blinded. Use a flashlight ifyou need more light.Be sure the battery has enough water. You don’tneed to add water to the Delco Freedom@ batteryinstalled in every new GM vehicle. But if abattery has filler caps, be sure the right amountof fluid is there. If it is low, add water to take careof that first. If you don’t, explosive gas couldbe present.Battery fluid contains acid that can burn you.Don’t get it on you. If you accidentally get it inyour eyes or on your skin, flush the place withwater and get medical help immediately.5. Check that the jumper cables don’t have loose ormissing insulation. If they do, you could get a shock.The vehicles could be damaged too.Before you connect the cables, here are some basicthings you should know. Positive (+) will go topositive (+) and negative (-) will go to negative (-)or a metal engine part. Don’t connect positive (+) tonegative (-) or you’ll get a short that would damagethe battery and maybe other parts too.A CAUTION:mFans or other moving engine parts can injure youbadly. Keep your hands away from moving partsonce the engine is running.I5-5
7. Don’t let the other endtouch metal. Connect itto the positive (+)terminal of the goodbattery. Use a remote6. Connect the red positive (+) cable to the remotepositive (+) terminal of the vehicle with thedead battery.Now connect theblack negative (-) cableto the good battery’snegative (-) terminal.5-6
Don’t let the other end touch anyhng until the nextstep. The other end of the negative cable doesn’t go tothe dead battery. It goes to a heavy unpainted metalpart on the engine of the vehicle with the dead battery.10. Try to start the vehcle with the dead battery. If itwon’t start after a few tries, it probably needs service.11. Remove the cables in reverse order to preventelectrical shorting. Take care that they don’t toucheach other or any other metal.8. Attach the cable at least 18 inches (45 cm) awayfrom the dead battery, but not near engine parts thatmove. The electrical connection is just as good there,but the chance of sparks getting back to the battery ismuch less.9. Now start the vehicle with the good battery and runthe engine for a while.A. Heavy Metal Engine PartB. Good BatteryC . Dead Battery5-7
Towing Your VehicleTry to have your dealer or a professional towing servicetow your vehicle. See “Roadside Assistance” in the Index.If your vehicle has been changed or modified since itwas factory-new by adding aftermarket items like foglamps, aero-skirting, or special tires and wheels, theseinstructions and illustrations may not be correct.Before you do anything, turn on the hazardwarning flashers.When you call, tell the towing service:That your vehicle cannot be touJ from the frontwith sling-type equipment.That your vehicle has front-wheel drive.The make, model and year of your vehicle.Whether you can still move the shift lever.If there was an accident, what was damaged.When the towing service arrives, let the tow operatorknow that this manual contains detailed towinginstructions and illustrations. The operator may want tosee them.3 help avoid i my to you or others:Never let passengers ride in a vehicle that isbeing towed.Never tow faster than safe or posted speeds.Never tow with damaged parts not fully secured.Never get under your vehicle after it hasbeen lifted by the tow truck.Always secure the vehicle on each side withseparate safety chains when towing it.Never use J-hooks. Use T-hooks instead.
\ CAUTION:A vehicle can fall from a car carrier if it isn’tadequately secured. This can cause a collision,serious personal injury and vehicle damage. Thevehicle should be tightly secured with chains orsteel cables before it is transported.Don’t use substitutes (ropes, leather straps,canvas webbing, etc.) that can be cut by sharpedges underneath the towed vehicle. Always useT-hooks inserted in the T-hook slots. Never useJ-hooks. They will damage drivetrain andsuspension components.When your vehicle is being towed, have the ignition keyturned to OFF. The steering wheel should be clamped ina straight-ahead position, with a clamping devicedesigned for towing service. Do not use the vehicle’ssteering column lock for this. The transaxle should be inNEUTRAL (N) and the parking brake released.Don’t have your vehicle towed on the drive wheels,unless you must. If the vehicle must be towed on thedrive wheels, be sure to follow the speed and distancerestrictions later in this section or your transaxle will bedamaged. If these limits must be exceeded, then thedrive wheels have to be supported on a dolly.5-9
~ ~~~ ~ .~~~~~~~ ~ .~Front TowingNOTICE:Do not tow with sling-type equipment orfascidfog lamp damage will occur. Use wheel-liftor car-carrier equipment. Additional rampingmay be required for car-carrier equipment. Usesafety chains and wheel straps.Towing a vehicle over rough surfaces coulddamage a vehicle. Damage can occur from vehicleto ground or vehicle to wheel-lift equipment. Tohelp avoid damage, install a towing dolly andraise the vehicle until adequate clearance isobtained between the ground and/orwheel-lift equipment.Do not attach winch cables or J-hooks tosuspension components when using car-carrierequipment. Always use T-hooks inserted inthe T-hook slots.- ~~_ _5-10
These slots are to be used when loading and securing tocar-c~arrier equipment.Attach T-hook chains on both sides, in the slotted holesin the bottom of the body rail, behind the front wheelsand engine frame.Attach a separate safety chain around the outboard endof each lower control arm.I NOTICE:Be sure not to attach the safety chain to the driveaxle. This could cause damage to the driveaxle boot.5-11
Rear TowingTow Limits -- 55 mph (88 km/h), 500 miles (800 km)Attach T-hook chains to theT-hook slots in the bottomof the floor pan just aheadof the rear wheels onPosition the lower-sling crossbar directly underthe fascia.5-12
Attach a separate safety chain around the outboard endof eachlower control arm.E,ngine OverheatingYou will fkd a coulmt temperature gage andthe.waming light about a hot engine an your.instrument panel.Steam fram an overheated engine can bnrn-youbadly, even if you just open the hood. Stay awayfrom the engine if you see or hear steam comingfrom it. Just turn it off and get everyone awayCAUTION: (Continued)
If there’s still no sign of steam, you can idle the enginefor two or three minutes while you’re parked, to see ifthe warning stops. Buthen, if you still have thewarning, turn off the engine and get everyone out of thevehicle until it cools down.You may decide not to lift the hood but to get servicehelp right away.Cooling SystemWhen you decide it’s safe to lift the hood, here’s whatyou’ll see:An electric engine cooling fan under the hood canstart up even when the engine is not running andcan injure you. Keep hands, clothing and toolsaway from any underhood electric fan.If the coolant inside the coolant recovery tank is boiling,don’t do anything else until it cools down.A. Radiator Pressure CapB. Two Electric Engine Cooling FansC. Coolant Recovery Tank5-15
The coolant level should be at or above FULL COLD.If it isn’t, you may have a leak in the radiator hoses,heater hoses, radiator, water pump or somewhere else inthe cooling system.Heater and radiator hoses, and other engineparts, can be very hot. Don’t touch them. If youdo, you can be burned.Don’t run the engine if there is a leak. If you runthe engine, it could lose all coolant. That couldcause an engine fire, and you could be burned.Get any leak fixed before you drive the vehicle.NOTICE:Engine damage from running your enginewithout coolant isn’t covered by your warranty.If there seems to be no leak, with the engine on, check tosee if the electric engine cooling fans are running. If theengine is overheating, both fans should be running. Ifthey aren’t, your vehicle needs service.How to Add Coolant to the CoolantRecovery TankIf you haven’t found a problem yet, but the coolant levelisn’t at FULL COLD, add a 50/50 mixture of cleanwater (preferably distilled) and DEX-COOL@ enginecoolant at the coolant recovery tank. (See “EngineCoolant” in the Index for more information.)5-16
Adding only plain water to your cooling systemcan be dangerous. Plain water, or some otherliquid like alcohol, can boil before the propercoolant ‘mixture will. Your vehicle’s coolantwarning system is set for the proper coolantmixture. With plain water or the wrong mixture,your engine could get too hot but you wouldn’tget the overheat warning. Your engine couldcatch fire and you or others could be burned.Use a 50/50 mixture of clean water andDEX-COOL@ coolant.I NOTICE:In cold weather, water can freeze and crack theengine, radiator, heater core and other parts.Use the recommended coolant and the propercoolant mixture.You can be burned if you spill coolant on hotengine parts. Coolant contains ethylene glycoland it will burn if the engine parts are hotenough. Don’t spill coolant on a hot engine.When the coolant in the coolant recovery tank is atFULL COLD, start your vehicle.5-17
If the overheat warning continues, there’s one morething you can try You can add the proper coolantmixture directly to the radiator but be sure the coolingsystem is cool before you do it.Steam and scalding liquids from a cooling hotsystem can blow out and burn you badly. Theyare under pressure, and if you turn the radiatorpressure cap -- even a little -- they can come outat high speed. Never turn the cap when thecooling system, including the radiator pressurecap, is hot. Wait for the cooling system andradiator pressure cap to cool if you ever have toturn the pressure cap.5-18
How to Add Coolant to the Radiator1. You can remove theradiator pressure capwhen the coolingsystem, including theradiator pressure cap andupper radiator hose, isno longer hot. Turn thepressure cap slowlycounterclockwise until itIfirst stops. (Don’t pressdown while turning thepressure cap.)If you hear a hiss, wait for that to stop. A hiss meansthere is still some pressure left.2. Then keep turning thepressure cap, hut nowpush down as youturn it. Remove thepressure cap.3. Fill the radiator with theproper DEX-COOL@coolant mixture, up tothe base of the fillerneck. (See “EngineCoolant” in the Indexfor more informationabout the propercoolant mixture.)
4. Then fill the coolsuit recovery tank to FULL COLD.- 5. Put the cap back on the coolant, recovery tank, butleave the radiator pressure cap off6.7.
8. Then replace the If a front tire fails, the flat tire will create a drag thatpressure cap. At any pulls the vehicle toward that side. Take your off foot thetime during thisaccelerator pedal and grip the steering wheel My.procedure if coolant Steer to maintain lane position, and then gently brake tobegins to flow out of the a stop well out of the traffic lane.filler neck, reinstall theA rear blowout, particularly on a curve, acts much like apressure cap. Be sure theskid and may require the same correction you’d use in aarrows on the pressureskid. In any rear blowout, remove your foot from thecap line up like this.accelerator pedal. Get the vehicle under control bysteering the way you want the vehicle to go. It may bevery bumpy and noisy, but you can still steer. Gentlybrake to a stop -- well off the road if possible.If a tire goes flat, the next part shows how to use yourIf a Tire Goes Flatjacking equipment to change a flat tire safely.It’s unusual for a tire to “blow out” while you’re driving,especially if you maintain your tires properly. If air goesout of a tire, it’s much more likely to leak out slowly.But if you should ever have a “blowout,” here are a fewtips about what to expect and what to do:5-21
Changing a Flat TireIf a tire goes flat, avoid further tire and wheel damageby driving slowly to a level place. Turn on your hazardwarning flashers.Changing a tire can cause an injury. The vehiclecan slip off the jack and roll over you or otherpeople. You and they could be badly injured.Find a level place to change your tire. To helpprevent the vehicle from moving:1. Set the parking brake firmly.2. Put the shift lever in PARK (P).3. Turn off the engine.To be even more certain the vehicle won’t move,you can put blocks at the front and rear of thetire farthest away from the one being changed.That would be the tire on the other side of thevehicle, at the opposite end.The following steps will tell you how to use the jack an(change a tire.5-22
Removing the Spare Tire and Tools2. Remove the wheel wrench and jack from the jackcontainer. Turn the spare tire retainer bolt to the leftand remove the retainer assembly.3. Remove the spare tire from the trunk.The equipment you’ll need is in the trunk.Instructions for changing your tires are on the inside ofthe tire cover. You can rest the cover near you for easyreference while you change the tire.1. Lift and remove the spare tire cover for access to thespare tire and jack.The tools you’ll be using include the jack (A) and wheelwrench (B).
Removing the Flat Tire and Installing'theSpare TireYour vehicle has a wheel cover which must be taken offto reach the wheel nuts. Insert the flat end of the wrenchinto the notch in the center cover. Pry carefully, so thecenter cover is not scratched.1. Position the wheel wrench securely over the wheelnuts to loosen, but don't remove them yet.2. Attach the wheel wrench to the bolt on the end of thejack to create a jack handle.5-24
Y3. Rotate the wheel wrench to the left to lower the jacklift head until it fits under the vehicle.4. Near each wheel well is a notch in the frame toposition the jack head. You’ll find the word JACKand an arrow stamped into the plastic near eachnotch. Position the jack under the vehicle and raisethe jack head until it fits firmly against the sheetmetal next to the word JACK. Do not raise thevehicle yet. Put the compact spare near you.5-25
Getting under a vehicle when it is jacked up isdangerous. If the vehicle slips off the jack, youcould be badly injured or killed. Never get undera vehicle when it is supported only by a jack.Raising your vehicle with t,,, jack improperlypositioned can damage the vehicle and even makethe vehicle fall. To help avoid personal injury andvehicle damage, be sure fit to the jack lift headinto the proper location before raisingthe vehicle.15. Raise the vehicle by rotating the wheel wrench to theright. Raise the vehicle far enough off the ground sothere is enough room for the spare tire to fit.6. Remove all the wheel nuts and take off the flat tire.
~7. Remove any rust or dirtfrom the wheel bolts,mounting surfaces andspare wheel.Never use oil or grease on studs or nuts. If youdo, the nuts might come loose. Your wheel couldfall off, causing a serious accident.8. Place the spare on thewheel-mounting surface.Rust or dirt on the wheel, or on the parts towhich it is fastened, can make the wheel nutsbecome loose after a time. The wheel could comeoff and cause an accident. When you change awheel, remove any rust or dirt from the placeswhere the wheel attaches to the vehicle. In anemergency, you can use a cloth or a paper towelto do this; but be sure to use a scraper or wirebrush later, if you need to, to get all the rust ordirt off.5-27
9. Replace the wheel nutswith the rounded end ofthe nuts toward thewheel. Tighten each nutby hand until the wheelis held against the hub.If a nut cannot be tightened by hand, use the wrenchand see your dealer right away.10. Lower the vehicle by rotating the wheel wrench tothe left. Lower the jack completely.
11. Using the wheel wrench,tighten the wheel nutsfirmly in a crisscrosssequence as shown.NOTICE:Improperly tightened wheel nuts can lead tobrake pulsation and rotor damage. To avoidexpensive brake repairs, evenly tighten the wheelnuts in the proper sequence and to the propertorque specification.12. Then replace the wheel cover. Be sure to positionthe alignment pin on the cover with the notch in thewheel. Apply pressure around the edge of the cap tosnap it in place.Incorrect wheel nuts or improperly tightenedwheel nuts can cause the wheel to become looseand even come off. This could lead to an accident.Be sure to use the correct wheel nuts, If you haveto replace them, be sure to get new GM originalequipment wheel nuts.Stop somewhere as soon as you can and have thenuts tightened with a torque wrench to 100 lb-ft(140 Nom).I NOTICE:Wheel covers won’t fit on your compact spare. Ifyou try to put a wheel cover on your compactspare, you could damage the cover or the spare.Don’t try to put a wheel cover on your compact --,aretire. It won’t fit. Store the wheel cover in the trunnuntil you have the flat tire repaired or replaced.5-29
Storing the Flat Tire and ToolsI A CAUTION:Storing a jack, a tire or other equipment in thepassenger compartment of the vehicle couldcause injury. In a sudden stop or collision, looseequipment could strike someone. Store all thesein the proper place.SI’ ring the Snare Tire and ToolsA CAUTION:Storing a jack, a tire or other equipment in thepassenger compartment of the vehicle couldcause injury. In a sudden stop or collision, looseequipment could strike someone. Store all thesein the proper place.Store the flat tire as far forward in the trunk as possible.Store the jack and wheel wrench in their comp&tment inthe trunk. For storage, the jack must be raised until thescrew end is flush with the edge of the jack.5-30
The compact spare is for temporary use only. Replacethe compact spare tire with a full size tire as soon as youcan. See “Compact Spare Tire” in the Index. See thestorage instructions label to replace your compact spareinto your trunk properly.SPARE TIRE COVERICompact SDT --- TireAlthough the compact SI e tire was fully inflated whenyour vehicle was new, it can lose air after a time. Checkthe inflation pressure regularly. It should be 60 psi(420 kPa) .After installing the compact spare on your vehicle, youshould stop as soon as possible and make sure yourspare tire is correctly inflated. The compact spare ismade to perform well at speeds up 65 to mph(105 km/h) for distances up to 3,000 miles (5 000 km),so you can finish your trip and have your full-size tirerepaired or replaced where you want. Of course, it’s bestto replace your spare with full-size a tire as soon as youcan. Your spare will last longer and be in good shape icase you need it again.NOTICE:When the compact spare is installed, don’t takeyour vehicle through an automatic car wash withguide rails. The compact spare can get caught onthe rails. That can damage the tire and wheel,and maybe other parts of your vehicle.5-31
Don’t use your compact spare on other vehicles.And don’t mix your compact spare tire or wheel withother wheels or tires. They won’t fit. Keep your sparetire and its wheel together.NOTICE:Tire chains won’t fit your compact spare. Usingthem can damage your vehicle and can damagethe chains too. Don’t use tire chains on yourcompact spare.If You’re Stuck: In Sand, Mud,Ice or SnowWhat you don’t want to do when your vehicle is stuck isto spin your wheels too fast. The method known as“rocking” can help you get out when you’re stuck, butyou must use caution.I A CAUTION:IIf you let your tires spin at high speed, they canexplode, and you or others could be injured. And,the transaxle or other parts of the vehicle canoverheat. That could cause an enginecompartment fire or other damage. When you’restuck, spin the wheels as little as possible. Don’tspin the wheels above 35 mph (55 km/h) as shownon the speedometer.I5-32
I NOTICE:Spinning your wheels can destroy parts of yourvehicle as well as the tires. If you spin the wheelstoo fast while shifting your transaxle back andforth, you can destroy your transaxle.For information about using tire chains on your vehicle,see “Tire Chains” in the Index.Rocking Your Vehicle To Get It OutFirst, turn your steering wheel left and right. That willclear the area around your front wheels. If your vehiclehas traction control, you should turn the system off. (See“Traction Control System” in the Index.) Then shiftback and forth between REVERSE (R) and a forwardgear, spinning the wheels as little as possible. Releasethe accelerator pedal while you shift, and press lightlyon the accelerator pedal when the transaxle is in gear. Ifthat doesn’t get you out after a few tries, you may needto be towed out. If you do need to be towed out, see“Towing Your Vehicle” in the Index.5-33
5-34
fi NOTES5-35
5-36
Section 6 S.ervice and AppearanceCare6-26-36- 86- 86- 11'6- 156- 176.1 86-206-236-25.6-26'6--296-3 16-336-396-476-486-516-546-546-556-566-566-646466-666-676-676-676-67
0 Be sure to use the proper nuts, bolts andother fasteners. “English” and “metric”fasteners can be easily confused. If you usethe wrong fasteners, parts can later t[ akor fall off. You could be hurt.Adding Equipment to the Outside ofYour VehicleThings you might add to the outside of your vehicle canaffect the airflow around it. This may cause wind noiseand affect windsheld washer performance. Check withyour dealer before adding equipment to the outside ofyour vehicle.FuelUse premium unleaded gasoline rated at 91 octaneor higher. At a minimum, it should meet specificationsASTM D4814 in the United States and CGSB 3.5-M93in Canada. Improved gasoline specifications have beendeveloped by the American Automobile ManufacturersAssociation (AAMA) for better vehicle performanceand engine protection. Gasolines meeting the AAMAspecification could provide improved driveabilityand emission control system protection compared toother gasolines.Be sure the posted octane for premium is at least 91. Ifthe octane is less than 91, you may get a heavy knockingnoise when you drive. (In an emergency, you may beable to use a lower octane -- as low as 87 -- if heavyknocking does not occur.) If you’re using 91 or higheroctane unleaded gasoline and you hear heavy knocking,your engine needs service.If your vehicle is certified to meet California EmissionStandards (indicated on the underhood emission controllabel), it is designed to operate on fuels that meetCalifornia specifications. If such fuels are not availablein states adopting California emissions standards, yourvehicle will operate satisfactorily on fuels meetingfederal specifications, but emission control systemperformance may be affected. The malfunction indicatorlamp on your instrument panel may turn and/or on yourvehicle may fail a smog-check test. If this occurs, returnto your authorized <strong>Buick</strong> dealer for diagnosis todetermine the cause of failure. In the event it isdetermined that the cause of the condition is the type offuels used, repairs may not be covered by your warra6-3
Some gasolines that are not reformulated for lowemissions contain an octane-enhancing additive calledmethylcyclopentadienyl manganese tricarbonyl (MMT);ask your service station operator whether or not his fuelcontains MMT. General Motors does not recommend theuse of such gasolines. If fuels containing MMT are used,spark plug life may be reduced and your emissioncontrol system performance may be affected. Themalfunction indicator lamp on your instrument panelmay turn on. If this occurs, return to your authorized<strong>Buick</strong> dealer for service.To provide cleaner air, all gasolines in the United Statesare now required to contain additives that will helpprevent deposits from forming in your engine and fuelsystem, allowing your emission control system tofunction properly. Therefore, you should not have toadd anything to the fuel. In addition, gasolinescontaining oxygenates, such as ethers and ethanol, andreformulated gasolines may be available in your area tohelp clean the air. General Motors recommends that youuse these gasolines if they comply with thespecifications described earlier.6-4NOTICE:Your vehicle was not designed for fuel thatcontains methanol. Don’t use it. It can corrodemetal parts in your fuel system and also damageplastic and rubber parts. That damage wouldn’tbe covered under your warranty.Fuels in Foreign CountriesIf you plan on driving in another country outside the UnitedStates or Canada, the proper fuel may be hard to find. Neuse leaded gasoline or any other fuel not recommended in theprevious text on fuel. Costly repairs caused by use ofimproper fuel wouldn’t be covered by your warranty.To check on fuel availability, ask an auto club, orcontact a major oil company that does business in thecountry where you’ll be driving.You can also write us at the following address foradvice. Just tell us where you’re going and give yourVehicle Identification Number (VIN).General Motors Overseas Distribution Corporation1908 Colonel Sam DriveOshawa, Ontario LlH 8P7
Filling Your TankIGasoline vapor is highly flammable. It burnsviolently, and that can cause very bad injuries.Don’t smoke if you’re near gasoline or refuelingyour vehicle. Keep sparks, flames and smokingmaterials away from gasoline.IThe release button is onthe driver’s door belowthe inside door handle.The cap is behind a hinged door on the left side ofyour vehicle.6-5
The fuel door can alsobe opened by using therelease in the trunkcompartment, on thedriver’s side of the vehicle.To remove the cap, turn it slowly to the left(counterclockwise). The cap has a spring in it; if you letgo of the cap too soon, it will spring back to the right.While refueling, hang the tethered cap in the notch onthe fuel door.
If you get gasoline on yourself and thensomething ignites it, you could be badly burned.Gasoline can spray out on you if you open thefuel filler cap too quickly. This spray can happenif your tank is nearly full, and is more likely inhot weather. Open the fuel filler cap slowly andwait for any “hiss” noise to stop. Then unscrewthe cap all the way.Be careful not to spill gasoline. Clean gasoline frompainted surfaces as soon as possible. See “Cleaning theOutside of Your Vehicle” in the Index.When you put the cap back on, turn it to the right(clockwise) until you hear a clicking sound. Makesure you fully install the cap. The diagnostic systemcan determine if the fuel cap has been left off orimproperly installed. This would allow fuel to evaporateinto the atmosphere. See “Malfunction Indicator Lamp’’in the Index.NOTICE:If you need a new cap, be sure to get the righttype. Your dealer can get one for you. If you getthe wrong type, it may not fit properly. This maycause your malfunction indicator lamp to lightand your fuel tank and emissions system may bedamaged. See “Malfunction Indicator Lamp” inthe Index.6-7
Filliry a Portable Fuel ContainerChecking Things Under the HoodINever fill a portable fuel container while it is inyour vehicle. Static electricity discharge from thecontainer can ignite the gasoline vapor, You canbe badly burned and your vehicle damaged if thisoccurs. To help avoid injury to you and others:Dispense gasoline only into approvedcontainers.Do not fill a container while it is inside avehicle, in a vehicle's trunk, pickup bed oron any surface other than the ground.Bring the fill nozzle in contact with theinside of the fiil opening before operatingthe nozzle. Contact should be maintaineduntil the filling is complete.Don't smoke whiIe pumping gasoline,An electric fan under the hood can start up andinjure you even when the engine is not running.Keep hands, clothing and tools away from anyunderhood electric fan.ihL CAUTION:Things that burn can get on hot engine parts andstart a fire. These include liquids like gasoline,oil, coolant, brake fluid, windshield washer andother fluids, and plastic or rubber. You or otherscould be burned. Be careful not to drop or spillthings that will burn onto a hot engine.I6-8
Hood ReleasePull the handle inside thevehicle to open the hood.The handle is located onthe lower left side of theinstrument panel, next toThen go to the front of the vehicle and locate thesecondary hood release. It is under the front edge of thegrille, slightly right of center as you face the vehicle.Push up on the secondary hood release lever as you liftup the hood.6-9
3800 Supercharged (L67) EngineWhen you open the hood on the 3800 Supercharged engine, here’s what you will see:A. Windshield Washer D. Engine Oil Dipstick G. Brake Master CylinderFluid Reservoir E. Oil ,ill Cap H. Engine Coolant RecoveryB. Remote Positive F. Automatic Transaxle I. Air CleanerBattery Terminal Fluid DipstickC. Radiator Pressure Cap6-10
Your vehicle has a 3800 Supercharged engine.Supercharging, rather than turbocharging, was chosenbecause it emphasizes smooth, refined power.The supercharger is a device which is designed to pumpmore air into the engine than it would normally use.This air, mixed with fuel, creates increased enginepower. Since the supercharger is a pump and is drivenfrom an engine accessory drive belt, increased pressureis available at all driving conditions,The Powertrain Control Module (PCM), works witha vacuum control to regulate the increased pressurerequired during specific driving conditions. When thisincreased pressure or boost is not desired, such as duringidling and light throttle cruising, the excess air that thesupercharger is pumping is routed through a bypass.All of these controls working together provide highperformance, character and fuel efficiency in the3800 V6 Supercharged engine.Engine OilC H EC K 0 I LLEVELIf the CHECK OIL LEVELlight on the instrumentpanel comes on, it meansyou need to check yourengine oil level right away.For more information, see “Check Oil Level Light” inthe Index. You should check your engine oil levelregularly; this is an added reminder.It’s a good idea to check your engine oil every time youget fuel. In order to get an accurate reading, the oil mustbe warm and the vehicle must be on level ground.The engine oil dipstick isa round, yellow looplocated directly behindthe engine fan.Turn off the engine andgive the oil a few minutesto drain back into the oilpan. If you don’t, the oildipstick might not showthe actual level.6-11
C: cking Engine OilPull out the dipstick and clean it with a paper towel orcloth, then push it back in all the way. Remove it again,keeping the tip down, and check the level.When to Add Engine OilIf the oil is at or below the ADD mark, then you’ll needto add at least one quart of oil. But you must use theright kind. This part explains what kind of oil to use. Forcrankcase capacity, see “Capacities and Specifications”in the Index.I NOTICE:Don’t add too much oil. If your engine has somuch oil that the oil level gets above thecross-hatched area that shows the properoperating range, your engine could be damaged.Add engine oil athe engine oil fill cap next to theoil dipstick.Be sure to fill it enough to put the level somewherein the proper operating range. Push the dipstick all theway back in when you’re through.6-12
What Kind of Engine Oil to UseOils recommended for your vehicle can be identifiedby looking for the "Starburst" symbol. This symbolindicates that the oil has been certified by the AmericanPetroleum Institute (API). Do not use any oil whichdoes not carry this Starburst symbol.If you change your ownoil, be sure you use oilthat has the Starburstsymbol on the front of theoil container. If you haveyour oil changed for you,be sure the oil put intoyour engine is AmericanPetroleum Institute certifiedfor pasoline engines.I I - u - URECOMMENDED SAE VISCOSITY GRADE ENGINE OILSFOR BEST FUEL ECONOMY AND COLD STARTING, SELECT THE LOWESTSAE VISCOSITY GRADE OIL FOR THE EXPECTED TEMPERATURE RANGE.HOTWEATHER-O F+loo.+ 80.+60.+ 40.i 2007"Ct 38t 21I+16 ,You should also use the proper viscosity oil for yourvehicle, as shown in the following chart:I lCOLDWEATHERSAL 5W-30DO NOT USE SAE 2OW-50 OR ANYOTHER GRADE OIL NOT RECOMMENDED6-13
As shown in the chart, SAE IOW-30 is best for yourvehicle. However, you can use SAE 5W-30 if it’s goingto be colder than 60°F (16” C) before your next oilchange. When it’s very cold, you should use SAE5W-30. These numbers on an oil container show itsviscosity, or thickness. Do not use other viscosity oils,such as SAE 20W-50.NOTICE:Use only engine oil with the American PetroleumInstitute Certified For Gasoline Engines“Starburst” symbol. Failure to use therecommended oil can result in engine damage notcovered by your warranty.GM Goodwrench@ oil meets all the requirements foryour vehicle.If you are in an area where the temperature falls below-20°F (-29”C), consider using either an SAE 5W-30synthetic oil or an SAE OW-30 oil. Both will provideeasier cold starting and better protection for your engineat extremely low temperatures.Engine Oil AdditivesDon’t add anything to your oil. Your dealer is ready toadvise if you think something should be added.When to Change Engine OilIf any one of these is true for you, use the short tripkitymaintenance schedule:Most trips are less than 5 to 10 miles (8 to 16 km).This is particularly important when outsidetemperatures are below freezing.Most trips include extensive idling (such as frequentdriving in stop-and-go traffic).Most trips are through dusty areas.You frequently tow a trailer or use a carrier on topof your vehicle.The vehicle is used for delivery service, police, taxior other commercial application.Driving under these conditions causes engine oil tobreak down sooner. If any one of these is true for yourvehicle, then you need to change your oil and filterevery 3,000 miles (5000 km) or 3 months -- whicheveroccurs first.
If none of them is true, use the long triphighwaymaintenance schedule. Change the oil and filter every7,500 miles (12 500 km) or 12 months -- whicheveroccurs first. Driving a vehicle with a fully warmedengine under highway conditions causes engine oil tobreak down slower.What to Do with Used OilDid you know that used engine oil contains certainelements that may be unhealthy for your skin and couldeven cause cancer? Don’t let used oil stay on your skinfor very long. Clean your skin and nails with soap andwater, or a good hand cleaner. Wash or properly throwaway clothing or rags containing used engine oil. (Seethe manufacturer’s warnings about the use and disposalof oil products.)Used oil can be real a threat to the environment. If youchange your own oil, be sure to drain all free-flowing oilfrom the filter before disposal. Don’t ever dispose of oilby putting it in the trash, pouring it on the ground, intosewers, or into streams or bodies of water. Instead,recycle it by taking it to a place that collects used oil. Ifyou have a problem properly disposing of your used oil,ask your dealer, a service station or a local recyclingcenter for help.Air CleanerAs you face the front of the vehicle, the air cleaner is inthe front right section of the engine compartment. Thereis a filter inside the air cleaner.6-15
Remove the air cleaner assembly as follows:1. Remove the air duct clamp and separate the hosefrom the air cleaner cover. Rotate the hose on thethrottle body upward so it is out of the way.2. Detach the electrical connector and remove the aircleaner cover by flipping the two latches on thebottom inboard side of the cover.3. Tilt and pull the cover toward the engine todisengage it from the assembly.4. Remove the old filter and install the new one.5. Reinstall the air cleaner cover by sliding the tabs intothe base of the air cleaner and locking the twolatches. Reinstall the electrical connector.6. Rotate the inlet duct into position and slide it ontothe air cleaner outlet, then tighten the clamp.Refer to the Maintenance Schedule to determine when toreplace the air filter.See “Scheduled Maintenance Services” in the Index.Operating the engine with the a11 cleaner oi :ancause you or others to be burned. The air cleanernot only cleans the air, it stops flame if the enginebackfkes. If it isn’t there, and the enginebackfires, you could be burned. Don’t drive withit off, and be careful working on engine the withthe air cleaner off.NOTICE:If the air cleaner is off, a backfire can cause adamaging engine fire. And, dirt can easily getinto your engine, which will damage it. Alwayshave the air cleaner in place when you’re driving.6-16
~Supercharger OilUnless you are technicallyqualified and have theproper tools, you shouldlet your dealer or aqualified service centerperform this maintenance.How to Check and Add OilCheck oil only when the engine is cold. Allow theengine to cool two to three hours after running.CA”I ION:If you :mov( le I 2erchargeroilfillplugwhilethe engine is hot, pressure may cause hot oil toblow out of the oil fill hole. You may be burned.Do not remove the plug until the engine cools.When to CheckCheck oil level every 30,000 miles (50 000 ktn) or every36 months, whichever occurs first.What Kind of Oil to UseSee “Recommended Fluids and Lubricants” in the Indexand use only the recommended oil.1. Clean the area around the oil fill plug beforeremoving it.2. Remove the oil fill plug using a 3/16 inchAllen wrench.3. The oil level is correct when it just reaches thebottom of the threads of the inspection hole.4. Replace the oil plug with the O-ring in place.Torque to 88 lb-in (10 N-m).6-17
Automatic Transaxle FluidWhen tceck and ChangeA good time to check your automatic transaxle fluidlevel is when the engine oil is changed.Change both the fluid and filter every 50,000 miles(83 000 km) if the vehicle is mainly driven under oneor more of these conditions:In heavy city traffic where the outside temperatureregularly reaches 90°F (32°C) or higher.In hilly or mountainous terrain.When doing frequent trailer towing.Uses such as found in taxi, police or delivery service.If you do not use your vehicle under any of theseconditions, the fluid and filter do not require changing.See “Scheduled Maintenance Services” in the Index.How to CheckBecause this operation can be a little difficult, you maychoose to have this done at your <strong>Buick</strong> dealershipService Department.If you do it yourself, be sure to follow all the instructionshere, or you could get a false reading on the dipstick.6-18NOTICE:Too much or too little fluid can damage yourtransaxle. Too much can mean that some of thefluid could come out and fall on hot engine partsor exhaust system parts, starting a fire. Be sure toget an accurate reading if you check yourtransaxle fluid.Wait at least 30 minutes before checking the transaxlefluid level if you have been driving:When outside temperatures are above 90°F (32°C).At high speed for quite a while.In heavy traffic -- especially in hot weather.While pulling a trailer.To get the right reading, the fluid should be at normaloperating temperature, which is 180 “F to 200°F(82°C to 93°C).Get the vehicle warmed up by driving about 15 miles(24 lun) when outside temperatures are above 50°F(10°C). If it’s colder than 50°F (lO”C), you may haveto drive longer.
Checking the Fluid LevelPark your vehicle on a level place. Keep ;heengine running.The transale fluiddipstick is a round, redloop losated next to thebmke master cylinder.Pull 'out the dipstick andwipe it with a clean ragor paper towel.3. Check both sides of the dipstick, and read thelower level. The fluid level must be in thecross-hatched4. If the fluid level is in the acceptable range, pushthe dipstick back in all -the way.area.
How to Add TI- 13Refer to the Maintenance Schedule to determine whatkind of transaxle fluid to use. See “RecommendedFluids and Lubricants” in the Index.If the fluid level is low, add only enough of the properfluid to bring the level into the cross-hatched area onthe dipstick.1. Pull out the dipstick.2. Using a long-neck funnel, add enough fluid at thedipstick hole to bring it to the proper level.It doesn’t take much fluid, generally less than onepint (0.5 L). Don’t overjill.NOTICE:We recommend you use only fluid labeledDEXRON@=III, because fluid with that label ismade especially for your automatic transaxle.Damage caused by fluid other than DEXRON-I11is not covered by your new vehicle warranty.3. After adding fluid, recheck the fluid level asdescribed under “How to Check.”4. When the correct fluid level is obtained, push thedipstick back in all the way.Engine Coolant(2The cooling s stem in your vehicle is filled withDEX-COOL engine coolant. This coolant is designedto remain in your vehicle for 5 years or 150,000 miles(240 000 km) whichever occurs first, if you add onlyDEX-COOL’ extended life coolant.The following explains your cooling system and howto add coolant when it is low. If you have a problemwith engine overheating, see “Engine Overheating” inthe Index.A 50/50 mixture of water and DEX-COOL@coolant will:0 Give freezing protection down to -34°F (-37°C).0 Give boiling protection up to 265 “F(129°C).Protect against rust and corrosion.0 Help keep the proper engine temperature.0 Let the warning lights and gages work asthey should.6-20
INOTICE:When adding coolant, is it important that youuse only DEX-COOL@ (silicate-free) coolant.I€ coolant other than DEX-COOL is added tothe system, premature engine, heater core orradiator corrosion may result. In addition, theengine coolant will require change sooner -- at30,000 miles (50 000 km) or 24 months,whichever occurs first. Damage caused by theuse of coolant other than DEX-COOL@ is notcovered by your new vehicle warranty.What to UseUse a mixture of one-half clean water (preferablydistilled) and one-half DEX-COOL’ coolant whichwon’t damage aluminum parts. If you use this mixture,you don’t need to add anything else.Adding only plain water to your cooling systemcan be dangerous. Plain water, or some otherliquid like alcohol, can boil before the propercoolant mixture will. Your vehicle’s coolantwarning system is set for the proper coolantmixture. With plain water or the wrong mixture,your engine could get too hot but you wouldn’tget the overheat warning. Your engine couldcatch fire and you or others could be burned.Use a 50/50 mixture of clean water andDEX-COOL@ coolant.6-21
NOTICE:Checking CoolantIf you use an improper coolant mixture, yourengine could overheat and be badly damaged.The repair cost wouldn't be covered by yourwarranty. Too much water in the mixture canfreeze and crack thengine, radiator, heater coreand other parts.If you have to add coolant more than four times a year,have your dealer check your cooling system.1 NOTICE:If you use the proper coolant, you don't have toadd extra inhibitors or additives which claim toimprove the system. These can be harmful.The engine coolant recovery tank is located on thedriver's side of the engine compartment.When your engine is cold, the coolant level should beat FULL COLD or a little higher. When your engineis warm, the level should be up FiLJLL to HOT or alittle higher.6-22
~~ILOWCOOLANTLEVELAdding CoolantIf this light comes on, itmeans you’re low onengine coolant.If you need more coolant, add the proper DEX-COOL@coolant mixture at the coolant recovery tank, but becareful not to spill it.Turning the radiator pressure cap when theengine and radiator are hot can allow steam andscalding liquids to blow out and burn you badly.With the coolant recovery tank, you will almostnever have to add coolant at the radiator.Never turn the radiator pressure cap -- even alittle -- when the engine and radiator are hot.You can be burned if you spill coolant on hotengine parts. Coolant contains ethylene glycol,and it will burn if the engine parts are hotenough. Don’t spill coolant on a hot engine.Radiator Pressure CapI NOTICE:Your radiator cap is a 15 psi (105 kPa)pressure-type cap and must be tightly installed toprevent coolant loss and possible engine damagefrom overheating. Be sure the arrows on the capline up with the overflow tube on the radiatorfiller neck.When you replace your radiator pressure cap, a GM capis recommended.6-23
ThermostatEngine coolant temperature is controlled by a thermostatin the engine coolant system. The thermostat stops theflow of coolant through the radiator until the coolantreaches a preset temperature.When you replace your thermostat, GM a thermostat isrecommended.Power Steering FluidWhen to Check Power Steering FluidIt is not necessary to regularly check power steeringfluid unless you suspect there is a leak in the system oryou hear an unusual noise. A fluid loss in this systemcould indicate a problem. Have the system inspectedand repaired.The power steering fluid reservoir on the L67 engine islocated below the generator and behind the accessorydrive belt.How To Check Power Steering FluidWhen the engine compartment is cool, wipe the cap andthe top of the reservoir clean, then unscrew the cap andwipe the dipstick with a clean rag. Replace the cap andcompletely tighten it. Then remove the cap again andlook at the fluid level on the dipstick.The level should be at the FULL COLD mark. Ifnecessary, add only enough fluid to bring the level upto the mark.What to UseTo determine what kind of fluid to use, see“Recommended Fluids and Lubricants” in the Index.Always use the proper fluid. Failure to use the properfluid can cause leaks and damage hoses and seals.6-24
Windshield Washer FluidWhat to UseWhen you need windshield washer fluid, be sure to readthe manufacturer’s instructions before use. If you will beoperating your vehicle in an area where the temperaturemay fall below freezing, use fluid a that has sufficientprotection against freezing.Adding Washer Flu--.NOTICE:0 When using concentrated washer fluid,follow the manufacturer’s instructions foradding water.0 Don’t mix water with ready-to-use washerfluid. Water can cause the solution to freezeand damage your washer fluid tank andother parts of the washer system. Also,water doesn’t clean as well as washer fluid.0 Fill your washer fluid tank onlythree-quarters full when it’s very cold. Thisallows for expansion if freezing occurs,which could damage the tank if it iscompletely full.0 Don’t use engine coolant (antifreeze) inyour windshield washer. It can damageyour washer system and paint.Open the cap labeled WASHER FLUID OKY. Addwasher fluid until the tank is fuli.6-25
BrakesBrake Fluidsystem fixed, since a leak means that sooner or later yourbrakes won’t work well, or won’t work at all.So, it isn’t a good idea to “top off’ your brake fluid.Adding brake fluid won’t correct a leak. If you add fluidwhen your linings are worn, then you’ll have too muchfluid when you get new brake linings. You should add(or remove) brake fluid, as necessary, only when work isdone on the brake hydraulic system.IYour brake master cylinder reservoir is here. It is filledwith DOT-3 brake fluid.There are only two reasons why the brake fluid level in thereservoir might go down. The first is that the brake fluidgoes down to an acceptable level during normal brakelining wear. When new linings are put in, the fluid levelgoes back up. The other reason is that fluid is leaking outof the brake system. If it is, you should have your brakeIf you have too much brake fluid, it can spill onthe engine. The fluid will burn if the engine ishot enough. You or others could be burned,and your vehicle could be damaged. Add brakefluid only when work is done on the brakehydraulic system.When your brake fluid falls to a low level, your brakewarning light will come on. A chime will sound if youtry to drive with this warning light on. See “BrakeSystem Warning Light” in the Index.6-26
What to AddWhen you do need brake fluid, use only DOT-3brake fluid -- such as Delco Supreme 11 @ (GM PartNo. 12377967). Use new brake fluid from a sealedcontainer only.Always clean the brake fluid reservoir cap and the areaaround the cap before removing it. This will help keepdirt from entering the reservoir.rWith the wrong kind of fluid in your brakesystem, your brakes may not work well, or theymay not even work at all. This could cause acrash. Always use the proper brake fluid.NOTICE:0 Using the wrong fluid can badly damagebrake system parts. For example, just a fewdrops of mineral-based oil, such as engineoil, in your brake system can damage brakesystem parts so badly that they’ll have to bereplaced. Don’t let someone put in thewrong kind of fluid.0 If you spill brake fluid on your vehicle’spainted surfaces, the paint finish can bedamaged. Be careful not to spill brake fluidon your vehicle. If you do, wash it offimmediately. See “Appearance Care” inthe Index.6-27
NOTICE:-~Continuing to drive with worn-out brake-padscould result, m costly brake repair.
Replacing Brake System PartsThe braking system on a modern vehicle is complex.Its many parts have to be of top quality and work welltogether if the vehicle is to have really good braking.Your vehicle was designed and tested with top-qualityGM brake parts. When you replace parts of your brakingsystem -- for example, when your brake linings weardown and you have to have new ones put in -- be sureyou get new approved GM replacement parts. If youdon’t, your brakes may no longer work properly. Forexample, if someone puts in brake linings that are wrongfor your vehicle, the balance between your front andrear brakes can change -- for the worse. The brakingperformance you’ve come to expect can change in manyother ways if someone puts in the wrong replacementbrake parts.BatteryEvery new <strong>Buick</strong> has a Delco Freedom’ battery. Younever have to add water to one of these. When it’s timefor a new battery, we recommend a Delco Freedombattery. Get one that has the replacement number shownon the original battery’s label.The battery is located under the rear seat cushion.To access the battery, see “Removing the Rear SeatCushion” in the Index. You don’t need to access thebattery to jump start your vehicle. See “Jump Starting”in the Index.A CAUTION:A battery that isnx properly vented can letsulfuric acid fumes into the area under the rearseat cushion. These fumes can damage your rearseat safety belt systems. You may not be able tosee this damage, and the safety belts might notprovide the protection needed in a crash. If areplacement battery is ever needed, it must bevented in the same manner as the originalbattery. Always make sure that the vent hoseis properly reattached before reinstalling theseat cushion.6-29
Vehicle StorageIf you’re not going to drive your vehicle for 25 daysor more, remove the black, negative (-) cable fromthe battery. This will help keep your battery fromrunning down.IU:1To be sure the vent hose (A) is properly attached, thevent hase connectors (B) must be securely reattached tothe vent outlets (C) on each side of the battery, and thevent assembly grommet (D) must be secured to thefloor pan (E).Batteric have acid that can burn you and gasthat can explode. You can be badly hurt if youaren’t careful. See “Jump Starting” in the Indexfor tips on working around a battery withoutgetting hurt.Contact your dealer to learn how to prepare your vehiclefor longer storage periods.Also, for your audio system, see “Theft-DeterrentFeature” in the Index.6-30
Bulb ReplacementThe following procedure tells you how to replace yourheadlamp bulbs.For any bulb changing procedure not listed in thissection, contact your <strong>Buick</strong> dealer’s service department.Halogen BulbsExterior Front BulbsHalogen bulbs have pressurized gas inside andcan burst if you drop or scratch the bulb. You orothers could be injured. Be sure to read andfollow the instructions on the bulb package.A. HeadlampB. Front Turn SignalThe entire front headlamp assembly must be removed toreplace the headlamps. You may find it easier to removethe air cleaner assembly when replacing bulbs on thedriver’s side.6-31
6-32Headlamps
1. Loosen the two bolts on the inboard edge of theheadlamp assembly. This allows you to pull outthe assembly for more hand clearance whenchanging bulbs.2. Reach into the assemblyand turn the bulb socketone-quarter of a turntoward the center of theengine compartment,while pressing it firmly.3.4.5.6.Remove the wire connector from the bulb bylifting the lock tab and pulling it away from theplastic base.Install the bulb by putting the small tab (D) into thesmall notch in the lamp (E).Turn the bulb socket one-quarter of a turn makingsure the tab is properly engaged in the panel slot.To reassemble, attach the wire connector (A) tothe plastic base making sure the lock tab (B) isover the lock (C).6-33
aaeeThe vehicle should not have any snow, ice or mudattached to it.The vehicle should be fully assembled and all otherwork stopped while headlamp aiming is being done.There should not be any cargo or loading of thevehicle, except it should have a full tank of gas andone person or 160 lbs. (75 kg) on the driver’s seat.Tires should be properly inflated.Rock the vehicle to stabilize the suspension.may flash their high beams at you if your adjustmentis much above plus 0.4 degrees.If you find that the headlamp aiming needs adjustment,follow these steps:Start with the vertical headlamp aim. Don’t try to adjustthe horizontal aim first. Adjustment screws can beturned with an E8 Torx@socket or T15 Torx screwdriver.NOTICE:To make sure your headlamps are aimedproperly, read all the instructions beforebeginning. Failure to follow these instructionscould cause damage to headlamp parts.For the vertical adjustment, state inspection stationsgenerally will allow a reading of plus 0.76 degrees orminus 0.76 degrees from the center of the bubble.It is recommended that the upper limit not exceed plus0.4 degrees from the center of the bubble. Other drivers6-341. Check the vertical aim for each headlamp. Thevehicle must be on level a surface. Turn the verticalaiming screw until the bubble in the level is centeredat 0 (zero).
Exterior Rear BulbsA2. Now adjust the horizontal aim. Check the horizontalaim for each headlamp and adjust it as necessary.Turn the horizontal aiming screw until the pointer islined up with the 0 (zero).3. Visually re-check the vertical aim, to make sure it isstill correct after the horizontal aim adjustment.Readjust, if necessary.Taillarnps: A, B and CRear Turn Signal: A and CBack-up Lamps: DThe entire taillamp assembly must be removed tochange any of these bulbs.6-35
To access them, do the following:1. Remove the screws that secure the trunk trim overthe taillamp area.2. Remove the plastic wing nuts that hold the taillampassembly in place.6-36
TaillampdRear Thrn SignaVBack-Up LampsThe following instructions explain how to changeeach bulb.3. Pull the taillamp assembly away from the vehiclecarefully, to avoid scratching the paint. The taillamphas safety straps to help you hold the assembly whilereplacing the bulbs.1. Remove the bulb socket assembly by squeezing theplastic lock and turning it one-quarter of a turn tothe left.6-37
Interior Lamps2. Pull the bulb straight outo remove it fromthe socket.3. Install a new bulb into the socket. Reverse theinstructions to replace the taillamp assembly.Front and Rear Reading LampsTo change the bulbs in the front and rear reading lamps,do the following:1. Carefully insert a flat head screwdriver in the slotbetween the lens cover and molding.2. Gently pry the lens cover away to expose the readinglamp bulb. The lens cover should pop off.3. Twist or pull the bulb from its assembly and install anew bulb.4. Snap the lens cover back in place.6-38
Windshield Wiper Blade Replacement3. Push the new wiper blade securely on the wiper arm.For the proper windshield wiper blade length andtype, see “Norrnal Maintenance Replacement Parts”in the Index.TiresYour new vehicle comes with high-quality tires made bya leading tire manufacturer. If you ever have questionsabout your tire warranty and where to obtain service, seeyour <strong>Buick</strong> Warranty booklet for details.Replacement blades come in different types and areremoved in different ways. Here’s how to remove thetype with a release hole:1. Pull the windshield wiper arm away from thewindshield.2. Insert a small screwdriver into the hole (A) and pullthe blade assembly off the wiper arm (B).Poorly maintained and improperly used tiresare dangerous.Overloading your tires can causeoverheating as a result of too much friction.You could have an air-out and a seriousaccident. See “Loading Your Vehicle” inthe Index.CAUTION: (Continued)6-39
000Underinflated tires pose the same danger asoverloaded tires. The resulting accidentcould cause serious injury. Check all tiresfrequently to maintain the recommendedpressure. Tire pressure should be checkedwhen your tires are cold.Overinflated tires are more likely to be cut,punctured or broken by a sudden impact --such as when you hit a pothole, Keep tiresat the recommended pressure.Worn, old tires can cause accidents. If yourtread is badly worn, or if your tires havebeen damaged, replace them.Inflation -- Tire PressureThe Tire-Loading Information label, which is located onthe rear edge of the driver’s door shows the correctinflation pressures for your tires when they’re cold.“Cold” means your vehicle has been sitting for at leastthree hours or driven no more than 1 mile (1.6 Ism).NOTICE:Don’t let anyone tell you that underinflation oroverinflation is all right. It’s not. If your tiresdon’t have enough air (underinflation), you canget the following:0 Too much flexingToo much heatTire overloadingBad wearBad handling0 Bad fuel economy.If your tires have too much air (overinflation),you can get the following:Unusual wearBad handlingRough ride0 Needless damage from road hazards.6-40
When to CheckCheck your tires once a month or more.Don’t forget your compact spare tire. It should be at60 psi (420 kPa).How to CheckUse a good quality pocket-type gage to check tirepressure. You can’t tell if your tires are properly inflatedsimply by looking at them. Radial tires may lookproperly inflated even when they’re underinflated.Be sure to the put valve caps back on the valve stems. They When rotating your tires, always use the correcthelp prevent leaks by keeping out dirt and moisture. rotation pattern shown here.Tire Inspection and RotationTires should be rotated every 6,000 to 8,000 miles(10 000 to 13 000 km). Any time you notice unusualwear, rotate your tires as soon as possible and checkwheel alignment. Also check for damaged tires or wheels.See “When It’s Time for New Tires” and “WheelReplacement” later in this section for more information.The purpose of regular rotation is to achieve moreuniform wear for all tires on the vehicle. The firstrotation is the most important. See “ScheduledMaintenance Services” in the Index for scheduledrotation intervals.Don’t include the compact spare tire in yourtire rotation.After the tires have been rotated, adjust the frontand rear inflation pressures as shown on theTire-Loading Information label. Make certain thatall wheel nuts are properly tightened. See “WheelNut Torque” in the Index.
When It’s Time for NEW TiresRust or dirt on a wheel, or on the parts to whichit is fastened, can make wheel nuts become looseafter a time. The wheel could come off and causean accident. When you change a wheel, removeany rust or dirt from places where the wheelattaches to the vehicle. In an emergency, you canuse a cloth or a paper towel to do this; but besure to use a scraper or wire brush later, if youneed to, to get all the rust or dirt off. (See“Changing a Flat Tire” in the Index.)Yim need a new tire if any 6f the following statementsare me:
Buying New TiresTo find out what kind and size of tires you need, look atthe Tire-Loading Information label.The tires installed on your vehicle when it was new hada Tire Perfomance Criteria Specification (TPC Spec)number on each tire’s sidewall. When you get new tires,get ones with that same TPC Spec number. That wayyour vehicle will continue to have tires that are designedto give proper endurance, handling, speed rating,traction, ride and other things during normal service onyour vehicle. If your tires have an all-season treaddesign, the TPC number will be followed by an “MS”(for mud and snow).If you ever replace your tires with those not having aTPC Spec number, make sure they are the same size,load range, speed rating and construction type (bias,bias-belted or radial) as your original tires.Mixing tires could cause you to lose control whiledriving. If you mix tires of different sizes or types(radial and bias-belted tires), the vehicle may nothandle properly, and you could have a crash.Using tires of different sizes may also causedamage to your vehicle. Be sure to use the samesize and type tires on all wheels.It’s all right to drive with your compact spare,though. It was developed for use on your vehicle.I A CAUTION:If you use bias-ply tires on your vehicle, thewheel rim flanges could develop cracks aftermany miles of driving. A tire and/or wheel couldfail suddenly, causing a crash. Use only radial-plytires with the wheels on your vehicle.6-43
TreadwearThe treadwear grade is a comparative rating based onthe wear rate of the tire when tested under controlledconditions on a specified government test course.For example, a tire graded 150 would wear one and ahalf (1 1/2) times as well on the government courseas a tire graded 100. The relative performance oftires depends upon the actual conditions of their use,however, and may depart significantly from the normdue to variations in driving habits, service practices anddifferences in road characteristics and climate.-- A, B, C'1'1 traction grades, from highest to lowest, are A, B,and C, and they represent the tire's ability to stop onwet pavement as measured under controlled conditionson specified government test surfaces of asphalt andconcrete. A tire marked C may have poor tractionperformance.Warning: The traction grade assigned to this tire is basedon braking (straight ahead) traction tests and does notinclude cornering (turning) traction.6-44
Temperature -- A, B, CThe temperature grades are A (the highest), B, and C,representing the tire’s resistance to the generation ofheat and its ability to dissipate heat when tested undercontrolled conditions on a specified indoor laboratorytest wheel. Sustained high temperature can cause thematerial of the tire to degenerate and reduce tire life,and excessive temperature can lead to sudden tirefailure. The grade C corresponds to a level ofperformance which all passenger car tires must meetunder the Federal Motor Vehicle Safety StandardNo. 109. Grades B and A represent higher levels ofperformance on the laboratory test wheel than theminimum required by law.Warning: The temperature grade for this tire isestablished for a tire that is properly inflated and notoverloaded. Excessive speed, underinflation, orexcessive loading, either separately or in combination,can cause heat buildup and possible tire failure.Wheel Alignment and Tire BalanceThe wheels on your vehicle were aligned and balancedcarefully at the factory to give you the longest tire lifeand best overall performance.Scheduled wheel alignment and wheel balancing arenot needed. However, if you notice unusual tire wear oryour vehicle pulling one way or the other, the alignmentmay need to be reset. If you notice your vehiclevibrating when driving on a smooth road, your wheelsmay need to be rebalanced.Wheel ReplacementReplace any wheel that is bent, cracked, or badly rustedor corroded. If wheel nuts keep coming loose, the whwheel bolts and wheel nuts should be replaced. If thewheel leaks air, replace it (except some aluminumwheels, which can sometimes be repaired). See yourdealer if any of these conditions exist.Your dealer will know the kind of wheel youneed.Each new wheel should have the same load-carryingcapacity, diameter, width, offset and be mounted thesame way as the one it replaces.If you need to replace any of your wheels, wheelbolts or wheel nuts, replace them only with new GMoriginal equipment parts. This way, you will be sure tohave the right wheel, wheel bolts and wheel nuts foryour <strong>Buick</strong> model.6-45
IN:Using the wrong replacement wheels, wheel boltsor wheel nuts on your vehicle can be dangerous.It could affect the braking and handling of yourvehicle, make your tires lose air and make youlose control. You could have a collision in whichyou or others could be injured. Always use thecorrect wheel, wheel bolts and wheel nuts forreplacement.Used Replacement WheelsA CAUTION:-Putting a used wheel on your vehicle isdangerous. You can’t know how it’s been used orhow far it’s been driven. It could fail suddenlyand cause an accident. If you have to replace awheel, use a new GM original equipment wheel.I NOTICE:The wrong wheel can also cause problems withbearing life, brake cooling, speedometer orodometer calibration, headlamp aim, bumperheight, vehicle ground clearance and tire or tirechain clearance to the body and chassis.See “Changing a Flat Tire” in the Index for moreinformation.6-46
Tire ChainsNOTICE:Use tire chains only where legal and only whenyou must. Use only SAE Class “S” type chainsthat are the proper size for your tires. Installthem on the front tires and tighten them astightly as possible with the ends securelyfastened. Drive slowly and follow the chainmanufacturer’s instructions. If you can hear thechains contacting your vehicle, stop and retightenthem. If the contact continues, slow down until itstops. Driving too fast or spinning the wheelswith chains on will damage your vehicle.Appearance CareRemember, cleaning products can be hazardous. Someare toxic. Others can burst into flame if you strike amatch or get them on a hot part of the vehicle. Some aredangerous if you breathe their fumes in a closed space.When you use anything from a container to clean yourvehicle, be sure to follow the manufacturer’s warningsand instructions. And always open your doors orwindows when you’re cleaning the inside.Never use these to clean your vehicle:GasolineBenzeneNaphthaCarbon Tetrachloride0 Acetone0 Paint Thinner0 Turpentine0 Lacquer Thinner0 Nail Polish RemoverThey can all be hazardous -- some more thanothers -- and they can all damage your vehicle, too.Don’t use any of these unless this manual~says you can.In many uses, these will damage your vehicle:0 AlcoholLaundry SoapBleachReducing Agents6-47
Cleaning the Inside of Your VehicleUse a vacuum cleaner often get to rid of dust and loosedirt. Wipe vinyl or leather with a clean, damp cloth.Your dealer has two cleaners, Multi-Purpose InteriorCleaner and Capture Non-Solvent Dry Spot and SoilRemover. They will clean normal spots and stains verywell. You can get GM-approved cleaning products fromyour dealer. (See “Appearance Care and Materials” inthe Index.)Here are some cleaning tips:Always read the instructions on the cleaner label.Clean up stains as soon as you can -- before they set.Carefully scrape off any excess stain.Use a clean cloth or sponge, and change to aclean area often. A soft brush may be used ifstains are stubborn.If a ring forms after spot cleaning, clean the entirearea immediately or it will set.Using Multi-Purpose Interior Cleaneron Fabric1. Vacuum and brush the area to remove any loose dirt.2. Always clean a whole trim panel or section. Masksurrounding trim along stitch or welt lines.3. Mix powdered cleaner following the directions onthe container label to form thick suds.4. Use suds only and apply with a clean sponge. Don’tsaturate the material and don’t rub it roughly.5. As soon as you’ve cleaned the section, use a spongeto remove the suds.6. Wipe cleaned area with a clean, damp towel or cloth.7. Wipe with a clean cloth and let dry.6-48
Special Fabric Cleaning ProblemsStains caused by such things as catsup, coffee (black),egg, fruit, fruit juice, milk, soft drinks, vomit, urine andblood can be removed as follows:1. Carefully scrape off excess stain, then sponge thesoiled area with cool water.2. If a stain remains, follow the multi-purpose interiorcleaner instructions described earlier.3. If an odor lingers after cleaning vomit or urine,treat the area with a waterhaking soda solution:1 teaspoon (5 ml) of baking soda to 1 cup (250 ml)of lukewarm water.4. Letdry.Stains caused by candy, ice cream, mayonnaise, chilisauce and unknown stains can be removed as follows:1. Carefully scrape off excess stain.2. First, clean with cool water and allow to drycompletely.3. If a stain remains, follow instructions forMulti-Purpose Interior Cleaner.Cleaning VinylUse warm water and a clean cloth.Rub with a clean, damp cloth to remove dirt. Youmay have to do it more than once.Things like tar, asphalt and shoe polish will stainif you don’t get them off quickly. Use a cleancloth and a vinyvleather cleaner. See your dealerfor this product.Cleaning LeatherUse a soft cloth with lukewarm water and a mild soapor saddle soap and wipe dry with a soft cloth. Then, letthe leather dry naturally. Do not use heat to dry.For stubborn stains, use a leather cleaner. See yourdealer for this product.Never use oils, varnishes, solvent-based or abrasivecleaners, furniture polish or shoe polish on leather.Soiled or stained leather should be cleanedimmediately. If dirt is allowed to work into thefinish, it can harm the leather.6-49
CleaninL :he Top of the Instrument PanelUse only mild soap and water to clean the top surfacesof the instrument panel. Sprays containing silicones orwaxes may cause annoying reflections in the windshieldand even make it difficult to see through the windshieldunder certain conditions.Cleaning Interior Plastic ComponentsUse only a mild soap and water solution on a softcloth or sponge. Commercial cleaners may affect thesurface finish.Cleaning Wood PanelsUse a clean cloth moistened in warm, soapy water (usemild dish washing soap). Dry the wood immediatelywith a clean cloth.Cleaning Speaker CoversVacuum around a speaker cover gently, so that thespeaker won’t be damaged. Clean spots with justwater and mild soap.Care of Safety BeltsKeep belts clean and dry.Do not bleach or uye shdy belts. If you do, itmay severely weaken them. In a crash, theymight not be able to provide adequate protection.Clean safety belts only with mild soap andlukewarm water.Cleaning Glass SurfacesGlass should be cleaned often. GM Glass Cleaner (GMPart No. 1050427) or a liquid household glass cleanerwill remove normal tobacco smoke and dust films oninterior glass.Don’t use abrasive cleaners on glass, because they maycause scratches. Avoid placing decals on the inside rearwindow, since they may have to be scraped off later. Ifabrasive cleaners are used on the inside of the rearwindow, an electric defogger element may be damaged.Any temporary license should not be attached across thedefogger grid.
Cleaning the Outside of theWindshield and Wiper BladesIf the windshield is not clear after using the windshieldwasher, or if the wiper blade chatters when running,wax, sap or other material may be on the blade orwindshield.Clean the outside of the windshield with GM WindshieldCleaner, Bon Ami@ Powder (non-scratching glasscleaning powder), GM Part No. 1050011. The windshieldis clean if beads do not form when you rinse it with water. Don’t use strong soaps or chemical detergents. Useliquid hand, dish or car washing (mild detergent) soaps.Grime from the windshield will stick to the wiperYou can get GM-approved cleaning products from yourblades and affect their performance. Clean the bladedealer. (See “Appearance Care and Materials” in theby wiping vigorously with a cloth soaked inIndex.) Don’t use cleaning agents that are petroleumfull-strength windshield washer solvent. Thenbased, or that contain acid or abrasives. All cleaningrinse the blade with water.agents should be flushed promptly and not allowed toCheck the wiper blades and clean them as necessary; dry on the surface, or they could stain. the Dry finishreplace blades that look worn.with a soft, clean chamois or an all-cotton towel toavoid surface scratches and water spotting.WeatherstripsSilicone grease on weatherstrips will make them lastlonger, seal better, and not stick or squeak. Applysilicone grease with a clean cloth at least every sixmonths. During very cold, damp weather more frequentapplication may be required. (See “RecommendedFluids and Lubricants” in the Index.)Cleaning the Outside of Your VehicleThe paint finish on your vehicle provides beauty, deptof color, gloss retention and durability.Washing Your VehicleThe best way to preserve your vehicle’s finish is tokeep it clean by washing it often with lukewarm orcold water.Don’t wash your vehicle in the direct rays of the sun.High pressure car washes may cause water to enteryour vehicle.6-51
Cleaning Exterior LampsLensesUse lukewarm or cold water, a soft cloth and a liquidhand, dish or car washing (mild detergent) soap to cleanexterior lamps and lenses. Follow instructions under“Washing Your Vehicle.”Finish CareI NOTICE:Machine compounding or aggressive polishing ona basecoatklearcoat paint finish may dull thefinish or leave swirl marks.Occasional waxing or mild polishing of your vehicle byForeign materials such as calcium chloride and otherhand may be necessary to remove residue from the paintsalts, ice melting agents, road oil and tar, tree sap, birdfinish. You can get GM-approved cleaning productsdroppings, chemicals from industrial chimneys, etc., canfrom your dealer. (See “Appearance Care and Materials”damage your vehicle’s finish if they remain on paintedin the Index.)surfaces. Wash the vehicle as soon as possible. IfYour <strong>Buick</strong> has a “basecoat/clearcoat” paint finish. necessary, use non-abrasive cleaners that are markedThe clearcoat gives more depth and gloss to the safe for painted surfaces to remove foreign matter.colored basecoat. Always use waxes’ and polishesExterior painted surfaces are subject to aging, weatherthat are non-abrasive and made for a basecoatlclearcoatand chemical fallout that can take their toll over a periodDa finish.of years. You can help to keep the paint finish lookingnew by keeping your vehicle garaged or coveredwhenever possible.
Cleaning Aluminum or Chrome Wheels Cleaning TiresKeep your wheels clean using a soft clean cloth with To clean your tires, use a stiff brush with a tire cleanmild soap and water. Rinse with clean water. Afterrinsing thoroughly, dry with a soft clean towel. A waxI may then be applied.NOTICE:The surface of these wheels is similar to the paintedsurface of your vehicle. Don’t use strong soaps,chemicals, abrasive polishes, abrasive cleaners orabrasive cleaning brushes on them because you coulddamage the surface. You may use chrome polish onchrome wheels, but avoid any painted surface of thewheel, and buff off immediately after application.Don’t take your vehicle through an automatic wash carthat has silicon carbide tire cleaning brushes. Thesebrushes can also damage the surface of these wheels.When applying a tire dressing always take careto wipe off any overspray or splash from allpainted surfaces on the body or wheels of thevehicle. Petroleum-based products may damagethe paint finish.Sheet Metal DamageIf your vehicle is damaged and requires sheet metalrepair or replacement, make sure the body repair shopapplies anti-corrosion material to the parts repaired orreplaced to restore corrosion protection.6-53
Finish DamageChemical Paint SpottingAny stone chips, fractures or deep scratches in the finish Some weather and atmospheric conditions can createshould be repaired right away. Bare metal will corrode a chemical fallout. Airborne pollutants can fall uponquickly and may develop into a major repair expense. and attack painted surfaces on your vehicle. ThisMinor chips and scratches can be repaired with touch-updamage can take two forms: blotchy, ringlet-shapeddiscolorations, and small irregular dark spots etchedmaterials available from your dealer or other serviceinto the paint surface.outlets. Larger areas of finish damage can be correctedin your dealer’s body and paint shop.Although no defect in the paint job causes this, <strong>Buick</strong>will repair, at no charge to the owner, the surfaces ofUnderbody Maintenancenew vehicles damaged by this fallout condition withinChemicals useu for ice and IW removal and dust 12 months or 12,000 miles (2000 km) of purchase,control can collect on the unuerbody. If these are not whichever occurs first.removed, accelerated corrosion (rust) can occur on theunderbody parts such as fuel lines, frame, floor panand exhaust system even though they have corrosionprotection.At least every spring, flush these materials from theunderbody with plain water. Clean any areas where mudand other debris can collect. Dirt packed in closed areasof the frame should be loosened before being flushed.Your dealer or an underbody car washing system cando this for you.6-54
~Appearance Care Materials ChartIPART NUMBERDESCRIPTION SIZEUSAGE994954 in. x 25 in. Polishing - Cloth - Wax Treated 23Exterior - polishing - cloth1050 172 16 oz. (0.473 L) Tat- and Road Oil Remover Removes tar, road oil and asphalt1050173 16 oz. (0.473 L) Chrome Cleaner and Polish Use on chrome, stainless steel, nickel, copper and brass1050174 oz. (0.473 L) White Sidewall Tire Cleaner 16 Removes soil and black marks from whitewalls1050214 32 oz. (0.946 L) Vinyl Cleaner Cleans vinyl tops, upholstery and convertible tops1050427 oz. (0.680 L)Removes dirt, me, smoke and fingerprints Glass C- - -1052870 I 16 oz. (0.473 L) I Wash Wax Concentrate I Cleans and lightly waxesProtects leather, wood, acrylics, Plexiglas m , plastic,rubber and vinylMulti-Purpose Interior Cleans carpets, seats, interior trim, door panels1052925 16 oz. (0.473 L)Cleanerand floor matsI 1052918**. 1 8 oz. (0.237 L) I Armor All” ProtectantII 16 oz. (0.473 L) I Wheel Cleaner I Spray on and rinse with water1052930 8 oz. (0.237 L) Capture Dry Spot Remover12345002 16 oz. (0.473 L) Armor All” Cleaner12345721sq. ft.12345725 12 oz. (0.354 L) Silicone Tire Shine12377964 16 oz. (0.473 L)12377966 16 oz. (0.473 L) Cleaner Wax12377984 oz. (0.473 L) Surface Cleaner 16See your General Motors Parts Department for these products.See “Fluids and Lubricants” in the Index.Attracts, absorbs and removes soilsCleans and shines a variety of surface typesShines vehicle without scratching Synthetic ChSpray on tire shineRemoves dust, fingerprints and surface contaminantsRemoves light scratches and oxidation and protects finishRemoves contaminants, blemishes and swirl marks** Not recommended for use on instrument panel vinyl.6-55
Vehicle Identification Number (VIN)f. \ ASSEMBLYENGINE/<strong>1998</strong>CODE MODEL YEAR PLANTThis is the legal identifier for your vehicle. It appears ona plate in the front corner of the instrument panel, on thedriver’s side. You can see it if you look through thewindshield from outside your vehicle. The VIN alsoappears on the Vehicle Certification and Service Partslabels and the certificates of title and registration.Engine IdentificationThe 8th character in your VIN is the engine code. Thiscode will help you identify your engine, specificationsand replacement parts.Service Parts Identification LabelYou’ll find this label on the underside of the spare tirecover. It’s very helpful if you ever need to order parts.On this label is:6-56your VIN,the model designation,0 paint information anda list of all production options andspecial equipment.Be sure that this label is not removed from the vehicle.Electrical SystemAdd-on Electrical EquipmentNOTICE:Don’t add anything electrical to your vehicleunless you check with your dealer first. Someelectrical equipment can damage your vehicleand the damage wouldn’t be covered by yourwarranty. Some add-on electrical equipment cankeep other components from working as theyshould.Your vehicle has an air bag system. Before attempting toadd anything electrical to your vehicle, see “ServicingYour Air Bag-Equipped <strong>Buick</strong>” in the Index.
Headlamp WiringThe headlamp wiring is protected by a circuit breaker.An electrical overload will cause the lamps to go on andoff, or in some ca.ses to remain off. If this happens, haveyour headlamp wiring checked right away.Windshield Wiper FusesThe windshield wiper motor is protected by a circuitbreaker and a fuse. If the motor overheats due to heavysnow, etc., the wiper will stop until the motor cools. Ifthe overload is caused by some electrical problem andnot snow, etc., be sure to get it fixed.Power Windows and Other Power OptionsCircuit breakers in the fuse panel protect the powerwindows and other power accessories. When thecurrent load is too heavy, the circuit breaker opensand closes, protecting the circuit until the problem isfixed or goes away.Fuses and Circuit BreakersThe wiring circuits in your vehicle are protectedfrom short circuits by a combination of fuses andcircuit breakers.Look at the silver-colored band inside the fuse. If theband is broken or melted, replace the fuse. Be sure youreplace a bad fuse with a new one of the identical sizeand rating.If you ever have a problem on the road and don’t havea spare fuse, you can “borrow” one that has the sameamperage. Just pick some feature of your vehicle thatyou can get along without -- like the radio or cigarettelighter -- and use its fuse if it is the correct amperage.Replace it as soon as you can.6-57
Instrument Panel Fuse BlockrThere is a fuse panel located at the end of the instrumentpanel near the driver’s door.There is an underhood electrical center and two otherfuse panels located under the rear seat.CNTRLLIGHTS6-58
FuseUsageFuseUsage1Air Bag15Cruise Control2Injectors16Perimeter Lights3Anti-Lock Brake System17Not Used4Left Exterior Lamps18Not Used5Turn Signal Lamps19Radio6Oxygen Sensor20Cooling Fan7Climate Control21Not Used8Right Exterior Lamps22Not Used9HVAC Relay23Windshield Wipers10MAF24Flat Pack Motor11Auxiliary Power25PCM12Interior Lamps26Cigarette Lighter13Chime27Crank14TMNSS28HVAC Blower6-59
Engine Compartment Fuse Block1 HORN1 1 /IICOOLINGFAN #2JCOOLINGFAN #3112IFuse Usage1 Air Conditionmg Lompressor2 Not Used3 Not Used4 Horn5 Not Used6 Not Used7 Cooling Fan #28 Cooling Fan #39 Cooling Fan10 ABS Main11 ABS Pump MotorNot Used13 Horn14 Not Used6-60
Under Rear Seat Fuse BlockFuseUsageTRUNK12OpenElectronic Level ControlUNLOCK34Trunk Release RelayOpen5Fuel Pump RelayDEFG - RR#2DEFG - REt#167- 10Driver Door Unlock RelayOpen11Rear Defogger Relay (Upper Zone)L12Rear Defogger Relay (Lower Zone)13op--14sp;15Spare16SpareRAPACSRYOPEN17-222324OpenDirect Accessory Power - AccessoryOpen6-61
ler:ar Seat Fuse BlockFuseUsage1-2Spare34OpenBreaker - Power WindowdSunroof5-6SpareIHVACCBBLOMTRVATSIGN 178-91011OpenSpareOpenBreaker - Power Seats12-13Spare14Open15Power Steering16Breaker-Headlamps1718HVAC Blower MotorPowel’ -1in Control ModulePASS-Key III192021Ignition 3Ignition 1Rear Defogger6-62
Fuse22232425262128293031UsageTrunk and Fuel Door ReleasesElectronic Level ControlHeated Seats/Instrument PanelExterior LampsOpenPower Door LocksInterior LampsHazard Lamps/StoplampsParking LampsHeated MirrorFuse33343536373839404142UsageFuel Door ReleaseTrunk ReleaseBattery ThennistorInstrument Panel #2Instrument Panel #1Heated SeatsFuel PumpOpenDefog 2Defog 132Open6-63
, ,..To Reinstall the Rear Seat Cushion
A safety belt that isn’t properly routed throughthe seat cushion or is twisted won’t provide theprotection needed in a crash. If the safety belthasn’t been routed through the seat cushion atall, it won’t be there to work for next thepassenger. The person sitting in that positioncould be badly injured. After reinstalling the seatcushion, always check to be sure that the safetybelts are properly routed and are twisted. not1. Buckle the center passenger position safety belt, thenroute the safety belts through the proper slots in thseat cushion. Don’t let the safety belts get twisted.2. Slide the rear of the cushion up and under theseatback so the rear locating guides hook into thewire loops on the back frame.3.. With the seat cushion lowered, push rearward andthen press down on the seat cushion until the springlocks on both ends engage.4. Check to make sure the safety belts are properlyrouted and that no portion of any safety belt istrapped under the seat. Also make sure the seatcushion is secured.6-65
Replacement BulbsApplication .........................ExteriorHeadlampNumberHigh-Beam .......................... 90051’Low-Beam .......................... 9006Parking/Turn ........................... 3057Back-up ............................... 3057Tail .................................... 194Tai .................................... 3057InteriorRail Courtesy, ReadingFront Overhead Reading.................. PC168................. PC168For service information on other bulbs, contact yourdealer’s service department,Capacities and SpecificationsThe following approximate capacities are given inEnglish and metric conversions. Please refer to“Recommended Fluids and Lubricants” in the Indexfor more information.Engine Code 1 (L67) 3.8L V6 SF1Automatic Transaxle. Drain and Refill .............. 7.4 quarts (7.0 L)Complete Overhaul ............ 10 quarts (9.5 L)When pe forming either transaxle procedure, cheekfluid level when done. More fluid may be needed.Belt Tensions ........... Automatically controlledby a Self-Tension idler pulley.Tension adjustment should never be necessary.Cooling System ............... 13 quarts (12.5 L)Engine Crankcase (oil change withfilter change) ............... 4.5 quarts (4.3 L)Fuel Tank .................. 18.5 gallons (70 L)Wheel Nut Torque .......... 100 lb-ft (140 N-m)Tire Pressure ....... See Tire-Loading Informationlabel on the rear edge of the driver’s door.R-134a Air Conditioning ... See refrigerant chargelabel under the hood.NOTE: All capacities are approximate. When adding,be sure to fill to the appropriate level as recommendedin this manual.6-66
Air Conditioning RefrigerantsNot all air conditioning refrigerants are the same.If the air conditioning system in your vehicle needsrefrigerant, be sure the proper refrigerant is used. Ifyou're not sure, ask your dealer.Engine SpecificationsEngineL67VIN Engine Code ........................... 1Type .................................... V6Displacement ............................ 3.8LHorsepower ........................... 240-hpFiring Order ...................... 1-6-5-4-3-2ThermostatTemperature ........... 195°F (91"C)Normal MaintenanceReplacement PartsAir Cleaner Filter ...................... A1096CEngineOilFilter ........................ PF47Radiator Cap ........................... RC27Sparkplugs .......................... 41-921,Gap 0.060 inch (1.52 mm)Windshield Wiper BladesType ............................... 6.32pinLength ..................... 22 inches (56 cm)Vehicle DimensionsLength ................. 207.2 inches (526.3 cm)Width ................... 75.0 inches (190.5 cm)Height .................... .55.2 inches (140 cm)Wheelbase ................ 113.8 inches (289 cm)Front Tread ............... 62.5 inches (158.8 cm)Rear Tread .................62.6 inches (159 cm)6-67
Supercharged Engine Accessory Belt (L67)F1.2.A.B.C.D.E.Front BeltBack BeltGeneratorPower SteeringCrankSuperchargerCoolant PumpE Air ConditioningThe Supercharged 3800 eng11 wo accessory webelts. One belt drives the generator, power steeringpump, coolant pump and air conditioning compressor.The second belt drives the supercharger. Each belt hasits own tensioner and idler pulley.6-68
Section 7 Maintenance ScheduleThs section covers the maintenance required for your <strong>Buick</strong>. Your vehicle needs these services to retain its safety,dependability and emission control performance.7-27-27-47-47-4IntroductionHow this Section is OrganizedPart A: Scheduled Maintenance ServicesUsing Your Maintenance ScheduleSelecting the Right Schedule7-31 Part B: Owner Checks and Services7-35 Part C: Periodic Maintenance Inspections7-36 Part D: Recommended Fluids and Lubricants7-38 Part E: Maintenance Record7-1
IMPORTANT-KEEP ENGINE OILI ATTHE PROPERLEVEL AND CHANGE ASIRECOMMENDEDHave you purchased the GM Protection Plan? The Plansupplements your new vehicle warranties. See yourWarranty and Owner Assistance booklet, or your <strong>Buick</strong>dealer for details.IntroductionYour Vehicle and the EnvironmentProper vehicle maintenance not only helps to keep yourvehicle in good working condition, but also helps theenvironment. All recommended maintenance proceduresare important. Improper vehicle maintenance can evenaffect the quality of the air we breathe. Improper fluidlevels or the wrong tire inflation can increase the levelof emissions from your vehicle. To help protect ourenvironment, and to keep your vehicle in goodcondition, please maintain your vehicle properly.How This Section is OrganizedThe remainder of this section is divided into five parts:“Part A: Scheduled Maintenance Services” showswhat to have done and how often. Some of theseservices can be complex, so unless you are technicallyqualified and have the necessary equipment, you shouldlet your dealer’s service department or another qualifiedservice center do these jobs.7-2
Performing maintenance work on a vehicle canbe dangerous. In trying to do some jobs, you canbe seriously injured. Do your own maintenancework only if you have the required know-howand the proper tools and equipment for the job.If you have any doubt, have a qualifiedtechnician do the work.If you are skilled enough to do some work on yourvehicle, you will probably want to get the serviceinformation. See “Service and Owner Publications” inthe Index.“Part B: Owner Checks and Services” tells you whatshould be checked and when. It also explains what youcan easily do to help keep your vehicle in good condition.“Part C: Periodic Maintenance Inspections” explainsimportant inspections that your dealer’s servicedepartment or another qualified service centershould perform.“Part D: Recommended Fluids and Lubricants” listssome recommended products to help keep your vehicleproperly maintained. These products, or theirequivalents, should be used whether you do the workyourself or have it done.“Part E: Maintenance Record” provides a place foryou to record the maintenance performed on yourvehicle. Whenever any maintenance is performed, besure to write it down in this part. This will help youdetermine when your next maintenance should be done.In addition, it is a good idea to keep your maintenancereceipts. They may be needed to qualify your vehicle forwarranty repairs.7-3
Part A: Scheduled MaintenanceServicesUsing Your Maintenance ScheduleWe at General Motors want to help you keep yourvehicle in good working condition. But we don’t knowexactly how you’ll drive it. You may drive very shortdistances only a few times a week. Or you may drivelong distances all the time in very hot, dusty weather.You may use your vehicle in making deliveries. Or youmay drive it to work, to do errands or in manyother ways.Because of all the different ways people use theirvehicles, maintenance needs vary. You may even needmore frequent checks and replacements than you’ll findin the schedules in this section. So please read thissection and note how you drive. If you have anyquestions on how to keep your vehicle in goodcondition, see your <strong>Buick</strong> dealer.This part tells you the maintenance services you shouldhave done and when you should schedule them. If yougo to your dealer for your service needs, you’ll knowthat GM-trained and supported service people willperform the work using genuine GM parts.The proper fluids and lubricants to use are listed inPart D. Make sure whoever services your vehicle usesthese. All parts should be replaced and all necessaryrepairs done before you or anyone else drivesthe vehicle.These schedules are for vehicles that:carry passengers and cargo within recommendedlimits. You will find these limits on your vehicle’sTire-Loading Information label. See “Loading YourVehicle” in the Index.are driven on reasonable road surfaces within legaldriving limits.use the recommended fuel. See “Fuel” in the Index.Selecting the Right ScheduleFirst you’ll need to decide which of the two schedules isright for your vehicle. Here’s how to decide whichschedule to follow:7-4
Maintenance ScheduleI Short TripKity DefinitionFollow the Short TripKity Maintenance Schedule if anyone of these conditions is true for your vehicle:0 Most trips are less than 5 to 10 miles (8 to 16 lun).This is particularly important when outsidetemperatures are below freezing.0 Most trips include extensive idling (such as frequentdriving in stop-and-go traffic).0 Most trips are through dusty areas.0 You frequently tow a trailer or use a carrier on top ofyour vehicle.0 If the vehicle is used for delivery service, police, taxior other commercial application.One’ of the reasons you should follow this schedule ifyou operate your vehicle under any of these conditionsis that these conditions cause engine oil to breakdown soonel:
Maintenance ScheduleI Long Tripmighway DefinitionFollow this maintenance schedule only if none of theconditions from the Short Trip/City MaintenanceSchedule is true. Do not use this schedule if the vehicleis used for trailer towing, driven in a dusty area or usedoff paved roads. Use the Short Trip/City schedule forthese conditions.Driving a vehicle with a filly warmed engine underhighway conditions causes engine oil to breakdown slowel:7-6Long Tripmighway IntervalsEvery 7,500 Miles (12500 km): Engine Oil and FilterChange (or every 12 months, whichever occurs first).Chassis Lubrication (or every 12 months, whicheveroccurs first). Tire Rotation.Every 30,000 Miles (50 000 km): Supercharger OilCheck (or every 36 months, whichever occurs first)(3.8L Code 1 engine only). Air Cleaner FilterReplacement. Fuel Tank, Cap and Lines Inspection.Every 50,000 Miles (83 000 km): Automatic TransaxleService (severe conditions only).Every 60,000 Miles (100 000 km): Engine AccessoryDrive Belt Inspection.Every 100,000 Miles (166000 km): Spark Plug WireInspection. Spark Plug Replacement.Every 150,000 Miles (240 000 km): Cooling SystemService (or every 60 months, whichever occurs first).These intervals only summarize maintenance services.Be sure to follow the complete maintenance schedule onthe following pages.
I Short Trip/City Maintenance Schedule 1The services shown in this schedule up to 100,000 miles(166 000 km) should be performed after 100,000 miles(166 000 km) at the same intervals. The services shownat 150,000 miles (240000 km) should be performed atthe same interval after 150,000 miles (240 000 km).See “Owner Checks and Services” and “PeriodicMaintenance Inspections” following.Footnotes?- The U.S. Environmental Protection Agency or theCalifornia Air Resources Board has determined that thefailure to perform this maintenance item will not nullifythe emission warranty or limit recall liability prior to thecompletion of the vehicle’s useful life. We, however,urge that all recommended maintenance services beperformed at the indicated intervals and the maintenancebe recorded.# Lubricate the transaxle shift linkage, parking brakecable guides and the underbody contact pointsand linkage.+ A good time to check your brakes is during tirerotation. See “Brake System Inspection” under “PeriodicMaintenance Inspections” in Part C of this schedule.7-7
I Short Trip/City Maintenance Schedule3,000 Miles (5 000 km)0 Change engine oil and filter (or every 3 months, whichever occurs first).An Emission Control Service.6,000 Miles (10 000 km)00Change engine oil and filter (or every 3 months, whichever occurs first).An Emission Control Service.Lubricate chassis components (or every 6 months, whichever occurs first).(See footnote #.)Rotate tires. See “Tire Inspection and Rotation” in the Index for properrotation pattern and additional information. (See footnote +.)9,000 Miles (I5 000 km)0 Change engine oil and filter (or every 3 months, whicheverAn Emission Control Service.Ioccurs first).DATEDATEMILEAGEDATEMILEAGEACTUAL 1 SERVICEDBY III12,000 Miles (20 000 km)0 Change engine oil and filter (or every 3 months, whichever occurs first).An Emission Control Service.DATEMILEAGEI7-8
I Short Trip/City Maintenance ScheduleI0 Lubricate chassis components (or every 6 months, whichever occurs first).(See footnote #.)Cl Rotate tires. See “Tire Inspection and Rotation” in the Index for properrotation pattern and additional information. (See footnote +.)15,000 Miles (25 000 km)17 Change engine oil and filter (or every 3 months, whichever occurs first).An Emission Control Service.0 Inspect air cleaner filter if you are driving in dusty conditions.Replace filter if necessary.An Emission Control Service. (See footnote?.)18,000 Miles (30 000 km)0 Change engine oil and filter (or every 3 months, whichever occurs first).An Emission Control Service.0 Lubricate chassis components (or every 6 months, whichever occurs first).(See footnote #.)0 Rotate tires. See “Tire Inspection and Rotation” in the Index for properrotation pattern and additional information. (See footnote +.)DATEMILEAGEDATEI7-9
Short WiplCity Maintenance Schedule I21,000 Miles (35 000 km)17 Change engine oil and filter (or every 3 months, whichever occurs first).An Emission Control Service.24,000 Miles (40 000 km)0017Change engine oil and filter (or every 3 months, whichever occurs first).An Emission Control Service.Lubricate chassis components (or every 6 months, whichever occurs first).(See footnote #.)Rotate tires. See “Tire Inspection and Rotation” the in Index for properrotation pattern and additional information. (See footnote +.)27,000 Miles (45 000 km)Change engine oil and filter (or every 3 months, whichever occurs first).An Emission Control Service.DATEI MILEAGE ACTUALII SERVICEDBY: IIDATEACTUALI MILEAGEI DATEMILEAGEI SERVICEDBY: I7-10
I Short Trip/City Maintenance Schedule30,000 Miles (50 000 km)000Change engine oil and filter (or every 3 months, whichever occurs first).An Emission Control Service.Lubricate chassis components (or every 6 months, whichever occurs first).(See footnote #.)Replace air cleaner filter.An Emission Control Service.Inspect fuel tank, cap and lines for damage or leaks. Inspect fuel capgasket for any damage. Replace parts as needed.An Emission Control Service. (See footnote?.)For supercharged engines only: Check the supercharger oil leveland add oil as needed (or every 36 months, whichever occurs first).See “Recommended Fluids and Lubricants” in this section.An Emission Control Service. (See footnote?.)Rotate tires. See “Tire Inspection and Rotation” in the Index for properrotation pattern and additional information. (See footnote +.)33,000 Miles (55 000 km)0 Change engine oil and filter (or every 3 months, whichever occurs first).An Emission Contrc Yer :e.IDATEI MILEAGEACTUALDATEI MILEAGE ACTUALI SERVICEDBY: II SERVICEDBY: II7-11
I Short Trip/City MaintenancSchedulel36,000 Miles (60 000 km)Change engine oil and filter (or every 3 months, whichever occurs first).An Emission Control Service.Lubricate chassis components (I- -- - .--,6 months, whichever occurs first).(See footnote #.)Rotate tires. See “Tire Inspection and Rotation’’ in the Index for properrotation pattern and additional information. (See footnote39,000 Miles (65 000 km)Change engine oil and filte1 (or every 3 months, whichever occurs first).An Emission Control Service.+.)DATEACTUALMILEAGESERVICED BY:I42,000 Miles (70 000 km)Change engine oil and filter (or every 3 months, whichever occurs first).An Emission Control Service.0 Lubricate chassis components (or every 6 months, whichever occurs first).(See footnote #.)0 Rotate tires. See “Tire Inspection and Rotation” in the Index for properrotation pattern and additional information. (See footnote +.)7-12
1 Short Trip/City Maintenance Schedule I45,000 Miles (75 000 km)Change engine oil and filter (or every 3 months, whichever occurs first).An Emission Control Service.Inspect air cleaner filter if you are driving in dusty conditions.Replace filter if necessary.An Emission Control Service. (See footnote?.)48,000 Miles (80 000 km)Change engine oil and filter (or every 3 months, whichever occurs first).An Emission Control Service.0 Lubricate chassis components (or every 6 months, whichever occurs first).(See footnote #.)0 Rotate tires. See “Tire Inspection and Rotation’’ the in Index for properrotation pattern and additional information. (See footnote50,000 Miles (83 000 km)0 Change automatic transaxle fluid and filter if the vehicle is mainly drivenunder one or more of these conditions:- In heavy city traffic where the outside temperature regularly reaches90°F (32°C) or higher.- In hilly or mountainous terrain.- When doing frequent trailer towing.+.)(Continued)I DATEACTUALMILEAGEDATEI MILEAGE ACTUALI DATEMILEAGESERVICED BYI SERVICED BY:II7-13
1 Short TripKity Maintenance Schedule I50,000 Miles (83 000 km) (Continued)- Uses such as found in taxi, police or delivery service.If you do not use your vehicle under any of these conditions, the fluid andfilter do not require changing.51,000 Miles (85 000 km)El Change engine oil and filter (or every 3 months, whichever occurs first).An Emission Control Service.DATEMILEAGE ACTUALI SERVICED BY:54,000 Miles (90 000 km)0 Change engine oil and filter (or every 3 months, whichever occurs first).An Emission Control Service.Lubricate chassis components (or every 6 months, whichever occurs first).(See footnote #.)Rotate tires. See “Tire Inspection and Rotation” in the Index for properrotation pattern and additional information. (See footnote +.)57,000 Miles (95 000 km)Change engine oil and filter (or every 3 months, whichever occurs first).An Emission Control Service.DATEDATEI7-14
I Short TripKity Maintenance Schedule60,000 Miles (100 000 km)000Change engine oil and filter (or every 3 months, whichever occurs first).An Emission Control Service.Lubricate chassis components (or every 6 months, whichever occurs first).(See footnote #.)Inspect engine accessory drive belt.An Emission Control Service.Replace air cleaner filter.An Emission Control Service.Inspect fuel tank, cap and lines for damage or leaks. Inspect fuelcap gasket for any damage. Replace parts as needed.An Emission Control Service. (See footnote?.)For supercharged engines only: Check the supercharger oil level and add oil asneeded (or every 36 months, whichever occurs first). See “RecommendedFluids and Lubricants” in this section.An Emission Control Service. (See footnote”f)Rotate tires. See “Tire Inspection and Rotation” in the Index for properrotation pattern and additional information. (See footnote +.)IDATEI7-15
I Short Trip/City Maintenance Schedule63,000 Miles (I05 000 km)Change engine oil and filter (or every 3 months, whichever occurs first).An Emission Control Service.II DATE66,000 Miles (110 000 km)00Change engine oil and filter (or every 3 months, whichever occurs first).An Emission Control Service.Lubricate chassis components (or every 6 months, whichever occurs first).(See footnote #.)Rotate tires. See “Tire Inspection and Rotation” in the Index for properrotation pattern and additional information. (See footnote69,000 Miles (115 000 km)I7 Change engine oil and filter (or every 3 months, whicheverAn Emission Control Service.+.)occurs first).IIIDATEDATEIIII72,000 Miles (I20 000 km)0 Change engine oil and filter (or every 3 months, whichever occurs first).1 Emission Control Service.DATE
Short TripKity Maintenance ScheduleLubricate chassis components (or every 6 months, whichever occurs first).(See footnote #.)[7 Rotate tires. See “Tire Inspection and Rotation” in the Index for properrotation pattern and additional information. (See footnote +.)75,000 Miles (125 000 km)0 Change engine oil and filter (or every 3 months, whichever occurs first).An Emission Control Service.0 Inspect air cleaner filter if you are driving in dusty conditions.Replace filter if necessary.An Emission Control Service. (See footnote?.)78,000 Miles (130 000 km)Change engine oil and filter (or every 3 months, whichever occurs first).An Emission Control Service.Lubricate chassis components (or every 6 months, whichever occurs first).(See footnote #.)0 Rotate tires. See “Tire Inspection and Rotation” in the Index for properrotation pattern and additional information. (See footnote +.)I DATEMILEAGEDATEI7-17
I Short Trip/City Maintenance Schedule81,000 Miles (I35 000 km)0 Change engine oil and filter (or every 3 months, whichever occurs first).An Emission Control Service.84,000 Miles (140 000 km)0 Change engine oil and filter (or every 3 months, whichever occurs first).An Emission Control Service.0 Lubricate chassis components (or every 6 months, whichever occurs first).(See footnote #.)0 Rotate tires. See “Tire Inspection and Rotation” in the Index for properrotation pattern and additional information. (See footnote +.)87,000 Miles (145 000 km)0 Change engine oil and filter (or every 3 months, whichever occurs first).An Emission Control Service.IDATEMILEAGEDATEMILEAGEDATEI MILEAGE ACTUALI SERVICEDBY: I90,000 Miles (I50 000 km) DATE0 Change engine oil and filter (or every 3 months, whichever occurs first).An Emission Control Service.0 Lubricate chassis components (or every 6 months, whichever occurs first).(See footnote #.)7-18ACTUALMILEAGESERVICED BY:
I Short Trip/City Maintenance ScheduleIReplace air cleaner filter.An Emission Control Service.Inspect fuel tank, cap and lines for damage or leaks. Inspect fuelcap gasket for any damage. Replace parts as needed.An Emission Control Service. (See footnote?.)For supercharged engines only: Check the supercharger oil level and add oil asneeded (or every 36 months, whichever occurs first). See “RecommendedFluids and Lubricants” in this section.An Emission Control Service. (See footnote?.)Cl Rotate tires. See “Tire Inspection and Rotation” in the Index for properrotation pattern and additional information. (See footnote +.)93,000 Miles (155 000 km)0 Change engine oil and filter (or every 3 months, whichever occurs first).An Emission Control Service.DATEI96,000 Miles (I60 000 km)0 Change engine oil and filter (or every 3 months, whichever occurs first).An Emission Control Service.MILEAGE(Continued) ?7-19
Short TripKity MaintenanceSchedule96,000 Miles (160 000 km) (Continued)Lubricate chassis components (or every 6 months, whichever occurs first).(See footnote #.)0 Rotate tires. See “Tire Inspection and Rotation” in the Index for properrotation pattern and additional information. (See footnote99,000 Miles (165 000 km)Change engine oil and filter (or every 3 months, whichever occurs first).An Emission Control Service.+.)I DATEACTUALMILEAGESERVICED BYI100,000 Miles (166 000 km)0 Inspect spark plug wires.An Emission Control Service.0 Replace spark plugs.An Emission Control Service.0 Change automatic transaxle fluid and filter if the vehicle is mainly drivenunder one or more of these conditions:- In heavy city traffic where the outside temperature regularly reaches90°F (32°C) or higher.7-20
I Short TripKity Maintenance ScheduleI- In hilly or mountainous terrain.- When doing frequent trailer towing.- Uses such as found in taxi, police or delivery service.If you do not use your vehicle under any of these conditions, the fluid andfilter do not require changing.150,000 Miles (240 000 km)0Drain, flush and refill cooling system (or every 60 months since last service,whichever occurs first). See “Engine Coolant” in the Index for what to use.Inspect hoses. Clean radiator, condenser, pressure cap and neck.Pressure test cooling system and pressure cap.An Emission Control Service.DATEMILEAGEI
IILong Tripmighway Maintenance ScheduleThe services shown in this schedule up to 100,000 miles(166 000 b) should be performed after 100,000 miles(166 000 km) at the same intervals. The services shownat 150,000 miles (240 000 krn) should be performed atthe same interval after 150,000 miles (240 000 km).See “Owner Checks and Services” and “PeriodicMaintenance Inspections” following.Footnotes3- The U.S. Environmental Protection Agency or theCalifornia Air Resources Board has determined that thefailure to perform this maintenance item will not nullifythe emission warranty or limit recall liability prior to thecompletion of the vehicle’s useful life. We, however,urge that all recommended maintenance services beperformed at the indicated intervals and the maintenancebe recorded.# Lubricate the transaxle shift linkage, parang brakecable guides and the underbody contact pointsand linkage.+ A good time to check your brakes is during tirerotation. See “Brake System Inspection” under “PeriodicMaintenance Inspections” in Part C of this schedule.7-22
--- 3 ‘Tripmighway Maintenant DCIICUUI~~7,500 Miles (12 500 km)0 Change engine oil and filter (or every 12 months, whichever occurs first).An Emission Control Service.0 Lubricate chassis components (or every 12 months, whichever occurs first).(See footnote #.)0 Rotate tires. See “Tire Inspection and Rotation” in the Index for properrotation pattern and additional information. (See footnote +.)15,000 Miles (25 000 km)0 Change engine oil and filter (or every 12 months, whichever occurs first).An Emission Control Service.0 Lubricate chassis components (or every 12 months, whichever occurs first).(See footnote #.)0 Rotate tires. See “Tire Inspection and Rotation” in the Index for properrotation pattern and additional information. (See footnote +.)22,500 Miles (37 500 km)!J Change engine oil and filter (or every 12 months, whichever occurs first).An Emission Control Service.0 Lubricate chassis components (or every 12 months, whichever occurs first).(See footnote #.)Rotate tires. See “Tire Inspection and Rotation” in the Index for properrotation pattern and additional information. (See footnote +.)DATEMILEAGEDATEI MILEAGE ACTUALDATEMILEAGEI SERVICEDBY III7-23
Long Trip/Highway Maintenance Schedule30,000 Miles (50 000 km)00II DATEMILEAGEI37,500 Miles (62 500 km)Change engine oil and filter (or every 12 months, whichever occurs first).An Emission Control Service.I DATEI MILEAGEACTUAL I SERVICEDBY II7-24
~0 Lubricate chassis components (or every 12 months, whichever occurs first).(See footnote #.)0 Rotate tires. See “Tire Inspection and Rotation” in the Index for properrotation pattern and adhtional information. (See footnote +.)45,000 Miles (75 000 km)0 Change engine oil and filter (or every 12 months, whichever occurs first).An Emission Control Service.I7 Lubricate chassis components (or every 12 months, whichever occurs first).(See footnote #.)0 Rotate tires. See “Tire Inspection and Rotation” in the Index for properrotation pattern and additional information. (See footnote50,000 Miles (83 000 km)0 Change automatic transaxle fluid and filter if the vehicle is mainly drivenunder one or more of these conditions:- In heavy city traffic where the outside temperature regularly reaches90°F (32°C) or higher.- In hilly or mountainous terrain.+.)(Continued)DATEI DATEI MILEAGE ACTUALI SERVICEDBY: III7-25
ILong rrlpnighway Maintena,nce Schedule b50,000 Miles (83 000 km) (Continued)- When doing frequent trailer towing.- Uses such as found in taxi, police or delivery service.If you do not use your vehicle under any of these conditions, the fluid andfilter do not require changing.52,500 Miles (87 500 km)17 Change engine oil and filter (or every 12 months, whichever occurs first).An Emission Control Service.0 Lubricate chassis components (or every 12 months, whichever occurs first).(See footnote #.)Rotate tires. See “Tire Inspection and Rotation” in the Index for properrotation pattern and additional information. (See footnote +.)60,000 Miles (100 000 km)Change engine oil and filter (or every 12 months, whichever occurs first).An Emission Control Service.Lubricate chassis components (or every 12 months, whichever occurs first).(See footnote #.)DATEMILEAGEACTUALDATEMILEAGE ACTUALI SERVICEDBY: II SERVICEDBY: II7-26
Long Trip/Highway Maintenance Schedule0 For supercharged engines only: Check the supercharger oil level andadd oil as needed (or every 36 months, whichever occurs first).See “Recommended Fluids and Lubricants” in this section.An Emission Control Service. (See footnote”f)0 Rotate tires. See “Tire Inspection and Rotation” in the Index for properrotation pattern and additional information. (See footnote +.)0 Inspect engine accessory drive belt.An Emission Control Service.0 Replace air cleaner filter.An Emission Control Service.0 Inspect fuel tank, cap and lines for damage or leaks. Inspect fuel capgasket for any damage. Replace parts as needed.An Emission Control Service. (See footnote?.)67,500 Miles (112 500 km)Change engine oil and filter (or every 12 months, whichever occurs first).An Emission Control Service.0 Lubricate chassis components (or every 12 months, whichever occurs first).(See footnote #.)0 Rotate tires. See “Tire Inspection and Rotation’’ in the Index for properrotation pattern and additional information. (See footnote +.)7-27
75,000 Miles (125 000 km)Change engine oil and filter (or every 12 months, whichever occurs first).An Emission Control Service.0 Lubricate chassis components (or every 12 months, whichever occurs first).(See footnote #.)0 Rotate tires. See “Tire Inspection and Rotation’’ in the Index for properrotation pattern and additional information. (See footnote +.)82,500 Miles (137 500 km)0 Change engine oil and filter (or every 12 months, whichever occurs first).An Emission Control Service.Lubricate chassis components (or every 12 months, whichever occurs first).(See footnote #.)El Rotate tires. See “Tire Inspection and Rotation” in the Index for properrotation pattern and additional information. (See footnote +.)90,000 Miles (150 000 km)Change engine oil and filter (or every 12 months, whichever occurs first).An Emission Control Sewice.0 Lubricate chassis components (or every 12 months, whichever occurs first).(See footnote #.)MILEAGEDATEI7-28
Long Tripmighway Maintenance ScheduleReplace air cleaner filter.An Emission Control Sewice.Inspect fuel tank, cap and lines for damage or leaks. Inspect fuel capgasket €or any damage. Replace parts as needed.An Emission Control Service. (See footnote?.)0 For supercharged engines only: Check the supercharger oil level andadd oil as needed (or every 36 months, whichever occurs first). See“Recommended Fluids and Lubricants” in this section.An Emission Control Sewice. (See footnote?.)0 Rotate tires. See “Tire Inspection and Rotation” in the Index for properrotation pattern and additional information. (See footnote +.)97,500 Miles (162 500 km) DATE0 Change engine oil and filter (or every 12 months, whichever occurs first).An Emission Control Service.ACTUALMILEAGESERVICED BY:0 Lubricatechassiscomponents (or every 12 months,whicheveroccurs first). %(See footnote #.)CI Rotate tires. See “Tire Inspection and Rotation’’ in the Index for properrotation pattern and additional information. (See footnote +.)7-29
ILong TripjHighway Maintenance Schedule100,000 Miles (166 000 km)Inspect spark plug wires.An Emission Control Service.0 Replace spark plugs.An Emission Control Service.0 Change automatic transaxle fluid and filter if the vehicle is mainly drivenunder one or more of these conditions:- In heavy city traffic where the outside temperature regularly reaches90°F (32°C) or higher.- In hilly or mountainous terrain.- When doing frequent trailer towing.- Uses such as found in taxi, police or delivery service.If you do not use your vehicle under any of these conditions, the fluid andfilter do not require changing.150,000 Miles (240 000 km)Drain, flush and refill cooling system (or every 60 months since last service,whichever occurs first). See “Engine Coolant” in the Index for what to use.Inspect hoses. Clean radiator, condenser, pressure cap and neck.Pressure test the cooling system and pressure cap.An Emission Control Service.7-30
Part B: Owner Checks and ServicesListed below are owner checks and services whichshould be performed at the intervals specified help toensure the safety, dependability and emission controlperformance of your vehicle.Be sure any necessary repairs are completed at once.Whenever any fluids or lubricants are added to yourvehicle, make sure they are the proper ones, as shown inPart D.At Each Fuel FillIt is important for you or a service station attendant toperform these underhood checks at each fuel fill.Engine Oil Level CheckCheck the engine oil level and add the proper oil ifnecessary. See “Engine Oil” in the Index forfurther details.Engine Coolant Level CheckCheck the engine coolant level and add DEX-COOL@coolant mixture if necessary. See “Engine Coolant” inthe Index for further details.Windshield Washer Fluid Level CheckCheck the windshield washer fluid level in thewindshield washer tank and add the proper fluid ifnecessary. See “Windshield Washer Fluid” in the Indexfor further details.At Least Once a MonthTire Inflation CheckMake sure tires are inflated to the correct pressures.See “Tires” in the Index for further details.Cassette Deck ServiceClean cassette deck. Cleaning should be done every50 hours of tape play. See “Audio Systems” in the Indexfor further details.Power Antenna ServiceClean power antenna mast. See “Audio Systems” in theIndex for further details.7-31
At Least Twice a YearRestraint System CheckMake sure the safety belt reminder light and all your Lubricate the key lock cylinders with the lubricantbelts, buckles, latch plates, retractors and anchorages are specified in Part D.working properly. Look for any other loose or damagedsafety belt system parts. If you see anything that might Body Lubrication Servicekeep a safety belt system from doing job, its have it Lubricate all body door hinges. Also lubricate all hingesrepaired. Have any torn or frayed safety belts replaced. and latches, including those for the hood, glove box door,Also look for any opened or broken air bag coverings, console door and any folding seat hardware. Part D tellsand have them repaired or replaced. (The air bag system you what to use. More fi-equent lubrication may bedoes not need regular maintenance.)required when exposed to a corrosive environment.Wiper Blade CheckInspect wiper blades for wear or cracking. Replace bladeinserts that appear worn or damaged or that streak ormiss areas of the windshield. Also see “Wiper Blades,Cleaning” in the Index.Automatic Transaxle CheckCheck the transaxle fluid level; add if needed. See“Automatic Transaxle” in the Index. A fluid loss mayindicate a problem. Check the system and repairif needed.Key Lock C . inders Service7-32
Starter Switch CheckBrake-Transaxle Shift Interlock (BTSI) CheckI/!\ CAUTION:When you are doing this check, the vehicle couldmove suddenly. If it does, you or others could beinjured. Follow the steps below.A CAUTION:When you are doi this check, the vehicle couldmove suddenly. If it does, you or others could beinjured. Follow the steps below.1.2.Before you start, be sure you have enough roomaround the vehicle.Firmly apply both the parking brake (see “ParkingBrake” in the Index if necessary) and theregular brake.1.2.Before you start, be sure you have enough roomaround the vehicle. It should be parked on alevel surface.Firmly apply the parking brake (see “Parking Brake’’in the Index if necessary).3.NOTE: Do not use the accelerator pedal, and beready to turn off the engine immediately if it starts.Try to start the engine in each gear. The startershould work only in PARK (P) or NEUTRAL (N).If the starter works in any other position, yourvehicle needs service.3.NOTE: Be ready to apply the regular brakeimmediately if the vehicle begins to move.With the engine off, turn the key to the RUNposition, but don’t start the engine. Without applyingthe regular brake, try to move the shift lever out ofPARK (P) with normal effort. If the shift levermoves out of PARK (P), your vehicle’s BTSIneeds service.
Ignition Transaxle Lock CheckWhile parked, and with the parking brake set, try to turnthe ignition key to LOCK in each shift lever position.The key should turn to LOCK only when the shiftlever is in PARK (I?).The key should come out only in LOCK.Parking Brake and Automatic Transaxle PARK (P)Mechanism CheckWhen you are doing this check, your vehiclecould begin to move. You or others could bePark on a fairly steep hill, with the vehicle facingdownhill. Keeping your foot on the regular brake, set theparking brake.0 To check the parking brake’s holding ability: Withthe engine running and transaxle in NEUTRAL (N),slowly remove foot pressure from the regular brakepedal. Do this until the vehicle is held by the parkingbrake only.To check the PARK (P) mechanism’s holding ability:With the engine running, shift to PARK (P). Thenrelease all brakes.Underbody Flushing ServiceAt least every spring, use plain water to flush anycorrosive materials from the underbody. Take care toclean thoroughly any areas where mud and other debriscan collect.7-34
7-35
~Part D: Recommended Fluidsand LubricantsNOTE: Fluids and lubricants identified below by narne,part number or specification may be obtained fromyour dealer.USAGEEngine OilEngine CoolantFLUIDLUBRICANTEngine Oil with the AmericanPetroleum Institute Certified ForGasoline Engines “Starburst”symbol of the proper viscosity. Todetermine the preferred viscosityfor your vehicle’s engine, see“Engine Oil” in the Index.50/50 mixture of clean water(preferably distilled) and use onlyGM Goodwrench@ DEX-COOL@or Havoline’ DEX-COOL’Coolant. See “Engine Coolant” inthe Index.USAGEHydraulic BrakeSystemParking BrakeCable Guides~~Power SteeringSystemAutomaticTransaxleKey LockCylindersFLUIDLUBRICANTDelco Supreme 11 @ Brake Fluid(GM Part No. 12377967 orequivalent DOT-3 Brake Fluid).Chassis Lubricant (GM PartNo. 12377985 or equivalent) orlubricant meeting requirements ofNLGI # 2, Category LB orGC-LB.GM Power Steering Fluid (GMPart No. 1052884 - 1 pint,1050017 - 1 quart, or equivalent).DEXRON@-I11 AutomaticTransmission Fluid.Multi-Pu ose Lubricant,Superlube % (GM PartNo. 12346241 or equivalent).7-36
USAGEFLUIDLUBRICANTUSAGEFLUIDLUBRICANTSuperchargerChassisLubricationWindshieldWasher SolventSupercharger Oil (GM PartNo. 12345982). See “SuperchargerOil“ in the Index.Chassis Lubricant (GM PartNo. 12377985 or equivalent) orlubricant meeting requirements ofNLGI # 2, Category LB orGC-LB.GM Optikleen@ Washer Solvent(GM Part No. 1051515) orequivalent.Hood LatchAssembly,Pivots, SpringAnchor andRelease PawlHood and DoorHingesWeatherstripConditioningLubriplate@ Lubricant Aerosol(GM Part No. 12346293 orequivalent) or lubricant meetingrequirements of NLGI # 2,Category LB or GC-LB.Multi-Pu ose Lubricant,Superlube % (GM PartNo. 12346241 or equivalent).Dielectric Silicone Grease (GMPart No. 12345579 or equivalent).7-37
Part E: Maintenance RecordAfter the scheduled services are performed, record thedate, odometer reading and who performed the servicein the boxes provided after the maintenance interval.Maintenance RecordAny additional information from “Owner Checks andServices” or “Periodic Maintenance” can be added onthe following record pages. Also, you should retain allmaintenance receipts. Your owner information portfoliois a convenient place to store them.I IODOMETER1 I DATE READING SERVICED BY MAINTENANCE PERFORMED7-38
Maintenance Record7-39
Maintenance RecordODOMETERDATE READING SERVICEDBY MAINTENANCE PERFORMED7-40
Section 8 Customer Assistance InformationHere you will find out how to contact <strong>Buick</strong> if you need assistance. This section also tells you how to obtain servipublications and how to report any safety defects.8-28 -48-58-58-68-7Customer Satisfaction ProcedureCustomer Assistance for TextTelephone (TTY) UsersRoadside AssistanceCanadian Roadside AssistanceCourtesy TransportationGM Participation in an Alternative DisputeResolution Program8-88-88-98-98-9Warranty InformationReporting Safety Defects to the UnitedStates GovernmentReporting Safety Defects to theCanadian GovernmentReporting Safety Defects to General MotorsOrdering Service and Owner Public.ationsin Canada
Customer Satisfaction Procedure<strong>Buick</strong> dealers have the facdities, trained technicians andup-to-date information to promptly address anyconcerns you may have. However, if a concern has notbeen resolved to your complete satisfaction, take thefollowing steps:STEP ONE -- Discuss your concern with a memberof dealership management. Normally, concerns canbe quickly resolved at that level. If the matter hasalready been reviewed with the sales, service or partsmanager, contact the owner of the dealership or thegeneral manager.8-2
STEP TWO -- If after contacting a member ofdealership management, it appears your concern cannotbe resolved by the dealership without further help,contact the <strong>Buick</strong> Customer Kelations Center by calling1-800-521-7300. In Canada, contact GM of CanadaCustomer Communication Centre in Oshawa by calling1-800-263-3777 (English) or 1-800-263-7854 (French).For help outside of the United States and Canada, callthe following numbers as appropriate:0 In Mexico: (525) 625-32560 In Puerto Rico: 1-800-496-9992 (English) or1-800-496-9993 (Spanish)0 In the U.S. Virgin Islands: 1400-496-99940 In the Dominican Republic: 1-800-751-4135(English) or 1-800-751-4136 (Spanish)0 In the Bahamas: 1-800-389-00090 In Bermuda, Barbados, Antigua and the BritishVirgin Islands: 1-800-534-01220 In all other Caribbean countries: (809) 763- 13 150 In other overseas locations, call GM OverseasDistribution Corporation in Canada at:(905) 644-4112.8-3
For prompt assistance, please'have the followinginformation available to give the CustomerAssistance Representative:0 Your name, address, home and businesstelephone numbers0 Vehicle Identification Number (This is availablefrom the vehicle registration or title, or the plate atthe top left of the instrument panel and visiblethrough the windshield.)* Dealership name and location0 Vehicle delivery date and present mileage0 Nature of concernWe encourage you to call uso we can give your inquiryprompt attention. However, if you wish to write<strong>Buick</strong>, address your inquiry to:<strong>Buick</strong> Motor DivisionCustomer Relations Center902 E. Hamilton AvenueFlint, MI 48550In Canada, write to:~General Motor -If Canada LimitedCustomer Communication Centre, 163-0051908 Colonel Sam DriveOshawa, Ontario L1H 8P78-4Refer to your Warranty and Owner AssistanceInformation booklet for addresses of GMOverseas offices.When contacting <strong>Buick</strong>, please remember that yourconcern will likely be resolved in the dealership, usingthe dealer's facilities, equipment and personnel. Thatis why we suggest you follow Step One first if youhave a concern.Customer Assistance for TextTelephone (TTY) UsersTo assist customers who are deaf, hard of hearing, orspeech-impaired and who use Text Telephones (TTYs),<strong>Buick</strong> has TTY equipment available at its CustomerAssistance Center. Any TTY user can communicate with<strong>Buick</strong> by dialing: 1-800-83-BUICK. (TTY users inCanada can dial 1-800-263-3830.)
Roadside %sistance<strong>Buick</strong> Motor Division is proud to offer <strong>Buick</strong> PremiumRoadside Assistance to customers for vehicles coveredunder the 3 year/36,000 mile (60 000 km) new carwarranty (whichever occurs first).Our commitment to <strong>Buick</strong> owners has always includedsuperior service through our network of over 2,800 <strong>Buick</strong>dealers. <strong>Buick</strong> Premium Roadside Assistance provides aextra measure of convenience and security.BUCK PREMIUM ROADSIDE ASSISTANCE:Provides owners with access to minor repairs ortowing for disabled vehicles. Although RoadsideAssistance is not a repair facility, it is a means ofassisting customers in an emergency situation.0 Takes the anxiety out of uncertain situations byproviding easy access to service professionals traineto work with <strong>Buick</strong> owners, 24 hours a day, 365 daysa year, including weekends and holidays.For details on <strong>Buick</strong> Premium Roadside Assistance,please consult your <strong>Buick</strong> Premium Roadside Assistaowner booklet included with your owner’s manual. Forneeded assistance, call the <strong>Buick</strong> Premium RoadsideAssistance toll-free hotline: 1-800-252- 1112.Canadian Roadside AssistanceVehicles purchased in Canada have an extensiveRoadside Assistance program accessible from anywherin Canada or the United States. Please refer the toseparate brochure provided by the dealer or call1-800-268-6800 for emergency services.8-5
Courtesy TransportationTo <strong>Buick</strong> Motor Division, Quality Means Service -- andservice means “keeping you on the road.”Included with your <strong>Buick</strong> new car warranty(3 years/36,000 miles (60000 km), whichever occursfirst), is Courtesy Transportation, a program whichwill provide <strong>Buick</strong> retail and lease customers with:@ Reimbursement toward a loaner vehicle, courtesyof <strong>Buick</strong> Motor Division, up to $30 a day (fivedays maximum) for vehicles requiring overnightwarranty repairs. Also, reimbursement up to $30 aday (five days maximum) may be available for thecost of a rental car, bus or even a cab.A free one-way shuttle ride or vehicle pick-up from alocation up to 10 miles (16 km) from the dealershipis available for those whose vehicle only requiressame day warranty repairs.NOTE: All Courtesy Transportation arrangementswill be administered by your <strong>Buick</strong> dealerservice management.Courtesy Transportation is <strong>Buick</strong>’s way of extending thePremium Service you’ve come to expect from <strong>Buick</strong>and its over 2,800 dealers. Please review the CourtesyTransportation glove box card contained in your vehicleor consult your <strong>Buick</strong> dealer for details.Because of uncertain availability, it is frequently notpossible to provide customers with the same modelloaner vehicle (including optional equipment) as thevehicle the customer owns or leases and has brought infor warranty repair. If a loaner vehicle is required, pleaseconsult your dealership for complete program detailsand loaner car availability in your area.Some state insurance regulations make it impracticalto rent vehicles to people under 21 years of age. If youare under 21 and have difficulty renting a vehicle, <strong>Buick</strong>will reimburse you up to $3O/day, for any documentedtransportation you receive. Please consult your dealerfor details.For warranty repairs during the Complete VehicleCoverage period in the New Vehicle Limited Warranty,interim transportation may be available under theCourtesy Transportation program. Please consult yourdealer for details. The Courtesy Transportation programis available only in the United States and Canada.In Canada, please consult your GM dealer forinformation on Courtesy Transportatil<strong>Buick</strong> reserves the right to make any cnanges ordiscontinue the Courtesy Transportation program atany time without notification.
GM Participation in an AlternativeDispute Resolution ProgramThis program is available in all 50 states and the Districtof Columbia. Canadian owners refer to your Warrantyand Owner Assistance Information booklet forinformation on the Canadian Motor Vehicle ArbitrationPlan (CAMVAP). General Motors reserves the right tochange eligibility limitations and/or to discontinue itsparticipation in this program.Both <strong>Buick</strong> and your <strong>Buick</strong> dealer are committedto making sure you are completely satisfied withyour new vehicle. Our experience has shown that,if a situation arises where you feel your concernhas not been adequately addressed, the CustomerSatisfaction Procedure described earlier in thissection is very successful.There may be instances where an impartial third partycan assist in arriving at a solution to a disagreementregarding vehicle repairs or interpretation of the NewVehicle Limited Warranty. To assist in resolving thesedisagreements, <strong>Buick</strong> voluntarily participates in BBBAUTO LINE.BBB AUTO LINE is an out-of-court programadministered by the Better Business Bureau system tosettle automotive disputes. This program is availablefree of charge to customers who currently own or lease aGM vehicle.If you are not satisfied after following the CustomerSatisfaction Procedure, you may contact the BBB usingthe toll-free telephone number, or write them at thefollowing address:BBB AUTO LINECouncil of Better Business Bureaus, Inc.4200 Wilson BoulevardSuite 800Arlington, VA 22203- 1804Telephone: 1-800-955-5100To file a claim, you will be asked to provide your nameand address, your Vehicle Identification Numberand a statement of the nature of your complaint.Eligibility is limited by vehicle age and mileage, andother factors.
We prefer you utilize the Customer SatisfactionProcedure before you resorto AUTO LINE, but youmay contact the BBB at any time. The BBB will attemptto resolve the complaint serving as an intermediary. Ifthis mediation is unsuccessful, an informal hearing willbe scheduled where eligible customers may present theircase to an impartial third-party arbitrator.The arbitrator will make a decision which you mayaccept or reject. If you accept the decision, GM will bebound by that decision. The entire dispute resolutionprocedure should ordinarily take about 40 days from thetime you file a claim until a decisionmade.Some state laws may require you to use this programbefore filing a claim with a, state-run arbitration programor in the courts. For further information, contact theBBB at 1-800-955-5100 or the <strong>Buick</strong> CustomerAssistance Center at 1-800-521 -7300.Warranty InformationYour vehicle comes with a separate warranty bookletthat contains detailed warranty information.REPORTING SAFETY DEFECTSTO THE UNITED STATESGOVERNMENTIf you believe that your vehicle has a defect which couldcause a crash or could cause injury or death, you shouldimmediately inform the National Highway TrafficSafety Administration (NHTSA), in addition tonotifying General Motors.If NHTSA receives similar complaints, it may open aninvestigation, and if it finds that a safety defect exists ina group of vehicles, it may order a recall and remedycampaign. However, NHTSA cannot become involvedin individual problems between you, your dealer orGeneral Motors.To contact NHTSA, you may either call the Auto SafetyHotline toll-free at 1-800-424-9393 (or 366-0123 in theWashington, D.C. area) or write to:NHTSA, U.S. Department of TransportationWashington, D.C. 20590You can also obtain other information about motorvehicle safety from the Hotline.8-8
REPORTING SAFETY DEFECTSTO THE CANADIANGOVERNMENTIf you live in Canada, and you believe that your vehiclehas a safety defect, you should immediately notifyTransport Canada, in addition to notifying GeneralMotors of Canada Limited. You may write to:Transport CanadaBox 8880Ottawa, Ontario KlG 352REPORTING SAFETY DEFECTSTO GENERAL MOTORSIn addition to notifying NHTSA (or Transport Canada)in a situation like this, we certainly hope you’ll notifyus. Please call us at 1-800-521-7300, or write:<strong>Buick</strong> Motor DivisionCustomer Relations Center902 E. Hamilton AvenueFlint, MI 48550In Canada, please call us at 1-800-263-3777 (English)or 1-800-263-7854 (French). Or, write:General Motors of Canada LimitedCustomer Communication Centre, 163-0051908 Colonel Sam DriveOshawa, Ontario L1H 8P7Ordering Service and OwnerPublications in CanadaService manuals, owner’s manuals and other serviceliterature are available for purchase for all current andpast model General Motors vehicles.The toll-free telephone number for ordering informatioin Canada is 1-800-668-5539.8-9
<strong>1998</strong> BUICK SERVICE PUBLICATIONS ORDERING INFORMATIONThe following publications covering the operation and servicing of your vehicle can be purchased bythe Sewice Publication Order Form in this book and mailing it in with your check, money order,or credit card information to Helm, Incorporated (address below.)SERVICE MANUALSService <strong>Manual</strong>s have the diagnosis and repair informationon engines, transmission, axle, suspension, brakes,electrical, steering, body, etc.RETAIL SELL PRICE: $90.00TRANSMISSION, TRANSAXLE, TRANSFER CASEUNIT REPAIR MANUALThis manual provides information on unit repair serviceprocedures, adjustments and specifications for the<strong>1998</strong> GM transmissions, transaxles and transfer cases.RETAIL SELL PRICE: $40.00CURRENT PUBLICATIONS FOR <strong>1998</strong> BUCKOWNER’S INFORMATIONOwner publications are written directly for Owners andintended to provide basic operational information about thevehicle. The owner’s manual will include the MaintenanceSchedule for all models.In-Portfolio: Includes a Portfolio, Owner’s <strong>Manual</strong> andWarranty Booklet.RETAIL SELL PRICE: $1 5.00Without Portfolio: Owner’s <strong>Manual</strong> only.RETAIL SE.LL PRICE: $1 0.00CURRENT & PAST MODEL ORDER FORMSService Publications are available for current and pastmodel GM vehicles. To request an order form, pleasespecify year and model name of the vehicle.
$&I NOTES8-12
Section 9 IndexAccessory Power Outlet ......................... 2-57AirBag ....................................... 1-21How Does it Restrain .......................... 1-25How it Works ................................ 1-23Location .................................... 1-23Readiness Light ......................... 1-23, 2-67Servicing ................................... 1-27What Makes it Inflate .......................... 1-25What Will You See After it Inflates ............... 1-25When Should it Inflate ......................... 1-25Aircleaner .................................... 6-15Air Conditioning ................................ 3-5Air Conditioning Refrigerants ..................... 6-67Air Control. Climate Control System ............. 3.3. 3.4Alarm. Universal Theft-Deterrent .................. 2- 15Alignment and Balance. Tire ...................... 6-45Aluminum Wheels. Cleaning ...................... 6-53Antenna. Power ................................ 3-21Antifreeze ..................................... 6-20Anti-LockBrake System Warning Light ................ 2-69. 4-7Brakes ...................................... 4-6Anti-Theft. Radio .............................. 3-15Appearancecare ............................... 6-47Appearance .. Care Materials ....................... 6-55Arbitration .............................. Program 8-7Ashtrays ...................................... 2-56Assist Handles ................................. 2-58Astroroof ..................................... 2-58Audio Controls. Steering Wheel Control ............. 3 . 18Audio Equipment. Adding ........................ 3-19Audio Systems ................................. 3-10Automatic Dimming Outside Rearview Mirror ........ 2-50Automatic Transaxle ............................ 6-18Check ...................................... 7-32Fluid ....................................... 6-18Operation ................................... 2-23Park Mechanism Check ........................ 7-34Back-up Lamp Bulb Replacement ........... 6.35. 6.37Battery ....................................... 6-29Jump Starting ................................. 5-3Replacement. Remote Keyless Entry .............. 2-11Rundown Protection ........................... 2-45WarningLight ............................... 2-67Warnings ................................ 5.3. 5.5BBB Auto Line ................................. 8-7Belt. Engine Accessory .......................... 6-68Better Business Bureau Mediation ................... 8-7Blizzard ...................................... 4-269-1
9-2
Damage. Finish ............................... 6-54Damage. Sheet Metal ............................ 6-53Daytime Running Larnps ......................... 2-41Dead Battery ................................... 5-3Defects. Reporting Safety ......................... 8-8Defensive Driving ............................... 4-2Defogger. Rear Window .......................... 3-8Defogging ..................................... 3-7Defrosting ..................................... 3-7Delayed Entry Lighting .......................... 2-43Delayed Exit Lighting ........................... 2-43DelayedLocking ................................ 2-7Dimensions. Vehicle ............................ 6-67DoorAjarLight ................................... 2-75Ajar Reminder ................................ 2-5Central Unlocking System ....................... 2-4Locks ....................................... 2-4Locks. Delayed Locking ........................ 2-7MemoryLocks ................................ 2-5Driver Position ................................. 1-13DrivingCity ........................................ 4-19Defensive .................................... 4-2Drunken ..................................... 4-2Freeway .................................... 4-20InaBlizzard ................................. 4-26IntheRain .................................. 4-16Night ...................................... 4-15OnCurves .................................. 4-10On Grades While Towing a Trailer ............... 4-369-3
DrivingOn Hill and Mountain Roads .................... 4-22On Snow and Ice ............................. 4-25Throughwater ............................... 4-18Wet Roads .................................. 4- 16Winter ...................................... 4-24With a Trailer ................................ 4-34DrunkenDriving ................................ 4-2Dual Automatic ComforTemp Climate Control ......... 3-2Electrical Equipment. Adding ............... 3.19.6.56Electrical System ............................... 6-56Electrochromic Daymight Rearview Mirror .......... 2-46WithCompass ............................... 2-47Electronic Level Control ......................... 4-3 1Engine ....................................... 6- 10Accessory Belt ................................ 6-68Coolant ..................................... 6-20CoolantHeater ............................... 2-22Coolant Level Check .......................... 7-31Coolant Temperature Gage ..................... 2-7 1Coolant Temperature Warning Light .............. 2-70Exhaust ..................................... 2-31FuseBlock .................................. 6-60Identification ................................ 6-56OilLevelCheck .............................. 7-31Overheating ................................. 5-13Running While Parked ......................... 2-32Specifications ................................ 6-67StartingYour ................................ 2-20Supercharged ................................ 6-10ngineOil .................................... 6-11Adding ..................................... 6-12Additives ................................... 6-14Checking ................................... 6-12Pressure Light ............................... 2-74Used ....................................... 6-15Whentochange .............................. 6-14Exhaust, Engine ................................ 2-31Exit Lighting, Delayed ........................... 2-43Express-Down Window .......................... 2-33Fabric Cleaning ............................... 6-48Fan Button. Climate Control System ................. 3-3FillingYourTank ................................ 6-5Filter, Air ..................................... 6-16Finishcare .................................... 6-52Finish Damage ................................. 6-54Flashers, Hazard Warning ......................... 5-2Flash-To-Pass Feature ........................... 2-36Flat Tire, Changing ............................. 5-22Fluids and Lubricants ............................ 7-36FrenchLanguage<strong>Manual</strong> ........................... 11 ..FrontTowing .................................. 5-10Fuel .......................................... 6-3Filling Your Tank .............................. 6-5Gage ....................................... 2-75In Foreign Countries ........................... 6-4Fuse Block, Under Rear Seat ................. 6-61, 6-62Fuses and Circuit Breakers ....................... 6-579-4
GagesEngine Coolant Temperature .................... 2-71Fuel ....................................... 2-75Garage Door Opener ....................... 2-5 1. 2.59GAWR ....................................... 4-29GloveBox .................................... 2-51Gross Axle Weight Rating ........................ 4-29Gross Vehicle Weight Rating ...................... 4-29..Guide en .................................FranGais 11GVWR ....................................... 4-29Halogen Bulbs ................................ 6-3 1Hazard Warning Flashers .......................... 5-2Head Restraints ................................. 1-7Headlamps .................................... 2-40Aiming ..................................... 6-33Bulb Replacement ............................ 6-3 1HighLow Beam Changer ...................... 2-35Wiring ..................................... 6-57Hearing Impaired, Customer Assistance .............. 8-4Heatedseats .................................... 1-5Heating ........................................ 3-5High-Beam Headlamps .......................... 2-35Highway Hypnosis .............................. 4-21Hill and Mountain Roads ......................... 4-22Hitches, Trailer ................................. 4-34HoodChecking Things Under ......................... 6-8Release ...................................... 6-9Horn ......................................... 2-33Hydroplaning .................................. 4- 18Ignition Key Positions .......................... 2-19Ignition Transaxle Lock Check .................... 7-34Illuminated Entry ............................... 2-43Inflation. Tire .................................. 6-40Inside Daymight Rearview Mirror ................. 2-46Inspections .................................... 7-35Brake System ................................ 7-35Engine Cooling System ........................ 7-35Exhaust Systems ............................. 7-35Front-Wheel-Drive Axle Boot and Seal ........... 7-35Steering .................................... 7-35Suspension .................................. 7-35Throttle Linkage .............................. 7-35Instrumentpanel ............................... 2-62.Brightness Control ............................ 2-43Cleaning .................................... 6-50Cluster ..................................... 2-64FuseBlock .................................. 6-58Interior Lamps ................................. 2-43BulbReplacement ............................ 6-38Jack. Tire .................................... 5-23Jumpstarting ................................... 5-3Key Lock Cylinders Service ..................... 7-32Key Reminder Warning .......................... 2-14Keyless Entry ................................... 2-8Keys .......................................... 2-29-5
Labels 4-28Certification ................................. 4-29Service Parts Identification ..................... 6-56Tire-Loading Information ...................... 4-28Vehicle Identification Number ................... 6-56Lamp. Trunk ................................... 2-45Lamps ........................................ 2-40Cornering ................................... 2-42Courtesy .................................... 2-43Instrument Panel ............................. 2-43Interior ..................................... 2-43OnReminder ................................ 2-41Latches, Seatback ................................ 1-7Leaving Your Vehicle ............................. 2-7Leaving Your Vehicle with the Engine Running ....... 2-29License Plate Holder ............................ 2-57Light Sensor, Twilight Sentinel ..................... 2-42Lighter ....................................... 2-57LightsAir Bag Readiness ....................... 1-23, 2-67Anti-Lock Brake System Warning ............ 2-69, 4-7Battery Warning .............................. 2-67Brake System Warning ......................... 2-68CheckOil ................................... 2-75DoorAjar ................................... 2-75Engine Coolant Temperature Warning ............. 2-70Interior ..................................... 2-43Low Coolant Warning ......................... 2-71LowFuel ................................... 2-76Oilpressure ................................. 2-74Safet- belt Reminder ...................... 1.9. 2.66Service Engine Soon .......................... 2-72Traction Control System Warning ............ 2.69.4.9Loading Your Vehicle ........................... 4-28Locks ......................................... 2-4Door ........................................ 2-4Door. Delayed Locking ......................... 2-7Ignition Transaxle Lock Check .................. 7-34Key Lock Cylinder Service ..................... 7-32Lockout Protection ............................. 2-7Memory Door ................................. 2-5PowerDoor .................................. 2-5Tr~nk ...................................... 2-13Low Coolant Warning Light ...................... 2-71LowFuelLight ................................ 2-76Lubricants and Fluids ............................. 7-36Lubrication Service. Body ........................ 7-32Lumbar Controls ................................. 1-2Mapasteer TM ................................ 4-10Maintenance. Normal Replacement Parts ............ 6-67Maintenance Record ............................ 7-38Maintenance Schedule ............................ 7-1Long Trip/Highway Definition ................... 7-6Long Tripmighway Intervals ..................... 7-6Owner Checks and Services ..................... 7-31Periodic Maintenance Inspections ................ 7-35Recommended Fluids and Lubricants ............. 7-36Short Trip/City Definition ....................... 7-5Short Trip/City Intervals ........................ 7-59-6
Maintenance. Underbody ......................... 6-54Maintenance When Trailer Towing ................. 4-37Malfunction Indicator Lamp ...................... 2-72MemoryDoorLocks ................................... 2-5Seats and Mirrors ......................... 1-3, 2-10Mirrors ....................................... 2-46Automatic Dimming Outside Rearview ............ 2-50Convex Outside .............................. 2-51Electrochromic Daymight Rearview .............. 2-46Inside Daymight Rearview ..................... 2-46Memory ................................ 1-3,2-10Parallel Park Assist ........................... 2-50Power Remote Control ......................... 2-50Visorvanity ................................. 2-57With Compass ............................... 2-47Mountain Roads ................................ 4-22Multifunction Lever ............................. 2-34Net. Convenience .............................. 2-56New Vehicle Break-In ........................... 2- 18Nightvision ................................... 4-15Normal Maintenance Replacement Parts ............. 6-67Odometer .................................... 2-65Odometer. Trip ................................. 2-65Off-Road Recovery ............................. 4- 12Oil Pressure Light .............................. 2-74Oil. Engine .................................... 6-11Oil. Supercharger ............................... 6- 17OnStar System ................................. 2-58Opener. Garage Door ....................... 2-5 1. 2-61Outside Rearview Mirrors ........................ 2-46Overheating Engine ............................. 5-13Owner Checks and Services ....................... 7-31Owner Publications. Ordering ................. 8-9. 8-10Paint Spotting. Chemical ........................ 6-54ParadeDimming ............................... 2-43Parallel Park Assist Mirror ........................ 2-50ParkShifting Into ................................. 2-27Shifting Out of ............................... 2-30PakingAtNight .................................... 2-14Brake ...................................... 2-26Brake Mechanism Check ....................... 7-34Lots ....................................... 2-15Over Things That Burn ........................ 2-31With a Trailer ................................ 4-36Passenger Zone Comfort Control .................... 3-9Passing ....................................... 4-12PASS-Key' I1 ................................. 2-17Perimeter Lighting .............................. 2-44Periodic Maintenance Inspections .................. 7-35Personal Choice Features .......................... 2-9PowerAccessory Outlet ............................. 2-57Antenna Mast Care ............................ 3-21Antenna Service .............................. 7-31DoorLocks ................................... 2-599.7
Power {Continued)Remote Control Mirror ........................ 2-50Seat ......................................... 1-2Seatback Recliner .............................. 1-5Steering .................................... 4-10Steering Fluid ................................ 6-24Windows ................................... 2-33Power. Retained Accessory ....................... 2-20Power SeatLumbar Controls .............................. 1-2Memory Seats and Mirrors ................. 1.3. 2. 10Pregnancy. Use of Safety Belts .................... 1-20Problems on the Road ............................ 5-1Publications. Service and Owner ............... 8.9. 8.10Radiator ..................................... 5-19Radiator Pressure Cap ........................... 6-23Radio Reception ................................ 3-19Radios ....................................... 3-10Rain. Driving In ................................ 4-16ReadingLamps ................................ 2-45RearOutside Seat Position .......................... 1-29Safety Belt Comfort Guides ..................... 1-32Seatpassengers .............................. 1-29Towing ..................................... 5-12Window Defogger ............................. 3-8Rear Turn Signal Bulb Replacement ........... 6-35. 6-37Rearview MirrorElectrochromic Daymight ...................... 2-469-8
9-9
Tachometer .................................. 2-65Taillamp Bulb Replacement .................. 6.35. 6.37TapePlayerCare ............................... 3-20Temperature Button, Climate Control System .......... 3-3Theater Dimming ............................... 2-43Theft ......................................... 2-14Theft-Deterrent Feature .......................... 3-15THEFTLOCK" ................................ 3-15Thermostat .................................... 6-24Tilt Steering Wheel ............................. 2-34Time, Setting the ............................... 3-10Tirechains .................................... 6-47Tire Loading ................................... 4-28Tire-Loading Information Label ................... 4-28Tires ......................................... 6-39Alignment and Balance ........................ 6-45BuyingNew ................................. 6-43Chains ..................................... 6-47ChangingaFlat .............................. 5-22Cleaning .................................... 6-53Compact Spare ............................... 5-31Inflation .................................... 6-40Inflation Check ............................... 7-31Inspection and Rotation ........................ 6-41Loading Your Vehicle ......................... 4-28Pressure .................................... 6-40Temperature ................................. 6-45Traction .................................... 6-44Treadwe ar ................................... 6-44Uniform Quality Grading ....................... 6-44Wear Indicators ............................... 6-42Wheel Replacement ........................... 6-45When It's Time for New ....................... 6-429-10
TopStrap ..................................... 1-44TorqueLoc lg ................................... 2-30Torque, Wheel Nut ......................... 5-29, 6-66Towing a Trailer ................................ 4-31Towing Your Vehicle ............................. 5-8TractionControl System ................................ 4-9Control System Warning Light .............. 2-69, 4-9TrailerBrakes ..................................... 4-34Driving on Grades ............................ 4-36Driving with ................................. 4-34Engine Cooling When Towing ................... 4-37Hitches ..................................... 4-34Maintenance When Towing ..................... 4-37ParkingonHills .............................. 4-36Safety Chains ................................ 4-34Tongueweight ............................... 4-33Total Weight on Tires .......................... 4-33Towing ..................................... 4-31Turnsignals ................................. 4-35Weight ..................................... 4-32Transaxle Fluid, Automatic ....................... 6- 18TransmitterRemote Keyless Entry .......................... 2-8Universal ................................... 2-59Transportation,Courtesy .......................... 8-6Trip Odometer ................................. 2-65TrunkLock ....................................... 2-13Release Lockout. Remote ...................... 2-14Release. Remote .............................. 2-13Security Override ............................. 2-14TTYUsers ..................................... 8-4Turn Signal and Lane Change Indicator ............. 2-35Turn Signal Reminder ........................... 2-35Turn SignalMultifunction Lever ................... 2-34Turn Signals When Towing a Trailer ................ 4-35Twilight Sentinel ............................... 2-42Underbody Flushing Service ..................... 7-34Underbody Maintenance ......................... 6-54Universal Theft-Deterrent System .................. 2-15Universal Transmitter ............................ 2-59VehicleControl ...................................... 4-5Damage Warnings .............................. ivDimensions ................................. 6-67IdentificationNumber ......................... 6-56Loading .................................... 4-28Storage ..................................... 6-30Ventilation System ............................... 3-6Visor Vanity Mirrors. Illuminated .................. 2-57Visors. Sun .................................... 2-579-11
warning Devices .... .-. ......................... 5-3Warranty Information ............................. 8-8Washer Fluid, Windshield ........................ 6-25Washing Your Vehicle ........................... 6-5 1Weatherstrips .................................. 6-5 1WheelAlignment .................................. 6-45Nut Torque ............................. 5-29. 6-66Replacement ................................. 6-45Wrench ..................................... 5-23Windows ..................................... 2-33 .Express-Down ............................... 2-33Power ...................................... 2-33WindshieldWasher ............................. 2-37Fluid ..... I .......................... 2-37. 6-25Fluid Level Check ............................ 7-31Windshield Wipers .............................. 2-36Bladecheck .................................. 7-32Blade Replacement ...................... 6-39, 6-67Cleaning the Blade ............................ 6-51Fuses ...................................... 6-57Winter Driving ................................. 4-24Wiper Blade Cleaning ........................... 6-51Wiring, Headlamp .............................. 6-57WreckerTowing ................................. 5-8Wrench, Wheel ................................. 5-239-12