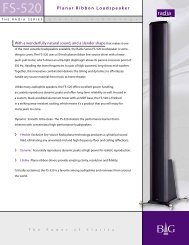
You also want an ePaper? Increase the reach of your titles
YUMPU automatically turns print PDFs into web optimized ePapers that Google loves.
Contents and IntroductionContents . . . . . . . . . . . . . . . . . . . . . . . . . . . . . . . . PageIntroduction . . . . . . . . . . . . . . . . . . . . . . . . . . . . . . . . . . . . 2Important Safety Instructions . . . . . . . . . . . . . . . . . . . . . . 3THX Performance Ratings and Technolgy. . . . . . . . . . . . . 3General Information. . . . . . . . . . . . . . . . . . . . . . . . . . . . . . 4Subwoofer Placement . . . . . . . . . . . . . . . . . . . . . . . . . . . 5-6Grille Options . . . . . . . . . . . . . . . . . . . . . . . . . . . . . . . . . . . 7Construction Principles and Preparation. . . . . . . . . . . . . . 8Retrofit installation. . . . . . . . . . . . . . . . . . . . . . . . . . . . . 9-10New construction installation . . . . . . . . . . . . . . . . . . . 11-12Subwoofer Amplifier General Information . . . . . . . . . . . 13Power ON / OFF . . . . . . . . . . . . . . . . . . . . . . . . . . . 14-15Menu Operation . . . . . . . . . . . . . . . . . . . . . . . . . . 16-21Remote and Rear Panel Control . . . . . . . . . . . . . . . . . 22-23Amplifier Protection. . . . . . . . . . . . . . . . . . . . . . . . . . . . . 24Serial Control . . . . . . . . . . . . . . . . . . . . . . . . . . . . . . . . 25-31Speakon Assembly Guide . . . . . . . . . . . . . . . . . . . . . . . . 32Warranty Information . . . . . . . . . . . . . . . . . . . . . . . . . . . 33IntroductionCongratulations and thank you for selecting this state-ofthe-artvibration-free architectural subwoofer system from<strong>BG</strong> <strong>Radia</strong>. We have assembled your system with the greatestcare using the finest materials available. The rugged andinert thermoset composite resin enclosure and steel andaluminum components have been painstakingly designedand constructed for years of listening enjoyment.This craftsmanship, combined with advanced designconcepts and technology developed by THX® Ltd. deliversincredibly powerful bass with virtually no distortion. Andit does it in a compact and elegant package suitable forcustom installation in today’s luxury homes.As the first vibration-free in-wall subwoofer to carry theTHX Ultra2 level of certification, you can be assured thatthis system will reproduce music and movie sound trackswith the best possible performance and as the artist ordirector intended.This <strong>manual</strong> will explain in detail how to setup and operatethis product in order to achieve maximum performance.PLEASE NOTE: the installation portion of this <strong>manual</strong> iswritten with professional custom in-stallers in mind andassumes experience and familiarity with local electricaland construction codes.THX, the THX logo and “ THX Balanced Bass-Line” are trademarks of THX Ltd. which may be registered in some jurisdic tions.Manufac tured under license from THX Ltd. All rights reser ved.23535 Arrowhead Drive · Carson City, NV 89706775-884-1900 ph · 775-884-1276 fx · www.bgcorp.com · sales@bgcorp.com
Safety InstructionsImportant Safety Instructions1. Read these instructions.2. Keep these instructions.3. Heed all warnings.4. Follow all instructions.5. Do not use this apparatus near water.6. Clean only with dry cloth.7. Do not block and ventilation openings. Install inaccordance with the manufacturer’s instructions.8. Do not install near any heat sources such as radiators,heat registers, stoves, or other apparatus (includingamplifiers) that produce heat.9. Do not defeat the safety purpose of the polarized orgrounding-type plug. A polarized plug has two bladeswith one wider than the other. A grounding type plughas two blades and a third grounding prong. The wideblade or the third prong are provided for your safety. Ifthe provided plug does not fit into your outlet, consultand electrician for a replacement of the obsolete outlet.10. Protect the power cord from being walked on orpinched particularly at plugs, convenience receptacles,and the point where they exit from the apparatus.11. Only use attachments/accessories specified bythe manufacturer.12. Use only with the cart, stand, tripod bracket or tablespecified by the manufacturer, or sold with theapparatus. When a cart is used, use caution whenmoving the cart/apparatus combination to avoid injuryfor tip-over.13. Unplug this apparatus during lightning storms or whenunused for long periods of time.14. Refer all servicing to qualified service personnel.Servicing is required when the apparatus has beendamaged in any way, such as power-supply cord orplug is damaged, liquid has been spilled or objectshave fallen into the apparatus, the apparatus has beenexposed to rain or moisture, does not operate normally,or has been dropped.THX TechnologyTHX Balanced Bass-Line Technology eliminatessound coloration due to wall vibration.The four bass modules contain 48 drive unitsthat provide a total radiating area equivalent tothat of two 18” drivers.3535 Arrowhead Drive · Carson City, NV 89706775-884-1900 ph · 775-884-1276 fx · www.bgcorp.com · sales@bgcorp.com3
Subwoofer PlacementFig. 1 Recommended placement of subwoofer modules in-roomFour subwoofer locationsTwo subwoofer locations63535 Arrowhead Drive · Carson City, NV 89706775-884-1900 ph · 775-884-1276 fx · www.bgcorp.com · sales@bgcorp.com
Grille OptionsGrille AssemblyYour choice of two grille sizes are included with the <strong><strong>BG</strong>X</strong>-4850 system. One is 7” wide and is used primarily for newconstruction or when a thinner profile is desired and somedrywall work is being done during installation. The otheroption is 15” wide and is used for retrofit installations. Nodrywall repair is required in this case. See Fig. 2.Fig. 2 Subwoofer grille optionsNarrow 7” grille for new construction installationWide 15” grille for retrofit installation3535 Arrowhead Drive · Carson City, NV 89706775-884-1900 ph · 775-884-1276 fx · www.bgcorp.com · sales@bgcorp.com7
Construction Principles & PreparationInstallation ConsiderationsThe <strong><strong>BG</strong>X</strong>-4850 subwoofer system has been designedprimarily with in-wall mounting in mind. However, sincethe woofers are self contained (they do not rely on the wallcavity or a separate back box) there are many other typesof installation opportunities including in-ceiling, cabinetmounting or even on-wall (with an appropriate covering).Make sure in these cases that the radiating slot has minimumclearance of 2” (50 mm) from any large obstructions likewalls or panels.Construction PreparationGenerally <strong><strong>BG</strong>X</strong> subwoofer modules do not require anyspecial preparation of wall or ceiling cavities for theirinstallation.We recommend adhering to usual safety and industrystandards, rules of good practice and techniques.However if you are considering installation of subwoofermodule below another <strong>BG</strong> speaker within one stud cavity,you need to separate the upper speaker cavity fromthe subwoofer cavity with an air tight seal. You do notneed to do this if you use one of <strong>BG</strong>’s back boxes for theupper speaker.Fig. 4 Installing NCB83535 Arrowhead Drive · Carson City, NV 89706775-884-1900 ph · 775-884-1276 fx · www.bgcorp.com · sales@bgcorp.com
Retrofit InstallationRetrofit installationwith 15” wide grille1. Remove the new construction bracket (NCB) from thepackaging and use it as a template for the drywallcutout. Mark and cut the wall in the desired location,as shown in Fig. 4, allowing for at least 1/16” clearance.Use a level if necessary.2. Run speaker wire to the subwoofer location(s).3. Insert NCB in the cutout, making sure that its mountingflange sits firmly on top of the drywall surface. Using atleast four long wood screws and a screw gun, install theNCB as how in Fig. 4. Level the NCB if necessary usingthe bend out metal tabs to account for any tolerance.4. Take the subwoofer module and install it inside the NCBusing the four supplied machine screws. See detail inFig. 5. Make sure it is fastened tightly and does not rattle.5. Hook up speaker cable to binding posts at the bottom,paying attention to correct polarity.6. Install the 15” wide grille by inserting its frame insidethe NCB. The magnets behind the grille’s rails will hold itsecurely in place.Fig. 5 Installing subwoofer module and 15” wide grille3535 Arrowhead Drive · Carson City, NV 89706775-884-1900 ph · 775-884-1276 fx · www.bgcorp.com · sales@bgcorp.com9
New Construction InstallationNew construction installation1. During pre-wire, pull wire to the planned subwooferlocation. You will need (one) two-conductor wire perwoofer module (or one four-conductor wire per pairof modules).2. Remove the new construction bracket (NCB) from thepackaging and install it in the stud bay in the desiredlocation. Make sure that its side metal flanges are settightly against drywall surface. Using at least four longwood screws and a screw gun, install NCB as shown onFig. 6 on the left. Level the NCB if necessary using thebend out metal tabs to account for any tolerance.3. Take the subwoofer module with protective coverattached and install it inside NCB using the foursupplied machine screws in the same way as shown onFig. 5. Make sure it is fastened tightly and does notrattle. Refer to the right image on Fig. 6.Fig. 6 Installing NCB and subwoofer module for new construction>103535 Arrowhead Drive · Carson City, NV 89706775-884-1900 ph · 775-884-1276 fx · www.bgcorp.com · sales@bgcorp.com
New Construction Installation4. When installing drywall, cut the opening around theprotective cover plate as shown on Fig. 7 on the left.5. After drywall painting is completed and the system isready for hook up, remove the cover plate and hook upthe speaker cable to the binding posts at the bottom,paying attention to correct polarity.6. Take the 7” wide grille bezel without the grille materialinstalled and attach it to subwoofer module as shownin Fig. 7 on the right image. Use the same four screwsthat were used to hold the cover.7. Remove the upper plastic end cap on the bezel. Slidethe grille material into the bezel and finish by snappingthe end cap in place.Fig. 7 Installing NCB and subwoofer module for new construction> >3535 Arrowhead Drive · Carson City, NV 89706775-884-1900 ph · 775-884-1276 fx · www.bgcorp.com · sales@bgcorp.com11
General InformationSignal ConnectionAll <strong>BG</strong> <strong>Radia</strong> speakers have binding post connectionsclearly marked “+” and “ –“ or color coded in red and black.The positive amplifier output terminals should be connectedto the red biding posts on the subwoofer module. Negativeamplifier output terminals should be connected to theblack binding posts on the subwoofer module.Two subwoofer modules must be connected to each<strong>BG</strong>A-2104 amplifier speaker output using the suppliedconnectors.ATTENTION! <strong>BG</strong>A-2104 amplifier has professional gradeSpeakon output speaker terminals.These were selected for greater connection reliability,protection against electric shock or shorting. In order toconnect subwoofer modules to the amplifier you haveto terminate your speaker cables with Speakon maleconnectors that are included in the package. Instructionson how to do this are given at the end of this <strong>manual</strong> (p. 17).Fig. 3 shows the connection and control option on the<strong>BG</strong>A-2104 amplifier used in this system. There are a fewrules of thumb to keep in mind when connecting thesystem.<strong>BG</strong> recommends high quality 14-16 AWG OFC (oxygenfree copper) speaker wire for all speaker connections. Wedo not recommend specialty connectors which are notcompatible with the push terminals (on the speaker end)or the Speakon connectors (on the amplifier side) used inthis system.When connecting SM-1250 woofer modules to the<strong>BG</strong>A-2104 amplifier, two modules are connected to eachamplifier channel.Note: When the mains plug or an application coupler is usedas a disconnect device, the disconnect device shall remainreadily operable.123535 Arrowhead Drive · Carson City, NV 89706775-884-1900 ph · 775-884-1276 fx · www.bgcorp.com · sales@bgcorp.com
Amplifier OperationTurning ON the SystemThere are 5 methods to wake the amplifier from its off stateincluding: Audio signal detection, encoder pressed, powertrigger, RS232 message and IR command. Each turn onmethod is discussed in detail below. System on is indicatedby a green lit power indicator.1. Audio Signal Detection - the system detected anaudio signal on the current input that is above the userselectable threshold (see Setup Menu).2. Encoder Pressed - the system sensed the encoderwas pressed.3. Power Trigger - the system detected a logic highvoltage, within the specified range, on the rear panelpower trigger connection. Note the system will remainon indefinitely while a logic high level is present.4. RS232 Message - the system received a valid ‘SystemON’ RS232 message.5. IR Command - the system received a ‘System ON’ IRCommand via the front remote input or the IR directrear panel connection. Note that only one input can beselected at a time (see Setup Menu).Turning OFF the SystemThere are 4 methods to turn off the amplifier: the auto offtimer, power trigger, RS232 message and IR command.Each turn-off method is discussed in detail below. Systemoff is indicated by a red lit power indicator.1. Auto Off Timer - the system did not sense any activityfor 30 minutes and turned off automatically.2. Power Trigger - the system detected a high to lowtransition on the rear panel power trigger connection.Note the system must first sense logic high, within thespecified range, otherwise it will not perform anychange as a logic low is the same as having nocable attached.3. RS232 Message - the system received a valid ‘SystemOFF’ RS232 message. The system will not turn off if validlogic high level is present on the Power trigger input.4. IR Command - the system received a valid ‘System OFF’IR Command via the front remote input or the IR directrear panel connection. Note that only one input can beselected at a time (see Setup Menu). The system willnot turn off if valid logic high level is present of thePower trigger input.The front of the chassis consists of a push and turn encoder to setup all operational parameters. A dotmatrix display provides real-time system feedback along with dedicated backlit mode indicators. Aseparate IR remote controls some of the most commonly utilized functions.3535 Arrowhead Drive · Carson City, NV 89706775-884-1900 ph · 775-884-1276 fx · www.bgcorp.com · sales@bgcorp.com13
Amplifier OperationMain Menu NavigationThe main menu consists of six functions with dedicatedindicators on the right side of the display area. Rotatingthe encoder in either direction changes the functionindicator position with the current setting shown on thedisplay center. To adjust the current setting, simply pressthe encoder then rotate to the desired value. Press againto accept the new setting. The adjustment mode isshown by the colon symbol ‘:’ on the far left.Main DisplayFunctionsL E V E LMODEX OV E RP HAS EI NP UTThe LEVEL function allows the user to adjust the output level within a range of -60dB to +7dBas shown on the display. Rotating to the right increases the output in 1dB steps while rotatingto the left decreases by the same amount.The level is dependant on the current mode selection and can be adjusted independently foreach of the two possibilities. RS232 messages and IR commands can also adjust the level.S E T UPL E V E LMODEX OV E RP HAS EI NP UTS E T UPThe MODE function allows the user to quickly switch between two presets of output level.The modes are labeled Music and Movie. The setting of the mode levels are accomplished byselecting a mode and then adjusting the level as described previously.RS232 messages, IR commands and the rear panel mode trigger input can also adjust themode setting.Note: If the rear panel mode trigger is active high, the mode setting cannot be changed via anymethod until this input goes low. The message ‘External Control’ will scroll across the display if anattempt is made to change the mode setting.L E V E LMODEX OV E RP HAS EI NP UTS E T UPThe XOVER function allows the user to set the desired low pass crossover selection in coarsesteps. Most applications utilize a pre-amplifier or receiver that already incorporates this functiontherefore the typical setting will be either bypass or THX (if using a THX product).The possible settings include: 50Hz, 60Hz, 80Hz, 100Hz, Bypass and THX. For 50Hz thru 100Hzthe low pass filter is a Linkwitz-Riley 4th order.Note: If the system is locked then Xover changes are not allowed. The message ‘LOCKED’ will displaymomentarily if an attempt is made to change the Xover setting.143535 Arrowhead Drive · Carson City, NV 89706775-884-1900 ph · 775-884-1276 fx · www.bgcorp.com · sales@bgcorp.com
Amplifier OperationL E V E LMODEX OV E RP HAS EThe PHASE function allows the user to set either positive phase (0deg) or negative phase(180deg).Note: If the system is locked then Phase changes are not allowed. The message ‘LOCKED’ will displaymomentarily if an attempt is made to change the Phase setting.I NP UTS E T UPL E V E LMODEX OV E RP HAS EI NP UTS E T UPThe INPUT function allows the user to select the input selection as either unbalanced (RCA) orBalanced (XLR).For a single connection to a Pre-amp or Processor the Left input should be utilized which willbe either a combined bass managed summation of all low frequency content or a dedicatedLFE signal.For connection to a stereo source, the left and right inputs will sum the two signals.Note: If the system is locked then Input changes are not allowed. The message ‘LOCKED’ will displaymomentarily if an attempt is made to change the Input setting.L E V E LMODEX OV E RP HAS EI NP UTThe SETUP function allows the user to set some of the more advanced parameters.If the system is currently unlocked the display will show ‘OPEN’ while navigating to the setupfunction. If the system is ‘LOCKED’ read the section on Unlocking the system.If no action occurs for 15 seconds, while in the main menu, the display will automatically turn off.S E T UP3535 Arrowhead Drive · Carson City, NV 89706775-884-1900 ph · 775-884-1276 fx · www.bgcorp.com · sales@bgcorp.com15
Amplifier OperationSetup Menu NavigationEntry into the setup menu provides a more advanced setof parameters for optimizing the system. While in the Setupmenu the ‘SETUP’ indicator will continuously flash.Note: The audio output is muted while in the Setup Menu. IRcommands and RS232 communication is also disabled in thesetup menu.Rotating the encoder in the setup menu shows the 8possible selections including: Info, Balanced Input Level,Unbalanced Input Level, Auto Input Attenuate, On SignalLevel, IR Direct, Lockup and Exit. Each is described indetail below.If no action occurs in the setup menu for 2 minutes thesystem will automatically exit back to the main menu,turn off the display and un-mute the audio.InfoThe INFO function shows a scrolling message of the currentHardware and Firmware revisions in case technical assistanceis required.Balanced Input LevelThe BA LVL function allows for a custom selection of themaximum expected balanced input level. This level functionoptimizes signal to noise and prevents input overload. Therange is 1Vrms to 18Vmrs in 1V steps. It is advised to readthe owners <strong>manual</strong> of the source electronics to determinethe best setting or consult a professional.Alternatively the ‘Auto Attenuate’ feature, described laterin this section, will decrease the balanced input gain toprevent overload when activated.Unbalanced Input LevelThe UN LVL function allows for a custom selection of themaximum expected unbalanced input level. This levelfunction optimizes signal to noise and prevents inputoverload. The range is 0.5Vrms to 9Vrms in 0.5V steps. It isadvised to read the owners <strong>manual</strong> of the source electronicsto determine the best setting or consult a professional.Alternatively the ‘Auto Attenuate’ feature, described laterin this section, will decrease the unbalanced input gain toprevent overload when activated.Note: The maximum input level is a summation of both leftand right unbalanced inputs.163535 Arrowhead Drive · Carson City, NV 89706775-884-1900 ph · 775-884-1276 fx · www.bgcorp.com · sales@bgcorp.com
Amplifier OperationAuto Attenuate Input LevelThe AutoAt function allows the system to automaticallyattenuate the current input gain to prevent input overload.This feature works on both the Balanced and Unbalancedinputs independently. The system operates by detectingan overload condition on the input signal and attenuatesin single steps until the overload is cleared. The step size isequivalent to the information provided in the previous twosections on input level adjustments.Auto Attenuate is simply an automated way of adjustingthe UN LVL and BA LVL but only as an atenuator.Note: This function does not perform auto ranging but onlyprevents overload.The total time to clear an input overload condition isdependant on the input signal and the severity ofthe overload.On Signal Level ThresholdThe ON SIG function allows the user to select the preferredaudio wake signal threshold from low, medium and highpossibilities. The three settings are described below.Low has a wake sensitivity of 25mV to 50mV (rms)Med has a wake sensitivity of 50mV to 100mV (rms)Hig has a wake sensitivity of 100mV to 200mV (rms)IR DirectThe IR DIR function allows the user to select the source ofthe IR Commands from either the front remote control orthe IR Direct electrical connection on the rear panel.IRD on = IR Direct is active and front remote controlis deactivatedIRDoff = IR Direct is deactivated and front remote controlis activeNote: This feature is a wideband sensing of the input signal thatgoes well beyond the frequency range of the subwoofer output.3535 Arrowhead Drive · Carson City, NV 89706775-884-1900 ph · 775-884-1276 fx · www.bgcorp.com · sales@bgcorp.com17
Remote ControlIR Remote ControlThe separate IR remote controls only the basic system functionsincluding: Power On, Power Off, Music Mode, MovieMode, Level Up (+) and Level Down (-)Most of these functions are self explanatory and weredescribed in previous sections. The level (+) and level (-) remotebuttons adjust the volume by 1dB per press. Holdingdown the level buttons will continuously adjust the volumeuntil released or the min/max positions are reached.Note: If the rear panel mode trigger is active high, the mode settingcannot be changed via any method until this input goeslow. The message ‘External Control’ will scroll across the displayif an attempt is made to change the mode setting.Note: If the rear panel power trigger is active high, the powerstate cannot be changed via any method until this input goeslow. The message ‘External Control’ will scroll across the displayif an attempt is made to change the power setting.Note: While in the Setup menu the IR remote control and therear panel IR direct connection are disabled.IR Direct ControlThe IR Direct rear panel connection performs exactlythe same functions as described above in the IR RemoteControl section except it utilizes the rear panel electricalconnection.Mode Trigger ControlA logic high (with the specified range) will activate Moviemode level setting. While a high level is present on themode trigger connection the system will remain in Moviemode indefinitely until removed.A high to low transition on the mode trigger connectionwill activate Music mode. A continuous low state (or nocable attached) allows the other mode change methods totake control as needed.Fig.12 Remote control functions<strong>BG</strong>A-1204 amplifier remote control with function buttons.Power Trigger ControlA logic high (within the specified range) will turn on thesystem if it was previously off. While a high level is presenton the power trigger connection the system will remain onindefinitely until removed.A high to low transition on the power trigger connectionwill turn off the system. A continuous low state (or no cableattached) allows the other power change methods to takecontrol as needed.3535 Arrowhead Drive · Carson City, NV 89706775-884-1900 ph · 775-884-1276 fx · www.bgcorp.com · sales@bgcorp.com19
Amplifier ProtectionSystem ProtectionThe system incorporates several protection schemes toprevent component/system failure including: Short Circuit,Thermal Overload and Limiters. During the former twoprotection schemes the display will indicate an error oneach of the speaker output pairs.If any of the protection schemes engage regarding speakeroutput 1 or 2 the message ‘OUT1 P’ will display. If any of theprotection schemes engage regarding speaker output 3 or4 the message ‘OUT3 P’ will display.If protection engages on both speaker outputs the message‘O1&3 P’ will display.\Short Circuit ProtectionEach speaker output connector can withstand a continuousshorted condition without permanent failure. However it isnot advised to short the system for any reason.Note: The amplifier/s will heat during a prolonged short circuitstate and eventually activate the fan.Under extreme conditions including high ambienttemperatures or inadequate ventilation, the amplifier/s canshutdown briefly until the internal temperature decreases.If shutdown occurs check for proper ventilation especiallyat the rear mounted fan and the top cover holes.Note: The amplifiers have individual thermal shutdown controlstherefore only one amp may shut down at a given time.LimitersThe system incorporates internal limiters to protect theamplifier and speaker from signal overloads on high peaksand long term high outputs. The operation is transparent tothe user and is not adjustable.Thermal Overload ProtectionThe thermal overload protection has two states where therear mounted fan operates under normal circumstancesand the amplifiers shut down individually under extremeconditions.During normal operation the fan provides more thanadequate cooling for prolonged high output levels. Thefan activates if the internal temperature rises above apredetermined point and typically operates for severalminutes cooling the system well below the trip point toprevent rapid on/off cycling.203535 Arrowhead Drive · Carson City, NV 89706775-884-1900 ph · 775-884-1276 fx · www.bgcorp.com · sales@bgcorp.com
Serial ControlRS232 Communication(Home Automation Control)The RS232 port, located on the back of the unit, allowsfor a home automation system to remotely activate someof the basic functions and read back the settings. Theautomation scheme operates with host communication viaa PC, Crestron or any other device that can be programmedto send and receive standard UART data.The port requires the following settings to establishcommunication:• 38400baud (38.4K)• 8-bits no parity• 1 stop bitCommunication follows a simple protocol for sendingcommands and receiving back a response. All commandshave a response to verify the command was indeedreceived but can be ignored if not required. The typicalresponse is the same command sequence followed by thedata value intended.Throughout this section TX refers to the host transmittingdata (sending commands) and RX refers to the datareceived by the host (Subwoofer Amplifier sends a response).All values are listed as 8-bit hexadecimal with notation as0x0A = 0A in hexadecimal.The following sequence describes the communicationstructure:SOP = Start of packet indicator (0x0F and also acontrol character)COMMAND = 5 basic commands are availableDATA = Data value to be processedCHKSUM = Calculated checksum of all bytes exceptcontrol characters(DATA + CHKSUM = 0x0, 0x100, 0x200 etcdefined as the lower single byte)EOP = End of packet indicator (0x04 and also acontrol character)The 5 basic commands available are listed below:A0 = Power Change (Turn system ON or OFF)A1 = Mode Change (Activate Music or Movie Mode)A2 = Level Change (Adjust Level Up or Down in 1dB steps)A3 = Level Specific [Adjust level to a specific setting (-60dBto +7dB)]A4 = Status/Settings (Read current status and settings)3535 Arrowhead Drive · Carson City, NV 89706775-884-1900 ph · 775-884-1276 fx · www.bgcorp.com · sales@bgcorp.com21
Serial ControlMode Change (A1)The mode change command includes switching betweenthe Movie and Music modes.Movie ModeTX = 0F 0F A1 01 5E 04RX = 0F 0F A1 01 5E 04 (same as TX)The above sequence will activate Movie mode. If the systemis already in Movie mode then no system change will occur.The mode function indicator and the Movie setting will beshown even if the display was in its off state.Note: If the hardware mode trigger is currently at logic high(within the specified range) then the mode command will notperform any system change as it is under external hardwarecontrol. In this case RX is not sent and the system display scrollsthe message ‘RS232 Change Ignored’. It is advised to poll thesystem using the Status/Settings command to determine if theexternal mode trigger is active before attempting to changemodes. If the system is off this command is ignored.Music ModeTX = 0F 0F A1 00 5F 04RX = 0F 0F A1 00 5F 04 (same as TX)The above sequence will activate Music mode. If the systemis already in Music mode then no system change will occur.The mode function indicator and the Music setting will beshown even if the display was in its off state.Note: If the hardware mode trigger is currently at logic high(within the specified range) then the mode command will notperform any system change as it is under external hardwarecontrol. In this case RX is not sent and the system display scrollsthe message ‘RS232 Change Ignored’. It is advised to poll thesystem using the Status/Settings command to determine if theexternal mode trigger is active before attempting to changemodes. If the system is off this command is ignored.Level Change (A2)The level change command includes increasing and decreasingthe current level by 1dB.Level UpTX = 0F 0F A2 01 5D 04RX = 0F 0F A2 01 5D 04 (same as TX)The above sequence will increase the level by 1dB. Thelevel function indicator and the new level setting will beshown even if the display was in its off state.Note: If the level is at its maximum of +7dB then no systemchange will occur and RX is not sent. Polling the system usingthe Status/Settings command will indicate the current levelposition for each of the modes. If the system is off thiscommand is ignored.Level DownTX = 0F 0F A2 00 5E 04RX = 0F 0F A2 00 5E 04 (same as TX)The above sequence will decrease the level by 1dB. Thelevel function indicator and the new level setting will beshown even if the display was in its off state.Note: If the level is at its minimum of -60dB then no systemchange will occur and RX is not sent. Polling the system usingthe Status/Settings command will indicate the current levelposition for each of the modes. If the system is off thiscommand is ignored.3535 Arrowhead Drive · Carson City, NV 89706775-884-1900 ph · 775-884-1276 fx · www.bgcorp.com · sales@bgcorp.com23
Serial ControlLevel Specific Change (A3)The level specific change command allows instant selectionof any level in the range -60dB to +7dB. This command isequivalent to having an unlimited number of modes.TX = 0F 0F A3 (00 to 46) CHKSUM 04RX = 0F 0F A3 (00 to 46) CHKSUM 04 (same as TX)The level function indicator and the new level setting willbe shown even if the display was in its off state.Note: If the level is outside of the specified range then no systemchange will occur and RX is not sent. If the system is off thiscommand is ignored.BE ADVISED THAT THE LEVEL CHANGE CAN INSTANTLYSWITCH TO A VERY HIGH OUTPUT.Status/Settings (A4)The Status/Settings command provides all the necessarysystem information to aid in control via home automationsetups.TX = 0F 0F A4 00 5C 04RX = In DetailINPUT = 00 for Unbalanced, 01 for BalancedMODE = 00 for Movie, 01 for MusicMOVIELEVEL = 00 thru 43 where 00 = -60dB, 3C = 0dB and43 = +7dBMUSICLEVEL = 00 thru 43 where 00 = -60dB, 3C = 0dB and43 = +7dBCROSSOVER = 00 = 50Hz, 01 = 60Hz, 02 = 80Hz,03 = 100Hz, 04 = Bypass, 05 = THXPHASE = 00 for 0deg, 01 for 180degLOCKUP = 00 for Unlocked, 01 for LockedIRDIRECT = 00 for OFF, 01 for ONAUTOATTENUATE = 00 for OFF, 01 for ONONSIGNALTHRESHOLD = 00 for LOW, 01 for MED,02 for HIGHUNBALANCEDLEVEL = 00 for 0.5V, 01 for 1V, 02 for 1.5V,03 for 2V, 04 for 2.5V, 05 for 3V,06 for 3.5V, 07 for 4V, 08 for 4.5V,09 for 5V, 0A for 5.5V, 0B for 6V0C for 6.5V, 0D for 7VBALANCEDLEVEL = 00 for 1V, 01 for 2V, 02 for 3V, 03 for 4V,04 for 5V, 05 for 6V, 06 for 7V, 07 for 8V,08 for 9V, 09 for 10V, 0A for 11V, 0B for 12V,0C for 13V, 0D for 14V and 0E for 15V,0F for 16V, 10 for 17V and 11 for 18VPOWERTRIGGER = 00 for OFF, 01 for ONMODETRIGGER = 00 for OFF, 01 for ONPOWERSTATUS = 00 for OFF, 01 for ON243535 Arrowhead Drive · Carson City, NV 89706775-884-1900 ph · 775-884-1276 fx · www.bgcorp.com · sales@bgcorp.com
Notes3535 Arrowhead Drive · Carson City, NV 89706775-884-1900 ph · 775-884-1276 fx · www.bgcorp.com · sales@bgcorp.com25
Speakon ® Assembly Guide263535 Arrowhead Drive · Carson City, NV 89706775-884-1900 ph · 775-884-1276 fx · www.bgcorp.com · sales@bgcorp.com
WarrantyWarrantyAll <strong>BG</strong> loudspeaker systems are warranted to the original purchaser for life against defects in materials and manufacturewhen used in properly designed systems. The warranty is five years for the Z-Sub.Please record your loudspeaker’s information below for future reference.Model: ______________________________________________________________________________________Serial Number: ______________________________________________________________________________________Purchase Date: ______________________________________________________________________________________Authorized Dealer: ______________________________________________________________________________________As part of our policy of continual product improvement, <strong>BG</strong> reserves the right to change or discontinue any specificationsor parts associated with any of its products without advanced notice.Thank you again for choosing <strong>BG</strong> loudspeakers!3535 Arrowhead Drive · Carson City, NV 89706775-884-1900 ph · 775-884-1276 fx · www.bgcorp.com · sales@bgcorp.com27
The Power of Clarity3535 Arrowhead Drive · Carson City, NV 89706775-884-1900 ph · 775-884-1276 fx · www.bgcorp.com · sales@bgcorp.com