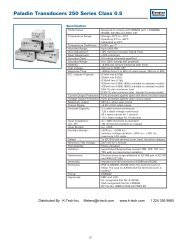
DI-50E Data Sheet - K - Tech, Inc.
DI-50E Data Sheet - K - Tech, Inc.
DI-50E Data Sheet - K - Tech, Inc.

Create successful ePaper yourself
Turn your PDF publications into a flip-book with our unique Google optimized e-Paper software.
Initial Setup Procedures[CodE_6] - Channel 4 FunctionsCode 6 is a single code thatcombines all the configurationand post processing functionsavailable for Channel 4.When a quad input signal conditioneris installed, the fourthinput signal is processed anddisplayed on CH4.Post processing and measurementtask functions for CH4 areconfigured in the 1st, 2nd, and3rd digits of Code 6. The diagramopposite lists the availableconfiguration selections inCode 6.CH4 POST PROCESSING0 Direct Display of Input (no processing)1 Square Root of Channel 42 Inverse of Channel 43 4 kB Meters32-point Linearization of CH4 usingTable 132 kB Meters32-point Linearization of CH4 usingTable 4Note:All linearization tables are set upin the Calibration Mode [24X].Example Procedure:Configure CH4 for a direct display of voltage input bysetting Code 6 to [01X].FIRST <strong>DI</strong>GIT SECOND <strong>DI</strong>GIT THIRD <strong>DI</strong>GITCODE 6 – CHANNEL 4 FUNCTIONSMEASUREMENT TASK0 No Function1 Voltage / Current2 TC (3rd digit selects type ofTC). See Note 73 RTD (3rd digit selects type ofRTD). See Note 74 Real Time Clock and Timer (3rddigit selects type)5 -6 -7 Smart Input Module (3rd digitselects register)Note 7:For future development.FOR THERMOCOUPLE0 Type J1 Type K2 Type R3 Type S4 Type T5 Type B6 Type N7 Select user defined linearizationtable (Table 1) set up in CAL [24X]FOR RTD TYPE (2-, 3-, 4- WIRE)0 Resistance1 RTD 3852 RTD 3923 RTD 1204 Cn 10FOR REAL-TIME CLOCK & TIMER0 HRS:MIN:SEC1 HRS:MIN2 -3 -4 1 Second Count UP Timer5 1 Second Count DOWN Timer6 -7 -See I-Series Input Modules Guide (Z87) for proceduresto set up a quad input module.STARART T HERECONFIGURECH4 FUNCTIONSStep 1Enter Brightness ModePressat sametimeOperational DisplayProg. SP1 SP2 SP3 SP4 SP5 SP6Pressat sametimeFOR SMART INPUT MODULE0 Output Register 11 Output Register 22 Output Register 33 Output Register 44 Output Register 55 Output Register 66 Output Register 77 Smart Input Module Register 3Code SetupPress PUse the buttons to set therequired smart input module code(0 to 377). See I-Series InputModule Guide (Z87) for codedetails.Prog. SP1 SP2 SP3 SP4 SP5 SP6Step 2Pass Brightness Mode,Calibration Mode, andCodes 1 to 5 and enterCode 6Press7Prog. SP1 SP2 SP3 SP4 SP5 SP6From Step 4Prog. SP1 SP2 SP3 SP4 SP5 SP6Prog. SP1 SP2 SP3 SP4 SP5 SP6Step 3Set Code 6 to [01X]:1st Digit = 0 Selects direct display of input2nd Digit = 1 Selects voltage, current3rd Digit = X Not relevantProg. SP1 SP2 SP3 SP4 SP5 SP6ORStep 5Exit Code 7. Return toOperational Display Pressat sametimeProg. SP1 SP2 SP3 SP4 SP5 SP6Pressat sametimeStep 4Save CH4 settingPress1Prog. SP1 SP2 SP3 SP4 SP5 SP6XProg. SP1 SP2 SP3 SP4 SP5 SP6Operational Display21 June, 2004 <strong>DI</strong>-50 320 Series (NZ300) Texmate, <strong>Inc</strong>. Tel. (760) 598-9899 • www.texmate.comPage 35