DATA BOOK - BVT Partners OÃ
DATA BOOK - BVT Partners OÃ
DATA BOOK - BVT Partners OÃ
You also want an ePaper? Increase the reach of your titles
YUMPU automatically turns print PDFs into web optimized ePapers that Google loves.
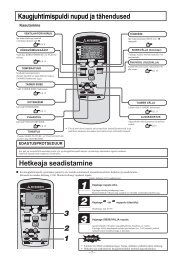
'11 • SCM-DB-1094 Remotecontroller(B) Control plural indoor units with one remote controllerUp to 16 indoor units can be connected.Installation of the controller holder1Connect the XY terminal with 2-core wire.As for the size, refer to the following note.Restrictions on the thickness and length of wire(Maximun total extension 600m.)Caution2For Packaged air conditioner series, set the StandardWithin 100m x 0.3 mm 2Within 200m x 0.5 mmDO NOT install it on the following placesindoor unit address with SW2 on the indoorHolder forWithin 300m x 0.75mm 21) Places exposed to direct sunlightremoteunit PCB from [0] to [F] so as not to duplicate.Within 400m x 1.25mm 22) Places near heat devicescontrollerWithin 600m x 2.0 mm 23) High humidity places4) Hot surface or cold surface enough to generateTerminal blockcondensation5) Places exposed to oil mist or steam directlyWood screw6) Uneven surfaceIndoor unit (1)Indoor unit (2)Indoor unit (16)Address (0)Address (1)Address (F)Installation tips for the remote controller holderKIT• Adjust and keep the holder upright.• Tighten the screw to the end to avoid scratchingthe remote controller.Remote controller• DO NOT attach the holder to plaster wall.How to insert batteries1 Detach the back lid.3For VRF series, set the indoor unit address with SW1, SW2 and SW5-2 on theindoor unit PCB from [000] to [127] so as not to duplicate.2 Insert the batteries. (two AAA batteries)3 Reattach the back lid.(C) Master/Slave setting when using plural remote controllerUp to two receivers can be installed in one indoor unit group.Switch Setting Function5 Cooling test run operationIndoor unitRemote controller lineON MasterSW1-2●After safety con rmation, turn on the power.(Non-polarized)OFF Slave●Transmit a cooling operation command with wireless remote controller, while the backupbutton on the receiver is pressed.●If the backup button on the receiver is pressed during a test run, it will end the test run.●If you cannot operate the unit properly during a test run, please check by consulting withinspection guides on the wiring diagram of outdoor units.RCN-KITSW1[Master]RCN-KITSW1[Slave](D) Change setting of auto mode operationBack-up buttonAuto mode operation is prohibited to be selected for KX models (except for KXRmodels).Therefore be sure to change setting of remote controller to disable the auto modeoperation for these models according to the following procedure.While pressing the MODE button, press the ACL switch, or while pressing theMODE button, insert the batteries to the remote controller. Then the auto modecan be invalid.AttentionWhen the batteries are removed, it is returned to initial setting (Auto modeON/CHECK MODEbecomes valid).OFFCHECKAccordingly when replacing the batteries, be sure to perform the above operationonce again.FILTER TIMER RUN/CHECK CHECK(E) Change setting of fan speedWhile pressing the FAN SPEED button, press the ACL switch, or while pressingthe FAN SPEED button, insert the batteries to the remote controller. Then thefan speed can be changed from 2-speed setting to 3-speed setting.When changing fan speed setting of remote controller, be sure to perform the same6 Setting of wireless remote controller and receiverfan speed setting as that of the indoor unit model to be used.AttentionWhen the batteries are removed, it is returned to initial setting (Fan speed setting(A) Methods of avoiding the malfunction due to the mixed communicationis 2-speed).Do both procedures 1 and 2.This setting is to avoid the mixed communication with other household electricAccordingly when replacing the batteries, be sure to perform the above operationonce again.appliances or the mixed communication when two receivers are located closely.1Setting change of the wireless remote controllerPressing ACL and AIRFLOW button at the same time or inserting the batterieswith pressing AIRFLOW button will customize the signal.Note *When the batteries are removed, the setting will return to the default setting.Make sure to reset it when the batteries are replaced.2Setting the PCB of the receiverTurn SW1-1 off. ●Wireless remote controller ●PCB of the receiverSetting toavoid mixedcommunication.SW1-1(Customized signalSW1-4(Auto restart)setting to avoidmixed communication)SW1-2(Receiver master/slavesetting)SW1-1Customized signal setting to ON : Normalavoid mixed communication OFF : RemoteSW1-2 Receiver master/slave settingON : MasterOFF : SlaveSW1-4 Auto restartON : ValidOFF : Invalid: Default setting


