
Create successful ePaper yourself
Turn your PDF publications into a flip-book with our unique Google optimized e-Paper software.
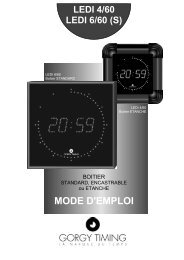
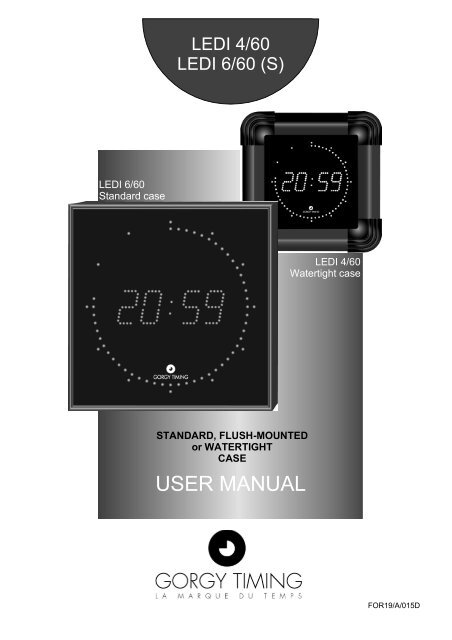
LEDI 4/60LEDI 6/60 (S)LEDI 6/60Standard caseLEDI 4/60Watertight caseSTANDARD, FLUSH-MOUNTEDor WATERTIGHTCASE<strong>USER</strong> <strong>MANUAL</strong>FOR19/A/015D
LEDI 4/60 – LEDI 6/603.2 - STANDARD and WATERTIGHT cases3.2.1 - Impulse or AFNOR code receiverIn the case of a polarised impulse or AFNOR NFS 87-500 code receiver clock, connect the impulse or code inputto terminal B1 and connect this to the bottom. The clock will then be automatically converted from autonomous toreceiver version.3.2.2 - Radio-synchronised versionIn the case of a radio-synchronised clock, connect the antenna to terminal B1.It may be necessary to carry out the initial setting manually (in the event of a disturbance in the radio signal ormomentary break-down of the DCF transmitter). In this case, proceed in the same way as for an autonomousclock (see section 4 - Setting).4 - SETTING (fig. 4)The time is set by using the "+", "-" and "PROG" keys at the back of the clock (in the case of the watertight cases,slightly loosen the knurled knob and open the access flap).Each time the "PROG" key is pressed, a different part of the display begins to flash. This is then modified by usingthe "+" and "-" keys. The figures can be advanced quickly by pressing continuously on these keys.The setting cycle is as follows:1 adjustment of time display time (from 1 to 9 seconds)2 adjustment of temperature display time (from 1 to 9 seconds)3 adjustment of hours4 adjustment of minutesSYNCHRONISATIONIf the minutes have not been modified, one press on "PROG" will validate the new time setting withoutmodifying the initial synchronisation (e.g. modification of time/temperature alternation or seasonal changeover forautonomous clocks).If the minutes have been modified, one press on the "PROG" key will make the entire display flash,indicating that the clock is in synchronisation phase. A second press on "PROG" will enable the clock to besynchronised (this should be done on a time signal given by a reference clock, e.g. the speaking clock). Thedisplay will then stop flashing.REMARKS- The first two cycles (time/temperature alternation) only apply in the case of a clock with the temperature displayoption. On initialisation, the default duration for the time display is 4 seconds and that for the temperature display2 seconds.- All setting phases are limited to 30 seconds, except the synchronisation phase, which can only be terminated bypressing on the "PROG" key.5 - BRIGHTNESS CONTROLThe brightness is adjusted by pressing on the "+" and "-" keys when not in the setting cycle.Alternatively, a light-dependent resistor may be built into the clock to ensure automatic brightness control inaccordance with the ambient lighting.5/8
LEDI 4/60 – LEDI 6/606 - OPTIONS6.1 - HOURLY PIP OUTPUTSWith this option, any of the following may be obtained on terminal B4:- 4 pips, each lasting 200 ms, delivered on the hour:1st pip: 59 min 57 sec2nd pip:59 min 58 sec3rd pip: 59 min 59 sec4th pip: 00 min 00 sec- a one-second pip every 12 hours- a 0.5-second pip on the second- a one-second pip on the minute- a one-second pip on the hour- a one-second pip every 24 hours- a one-second pip on the quarter hour- an end-of-timer contact (when the timer function reaches 0 in count-down mode).Two types of output are offered for these time signals:Dry-contact output- output via a relay, with contact closing on each time signal,- characteristics of relay to be used: cut-off capability.Open-collector outputUmax: 60 V Imax: 50 MaIn case of an open-collector output, the ground is connected to 1.6.2 - 12-HOUR OPTIONThis version has the same characteristics as the standard version, except that the display goes from 01h00 to12h59 (the timer format remains in 24-hour mode).6.3 - THERMOMETER OPTIONThe temperature transducer is supplied with a 4 metre cable, which may be extended up to a maximum of 25metres. Accuracy is to within ±0.4°C.In the event of an indoor temperature being displayed, the transducer must be placed between 1.5 and 2 m aboveground and as far as possible from any heat source.In the event of an outdoor temperature being displayed, the transducer must be placed under cover, in aventilated area, to avoid any effect from direct sunlight. Greenhouse effects should also be avoided.6.4 - ASCII RS232 OR RS422 OPTIONWiring the terminal B3 :ASCII RS232C link on terminal B3 ASCII RS422/485 link on terminal B31: GND 1: E/S -2: TXD 2: E/S+3: RXD 3: GND6/8
LEDI 4/60 – LEDI 6/60This option operates in three modes:6.4.1 – Unidirectional mode6.4.11 - TransmitterIn this mode, the clock transmits a code (configuration 2400 bauds, 8-bit format, even parity, 1 stop bit) which hastwo parts:1- time information in the form:STX day of week SP day of month/month/year SP SP hour:minute:second CR2 - status information (timer, temperature, brightness, etc.).The first part of the information sequence serves, for example, to synchronise a computer (in this case the secondpart is not taken into account).The complete information sequence is used to control another clock.6.4.12 - ReceiverIn this mode, the clock works autonomously but is set with respect to the ASCII code that it receives(configuration 2400 bauds, 8-bit format, even parity, 1 stop bit).This ASCII code may be:- time information in the form:STX day of week SP day of month/month/year SP SP hour:minute:second CRgenerated either by the RT3000 or RADIO TIMING ASCII or any other ASCII code generator,- information from another clock of the same type working in transmitter mode; in this case, the clock iscompletely slaved to the other.6.4.2 - Two-directional modeIn this mode the ASCII coded time message is transmitted after reception of a recognition character ("D")(configuration 2400 bauds, 8-bit format, even parity, 1 stop bit).Message transmitted:STX hundredth of second SP day of week SP day of month/month/year SP SP hour:minute:second CRe.g. 76 FRI 03/02/90 15:14:45which means that the second corresponding to this message is 76 hundredths of a second over when thecharacter "D" is received.N.B.: - In the case of the LEDI 4/60 or LEDI 6/60 (indicating only hour and minute information), the dateinformation is replaced by zeros and the day of the week in alphanumeric characters by three spaces. However,if this clock is an AFNOR NFS 87-500 receiver or is radio-synchronised, the date information is generated.If there is a mains cut, the display goes out but the clock continues to run on its internal battery (the hour pips andASCII output are no longer generated).- For ASCII code receiver clocks, if the incoming message is not in the correct configuration, it may benecessary to set the clock manually. As soon as the ASCII message is received, the clock compensates for anydifference with the reference time.7/8
LEDI 4/60 – LEDI 6/60ISOLATE BEFORE REMOVE COVERWARNINGGORGY TIMING RC 74 B 38 Registered trademark and pattern All modifications reserved8/8