Manual drilling series - Practica Foundation
Manual drilling series - Practica Foundation
Manual drilling series - Practica Foundation

You also want an ePaper? Increase the reach of your titles
YUMPU automatically turns print PDFs into web optimized ePapers that Google loves.
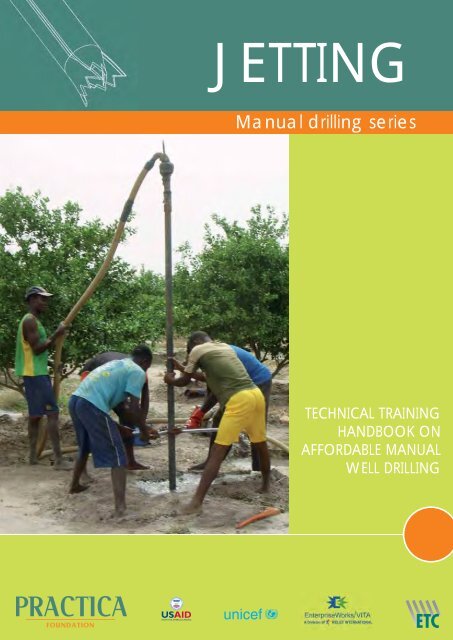
JETTING<strong>Manual</strong> <strong>drilling</strong> <strong>series</strong>TECHNICAL TRAININGHANDBOOK ONAFFORDABLE MANUALWELL DRILLING
<strong>Manual</strong> <strong>drilling</strong> <strong>series</strong>JETTINGTECHNICAL TRAINING HANDBOOK ONAFFORDABLE MANUAL WELL DRILLINGPublished by the PRACTICA <strong>Foundation</strong>Author – Robert VuikCo-author – Arjen van der WalPeer reading – Richard CansdaleStructural support – Melanie StallenTechnical drawings & photos – Don de Koning, Robert VuikFrench translation – Julien LabasIllustrations – Ron Offerman/TekenteamLayout – Marijke Kreikamp/4colour designJune 2010PRACTICA <strong>Foundation</strong> develops and disseminates low-cost appropriate technology in water and renewable energy indeveloping countries. We focus on technology that responds to local cultural contexts, can be locally produced andmaintained, and supports existing markets.PRACTICA foundationOosteind 47 - NL-3356 AB Papendrecht - The Netherlands(t) +31(0)786150125info@practicafoundation.nlwww.practicafoundation.nlPRACTICA <strong>Foundation</strong> - <strong>Manual</strong> <strong>drilling</strong> <strong>series</strong>
DisclaimerThis manual is free of charge. Any parts of this instructionmanual, including the illustrations and technical drawingsmay be copied to meet local needs, without permissionfrom the author or publisher, provided the parts aredistributed free, not for profit and reference to thesource is made. The author would appreciate receivingnotice and a copy of any materials in which original textor pictures have been used. For any reproduction withcommercial ends, written permission must be obtained inadvance from the PRACTICA <strong>Foundation</strong>.This instruction manual is available in English and in Frenchand has been developed for use in technical trainingcourses organised for the intended users. In case you wantto organize such training, you may contact the PRACTICA<strong>Foundation</strong> for further information and support.This publication was made possible by a financialcontribution from the United States Agency for InternationalDevelopment (USAID) as part of the West Africa WaterInitiative (WAWI).The United Nations International Children’s Fund(UNICEF), PRACTICA <strong>Foundation</strong> and EnterpriseWorks/Vita have developed a toolkit for Africancountries wishing to embark on the professionalizationof manual <strong>drilling</strong>. This toolkit includes TechnicalNotes, Technical <strong>Manual</strong>s including this publication,Advocacy Materials, Mapping of suitable areas formanual <strong>drilling</strong>, Case Studies, and Implementation andTraining <strong>Manual</strong>s. This initiative builds the capacity ofthe local private sector in order to respond to the everincreasing demand for safe water in rural areas.The Technical Training Program (TTP) of the ETC <strong>Foundation</strong>contributed with structural support in the educationalaspects of this manual.While every care has been taken to ensure accuracy ofthe information given in this manual, neither the publisher(s)nor the author(s) can be held responsible for any damageresulting from the application of the described methods.Any liability in this respect is excluded.Note to those considering translation or modification; before beginning any translation or modification and in order toavoid duplication of efforts and unintended mistakes, please contact the PRACTICA <strong>Foundation</strong>. This document or parts of thisdocument may not be copied or published under a new name or author without permission from PRACTICA <strong>Foundation</strong>.PRACTICA <strong>Foundation</strong> - <strong>Manual</strong> <strong>drilling</strong> <strong>series</strong>
ForewordThe high cost of developing potable water sources preventsmany rural people from gaining access to clean, safe watersupplies. Increasing access to improved water supply forunder-served people and communities while keeping upwith growing populations will require serious considerationof lower cost alternatives to the existing expensive watersupply options. The manual <strong>drilling</strong> sector has provenitself as a successful, lower-cost approach with greatpotential under suitable conditions. In numerous countriesmanual <strong>drilling</strong> techniques are used as an alternative or tocomplement machine <strong>drilling</strong>. Drilling ‘shallow’ water wellsby hand using local enterprises, can reduce the cost ofa well by a factor 4 - 10 compared to a machine-drilledborehole. This cost reduction not only enables NGOsand Governments to construct more water points, but also‘opens the door’ to villagers, farmers, schools and smallcommunities to finance well construction independentlythrough the private sector. Strategies and programs shouldbe adopted to professionalize the manual <strong>drilling</strong> sectorin order to scale-up rural water supply for drinking andirrigation purposes.Variations of four manual <strong>drilling</strong> technologies are beingused, each with their own advantages, disadvantages andsuitability for different geological conditions. This handbookdescribes the practical aspects of the <strong>drilling</strong> techniqueJetting and is part of a <strong>series</strong> of 5 handbooks providing thebasis for local entrepreneurs to start practicing affordablewell <strong>drilling</strong>.We suggest that this <strong>drilling</strong> handbook is used in combinationwith the manual: ‘Understanding Groundwater & Wellsin manual <strong>drilling</strong>’.READERSHIPThis handbook can be used as a guide during training sessions for well drillers, local trainers and quality controllers. It alsoserves as a reference for <strong>drilling</strong> supervisors, NGOs, development agencies, manual <strong>drilling</strong> teams and enterprises during theentire <strong>drilling</strong> process. The handbook consists of three sections that can be read together, or used and printed separatelyfor the various target groups.NOTETechnical terms and the way in which subjects are explained are based on the average expected educational level ofthe intended users. Sometimes, the use of complicated geological and technical terms has been avoided to create betterunderstanding. Please keep in mind that the objective of the handbook is to create better understanding of well <strong>drilling</strong> inpractice, aimed at technical workers of manual <strong>drilling</strong> teams who may have a limited educational background.PRACTICA <strong>Foundation</strong> - <strong>Manual</strong> <strong>drilling</strong> <strong>series</strong>
ColophonAVAILABLE MANUALS IN THIS SERIES:Technical training handbooks on affordable manual well <strong>drilling</strong>.These practical handbooks create awareness of manual <strong>drilling</strong> for affordable water supply and a roadmap for implementationof manual <strong>drilling</strong> programs. The manuals provide an extensive and detailed guide for trainers and <strong>drilling</strong> teams in the useof various <strong>drilling</strong> techniques for making affordable boreholes. The techniques are explained in simple and understandablelanguage, using clear illustrations and drawings.JETTING<strong>Manual</strong> <strong>drilling</strong> <strong>series</strong>TECHNICAL TRAININGHANDBOOK ONAFFORDABLE MANUALWELL DRILLING1. <strong>Manual</strong> <strong>drilling</strong> <strong>series</strong>: JETTINGThis handbook describes in detail the various jetting techniques that can be used to drill wells inloose and soft soil formations. With this technique, wells are drilled in a number of hours ratherthan days.PERCUSSION<strong>Manual</strong> <strong>drilling</strong> <strong>series</strong>TECHNICAL TRAININGHANDBOOK ONAFFORDABLE MANUALWELL DRILLING2. <strong>Manual</strong> <strong>drilling</strong> <strong>series</strong>: PERCUSSIONThis handbook describes in detail the percussion technique. Although the technique is slowerthan other <strong>drilling</strong> techniques, it is the only manual <strong>drilling</strong> technique that is able to drill throughconsolidated rock layers.AUGERING<strong>Manual</strong> <strong>drilling</strong> <strong>series</strong>TECHNICAL TRAININGHANDBOOK ONAFFORDABLE MANUALWELL DRILLING3. <strong>Manual</strong> <strong>drilling</strong> <strong>series</strong>: HAND AUGERThis handbook describes the hand auger technique. This cheap and effective technique is verysuitable for sinking shallow wells in soft soils and is excellent for soil surveys. Many <strong>drilling</strong> teamshave this technique in their toolkit to complement other <strong>drilling</strong> techniques.SLUDGING<strong>Manual</strong> <strong>drilling</strong> <strong>series</strong>TECHNICAL TRAININGHANDBOOK ONAFFORDABLE MANUALWELL DRILLING4. <strong>Manual</strong> <strong>drilling</strong> <strong>series</strong>: SLUDGINGThis handbook describes the sludging technique, and in greater detail the ROTA-sludge technique.It is a combination of sludging and percussion and is particularly useful due to its versatileapplication for a range of soil formations.UNDERSTANDINGGROUNDWATER & WELLSin manual <strong>drilling</strong>INSTRUCTIONHANDBOOKfor manual <strong>drilling</strong>teams onhydro-geologyfor well <strong>drilling</strong>,well installation andwell development5. <strong>Manual</strong>: ‘Understanding Groundwater and Wells in manual <strong>drilling</strong>’The manual ‘Understanding Groundwater & Wells in manual <strong>drilling</strong>’ complements the 4 technicaltraining handbooks and highlights those essential subjects which are relevant to manual <strong>drilling</strong>,geo-hydrology, hygiene, well installation and well development in practice, in simple andunderstandable language.PRACTICA <strong>Foundation</strong> - <strong>Manual</strong> <strong>drilling</strong> <strong>series</strong>
Table of contentsModule 11. What is manual <strong>drilling</strong>2. Choices: the 4 manual <strong>drilling</strong>techniques3. What organizations must know4. Getting started2368THE CONTEXT OFMANUAL DRILLINGThis module creates awareness on manual <strong>drilling</strong> andprovides a road-map for implementation. It is meant forNGO’s, governments and implementing organisationsand those interested in using manual <strong>drilling</strong> foraffordable water supply.Module 21. What is jetting2. What <strong>drilling</strong> teams must know3. What to bring: tools & materials4. How to drill a borehole5. Specific situations and common pitfalls!6. Rapid well jetting121517193335USING THE JETTINGTECHNIQUEModule 2 describes the <strong>drilling</strong> technique in detail andincludes: how the technique works and where it is canbe used. This module is a step-by-step explanation thatmakes use of cartoons to illustrate the <strong>drilling</strong> process.This module is designed to be used by technical trainersand as a reference for manual <strong>drilling</strong> teams.Module 3MAKING THE DRILLINGEQUIPMENT1. What to buy2. Tips for construction3. Technical drawingsModule 3 is meant for local workshops that want tofabricate <strong>drilling</strong> equipment. It consists of a packageof technical drawings, tips for construction and a list ofmaterials that are necessary to make a complete set of<strong>drilling</strong> equipment.424345PRACTICA <strong>Foundation</strong> - <strong>Manual</strong> <strong>drilling</strong> <strong>series</strong>
PRACTICA <strong>Foundation</strong> - <strong>Manual</strong> <strong>drilling</strong> <strong>series</strong>
JETTINGModule 1THE CONTEXT OF MANUAL DRILLING
JETTING - Module 1 - The context of manual <strong>drilling</strong>1. WHAT IS MANUAL DRILLINGAffordable water<strong>Manual</strong>ly drilled wells for water supply are more affordable than machine drilled wells and more productive than hand dugwells, thereby providing access to improved sustainable water points at a lower cost. This module describes the context inwhich manual <strong>drilling</strong> is used in various countries and elaborates on the techniques and its implementation. It gives insights andcreates awareness and is meant for NGO’s, governments, implementing organisations and those interested in using manual<strong>drilling</strong> for affordable water supply. This module might also be interesting for the manual <strong>drilling</strong> teams themselves, especiallyonce they have gained more field experience in well <strong>drilling</strong>.<strong>Manual</strong> <strong>drilling</strong> is a practical and affordable solutionfor wells less than 40 meters deep in alluvial soils (loosematerial, such as clay and sand) and soft weathered rockformations (such as soft sand stone and lime stone). Thereare many areas around the world where it can effectivelyprovide water for drinking and for irrigation to un-servedrural populations at a fraction of the cost of conventional<strong>drilling</strong>. This is especially true in small isolated communitiesthat will never benefit from the large donor funded <strong>drilling</strong>programs because they are often not included in nationalplans.WHY MANUAL DRILLING?• Cost savings: 4-10 times cheaper than a machine drilledwell of the same depth.• Better access to <strong>drilling</strong> sites with lightweight equipment,remote communities can now be reached.• Locally manufactured <strong>drilling</strong> equipment, under € 2,000initial investment for start-ups.• Ready-to-go in emergency situations and in politicallyunstable countries.• It creates jobs and knowledge remains in the country,even after donor projects are finished.• Overcomes problems in water quality and quantity incomparison with hand-dug wells.• Can be used for both drinking water and irrigation.The cost of wells vary among countries and will generallybe in the range of € 5000 – 15000 for a 30-meter deepmachine drilled well and € 2500 - € 8000 for a lined handdug well. In many countries manual <strong>drilling</strong> techniques areused as an alternative.Costs of 30 meter deep manually drilled wells vary fromabout € 100 - 2500, depending on geology, country andapplication (i.e. small scale irrigation to high qualitycommunity wells for potable water). The equipment formanual <strong>drilling</strong> can be locally manufactured, transportedand maintained.Machine drilled wells are high in quality, but also veryexpensive. Hand dug wells are lower in cost and veryuseful in formations with a low permeability due to theircapacity to store water which seeps in through well wallsovernight. However, the total yield/day may be low, andwater quality may be poor because the water comesfrom an open source allowing pollutants to enter easily.Hand dug wells also often collapse if not properly lined. Ahand dug well lined with concrete rings, preventing it fromcollapsing, has a high yield, but the price will come close tothat of a machine drilled well.2PRACTICA <strong>Foundation</strong> - <strong>Manual</strong> <strong>drilling</strong> <strong>series</strong>
JETTING - Module 1 - The context of manual <strong>drilling</strong>2. CHOICES: THE 4 MANUAL DRILLING TECHNIQUESWhen a borehole is drilled, different types of geological formations (soil layers) can be encountered. To drill through thesediverse formations a range of different manual <strong>drilling</strong> techniques have been developed and are used around the world. Ineach case the <strong>drilling</strong> technique must (a) break or cut the formation, (b) remove the cut material (the soil) from the hole, and(c) if necessary provide support to the walls of the hole, to prevent collapse during <strong>drilling</strong>.Each <strong>drilling</strong> technique has been developed for either one or a range of specific formations (soil layers); therefore it may bepossible that combinations of different <strong>drilling</strong> techniques are used to drill a single borehole. All existing <strong>drilling</strong> techniquescan be divided into four main <strong>drilling</strong> principles: Hand Auger, <strong>Manual</strong> Percussion, Sludging and Jetting. Within these four main<strong>drilling</strong> principles, a wide range of variations have been developed in various countries.THE HAND AUGER consists of extendable steel rods,rotated by a handle. A number of different steel augers(drill bits) can be attached at the end of the drill rods. Theaugers are rotated into the ground until they are filled,then lifted out of the borehole to be emptied. Specializedaugers can be used for different formations (soil types).Above the water table, the borehole generally staysopen without the need for support. Below the water tablea temporary casing may be used to prevent boreholecollapsing. Drilling continues inside the temporary casingusing a bailer until the desired depth is reached. Thepermanent well casing is then installed and the temporarycasing must be removed. Augers can be used up to a depthof about 15-25 meters, depending on the geology.Geological application; suitable for unconsolidatedformations: Sand, silt & soft clay.MANUAL PERCUSSION uses a heavy cutting or hammeringbit attached to a rope or cable and is lowered in the openbore hole or inside a temporary casing. Usually a tripod isused to support the tools. By moving the rope or cable upand down, the cutting or hammering bit loosens the soil orconsolidated rock in the borehole, which is then extractedby using a bailer. Just as with hand augering, a temporarycasing of steel or plastic may be used to prevent thehole from collapsing. When the permanent well screenand casing are installed, this temporary casing has to beremoved. <strong>Manual</strong> percussion <strong>drilling</strong> is generally used upto depths of 25 meters.Geological application; suitable for unconsolidated andconsolidated formations: Sand, silt, stiff clays, sandstone,laterite, gravel layers and small stonesPRACTICA <strong>Foundation</strong> - <strong>Manual</strong> <strong>drilling</strong> <strong>series</strong> 3
JETTING - Module 1 - The context of manual <strong>drilling</strong>SLUDGING uses water circulation to bring the cuttingsup to the surface. The drill pipes are moved up and down.On the down stroke, the impact of the drill bit loosens thesoil and on the up stroke, the top of the pipe is closed byhand (or valve), drawing up the water through the pipeand transporting the cuttings to the surface. On the nextdown stroke, the hand (valve) opens the top of the pipeand the water squirts into a pit, in front of the well. In thispit, the cuttings separate from the water and settle out,while the water overflows from the pit back into the well.The borehole stays open by water pressure. Thickeners(additives) can be added to the water in order to preventhole collapse and reduce loss of working water (drillfluid). Sludging (with or without rotation) can be used upto depths of about 35 meters.Geological application; suitable for unconsolidatedformations: Sand, silt and clay. If rotated (including a drillbit) it may be possible to penetrate softer-consolidatedformations such as stiff clays, soft sandstone, and weatheredlaterite.JETTING is based on water circulation and water pressure.As opposed to sludging, water is pumped down the <strong>drilling</strong>pipes. The large volume of water has an erosive effectat the bottom and the ‘slurry’ (water and cuttings) aretransported up between the drill pipe and the boreholewall. A motor pump is used to achieve an adequate waterflow. The drill pipe may simply have an open end, or a drillbit can be added and partial or full rotation of the drillpipe can be used.Thickeners (additives) can be added to the water in orderto prevent hole collapse and reduce loss of working water(drill fluid). Jetting (with rotation) is generally used up todepths of 35-45 meters.Geological application; suitable for <strong>drilling</strong> in alluvialmaterial such as weakly cohesive sands, silts and thin layersof soft clay .4PRACTICA <strong>Foundation</strong> - <strong>Manual</strong> <strong>drilling</strong> <strong>series</strong>
JETTING - Module 1 - The context of manual <strong>drilling</strong>CHOICES FOR MANUAL DRILLING TECHNIQUESDrillingTechnique*Equipmentcost (€)Average <strong>drilling</strong> speed for 15m in different geological formations(days)**Weakcohesivesand, siltgravelSoft clayStiff clayformationsSoftconsolidatedformationsSoftweatheredrockUn-weatheredCrystallinebasement rock,e.g. graniteHand auger 200 - 600 1 1-22-4Percussion 300 -1200 2-3 2-33-4Rotary Jetting 800 - 1400 1 1-2LesseffectiveRota Sludging 600 - 1000 1-2 1-22-3Not suitableNot suitable Not suitable> 3 > 8 Not suitableNot suitable> 3 LesseffectiveNot suitable Not suitableNot suitableDrillingTechnique*Advantages Disadvantages Average <strong>drilling</strong>depth (m)Hand augerEasy to use abovegroundwater table.Use of the temporary casing if clay layersare penetrated is very limitedCheap equipmentIf a collapsing sand layer is encounteredbelow a clay layer (through which thetemporary casing could not penetrate), theborehole does not stay open15 - 25Percussion Drills hard formations Slow and high equipment costs 25Rotary Jetting Quick Lots of working water is needed at once 35 - 45Rota SludgingEasy to useApplicable in most softformationsHighly permeable layers (coarse gravel)causes loss of working water and cannotbe drilled35* Note: Drilling teams are keen on using a variety of <strong>drilling</strong> techniques to penetrate different geological formations.**Note: Many different soil layers may be encountered during the construction of one borehole. The information given inthe table is an indication of the <strong>drilling</strong> speed in one particular type of soil.PRACTICA <strong>Foundation</strong> - <strong>Manual</strong> <strong>drilling</strong> <strong>series</strong> 5
JETTING - Module 1 - The context of manual <strong>drilling</strong>3. WHAT ORGANIZATIONS MUST KNOWHOW TO IMPLEMENT MANUAL DRILLINGUsing manual <strong>drilling</strong> as implementing tool for affordablewater supply is possible for a wide range of qualitiesand scales. Before one can start the implementation of amanual <strong>drilling</strong> program there is a whole list of things to beconsidered. For example:• What is the required quality of the wells?• Who will pay for the construction of the water point?• Who will be the end user of the well (households,community, farmers, refugees in camps, etc)?• Are we <strong>drilling</strong> for potable water, irrigation water ormultiple use?• What is the number of wells that need to be drilled peryear?• Is there already an existing manual <strong>drilling</strong> sectorpresent and what is their capacity?• What is the need and scale for quality monitoring?• What is the size of the project area?• What is the hydro-geologic potential for manual<strong>drilling</strong> in the project area (type of soil and the depthof groundwater)?• What is a sustainable number of <strong>drilling</strong> teams needed(based on the demand)?• What is the relation between user density and hydrogeologyin the project areas (how many people can wereach with manual <strong>drilling</strong>)?• What are the objectives of the implementingorganization?• Etc.The answers to all these questions (and the objectivesfor scale and costs) provide the basis for making the rightchoice of the approach for training and implementation.A few examples:Figure 1. Range of implementation possibilitiesa) For the introduction of shallow irrigation wells thefollowing criteria are very important: The well has tobe affordable for the farmer (i.e. low cost materials andshallow), while the water quality is of less importance.A training program in this case will focus on <strong>drilling</strong>affordable wells, using low cost materials in areaswhere shallow groundwater exists and where farmershave access to markets to sell their vegetables. <strong>Manual</strong><strong>drilling</strong> enterprises will work directly with farmers.b) For a professional and sustainable water supply tolarge communities, the government and larger donorsare often involved. The most important criteria hereare: a very high quality of the well, high quality ofdrinking water (meeting all standards), sustainabilityof the well and sustainability of the whole <strong>drilling</strong>sector. A training program in this case will require amuch larger capacity building road map with its focuson professionalization of the <strong>drilling</strong> sector as a whole,involving technical training, quality control, businessskill training, social mobilization and social marketing.Making manual <strong>drilling</strong> enterprises ready to respond tolarge tenders and <strong>drilling</strong> high quality wells, generallythrough governments or donors.c) Multiple use of wells by households and small communitiesoften requires a mix of both previous options: the wellshould still be affordable (or partly subsidized), butalso have an acceptable water quality.Always realize that the purpose of the well, the waterquality, affordability and sustainability go hand-in-handand that all are important for a right choice of the furtherapproach in training and implementation.GOING TO SCALEOnce a feasibility study has revealed that there is a highpotential for manual <strong>drilling</strong> in a given area or country€ 50-100 for eachwaterpointLower qualitySimple shallow wellsfor irrigation€ 250 – 600 for eachwaterpointWell qualityMultiple use wells forhousehold and smallcommunities€ 1000 - 2500 for eachwaterpointHigher qualityHigh quality standardpotable water wellsfor large communities6PRACTICA <strong>Foundation</strong> - <strong>Manual</strong> <strong>drilling</strong> <strong>series</strong>
JETTING - Module 1 - The context of manual <strong>drilling</strong>and the first team(s) have been <strong>drilling</strong> successfully, there ispotential to scale up the capacity of the sector.Scaling up is often explained as: training more teams. Thatis partly what it is, but be careful: training more teamsalone is not enough to ensure the quality, affordabilityand sustainability of wells! When going to scale, not onlythe <strong>drilling</strong> enterprises are involved. Other actors play animportant role in this process. To visualise this, let’s go backto the three examples of the previous page:a) shallow wells for irrigation, b) high quality communalwells and c) multiple use wells for households.In all these three examples not only the purpose, qualityand price of the wells are different, but also the actorsinvolved. Example b for instance, has its focus onprofessionalization of the <strong>drilling</strong> sector as a whole. Thisinvolves of course the <strong>drilling</strong> enterprises, but also qualitycontrollers, the government (responsible for a nationalquality control system and certification), social actors (toguide communities) and pump suppliers. While in examplea, the <strong>drilling</strong> enterprises, farmer associations and pumpsuppliers play the biggest role.Whenever starting a program to go to scale it is importantto realize that such a program is not ‘a borehole <strong>drilling</strong>program’ only. Going to scale requires a capacity buildingprocess with its focus on training, repetition, qualityand sustainability of the manual <strong>drilling</strong> sector. This maytake as much as 3-5 years to develop. For an exampleof a more detailed roadmap on the implementation oflarger manual <strong>drilling</strong> programs please read the manual;‘Professionalizing the <strong>Manual</strong> Drilling Sector inAfrica’ A capacity building program to increase access tosafe water in rural areas.THE FIRST STEPS IN ANY MANUAL DRILLINGPROGRAMFeasibility studyA feasibility study will assess the potential for manual<strong>drilling</strong> and whether it is a practical solution for watersupply under the given conditions. Collecting informationon hydrology (depth, quality and quantity of groundwater),geology (soil type) and population density will providea clear indication of areas with the highest potential. Itis also of great importance to assess the existing <strong>drilling</strong>sector. Do manual <strong>drilling</strong> enterprises already exist? And ifso, what is quality of their current work? And what trainingis required? What are the roles of the other actors involvedin the sector such as NGO’s, workshops, well diggers,Governments, pump suppliers, etc? This information willbe used to determine the right approach for training andimplementation, building on- and reinforcing the existinglocal capacity.Technical hands-on training on manual <strong>drilling</strong>If there is not an existing manual <strong>drilling</strong> sector present orif there is a need for further improvement of technical skills,a technical hands-on training on a specific manual <strong>drilling</strong>method(s) is required.The technical trainer will advise on the purchase of toolsand well construction materials and assure that the <strong>drilling</strong>equipment is fabricated properly. During several weeks ahands-on technical <strong>drilling</strong> training is given to a team(s)of selected manual <strong>drilling</strong> trainees. During and after thisfirst training several wells are drilled, allowing the teams topractice and improve their technical skills.Follow-up and geo-hydrological trainingOnce teams have gained sufficient experience in the use ofthe equipment while <strong>drilling</strong> boreholes, they are ready forthe next step: a technical follow-up training combined witha training on geo-hydrology, hygiene, well installation andwell development.Although most existing manual <strong>drilling</strong> enterprises arevery capable of <strong>drilling</strong> a borehole, a lot of improvementscan be made during the construction and developmentof the wells, resulting in a better water quality, quantityand hygienic use of the well. Most manual <strong>drilling</strong> teamsexperience problems with site selection, loss of workingwater, soil texture determination, logging, well casinginstallation, well development, water quality and wellyield (flow rate of the well). These problems may occurwhen the <strong>drilling</strong> process is not completely understoodand important steps are missed. The classroom training ongeo-hydrology ‘Understanding Groundwater & Wellsin manual <strong>drilling</strong>’, addresses the above issues. Duringthis training, the <strong>drilling</strong> team will get a technical follow uptraining in the field to bring the theory and lessons learntinto practice.Depending on the size and objectives of a program,additional training can be given on business skills andquality control for manual <strong>drilling</strong> teams.PRACTICA <strong>Foundation</strong> - <strong>Manual</strong> <strong>drilling</strong> <strong>series</strong> 7
JETTING - Module 1 - The context of manual <strong>drilling</strong>4. GETTING STARTEDThe construction of a well, using manual <strong>drilling</strong> techniquesis a complicated process. Before <strong>drilling</strong> starts a good<strong>drilling</strong> site has to be selected, where experience suggeststhat there will be an adequate quantity of good qualitygroundwater. During the <strong>drilling</strong> process there are a lot ofdifferent aspects which require attention to prevent thingsfrom going wrong. Besides the practical <strong>drilling</strong> skills whichare executed at ground level, attention also has to be paidto important processes which are happening below groundlevel during <strong>drilling</strong>. Water used in <strong>drilling</strong> (working water)could flow away or worse; the borehole could collapse,burying part of the <strong>drilling</strong> equipment. And finally, once thehole has been drilled, the well casing, screen and sanitaryseals have to be installed at the right depth, preventingcontaminated water from entering, and ensuring a sufficientyield. With this in mind, it becomes clear that the introductionof manual <strong>drilling</strong> needs adequate supervision, with propertraining and guidance of the <strong>drilling</strong> teams.PREPARATIONS AND THE FIRST TRAININGMaking the <strong>drilling</strong> equipmentThe decision to use quality tools is one of the key factors forsuccess that manual <strong>drilling</strong> teams can make. Although thislooks obvious, the quality of the tools is often overlooked,resulting in loss of equipment and breakdowns in the field.How to avoid this?All tools and equipment are purchased and made locally. It isimportant that a good workshop is selected to manufacturethe <strong>drilling</strong> equipment. The workshop should have the rightequipment and be skilled to do the job! Module 3 of thishandbook has all the technical drawings of the equipmentand will guide the workshop during construction. Although itmay be expected that the workshop is able to make quality<strong>drilling</strong> equipment from the drawings, when it is the first timefor them, additional supervision is useful. Guidance duringconstruction and quality control of the equipment before itleaves the workshop is essential. At first this quality controlcan be done by a technical trainer. In a later stage, the<strong>drilling</strong> enterprises will take care of the quality controlthemselves.Training the <strong>drilling</strong> team<strong>Manual</strong> <strong>drilling</strong> must be understood as a profession thatdevelops through training, hands-on experiences, successesand failures. Technical training sessions by experienceddrillers/trainers are an essential base for new teams tobecome professional manual drillers.Make a selection of trainees before training starts: It isimportant that the trainees either have experience oraffinity with wells (pump workshops, well diggers) and aremotivated to run their own business. On average, a teamconsists of 5 or more workers and 1 team leader. Duringseveral weeks, hands-on technical <strong>drilling</strong> training is givento the manual <strong>drilling</strong> trainees. During and after this firsttraining, several wells are drilled. It is good to provide thetraining and these first wells in an area that consists of loosesoils, which are easy to drill. This will allow the team(s) topractise and improve their technical skills, without becomingfrustrated.Important: during this first practice period (a few months)the team(s) will come across problems, may have questions,experience difficult situations or worse may lose some oftheir equipment. Realize that this is all normal and part ofthe learning process! It is important that the team(s) areguided well and have access to experienced trainers. Aftera few months of practise a follow up training will evaluatethe problems encountered with the <strong>drilling</strong> team(s).GUIDING THE NEW TRAINED TEAMDrilling in a new areaWhen a <strong>drilling</strong> team is new to an area, it is important forthem to have information on the geology (soil type) theyare going to drill. And how deep they have to drill. In otherwords: what is the depth of the groundwater and how deepdo they need to drill into the groundwater to find a goodyielding aquifer?There are several ways to get this information: Ask villagersto show existing hand dug wells and try to talk with welldiggers. They can give information on the different typesof formations (soil) and the level of the ground water indry- and in rainy season.To complement this information;the team should drill its first well to the maximum possibledepth. During this exploration, soil sampling will help themto define the depth of a good aquifer. Note that <strong>drilling</strong>in valley bottoms, floodplains and riverbeds is likely to bemore successful than high up in the hills.8PRACTICA <strong>Foundation</strong> - <strong>Manual</strong> <strong>drilling</strong> <strong>series</strong>
JETTING - Module 1 - The context of manual <strong>drilling</strong>Remember; there is NOT a standard for the depth of<strong>drilling</strong>. This always depends on the depths of an aquiferand the requirements of the users and the pump.Selecting construction materialsFor the well casing different types of PVC pipe are used.The quality can vary from cheap drain pipes with self madefilter screens to expensive, high quality factory slotted filterscreens and casing pipes. Around the filter screen a gravelpack or filter cloth is placed to reduce the inflow of finesand. A sanitary seal is placed to prevent pollution fromentering the well. Find more information on constructionmaterials in module 2, chapter 2: What the <strong>drilling</strong> teamsmust know.Giving a follow up trainingWhen the team has drilled a number of wells and gainedpractical experience, they are ready for a follow-uptraining ‘Understanding Groundwater and Wells in <strong>Manual</strong>Drilling’. This training helps them to understand the <strong>drilling</strong>process and the theory behind it. It will allow the <strong>drilling</strong>teams to solve problems in the field. During this training, theteams will get a technical training in the field to bring thetheory and lessons learnt into practice.Finalizing the wellOnce installed the well should be further developed tomaximize the yield of the well. Then an apron and a pumpare placed.For more details see the manual: ‘UnderstandingGroundwater and Wells in manual <strong>drilling</strong>’. Aninstruction manual on hydro-geology, hygiene, wellinstallation and well development.PRACTICA <strong>Foundation</strong> - <strong>Manual</strong> <strong>drilling</strong> <strong>series</strong> 9
JETTING - Module 1 - The context of manual <strong>drilling</strong>10PRACTICA <strong>Foundation</strong> - <strong>Manual</strong> <strong>drilling</strong> <strong>series</strong>
JETTINGModule 2USING THE JETTING TECHNIQUE
JETTING - Module 2 - Using the jetting technique1. WHAT IS JETTINGThis second module of the jetting handbook teaches entrepreneurs and technical trainers how to use the <strong>drilling</strong> equipmentand how to drill wells for drinking water, using the manual rotary jetting technique. It also explains another type of jetting; theso called rapid well jetting, which is recommended for low cost shallow wells for drinking and/or irrigation water.HISTORYA desk study reveals that at present there is very littlepractical open source information available on jettingtechniques. Existing information consists of specific casestudies and basic descriptions of the technique, whileopen source information on the use of <strong>drilling</strong> equipmentand fabrication of tools is absent. This practical moduleis created with information compiled from availableliterature, field observations in various African andWestern countries, discussions with local <strong>drilling</strong> teams andinterviews with jetting experts. This module summarises bestpractices in <strong>drilling</strong> with the jetting technique.Where is jetting coming from?<strong>Manual</strong> rotary jetting was developed overtime through acombination of the manual rapid well jetting technique andconventional rotary machine <strong>drilling</strong>. Richard Cansdale,a key pioneer in rapid well jetting, first perfected thistechnique on coastal sandy beaches in order to extractclean salt water for aquariums and marine laboratories. Hethen introduced the technique in Nigeria and other countriesto access groundwater in riverbeds and floodplains. It isalso used for <strong>drilling</strong> inside hand dug wells to increase theyield. Rapid well jetting is the simplest and cheapest form ofjetting and is suitable for areas with shallow water tablesin very soft and loose sandy soil conditions, while rotaryjetting has been developed to drill deeper. Nowadaysjetting is being used in Nigeria, Niger, Madagascar, Chad,Senegal, Burkina Faso, Uganda, Kenya, Sudan, Benin, SriLanka and Western countries.HOW DOES IT WORK?A jetted well is a small diameter borehole that is drilled intothe ground using a large volume of water that is pumpedthrough the <strong>drilling</strong> pipe. The water jet washes down the<strong>drilling</strong> pipe in loose and soft soil formations such as sand,silt and fine gravel. Jetting is most suited for shallow watertables, but with rotary jetting deeper wells can be drilled.A PVC casing and filter screen are placed inside the drilledborehole and the remaining space between filter screenand borehole wall can be filled with a gravel pack toprevent fine sand from entering the well.The name manual rotary jetting comes from ‘the removal ofmaterial from the borehole by the washing action of a waterjet’. Therefore the technique is called jetting. It is also referredto as ‘wash boring’. A rotating handle is attached to the<strong>drilling</strong> pipes to break and cut the soil formations; thereforeothers call it ‘rotary jetting’ or ‘hand turning’.A motor pump is used to circulate a large volume of waterthrough the <strong>drilling</strong> pipe to the bottom of the borehole. Atthe same time human power is used for the rotating andpercussive movement of the <strong>drilling</strong> pipe. How deep youare able to drill depends entirely on the type of soil youencounter and the amount of water that is available onsite,but generally wells can be drilled up to 35 meters, andexceptionally to 50 meters.12PRACTICA <strong>Foundation</strong> - <strong>Manual</strong> <strong>drilling</strong> <strong>series</strong>
JETTING - Module 2 - Using the jetting techniqueThe borehole is kept full of water to prevent the wellfrom collapsing, while the drill bit cuts into the formation.The ‘slurry’ (water and cuttings) are transported up theborehole between the drill stem and the borehole wall.A mud pit, dug close to the borehole, allows the cuttingsto settle and the ‘clean water’ to circulate back into the<strong>drilling</strong> pipe.During jetting it is important to conserve the water supply,especially in highly permeable sands and gravels, where asmuch as 5 drums of water/ hour may be needed. Thickeners(additives) can be mixed with the water to plaster theborehole wall in unstable formations, which prevents theworking water from flowing away and increases viscosityof the water to bring up the cuttings more easily.PRACTICA <strong>Foundation</strong> - <strong>Manual</strong> <strong>drilling</strong> <strong>series</strong> 13
JETTING - Module 2 - Using the jetting techniqueTHE 2 JETTING TECHNIQUESRapid well jetting is also called ‘clear water jetting’ or‘farmer jetting’ and consists of driving a plastic pipe downwith a large volume of water from a motor pump.The technique can be used up to 6-10 meter <strong>drilling</strong> depthin loose sandy formations. The chapter ‘Rapid well jetting’later in this module describes this technique in detail. Thetechnique is very useful for deepening collapsing handdug wells. It is also used to drill low cost shallow wells fordrinking water and irrigation.With manual rotary jetting boreholes can be drilled muchdeeper than with rapid well jetting. It is generally beingused for drinking water wells.A <strong>drilling</strong> bit and rotation arm are attached to metal <strong>drilling</strong>pipes allowing the penetration of clay, gravel and sandwith loose to medium compaction. Because additives areused to thicken the water and make a ‘mud’, as the water iscirculated, the wall of the borehole becomes plastered. Thisreduces the loss of water and collapsing of the borehole. Inpractice, it increases the time available for the <strong>drilling</strong> andthe well installation process.ADVANTAGES & DISADVANTAGESAdvantages of jetting.In loose formations such as sand and fine gravel the <strong>drilling</strong>pipe sinks down easily, making it the quickest manual <strong>drilling</strong>technique. Wells can be drilled in a number of hours ratherthan days needed with other techniques.The equipment is light, making it easy to transport, especiallyin rural areas.Disadvantages of jetting.The amount of water available on site can be a limitation.Some wells can be drilled with just a few barrels of water(500 – 1000 liters), whilst others need as much water as alarge water truck can hold.Drilling is done in loose soil structures, which can easilycollapse. To prevent collapsing, the borehole needs tobe kept full of water during the entire <strong>drilling</strong> and wellinstallation process.Clay can be penetrated only very slowly. Very coarsegravel (pebbles) and other highly permeable materials(cracks in the formation) may create too much loss of waterso that they cannot be drilled. If deeper wells are drilledin permeable soils (sand and gravel), expensive <strong>drilling</strong>additives are needed, which increase the total cost of theborehole.14PRACTICA <strong>Foundation</strong> - <strong>Manual</strong> <strong>drilling</strong> <strong>series</strong>
JETTING - Module 2 - Using the jetting technique2. WHAT DRILLING TEAMS MUST KNOWBEFORE YOU START DRILLINGBefore you start <strong>drilling</strong>, there are some important thingsyou need to know. First; a good <strong>drilling</strong> site needs to beselected, where a good quantity (high yield) and quality(no pollution) of groundwater is expected. Second; someknowledge of construction materials such as PVC casingsand also of soil sampling and <strong>drilling</strong> safety could help youto become a better driller.Selection of the <strong>drilling</strong> siteSelecting a good location for the well is not always easyand depends on: needs and preferences of the users,expected groundwater level, type of formation (soil) andany nearby sources of pollution (latrines) that may beharmful.Some tips to help you in site selection:o The needs, preference and ideas of the users should beplaced first when you select a location.o Always discuss advantages and disadvantages of theselected location with the users (you are a specialistwho has knowledge about the expected quantity andquality of water in relation to the selected site).o Ask villagers to show existing hand dug wells and try totalk with hand diggers. They can give useful informationon the different types of formation (soil) and the levelof the ground water in dry- and in rainy season.o Note that <strong>drilling</strong> in valley bottoms and riverbeds islikely to be more successful than high up in the hills. Keepin mind that the selected site is not flooded during therainy season (if it is the lowest point in the landscape).o Always choose a site at least 30 m away from a latrine.Avoid other possible sources of pollution such as wastedumps, fire places and fuel stations.MATERIALSWhat about the PVC pipes?For the well casing, you can use different types of PVC.The quality can vary from cheap drain pipes with self madefilter screens to expensive, high quality factory slotted filterscreens and casing pipes. The choice of pipes depends on:diameter of the pump (the pumps should fit the pipe), typeof the well (irrigation or potable water), user intensity(household or communal) and the users budget (low orhigh).Buying the pipesYou can buy high quality factory slotted pipe in a specializedhardware store. The pipe has a thick wall, is strong andhas a lot of slots per meter filter screen, resulting in a highwater inflow. The pipes are expensive and are often usedfor large communal wells.You can also buy cheaper PVC pipes. You can find theseregular pipes in almost each hardware store.The wall thickness should be 3 mm or more to prevent thepipes from breaking. In this case you have to make the slotsof the filter screen yourself.Making the slots in the filter screenUse a hacksaw to make slots in the pipe. For a 4-inch screen,6 parallel lines are drawn along the full length of the pipe.The spaces between thealternate lines should be about4-5 and 6-7 cm (see drawing).The slots are sawn between 6-7cm lines. The distance betweenthe slots should be about onecentimeter.Guideline: the length of thefilter screen should be at least3 meter. The last meter of pipe has no slots. This is calledthe sump in which fine particles that enter the well screencan settle, without blocking the filter screen. The bottomis closed with a PVC cap or by cutting and bending thebottom of the PVC pipe.Gravel packCoarse river sand in the range 1.5-3 mm is used as a gravelpack. The gravel pack fills the space between the boreholewall and the filter screen. It may also serve to filter some ofthe fine sand particles from entering the well. Use a minimumand a maximum sized sieve to prepare the ‘gravel’.Sanitary sealDuring installation a sanitary seal is placed on top ofthe gravel pack to prevent pollution entering the well. Asanitary seal is made of clay or cement grout. If cementis used for the seal, first a half meter of clay is backfilledon top of the gravel pack to prevent the cement frompenetrating the gravel pack.PRACTICA <strong>Foundation</strong> - <strong>Manual</strong> <strong>drilling</strong> <strong>series</strong> 15
JETTING - Module 2 - Using the jetting techniqueDrilling fluidAlthough expensive, for rotary jetting polymers (additives)are used. They thicken the working water and plaster theborehole wall. Natural polymers are biodegradable;in other words, after some time they disappear naturally.There are different additives available which are knownby different names in several countries, each with theiradvantages and disadvantages. Please see the manual‘Understanding Groundwater and Wells in manual<strong>drilling</strong>’ for more details.TO REMEMBER DURING DRILLINGTake soil samplesSoil sampling helps you to understand what material youhave been <strong>drilling</strong> through and helps you to indicate whenyou have reached the final depth of <strong>drilling</strong>If the drilled material is very fine, such as silt and clay, it willnot transmit water easily and is called impermeable. Do notinstall the filter screen in this formation.Field tricksTake a sample of the soil and squeeze it into a ball, betweenyour hands. Then drop the ball from a height of one meterabove ground level.o If the ball consists of non cohesive (non-sticky) particles,the ball totally falls apart. In this case the material ispermeable. The particles of sand or gravel will beeasily visible.o If the ball falls apart only partially, the soil containssome silt or clay and sand. The formation has a lowpermeability.o If the ball only deforms and remains more or less inshape, it is composed of clay, and is described asimpermeable.Drilling safetyKeep the borehole full of water at all times!A frequently made mistake is to go for lunch, withoutkeeping an eye on your working water. When you comeback, the water level in the borehole has dropped, thehole has collapsed and your equipment is lost!When you have to leave the site overnight during <strong>drilling</strong>,you need to take important precautions:o Lift up the pipe a few meters in the borehole or takeit out. This will prevent the <strong>drilling</strong> pipe from gettingstuck.o Always keep your borehole full of water, also duringthe night. This is necessary to prevent the boreholefrom collapsing.o Protect the borehole and the mud pits. Take measuresto prevent cattle from stepping inPlease be aware that <strong>drilling</strong> can be a dangerous activity.Watch each other and ask villagers (especially children)to watch you from a safe distance. This prevents them fromaccidentally being hit by one of the <strong>drilling</strong> pipes.This sampling is also a good way to determine how easilywater flows through the pores (open space) of the drilledmaterial. Sand and gravel are very permeable, and aretherefore suitable layers which transmit the water easily.NOTEThese are a few guidelines to help you during <strong>drilling</strong>. Youcan find more information on soil, groundwater, hygiene,sampling, well installation and well development in themanual ‘Understanding Groundwater and Wells inmanual <strong>drilling</strong>’.16PRACTICA <strong>Foundation</strong> - <strong>Manual</strong> <strong>drilling</strong> <strong>series</strong>
JETTING - Module 2 - Using the jetting technique3. WHAT TO BRINGTools & materialsJetting <strong>drilling</strong> pipes (30 meters)Flexible suction hose(2 meters)Jetting clamp (1 piece)2” flexible delivery hose(5 meters)Jetting drill bit(1 or 2 pieces)Hacksaw (2 pieces)Jetting swivel (1 piece)Pipe wrench (3 pieces)Motor pump set (1) 3,5-4,5 Hpengine, 2” pump outlet(able to pump 15-20 m3/h)Shovel (2 pieces)Filter for pump set(1 piece)PRACTICA <strong>Foundation</strong> - <strong>Manual</strong> <strong>drilling</strong> <strong>series</strong> 17
JETTING - Module 2 - Using the jetting techniqueToolbox (full)Inner tube (2 meters)Tarp (plastic sheet) 4x6meters (1 piece)PVC casing pipeBucket 12 liters (2 pieces)Oil + gasoline(1 + 5 liters)Empty oil drums(200 liters) (5 pieces)Sieved gravelpack(50 kg bag)Sieves 1,5 & 3 mm(2 types)Depth measuring tool(1 piece)Additives (1 bag)18PRACTICA <strong>Foundation</strong> - <strong>Manual</strong> <strong>drilling</strong> <strong>series</strong>
JETTING - Module 2 - Using the jetting technique4. HOW TO DRILL A BOREHOLEWITH ROTARY JETTINGSTEP 1 PREPARING THE MUDPITDig the mud pitsStart with digging the mud pits. These are dug to givestorage for your <strong>drilling</strong> water. In the pits, the drilledmaterial is separated from the <strong>drilling</strong> water.The little pit first separates larger material and the big pitseparates smaller material..Cover the mud pitsIn sand it is helpful to line the mud pits with a plastic sheetto conserve your water. An alternative is to seal the mud pitwith clay or <strong>drilling</strong> fluid (water + additives)PRACTICA <strong>Foundation</strong> - <strong>Manual</strong> <strong>drilling</strong> <strong>series</strong> 19
JETTING - Module 2 - Using the jetting techniqueSTEP 2 PREPARING THE EQUIPMENTConnect the drill bit and the swivelConnect the drill bit and the swivel to the <strong>drilling</strong> pipeusing the pipe wrenches.TipLook after your <strong>drilling</strong>pipes! Keep threads cleanand apply some greaseto the threads. Especiallyduring transport protectthreads with a PVC cap,socket or wrapping, toprevent damage.Place the pump setThe pump set is placed next to the larger mud pit. Thedelivery and suction hose are now connected to thepump set.TipAn airtight seal between the SUCTION hoseand the pump is important! If the joint sucksin air, wrap inner tube tightly around theconnection. If the seal is leaking, the pumpwill suck-in air and will not work well. Claymay also be used to seal leaks.20PRACTICA <strong>Foundation</strong> - <strong>Manual</strong> <strong>drilling</strong> <strong>series</strong>
JETTING - Module 2 - Using the jetting techniqueAttach the two fl exible hosesThe short suction hose (2m) has a filter at the end. Place thefilter in the large mud pit and attach it to a pole to hang itabout 30 centimeters above the bottom of the pit! Connectthe long delivery hose (5m) to the swivel.STEP 3 PREPARING THE DRILLING FLUIDWhat about the water supply?Fill the mud pits with water from a nearby well or river (asklocal people to assist you or bring it in by truck).TipIt is wise to estimate how muchwater you will need for a day’s<strong>drilling</strong>. Make sure you havemore than enough.Make sure you have water all day! You will loose waterduring <strong>drilling</strong>.PRACTICA <strong>Foundation</strong> - <strong>Manual</strong> <strong>drilling</strong> <strong>series</strong> 21
JETTING - Module 2 - Using the jetting techniqueMake <strong>drilling</strong> fl uidAdd a few hands of additives to the water until the wateris getting thicker.Drilling fluid helps to bring the drilled material up to thesurface and reduces loss of water and the chance ofcollapsing.TipWhen you are losing a lot of workingwater or the drilled material is notcoming up, more additive can bemixed.STEP 4 ALMOST READY TO START!Set up the <strong>drilling</strong> pipePlace the <strong>drilling</strong> pipe with the attached swivel anddrill bit inside the starter hole.22PRACTICA <strong>Foundation</strong> - <strong>Manual</strong> <strong>drilling</strong> <strong>series</strong>
JETTING - Module 2 - Using the jetting techniquePlace the clampConnect the clamp (rotating arm) around the <strong>drilling</strong>pipe. Connect the clamp at a comfortable workingposition; the average chest height should be the aim.STEP 5 STARTING TO DRILLWater circulationSwitch the engine on to start pumping water fromthe mud pit through the hoses into the <strong>drilling</strong> pipes,creating a constant water circulation.2-4 team members will hold the clamp. 1 team memberkeeps the delivery hose straight with the swivel toprevent the hose from getting wrapped around the<strong>drilling</strong> pipe when the clamp is turned.PRACTICA <strong>Foundation</strong> - <strong>Manual</strong> <strong>drilling</strong> <strong>series</strong> 23
JETTING - Module 2 - Using the jetting techniqueDrill a straight borehole!Start to drill slowly. In the first meters of <strong>drilling</strong>, 2 workersshould look at the <strong>drilling</strong> pipe from different angles tokeep the pipe straight (if only 1 worker is checking the<strong>drilling</strong> pipe, there is still a chance that the borehole willnot be straight).A borehole which is not straight will cause problems laterduring installation of the well casing and the hand pump.How to drillThe <strong>drilling</strong> movement is a combination of rotation anddownward pressure, making the <strong>drilling</strong> bit cut downwardsand clockwise.24PRACTICA <strong>Foundation</strong> - <strong>Manual</strong> <strong>drilling</strong> <strong>series</strong>
JETTING - Module 2 - Using the jetting technique1. forwards 2. backwards 3. forwards 4. backwards 5.forwards, and stay 6.continue as for no.1The rotation movement1) Each team member rotates one side of the clamp aquarter of a turn in clockwise direction. Then he rotatesit back to starting position. Do this 2 times.2) Hereafter he rotates it once more and passes his side ofthe clamp to the team member on his left side.Repeat these 2 steps continuously. During these movements,the body weight is used to push down on the clamp.Tip!Always use the clamp, even when <strong>drilling</strong>in soft soils is going very rapidly. Keepon rotating and lower the <strong>drilling</strong> pipeslowly. This will create enough time forthe soil particles to be washed up and outof the borehole. Doing so will preventthe <strong>drilling</strong> pipes and drill bit from gettingstuck.PRACTICA <strong>Foundation</strong> - <strong>Manual</strong> <strong>drilling</strong> <strong>series</strong> 25
JETTING - Module 2 - Using the jetting techniqueSTEP 6 MAKING A TEMPORARY STOP& ADDING A NEW DRILLING PIPEMake a temporary stopContinue <strong>drilling</strong> until the clamp has reached theswivel and is able to rest on the ground surface.Keep the <strong>drilling</strong> pipes in their position (do not drilldeeper!) and let the water circulate continuously. Thiswill wash out all the cuttings from the borehole.Shut down the engineMake sure that ALL the drilled cuttings have been removedfrom the borehole. Check if the water that comes out ofthe borehole is ‘clean’.Only then it is safe to shut down the engine (and stopwater circulation).When <strong>drilling</strong> additives have been used and there is notmuch loss of water, the engine can be shut down safely.26PRACTICA <strong>Foundation</strong> - <strong>Manual</strong> <strong>drilling</strong> <strong>series</strong>
JETTING - Module 2 - Using the jetting techniqueEmpty the mud pitOnce the engine is shut down, the cuttings can beremoved from both mud pits. Be careful not to damagethe plastic sheet with your shovel when you empty themud pits.Add a new <strong>drilling</strong> pipeRemove the swivel from the <strong>drilling</strong> pipe in theborehole.Attach the swivel to a new <strong>drilling</strong> pipe.PRACTICA <strong>Foundation</strong> - <strong>Manual</strong> <strong>drilling</strong> <strong>series</strong> 27
JETTING - Module 2 - Using the jetting techniqueAdd this new <strong>drilling</strong> pipe to the pipe in the borehole.Then, place the clamp on a higher position and switchon the engine to continue <strong>drilling</strong>.Tip!Keep the borehole full ofwater at all times!A frequently made mistake isto shut down the engine andgo for lunch, without keepingan eye on your working water.When you come back, thewater level in the boreholehas dropped, the hole hascollapsed and your equipmentis lost!STEP 7 DRILLING TO THE RIGHT DEPTHTake soil samplesTake a sample of the drilled soil, every meter or every timebefore a new pipe is added. Take the soil sample from theupper part of the smaller mud pit (be careful, soil can bemixed). Alternatively you can take a soil sample from thetop of the borehole.The right depth of <strong>drilling</strong>Continue <strong>drilling</strong> until you have reached the final depth.The final depth of <strong>drilling</strong> is reached when you have drilledat least 4 meter into a coarse layer of sand/gravel.Tip!It is very useful to place allsamples on a piece of plastic andwrite down the depth.28PRACTICA <strong>Foundation</strong> - <strong>Manual</strong> <strong>drilling</strong> <strong>series</strong>
JETTING - Module 2 - Using the jetting techniqueSTEP 8 THE FINAL STEPSOnly continue with the next step if you have reachedthe final depth of <strong>drilling</strong>Flush the wellThe next step is to wash out ALL the drilled cuttings from theborehole!Keep the <strong>drilling</strong> pipes in their position (do not drill deeper!)and let the water circulate continuously for about 5 minutes.This will wash out all the cuttings from the borehole.Shut down the engineKeep circulating until ALL the drilled cuttings have beenremoved from the borehole. Check if the water that comesout of the borehole is ‘clean’.Only then it is safe to shut down the engine (and stop watercirculation).PRACTICA <strong>Foundation</strong> - <strong>Manual</strong> <strong>drilling</strong> <strong>series</strong> 29
JETTING - Module 2 - Using the jetting techniqueRemove the <strong>drilling</strong> pipesWhen the borehole is clean, you can remove your <strong>drilling</strong>pipes.Lift up one <strong>drilling</strong> pipe at the time!1. Lift up a <strong>drilling</strong> pipe and hold it with the pipe wrench.2. Attach the clamp at ground level to prevent the pipefrom dropping back into the borehole.3. Remove the pipe, lift up the next pipe and lower theclamp.4. Continue until all pipes have been removed.Tip!Pay close attention when youremove the <strong>drilling</strong> pipes!All team members should be fullyconcentrated on the job. Thereis always a RISK that if a <strong>drilling</strong>pipe is not held properly by apipe wrench, it falls back into theborehole!Pulling lost <strong>drilling</strong> pipes from thebottom of your borehole will notbe easy. Please see in chapter 5 ofthis module the paragraph: ‘Fishingwhen a pipe has dropped’Measuring the depth of <strong>drilling</strong>Measure the exact depth of your borehole. This gives youinformation on the total length of casing pipes needed.Tip!For measuring; use a rope or longmeasuring tape with a small weightattached. Measuring with a ropecan be best done when you makesmall knots at every meter.30PRACTICA <strong>Foundation</strong> - <strong>Manual</strong> <strong>drilling</strong> <strong>series</strong>
JETTING - Module 2 - Using the jetting technique1234Installation of the PVC casingPrepare the filter screen, the sump and the casing,before you start the installation (1).Tip!Always make sure that oneperson is holding the casingto prevent it from droppinginto the borehole.Lower the filter screen into the borehole (2). Then screwor glue the first PVC casing pipe to the screen (3). Lowerthe casing further into the borehole (4). More PVC pipesare added one by one.Cleaning the well and the screenWhen the casing and screen is installed, the boreholeand screen are now further cleaned:Drain the dirty water away from the mud pits.Then pour clean water into the casing and allow dirtywater to overflow the borehole. Only when clean watercomes out of the borehole, the cleaning is finished andthe gravel packing can start.PRACTICA <strong>Foundation</strong> - <strong>Manual</strong> <strong>drilling</strong> <strong>series</strong> 31
JETTING - Module 2 - Using the jetting techniqueGravel packingStart slowly pouring in the gravel, all around the pipe.While putting the gravel in, keep moving the PVC pipe fromside to side in the borehole.Measuring the depth of the gravel packMeasure regularly to check if the right depth of gravelpacking has been reached. Fill the open space between thecasing pipe and the borehole wall for 1-2 m above the topof the filter screen.BackfillingAfter you have installed the gravel pack, you must installthe sanitary seal and the rest of the backfilling.Leaving the well behindWhen the <strong>drilling</strong> is finished and you are leaving the site,remember to cover the PVC casing!This can be done with a PVC cap or tightly wrapped withinner tube. This is needed to ensure that nothing can bedropped into the well by children, before the pump isinstalled.32PRACTICA <strong>Foundation</strong> - <strong>Manual</strong> <strong>drilling</strong> <strong>series</strong>
JETTING - Module 2 - Using the jetting techniqueShort stopsIf you have to make a short stop for any reason (forexample a few minutes rest), you can lower the speed ofthe engine. This allows you to keep the water circulatingwithout <strong>drilling</strong> any deeper.Never forget!!1. Keep your borehole full of water at all times.2. Always choose a site at least 30 m away from a latrineand other sources of pollution.3. If you pause <strong>drilling</strong> for a longer time (for examplelunch), lift the pipe a few meters up in the borehole. Thiswill prevent the <strong>drilling</strong> pipe from getting stuck.4. Always take soil samples. Place them on a plastic sheetand write down the depth. This will help to determinethe depth of your <strong>drilling</strong>.5. Always place your filter screen in the coarsest layer ofsand or gravel.6. Use a sump (blind pipe) below your filter screen tocollect any fine material that enters the well.7. A guideline for the length of the filter screen is 3 meter.8. When <strong>drilling</strong> goes very fast (1 meter in 5 minutes orless), always keep rotating the clamp and lower thespeed of <strong>drilling</strong>. Your <strong>drilling</strong> pipe can get stuck whentoo much soil is drilled at once.9. When the <strong>drilling</strong> is finished and you are leaving thesite, remember to cover the PVC casing. This can bedone with a PVC cap or a plastic bag tightly wrappedwith inner tube. It is needed to assure that nothing canbe dropped into the well by children.Tool maintenanceo Look after your <strong>drilling</strong> pipes. Keep threads clean andapply some grease to the threads. Protect threadswith a PVC cap, socket or wrapping, especially duringtransport, to prevent damage.o Regularly sharpen the teeth of the <strong>drilling</strong> bit using anangle grinder.o Check the welds on the <strong>drilling</strong> pipe connections, swiveland clamp.o Inspect the flexible pipes for leakages. If found; repairthem with inner tube.o Regularly check the <strong>drilling</strong> pipes for straightness andleakages.o Maintain the pump set.o Check if the tools are complete and replace ifnecessary.34PRACTICA <strong>Foundation</strong> - <strong>Manual</strong> <strong>drilling</strong> <strong>series</strong>
JETTING - Module 2 - Using the jetting technique6. RAPID WELL JETTINGRapid well jetting is especially suitable for farmers orhouseholds who want very low cost wells for irrigationor drinking water, but it is also used in many places toincrease the yield of hand dug wells. Rapid well jettingis used in areas where the water table is high (within 5meter of the surface) and the soil is sandy, such as in rivers,coastal areas and floodplains of rivers. In these cases itis possible to jet rapidly without the need for rotation,a special cutting bit, additives and water circulation (nomud pits).This technique is also called ‘clear water jetting’ or ‘farmerjetting’ or ‘wash bore’. The maximum <strong>drilling</strong> depth is 6 - 10meters. This chapter gives a description of a generalizedmethod, but there are many variations of rapid well jettingfor particular situations.STEP 1 PREPERATIONThe equipment you need:a) 5 drums (200l) full of water (or a 1m 3 dug reservoir)b) A suction hose with filter and a delivery hosec) A motor pump setd) A jetting pipe: a single 50 mm PVC pipe, at least 4mmwall thicknesse) Connection between delivery hose and jetting pipe: 45degree PVC elbowf) A simple hand augerg) Well casing: 63 to 100 mm PVC casing pipeConnect the suction hose and the delivery hose to thepump and connect the delivery hose to the jetting pipe. InRapid well jetting there are no mud pits. Only a starter holeis dug.Drill a starter holeDrill a 2 meter starter hole with the hand auger.STEP 2 MAKE A TEST JETWhat is a test jet?A test jet is a quick <strong>drilling</strong> (to a maximum depth of 10 meteror the length of your jetting pipe). A test jet is done to finda coarse layer of sand or gravel and identify its depth. Atthis depth the filter screen will be placed during the final<strong>drilling</strong>. After the quick test jet, the jetting pipe is removedfrom the borehole.PRACTICA <strong>Foundation</strong> - <strong>Manual</strong> <strong>drilling</strong> <strong>series</strong> 35
JETTING - Module 2 - Using the jetting techniqueTip!Make sure that the end of thesuction hose (with filter) isALWAYS held UNDER water inthe drum or reservoir! Do NOTstop the pump during <strong>drilling</strong>!Make a test jetStart the engine. Place the jetting pipe in the starter holeonce the water is running. Now jet (drill) down the wholelength of your jetting pipe.How to assure continuespumping;o Make sure to have peoplestanding in line that can re-fillthe drum with buckets during<strong>drilling</strong>.o If there are no peoplearound that can help you tore-fill the same drum, you candig a 1m3 reservoir.Finding a coarse layerWhile <strong>drilling</strong> down, you may hear a rattling sound. This isthe material that hits your jetting pipe. The sound indicateshow coarse the soil is. Large material such as gravel willmake a stronger rattling sound than fine sand.Tip!Take samples of the soil andwrite down the depth of thecoarse soil layer.Do NOT stop the pump!36PRACTICA <strong>Foundation</strong> - <strong>Manual</strong> <strong>drilling</strong> <strong>series</strong>
JETTING - Module 2 - Using the jetting techniqueTake the jetting pipe which was used during the test jetand place it inside the casing and filter screen. Let thejetting pipe stick out for 15 cm at the bottom. Wrap thegeo-textile firmly to the jetting pipe with inner tube.Then wrap the top of the casing to the jetting pipe withinner tube.STEP 4 DRILLING THE BOREHOLEStart the engine pump and place the jetting pipe, withthe casing attached, in the same starter hole.Wash the jetting pipe down until you reach the depthyou have identified with the test jet38PRACTICA <strong>Foundation</strong> - <strong>Manual</strong> <strong>drilling</strong> <strong>series</strong>
JETTING - Module 2 - Using the jetting techniqueContinue pumping for a short time to wash up the fines.STEP 5 FINISHING THE WELLCreating a natural ‘gravel pack’Reduce the engine speed very gradually until it stops.The fine soil particles will be washed up, while thecoarse soil particles stay down. This ensures that anatural gravel pack will be formed around the filterscreen automatically.Remove the jetting pipeKeep the casing in place, while you carefully pull outthe jetting pipe from the casing.PRACTICA <strong>Foundation</strong> - <strong>Manual</strong> <strong>drilling</strong> <strong>series</strong> 39
JETTING - Module 2 - Using the jetting techniqueThe inner tube will close the geo-textile at bottomautomatically. To be extra safe; you can make a plugfrom a bag of sand and drop it down to ensure that thebottom is totally closed.BackfillingNow this is done, you can install the rest of the backfillingLeaving the well behindWhen the <strong>drilling</strong> is finished and you are leaving the site,remember to cover the PVC casing!This can be done with a PVC cap or tightly wrapped withinner tube. It is needed to ensure that nothing can bedropped into the well by children.40PRACTICA <strong>Foundation</strong> - <strong>Manual</strong> <strong>drilling</strong> <strong>series</strong>
JETTINGModule 3MAKING THE DRILLING EQUIPMENT
JETTING - Module 3 - Making the <strong>drilling</strong> equipment1. WHAT TO BUYThis module explains how to fabricate all <strong>drilling</strong> equipment. It consists of a material list for the <strong>drilling</strong> equipment and toolsand a package of technical drawings, including tips that are necessary to make a complete <strong>drilling</strong> set.Material list for the construction of <strong>drilling</strong> equipmentEquipment Part Material Dimension (mm) Thickness Amount Additional informationJetting clamp handle bar galvanised steel pipe Ø 35 x 400 ≥ 3 4hingeplate galvanised steel plate 75 x 30 8 2baseplate galvanised steel plate 210 x 95 15 2hinge connector galvanised steel plate 215 x 30 8 1bolt steel bolt M8 x 50 8 4nut steel Nut M8 4clamp key galvanised steel bar 8 x 130 8 1nut steel nut M10 1shock absorbers from motorbikescan be usedJetting pipe <strong>drilling</strong> pipe galvanised steel pipe 2'' x 1000 5 1 notice the wallthickness<strong>drilling</strong> pipe galvanised steel pipe 2'' x 6000 3 5 notice the wallthicknessround bar galvanised steel bar 6 x 6000 6 1coupling galvanised steel coupling 2'' 5 10Jetting bit bit galvanised steel pipe Ø 115 x 500 7 1 It is possible to use a thick metalplate, but much more difficult tobend into a circlecoupling galvanised steel coupling 2'' 5 1 thickness in the range of 4-7 mmcover plate galvanised steel plate Ø 100 7 1Jetting swivelpipe galvanised steel pipe Ø 50 x 500 3 1bearing galvanised steel bearing Ø 90 x Ø 50 20 1 SKF 6210connection galvanised steel plate Ø 90 5 1round bar galvanised steel bar 6 x 550 6 1bearing cover galvanised steel sheet metal Ø 100 1 1bearing cover galvanised steel sheet metal 40 x 320 1 1pipe galvanised steel pipe 2'' x 50 3 1Purchase list for additional toolsPart Material Dimension (mm) Thickness Amount Additional informationTools suction hose reinforced 2'' 3 2 meter depends on pumpset dimensionsdelivery hose reinforced 2'' 3 5 meter depends on pumpset dimensionsfilter sheetmetal 2'' 1 fitting the flexible hosemotor pump set 3.5-4.5 HP 1 standard typehacksaw 2wrenches 24'' 3 high qualityshovel 1Materialstoolbox (full) 1measuring tool metal pipe Ø 50 x 80 3 1metal bar 8 x 1000 8 1inner tube rubber 2msieves mesh 1mm and 3mm 2tarp plastic sheet 4000 x 6000 1 (plastic sheet)buckets plastic 12 liters 2oil drums metal 200 liters 51 + 5oil + gasolinelitersbasic use (rope, glue, spanners,measuring tape etc.)depending on available watersourcepump set specificSize depends on pump/userrequirementspvc casinggravel pack 1 mm and 3 mm 50 kgadditives 1 bag Any brand (varies in each country)42PRACTICA <strong>Foundation</strong> - <strong>Manual</strong> <strong>drilling</strong> <strong>series</strong>
JETTING - Module 3 - Making the <strong>drilling</strong> equipment2. TIPS FOR CONSTRUCTIONRead the following tips together with the technicaldrawings at the end of this module. These tips will help youin the fabrication of the <strong>drilling</strong> pipes, the drill bit and themeasuring tool. The other <strong>drilling</strong> equipment can made withthe technical drawings only.TIPS FOR MAKING THE DRILLING PIPES(To be used by construction of drawing nr: 003 & 004)How to weld the couplingThe thin wall pipe needs to be threaded on one side. Then,screw the steel coupling completely on this thread andweld the coupling to the thin wall pipe.How to weld the thick wall pipeTake a short piece of thick wall pipe and make threadson one side. Now weld the opposite side to the thin wallpipe. Be careful: It is very important that they are centeredproperly!Tip: A good tool to make is a mould (welding jig) asshown in the picture. The mould consists of two pieces ofangle iron welded inline on a solid base (1). The thin wallpipe (2) and the short piece thick wall pipe can now beplaced in the mould (3). Shift the two pipes to each other(4). Then weld the two pieces together, all around (5).This will assure a straight connection.Tip: Make sure the threads are greased to protect thethreads during welding (welding spatters).The <strong>drilling</strong> pipesThin wall <strong>drilling</strong> pipes are cheap and great in use, but whenintensively used they break at the threaded connections!To overcome this problem:a) Screw a regular steel coupling on the one side of thethin wall pipe and weld it.b) Weld a short piece of thicker wall pipe with threads tothe other side of the thin wall pipe.PRACTICA <strong>Foundation</strong> - <strong>Manual</strong> <strong>drilling</strong> <strong>series</strong> 43
JETTING - Module 3 - Making the <strong>drilling</strong> equipmentTIPS FOR MAKING THE DRILL BIT(To be used by construction of drawing nr: 005 & 006)1If pipe with a diameter 115 mm and wall thickness 7 mm isnot available in the markets or scrap yards, there are otherways to make the drill bit.First, see if you can find something similar such as a pipewith a diameter between 110 – 120 mm and a wall thicknessbetween 5-7 mm.If this is not possible, try to find a galvanized plate of 500 x350 mm with a thickness of 5-7mm. Although much more timeconsuming, a blacksmith should be able to heat up this plateand bend it into a pipe.Making it out of a plateUse a grinder to make two cuts of 100 mm and make theteeth (1). Bend the three pieces inwards and outwards asshown in the technical drawings. Now the plate should beheated and bent into a pipe and welded.2Making it out of a pipea) use a grinder to make three cuts of 100 mm.b) make the teeth.c) bend the three pieces inwards and outwards as shownin the picture (2) and technical drawings.TIPS FOR MAKING THE DEPTH MEASURINGTOOLTake a rope (6mm) of about 35 meters long and make knotsat every meter.Option 1: measuring the depth of the water table. Use ashort piece of pipe (Ø 50 x 80 mm) and close one side, bywelding on a small plate. Drill a hole in this side to attachthe rope.Option 2: measuring the depth of the gravel pack. Take thesame rope, and remove the short piece of pipe that wasused in option 1. Attach a long re-bar (Ø 6 x 1000 mm).44PRACTICA <strong>Foundation</strong> - <strong>Manual</strong> <strong>drilling</strong> <strong>series</strong>
JETTING - Module 3 - Making the <strong>drilling</strong> equipment3. TECHNICAL DRAWINGSJetting swivelDrawing 007, 008Jetting pipeDrawing 003, 004Jetting clampDrawing 001, 002Jetting bitDrawing 005, 006PRACTICA <strong>Foundation</strong> - <strong>Manual</strong> <strong>drilling</strong> <strong>series</strong> 45
821 2 3471575451A308152M8x50 (3x)4858153Key M815435254003501515830BC1Pipe35x3mm3D1530801025E17,508 (2x)27,5015 1535951546757590 120Thickness 15mmF01020304Handlebarhingeplatebaseplatehinge connectorDRAWN BY:DATE:VERSION:Don de Koning 01-06-2010 Final v1.0TITLE:DWG NO.Jetting clamp (1)001SCALE:1:2A4
1 2 34A5BM8x50 + double nutC590Nut M108mm roundbarD2050Nut M8EF05 Clamp key M8TITLE:Jetting clamp (2)DRAWN BY:DATE:VERSION:Don de Koning 01-06-2010 Final v1.0DWG NO.002SCALE:1:1A4
1 2 342A241B2" coupling4C506mm roundbar3Scale: 1:513D60152" thread30100E30002" thread2" pipe 3mm wallthickness2" pipe 5mm wallthicknessScale: 1:5F010203042" pipe 2mm wallthickness2" coupling2"pipe 5mm wallthickness6mm roundbarDRAWN BY:DATE:VERSION:Don de Koning 01-06-2010 Final v1.0TITLE:DWG NO.Jetting pipe (1)003SCALE:1:2A4
1 2 34Assembly overviewA3585148530353135BKKC6mm roundbarDESECTION K-KSCALE 1 : 2FTITLE:Jetting pipe (2)DRAWN BY:DATE:VERSION:Don de Koning 01-06-2010 Final v1.0DWG NO.004SCALE:1:5A4
1 2 34A1123B2"couplingScale: 1:22C3Pipe115x7mm7mm sheetmetal30715060101500DEScale: 1:2F0102032" couplingCover platebitTITLE:Jetting bit (1)DRAWN BY:DATE:VERSION:Don de Koning 01-06-2010 Final v1.0DWG NO.005SCALE:1:5A4
A1 2 34ACBCBASECTION A-AD1005E30DETAIL BSCALE 2 : 5DETAIL CSCALE 2 : 5FTITLE:Jetting bit (2)DRAWN BY:DATE:VERSION:Don de Koning 01-06-2010 Final v1.0DWG NO.006SCALE:1:5A4
1 2 34A16mm roundbar8020012B30035°35°3C23D50959754901mm sheetmetal6mm roundbarE405551mm sheetmetalØ60x3mmScale: 1:2 Scale: 1:2F010203Swivelpipe Ø50x3x500Bearing cover 1mmSwivel connectionTITLE:Jetting Swivel (1)DRAWN BY:DATE:VERSION:Don de Koning 01-06-2010 Final v1.0DWG NO.007SCALE:1:5A4
1 2 34AA4BAC5581SECTION A-ADETAIL CSCALE 1 : 2C4D5090E20F04 Bearing SKF 6210TITLE:Jetting swivel (2)DRAWN BY:DATE:VERSION:Don de Koning 01-06-2010 Final v1.0DWG NO.008SCALE:1:5A4