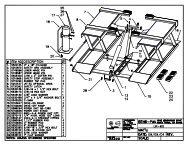
CEMB C72 Parts List
CEMB C72 Parts List
CEMB C72 Parts List
You also want an ePaper? Increase the reach of your titles
YUMPU automatically turns print PDFs into web optimized ePapers that Google loves.
3.2 - CALIBRATION OF THE DISTANCE POTENTIOMETER- Remove the weight shelf and refi t the tip on the gauge rod.- Back-off the screws fastening the pulley on the potentiometer shaft.- Select on the FUNCTIONS MENU (CONTROL OF THE FUNCTIONS MENU) → SET UP → AUTODIAGNOSTIC(SELF-DIAGNOSTICS)- Scroll until the wording (diS) appears on the left display while a number appears on the rightdisplay, which varies when the distance gauge is moved and represents a reference for calibrating thepotentiometer.- With the gauge fully retracted, turn the potentiometer shaft keeping the pulley still until a numberbetween 50 and 100 is read.- Decrease by two numbers, then retighten the screws to secure the pulley on the shaft.Carry out the DISTANCE GAUGE SET UP (RIM DISTANCE GAUGE);3.3 - CALIBRATION OF THE DIAMETER POTENTIOMETER- After CALIBRATION OF THE DISTANCE POTENTIOMETER press- The wording [dIA] appears on the left display, a number appears on the right display, which varies whenthe gauge is turned and represents a reference for calibrating the potentiometer.- Remove the diameter gauge from the gauge rod after backing off relative screw.- Slightly pull out the gauge rod and rest its stop on the machine shaft in external position near the base.- Turn the potentiometer shaft until a number between 50 and 100 is read, then place it back in itscorrect work position.- Lock the potentiometer with relative set screw- Carry out the DIAMETER GAUGE SET UP (DIAMETER GAUGE)3.4 - CALIBRATION WIDTH SONAR AND EMS (OPTIONAL)- After DIAMETER POTENTIOMETER CALIBRATION press .- Place a fl at surface at least 12 cm from the width Sonar and check that there are variations in thenumber displayed.- If on control, after having performed calibration, a measurement inaccuracy is found greater than 1/2”,repeat the calibration modifying the distance value between the tyre and the sensor (tolerance ± 20 mmfrom the measurement found manually) until a correct width value is obtained.- Press again and repeat the operation for the EMS sonar, checking the number on the display.M 0226 - 4 GB


