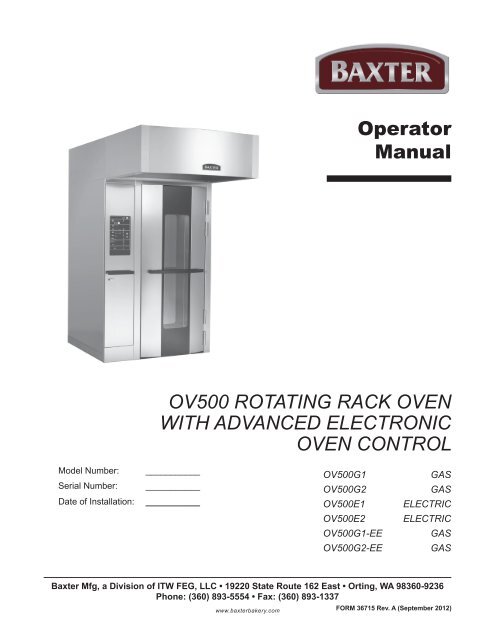
Operator Manual OV500 rOtating rack OVen with ... - Hobart
Operator Manual OV500 rOtating rack OVen with ... - Hobart
Operator Manual OV500 rOtating rack OVen with ... - Hobart
- No tags were found...

Create successful ePaper yourself
Turn your PDF publications into a flip-book with our unique Google optimized e-Paper software.
Table of ContentsGENERAL.............................................................................................................................................. 5INSTALLATION...................................................................................................................................... 5OPERATION........................................................................................................................................... 6<strong>OV500</strong> Digital Controls..................................................................................................................... 6Back-Up Control Operation (optional).............................................................................................11Safety Alarm (Standard Feature, No Parameter Setup Required)..................................................11Pulse or Food Service Steam Mode............................................................................................... 12Kosher Operation Mode (Ovens Equipped With Kosher Package)................................................ 12Programming the Oven.................................................................................................................. 13Customized Operation.................................................................................................................... 17Energy Saving Mode...................................................................................................................... 20Shutdown........................................................................................................................................ 20Restarting Oven.............................................................................................................................. 20Troubleshooting......................................................................................................................... 21Burners Will Not Light on Gas Oven............................................................................................... 21Alarms and Display Messages....................................................................................................... 21Other Troubleshooting Topics......................................................................................................... 21Cleaning........................................................................................................................................... 22MAINTENANCE................................................................................................................................... 23General .......................................................................................................................................... 23Preventive Maintenance................................................................................................................. 23Service and Parts Information........................................................................................................ 23Owner PREVENTIVE MAINTENANCE PROCEDURE..................................................................... 24Introduction..................................................................................................................................... 24Preventive Maintenance Procedure............................................................................................... 24– 4 –
OPERATION<strong>OV500</strong> Digital Controls– 6 –
Control Guide - AdvancedBUTTON ACTION DISPLAYAUTO ON/OFFTIMERAUTO ON TIMEAUTOONTIMEPress to turn the oven ON or OFF.Press to enter current time or time foroven to automatically turn on or Off,when corresponding Auto On Time orAuto Off Time button is pressed.Press arrow keys to set the desiredtime of oven to automatically turn on.Control panel displays are lit when the oven is on. Ovendefaults to Program 0. If oven is turned off and backon <strong>with</strong>in 2 minutes, the oven will come up in the lastmode and oven setting.The AUTO ON/OFF TIMER window displays the currenttime or the time the oven will automatically turn on oroff.The AUTO ON/OFF TIMER window displays the timethe oven will automatically turn on.AUTOAUTO OFF TIMETIMEAUTOOFFTIMETIMER AUTO ON/OFFOFFTIMETIMERONOFFPress arrow keys to set the desiredtime of oven to automatically turn oFF.Press to turn the automatic timer ONor OFF.The AUTO ON/OFF TIMER window displays the timethe oven will automatically turn oFF.The indicator light beside the timer ON/OFF button is litwhen the function is enabled.SET TEMPAUTOOFFTIMEBAKE TIMERAUTOOFFTIMESTEAM STEP TIMERSTEPAUTOFANOFFDELAY TIMEAUTOOFFTIMESTARTPress to set the desired temperature(5-degree increments).Press arrow keys to enter the BAKEtime (1 minute increments). Press theup arrow key to enter additional time atthe end of the bake program.Press to enter the STEAM time(5-second increments in Burst steam orBakery mode; 1-second increments inPulse steam or Food Service mode).Press to enter the FAN DELAY time(1-minute increments).Press to start the BAKE TIMER.The SET TEMP window displays the set temperature.The HEAT ON light is lit while the oven is heating. Theactual temperature in the oven cavity is displayed in theOVEN TEMP window.The BAKE TIMER window displays the amount of timefor the current baking cycle. The minutes set are theleft two digits and minutes remaining are the right twodigits. The windows can be set to display hours andminutes remaining. The ON light is lit when bake timeis active. See Customized Operation to configure thissetting.The STEAM TIMER window displays the amount oftime set for the steam cycle. The ON light is lit when thesteam system is active.The FAN DELAY TIMER window displays the amount oftime set for the circulation blower delay cycle0-9 minutes.The ON light blinks when the BAKE TIMER is active.STOPRECIPE AUTOOFFTIMEPress to stop the BAKE TIMER orsilence the beeper after the BAKETIMER has timed out.Press the arrow keys to select a bakeprogram.The ON light is off when the BAKE TIMER is inactive.The RECIPE window displays the number of the currentprogram.STEPPress to select one of four bakingsteps.The corresponding indicator light will be lit (1 to 4),depending on which step is selected.– 7 –
STEPBUTTON ACTION DISPLAYAUTOOFFTIMEPress to open or close the vent.The indicator light next to the VENT button is lit whenthe vent cycle is enabled.COOLDOWNUse to cool down the oven. To enable this feature, set a temperature at least 25°F(14°C) cooler than the oven temperature. Press theCOOL DOWN button. The COOL DOWN mode is exitedwhen the oven reaches the new set temperature, or ifdoor is opened when temperature is 25°F (14°C) belowset temperature, or by pressing any button.Auto On/Off Timer and ClockThe Auto ON/OFF Timer display shows the current time of day. To set the clock, the control must be turnedon. Press and hold either arrow button to initiate clock setting, then adjust time using arrow buttons. A fewseconds after the time is adjusted, the colon in the time display will resume flashing.Timer SettingsThe oven can be set to turn itself on and off. After the AUTO ON/OFF TIMER is set, the POWER ONOFF button can be pressed to turn the oven off. This will not disrupt the AUTO ON/OFF setting. Electricalpower to the oven must remain on.NOTE: Auto On/Off has restricted access when P21 (Advanced Energy Savings Mode) is set to 1.1. To set the oven to turn on, press and hold the AUTO ON TIME button. The previously entered starttime will appear in the display. Use the UP and DOWN arrows to adjust the start time. Then releasethe AUTO ON TIME button.2. To set the oven to turn off, press and hold the AUTO OFF TIME button. The previously entered endtime will appear in the display. Use the UP and DOWN arrows to adjust the end time. Then releasethe AUTO ON TIME button.3. To enable the automatic start, press and hold the TIMER ON/OFF button until the indicator LED tothe right of the TIMER ON/OFF button is illuminated.NOTE: When using AUTO ON/OFF to preheat the oven, if the oven is not disturbed for the time set inparameter P17 (Temperature setback time), it will revert to the Setback temperature stored in parameterP18 (Setback temperature) setup.Backup BatteryThe clock is backed up by a lithium battery which keeps the clock circuitry operating when all external poweris off. If the battery becomes low or dead while the external power is off, the display will read 12:00 (12hr mode) or 0:00 (24 hr mode) and will not increment until a new time is set. The clock will operate <strong>with</strong> adead or missing battery, but must be set each time external power is turned on. Batteries must be replacedwhen low or dead to avoid corrosive damage to the circuitry. Contact your local authorized service office.– 8 –
Oven PreheatFor best results, the oven must be preheated to bake temperature before baking begins.1. The door must be closed for oven to heat. The <strong>rack</strong> carrier will lift and rotate only during timedbake.NOTE: The <strong>rack</strong> carrier will be in the unload position from the last bake. If the <strong>rack</strong> carrier was movedout of the home position, the <strong>rack</strong> carrier will lift and turn to the unload position when the door is opened.2. Press the POWER ON OFF button to turn the oven on.3. Press the UP or DOWN arrows next to the SET temp window to enter the desired baking temperature.Actual temperature of the oven will appear in the OVEN TEMP window.4. For optimum steaming capability, allow 30 minutes after the oven has reached the set temperaturefor the steam system to charge.5. The oven is now ready for baking operations.Basic OperationThe oven and its parts are hot. To prevent burns, use hot pads or protective mittswhen loading or unloading the oven.Hot air and steam are released from the oven interior when the loading door isopened. To avoid burns, open the door slowly and keep clear of the opening.1. Preheat the oven (See Oven Preheat).2. <strong>Manual</strong>ly select baking settings:• Press the UP or DOWN arrows next to TIMERto enter the desired value.• Press the UP or DOWN arrows next toSTEAM TIMER to enter the desired value.• Press the UP arrow next to FAN DELAY to enter the desired value.• The steam and airflow delay settings are optional and can be left at 0 if desired.3. Slowly open the door and load product.4. Press the start button and close the door. The on light in the Timer window blinks as the timer countsdown.5. Rack lifts from floor and rotates from right to left.6. The oven beeps after the TIMER times out. Press STOP to silence the beeper.7. Open door. Allow <strong>rack</strong> carrier to stop and lower. Remove product.– 9 –
Loading Procedure1. Type B and C <strong>rack</strong> carriers are equipped <strong>with</strong> stops on both ends. For B lifts, ensure stop flap is inthe up position to load the <strong>rack</strong> on the <strong>rack</strong> carrier. For C lifts, push <strong>rack</strong> stop to the left after <strong>rack</strong> isloaded.2. Roll the <strong>rack</strong> into the oven so the end b<strong>rack</strong>ets channel onto the <strong>rack</strong> carrier. When using <strong>rack</strong>sequipped <strong>with</strong> pan stops, load <strong>rack</strong>s so stops will prevent movement of trays toward user when <strong>rack</strong>sare unloaded. Position pans so they do not extend beyond the <strong>rack</strong>. If the pans extend beyond the<strong>rack</strong> it may cause the <strong>rack</strong> to get jammed when rotating.3. Close the loading door. The <strong>rack</strong> carrier will lift and rotate only during timed bake.Unloading ProcedureThe oven and its parts are hot. To prevent burns, use hot pads or protective mittswhen loading or unloading the oven.Hot air and steam are released from the oven interior when the loading door isopened. To avoid burns, open the door slowly and keep clear of the opening.1. Press STOP and/or open the loading door to silence the beeper.2. Wait for the <strong>rack</strong> carrier to stop and lower.3. For B lifts, push the <strong>rack</strong> stop down to unload the <strong>rack</strong> from the <strong>rack</strong> carrier. For C lifts, push <strong>rack</strong>stop to the right to open.4. Roll the <strong>rack</strong> from the <strong>rack</strong> carrier.5. Close the loading door.Cooling Oven• To cool the oven more than 20 degrees below its current temperature; change SET TEMP to thedesired new temperature, open the oven door, and press COOL DOWN. The SET TEMP displaywill alternate between ‘COOL’ and the SET TEMP until the oven has cooled. When the oven hasreached the set temperature, the alarm will beep and the control will return to normal operation.Closing the oven door or pressing any control button during Cool-Down mode will also return thecontrol to normal operation.• The VENT control can provide a means of cooling down the oven. When the oven is in the offmode and the door is open, press the VENT button once to start or stop the circulation fan. Ventlight will be lit. The fan will also stop when the door is closed or the oven is put into the on mode.• If the oven temperature is more than 20 degrees higher than the set temperature, and the baketimer is not activated, the oven will automatically open the vent. The vent will remain open untilthe oven temperature is <strong>with</strong>in 20 degrees of the set temperature.Operational Hints• On the initial startup, the oven temperature will default to the factory setting of 375°F (190°C)unless changed.• During a baking cycle, the START and STOP buttons control the TIMER, STEAM, and FAN DELAYsettings only. They have no effect on the oven heat. When the TIMER times out, the oven heat willcycle on and off to maintain the set temperature. Care should be taken not to overbake products.• To adjust the temperature during a baking cycle, press the UP or DOWN arrows in the Oven Tempsection to enter the new temperature. If P20 (Restricted operator mode) is set for 1 then oventemperature cannot be changed during the bake cycle.– 10 –
• To adjust steam settings, press the corresponding arrows to enter the new values. The steam timercannot be adjusted during bake operation.• You can adjust the time remaining <strong>with</strong> the arrows. The set time remains unchanged unless you“0” out the remaining time. If P20 (Restricted operator mode) is set for 1 the bake time cannot bechanged during the bake cycle.• If the door is opened at any time during the baking cycle, the TEMP, TIME, STEAM, and FANDELAY settings will pause. Close the door to resume all functions.• The FAN DELAY option turns off the airflow at the beginning of the baking cycle for the total timeentered in this window. The heat is off while the FAN DELAY is activated.• The oven monitors the heating system by comparing the current oven temperature to the settemperature. If a problem arises in the heating system or there is a heating system failure, bothtemperature displays will flash after 15 minutes. If the problem continues, contact your authorizedBakery Systems service agency.Back-Up Control Operation (optional)If the main control panel ceases to function properly, baking can continue <strong>with</strong> the use of the Back-upControls, if equipped. The Back-up Controls are located behind the control door on rear wall of thecomponent panel.To activate the Back-up Controls, flip the toggle switch to BACK-UP position. Temperature and steam arenow controlled by the thermostat dial and steam rocker switch, located on the back-up control panel. Setthe thermostat dial to the desired temperature. Once the oven has reached temperature, steam can beinjected by pressing and holding the steam rocker switch up to a maximum of 20 seconds. More than thiswill cool down the oven and steamer excessively. Venting the oven must be done manually by openingthe door. The <strong>rack</strong> carrier will stop and lower when door is open. Close door after venting is complete for<strong>rack</strong> carrier to lift and resume rotating. While in the backup mode the timer feature will not function.Safety Alarm (standard feature, no parameter setup required)If the temperature at the probe is in the range of 570 - 600 degrees Fahrenheit for 10 seconds, the unitwill do the following:1. Shut off all features.2. Sound an alarm.3. Flash the OVEN TEMP display (actual temperature is displayed).4. Display the letters ‘SHdn’ in the TIMER display.The oven will remain in the shutdown mode until the 120VAC power is shut off. Turning on and off thecircuit breakers will restore the oven to normal operation if the temperature is below 570 degrees.Disconnect the electrical power to the machine and follow lockout / tagout procedures.There may be multiple circuits. Be sure all circuits are disconnected.Shut off gas. Contact your authorized bakery systems service office.– 11 –
PULSE OR FOOD SERVICE STEAM MODEThis mode can be used to provide steam on a periodic basis throughout operation. When this mode isenabled, the STEAM TIMER controls how many seconds of steam are provided to the oven, while a valueentered in the Parameter 14 (Steam timer mode) setup controls how frequently the steam is operated.To enable the Pulse Steam mode:1. Enter the parameter set up mode by pressing and holding the START button and POWER ON OFFbutton.2. Select Parameter 14 (Steam timer mode).3. If the TIMER window displays ‘0’, it is set up for Burst Steam or Bakery Mode (factory default). Pressthe UP or DOWN arrow buttons to enter FSS mode (display will change to a 3-digit number).4. Set the desired time between steam cycles using the UP or DOWN arrow buttons. The range is from300 seconds (5 min.) to 990 seconds (approximately 17 min.), and increments by 10 seconds at atime.5. After setting the desired cycle, press the POWER ON OFF button to save the settings.6. The STEAM TIMER will now operate in 1-second increments, up to 10 seconds, to set the durationof steaming.Examples:‘300’ is selected for P14 (Steam timer mode)‘3’ is entered in STEAM TIMER= steam is turned on for 3 seconds every 300 seconds (5 min.)‘990’ is selected for P14‘3’ is entered in STEAM TIMER= steam is turned on for 3 seconds every 990 seconds (17 min.)To return the oven to Burst Steam Mode, repeat the above process to access P14 and set the value inthe TIMER window to ‘0’. The STEAM TIMER will now operate in 5-second increments.Kosher Operation Mode (ovens equipped <strong>with</strong> Kosher Package)NOTE: The oven will be put into Kosher operation mode by authorized personnel at the timeof start-up.NOTE: Setting up the parameters and adding programs to the controller should be done before the initialstart-up since the oven controller has to be shut off to do this.For Kosher operations, the oven must maintain a minimum temperature in order to retain Kosher approval.The oven control will make the minimum set temperature 200°F in order to maintain minimum temperaturerequirements. The oven controller can not be set below 200° F.If the oven temperature is at risk of falling below the approved range, a rapid beep alarm will sound (fasterthan the normal TIMER alarm). If you hear this alarm, do the following:• Check that the oven door is closed.• If the Vent mode is active, turn the Vent off.If the oven temperature falls below 150°F, the control will lock out. The display will read ‘LOC OUT’ andthe unit will not operate. Authorized personnel must be contacted to restart the oven.If the control is inadvertently turned OFF while in kosher mode, when powered ON, the control will re-startin kosher mode as long as the temperature has not dropped below the minimum requirements.– 12 –
Programming the OvenSingle Step RecipesThe recipe menu stores up to 99 recipes that can be recalled by number when needed. A recipe is a setof baking instructions (temperature, time & steam time, vent and fan delay settings) that the operatordefines for any baking operation.1. With the oven in the OFF mode, press and hold the UP arrow in the STEP section. While pressingand holding the UP arrow, press and hold the POWER ON OFF button for 3 seconds. When all thedisplays light, the oven is in the recipe mode.2. Press the RECIPE UP or DOWN arrows until the recipe number that is desired is displayed.3. Press the TEMP UP or DOWN arrows to enter the desired temperature.4. Set the Time, Steam, Fan Delay, and Vent settings:• Press the UP or DOWN arrows next to TIMER to enter the desired time.• Press the UP or DOWN arrows next to STEAM TIMER to enter the desired time.• Press the UP arrow next to FAN DELAY to enter the desired time.NOTE: Steam and fan delay settings are optional and can be left at 0 if desired.• Press the VENT button to vent the cavity for the entire time of the step. When step is complete,vent will close.5. To store the recipe, press the RECIPE UP or DOWN arrows to move to the next recipe number orpress the POWER ON OFF button to exit the recipe mode. To store additional recipe settings, repeatsteps 2 to 4.– 13 –
Multi-Step RecipesAdditional steps can be entered <strong>with</strong>in the original recipe number. Up to four individual steps can be addedby the operator, each <strong>with</strong> different bake settings.For example, Recipe 1 has temperature, time, steam, and fan delay time settings set by the operator. Thisis known as Step 1. After the timer times out in Step 1, the oven automatically starts the programmed bakesettings in Step 2. The system continues <strong>with</strong> each step until all steps have been timed out.1. With the oven in the OFF mode, press and hold the UP arrow in the STEPS section. While pressingand holding the UP arrow, press the POWER ON OFF button for 3 seconds. When all the displayslight, the oven is in the recipe mode.2. Press the RECIPE UP or DOWN arrows until the recipe number that is desired is displayed. TheStep 1 light is lit.3. Press the TEMP UP or DOWN arrows to enter the desired temperature.4. Set the Time, Steam, Fan Delay, and Vent settings:• Press the UP or DOWN arrows next to TIMER to enter the desired time.• Press the UP or DOWN arrows next to STEAM TIMER to enter the desired time.• Press the UP arrow next to FAN DELAY to enter the desired time.NOTE: The steam and fan delay settings are optional and can be left at 0 if desired.• Press the VENT button to vent the cavity for the entire time of the step. When step is complete,vent will close.5. Press the UP arrow in the STEPS section to advance to the next step <strong>with</strong>in the recipe. The selectedstep light is lit. Repeat steps 3 and 4 above to set each step, if needed, in the program.6. To store all the steps in the program, press the RECIPE UP or DOWN arrows to move to the nextrecipe number, or press the POWER ON OFF button to exit the recipe mode.– 14 –
Editing the Recipes1. With the oven in the OFF mode, press and hold the UP arrow in the STEPS section. While pressingand holding the UP arrow, press the POWER ON button for 3 seconds. When all the displays light,the oven is in the recipe mode.2. Press the RECIPE UP or DOWN arrows until the recipe number that is desired is displayed.3. Enter the new Time, Steam, and Fan Delay settings:• Press the UP or DOWN arrows next to TIMER to enter the desired time.• Press the UP or DOWN arrows next to STEAM TIMER to enter the desired time.• Press the UP arrow next to FAN DELAY to enter the desired time.NOTE: The steam and fan delay settings are optional and can be left at 0 if desired.4. To change the settings in a Step, press the UP arrow in the STEPS section and make changes ineach step accordingly.5. To store the recipe, press the RECIPE UP or DOWN arrows to move to the next recipe number orpress the POWER ON OFF button to exit the recipe mode.– 15 –
Using the Recipes1. With the oven on, press the RECIPE UP or DOWN arrows to select the desired recipe number (1-99). The TEMP, TIMER, STEAM, and FAN DELAY settings are displayed.2. Confirm that the oven is at the set temperature.3. Slowly open the doors.4. Roll the <strong>rack</strong> into the oven so the end b<strong>rack</strong>ets channel onto the <strong>rack</strong> lifting carrier. (See LoadingProcedure.)5. Press START, and then close and latch the door.6. A beeper will sound after the TIMER times out. Press STOP to silence the beeper.Recipe Hints• The oven defaults to the Recipe 0 settings when first turned on. Recipe 0 settings are as follows:Temp = 375°F, Timer = 0, Steam Timer = 0, Delay Timer = 0, Recipe = 0.• Any combination of bake settings can be manually entered for one-time custom baking operations.These settings are not saved to the recipe memory.• If any of the parameters are changed in a recipe before or during a bake cycle, the oven reverts toa manual program (Recipe 0). If P20 (Restricted Mode) is set for 1 the settings can not be changedduring a bake cycle.• The RECIPE UP and DOWN arrows have no effect while the bake cycle is in progress. However,if the TIMER has been stopped, either by pressing the STOP button or by opening the door, thenpressing the RECIPE UP and DOWN arrows will select a new recipe and cancel the baking cyclethat was in progress.• When selecting recipes, the system will skip over unprogrammed numbers. For example, if Recipe1 is displayed in the RECIPE window and no recipes are stored in 2, 3, and 4, then the system willskip over 2, 3, and 4. Recipe 5 will be the next recipe displayed.– 16 –
Customized OperationThe <strong>OV500</strong> oven controls have the capability of being customized to fit your own personal needs usingthe setup mode.Before entering the setup mode, read all the instructions to make sure you are completely clear on whatto do. If you need assistance, please call your authorized Baxter service office.Entering Setup ModeWith the oven in the OFF mode, press and hold the START button. While pressing and holding the Startbutton, press the POWER ON OFF button for 3 seconds. The oven is now in Setup mode and P1 isdisplayed in the SET TEMP window.Changing Items in Setup ModeThe number in the SET TEMP window is the setup number. The TIMER window displays the setup item(the settings that can be changed).1. To change the setup number, press the SET TEMP UP or DOWN arrows. The setup item will bedisplayed in the TIMER window.2. To make a change in the setup item being displayed, press the TIMER UP or DOWN arrows. Toadjust the setting, see Setup Guide. Do not attempt to change item numbers P4, P5, P6, and P8.Consult your authorized Baxter service office for help <strong>with</strong> these features.3. To exit the setup mode, press the POWER ON OFF button.– 17 –
Setup GuideSETUPNUMBERP1P2P3P4SETUP ITEM DISPLAYMaximumTemperatureSetpointPreheatTemperatureMinimumTemperatureSetpointTemperatureOffsetThis is the maximum temperature at which the oven can be set. Range is 50°Fto 525°F (10°C to 275°C).This is the default temperature setpoint when the oven is first turned on(Program 0). The preheat temperature cannot be set higher than the value inP1 or lower than the value in P3.Range is 10°F to 525°F (10°C to 275°C).This is the minimum temperature at which the oven can be set. Range is 10°Fto 200°F (10°C to 200°C).This value permits an offset of correction between the oven temperaturedisplay and the real baking chamber temperature. Call your authorized serviceagency for help <strong>with</strong> this feature.P5 Heat OFF Offset This value adjusts the temperature difference between the set point andstopping of the heating system. Call your authorized service agency for help<strong>with</strong> this feature.P6P7P8Heat DifferenceHysteresisMaximum SteamTimeTemperatureUnitsThis value adjusts the temperature difference between the on temperature andoff temperature of the heating system. Call your authorized service agency forhelp <strong>with</strong> this feature.Time set is the maximum time (in seconds) that water is supplied during theSTEAM TIMER operation.The oven can be set to display temperature in Fahrenheit or Celsius. To ensureaccurate temperature parameters, call your authorized Bakery Systems serviceagency for help <strong>with</strong> this feature.P9 Timer Mode The TIMER can be set up to display minutes set/minutes remaining or hoursand minutes. Select 0 for minutes set/minutes remaining or 1 for hours andminutes. (If this parameter is changed to hours and minutes, a label has beenprovided to place on the control panel to indicate the change.)P10P11P12P13Vent EvacuateTimeVent OpenPercentageEnd of BakeAutomaticVent - EnableEnd of BakeAutomaticVent TimeTime set is the time (in seconds) that the vent is 100% open at the beginning ofthe venting cycle. Range is 0 to 180 seconds.This value is the percentage the bake chamber vent is open after the ventevacuate time has expired. Range is 5 to 100%.This feature enables the Automatic Vent Cycle. Select 0 to disable or 1 toenable this feature (see P13 for entering time).This is the number of minutes before the end of the bake cycle that the vent isopen.– 18 –
SETUPNUMBERP14P15SETUP ITEM DISPLAYSteam TimerModeInterior LightBrightnessThe steam timer can be set up to display in seconds or operate in food servicemode. Select 0 for seconds or 300 to 990 for food service mode.This value is the brightness of the interior lights. The higher the number, thebrighter the lights. Range is 50 to 100.P16 Clock Operation This selects either 12 hours (AM/PM) or 24 hours real time display. Press theBake Time Up button to switch between the two types of display.P17P18TemperatureSetback TimeSetbackTemperatureThis selects the elapsed time from the last timed bake to when the oven willlower the oven set temperature to the value set in P18. Range is 10 to 180minutes.This selects the oven set temperature that the oven will change to when thetemperature setback time has been exceeded in P17. Range is 50°F to 300°F(50°C to 300°C).P19 Lights Mode Select 1 for lights on continuously (when oven is on) or select 0 for automaticoperation. Lights will turn off automatically after 30 minutes of no user activity(door opened or closed, no buttons pushed).P20P21P22P23P24P25Restricted<strong>Operator</strong> ModeAdvancedEnergy SavingsModeOV210Operation ModeUnusedUnusedCommunicationModeSelect 1 for Restricted <strong>Operator</strong> Mode. When a recipe is selected by theoperator, the Bake Timer Minutes Set window will display the total bake timeof all steps in the recipe. Standard operation only displays the minutes inthe selected step. When a recipe is selected and the start button is pressedthe operator cannot make changes to the bake time remaining or the ovenset temp. If set for steam, steam is produced in 5-seconds on, 5-seconds offintervals for the time set in P7. The maximum solenoid on time range that canbe set in P7 increases to 60 seconds. Change P7 to 60 when P20 is set for 1.When P20 is changed from 1 = restricted operator mode to 0 = standard mode,P7 must be changed below 30 (range 0 to 30 max) or solenoid will energizecontinuously for up to 60 seconds.Select 1 for Advanced Energy Saving. Forcing the oven into an advancedAuto On - Auto Off mode to conserve energy. Several steps are necessary toenable this mode. Set the Auto On time to allow the oven to preheat beforethe first bake time. Set the Auto Off time. Press the Auto On/Auto Off button toilluminate the Timer On/Off indicator. Set P17 & P18 to customer settings. AutoON/OFF time is restricted when this feature is set to 1. Auto ON/OFF timescan only be changed while in P21.Select 1 for installation of an HBA control panel and control door on an OV210.When enabled, the OV210 will emulate all the functions of an HBA.Select 1 for NAFEM protocol compliant communication.– 19 –
ENERGY SAVING MODESet backSet back mode provides the ability to dial down the set temperature of the oven automatically when it isnot being used, but needs to be in a standby mode for baking. When the oven is switched to set backtemperature, the heating system remains in standby mode until it reaches that temperature. This leads toa reduction in the amount of energy used.Parameter 17 (Temperature Setback Time) allows the user to set the desired time for the oven to sit idlebefore dropping the temperature to the value entered in Parameter 18 (Setback Temperature). AdjustP18 to the desired setback temperature. A setting of 250°F is recommended to keep the steam systemabove the water flash point.AdvancedAdvanced energy savings (Parameter 21) mode allows the user to use the features of “Setback” as wellas locking the time that the oven can be turned on or off. This will prevent the oven from being turned onto early or left on overnight. Follow the instructions for P21 (Advance energy savings mode) to set theoven for advanced energy savings mode.The oven will automatically shut down at the pre-determined time, unless there is a bake in process.If you need to operate the oven after the pre-determined shutoff time, turn the oven back on by pressingthe ON/OFF button and immediately set the Bake Timer to at least 30 minutes and press start. If the baketimer has not been set to at least 30 minutes the oven will shut down.NOTE: If you do not use the oven <strong>with</strong>in 30 minutes, after timer counts down to 00:00, the oven will shutdown.ShutdownNOTE: Before restarting a gas oven, the power switch and the gas burner valve must be off for a minimumof 5 minutes.1. Remove all remaining product.NOTE: Vent can be used to evacuate steam from oven.2. Allow the oven to cool, then press the POWER ON/OFF button. If desired, quicker cool down timecan be accomplished through the use of the COOL DOWN button.3. Clean the baking chamber. See Cleaning page 22.4. For lengthy shutdowns, disconnect the main power and shut off the gas and water supply.RESTARTING OVENNOTE: Before restarting a gas oven, power switch and gas burner valve must be off for a minimum of5 minutes.1. Press the POWER ON OFF button to turn the oven on.2. Press the UP or DOWN arrows next to the SET TEMP window to enter the desired temperature.– 20 –
TroubleshootingBurners Will Not Light on Gas Oven1. Check that the loading door is shut and the door switch is actuated.2. Press the OFF button to turn the oven off and wait 5 minutes.3. Make sure the gas shutoff valve and gas valve are in the ON position.4. Press the ON button to turn the oven back on.If the above suggestions do not remedy the problem, contact a Bakery Systems service office.Alarms and Display MessagesAlarm or Message Cause ActionTemperature display changesbetween a number and ‘COOL’.Display is flashing <strong>with</strong> nobeeping, while oven is in a timedbake cycle and is calling for heat.Display shows ‘SHdn’.Control beeps continuously.Controls beeps rapidly (fasterbeep than Baker Timer).Display shows ‘LOC OUT’.Other Troubleshooting TopicsCool Down modeis active.Temperaturerecovery alert.Safety Alarm hasdisabled oven.Rack Rotationalert.Temperature alertfor Kosher Mode.Oven in KosherLock-Out Mode.To return to normal mode, close oven door or press anybutton.Open oven door and close to reset heat control. Ifunit does not begin heating, contact your local Bakeryservice office.TURN OFF ALL POWER AND GAS TO THE OVEN.Contact your local Bakery service office.Check that <strong>rack</strong> is rotating; check for pans that may beprotruding from <strong>rack</strong>. If problem persists contact yourlocal Bakery service office.Turn VENT off, if activated. Gas ovens: check thatburner is firing. If not firing, briefly open door and closeto reset temperature control.Contact your local Bakery service office.Condition Cause ActionOven is in Cooling mode.Oven circulation fan is running butoven is turned off.STEAM TIME cannot be set above10 seconds, and time incrementsby 1-second.Rack does not lift and rotate.Oven is in Food Service or Pulsesteam mode.Bake time has not been enteredin timer and/or timer has not beenstarted.Close oven door to cancel coolingmode. If door was not open, contactyour local Bakery service office.See Food Service Modeinstructions to return oven toBakery mode.Enter time in TIMER and pressSTART. If problem persists, contactyour local Bakery service office.– 21 –
CleaningDisconnect the electrical power to the machine and follow lockout / tagout procedures.There may be multiple circuits. Be sure all circuits are disconnected.The <strong>rack</strong> oven and its parts are hot. Use care when operating, servicing or cleaningthe <strong>rack</strong> oven.Hot air and steam are released from the oven interior when the loading door isopened. To avoid burns, open the door slowly and keep clear of the opening.• Allow the oven to cool.• Clean the outside of the oven daily <strong>with</strong> a clean, damp cloth.• Remove <strong>rack</strong>(s) and clean as you would any cooking utensil. Use warm, soapy water and a brush.Rinse <strong>with</strong> clear water and dry <strong>with</strong> a clean cloth.• Use care when cleaning around sensitive interior parts such as probes, sensors or the rotatingmechanism.• Using a clean cloth and warm, soapy water, wash the stainless steel interior of the oven. Rinse<strong>with</strong> clear water and dry <strong>with</strong> a clean cloth.• Gently scrape heavy buildup off door glass. Residue can be removed <strong>with</strong> a glass cleaner whenoven is cool.• Clean hood filters (if equipped) <strong>with</strong> soap and warm water.• Do not use oven cleaners or steel wool on stainless steel surfaces. Never spray down the oven<strong>with</strong> water or steam.• Never use cleaners that contain chlorine. Chlorine corrodes stainless steel.– 22 –
MAINTENANCEThe <strong>rack</strong> oven and its parts are hot. Use care when operating, servicing or cleaningthe <strong>rack</strong> oven.Hot air and steam are released from the oven interior when the loading door isopened. To avoid burns, open the door slowly and keep clear of the opening.Disconnect the electrical power to the machine and follow lockout / tagout procedures.There may be multiple circuits. Be sure all circuits are disconnected.On gas ovens, annually check the flue to be sure it is free of obstructions.GeneralAs Needed• Inspect the area around the oven. The area must be free and clear from combustibles. There mustbe no obstructions to the air flow.Daily• Clean Exterior (See Cleaning).Weekly• Clean the oven interior and remove loose debris (See Cleaning).• Clean the windows.• Empty grease catcher (if equipped).Monthly• Clean exhaust hood filters (if equipped) <strong>with</strong> soap and water.Bi-Monthly• Owner Preventive Maintenance Procedure.Preventive MaintenanceThe <strong>OV500</strong> Rack Oven must be kept on a regular preventive maintenance schedule. Ovens requirespecific preventive maintenance based on usage and environmental factors. The failure to have the ovenproperly maintained by following recommended preventive maintenance procedures may result in higherrepair costs, shortened equipment life, or unsafe operating conditions.It is the owner’s responsibility to make sure preventative maintenance is performed on the <strong>rack</strong> oven.This will ensure continued safe and reliable operation. Contact an authorized Bakery Service agency toprovide this skilled service for you.Service and Parts InformationContact your authorized Bakery Systems service office.– 23 –
Owner PREVENTIVE MAINTENANCE PROCEDUREIntroductionThis customer preventive maintenance (PM) section includes procedures to inspect for proper operationand cleaning of components. Owner Preventive Maintenance Procedures are written for gas ovens. Theycan also be used for electric ovens by omitting the steps that refer to components found only on gas ovens.To maintain the safety and performance of bakery ovens a program of scheduled periodic maintenancemust be implemented. It is the sole responsibility of the user to establish, schedule, and enforce such aprogram. Although the service interval will vary depending on the environment in which the equipmentis operating it is recommended that Preventive Maintenance be performed and all safety devices arechecked at a minimum of 12 month intervals. Check <strong>with</strong> the authority having local jurisdiction if there arespecific maintenance requirements specified by local, state, or national codes. A convenient PM Checklistis provided at the end of this section.NOTE: This PM procedure does not discuss repair or replacement of components. Upon completion ofthe PM procedure you will need to contact a qualified servicer for any needed repairs.Tools Used For Inspection Procedure• Standard set of hand tools• Vacuum cleaner - shop vacPreventive Maintenance ProcedureDisconnect the electrical power to the machine and follow lockout / tagout procedures.There may be multiple circuits. Be sure all circuits are disconnected.Shut off the gas before servicing the unit.Certain procedures in this section may require electrical test or measurements whilepower is applied to the machine. Exercise extreme caution at all times. If test points are not easilyaccessible, disconnect power and follow lockout / tagout procedures, attach test equipment andreapply power to test.Inspect Oven Lamps1. Lamps should be on when oven is powered.2. If not, replace lamps (Fig. 1).A. Remove lens cover by turning out of lamphousing.B. Remove oven lamp by turning lamp out oflamp socket.3. Reverse the procedure to install new lamps.Fig. 1– 24 –
Clean and Vacuum Components and Control/Burner Compartment Area (Gas Only)1. Clean the control/burner compartment (Fig. 2) area of dust and/or lint accumulation.2. Vacuum the control/burner compartment floor of dust and/or lint accumulation.3. Gain access to the top of oven and clean dust that may have accumulated on top of circulation blowermotor (Fig. 3) and motor cooling fan.Rack Lift and Rotation AssembliesFig. 2 Fig. 31. Check <strong>rack</strong> lift assembly for proper operation.A. Open door. Rack lift should lower to correct height of <strong>rack</strong> and be in forward loading positionto accept <strong>rack</strong> entry.B. The oven <strong>rack</strong> should be easily rolled in and out of oven and the wheels completely off theoven floor when raised.2. Tighten all set screws (4) in carrier (Fig. 4).A. Check and tighten all set screws on carrier.Fig. 4– 25 –
Inspect Door Components1. Check loading door latch.A. Check door gasket for good condition. Ifdoor gasket needs replacement, contactyour local Bakery Systems office for service.B. Check that the loading door lock ramps areclean (Fig. 5) and rollers on the door moveup and down and spin freely (Fig. 6).C. Adjust latch ramps in or out by looseningthe two screws. DO NOT REMOVE THEM.Slide ramp in or out to loosen or tightendoor (Fig. 5).D. Tighten screws.2. Check door sweep.A. The door sweep should hit the floor evenlyacross door width, when door is in the closedposition.B. Turn oven on.C. If air (or steam) blows out from underneaththe door, door will need to be adjusted. If doorsweep needs replacement or adjustment,contact your local Bakery Systems office for service.3. Check interior door release (Fig. 7) for proper operation.4. Check door switch for proper operation.A. When door switch actuator rod is in the open position(door open), the door switch rollers should bepositioned on the small part of the rod (Fig. 8).Fig. 5Fig. 6Fig. 7Fig. 8Fig. 9– 26 –
5. Check door handle operation.A. Pull out on door handle (Fig. 10) to open door, then push door shut (Fig. 11). If the door is toohard to open or close, see door ramps adjustment (Fig. 5).6. Clean door glass.Fig. 10 Fig. 11 Fig. 12A. With the loading door shut, pull door handle lock pin out(Fig. 12).B. Pull door handle out (Fig. 13).C. Swing handle open (Fig. 14).NOTE: Make sure not to dent door on hinged side.D. Check that there is no residue buildup on the handle lockmechanism (Fig. 14).NOTE: The handle for the glass is located at the top or bottom of glass.Fig. 13E. Pull out on handle (Fig. 14) to open glass door. If glass door needs to be adjusted, contact yourlocal Bakery Systems office for service.Failure to contact service for glass door adjustment may result in the glass breaking.Fig. 14– 27 –
F. To close the glass door simply push shut.G. To close handle, the lock mechanism needs tobe in the unlock orientation (Fig. 15).NOTE: If lock is not in the unlock orientation, pull lockpin out and rotate lock to the unlock orientation.H. Place lock box over hex bolt and slowly pushhandle in to door (Fig. 15). Check to see ifthe handle latch engaged by opening door(Fig. 10). Repeat if necessary.Inspect Air LouversFig. 151. Check air louvers (shutters) (Fig. 16) inside oven andtighten any loose screws.2. Check oven interior, tighten or replace loose or missingpanel screws. Also check floor anchors.Inspect Cavity Vent1. Check cavity vent for proper operation.A. Push VENT (Fig. 17) button on control panel toopen vent and then push again to close vent.B. Visually check that vent opens (Fig. 18) andcloses (Fig. 19) when button is pressed.C. Check that vent gasket is intact.Fig. 16Fig. 17Fig. 18 Fig. 19Visually Inspect Electrical Connections1. Inspect all wiring connections for discoloration. If discoloration is visible, contact your local BakerySystems service office.– 28 –
Verify Ignition Module Safety Lockout Functions(Gas Only)1. Verify ignition module safety lockout functions.A. Turn off main gas supply to the oven.B. Open control panel door to gain access toburner compartment area.C. Turn the oven on. Check that electricalbreakers are turned on.D. Set the oven to call for heat and make sureconvection fan is running.E. Observe LED light through hole in controlbox cover (Fig. 20). After trying to lightthe burner three times, the module shouldlockout. (See chart below.)F. Turn off the oven control for a minimum offive seconds and then turn the oven controlback on.G. Turn main gas supply to the oven back on.H. Set the oven to call for heat, making sureconvection fan is running and the burner hasestablished a flame.Fig. 20I. Turn off main gas supply to the oven.J. Observe LED light through hole in control box cover (Fig. 20). The ignition module should gointo lockout after three trials for ignition. (See chart below.)LED DIAGNOSTIC INDICATOR CODESLEDLEDLED offNo FaultLED IlluminatedModule Fault‘1’ Flash Air Flow Fault‘2’ Flash Flame Fault No Call for Heat‘3’ Flash Ignition Module LockoutK. If the proper results have been obtained,proceed to step 2 , if not contact your localBakery Systems service office.2. Verify hood exhaust air pressure switch (Fig. 21)operation.Fig. 21A. Turn on main gas supply and set oven control to call for heat and make sure convection fan isrunning.B. Once flame is established, disconnect tubing from hood pressure switch hose. Burner flameshould go out.C. Reconnect tubing. Burner should establish a flame. If not, contact your local Bakery Systemsservice office.– 29 –
3. Verify draft inducer pressure switch (Fig. 22)operation.A. Set oven control to call for heat and makesure convection fan is running.B. Once flame is established, disconnect tubingfrom draft inducer pressure switch. Burnerflame should go out.C. Reconnect tubing. Burner should establisha flame. If not, contact your local BakerySystems service office.Verify Operation of Steam1. Check steam system for proper operation.A. Turn the water supply on.B. Turn oven on and set to normal baketemperature.C. Allow oven to preheat for 30 minutes.D. Set control to call for steam.Fig. 22E. Observe operation. If steam is not observed, contact your local Bakery Systems service office.After completion of the owner PM procedure, you will need to contact a qualified servicer for anyneeded repairs.Keep a copy of the Owner Preventive Maintenance Checklist for your records.– 30 –
COPY AS NEEDEDMODEL/SERIAL NUMBERSRECOMMENDED OWNERPREVENTIVE MAINTENANCE CHECKLISTBAKERY RACK OVENS - GASCHECK FOR PROPER OPERATION OR CLEAN.CALL FOR SERVICE AS NECESSARYInspect ovenlampsClean and vacuum components and burner areasInspect <strong>rack</strong> lift and rotationInspect door componentsInspect air louversInspect cavity ventassembliesVisually inspect electrical connectionsVerify ignition module safety lockoutVerify operation of steamfunctions√ =PROCESS COMPLETEDPM Frequency:Type of GasBi-monthlyNatural GasPropaneLocation:Inspector:Store No.Date Completed:Service Notified for Necessary Repairs:(Date)Comments:(Inspector Signature)– 31 –
NOTESFORM 36715 Rev. A (September 2012)– 32 –PRINTED IN U.S.A.