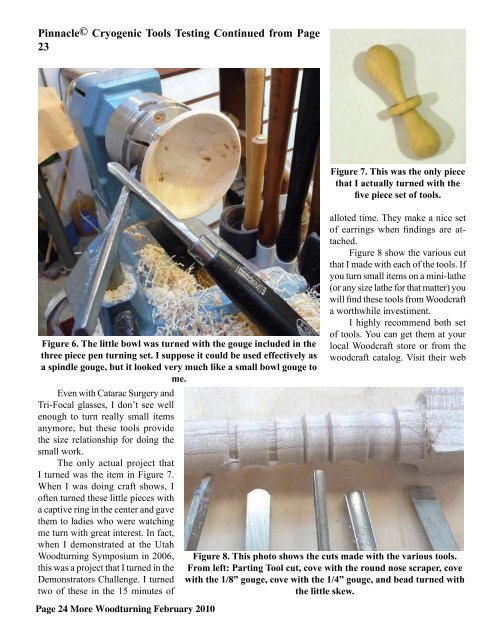
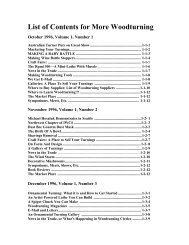
Pinnacle© Cryogenic Tools Testing Continued from Page23Figure 6. The little bowl was turned with the gouge included in thethree piece pen turning set. I suppose it could be used effectively asa spindle gouge, but it looked very much like a small bowl gouge tome.Even with Catarac Surgery andTri-Focal glasses, I don’t see wellenough to turn really small itemsanymore, but these tools providethe size relationship for doing thesmall work.The only actual project thatI turned was the item in Figure 7.When I was doing craft shows, Ioften turned these little pieces witha captive ring in the center and gavethem to ladies who were watchingme turn with great interest. In fact,when I demonstrated at the Utah<strong>Woodturning</strong> Symposium in 2006,this was a project that I turned in theDemonstrators Challenge. I turnedtwo of these in the 15 minutes ofPage 24 <strong>More</strong> <strong>Woodturning</strong> February 2010Figure 7. This was the only piecethat I actually turned with thefive piece set of tools.alloted time. They make a nice setof earrings when findings are attached.Figure 8 show the various cutthat I made with each of the tools. Ifyou turn small items on a mini-lathe(or any size lathe for that matter) youwill find these tools from Woodcrafta worthwhile investiment.I highly recommend both setof tools. You can get them at yourlocal Woodcraft store or from thewoodcraft catalog. Visit their webFigure 8. This photo shows the cuts made with the various tools.From left: Parting Tool cut, cove with the round nose scraper, covewith the 1/8” gouge, cove with the 1/4” gouge, and bead turned withthe little skew.
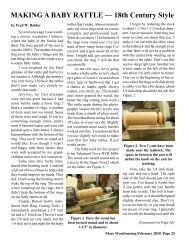
MAKING A BABY RATTLE — 18th Century Styleby Fred W. HolderSeveral years ago I was watchinga movie, Australian I believe,where the baby in the family haddied. The time period of the moviewas the 1800’s. The mother was puttingaway the baby’s things and thelast thing she laid in the trunk was awooden baby rattle.I was inspired by the briefglimpse of that rattle and had to trymy hand at it. Although my memorywas a bit fuzzy, I believe the rattlesthat I now make very closely resemblethat rattle.Anyway, my first attemptswere not too great because I hadnever before made a loose ring. Ibroke a number of rings. A numberof them were not too round. Someof them were real rough. If you trysomething enough times, prettysoon it become easier and your endproduct gets a little better. I alwayshad problems with the bottom of thering. They never were as round as Iwould like. Even though I wasn’treal happy with these rattles, theywere well accepted by my grandchildrenand even a few customers.Some time later Sorby introducedtheir beading tools. I ordereda full set of five of these in hopes thatthey would improve my beads. Theydid. I tried using the beading tool tomake the top of the ring. This madea nice round top on my rings, but itdidn’t help the bottom of the ringson my baby rattles at all.Finally, Robert Sorby introducedtheir Ring Cutting Tools. Iimmediately purchased a 1/4 inchset and a 3/ 8 inch set. I haven’t usedthe 3/8 inch set very much, but the1/4 inch set is just right for the babyrattles that I make. Almost immediatelymy loose rings took on a morecomplete and professional look.What do you know! The bottoms ofthe rings were round too! I’ve losttrack of how many loose rings I’vecut now and it gets easier all of thetime. I might add, get careless andyou break the ring. I still do thatoccasionally.As the title says, we’re goingto make a baby rattle so let’s chuckup a piece of wood. I’ve used aboutevery type of hardwood that I geta chance at: maple, apple, cherry,walnut, yew, birch, etc. (The harderand closer grained the wood, thebetter the ring cutting tools work.)The rattle made during the photographicsession for this article wasmade from a chunk of plum wood.The wood had been curing for about10 years, so it was very dry. Slightlywet wood turn more easily, but thisworked just fine. I recommend thatyou use slightly wet wood to makeyour first few baby rattles. It justworks easier.The lathe used for this projectis my Teknatool Nova DVR 3000.The wood was turned round and toa size to fit the Super Nova2 chuckon my lathe, see Figure 1.Figure 1. Here the wood hasbeen turned round and to about1-1/2” in diameter.I begin by reducing the stockto about 1-1/4 to 1-1/2 inch in diameter.I never measure it but they justseem to come out about that size. Imake a vee cut with the skew closeto the tailstock, but far enough awayso that there will not be a problemwith the center hole winding up inthe end of the rattle. Don’t cut thisvee too deep right now. Another veeis now made to the left of the firstone about 5/8 inch center to center.This vee is the beginning of the recesswhere the rings will slide freelyto rattle. Cut this a bit deeper, about3/8 inch deep should do the job. SeeFigure 2.Figure 2. Two V-cuts have beenmade near the tailstock. Thespace in between the cuts willdefine the knob on the end forteething.Now, take the 1/4 inch beadingtool and cut a bead. The rightside of the tool should just cut intoyour vee. I’ve found it works bestif you gently rock the tool handlefrom side to side. This tool is basicallya scraper so it should be tippedslightly downward also. Don’t tryto cut too heavily or you may breakout pieces of your ring. I generallycut in with the beading tool until the[Continued on Page 26]<strong>More</strong> <strong>Woodturning</strong> February 2010 Page 25