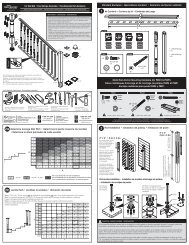
TAT60 Guide - Buchner Manufacturing
TAT60 Guide - Buchner Manufacturing
TAT60 Guide - Buchner Manufacturing

You also want an ePaper? Increase the reach of your titles
YUMPU automatically turns print PDFs into web optimized ePapers that Google loves.
Saw Track Adjustment (cont.)4. Note: Complete this optional step only if tracks are loweredand additional support under rails is desired. First, notch outeach rear fence to a point even with bottom of rails. Once youare ready to make cuts, position the saw boom at the desiredangle and lock in place (see examples on page 3). Next, looseneach rear fence and position notches under each saw track (tohelp prevent saw tracks from sagging). Remember to loosenrear fences and slide out of the way before repositioning sawboom.Remove NotchUsing Quick-In/Out Feature and Setting Saw Blade DepthIV.Now that your saw freely slides the length of the tracks, youcan quickly remove or insert it by following the followingprocedure: While holding the saw at a slight angle, slide theedge of the saw shoe into the opening of the track and let theopposite edge of the shoe fall into place through the notch.Using the saw’s height adjustment feature, raise or lower theblade to a point where it breaks the plane of the boom’s baseby at least an 1/8 inch (review on page 1).NotchWing Supports, Memory Stops and Butt Stop UseV. To install the wing supports, slide top decks away from sawboom. Align the male tracking nub with the female opening inthe top deck and slide into place. After locking your saw boomto an angle, slide the wing under any material that may overhangthe top decks. Butt stops can be used along the rear fencesor extension rails to provide a convenient means for placingmaterials at a fixed point for repeat cuts. Memory stops can betightened, or loosened on your mark along the saw boom andstop the boom at that point for repeat cutting.Operation & TipsVI. 1.Top decks, rear fences and extensions can all be locked in place using the spring-loaded lockscrews. Wings are designed to be free floating. To start cutting angles, slide tops away from centerand rotate saw boom until the mark on the base is at the desired angle on the protractor. Turn lockingknob clockwise until saw boom is firmly in place. Slide top decks back toward center to takeup any gaps and lock in place. Slide material along the rear fence up to the desired cut. Make cutalong entire cut line remembering to observe all manufacturers safety warnings and pre-cautionswhile operating any, and all related power tools.Saw Boom locked at 45 degrees2. When cutting wide materials extending beyond the support offered by the wings, remove the rear fences. If a special angle is needed,create a template from scrap and draw the angle. Use this to set your saw boom. Periodically check the alignment of your saw boomassembly and re-tighten all fasteners as needed. Memory stops are provided on either side of the boom. Use them as stops to return thesaw boom to a previous angle. Be sure to move the memory stops out of the way when rotating the saw boom.3. When transporting table, loosen locking knob and lift saw boom from pivot stub. Slide top decks and extensions toward center and lockwith thumbscrews. Be careful not to place items on top of table or boom or bang into them as damage can/will occur.