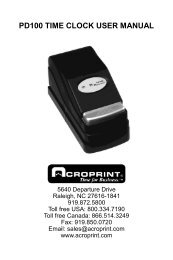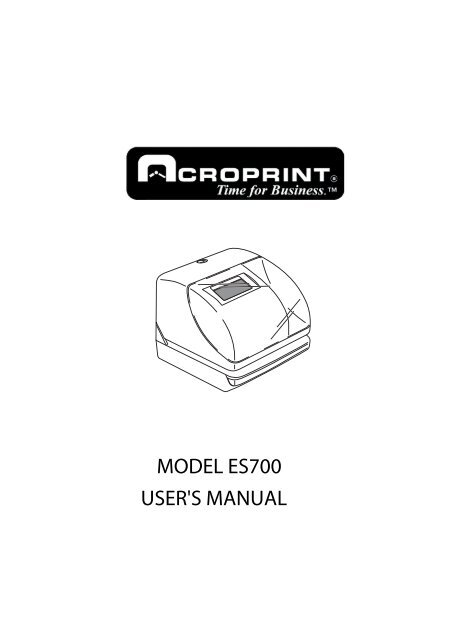
MODEL ES700 USER'S MANUAL - Acroprint
MODEL ES700 USER'S MANUAL - Acroprint
MODEL ES700 USER'S MANUAL - Acroprint

You also want an ePaper? Increase the reach of your titles
YUMPU automatically turns print PDFs into web optimized ePapers that Google loves.
Time for Business.R<strong>MODEL</strong> <strong>ES700</strong><strong>USER'S</strong> <strong>MANUAL</strong>
WARNINGThis equipment has been tested and found to comply with the limits for a Class Adigital device, pursuant to Part 15 of FCC Rules. These limits are designed toprovide reasonable protection against harmful interference when the equipmentis operated in a commercial environment. This equipment generates, uses, andcan radiate radio frequency energy and, if not installed and used in accordancewith the instruction manual, may cause harmful interference to radiocommunications. Operation of this equipment in a residential area is likely tocause harmful interference in which case the user will be required to correct theinterference at his or her own expense.Caution: Changes or modifications not expressly approved by the partyresponsible for compliance could void the user's authority to operate theequipment.THIS DIGITAL APPARATUS DOES NOT EXCEED THE CLASS A LIMITS FOR RADIO NOISE EMISSIONSFROM DIGITAL APPARATUS AS SET OUT IN THE RADIO INTERFERENCE REGULATIONS OF THECANADIAN DEPARTMENT OF COMMUNICATIONS.LE PRÉSENT APPAREIL NUMÉRIQUE N'ÉMET PAS DE BRUITS RADIOÉLECTRIQUES DÉPASSANT LESLIMITES APPLICABLES AUX APPAREILS NUMÉRIQUES DE CLASSE A PRESCRITES DANS LERÈGLEMENT SUR LE BROUILLAGE RADIOÉLECTRIQUE ÉDICTÉ PAR LE MINISTÈRE DESCOMMUNICATIONS DU CANADA.This product utilizes a battery that contains Perchlorate Material.Perchlorate Material - special handling may apply, Seewww.dtsc.ca.gov/hazardouswaste/perchlorateThis manual is the confidential proprietary document solely for the use of<strong>Acroprint</strong> Time Recorder customers. Material in this manual is subject to changewithout notice and does not represent an obligation on the part of <strong>Acroprint</strong> TimeRecorder. No part of this manual may be reproduced or transmitted in any form byany means without the express written permission of <strong>Acroprint</strong> Time Recorder.This User's Manual has been carefully prepared to cover all aspects of the timerecorder's use. Before using the time recorder, we recommend you carefully readthis manual to familiarize yourself with the Time Recorder.ALL RIGHTS RESERVED.© 2001 & 2006 ACROPRINT TIME RECORDERTime for Business.R
PRECAUTIONSThis user's manual is prepared for safe and proper use of the unit.Please follow all the instructions to avoid possible danger to yourself orothers and damage to the unit.SignsVarious warnings and cautions are provided throughout this manual along with signs.Remember each sign and its explanation listed below for your safety and properoperation of the unit.WarningCautionImproper handling may cause bodily accidents includingdeath and serious injury.Improper handling may harm the human body or material.Improper handling may cause electricshock DANGER.DO NOT disassemble the unit."Must-Do" sign.Be sure to remove the line cord plugfrom the outlet."Don't" sign.WarningDo not disassemble the unit. There is a high voltage present inside, possibly leading to anelectric shock.Do not modify the unit. Modifications may cause a fire and/or electric shock.If any anomaly occurs, for example, heat or smoke is generated or an odor is emitted, unplugthe unit immediately and contact your dealer for servicing. There is a danger that further usemay cause a fire or electric shock.Do not use any voltage of the power source other than designated.Do not share a single outlet with another plug. These may lead to fire or shock hazards.Do not damage, break, or modify the power cord. Do not put a heavy object on, pull, orforcefully bend the cord, either. These may damage the cord, possibly resulting in a fire orelectric shock.11
If foreign matter should get in the unit (including a piece of metal, water, or liquid), disconnectthe plug from the outlet immediately and contact your dealer for servicing. There is a dangerthat further use may cause a fire or electric shock.Do not plug or unplug the unit with a wet hand. You may get an electric shock.CautionDo not place the unit on an uneven or tilted surface. This may result in injuries due to the unitdropping or falling off.Do not put a water-filled container or a metal object on top of the unit. If water is spilled or themetallic object slips inside, a fire or shock hazard may occur.Do not install the unit in a humid or dusty environment. It may cause a fire or electric shock.Do not place the unit near kitchen counter or humidifier. Oil, smoke, or steam generating fromthem may cause fire or shock hazards.Do not yank the power cord to disconnect from the outlet. Hold the plug with your hand to doso, or the cord may be damaged, possibly leading to a fire or electric shock.Remove the line cord plug from the outlet before transferring the unit, or it may damage thecord, possibly leading to a fire or electric shock.Be careful not to contact the print head, as you may get hurt or burned.Make sure to insert the power plug as far as it will go. Improper insertion of the plug maydevelop fire or shock hazards.Do not insert or drop any other time card than specified into the slot. Such misuse may cause afire or electric shock.If the unit should be dropped or the case be broken, unplug the unit and contact your dealer forservicing. Further use may lead to a fire or shock hazard.2 2
CONTENTSIntroduction & features ..............................................................................Before using your time recorder ................................................................Quick easy setup ..........................................................................................How to program the recorder ....................................................................Setting the display formatSetting the time .....................................................................................Setting the date .....................................................................................Setting the 12/24 hour display format ..................................................Setting the print order .................................................................................Setting the print styleSetting the year digit .............................................................................Setting the hour/min .............................................................................Disabling the leading zero ....................................................................Setting the comment .............................................................................Setting the language ..............................................................................Setting the print method .............................................................................Setting the daylight saving timeSetting the starting date of daylight saving time ...................................Setting the ending date of daylight saving time ....................................Deleting the daylight saving time setting .............................................Setting the passwordRegistering the password ......................................................................Using the password to access program ................................................Canceling the password ........................................................................Resetting .......................................................................................................Wall mounting ..............................................................................................Replacing the ribbon cassette .....................................................................Troubleshooting ...........................................................................................Specifications ................................................................................................12345678910111213141617181920212324252728
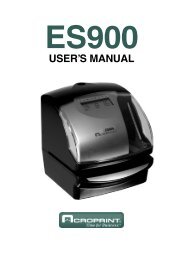
INTRODUCTION & FEATURESINTRODUCTION:Thank you for purchasing an <strong>Acroprint</strong> Model <strong>ES700</strong> Time Recorder.We are confident this time recorder will give you full satisfaction. Itemssuch as the time and date are preset at the factory. After plugging inthe AC power, the recorder may be used immediately.However, we recommend reading this manual before you start usingyour time recorder.FEATURES:Main applications: payroll/job cost recorder or time stamp.Caution:Quartz timing for accuracyDigital LCD display(Date, Hour, Minute, Day ofthe week indication)Dot-Matrix printerPerpetual calendarAutomatic date, day, andmonth change3-way print activationManualAutomaticSemi-automaticPrints 4 languages: English,French, Spanish, PortuguesePrints seconds12 or 24-hour formatRegular minute, tenths,twentieths, or hundredths of anhour2 or 4-digit year print13 preprogrammed commentsAdjustable print positionDo not use in places:• Subject to high humidity and dust.• Exposed to strong or continuous vibrations.• Exposed to direct sunlight.• Affected by chemical or ozone.Place the time clock close to the wall outlet so that it is easilyaccessible to disconnect.The temperature range in which all functions of the time recorder willoperate correctly is from -5˚C to 45˚C. Be sure to place your timerecorder only in locations where the temperature range is notexceeded and has no sharp fluctuations in temperature.•12
BEFORE USING YOUR TIME RECORDERPackage ContentsUnpack the time recorder and check its contents to ensure that the time recorder unitand all accessories as shown below are included.ACCESSORIES INCLUDEDDisplay• Time recorderKey hole• User's Manual• Ribbon cassette...................1 pcs.Cover• Keys...............2 pcs.• The ribbon casette isinstalled at the factory.Push bar• Wall-mount fittingsScrew ................ 2 pcs.Template .........1 sheet.Wall-mount holesAC adapterAC Power PlugLOCATION OF COMPONENTSIt is important to become familiar with the time recorder before setting it up and using it.2Control buttonsDisplayRibbon cassettePrint headThe print position from the cardedge is adjustable by pressingand sliding the print positionbutton on outside bottom.JAN 31AM12:00JAN 31AM12:0015mmJAN31A30mmPRINT POSITIONON TIME CARDThe print position fromthe card edge is adjustableby pressing and sliding theprint position buttonlocated on the bottom ofthe recorder. Maximumdistance from edge ofform to print isapproximately 1 3/16"(30mm)2
QUICK EASY SETUPStep 1Unlock the key and remove the top case.Step 3Plug the AC cord into the AC outlet.The recorder is now ready to be set.CAUTIONStep 2Remove the PROTECTION PAD.Plug the AC adapter into the timerecorder.Step 4Replace the cover and lock.Insert a card.AC outletAC adapterProtection padCAUTIONCardJAN 31 AM12:003(print example)
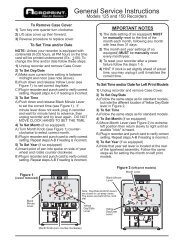
HOW TO PROGRAM THE RECORDERTo enter the program setting mode, one must plug the AC adapter into the AC outlet andremove the cover. Next press the SELECT button once. Then the recorder changes into theprogram mode showing the on the display positioned under the "TIME" mark.Program modesControl buttonsFUNCTION OF 3 CONTROL BUTTONSSELECT : Press the SELECT button to choose the program setting mode. The selectedprogram mode is indicated by the mark on the display.CHANGE : Pressing the CHANGE button allows you to cycle through the options.SET : Pressing the SET button allows you to set the option shown on the display.4
SETTING THE DISPLAY FORMATSETTING THE TIMEEx: Set the time from 10:08 to 10:09.Step 1Second Hour MinuteTIMEStep 2TIMESELECT CHANGE SETSELECT CHANGE SETPress the SELECT button and positionthe under the "TIME" mark. One cansee that the "hour" flashes. (the flashingmeans that the number can be changed.)Change the "Minute"In this case, press the CHANGE buttonto set at "09". And then press the SETbutton.At that moment, the "Second" starts torun from "00".TIMESELECT CHANGE SETChange the "Hour"In case of the example, press the SETbutton because the hour is not to bechanged.At that moment, the flashing changesfrom "Hour" to "Minute".Step 3MOTU WE TH FR SA SUAfter you finish setting the time, pressthe SET button once again.Now the hour/minute setting has beencompleted. Replace the cover and lock.Important: Printing will not occur unlessStep 3 is completed.5
SETTING THE DISPLAY FORMATEx: Set the hour format to 24 hour.Step 1SETTING THE 12/24 HOUR DISPLAY FORMATHOURHOURSELECT CHANGE SETPress the SELECT button and positionthe under the "HOUR" mark.At that moment, the flashing digitindicates "Hour Display FormatOptions".SELECT CHANGE SETIn case of the example, press theCHANGE button to set at "2".And then press the SET button.1.2.Hour Display Format Options12 hour24 hourDisplayPM 3:0015:00Step 2MOTU WE TH FR SA SUAfter you finish setting the 12/24 hourdisplay format, press the SET buttononce again.Now the 12/24 hour setting has beencompleted. Replace the coverand lock.Important: Printing will not occurunless Step 2 is completed.7
SETTING THE PRINT ORDEREx: Set the print order to "Month, Date, Year, Hour, Minute".Step 1PRINTORDERPRINTORDERSELECT CHANGE SETPress the SELECT button and positionthe under the "PRINT ORDER" mark.At that moment, the flashing digitindicates "Print Order Options".SELECT CHANGE SETIn case of the example, press theCHANGE button to set at "3".And then press the SET button.Y=Year, M=Month, D=Date, DOW=Day of the week, H=Hour, Min=MinuteS=Second, C=Comment1.2.3.4.5.6.7.8.9.10.11.12.13.14.15.16.17.18.Print Order OptionsM, D, H, MinD, M, H, MinM, D, Y, H, MinD, M, Y, H, MinY, M, D, H, MinY, M, D, H, Min, SD, H, MinDOW, D, H, MinY, M, DM, DDOW, D, M, YC, M, D, YC, D, M, YC, Y, M, DM, D, Y, CD, M, Y, CY, M, D, CC, D, H, MinPrint ExampleJAN 31 AM10:0031 JAN AM10:00JAN 31 '06 AM10:0031 JAN '06 AM10:00'06 JAN 31 AM10:00'06 JAN 31 AM 10:00:0031 AM10:00TU, 31 AM10:00'06 JAN 31JAN 31TU, 31 JAN '06SENT JAN 31 '06SENT 31 JAN '06SENT '06 JAN 31JAN 31 '06 SENT31 JAN '06 SENT'06 JAN 31 SENTSENT 31 AM10:00Step 2MOTU WE TH FR SA SUAfter you finish setting the print order,press the SET button once again.Now the print order setting has beencompleted. Replace the cover and lock.Important: Printing will not occurunless Step 2 is completed.8
SETTING THE PRINT STYLEEx: Set the year imprint to 4 digits.SETTING THE YEAR DIGITStep 1YEARDIGITYEARDIGITSELECT CHANGE SETPress the SELECT button and positionthe under the "YEAR DIGIT" mark.At that moment, the flashing digitindicates "Year Digit Options".SELECT CHANGE SETIn case of the example, press theCHANGE button to set at "2", andthen press the SET button.1.2.Year Digit Options2 Digits4 DigitsPrint ExampleJAN 31 '06 AM10:00JAN 31 2006 AM10:00Step 2MOTU WE TH FR SA SUAfter you finish setting the year digit,press the SET button once again.Now the year digit setting has beencompleted. Replace the cover andlock.Important:Printing will not occurunless Step 2 is completed.9
SETTING THE PRINT STYLEEx: Set the print style of the "Hour" and "Minute" to 24 hour and 1/100min.Step 1SETTING THE HOUR/MIN.Type ofan hourHOURMIN.Type ofMinuteHOURMIN.SELECT CHANGE SETPress the SELECT button and positionthe under "HOUR/MIN" mark.At that moment, the flashing digitindicates "Hour Options".Change the "Hour".1.2.Hour Options12 Hour24 HourSELECT CHANGE SETIn case of the example, press theCHANGE button to set at 2. Andthen press the SET button. At thatmoment, the flashing changes from"Hour" to "Minute".Print ExampleJAN 31 PM3:00JAN 31 15:00Step 2HOURMIN.In case of the example, press theCHANGE button to set at "2". Andthen press the SET button.SELECT CHANGE SETChange the "Minute".1.2.Order Options Print ExampleOrder Options Print Example1/60 Min. JAN 31 AM12:10 3. 1/20 Min. (=5/100 Min.) JAN 31 AM12.151/100 Min. JAN 31 AM12.17 4. 1/10 Min.JAN 31 AM12.1Step 3MOTU WE TH FR SA SUAfter you finish setting the hour/minute,press the SET button once again.Now the hour/minute setting has beencompleted. Replace the cover and lock.Important: Printing will not occur unlessStep 3 is completed.10
SETTING THE PRINT STYLEDISABLING THE LEADING ZEROEx. Set the leading zero to "Zero: Disabled".Step 1LEADINGZEROLEADINGZEROSELECT CHANGE SETPress the SELECT button and positionthe under "LEADING ZERO" mark.At that moment, the flashing digitindicates "Leading Zero Options".SELECT CHANGE SETIn case of the example, press theCHANGE button to set at "1". Andthen press the SET button.1.2.Leading Zero OptionsZERO DisabledZERO EnabledPrint ExampleJAN 1 PM3:00JAN 01 PM03:00Step 2MOTU WE TH FR SA SUAfter you finish setting the leading zero,press the SET button once again.Now the leading zero setting has beencompleted. Replace the cover and lock.Important: Printing will not occur unlessStep 2 is completed.11
SETTING THE PRINT STYLEEx: Set the comment to "SENT".Step 1SETTING THE COMMENTCOMMENTCOMMENTSELECT CHANGE SET SELECT CHANGE SETPress the SELECT button and positionthe under "COMMENT" mark.At that moment, the flashing digitindicates "Comment Options".(The flashing means it can bechanged)In case of the example, press theCHANGE button to set at "2". Andthen press the SET button.1.2.3.4.5.6.7.8.9.10.11.12.13.Comment OptionsRCVD (Received)SENTINOUTCFMD (Confirmed)FILEDPAIDUSEDFAXEDVOIDORIGN (Original)APR'D (Approved)CMPL'D (Completed)Print ExampleJAN 31 '06 RCVDJAN 31 '06 SENTJAN 31 '06 INJAN 31 '06 OUTJAN 31 '06 CFMDJAN 31 '06 FILEDJAN 31 '06 PAIDJAN 31 '06 USEDJAN 31 '06 FAXEDJAN 31 '06 VOIDJAN 31 '06 ORIGNJAN 31 '06 APR'DJAN 31 '06 CMPL'DStep 2MOTU WE TH FR SA SUAfter you finish setting the comment,press the SET button once again.Now the comment setting has beencompleted. Replace the cover and lock.Important: Printing will not occurunless Step 2 is completed.12
SETTING THE PRINT STYLEThis setting is available if one selects "Month, "Day of the week" or "Comment" in previous"PRINT ORDER"Ex: Set the print language into French.Step 1SETTING THE LANGUAGELANGUAGELANGUAGESELECT CHANGE SET SELECT CHANGE SETPress the SELECT button and positionthe next to "LANGUAGE" mark.At that moment, the flashing digitindicates "Print Language Options".In case of the example, press theCHANGE button to set at "2". Andthen press SET button.Print Language OptionsPrint Example1.2.3.4.ENGLISHFRENCHSPANISHPORTUGUESEWE, 27 DEC '06OUT 31 AM10:00ME, 27 DEC '06SORT 31 AM10:00MI, 27 DIC '06SAL 31 AM10:00QA, 27 DEZ '06SAIDA 31 AM10:00Step 2MOTU WE TH FR SA SUAfter you finish setting the language,press the SET button once again.Now the language setting has beencomplete. Replace the cover and lock.Important: Printing will not occurunless Step 2 is completed.13
SETTING THE PRINT METHODEx: Change the print direction to "Left" and the print activation to "Manual".Step 1PrintdirectionPrintactivationPRINT DIRECTIONPRINT ACTIVATIONSELECT CHANGE SETPress the SELECT button and positionthe over at the "PRINT DIRECTION;PRINT ACTIVATION".At that moment, the flashing digitindicates "Print Direction Options".PRINT DIRECTIONPRINT ACTIVATIONSELECT CHANGE SETIn case of the example, press theCHANGE button to set at "2" Andthen press the SET button.The flashing changes from the"PRINT DIRECTION" to the "PRINTACTIVATION".Change the "Print Direction".Print Direction Options1. Right-hand margin of form2. Left-hand margin of form14
SETTING THE PRINT STYLEStep 2In case of the example, press theCHANGE button to set at "3". Andthen press the SET button.PRINT DIRECTIONPRINT ACTIVATIONSELECT CHANGE SETChange the "Print Activation".Print Activation Options1. Automatic2. Semi-automatic3. ManualStep 3MOTU WE TH FR SA SUAfter you finish setting the printmethod, press the SET button onceagain. Now the print method settinghas been completed. Replace the coverand lock.Important: The recorder will not print ifyou do not complete Step 2.Automatic will allow the clock to printby simply inserting a card or form.Semi-automatic will allow the clock toprint by pressing the push bar only whena card or form is inserted. (will print onlywhen the card or paper reaches thesensor)Manual will allow the clock to print bypressing the push bar. (will print evenwhen the card or form does not reach thesensor)Push bar15
SETTING THE DAYLIGHT SAVING TIMEEx: Start date Sunday, March 11, 2007.End date Sunday, November 4, 2007.If set as the above, the unit remembers the start date as the second Sunday of March and theend date as the first Sunday in November. Once set, the unit automatically updates the settingsevery year thereafter. No further manual setting is necessary.SETTING THE STARTING DATE OF DAYLIGHT SAVING TIMEStep 1Step 2Step 3YearMonthDateD.S.T.STARTSELECT CHANGE SETD.S.T.STARTSELECT CHANGE SETD.S.T.STARTSELECT CHANGE SETPress the SELECT button and positionthe over the "D.S.T.START".At that moment the "Year" flashes.(The flashing means it can bechanged)Change the "Year"In case of the example, press theCHANGE button to set at "07". Andthen press the SET button.At that moment, the flashingchanges from "Year" to "Month".Change the "Month"Press the CHANGE button to set at"3". And then press the SET button.At that moment, the flashingchanges from "Month" to "Date".Change the "Date"Press the CHANGE button to set at"11".And then press the SET button.Step 4D.S.T.STARTSELECT CHANGE SETAfter you finish setting the starting dateof D.S.T., press the SET button once again.Now the starting date of D.S.T. setting hasbeen completed.Go on to the "SETTING THE ENDING DATEOF DAYLIGHT SAVING TIME".16
SETTING THE DAYLIGHT SAVING TIMESETTING THE ENDING DATE OF DAYLIGHT SAVING TIMEEx: Daylight saving time ends on Sunday, November 4, 2007.Step 1YearMonthDatePress the SELECT button and positionthe over the "D.S.T. END".At that moment, the "Year" flashes.Step 2Step 3D.S.T.ENDSELECT CHANGE SETD.S.T.ENDSELECT CHANGE SETD.S.T.ENDSELECT CHANGE SETChange the "Year"In case of the example, press theCHANGE button to set at "07". Andthen press the SET button.At that moment, the flashingchanges from "Year" to "Month".Change the "Month"Press the CHANGE button to set at"11".And then press the SET button.At that moment, the flashingchanges from "Month" to "Date".Change the "Date"Press the CHANGE button to set at"4".And then press the SET button.17Step 4D.S.T.ENDSELECT CHANGE SETAfter you finish setting the ending dateof D.S.T., press the SET button onceagain.Now the ending date of D.S.T. settinghas been completed. Replace the coverand lock.Important: Printing will not occur unlessStep 4 is completed.
SETTING THE DAYLIGHT SAVING TIMEDELETING THE DAYLIGHT SAVING TIME SETTINGTo delete and cancel the daylight saving time, change the display of "Month" of the startingsetting to " ".Ex: Change March 11, 2007 of "D.S.T START" and delete daylight saving time setting.Step 1YearMonthDatePress the SELECT button and positionthe over the D.S.T. START.At that moment, the "Year" flashes.D.S.T.STARTSELECT CHANGE SETNext, press the SET button. At thatmoment, the flashing changes from"Year" to "Month".Step 2Step 3D.S.T.STARTSELECT CHANGE SETD.S.T.STARTSELECT CHANGE SETPress the CHANGE button to set at" ". And then press the SETbutton.At that moment, the flashing changesfrom "Month" to "Date".Press the SET button again. At thatmoment, the flashing changes from"11" to " ".Step 4D.S.T.STARTSELECT CHANGE SETPress the SET button once again.Now the D.S.T. deleting has beencompleted. Replace the cover andlock.Important: Printing will not occurunless Step4 is completed.18
SETTING THE PASSWORDWhen the password is set, you will be required to enter the password. If the password youentered does not coincide with the setting, you cannot change the setting values.You may select any 4-digit number from 0001 to 9998 as your password.Note: "0000" and "9999" are not valid passwords.Ex: Set the password to "1234"Step 1REGISTERING THE PASSWORDPress the SELECT button and positionthe mark at the "PASSWORD"The first two digits flash.PASSWORDSELECT CHANGE SETPASSWORDSELECT CHANGE SETIn case of the example, press theCHANGE button to select "12", andpress the SET button. The flashingchanges to the last two digits.Step 2Using the CHANGE button, select"34" and press the SET button.PASSWORDSELECT CHANGE SETStep 3MOTU WE TH FR SA SUAfter the password has been set, pressthe SET button once more. Thepassword is now set. Replace thecover and lock.Important: Printing will not occurunless Step 3 is completed.19
SETTING THE PASSWORDUSING THE PASSWORD TO ACCESS PROGRAMIf you want to change any program settings, you are required to enter the currentpassword first. "9999" will be displayed when you press the SELECT button beforeentering.Ex: Password "1234"Step 1TIMEPress the SELECT button. At thatmoment "9999" is displayed and firsttwo digits flashes.SELECT CHANGE SETSELECT CHANGE SETIn the example, press the CHANGEbutton to set at "12". And then pressthe SET button.At that moment, the flashingchanges to last two digits.Step 2SELECT CHANGE SETIn case of the example, press theCHANGE button to set at "34". Andthen press the SET button. At thatmoment, the mark indicates the"TIME".TIMESELECT CHANGE SETStep 3Select desired setting mode bypressing the SELECT button.Then make settings asexplained.20
SETTING THE PASSWORDCANCELING THE PASSWORDThe code "0000" will cancel the password when entered. You may select a different 4-digitpassword from 0000 to 9998 using this same method.Ex: Cancel the password "1234".Step 1TIMEPress the SELECT button, at thatmoment "9999" is displayed and firsttwo digits flashes.SELECT CHANGE SETSELECT CHANGE SETIn case of the example, press theCHANGE button to set at "12". Andthen press the SET button.At that moment, the flashingchanges to last two digits.Step 2SELECT CHANGE SETIn case of the example, press theCHANGE button to set at "34". Andthen press the SET button.At that moment, the markindicates the "TIME".TIMESELECT CHANGE SET21
SETTING THE PASSWORDStep 3PASSWORDSELECT CHANGE SETPress the SELECT button and positionthe mark at the "PASSWORD".At that moment, first two digits "12"flashes.Press the CHANGE button to set at"00". And then press the SET button.At that moment, the flashing changesto last two digits "34".PASSWORDSELECT CHANGE SETStep 4Press the CHANGE button to set at"00"And then press the SET button.PASSWORDSELECT CHANGE SETStep 5MOTU WE TH FR SA SUAfter you finish canceling thepassword, press the SET button onceagain.Now the password canceling hasbeen completed. Replace the coverand lock.Important: Printing will not occurunless Step 5 is completed.22
RESETTINGTo return all settings to the factory defaults, push the reset switch with a pointed implement.NOTICE: All custom settings made by individuals will be deleted and will revert to the factorydefaults when the reset switch is pushed. To make new settings, please refer to "Setting ··· ".Reset switch23
WALL MOUNTINGCaution: The supplied screws are intended for use on a thick wooden wall or wooden column.Do not use any other materials. The time clock may come off if used on other materials.Step 1 Step 3WALLWALLInstall the supplied wall-mount screwsinto a wall by using the template.Be sure to keep about 6mm(1/4") of thescrew head away from the wall.The recommended height from the floorto the bottom of the <strong>ES700</strong> is 45".Replace cover and lock.Step 2WALLUnlock the key and remove the cover.And then hang it on the wall.24
REPLACING THE RIBBON CASSETTEStep 1 Step 3Turn the knob of the new cassette in thedirection of the arrow(clockwise) totighten the ribbon.Unlock the key and remove the cover.Step 2Step 4Hold the ribbon cassette by its tab andpull straight out to remove it.Place the cassette inside the timerecorder as shown in the figure. Push theribbon until it snaps into position.Turning the knob on the ribbon cassettemay make installation easier.25
REPLACING THE RIBBON CASSETTEPrint headRibbonRibbon maskNOTICE: Install the cassette so thatthe ribbon is between the print headand the ribbon mask. Printing will notcome out properly if the ribbon isplaced behind the ribbon mask.Step 5Step 6Turn the knob of the cassette in thedirection of the arrow to tighten theribbon.Replace the cover and lock.26
TROUBLESHOOTINGErrorNo. Error contents ActionE-00E-01CPU errorThe remaining life of lithium battery formemory back-up is short.Call the servicing dealer from whom youpurchased your <strong>ES700</strong> or call <strong>Acroprint</strong> at(800)-344-7190 (in USA).E-05E-30E-38E-40E-41E-49The card is not inserted in the clock properly.Cannot print.The printer motor or home position sensoris not normal.Cannot print.The print head motor or the sensor does notoperate properly.Incorrect passwordD.S.T. setting mistakeSetting data you entered is not usable.Correctly insert the card.Make sure that the ribbon cassette iscorrectly inserted in place.Press the push bar.Enter the correct password again.Make sure the correct starting and endingdate of daylight saving time and enter again.Refer to your owner's manual on the pagerelated to the item (you want to set andenter again correct setting data.)•••Other FailuresThe time clock does not operateEnsure the AC adapter is properly plugged into the AC outlet and AC power isavailable.The time clock does not printEnsure the ribbon is installed correctly and the proper print method is set.The card is jammedPress the push bar and try to pull out the card at the same time.27
Time for Business.R5640 Departure DriveRaleigh, North Carolina 27616 USA(919) 872-5800In USA (800) 334-7190Fax: (919) 850-0720www.acroprint.comQ7152-6120-1P/N 06-0293-000 Rev. B